Tennessee, United States
Joined: April 04, 2002
KitMaker: 1,290 posts
Armorama: 658 posts
Posted: Monday, January 23, 2017 - 08:59 AM UTC
New Jersey, United States
Joined: December 08, 2003
KitMaker: 2,864 posts
Armorama: 2,497 posts
Posted: Monday, January 23, 2017 - 09:22 AM UTC
Very nice. You filled in the gap on the superstructure where it meets the fenders? I filed down a couple of corners on the superstructure. The inside corners weren't sharply molded.
But so far, looking better than mine did. Looking at your TK-3 I realize that I mounted the interior parts too far forward which is why my parts didn't fit right!

On the TKS, check photos, a couple of the view ports should have vision slits in them. There are replacement pieces in the interior set that'll give you the pattern.
"The only thing a man should take seriously is the fact that nothing should be taken seriously."
Samuel Butler, Victorian satirist
Steve Willoughby
Tennessee, United States
Joined: April 04, 2002
KitMaker: 1,290 posts
Armorama: 658 posts
Posted: Monday, January 23, 2017 - 07:09 PM UTC
Quoted Text
Very nice. You filled in the gap on the superstructure where it meets the fenders? I filed down a couple of corners on the superstructure. The inside corners weren't sharply molded.
But so far, looking better than mine did. Looking at your TK-3 I realize that I mounted the interior parts too far forward which is why my parts didn't fit right! 
On the TKS, check photos, a couple of the view ports should have vision slits in them. There are replacement pieces in the interior set that'll give you the pattern.
Thanks. I used some plastic strip and putty to fill the gaps on the TKS. I spent a lot time dry fitting the TK-3 interior with the three parts of the superstructure to ensure everything fit...took most of a modeling day. I thought about replacing the visors on the TKS but worried about over doing it while removing the original visors. Since there is no interior to screw up, I could still it.
Connecticut, United States
Joined: February 04, 2003
KitMaker: 82 posts
Armorama: 71 posts
Posted: Tuesday, January 24, 2017 - 06:52 AM UTC
Jeff:
Just placed an order with Archer Fine Transfers the other day and happened to scope out the exact rivet set you just applied to your build.
Wondering what your take is on them? ...they look convenient!
Considering getting a set on my next purchase.
I love the smell of enamel thinner in the morning.
The smell, you know that enamel smell ...
the whole scale modeling room.
Smelled like …Victory
Someday those acrylics will prevail ...
Tennessee, United States
Joined: April 04, 2002
KitMaker: 1,290 posts
Armorama: 658 posts
Posted: Tuesday, January 24, 2017 - 07:25 AM UTC
Richard, The new decal-style rivets are much better than his old rub-on style, which have and which are hit-and-miss. The resin rivets are printed on a continuous sheet of decals film, so you need to cut close the the rivet(s). 6-7 rivets at one time is the longest run I have tried at one time. I put some Microset on the model so I can maneuver the decals around. I then put more Microset on with a cotton bud and carefully press the decals to the surface. The smoother the service the better, just like any other decals. Once you finish get some kind of top coat over them. I just sprayed on my base color onto the TKS to seal the rivets. It you don't seal them and handle the model too much you can knock the rivets off. I did that on the frame for my Ursus A build.
Much better than cutting and gluing individual rivets!
Connecticut, United States
Joined: February 04, 2003
KitMaker: 82 posts
Armorama: 71 posts
Posted: Tuesday, January 24, 2017 - 10:04 PM UTC
Thanks Jeff,
I do believe I'll be giving these a shot.
I love the smell of enamel thinner in the morning.
The smell, you know that enamel smell ...
the whole scale modeling room.
Smelled like …Victory
Someday those acrylics will prevail ...
Tennessee, United States
Joined: April 04, 2002
KitMaker: 1,290 posts
Armorama: 658 posts
Posted: Tuesday, January 24, 2017 - 11:36 PM UTC
I have to aims with this entry: 1- Show a progression of rivets being added to the TKS; 2- ask for recommendations on removing "edges" for rivet decals. I did not see the edges while paint was wet, but they definitely show up with dry paint. I do have a couple wrinkles to remove:
1. As built from box. Rivets on some panels, not on others

2. Rivets have been applied

3. After 1st color for camo, one coat.

I have heard of using 0000 steel wool, on aircraft models to remove the edge. Don't know if will work in this case.

#152
Texas, United States
Joined: December 07, 2002
KitMaker: 487 posts
Armorama: 441 posts
Posted: Wednesday, January 25, 2017 - 01:54 AM UTC
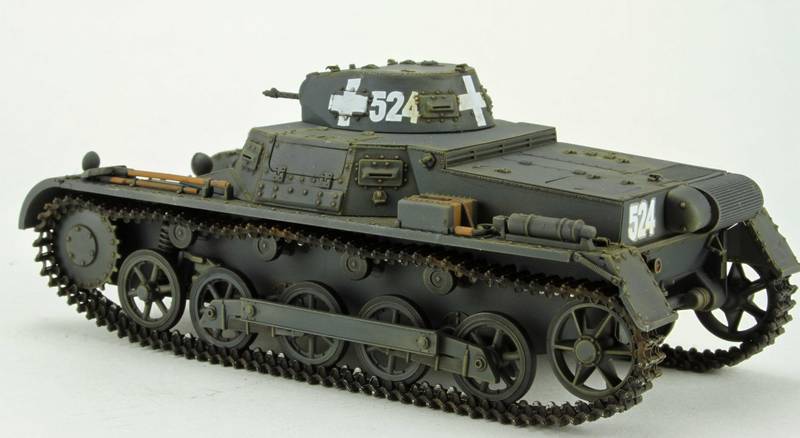
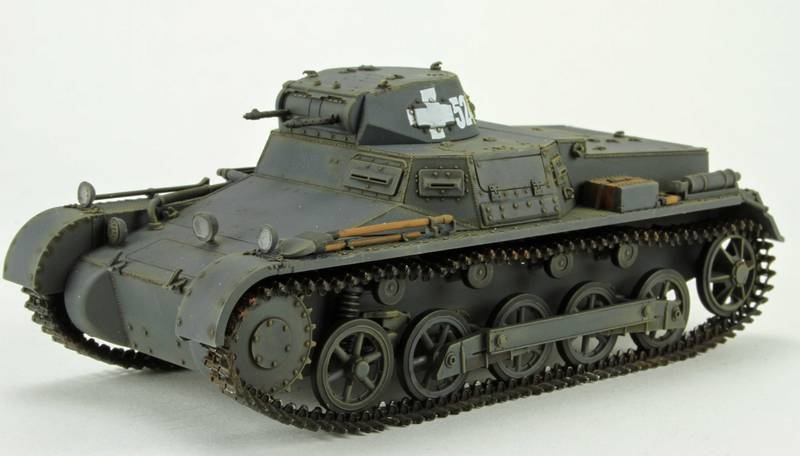
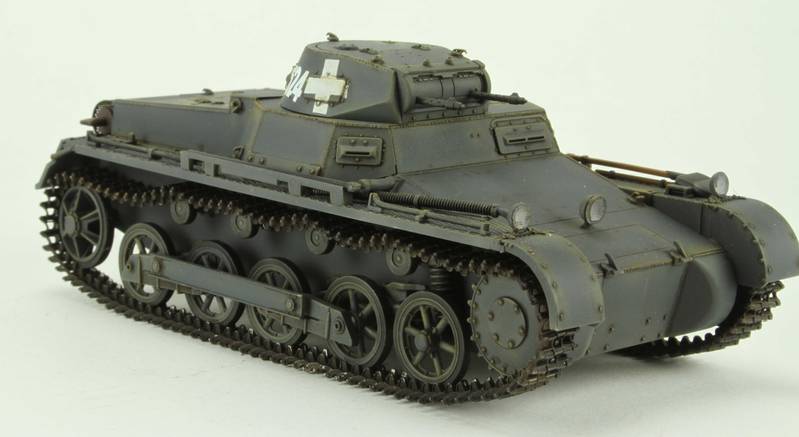
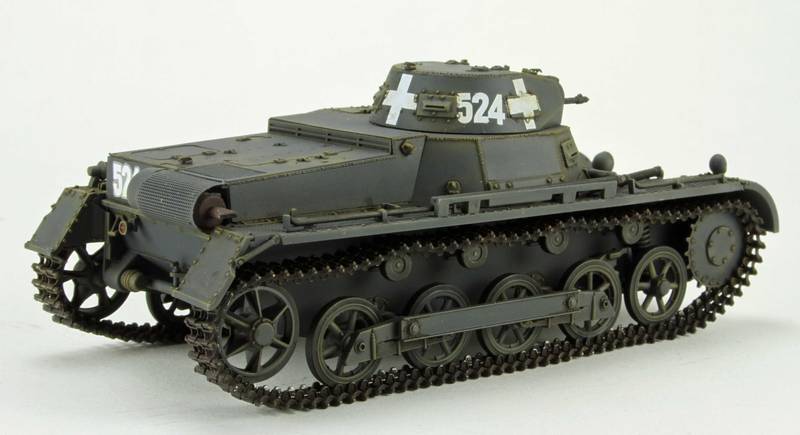
Here are my finished photos of the Pz I Ausf B.
The same photos are in the campaign gallery also.
This is going to the first show of the year in our area.
This has been a lot of fun and I'm looking forward to seeing the finished work of the rest of the campaigners.
Tom
Long time modeller. Starting when I was a teenager, then I found out about girls and college and work and kids. But now that I have one girl, no school, no work and the kids are grown, I'm back to full time modelling. My prime area of interest is armor, b

#453
Texas, United States
Joined: August 28, 2016
KitMaker: 1,925 posts
Armorama: 601 posts
Posted: Wednesday, January 25, 2017 - 02:27 AM UTC
Great looking Panzer I. Really nice paint and weathering work. Hope my looks half as good as yours.

#454
Georgia, United States
Joined: July 10, 2016
KitMaker: 1,273 posts
Armorama: 1,138 posts
Posted: Wednesday, January 25, 2017 - 04:41 AM UTC
Tom- Beautiful work, looks like a show winner!
Jeff- the rivets are looking good!
"I can make armored cars, safe and unassailable...and behind these our infantry will be able to follow quite unharmed and without any opposition."
-Leonardo da Vinci, 1487
New Jersey, United States
Joined: December 08, 2003
KitMaker: 2,864 posts
Armorama: 2,497 posts
Posted: Wednesday, January 25, 2017 - 05:31 AM UTC
Tom, looks great. Nice clean build really catching the first campaign of the war.
"The only thing a man should take seriously is the fact that nothing should be taken seriously."
Samuel Butler, Victorian satirist
Steve Willoughby
Connecticut, United States
Joined: February 04, 2003
KitMaker: 82 posts
Armorama: 71 posts
Posted: Thursday, January 26, 2017 - 04:20 AM UTC
WOW Tom, that was quick!
Nice clean presentation...Looks Great.
Is this a straight OOB build?
What did you use for the Panzer Grey finish?
I love the smell of enamel thinner in the morning.
The smell, you know that enamel smell ...
the whole scale modeling room.
Smelled like …Victory
Someday those acrylics will prevail ...
Alberta, Canada
Joined: April 24, 2014
KitMaker: 342 posts
Armorama: 342 posts
Posted: Thursday, January 26, 2017 - 04:30 AM UTC
Quoted Text
After Stephen commented about adding/replacing rivets on his tankettes, I decided I better look at my two. Egads, lost of nice rivets on the kits, but then numerous armor plates had no rivets! Found photos and printed them so I could determine rivet patterns. I got out my Archer resin rivets (the ones on decal film) and went to work. It was difficult getting the right size and spacing. I was not going to place individuals rivets.]
I built bothe the TK-3 and TKS 15 years ago when the first came out to put in the back of a Faun 4500 truck. I added around 200+ individual rivets to each one, along with numerous other additions. Adding individual rivets is really not that difficult, but the Archer sets look like a decent alternative. The Aber PE sets include panels to place on top of the kit parts to provide rivet detail, so that's another alternative. I have these kits with interiors - might have to build them again someday!
England - East Anglia, United Kingdom
Joined: June 04, 2003
KitMaker: 1,405 posts
Armorama: 656 posts
Posted: Thursday, January 26, 2017 - 06:20 PM UTC
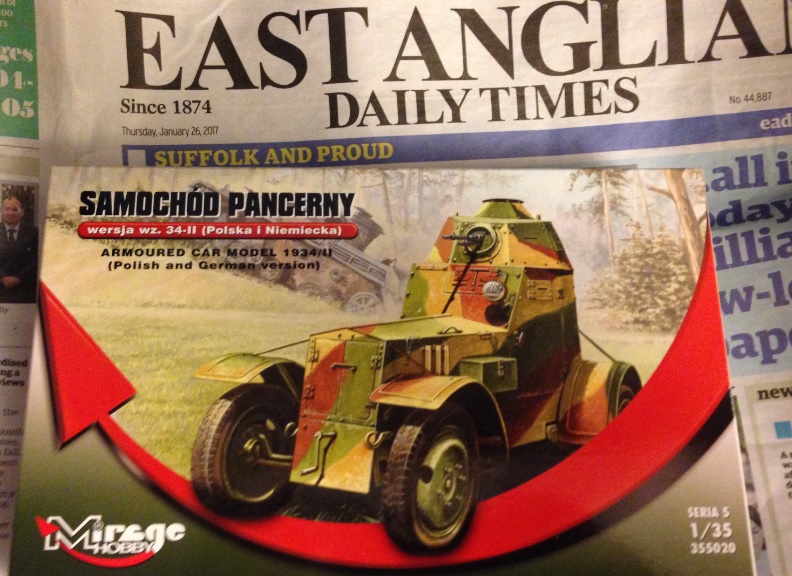
Got this one to build for the campaign. Looks like a challenge.

Nothing spoils your day like an AK!

#152
Texas, United States
Joined: December 07, 2002
KitMaker: 487 posts
Armorama: 441 posts
Posted: Thursday, January 26, 2017 - 07:58 PM UTC
Quoted Text
WOW Tom, that was quick!
Nice clean presentation...Looks Great.
Is this a straight OOB build?
What did you use for the Panzer Grey finish?
I'm retired so my day job is building models. (and sometimes my second evening job)
The paint is the Tamiya XF 63 German Grey thinned with their lacquer thinner. The only thing not OOB was the tracks. I found a set of Fruils in my stash that had already been assembled, but not painted.
This Pz will go into the first contest of the year for my area tomorrow.
Thanks for the kind remarks.
Tom
Long time modeller. Starting when I was a teenager, then I found out about girls and college and work and kids. But now that I have one girl, no school, no work and the kids are grown, I'm back to full time modelling. My prime area of interest is armor, b
Tennessee, United States
Joined: April 04, 2002
KitMaker: 1,290 posts
Armorama: 658 posts
Posted: Friday, January 27, 2017 - 05:00 AM UTC
Quoted Text
Quoted Text
WOW Tom, that was quick!
Nice clean presentation...Looks Great.
Is this a straight OOB build?
What did you use for the Panzer Grey finish?
I'm retired so my day job is building models. (and sometimes my second evening job)
The paint is the Tamiya XF 63 German Grey thinned with their lacquer thinner. The only thing not OOB was the tracks. I found a set of Fruils in my stash that had already been assembled, but not painted.
This Pz will go into the first contest of the year for my area tomorrow.
Thanks for the kind remarks.
Tom
Retirement definitely has increased my output!
Jeff

#454
Georgia, United States
Joined: July 10, 2016
KitMaker: 1,273 posts
Armorama: 1,138 posts
Posted: Friday, January 27, 2017 - 05:16 AM UTC
Tom- Best of luck in the show!
Jeff- Disability became my (premature) retirement, but thanks to Armorama it's quite a bit more bearable!

"I can make armored cars, safe and unassailable...and behind these our infantry will be able to follow quite unharmed and without any opposition."
-Leonardo da Vinci, 1487
Hessen, Germany
Joined: January 24, 2017
KitMaker: 15 posts
Armorama: 15 posts
Posted: Saturday, January 28, 2017 - 04:53 PM UTC
Hey all,
I'll be throwing my hat in the ring with a RPM TKS with 20mm NKM automatic cannon and something a little more unique, a kitbashed/scratched TKS-D tank destroyer.
The TSK-D was a C2P artillery tractor (itself a modified TKS) with a 37mm wz. 36 anti-tank gun on board. It'll be my first attempt at doing a kitbash, but I'm reasonably confident. S Model (the Polish brand, not the Chinese one of the same name) will be contributing its C2P and wz. 36.
http://derela.republika.pl/TKSD_Karol2.jpg First up though, the TKS w/20mm.
Tennessee, United States
Joined: April 04, 2002
KitMaker: 1,290 posts
Armorama: 658 posts
Posted: Monday, January 30, 2017 - 05:57 AM UTC
Uusimaa, Finland
Joined: October 01, 2016
KitMaker: 514 posts
Armorama: 171 posts
Posted: Tuesday, January 31, 2017 - 12:30 AM UTC
Finished my campaign entry today.

Rest of the photos are in the gallery (three in total). This was a fun build without much trouble. It's out of the box except towing cable. I did leave quite a lot of provided kit parts (eg interior) off, and also some of the exterior PE details.

#454
Georgia, United States
Joined: July 10, 2016
KitMaker: 1,273 posts
Armorama: 1,138 posts
Posted: Tuesday, January 31, 2017 - 01:11 AM UTC
Good -looking build, Pasi!
"I can make armored cars, safe and unassailable...and behind these our infantry will be able to follow quite unharmed and without any opposition."
-Leonardo da Vinci, 1487
Connecticut, United States
Joined: February 04, 2003
KitMaker: 82 posts
Armorama: 71 posts
Posted: Tuesday, January 31, 2017 - 05:24 AM UTC
Nice touch with the period yellow, low-vis balkenkreuz.
I love the smell of enamel thinner in the morning.
The smell, you know that enamel smell ...
the whole scale modeling room.
Smelled like …Victory
Someday those acrylics will prevail ...
New Jersey, United States
Joined: December 08, 2003
KitMaker: 2,864 posts
Armorama: 2,497 posts
Posted: Tuesday, January 31, 2017 - 06:01 AM UTC
"The only thing a man should take seriously is the fact that nothing should be taken seriously."
Samuel Butler, Victorian satirist
Steve Willoughby

#453
Texas, United States
Joined: August 28, 2016
KitMaker: 1,925 posts
Armorama: 601 posts
Posted: Tuesday, January 31, 2017 - 06:57 AM UTC

#513
Alabama, United States
Joined: March 28, 2006
KitMaker: 554 posts
Armorama: 172 posts
Posted: Tuesday, January 31, 2017 - 07:27 AM UTC
Great builds going on here.
Eric, you're in for a challenge with that armored car kit. I had some poor fit issues and the instructions weren't very clear. Its also a pretty small kit. Smaller than a jeep when built. I wish they had molded the observation hatch as two pieces so you could have a commander's head visible. I still haven't painted mine. Do you know what paint scheme you want to use?
I've been out of the country for a while so I hope to get back to my gunnery training ship this week. Keep those builds going.


