

Hosted by Richard S.
TAKOM - Campaign

bulldawg380

Joined: August 19, 2009
KitMaker: 347 posts
Armorama: 338 posts
Posted: Friday, September 15, 2017 - 05:48 AM UTC
Looks very nice awesome build and I would love to be able to do mud like that....ahhh maybe one day

janders
Joined: July 10, 2016
KitMaker: 45 posts
Armorama: 45 posts
Posted: Friday, September 15, 2017 - 06:48 AM UTC
Oh if I can do it, anyone can!
All that mud is just various pigments, mixed alternatively with water, lacquer thinner, or pigment fixer, and applied either by splashing the brush or dabbing it to the surface.
Some of the splashes are also dilutes oils flicked from slightly wet brush bristles.
The thicker piles are just that-- piles of dried pigment, with a bit of pigment fixer pipetted onto them. Sometimes doing a few different repetitions to make a bigger pile.
petbat

Joined: August 06, 2005
KitMaker: 3,353 posts
Armorama: 3,121 posts
Posted: Friday, September 15, 2017 - 03:39 PM UTC
Very nice Jon, the mud effect looks great.

JSSVIII
Joined: March 28, 2007
KitMaker: 1,169 posts
Armorama: 1,067 posts
Posted: Friday, September 15, 2017 - 03:46 PM UTC
Quoted Text
Oh if I can do it, anyone can!
All that mud is just various pigments, mixed alternatively with water, lacquer thinner, or pigment fixer, and applied either by splashing the brush or dabbing it to the surface.
Some of the splashes are also dilutes oils flicked from slightly wet brush bristles.
The thicker piles are just that-- piles of dried pigment, with a bit of pigment fixer pipetted onto them. Sometimes doing a few different repetitions to make a bigger pile.
Nice build Jon, I also like the mudwork. How well does it hold up, will it stay on during the trip to shows, and during judging?
janders
Joined: July 10, 2016
KitMaker: 45 posts
Armorama: 45 posts
Posted: Friday, September 15, 2017 - 06:26 PM UTC
Quoted Text
Nice build Jon, I also like the mudwork. How well does it hold up, will it stay on during the trip to shows, and during judging?
You know, the stuff with pigment fixer on it is pretty damned hardy. I wouldn't be afraid of it going anywhere.
The parts just on with water or even with gentle lacquer thinner don't fall off or blow off, but if you rub them they will come off on your finger.
I don't compete/go to shows, but if I did I might bring a bit of pigment with me to touch up the edges when I arrived.
petbat
Joined: August 06, 2005
KitMaker: 3,353 posts
Armorama: 3,121 posts
Posted: Saturday, September 16, 2017 - 04:16 AM UTC
Forgot to post the progress pics. All major sub assemblies finished and etch added. This is straight out of the box.
Turret and hull are just loose fit. I will need to leave the upper hull off for tracks and painting if I intend to add the skirt and use the part destroyed tracks I have.


Some smaller fittings have been left off for painting such as the episopes, the covers around the turret hatch, etc, and to prevent breakage (read mirror mounts)
Apart from the finicky bevelled edge joins on some parts, she went together with no issues at all. A little filler in places - the rear turret component has panels a tad short of what they should be, but nothing startling.
Really enjoyed the build until I spilled the glue over the tracks. Still slapping myself silly over that.
Turret and hull are just loose fit. I will need to leave the upper hull off for tracks and painting if I intend to add the skirt and use the part destroyed tracks I have.
Some smaller fittings have been left off for painting such as the episopes, the covers around the turret hatch, etc, and to prevent breakage (read mirror mounts)
Apart from the finicky bevelled edge joins on some parts, she went together with no issues at all. A little filler in places - the rear turret component has panels a tad short of what they should be, but nothing startling.
Really enjoyed the build until I spilled the glue over the tracks. Still slapping myself silly over that.

Thirian24
Joined: September 30, 2015
KitMaker: 2,493 posts
Armorama: 2,344 posts
Posted: Saturday, September 16, 2017 - 01:32 PM UTC
Real good lookin Peter. What's the plan for paint?
bulldawg380
Joined: August 19, 2009
KitMaker: 347 posts
Armorama: 338 posts
Posted: Saturday, September 16, 2017 - 05:31 PM UTC
How can I reply in the larger letters when I leave posts

Nahuel19431

Joined: August 15, 2010
KitMaker: 593 posts
Armorama: 548 posts
Posted: Saturday, September 16, 2017 - 08:59 PM UTC
Hello everyone
I add my model, AMX 13-105 of the Argentine Army.
I hope they like it.


Regards
I add my model, AMX 13-105 of the Argentine Army.
I hope they like it.
Regards
bulldawg380
Joined: August 19, 2009
KitMaker: 347 posts
Armorama: 338 posts
Posted: Saturday, September 16, 2017 - 09:14 PM UTC
Looks awesome

ClaytonFromEllijay

#454
Joined: July 10, 2016
KitMaker: 1,273 posts
Armorama: 1,138 posts
Posted: Sunday, September 17, 2017 - 01:27 AM UTC
Omar, that is beautiful work...
petbat
Joined: August 06, 2005
KitMaker: 3,353 posts
Armorama: 3,121 posts
Posted: Sunday, September 17, 2017 - 01:38 PM UTC
I'm sure they would like and we do too. Very well done Omar.
Dustin paint will be 3 tone Nato if the Meng tracks fit the Takom sprockets or the 'Cheetah' camo of the demonstration vehicle if I need to hide the track issue (spilled glue over the links and guide horns)behind skirts

Dustin paint will be 3 tone Nato if the Meng tracks fit the Takom sprockets or the 'Cheetah' camo of the demonstration vehicle if I need to hide the track issue (spilled glue over the links and guide horns)behind skirts
bulldawg380
Joined: August 19, 2009
KitMaker: 347 posts
Armorama: 338 posts
Posted: Tuesday, September 26, 2017 - 03:39 AM UTC
OK so I think I will call this one done. I might add some more weathering but I wanted to depict a depot tank out on training manuvers. That being said I wanted to go light on the weathering but feel free to give me any input. The mud splater is the new Vallejo splatter mudd. I used a metal rod and my air brush to blow it on as that is how it is recomended to apply. Also again I did not want to go heavy but again any input welcome.


petbat
Joined: August 06, 2005
KitMaker: 3,353 posts
Armorama: 3,121 posts
Posted: Wednesday, September 27, 2017 - 01:46 AM UTC
Interesting that you use a rod for this medium Ronnie. I have not heard of that before. Usually it is the 'old brush' and airbrush that is recommended.
It looks great to me - more of a wet splatter effect.
I have enjoyed watching this one progress. I hope you had fun. Cheers
It looks great to me - more of a wet splatter effect.
I have enjoyed watching this one progress. I hope you had fun. Cheers
bulldawg380
Joined: August 19, 2009
KitMaker: 347 posts
Armorama: 338 posts
Posted: Wednesday, September 27, 2017 - 03:39 AM UTC
I used a small metal rod because my air brush would not blow the product of the paint brush even with the pressure up to 30 PSI.
Removed by original poster on 09/30/17 - 08:54:41 (GMT).

LinusB
Joined: March 21, 2016
KitMaker: 247 posts
Armorama: 126 posts

Posted: Friday, September 29, 2017 - 01:56 PM UTC
Starting on my AM-13/90


petbat
Joined: August 06, 2005
KitMaker: 3,353 posts
Armorama: 3,121 posts
Posted: Saturday, September 30, 2017 - 01:07 AM UTC
Nice choice Linus. Looking forward to seeing this one.
Thirian24
Joined: September 30, 2015
KitMaker: 2,493 posts
Armorama: 2,344 posts
Posted: Saturday, September 30, 2017 - 01:41 AM UTC
janders
Joined: July 10, 2016
KitMaker: 45 posts
Armorama: 45 posts
Posted: Saturday, September 30, 2017 - 05:20 AM UTC
excited to see your T-55, I have the AMV kit (with the inappropriate truck and trailer) HIGH on my build list....
Thirian24
Joined: September 30, 2015
KitMaker: 2,493 posts
Armorama: 2,344 posts
Posted: Sunday, October 01, 2017 - 11:03 PM UTC
Thank you Jon. Seems to be a nice kit so far.
This isn't much, but at my build rate lately, this is good for me.
https://imgur.com/gallery/rWId8
This isn't much, but at my build rate lately, this is good for me.
https://imgur.com/gallery/rWId8
LinusB
Joined: March 21, 2016
KitMaker: 247 posts
Armorama: 126 posts
Posted: Saturday, October 07, 2017 - 03:04 PM UTC
Olive drab coat added to my AMX 13/90


imransz

Joined: July 10, 2007
KitMaker: 38 posts
Armorama: 37 posts
Posted: Sunday, October 15, 2017 - 07:03 PM UTC
Primed and preshaded...


bulldawg380
Joined: August 19, 2009
KitMaker: 347 posts
Armorama: 338 posts
Posted: Monday, October 16, 2017 - 05:52 AM UTC
Looks great yall keep it up I got so into my build I was adding the dust effect when I realized that I did not even do an oil wash. lolololololol
barkingdigger

#013

Joined: June 20, 2008
KitMaker: 3,981 posts
Armorama: 3,403 posts
Posted: Monday, October 16, 2017 - 03:52 PM UTC
Hi gang,
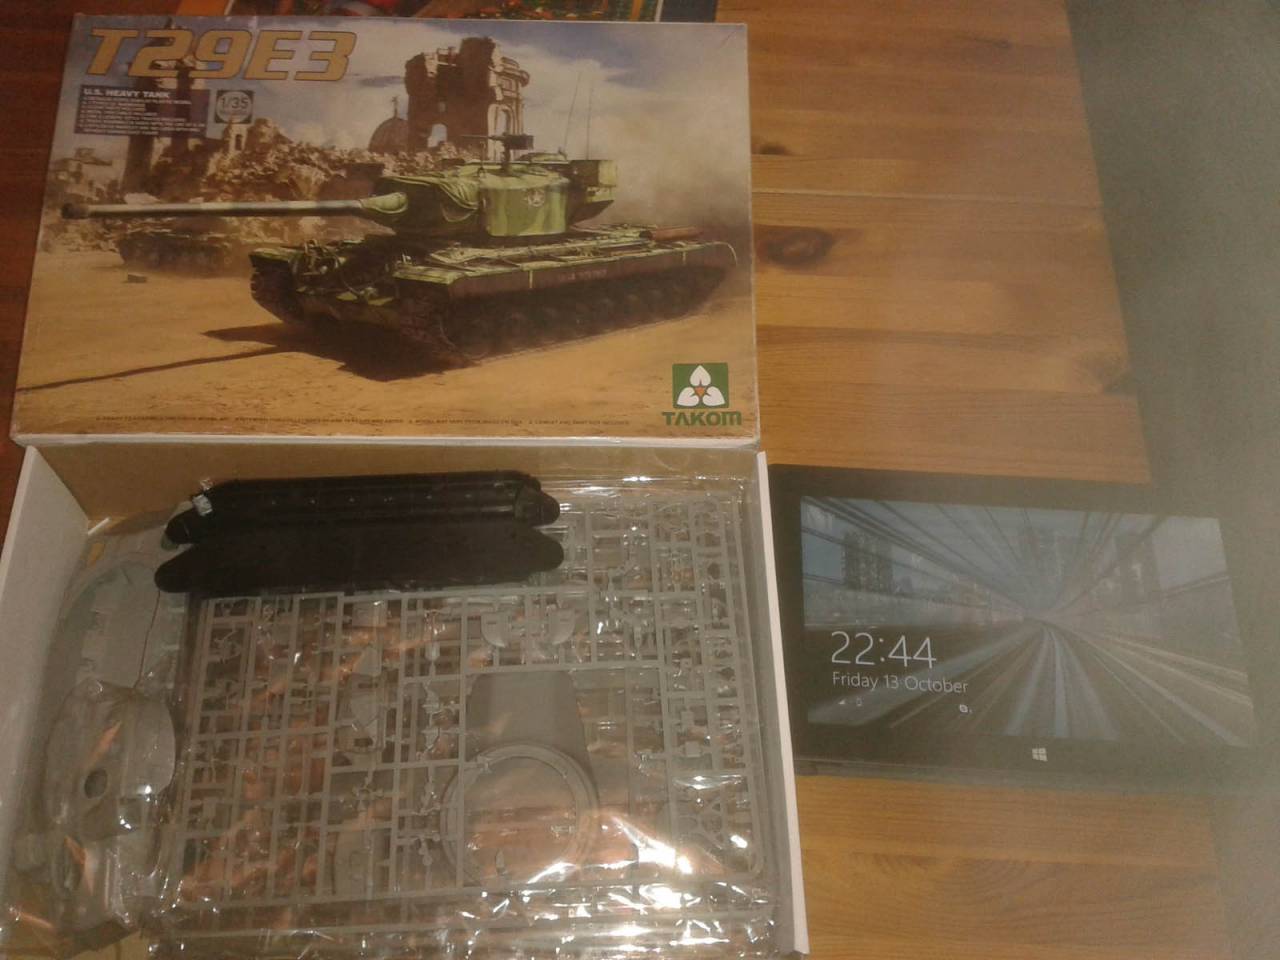
I picked up the Takom T29E3 at the Tankmod show a week ago, and this campaign is the perfect excuse to build it! (Lots of neat modelling going on here, by the way...) I'll be doing mine mostly OOTB, with a little extra on te interior so I can leave the hatches open. The aim is to replicate the tank during evaluation, since it never saw combat.
Here is the "before" shot:
I spent the past three evenings building the hull/suspension (no surprises - just pay close attention to the parts call-outs), then the left track, then the right. Those polyprop templates are a nifty feature and the left track almost fell into place. The only issue is the sparse way Takom has labelled the parts on the sprue - there are four different indy links (two types per side, with different curvatures for the end connectors) and maybe 1/4 of these have a number nearby - I spent a lot of time squinting and scratching my head to get the right ones! The left track went ok, and after dry-fitting the track onto the hull I glued all the roadwheels onto the track - that way the entire track/wheels assembly can be pried off later for separate painting. The right track however was a problem - it came up about a link too short! After it parted company at the idler, I softened the joints with more glue, re-shaped the curved ends to put all the gap in one spot at the top of the idler, added a spare link, and now it is fine. Had I only known beforehand...
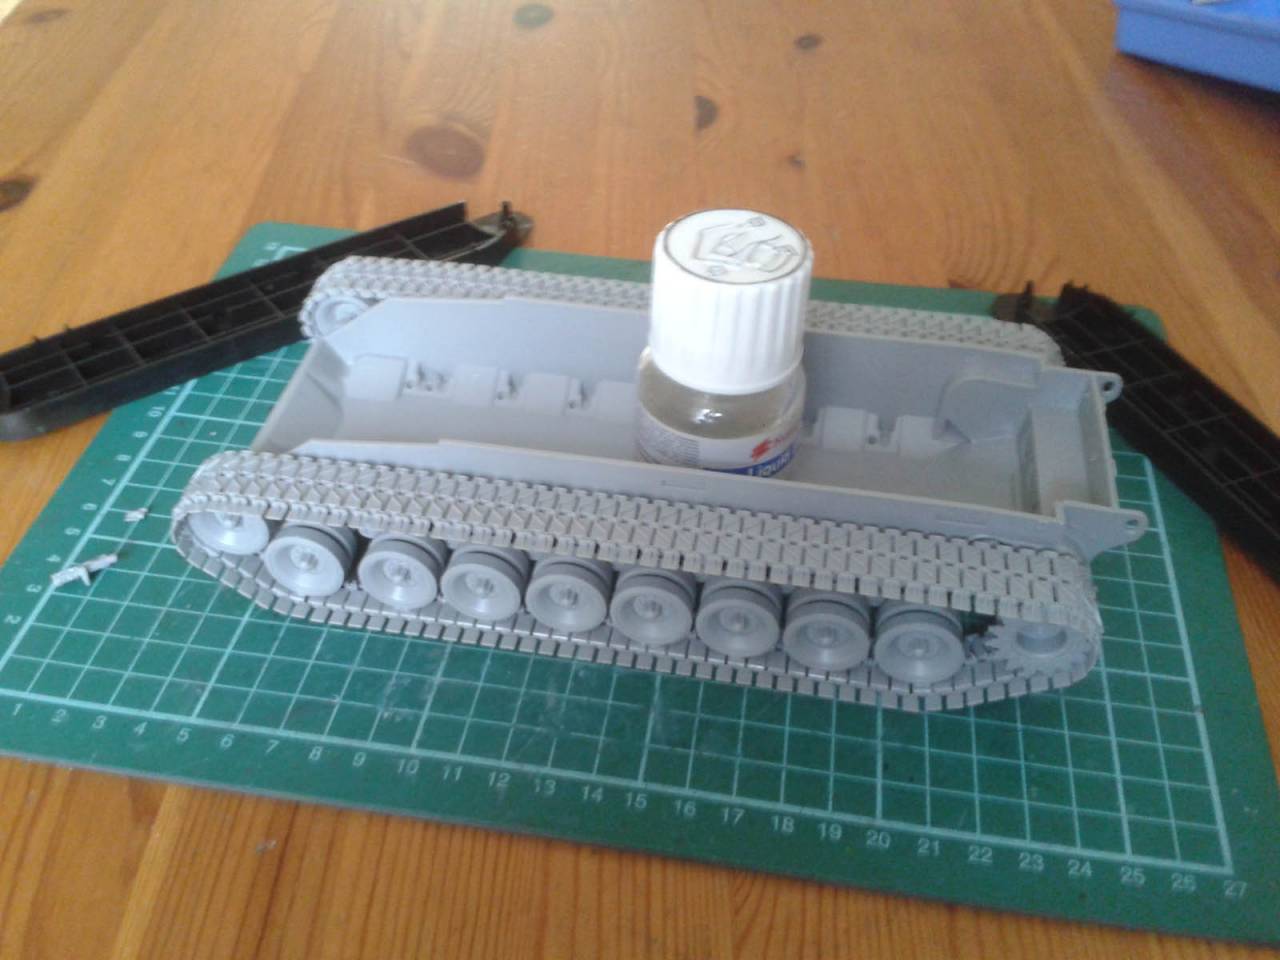
Still, the tricky part is done now...
I picked up the Takom T29E3 at the Tankmod show a week ago, and this campaign is the perfect excuse to build it! (Lots of neat modelling going on here, by the way...) I'll be doing mine mostly OOTB, with a little extra on te interior so I can leave the hatches open. The aim is to replicate the tank during evaluation, since it never saw combat.
Here is the "before" shot:
I spent the past three evenings building the hull/suspension (no surprises - just pay close attention to the parts call-outs), then the left track, then the right. Those polyprop templates are a nifty feature and the left track almost fell into place. The only issue is the sparse way Takom has labelled the parts on the sprue - there are four different indy links (two types per side, with different curvatures for the end connectors) and maybe 1/4 of these have a number nearby - I spent a lot of time squinting and scratching my head to get the right ones! The left track went ok, and after dry-fitting the track onto the hull I glued all the roadwheels onto the track - that way the entire track/wheels assembly can be pried off later for separate painting. The right track however was a problem - it came up about a link too short! After it parted company at the idler, I softened the joints with more glue, re-shaped the curved ends to put all the gap in one spot at the top of the idler, added a spare link, and now it is fine. Had I only known beforehand...
Still, the tricky part is done now...
 |

WEB HOSTING BY


Copyright ©2021 Armorama and Kitmaker Network, a subsidiary of Silver Star Enterprises
All Rights Reserved. Please read our Conditions of Use and Privacy Policy.
All Rights Reserved. Please read our Conditions of Use and Privacy Policy.