Wheel arches as well as the front bumper and splash board will be done with the sponge chipping method.
For some reason those areas just wouldn't chip properly, I am thinking the hairspray didn't reach those area properly. It was tough to see where it was laying down on a glossy dark grey surface
I don't typically weather my models very much so this is all a learning experience for me and I very much appreciate the input you are all giving.
Campaigns: Active Campaigns
Campaigns that are either in planning or underway should be grouped here.
Hosted by Richard S.
Crusader to Gazala Campaign
Posted: Tuesday, November 28, 2017 - 07:06 PM UTC
iowabrit
Iowa, United States
Joined: November 06, 2007
KitMaker: 585 posts
Armorama: 557 posts
Joined: November 06, 2007
KitMaker: 585 posts
Armorama: 557 posts
Posted: Tuesday, November 28, 2017 - 08:48 PM UTC
I signed up for this campaign but I cant see a way to upload my entry pic.....I don't have a photobucket account (nor will I).
Posted: Tuesday, November 28, 2017 - 09:03 PM UTC
Quoted Text
I signed up for this campaign but I cant see a way to upload my entry pic.....I don't have a photobucket account (nor will I).
I use Imgur. You can also use the Kit Maker Network Gallery. Each member has some space there.
JackG
Ontario, Canada
Joined: May 28, 2006
KitMaker: 172 posts
Armorama: 122 posts
Joined: May 28, 2006
KitMaker: 172 posts
Armorama: 122 posts
Posted: Tuesday, November 28, 2017 - 09:39 PM UTC
I think the chipping looks fine, but most of what we see now will be cut back once the dust is added?
Also, what was the paint colour for the base coat - on my screen it looks dark yellow (dunkelgelb), so hope is my screen settings that are off.
Posted: Tuesday, November 28, 2017 - 10:10 PM UTC
Quoted Text
I think the chipping looks fine, but most of what we see now will be cut back once the dust is added?
Also, what was the paint colour for the base coat - on my screen it looks dark yellow (dunkelgelb), so hope is my screen settings that are off.
Dust will be added once its done.
Colour is XF-60 with several areas lightened done over a base-coat of German Grey. The lighting isn't the best either so it looks a bit darker than it really is.
JackG
Ontario, Canada
Joined: May 28, 2006
KitMaker: 172 posts
Armorama: 122 posts
Joined: May 28, 2006
KitMaker: 172 posts
Armorama: 122 posts
Posted: Tuesday, November 28, 2017 - 10:45 PM UTC
hmm, well up to you what you want to do with this info, but Tamiya's XF-60 does represent dark yellow (dunkelgelb), a colour introduced officially to the Wehrmacht in February of 1943.
Special tropical colours were created for African vehicles, first in March 1941, and then a year later another set of colours in 1942.
-----------------
I wouldn't repaint. While some will point out base colour doesn't matter once all the weathering is on, personally I'd add a brownish filter overall.
Removed by original poster on 11/29/17 - 17:59:09 (GMT).
iowabrit
Iowa, United States
Joined: November 06, 2007
KitMaker: 585 posts
Armorama: 557 posts
Joined: November 06, 2007
KitMaker: 585 posts
Armorama: 557 posts
Posted: Tuesday, November 28, 2017 - 11:03 PM UTC
Last attempt
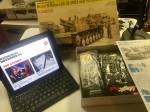
Before I start removing parts from sprues and knowing DML's penchant for monumental screw ups, does anyone know of any major problems I need to be aware of? It looks like a pretty decent kit in the box but I'm no expert on German armour/artillery
So far I have discovered that there is only one frame provided for the radios (you need two) and the drive sprocket or tracks are wrong because one doesn't fit the other...wtf?
You have to hand it to DML, when they screw up, they make a good job of it.
Back to the stash methinks...
Posted: Tuesday, November 28, 2017 - 11:47 PM UTC
Quoted Text
hmm, well up to you what you want to do with this info, but Tamiya's XF-60 does represent dark yellow (dunkelgelb), a colour introduced officially to the Wehrmacht in February of 1943.
It's the colour called out in the instructions. I also found it used by others on the inter-webs. I have also found that Dunkelgelb is one of those colours that no one can agree on. I have a few late war german vehicles that are all different colours simply because I tried different flavours of yellow as suggested by the internet.
More importantly I only really have 2 colours of desert-ish paint at home and I will be using one of them on the Matilda.
My goal with this kit is to spend the least amount possible so no extra PE and no new paints because the nagging from the Mrs's would never end (Apparently I am always buying paint)
Posted: Tuesday, November 28, 2017 - 11:49 PM UTC
Removed by original poster on 11/29/17 - 18:53:34 (GMT).
Posted: Tuesday, November 28, 2017 - 11:58 PM UTC
Steve,
Welcome! Glad to see you here with your upload troubles ironed out.
Some great info and tips coming in. For those of us less experienced, I thank you guys for your advice.
Gaz
Welcome! Glad to see you here with your upload troubles ironed out.
Some great info and tips coming in. For those of us less experienced, I thank you guys for your advice.
Gaz
petbat
Queensland, Australia
Joined: August 06, 2005
KitMaker: 3,353 posts
Armorama: 3,121 posts
Joined: August 06, 2005
KitMaker: 3,353 posts
Armorama: 3,121 posts
Posted: Wednesday, November 29, 2017 - 02:22 AM UTC
Colour is all subjective when you add filters, washes, fading, modulation, dust, etc.... Don't get hung up on the exact right colour/shade. Especially when no 2 brands have an identical colour for what is supposed to be the same paint to begin with.
However, technically the info is correct, the Germans used different RAL paints in the desert to the Dunkelgelb RAL 7028 (dark yellow) used later in the war:
- Base colour of Gelbbraun RAL 8000 (yellow-brown)
sometimes with one-third of the vehicle covered by Graugrün RAL 7008 (gray-green)
If it looks like a duck.....
Glad to see you enjoying the build Rory.
Chaman911
United States
Joined: August 28, 2015
KitMaker: 319 posts
Armorama: 308 posts
Joined: August 28, 2015
KitMaker: 319 posts
Armorama: 308 posts
Posted: Wednesday, November 29, 2017 - 02:25 AM UTC
I think the XF60 looks fine. Once you add some dust or dot filter it you will be fine. That chipping looks good! I’m still only on step 8 of my build!
Hangelafette
Pennsylvania, United States
Joined: April 22, 2012
KitMaker: 344 posts
Armorama: 315 posts
Joined: April 22, 2012
KitMaker: 344 posts
Armorama: 315 posts
Posted: Wednesday, November 29, 2017 - 04:12 AM UTC
Quoted Text
Before I start removing parts from sprues and knowing DML's penchant for monumental screw ups, does anyone know of any major problems I need to be aware of? It looks like a pretty decent kit in the box but I'm no expert on German armour/artillery
So far I have discovered that there is only one frame provided for the radios (you need two) and the drive sprocket or tracks are wrong because one doesn't fit the other...wtf?
You have to hand it to DML, when they screw up, they make a good job of it.
Back to the stash methinks...
Hi Steve,
Checkout Bill Plunk's build log of the Bison II here: http://www.bpmodels.net/Model/Album/phpBB2/viewtopic.php?t=55
He covers a number of issues with the instructions.
-Nate
Posted: Wednesday, November 29, 2017 - 04:14 AM UTC
Rory,
Looking Good!
I would tend to agree with Mike. I would (and I know it's your model, not mine) add more base coat color. I use a small spongey piece of foam, the kind used for packing delicate items such as electronic stuff. I dab a little paint on it and then touch it to some paper repeatedly so that most of the paint comes off (think dry brush technique) then I dab it on the chipped area. Just my two cents...
You're doing great so keep it up.
Take care,
Don "Lakota"
spacewolfdad
England - West Midlands, United Kingdom
Joined: May 23, 2010
KitMaker: 642 posts
Armorama: 593 posts
Joined: May 23, 2010
KitMaker: 642 posts
Armorama: 593 posts
Posted: Wednesday, November 29, 2017 - 04:34 AM UTC
I have been able to get some modelling time and managed to sort the tracks out on the A13. I did the one side and it was quite successful...
Using the other side here is how I did it...
Firstly the resin wheels were cleaned up and a brass axle attached...
Then the location holes were made in the side of the hull...
The wheels were then glued in place...
Next was cleaning up the tracks from the S-Model kit to use here, I did the top run first...
After cleaning up the top run the idler and sprocket were just push fit to ensure that the tracks were correctly positioned, once that was achieved the idler was glued in place...
The track was glued along the tops of the road wheels and finally the sprocket was lined up with the track and, when correct, glued in place...
Now the lower run of track was prepared, the wheels removed and the excess pared down using a sharp blade, finally being filed smooth...
The lower run of track was then added to the road wheels...
All that remains now is to replace the few guide teeth that got damaged in the operation and then it is on to the upper hull. Here it is push fit on the lower hull...
I shall be getting the upper hull sorted over the next week and hopefully have it fitted.
Thanks for looking, all comments welcome.
All the best,
Paul
Using the other side here is how I did it...
Firstly the resin wheels were cleaned up and a brass axle attached...
Then the location holes were made in the side of the hull...
The wheels were then glued in place...
Next was cleaning up the tracks from the S-Model kit to use here, I did the top run first...
After cleaning up the top run the idler and sprocket were just push fit to ensure that the tracks were correctly positioned, once that was achieved the idler was glued in place...
The track was glued along the tops of the road wheels and finally the sprocket was lined up with the track and, when correct, glued in place...
Now the lower run of track was prepared, the wheels removed and the excess pared down using a sharp blade, finally being filed smooth...
The lower run of track was then added to the road wheels...
All that remains now is to replace the few guide teeth that got damaged in the operation and then it is on to the upper hull. Here it is push fit on the lower hull...
I shall be getting the upper hull sorted over the next week and hopefully have it fitted.
Thanks for looking, all comments welcome.
All the best,
Paul
Posted: Wednesday, November 29, 2017 - 04:50 AM UTC
Quoted Text
Last attempt
Before I start removing parts from sprues and knowing DML's penchant for monumental screw ups, does anyone know of any major problems I need to be aware of? It looks like a pretty decent kit in the box but I'm no expert on German armour/artillery
So far I have discovered that there is only one frame provided for the radios (you need two) and the drive sprocket or tracks are wrong because one doesn't fit the other...wtf?
You have to hand it to DML, when they screw up, they make a good job of it.
Back to the stash methinks...
Quoted Text
put quote text here
Steve,
Sorry tohear that tbekit is so messed up. That's one of those rare creatures that I really wanted to see our together.
Gaz
Posted: Wednesday, November 29, 2017 - 04:56 AM UTC
Paul,
You're really getting it together quickly. It really looks great so far.
Gaz
You're really getting it together quickly. It really looks great so far.
Gaz
Mrclark7
Texas, United States
Joined: June 04, 2017
KitMaker: 503 posts
Armorama: 477 posts
Joined: June 04, 2017
KitMaker: 503 posts
Armorama: 477 posts
Posted: Wednesday, November 29, 2017 - 07:41 AM UTC
Mrclark7
Texas, United States
Joined: June 04, 2017
KitMaker: 503 posts
Armorama: 477 posts
Joined: June 04, 2017
KitMaker: 503 posts
Armorama: 477 posts
Posted: Wednesday, November 29, 2017 - 07:45 AM UTC
Quoted Text
I signed up for this campaign but I cant see a way to upload my entry pic.....I don't have a photobucket account (nor will I).
iowabrit, try https://postimages.org/
You dont even have to have an account.
petbat
Queensland, Australia
Joined: August 06, 2005
KitMaker: 3,353 posts
Armorama: 3,121 posts
Joined: August 06, 2005
KitMaker: 3,353 posts
Armorama: 3,121 posts
Posted: Wednesday, November 29, 2017 - 07:59 AM UTC
Hi Steve
I do not know what you have in the stash, but I suggest a peek at other Dragon kits to see if you have a spare frame in there amongst all the not needed parts listed in the instructions. I always keep my leftovers and I have a spare RD frame in my spares box that I will use for my Bison when I get around to it. Not sure what it came from. Even then, it is a simple rectangular frame that you could easily build with some styrene strip using the one you have for sizing.
Plenty of other kits have the spare RA sprue (that seems to the frame Bill used in his article), with the frame with the V shaped side pieces that might be able to be trimmed down.
petbat
Queensland, Australia
Joined: August 06, 2005
KitMaker: 3,353 posts
Armorama: 3,121 posts
Joined: August 06, 2005
KitMaker: 3,353 posts
Armorama: 3,121 posts
Posted: Wednesday, November 29, 2017 - 08:00 AM UTC
Great to see you join up Kelly. Are you going to paint is pink?
Nice work Paul. An interesting solution... I bet you were so careful in cleaning out the wheels from those tracks.
Mrclark7
Texas, United States
Joined: June 04, 2017
KitMaker: 503 posts
Armorama: 477 posts
Joined: June 04, 2017
KitMaker: 503 posts
Armorama: 477 posts
Posted: Wednesday, November 29, 2017 - 08:23 AM UTC
Quoted Text
Great to see you join up Kelly. Are you going to paint is pink?
Nice work Paul. An interesting solution... I bet you were so careful in cleaning out the wheels from those tracks.
No pink for this one, but I will try and throw a twist into this one.
Maybe a pink one for the Cats campaign?
Removed by original poster on 11/30/17 - 04:28:35 (GMT).