Oklahoma, United States
Joined: February 11, 2013
KitMaker: 294 posts
Armorama: 196 posts
Posted: Friday, November 24, 2017 - 01:08 AM UTC
I got the tracks on. I had to add one link the get the right side to fit. I also started some of the weathering. Some progress has been made on the figure as well but I still have plenty more to do all around.


On the bench:
The Night Shift Campaign: GWH P-61 "The Last Shoot Down". 1/48
Spanish Civil War Campaign: Dragon Pz I Ausf B 1/35
Revell B-17 1/48 with lots of add ons.
Complete rehab and repaint of Dragon Pz III J. 1/35
England - South West, United Kingdom
Joined: January 20, 2005
KitMaker: 103 posts
Armorama: 95 posts
Posted: Sunday, November 26, 2017 - 08:36 PM UTC
That's great! It's such an odd scheme for these Panzers, you get so used to the gray or sand of the Afrika Corps it's a really nice change to see the colourful pre-war ones. Well Done


#460
California, United States
Joined: September 16, 2014
KitMaker: 1,156 posts
Armorama: 1,024 posts
Posted: Monday, November 27, 2017 - 02:40 AM UTC
Robert - I gotta agree with Jason, the colors are exciting compared to whay we normally see. Your panzer is coming along nicely.
Vintage Paul
I'd happily live in the past but for air conditioning, the internet, mobile phones, modern medicine & dentistry and, and, and . . .
#460
California, United States
Joined: September 16, 2014
KitMaker: 1,156 posts
Armorama: 1,024 posts
Posted: Monday, November 27, 2017 - 02:56 AM UTC
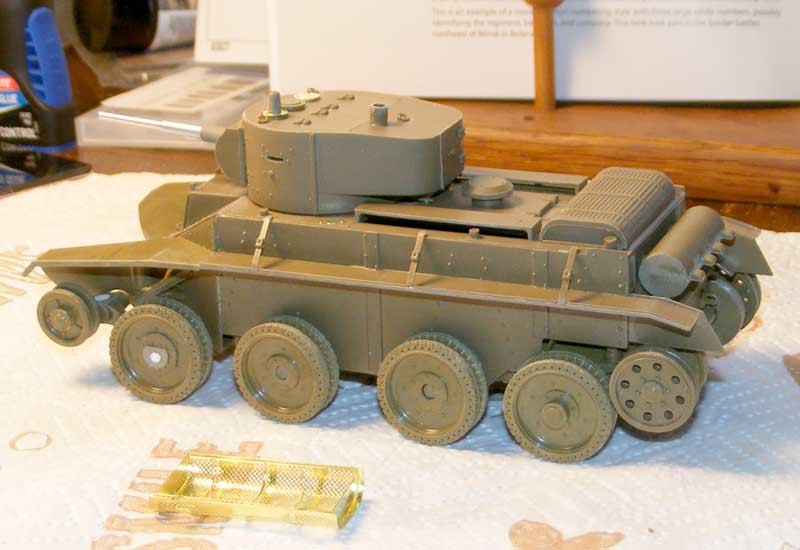
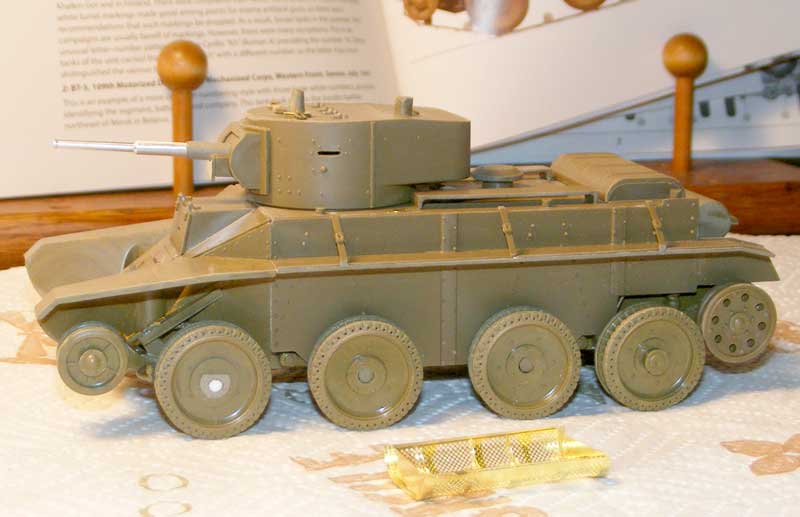
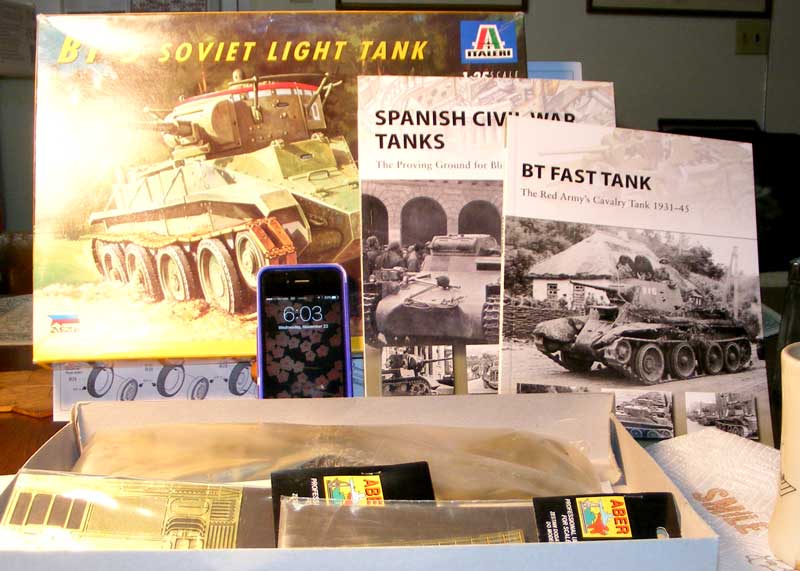
I got a start on the Republican BT-5 Fast Tank over the holiday weekend. I found a little tag inside the bag stating that it was "Made in Russia." OK, that clears that up. It might be an Italeri box but the plastic was shot in Russia and it is of a better grade to work with than that used in the new T-35 I completed a few weeks ago.
That is a good thing as there is a lot of work to do to get these kit parts to fit. This is an older kit and many of the parts need "modeling skills" to be fitted, puttied or altered to achieve alignment. I read reviews saying that a lot of putty was needed. I found lots of small jobs but careful fitting kept the amounts small.
The detail is not too bad and the PE kit adds some nice things to otherwise blank areas. Online references are few and of only two much altered survivors. Printed material is also thin so much of this will be on a best guess basis.
To add to the kit & the ABER PE kit I found a set of MasterClub resin tracks & an ABER metal barrel. There is even a set of SCW decals with some BT-5 markings that should arrive shortly. I'm excited to see what the offerings will look like.
Here are a few pics:

Vintage Paul
I'd happily live in the past but for air conditioning, the internet, mobile phones, modern medicine & dentistry and, and, and . . .
Massachusetts, United States
Joined: March 28, 2007
KitMaker: 1,169 posts
Armorama: 1,067 posts
Posted: Monday, November 27, 2017 - 05:27 AM UTC
Paul, watch out for the drive sprockets in the rear, if you mount them as is, IIRC they will be very noticeably higher than the idler wheels, which makes the track runs look funny. I just cut the mounting point on mine and moved it until it was the right height. it will end up totally wrong when seen from the back, but on the shelf, at least the tracks look right!
#460
California, United States
Joined: September 16, 2014
KitMaker: 1,156 posts
Armorama: 1,024 posts
Posted: Monday, November 27, 2017 - 11:14 PM UTC
Quoted Text
Paul, watch out for the drive sprockets in the rear, if you mount them as is, IIRC they will be very noticeably higher than the idler wheels, which makes the track runs look funny. I just cut the mounting point on mine and moved it until it was the right height. it will end up totally wrong when seen from the back, but on the shelf, at least the tracks look right!
Thanks for the heads-up on this. Can you flesh it out a bit? I just last night fitted the wheels and everything looked pretty good to my eyes. I would love to see pics of your corrections.
Vintage Paul
I'd happily live in the past but for air conditioning, the internet, mobile phones, modern medicine & dentistry and, and, and . . .
#460
California, United States
Joined: September 16, 2014
KitMaker: 1,156 posts
Armorama: 1,024 posts
Posted: Monday, November 27, 2017 - 11:38 PM UTC
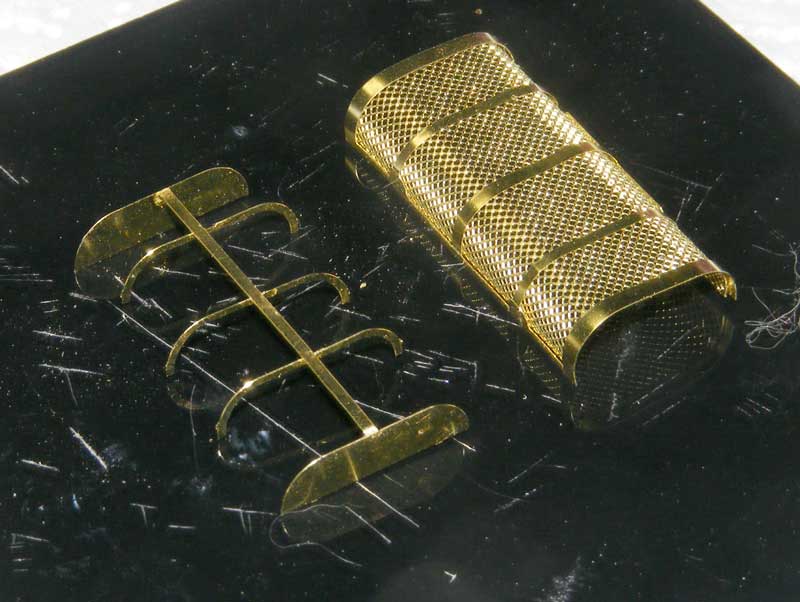
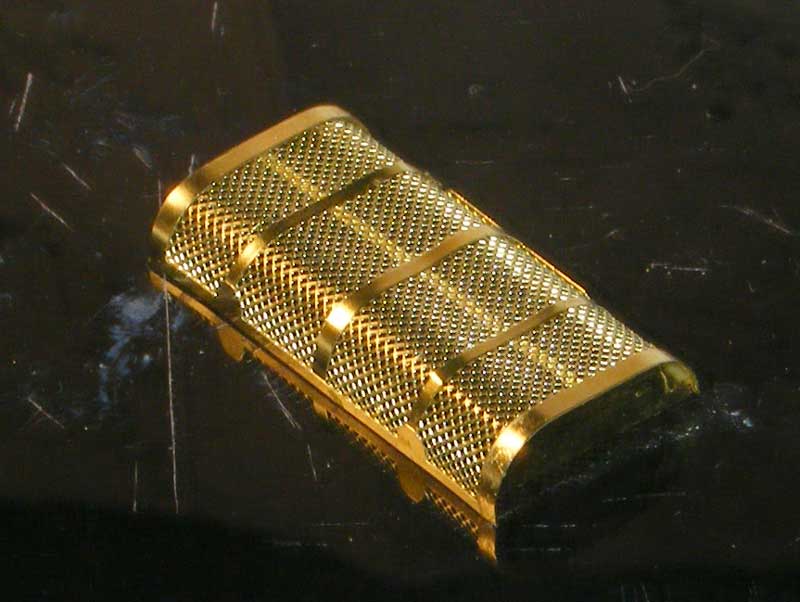
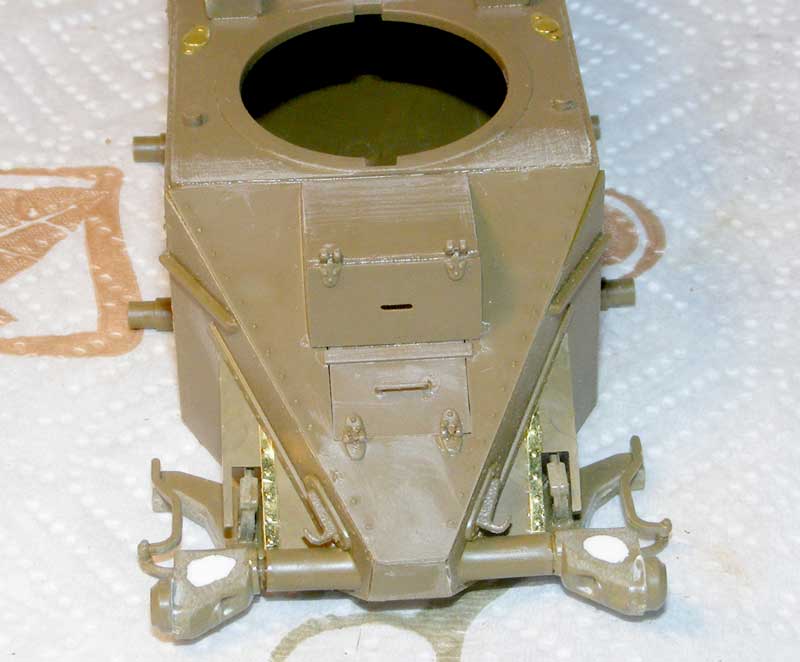
One of the PE upgrades in the ABER kit is an engine cover screen made of of a frame, a screen, a back strap, two ends and several formers along with hinges. I'm tired just looking at the bits! Just the same, I'm going to have a go at it. If it doesn't go well I can use the kit plastic part which isn't horrible.
If I can make an acceptable cover, it will leave a large rectangular hole in the deck visible through the screen. My reference material is thin and I found only one picture that seems to show T-34 style shutters, possibly only two rather than three. Can anyone confirm this?
Vintage Paul
I'd happily live in the past but for air conditioning, the internet, mobile phones, modern medicine & dentistry and, and, and . . .
Massachusetts, United States
Joined: March 28, 2007
KitMaker: 1,169 posts
Armorama: 1,067 posts
Posted: Wednesday, November 29, 2017 - 04:36 PM UTC
Quoted Text
Quoted Text
Paul, watch out for the drive sprockets in the rear, if you mount them as is, IIRC they will be very noticeably higher than the idler wheels, which makes the track runs look funny. I just cut the mounting point on mine and moved it until it was the right height. it will end up totally wrong when seen from the back, but on the shelf, at least the tracks look right!
Thanks for the heads-up on this. Can you flesh it out a bit? I just last night fitted the wheels and everything looked pretty good to my eyes. I would love to see pics of your corrections.
I haven't had time to get to the bench in a couple of weeks Paul, but I will try to get a photo this weekend. Fair warning though, I was really frustrated when I finally got the sprocket where I wanted it, and at I had made the decision that this would only be seen on the shelf, so it will be ugly IIRC.
#460
California, United States
Joined: September 16, 2014
KitMaker: 1,156 posts
Armorama: 1,024 posts
Posted: Friday, December 01, 2017 - 01:02 AM UTC
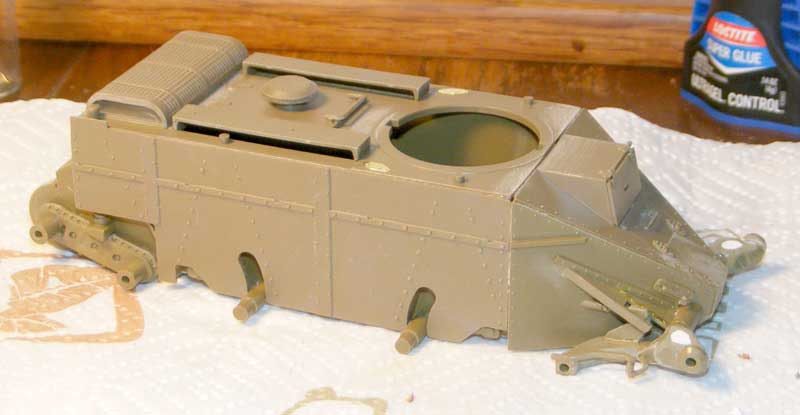
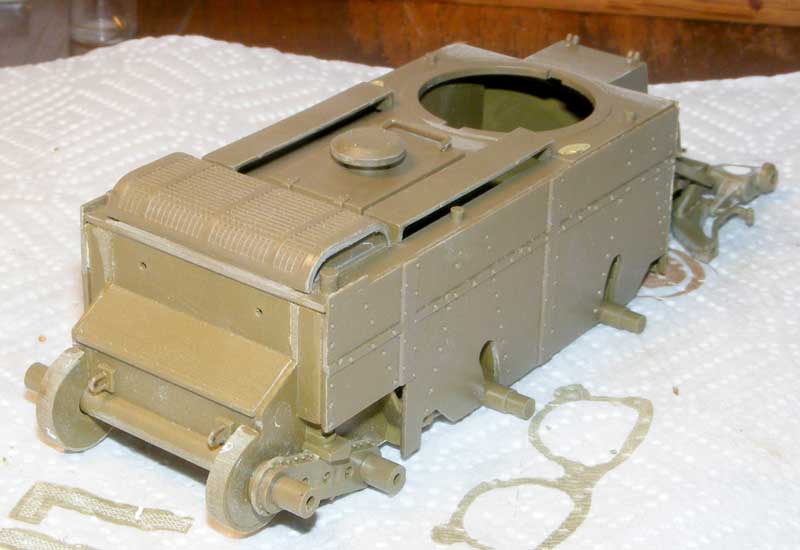
John - I think I have figured out what you are driving at. The road wheels are a bit low compared to the rear drive sprocket. I see two possibilities here. First, Zvezda might have gotten things wrong. It wouldn't be the first time that a model maker got something wrong. The other possibility is that the BT-5 might have had a supple long travel suspension to allow the high cross country speeds. The model might be of a BT-5 with no load - fuel, ammo and crew.
i'll be building the tracks next and will see how bad it looks with them trial fitted before deciding what to do. It looks OK sitting on its wheels.
Vintage Paul
I'd happily live in the past but for air conditioning, the internet, mobile phones, modern medicine & dentistry and, and, and . . .
#460
California, United States
Joined: September 16, 2014
KitMaker: 1,156 posts
Armorama: 1,024 posts
Posted: Friday, December 01, 2017 - 01:07 AM UTC
Vintage Paul
I'd happily live in the past but for air conditioning, the internet, mobile phones, modern medicine & dentistry and, and, and . . .
Massachusetts, United States
Joined: March 28, 2007
KitMaker: 1,169 posts
Armorama: 1,067 posts
Posted: Friday, December 01, 2017 - 05:11 AM UTC
Quoted Text
John - I think I have figured out what you are driving at. The road wheels are a bit low compared to the rear drive sprocket. I see two possibilities here. First, Zvezda might have gotten things wrong. It wouldn't be the first time that a model maker got something wrong. The other possibility is that the BT-5 might have had a supple long travel suspension to allow the high cross country speeds. The model might be of a BT-5 with no load - fuel, ammo and crew.
i'll be building the tracks next and will see how bad it looks with them trial fitted before deciding what to do. It looks OK sitting on its wheels.
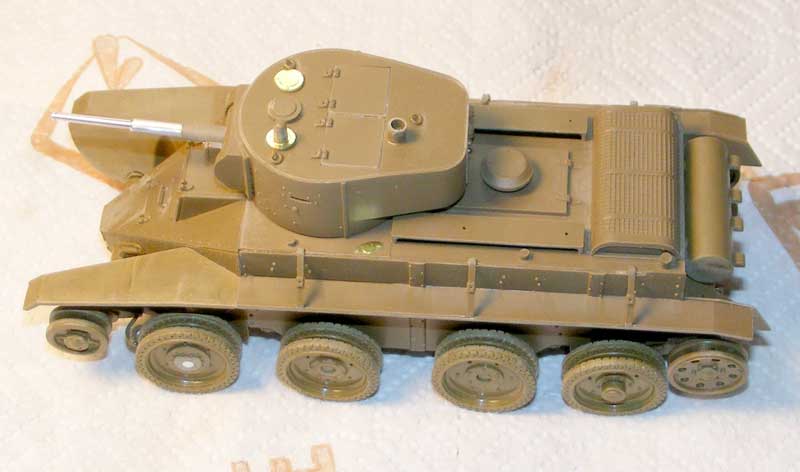
Paul, the problem is not the road wheels being too low, it's the rear sprocket is too high. If you look at your last photo, the side view, you can see the problem perfectly. At the front, the top of the idler wheel is just a little bit higher than the tops of the road wheels, as it should be. If you look at your photo the top of the sprocket is MUCH higher than the tops of the road wheels, as I understand it, it should be about the same as the front idler wheel, (that is, just a little bit higher than the road wheels). it may not look like much now but when the tracks are on, it will stand out a lot.
Oklahoma, United States
Joined: February 11, 2013
KitMaker: 294 posts
Armorama: 196 posts
Posted: Saturday, December 02, 2017 - 04:48 AM UTC
I manage to start the weathering. I have the front half of the upper hull done.


I'm getting there a bit at a time.
On the bench:
The Night Shift Campaign: GWH P-61 "The Last Shoot Down". 1/48
Spanish Civil War Campaign: Dragon Pz I Ausf B 1/35
Revell B-17 1/48 with lots of add ons.
Complete rehab and repaint of Dragon Pz III J. 1/35
Western Australia, Australia
Joined: March 21, 2016
KitMaker: 247 posts
Armorama: 126 posts
Posted: Saturday, December 02, 2017 - 02:06 PM UTC
#460
California, United States
Joined: September 16, 2014
KitMaker: 1,156 posts
Armorama: 1,024 posts
Posted: Wednesday, December 06, 2017 - 03:15 AM UTC
Quoted Text
Paul, the problem is not the road wheels being too low, it's the rear sprocket is too high. If you look at your last photo, the side view, you can see the problem perfectly. At the front, the top of the idler wheel is just a little bit higher than the tops of the road wheels, as it should be. If you look at your photo the top of the sprocket is MUCH higher than the tops of the road wheels, as I understand it, it should be about the same as the front idler wheel, (that is, just a little bit higher than the road wheels). it may not look like much now but when the tracks are on, it will stand out a lot.
OK, thanks for a clear explanation of the problem. I made a real hash of the MasterClub tracks and have just ordered a set of Spade Ace tracks. It may be a while before I can get them on for a look-see.
Vintage Paul
I'd happily live in the past but for air conditioning, the internet, mobile phones, modern medicine & dentistry and, and, and . . .
#460
California, United States
Joined: September 16, 2014
KitMaker: 1,156 posts
Armorama: 1,024 posts
Posted: Wednesday, December 06, 2017 - 03:17 AM UTC
Robert - Your figure adds a lot to the build. Its pose adds drama and its size adds scale.
Vintage Paul
I'd happily live in the past but for air conditioning, the internet, mobile phones, modern medicine & dentistry and, and, and . . .
#460
California, United States
Joined: September 16, 2014
KitMaker: 1,156 posts
Armorama: 1,024 posts
Posted: Wednesday, December 06, 2017 - 03:19 AM UTC
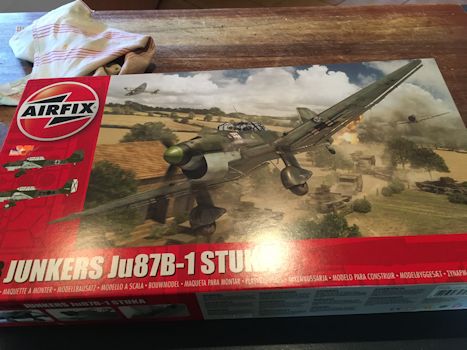
Linus - I have heard good things about the new Airfix kits. I just bought the Walrus kit and it looks stunning in the box. I'm looking forward to seeing how the Stuka looks as your build progresses.
Vintage Paul
I'd happily live in the past but for air conditioning, the internet, mobile phones, modern medicine & dentistry and, and, and . . .
Western Australia, Australia
Joined: March 21, 2016
KitMaker: 247 posts
Armorama: 126 posts
Posted: Thursday, December 07, 2017 - 07:55 AM UTC
Quoted Text
Linus - I have heard good things about the new Airfix kits. I just bought the Walrus kit and it looks stunning in the box. I'm looking forward to seeing how the Stuka looks as your build progresses.
Hi Paul
I haven't taken any photos but I have to say that the Stuka is going together a treat, the fit of parts is amazing. I have the Walrus too but the rigging is always something I have issues with. Will be interested in your building it.
United Kingdom
Joined: September 17, 2012
KitMaker: 462 posts
Armorama: 417 posts
Posted: Tuesday, December 12, 2017 - 11:12 PM UTC
Hello,
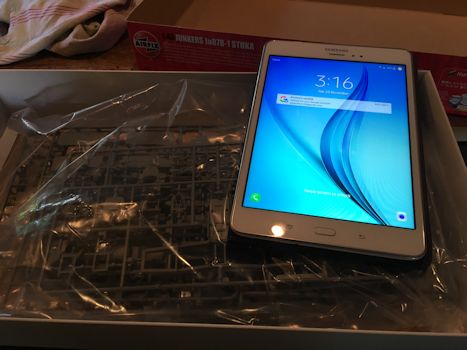
I come to this party late. These are my start up photos


The kit is the early version so I'll have to scratch the fuel tanks on the back for a later SCW version.
I hope to make good inroads with this one over the holiday season.
Cheers
Matthew
#460
California, United States
Joined: September 16, 2014
KitMaker: 1,156 posts
Armorama: 1,024 posts
Posted: Wednesday, December 13, 2017 - 05:17 AM UTC
I'm glad to see your Schneider build. These interesting tanks are rarely built and that's too bad. I'm looking forward to seeing your pictures.
I see you have the STAR decals for the SCW. STAR really stepped out for the SCW with several sheets. I'll be using their decals on the BT-5.
Vintage Paul
I'd happily live in the past but for air conditioning, the internet, mobile phones, modern medicine & dentistry and, and, and . . .
Oklahoma, United States
Joined: February 11, 2013
KitMaker: 294 posts
Armorama: 196 posts
Posted: Wednesday, December 13, 2017 - 09:11 AM UTC
I used STAR decals on the Pz I as well. They're good product.
On the bench:
The Night Shift Campaign: GWH P-61 "The Last Shoot Down". 1/48
Spanish Civil War Campaign: Dragon Pz I Ausf B 1/35
Revell B-17 1/48 with lots of add ons.
Complete rehab and repaint of Dragon Pz III J. 1/35
United Kingdom
Joined: September 17, 2012
KitMaker: 462 posts
Armorama: 417 posts
Posted: Tuesday, December 19, 2017 - 02:51 AM UTC
So
Thinking Id get on with the heavy lifting first, I decided to tackle the tracks of the Hobby Boss Schneider CA
What a pita!
There are 64 track links and 128 attachments - 2 per link
Whats more HB have horrible sprue gates to each attachment (cant think of the appropriate word)
See below

and these

Well, with my handy Exacto number 10 blade, I managed to trim most of the gate away from the cursed attachments, but
one momentary lapse of concentration resulted in a slip, a biggish gash and a make-shift bandaid (Parafilm wrapped round tissue works)

Next up gluing the attachments, two each, per link
Cant wait to get past this stage and get on with the build proper
cheers
Matthew
United Kingdom
Joined: September 17, 2012
KitMaker: 462 posts
Armorama: 417 posts
Posted: Tuesday, December 19, 2017 - 12:39 PM UTC
Small update: Ive finished assembling each track link


I just hope they fit together to make track runs now
Cheers
Matthew
Massachusetts, United States
Joined: March 28, 2007
KitMaker: 1,169 posts
Armorama: 1,067 posts
Posted: Tuesday, December 19, 2017 - 05:10 PM UTC
Nice work Matthew I hear a lot of people give up on those tracks!
#460
California, United States
Joined: September 16, 2014
KitMaker: 1,156 posts
Armorama: 1,024 posts
Posted: Wednesday, December 20, 2017 - 02:51 AM UTC
I feel your pain! Are AM tracks available? At least you are making progress on what looks to be the toughest part of the build.
The Spade Ace tracks for the BT-5 arrived the other day but it might be a while before I can get to them. Weather is cool enough now to work outdoors on a number of long delayed projects.
Paul
Vintage Paul
I'd happily live in the past but for air conditioning, the internet, mobile phones, modern medicine & dentistry and, and, and . . .
United Kingdom
Joined: September 17, 2012
KitMaker: 462 posts
Armorama: 417 posts
Posted: Wednesday, December 20, 2017 - 01:33 PM UTC
Now the heavy lifting is out of the way, I've got on to more fun stuff.
These parts, the drive housing, are all wrong...

So I scratched something that is a better approximation of the real thing...


I say an approximation, because I know they're not 100% accurate, but better than the kit parts. And here fitted to the under side of the hull.

Cheers
Matthew