

Very nicely done, Richard!
I might have to add one of those to my stash.
I finished my M1117 Guardian today; but I'm waiting for the dull coat to dry before I shoot my last pics of it.
I'm using some older Testor's rattle can Dull Cote; but it doesn't seem to be drying very flat. I've heard that pigment fixer (AK Interactive) dries flat too. Can anyone confirm that? If push comes to shove I'll just give it a couple coats of that.
Hosted by Richard S.
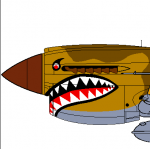
Armored CARMax...

GulfWarrior

Joined: January 05, 2010
KitMaker: 1,051 posts
Armorama: 1,029 posts

Posted: Sunday, August 26, 2018 - 11:30 AM UTC

petbat

Joined: August 06, 2005
KitMaker: 3,353 posts
Armorama: 3,121 posts
Posted: Sunday, August 26, 2018 - 08:30 PM UTC
Excellent Richard. Love the final finish looks great.
Richard err.... Richard 2... ...looking forward to the pics. I stopped using Dullcoat many years ago after a disaster with it. I can't comment on the AK sorry.
Well time to put the pics where my mouth is. Finally have construction complete and ready for some paint. Be kind, these pics show the vehicle twice rear size!
Rear end. Stripped off all the location parts for the kit's way undersized tools. All scratch built using styrene and etch scrap. The pry bar is brass rod suitably flattened and split at one end and sharpened at the other. Added the rear lights and cabling behind the fenders. The kit lights are post war Dutch modifications... as were some of the other details.

Spring added for the aerial and handles, etc.

Chassis got some basic work too, brake lines, bump stops, missing chassis crossmember (there is one right at the rear that should not be there, but you do not see it)

Work done to the door insides and corrected wheel hubs. The grey ones are the kit - no idea where they got those from - the tan ones are castings of Mirror Models hubs.

I forgot to take pics of the remaining interior bits, but here you see the cast radio switch boxes and Headphone jacks hanging down. The wiring is visible in real life, but not in pics.
Onward for paint

Richard err.... Richard 2...
...looking forward to the pics. I stopped using Dullcoat many years ago after a disaster with it. I can't comment on the AK sorry.Well time to put the pics where my mouth is. Finally have construction complete and ready for some paint. Be kind, these pics show the vehicle twice rear size!
Rear end. Stripped off all the location parts for the kit's way undersized tools. All scratch built using styrene and etch scrap. The pry bar is brass rod suitably flattened and split at one end and sharpened at the other. Added the rear lights and cabling behind the fenders. The kit lights are post war Dutch modifications... as were some of the other details.
Spring added for the aerial and handles, etc.
Chassis got some basic work too, brake lines, bump stops, missing chassis crossmember (there is one right at the rear that should not be there, but you do not see it)
Work done to the door insides and corrected wheel hubs. The grey ones are the kit - no idea where they got those from - the tan ones are castings of Mirror Models hubs.
I forgot to take pics of the remaining interior bits, but here you see the cast radio switch boxes and Headphone jacks hanging down. The wiring is visible in real life, but not in pics.
Onward for paint

BogiBg

Joined: May 29, 2018
KitMaker: 397 posts
Armorama: 388 posts
Posted: Sunday, August 26, 2018 - 10:16 PM UTC
It looks really good Peter. Seems like adding details is your favourite part of modelling.

LikesTanks

Joined: May 07, 2013
KitMaker: 242 posts
Armorama: 234 posts
Posted: Sunday, August 26, 2018 - 11:19 PM UTC
Thanks for the compliments guys.
Truly admire the attention to details Peter. Seems such a shame to put a roof on after all the effort for the interior.
Truly admire the attention to details Peter. Seems such a shame to put a roof on after all the effort for the interior.
GulfWarrior
Joined: January 05, 2010
KitMaker: 1,051 posts
Armorama: 1,029 posts
Posted: Monday, August 27, 2018 - 12:47 AM UTC
I took a chance and went ahead and brush coated some figment fixer onto the turretto see how it worked. It did OK. Its not totally flat; but its better than nothing. Im going to run some through my airbrush tonight on the lower hull so I can stick a fork in this one!
petbat
Joined: August 06, 2005
KitMaker: 3,353 posts
Armorama: 3,121 posts
Posted: Monday, August 27, 2018 - 08:33 AM UTC
Thanks guys.
The build has always been my favourite part and detailing where it is needed expands the building skills. The downside is you can get to a stage where you just want to see it finished... or lose interest. A fine line to walk.
One thing I like about this vehicle is it is so rudimentary compared to German precision. This has rough prominent weld beads, the frames on the inside of the doors are rough and not perfectly square, etc. All little things that add interest, but a modelling judge would likely ping at a comp.....
Keep building guys, we are coming up to "pencils down, hands away" time...
Quoted Text
It looks really good Peter. Seems like adding details is your favourite part of modelling.
The build has always been my favourite part and detailing where it is needed expands the building skills. The downside is you can get to a stage where you just want to see it finished... or lose interest. A fine line to walk.
One thing I like about this vehicle is it is so rudimentary compared to German precision. This has rough prominent weld beads, the frames on the inside of the doors are rough and not perfectly square, etc. All little things that add interest, but a modelling judge would likely ping at a comp.....
Keep building guys, we are coming up to "pencils down, hands away" time...
LikesTanks
Joined: May 07, 2013
KitMaker: 242 posts
Armorama: 234 posts
Posted: Wednesday, August 29, 2018 - 07:05 AM UTC
This one's not for the campaign, just the Lot as I had some modelling time on my hands:

Revell's old rebox of an old Dragon kit


This is much simplified, I have a Trumpeter BRDM-2 Spandrel in the stash and the difference in detail is staggering.


The decals are a bit thick, but my main gripe is that the tyres are too wide for the wheel hubs and the hole is too small so stretching them over the hubs exacerbates the waist in the tyre opposite the pouring hole.
My question for you wonderful experts is on the colour. I've used Revell 67 - equivalent to Humbrol 116 (US Dark Green), although advised colour is Humbrol 117 (US Light Green). Any comments on the shade would be much appreciated as I see several NVA vehicles in the near future.
Revell's old rebox of an old Dragon kit
This is much simplified, I have a Trumpeter BRDM-2 Spandrel in the stash and the difference in detail is staggering.
The decals are a bit thick, but my main gripe is that the tyres are too wide for the wheel hubs and the hole is too small so stretching them over the hubs exacerbates the waist in the tyre opposite the pouring hole.
My question for you wonderful experts is on the colour. I've used Revell 67 - equivalent to Humbrol 116 (US Dark Green), although advised colour is Humbrol 117 (US Light Green). Any comments on the shade would be much appreciated as I see several NVA vehicles in the near future.
GulfWarrior
Joined: January 05, 2010
KitMaker: 1,051 posts
Armorama: 1,029 posts
Posted: Wednesday, August 29, 2018 - 07:37 AM UTC
I like it! Very evenly applied.
The only thing I'd say and I'm sure you already know it is to gloss coat it before putting the decals on. You've got some silvering around the numbers and on the NVA roundel.
As far as finish and construction go I think you did pretty good.
I don't want to sound like I'm busting your chops! God knows that my M1117 Guardian I'll be posting tonight or tomorrow is hardly a masterpiece. It's just the first one I've actually completed after a loooooooong hiatus.
GulfWarrior
Joined: January 05, 2010
KitMaker: 1,051 posts
Armorama: 1,029 posts
Posted: Wednesday, August 29, 2018 - 02:30 PM UTC
OK. The M1117 Guardian is done. It's the first one I've been able to complete in over four years. I still need to give it some love with some flat coat; but since I don't have any right now.... 


I've uploaded the picks (or is it pics) of the litter to the campaign gallery. On to the next one.
I've uploaded the picks (or is it pics) of the litter to the campaign gallery. On to the next one.
petbat
Joined: August 06, 2005
KitMaker: 3,353 posts
Armorama: 3,121 posts
Posted: Wednesday, August 29, 2018 - 03:56 PM UTC
Excellent Richard. Fantastic build. Lets hope it is the start of many more and no more long breaks. Thanks for joining in. See you in the next build.
GulfWarrior
Joined: January 05, 2010
KitMaker: 1,051 posts
Armorama: 1,029 posts
Posted: Thursday, August 30, 2018 - 01:29 AM UTC
Oh yeah! I'm already in the Launchers campaign that starts on Saturday and will probably join the Logistics one too.
I'm even thinking about submitting a proposal for a campaign myself. More info to come.

I'm even thinking about submitting a proposal for a campaign myself. More info to come.

zontar
Joined: August 27, 2006
KitMaker: 1,646 posts
Armorama: 1,557 posts
Posted: Thursday, August 30, 2018 - 04:37 PM UTC
Aloha All,
Richard L: well done on the Boxer. the Camo turned out great. Also the BRDM looks the part. As to color, I'm no expert but seem to recall what I've seen of the NVA armor it tends towards a more green appearance, where this one looks a little grey-ish. But then again, I recently saw a Facebook post about the "true Russian green" and it showed a field of defunct Russian armor in just about every shade of green imaginable.
Pete: Wow!! Superb detailing. Looks fantastic. Like you, I prefer the build, but keep my scratching fairly minimal so far.
Richard S: Great looking Guardian. I don't have any advice on the dull coat as I've been struggling with them myself. For the LAV below, I used Vallejo Matte Varnish, which seemed to work pretty well, but if you get the light just wrong, still has some sheen to it. Not sure if I didn't do a good job or if that's just how it is. Always heard good things about Testors Dull Coat, but hard to get here, so I don't have any direct experience with it.
Well, my turn. After making a right mess out of my gloss coat, I stripped the whole thing back to bare plastic and started over. Still had a bit of a fuss with the gloss coat the second time around, but not nearly as bad.
Here's the repainted vehicle with the decals applied.


And here is the final. I only did a light wash without any weathering. It seems to me the Japanese keep their kit pretty tidy. Tamiya 1/48th JGSDF Light Armored Vehicle.


Overall a fun build and I'm pretty happy with it. I really love the vehicle itself and feel I did a decent enough job.
Happy Modeling,
Zon
Richard L: well done on the Boxer. the Camo turned out great. Also the BRDM looks the part. As to color, I'm no expert but seem to recall what I've seen of the NVA armor it tends towards a more green appearance, where this one looks a little grey-ish. But then again, I recently saw a Facebook post about the "true Russian green" and it showed a field of defunct Russian armor in just about every shade of green imaginable.
Pete: Wow!! Superb detailing. Looks fantastic. Like you, I prefer the build, but keep my scratching fairly minimal so far.
Richard S: Great looking Guardian. I don't have any advice on the dull coat as I've been struggling with them myself. For the LAV below, I used Vallejo Matte Varnish, which seemed to work pretty well, but if you get the light just wrong, still has some sheen to it. Not sure if I didn't do a good job or if that's just how it is. Always heard good things about Testors Dull Coat, but hard to get here, so I don't have any direct experience with it.
Well, my turn. After making a right mess out of my gloss coat, I stripped the whole thing back to bare plastic and started over. Still had a bit of a fuss with the gloss coat the second time around, but not nearly as bad.
Here's the repainted vehicle with the decals applied.
And here is the final. I only did a light wash without any weathering. It seems to me the Japanese keep their kit pretty tidy. Tamiya 1/48th JGSDF Light Armored Vehicle.
Overall a fun build and I'm pretty happy with it. I really love the vehicle itself and feel I did a decent enough job.
Happy Modeling,
Zon
petbat
Joined: August 06, 2005
KitMaker: 3,353 posts
Armorama: 3,121 posts
Posted: Friday, August 31, 2018 - 03:49 PM UTC
Good to see Richard. I have enlisted on a couple of those. Will see you there.
Fantastic Zon. It has turned out exceptional. The detail on the lights is amazing.
Well best laid plans for me. Hoped to have the Otter completely finished, but wife and a washing machine that needed repairs had other plans. I have painted it, so under the rules, painted is finished!!! ahem...
Will still give it some wash and weathering, and some more detail painting as well over the next few days, so keep an eye out here if you want to see the second final finish..
BogiBg
Joined: May 29, 2018
KitMaker: 397 posts
Armorama: 388 posts
Posted: Friday, August 31, 2018 - 04:42 PM UTC
Nice job Peter. Waiting to see it finished...
zontar
Joined: August 27, 2006
KitMaker: 1,646 posts
Armorama: 1,557 posts
Posted: Friday, August 31, 2018 - 09:31 PM UTC
Pete: Looks great! Your scratching really payed off. Ill keep my eye out for the update.
Happy Modeling,
Zon
Happy Modeling,
Zon
GulfWarrior
Joined: January 05, 2010
KitMaker: 1,051 posts
Armorama: 1,029 posts
Posted: Wednesday, September 05, 2018 - 01:41 AM UTC
Has anyone seen their ribbon posted for this campaign? This will be my first successful campaign completion. 
I know there's probably a volunteer who needs to do it and is working it into his/her other duties. I'd be glad to volunteer for to help out with that if someone can show me how it needs to be done.
I know there's probably a volunteer who needs to do it and is working it into his/her other duties. I'd be glad to volunteer for to help out with that if someone can show me how it needs to be done.
petbat
Joined: August 06, 2005
KitMaker: 3,353 posts
Armorama: 3,121 posts
Posted: Wednesday, September 05, 2018 - 06:44 PM UTC
Quoted Text
Has anyone seen their ribbon posted for this campaign? This will be my first successful campaign completion.
I know there's probably a volunteer who needs to do it and is working it into his/her other duties. I'd be glad to volunteer for to help out with that if someone can show me how it needs to be done.

petbat
Joined: August 06, 2005
KitMaker: 3,353 posts
Armorama: 3,121 posts
Posted: Wednesday, September 05, 2018 - 06:54 PM UTC
Ribbons usually take a little while to be allocated as the moderators don't always have time to pounce when the end date hits.
I have sent a polite PM off and I know it will be responded to as soon as they can. Keep an eye on this thread as confirmation they have been awarded will be posted here.
On a personal note, thanks to everyone who participated. It was a great build with a lot of excellent skills put on display. I also appreciate the feedback and support you gave each other - that is what these builds are all about. It was a pleasure building with you all.
Thanks also to Clayton for suggesting the theme, but unfortunately had to bow out for personal reasons. He has been a lurker on occasion, so good to see him getting back on the forum.
Back to the weathering on the Otter for me...

Nito74

Joined: March 04, 2008
KitMaker: 5,386 posts
Armorama: 4,727 posts
Posted: Thursday, September 06, 2018 - 11:06 PM UTC
Ribbons sent fellas.
Sorry for the delay.
Hope everyone had fun on this one !!
Sorry for the delay.
Hope everyone had fun on this one !!

md72

#439
Joined: November 05, 2005
KitMaker: 4,950 posts
Armorama: 289 posts

Posted: Friday, September 07, 2018 - 12:25 AM UTC
Thanks John. Ribbon looks pretty good up there. Thanks guys, it was a fun build, I learned a lot and tried some stuff I'd never done before. Even started picking up a few AFVs to work on. See you next time.

GulfWarrior
Joined: January 05, 2010
KitMaker: 1,051 posts
Armorama: 1,029 posts
Posted: Friday, September 07, 2018 - 01:48 AM UTC
WooHoo!! I feel like I did when I was a budding young Private and got my first ribbon!
johhar
Joined: September 22, 2008
KitMaker: 476 posts
Armorama: 447 posts
Posted: Friday, September 07, 2018 - 02:33 AM UTC
Of course we want to see the Otter with all the trim and detail. A great subject and something to look forward to.
SGTJKJ

#041

Joined: July 20, 2006
KitMaker: 10,069 posts
Armorama: 4,677 posts

Posted: Friday, September 07, 2018 - 02:53 AM UTC
Great campaign!


eMan
#298

Joined: August 08, 2002
KitMaker: 1,182 posts
Armorama: 665 posts

Posted: Friday, September 07, 2018 - 04:57 AM UTC
Thanks John!

ayovtshev
#490

Joined: September 22, 2016
KitMaker: 1,432 posts
Armorama: 1,390 posts

Posted: Friday, September 07, 2018 - 05:06 AM UTC
Thank you All!
This campaign was a real pleasure to participate.

This campaign was a real pleasure to participate.
 |

WEB HOSTING BY


Copyright ©2021 Armorama and Kitmaker Network, a subsidiary of Silver Star Enterprises
All Rights Reserved. Please read our Conditions of Use and Privacy Policy.
All Rights Reserved. Please read our Conditions of Use and Privacy Policy.