Campaigns: Completed Campaigns
Campaigns that are completed should be grouped here.
Hosted by Richard S.
Anti-AircraftCampaign
deerstalker36
Visit this Community
Queensland, Australia
Joined: May 16, 2010
KitMaker: 232 posts
Armorama: 218 posts
Posted: Sunday, April 08, 2018 - 05:35 PM UTC
First coat using the Vallejo Russian Green Paint set


onto the weathering
k_mero4
Visit this Community
Sofiya, Bulgaria
Joined: November 26, 2017
KitMaker: 393 posts
Armorama: 369 posts
Posted: Sunday, April 08, 2018 - 06:03 PM UTC
Hi, Marc (callsign: Petro)! This is one of my favorite models of Tamiya. It works easy, it gives pleasure in modeling, and the end result is wonderful. Good choice and good work. I expect the sequel. Good luck.
k_mero4
Visit this Community
Sofiya, Bulgaria
Joined: November 26, 2017
KitMaker: 393 posts
Armorama: 369 posts
Posted: Sunday, April 08, 2018 - 06:07 PM UTC
And that's my modest progress on the project.


Within a few days it will be finished and I will introduce it to you. Good luck to everyone in the campaign.
Northern_Lad
Visit this Community
United Kingdom
Joined: September 17, 2012
KitMaker: 462 posts
Armorama: 417 posts
Posted: Tuesday, April 10, 2018 - 02:37 PM UTC
Hello,

There are some awesome builds in this campaign!

I was going to build the Tamiya sdkfz 7/1 flak, but I’ve changed my mind.

Instead I’ll build the Zvezda maultier and add the Trumpeter Flak 37 on the truck bed. Here are my start up photos…


I still need to finish the SCW and Trumpeter campaigns so this one will be a slow burn…

Cheers

Matthew
deerstalker36
Visit this Community
Queensland, Australia
Joined: May 16, 2010
KitMaker: 232 posts
Armorama: 218 posts
Posted: Thursday, April 12, 2018 - 05:07 PM UTC
Calling this finished now


Still a couple of minor touch ups but otherwise done
Igorbc
Visit this Community
Croatia Hrvatska
Joined: December 11, 2015
KitMaker: 101 posts
Armorama: 95 posts
Posted: Thursday, April 12, 2018 - 09:57 PM UTC
My Mobelwagen is completed now.
petbat
Visit this Community
Queensland, Australia
Joined: August 06, 2005
KitMaker: 3,353 posts
Armorama: 3,121 posts
Posted: Friday, April 13, 2018 - 01:32 AM UTC
Colin and Igor. Fantastic builds guys. Two very different vehicles for sure. Thanks for joining in.

Kalin, that sure is a detailed kit. You are really bringing it all together.

Welcome aboard Matthew.
Petro
Visit this Community
Connecticut, United States
Joined: November 02, 2003
KitMaker: 984 posts
Armorama: 846 posts
Posted: Sunday, April 15, 2018 - 05:32 AM UTC

Quoted Text

Hi, Marc (callsign: Petro)! This is one of my favorite models of Tamiya. It works easy, it gives pleasure in modeling, and the end result is wonderful. Good choice and good work. I expect the sequel. Good luck.


It is working nice. Gotta love Tamiya instructions. The molds are definitely old. The plastic is also nice. I only broke 1 part so far, and it was so eaily repaired. Lol
Here is some progress.
SGTJKJ
#041
Visit this Community
Kobenhavn, Denmark
Joined: July 20, 2006
KitMaker: 10,069 posts
Armorama: 4,677 posts
Posted: Sunday, April 15, 2018 - 10:05 PM UTC
Igor and Colin, beautiful builds! Congratulations on finishing.
barkingdigger
Staff MemberAssociate Editor
ARMORAMA
#013
Visit this Community
England - East Anglia, United Kingdom
Joined: June 20, 2008
KitMaker: 3,981 posts
Armorama: 3,403 posts
Posted: Monday, April 23, 2018 - 02:51 AM UTC
Hi all,

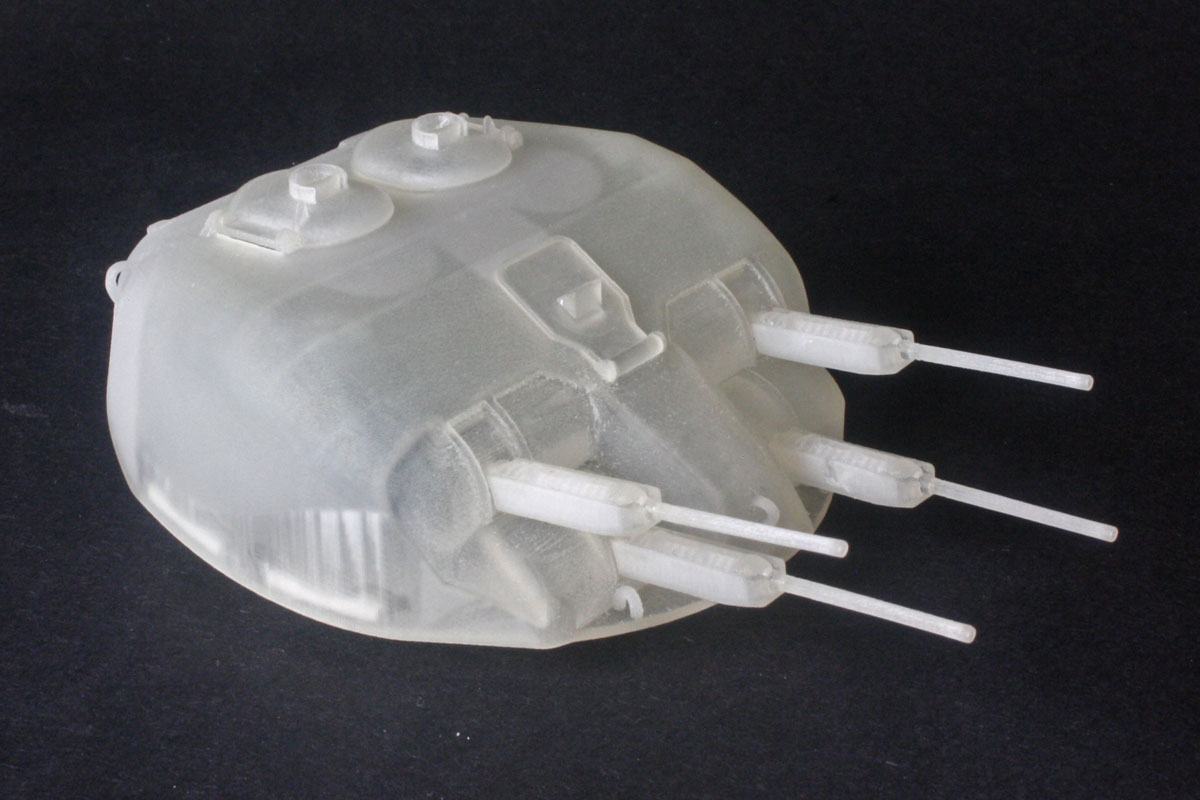
Some great builds in this campaign! My own entry is a little late, but hopefully of interest - it's the Canadian AA tank, the M4 Skink! That's a cast-hull Sherman tank with a funky four-barrel turret full of Polsten guns, only one example of which saw any field-testing before the war ended. (By then there was no Luftwaffe to shoot at, but it was a hit against dug-in infantry...)

I reviewed a 3D-printed resin turret a little while back, and am now getting round to building it. I've chosen to put it on the venerable DML M4A1 hull (kit 6048) because, well, it was in the stash. And despite being a tad "broad-shouldered" the hull still looks good.
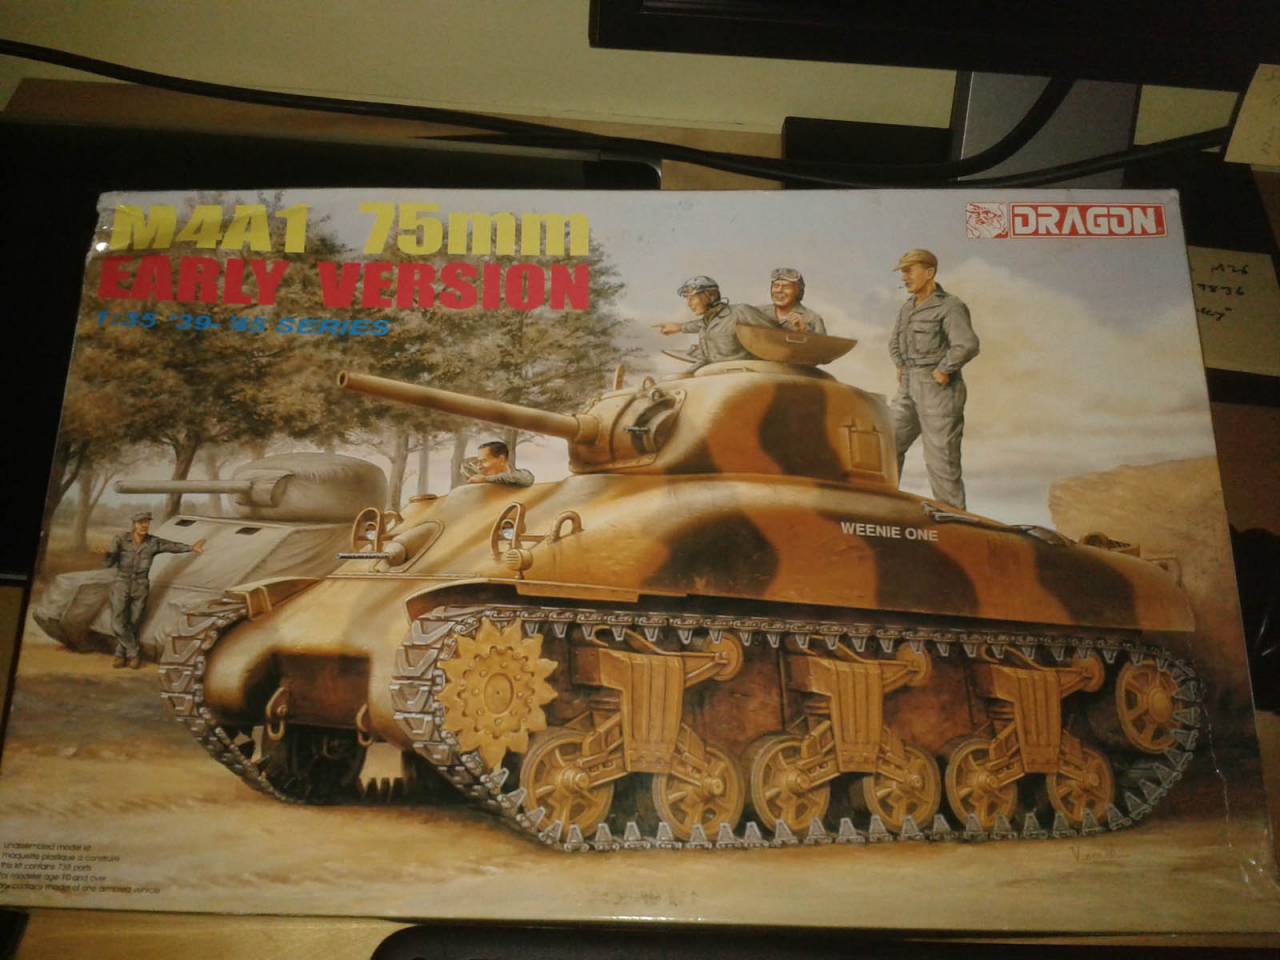


First step was getting the turret to fit. The print does not include mounting tabs, so I made some from L-shaped plastic strip. I also needed to pad the turret hole with about 0.25" of plastic strip (I used some 0.020x0.040, topped by 0.010x0.040, then scraped and sanded til the turret ring fit), and then had to sand down the outer rear corners because they fouled the extinguisher-handle hood and the splash ring.
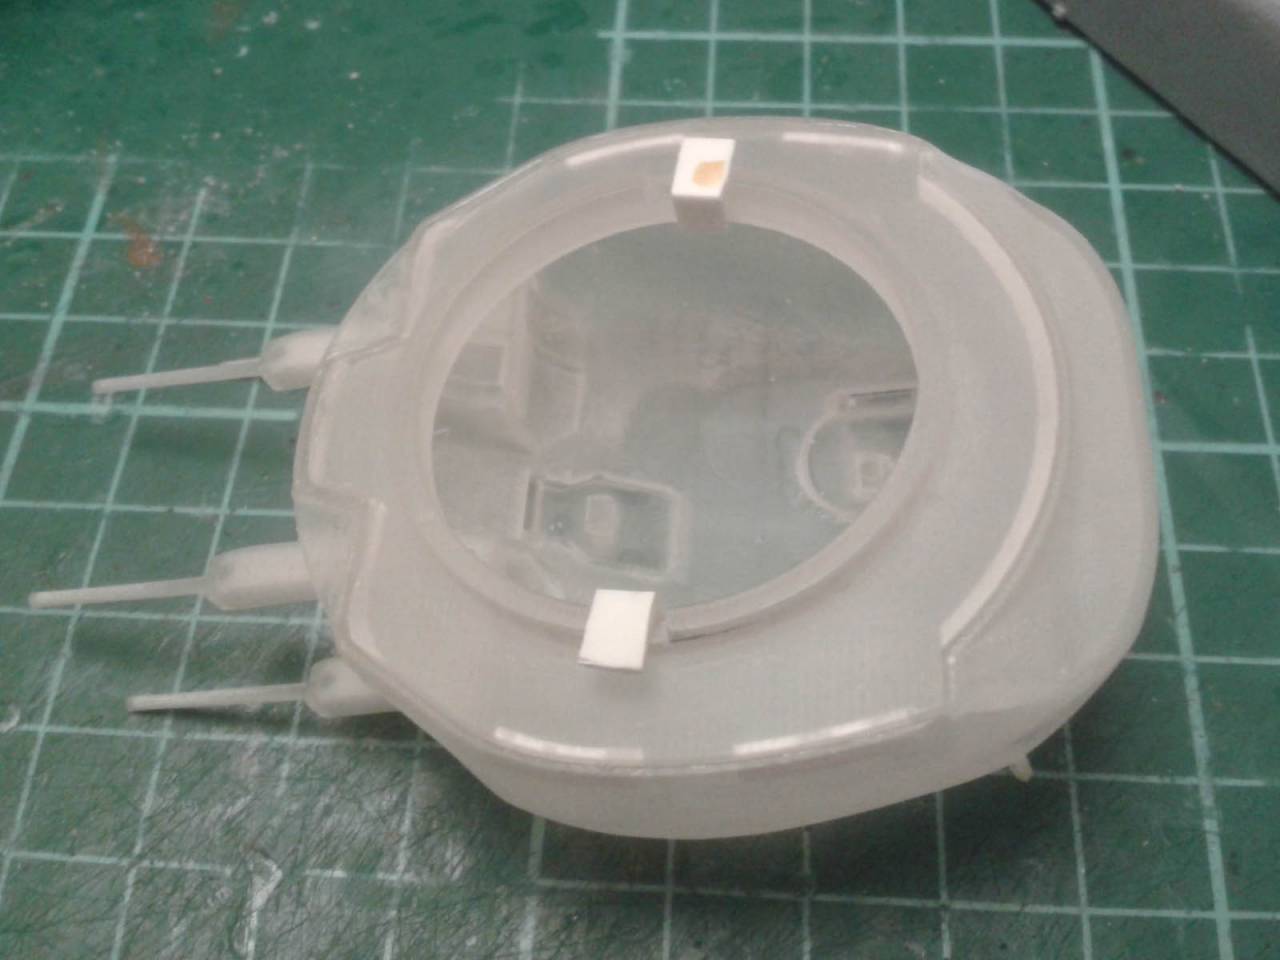
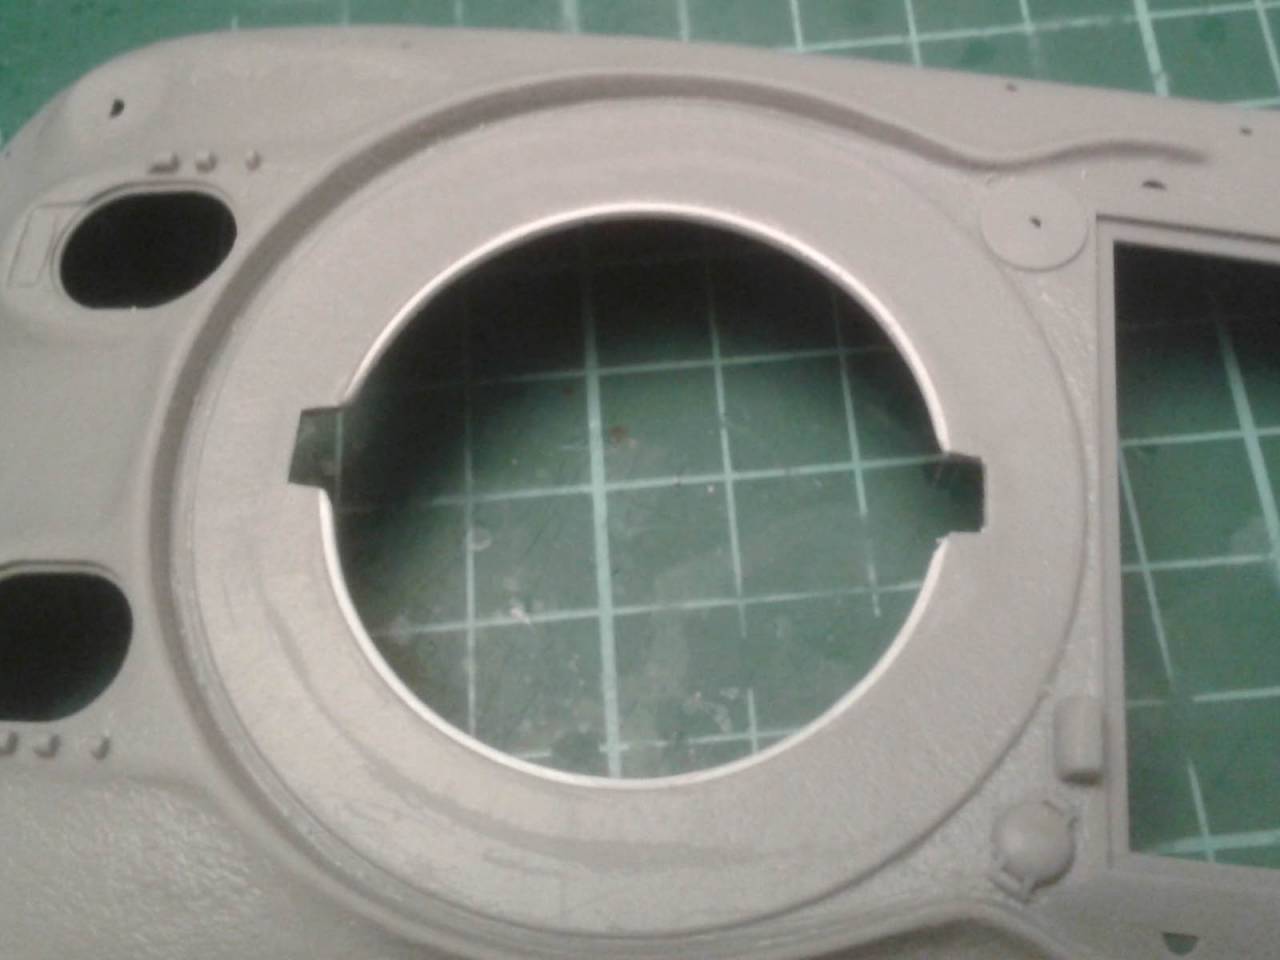
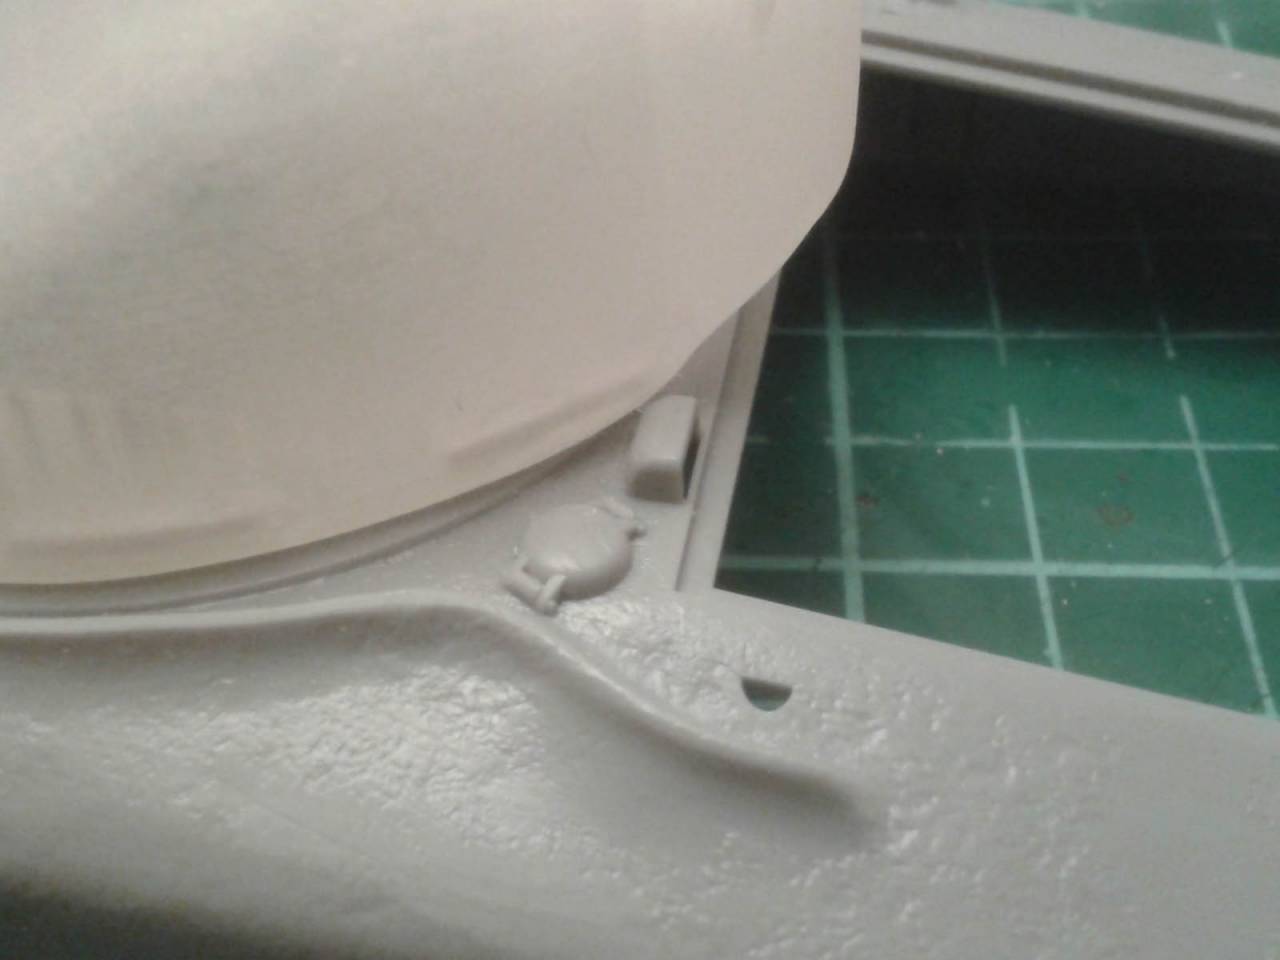


There isn't much "meat" on those corners, so to make room I had to scrape away maybe half a millimetre from the inner edge of the splash ring all the way round.

Next up I'll start tackling the main hull.
Martinvidas
Visit this Community
Noord-Brabant, Netherlands
Joined: February 13, 2011
KitMaker: 322 posts
Armorama: 300 posts
Posted: Friday, April 27, 2018 - 11:25 AM UTC
I'm coming back to the bench, after short trip to Sofia (Bulgaria).
The plastic tracks are almost finished:


I'm planing to finish them today and get them painted.
TacFireGuru
Visit this Community
Colorado, United States
Joined: December 25, 2004
KitMaker: 3,770 posts
Armorama: 2,263 posts
Posted: Sunday, April 29, 2018 - 07:18 AM UTC
Just now started my Flak Drasine:


And a basic start on the lower hull:


Mike
Martinvidas
Visit this Community
Noord-Brabant, Netherlands
Joined: February 13, 2011
KitMaker: 322 posts
Armorama: 300 posts
Posted: Sunday, April 29, 2018 - 10:21 AM UTC
2 parts of the body are assembled - there is a big gap between the bottom and the upper parts of the hull. Waiting to get dry to sand it. Filled with mr. white putty.


TacFireGuru
Visit this Community
Colorado, United States
Joined: December 25, 2004
KitMaker: 3,770 posts
Armorama: 2,263 posts
Posted: Monday, April 30, 2018 - 09:32 PM UTC
Bits of the lower hull put together.


Mike
TacFireGuru
Visit this Community
Colorado, United States
Joined: December 25, 2004
KitMaker: 3,770 posts
Armorama: 2,263 posts
Posted: Tuesday, May 01, 2018 - 09:27 PM UTC
Tie downs on the side. The molded ones are nothing. Remove, drill, add the PE replacement. MUCH better.


Mike
petbat
Visit this Community
Queensland, Australia
Joined: August 06, 2005
KitMaker: 3,353 posts
Armorama: 3,121 posts
Posted: Tuesday, May 01, 2018 - 11:39 PM UTC
Looking good Mike. Little details add a lot.
TacFireGuru
Visit this Community
Colorado, United States
Joined: December 25, 2004
KitMaker: 3,770 posts
Armorama: 2,263 posts
Posted: Wednesday, May 02, 2018 - 03:16 AM UTC

Quoted Text

Looking good Mike. Little details add a lot.


Thanks Peter. I debated whether or not to use them, then decided I'm going to string "wire" through them for natural camouflage (not sure if I'll actually camo this one up).

The Aber PE set (usually pretty hard to find) covers all three of Dragon's Schwerer Panzerspahwagen's. There'll be a lot left over which some will find it's way to my Ratte.

Mike
TacFireGuru
Visit this Community
Colorado, United States
Joined: December 25, 2004
KitMaker: 3,770 posts
Armorama: 2,263 posts
Posted: Wednesday, May 02, 2018 - 03:37 AM UTC
Sides and ends assembled and primed. JB Model (now RB Model?) bumpers have springs in them.

Roof is going to get a lot of PE brackets.


Mike
petbat
Visit this Community
Queensland, Australia
Joined: August 06, 2005
KitMaker: 3,353 posts
Armorama: 3,121 posts
Posted: Wednesday, May 02, 2018 - 09:24 AM UTC

Quoted Text


Quoted Text

Looking good Mike. Little details add a lot.


Thanks Peter. I debated whether or not to use them, then decided I'm going to string "wire" through them for natural camouflage (not sure if I'll actually camo this one up).


Mike


The fastest Shrubbery on the Eastern Front?

Petro
Visit this Community
Connecticut, United States
Joined: November 02, 2003
KitMaker: 984 posts
Armorama: 846 posts
Posted: Saturday, May 05, 2018 - 03:51 AM UTC
I have been working slowing. I've made a couple small mistakes along the way and fixing them as i go. Also, i am adding a fewmore details if i can.
I am going to build it in tow mode. Still need to build the wheel assemblies.
The shield is a little warped. I need to see if i can bend it a little with out killing it

d6mst0
#453
Visit this Community
Texas, United States
Joined: August 28, 2016
KitMaker: 1,925 posts
Armorama: 601 posts
Posted: Saturday, May 05, 2018 - 03:57 AM UTC
Marc,

Nice clean looking build. Good luck with the shield.

Mark
deerstalker36
Visit this Community
Queensland, Australia
Joined: May 16, 2010
KitMaker: 232 posts
Armorama: 218 posts
Posted: Saturday, May 05, 2018 - 04:40 AM UTC
Marc, lovely clean build there.

i always wanted that kit as a kid but it was way to expensive at £8 (it was a few years ago lol)
petbat
Visit this Community
Queensland, Australia
Joined: August 06, 2005
KitMaker: 3,353 posts
Armorama: 3,121 posts
Posted: Saturday, May 05, 2018 - 06:28 AM UTC
Looking very nice indeed Marc. Bummer about the shield. Fingers crossed you fix it with no issues.
TacFireGuru
Visit this Community
Colorado, United States
Joined: December 25, 2004
KitMaker: 3,770 posts
Armorama: 2,263 posts
Posted: Saturday, May 05, 2018 - 07:14 AM UTC
PE is all on the roof and it's primed. "Turret hole" has been enlarged to accept the Kugelblitz.

The rail car will get the base Dunkelgelb with Olivgrun camo. The turret will get Dunkelgelb with Olivgrun camo with added Schokobraun. The "intent" is an earlier war Drasine with a later painted AA turret.

The white disk on the left will be cut to fit inside the turret sides (half-moon shape) to hide the ball pivots.


Mike
Martinvidas
Visit this Community
Noord-Brabant, Netherlands
Joined: February 13, 2011
KitMaker: 322 posts
Armorama: 300 posts
Posted: Saturday, May 05, 2018 - 11:57 PM UTC
My small update - the hull is ready for paint after primer: