Bury My Heart at Stalingrad
Namabiiru
 Associate Editor
#399
Rhode Island, United States
Joined: March 05, 2014
KitMaker: 2,888 posts
Armorama: 1,920 posts
Posted: Wednesday, April 10, 2019 - 10:52 AM UTC
KV-1 has got pre-shade, base coat, and a very subtle post-shade.
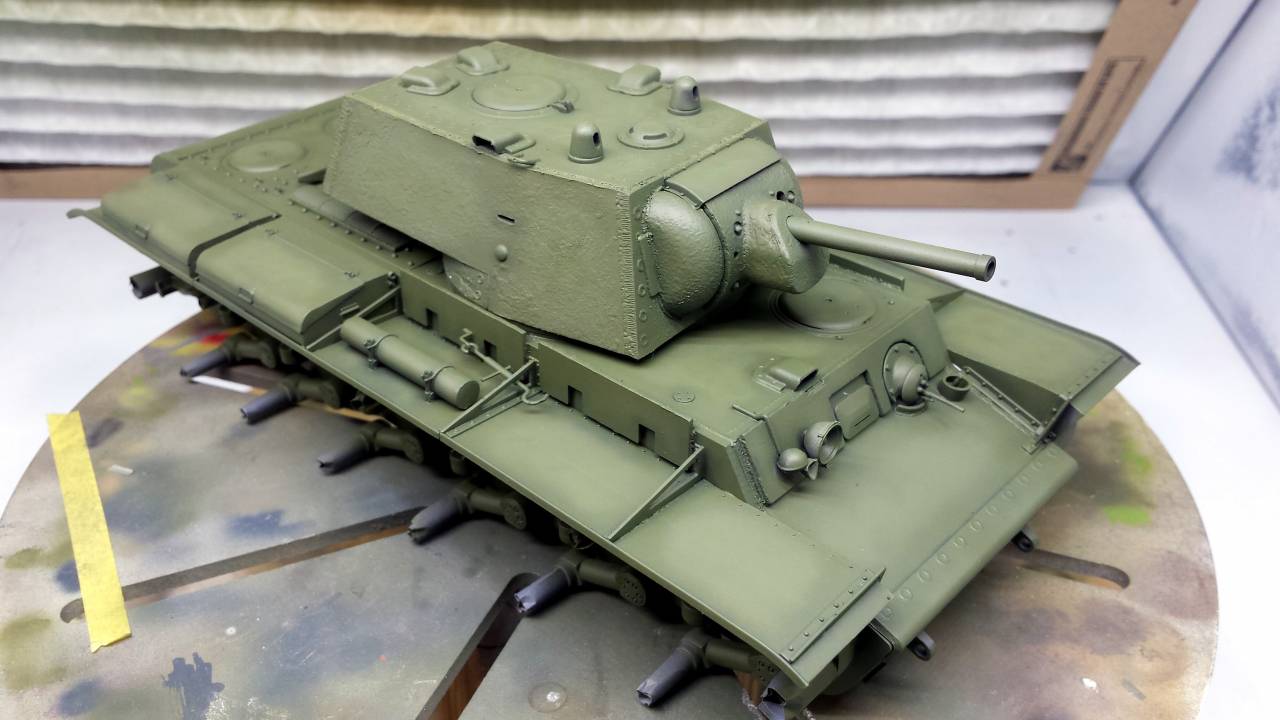
The extra texture and weld lines make a huge difference, if I may say; although now that I look at it, I think I should have given the glacis a similar treatment to the turret. No going back now!


#424
Queensland, Australia
Joined: April 23, 2015
KitMaker: 4,648 posts
Armorama: 2,248 posts
Posted: Wednesday, April 10, 2019 - 11:07 AM UTC
Mark,
Already looks awesome!
Gaz
"Artillery adds dignity, to what would otherwise be an ugly brawl."
Frederick The Great
Queensland, Australia
Joined: August 06, 2005
KitMaker: 3,353 posts
Armorama: 3,121 posts
Posted: Wednesday, April 10, 2019 - 07:49 PM UTC
On the Bench:
Dust, styrene scraps, paint splotches and tears.
Namabiiru
 Associate Editor
#399
Rhode Island, United States
Joined: March 05, 2014
KitMaker: 2,888 posts
Armorama: 1,920 posts
Posted: Thursday, April 11, 2019 - 03:27 AM UTC
Thanks, Gents!

Michigan, United States
Joined: January 02, 2012
KitMaker: 139 posts
Armorama: 65 posts
Posted: Tuesday, April 16, 2019 - 11:30 AM UTC
Greetings,
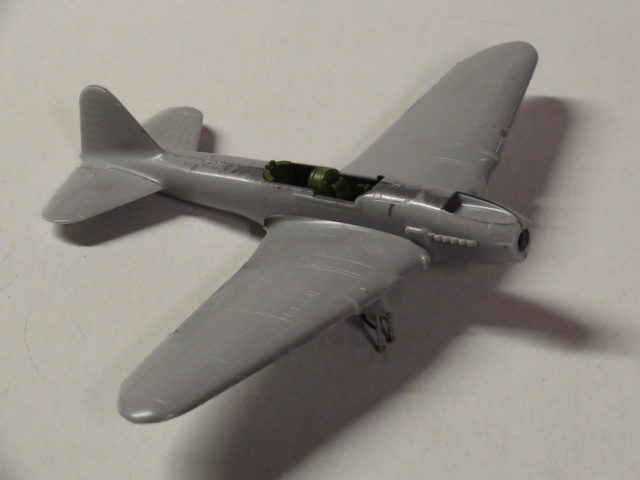
I've made some progress on the Il-2m3. Cockpit painted, assembled. Wings assembled. Fuselage assembled. Fuselage and wings together. Fit is good. More to follow.
Cheers,
Firstsergeant


In progress:
MPC Boeing B-17G Mighty Eighth Campaign
California, United States
Joined: March 03, 2016
KitMaker: 142 posts
Armorama: 137 posts
Posted: Tuesday, April 16, 2019 - 12:50 PM UTC
Hello All,
Very impressive builds there Gents!!
Been a while sense my last post here on Armorama. Baseball, Work.... been taking up all my time again. I never have time to complete a 1/35 scale model for any campaign that I have joined. With that said, I decide that I'm going to scale down to 1/72. I will have enough time to build, paint and weather

.
My entry for this campaign is Dragons ArmorPro 1/72 PzKpfw IV Ausf F2 (G). Death of the Leaping Horseman (24thPzDiv) sounds like a good Division for this F2!

Here I am at the moment.


Cheers,
John
Queensland, Australia
Joined: August 06, 2005
KitMaker: 3,353 posts
Armorama: 3,121 posts
Posted: Tuesday, April 16, 2019 - 03:20 PM UTC
The best words a modeller could hear First sergeant "Fit is good". And looking good it is.
Nice to see you John A. Yep death alright, 24th crushed at Stalingrad. The link and length tracks don't look too bad.
On the Bench:
Dust, styrene scraps, paint splotches and tears.

#424
Queensland, Australia
Joined: April 23, 2015
KitMaker: 4,648 posts
Armorama: 2,248 posts
Posted: Tuesday, April 16, 2019 - 03:40 PM UTC
FirstSergeant, your Sturmovik is coming along nicely!
Gaz
"Artillery adds dignity, to what would otherwise be an ugly brawl."
Frederick The Great

#424
Queensland, Australia
Joined: April 23, 2015
KitMaker: 4,648 posts
Armorama: 2,248 posts
Posted: Tuesday, April 16, 2019 - 03:42 PM UTC
JohnA,
I'm glad to see your entry! The sag on the tracks looks good!
Gaz
"Artillery adds dignity, to what would otherwise be an ugly brawl."
Frederick The Great
California, United States
Joined: March 03, 2016
KitMaker: 142 posts
Armorama: 137 posts
Posted: Sunday, April 21, 2019 - 05:47 PM UTC
At Pete & Gaz.... I too like the sag of the tracks!! Hopefully the sag stays once I attached them and don't stretch. I was hoping that the tracks would be all plastic not rubber

. It would've been easier to attach, paint and weather, IMHO.
I had time Saturday night to finish building the F2 and but a coat of Tamiya's Primer (rattle can).


Couple of hours ago, I had time to spray the final coat using Tamiya's German Grey rattle can. BUT there was 1 step I forgot to do. I forgot to pre-shade the F2 before the GG went on. SMH!!!!
Pictures where taken inside the paint both and the lighting is drowning the GG. I hoping....


These pictures where taken inside and looks about the same.


UGH!!

JohnA
Queensland, Australia
Joined: August 06, 2005
KitMaker: 3,353 posts
Armorama: 3,121 posts
Posted: Sunday, April 21, 2019 - 09:11 PM UTC
Hmmm. What colour was that rattle can? TS4?. I think that is more a battleship grey colour than tank colour.
Before anything too drastic, I suggest you do a thin very dark Grey wash and see if that deepens the colour. Try the hull bottom first.
If you use an acrylic colour for the wash, wet the surface a bit first, then dab the wash on around where you would want the dark to be. Then tease the wash out to be thinner toward the center of panels, etc, and to avoid tide lines (the already wet surface should draw the edge to feather it out). Do small areas a time so you can work it. Keep some kitchen towel, clean water and clean brush handy. Use more water on a clean brush to clear excess from pooling or tide marks forming, and to thin too dark areas before the wash dries too much. If necessary, blot the wash with kitchen towel if you add too much, but don't leave fibres behind..
It may need a couple of layers but thin, not heavy, and do the layer over the whole vehicle last after you have shaded the areas you want darker, that way you can control the colour.
You can also vary the finish by adding a little black to the grey to get varying shades under protrusions, etc to add some depth the finish.
There is always the option of whitewash later if the grey doesn't meet your requirements.
Good luck.
On the Bench:
Dust, styrene scraps, paint splotches and tears.

#453
Texas, United States
Joined: August 28, 2016
KitMaker: 1,925 posts
Armorama: 601 posts
Posted: Tuesday, April 23, 2019 - 11:09 AM UTC

#424
Queensland, Australia
Joined: April 23, 2015
KitMaker: 4,648 posts
Armorama: 2,248 posts
Posted: Tuesday, April 23, 2019 - 02:10 PM UTC
JohnA
Your panzer is looking the part. As Peter says, you can use filters to do what you wanted to do with preshading.
On my T-34 build I used a blue filter on the lower half of each vertical panel and brown on the upper half of the panels to get colour variation with oils.
Gaz
"Artillery adds dignity, to what would otherwise be an ugly brawl."
Frederick The Great

#424
Queensland, Australia
Joined: April 23, 2015
KitMaker: 4,648 posts
Armorama: 2,248 posts
Posted: Tuesday, April 23, 2019 - 02:13 PM UTC
Mark,
Your panzer looks smashing.
Gaz
"Artillery adds dignity, to what would otherwise be an ugly brawl."
Frederick The Great

#453
Texas, United States
Joined: August 28, 2016
KitMaker: 1,925 posts
Armorama: 601 posts
Posted: Tuesday, April 23, 2019 - 11:17 PM UTC
Quoted Text
Mark,
Your panzer looks smashing.
Gaz
Thank you.
Mark

Michigan, United States
Joined: January 02, 2012
KitMaker: 139 posts
Armorama: 65 posts
Posted: Sunday, April 28, 2019 - 11:47 AM UTC
Greetings,
Reporting in with more progress...
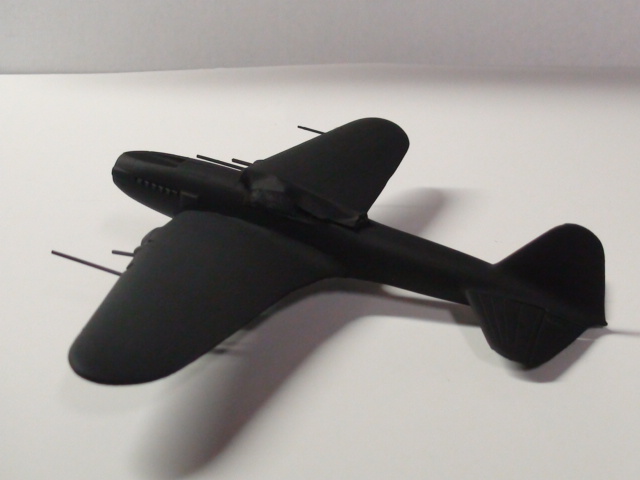
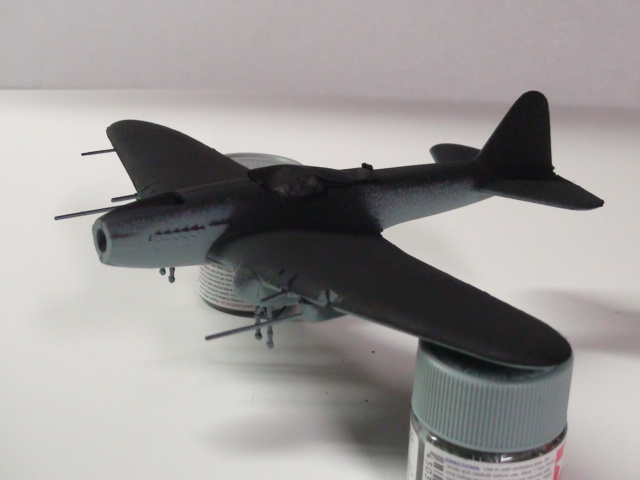
Primed, Tamiya light blue applied to underside. Next, tape it off, spray on white winter camo. More to follow...
Cheers,
Firstsergeant


In progress:
MPC Boeing B-17G Mighty Eighth Campaign

#424
Queensland, Australia
Joined: April 23, 2015
KitMaker: 4,648 posts
Armorama: 2,248 posts
Posted: Sunday, April 28, 2019 - 02:22 PM UTC
Good progress, First Sergeant!
"Artillery adds dignity, to what would otherwise be an ugly brawl."
Frederick The Great

#453
Texas, United States
Joined: August 28, 2016
KitMaker: 1,925 posts
Armorama: 601 posts
Posted: Thursday, May 02, 2019 - 11:56 AM UTC

#424
Queensland, Australia
Joined: April 23, 2015
KitMaker: 4,648 posts
Armorama: 2,248 posts
Posted: Thursday, May 02, 2019 - 09:27 PM UTC
Wow, Mark!
Congratulations on a stunner! I love all of the adde,d gear and wear you put on it. The base, background color and lighting make for a great presentation!
Well done!
Gaz
"Artillery adds dignity, to what would otherwise be an ugly brawl."
Frederick The Great
Sofiya, Bulgaria
Joined: November 26, 2017
KitMaker: 393 posts
Armorama: 369 posts
Posted: Friday, May 03, 2019 - 04:43 AM UTC
Mark, fantastic. The exterior is impressive, realistic and ...
Congratulations.
Kalin

#453
Texas, United States
Joined: August 28, 2016
KitMaker: 1,925 posts
Armorama: 601 posts
Posted: Friday, May 03, 2019 - 05:31 AM UTC
Gaz, Kalin,
Thank you.
Mark

Noord-Brabant, Netherlands
Joined: February 13, 2011
KitMaker: 322 posts
Armorama: 300 posts
Posted: Sunday, May 05, 2019 - 12:51 AM UTC
I will enter with Tamiya Zundapp R750 kit, this time in 1/35 scale, together with Eduard PE set.
The starting pic:


#424
Queensland, Australia
Joined: April 23, 2015
KitMaker: 4,648 posts
Armorama: 2,248 posts
Posted: Sunday, May 05, 2019 - 09:03 AM UTC
Nice Choice and welcome, Martin!
"Artillery adds dignity, to what would otherwise be an ugly brawl."
Frederick The Great
United Kingdom
Joined: September 17, 2012
KitMaker: 462 posts
Armorama: 417 posts
Posted: Monday, May 06, 2019 - 07:12 AM UTC
Hello,
Great looking builds here! I especially like the panzer iv F1!
I’ve cleared some space on the bench, so will start this beauty!


Cheers
Matthew
United Kingdom
Joined: September 17, 2012
KitMaker: 462 posts
Armorama: 417 posts
Posted: Monday, May 06, 2019 - 11:24 AM UTC
Hello again!
I’ve found a few snags with the 15-cm Sturm-Infanteriegeschutz 33. CyberHobby (Dragon) provide decals for “G7”as per the box art. See below…

The snags are “G7” had the earlier style idler wheel, and the earlier style headlight. See below…

Fortunately, I have the earlier style idler wheels knocking around in the spares box, and a headlight that should do the job.
Happy day again!
Cheers
Matthew
PS now is that panzergrau or dunkelgelb in the second picture?




 .
. 


 . It would've been easier to attach, paint and weather, IMHO.


