RFM Jagdpanther Ausf. G2 Build Log

#456
Oklahoma, United States
Joined: September 22, 2016
KitMaker: 654 posts
Armorama: 638 posts
Posted: Thursday, September 05, 2019 - 04:12 AM UTC
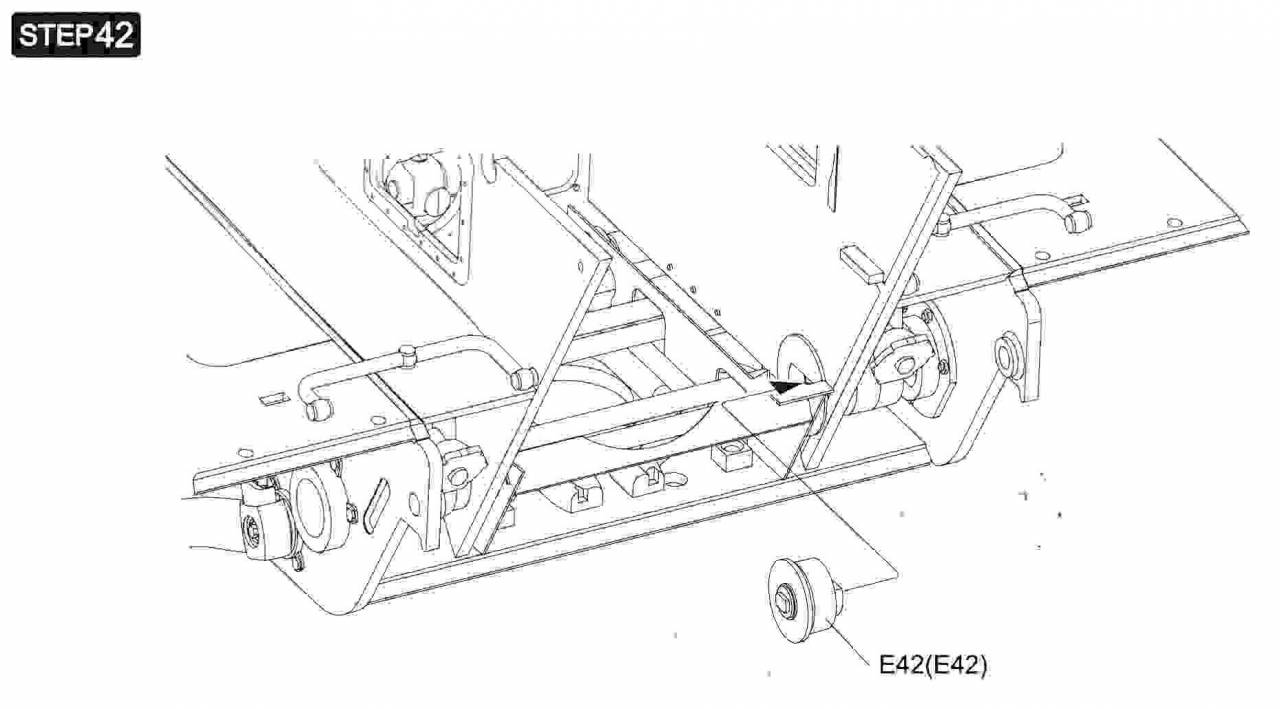
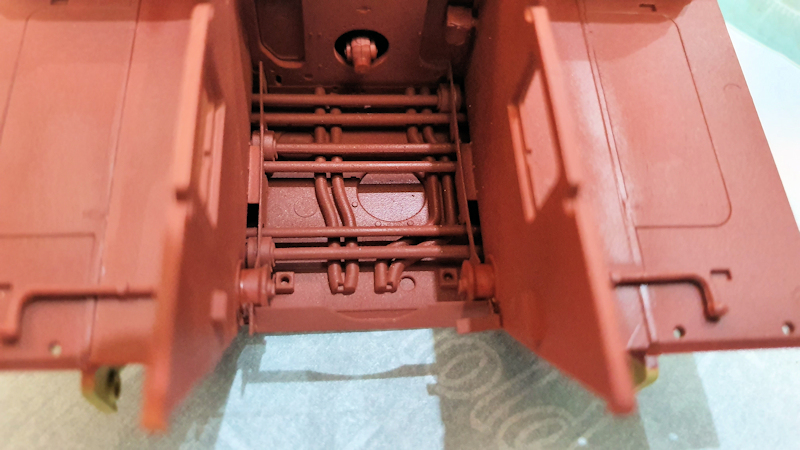
Step 42 is a simple and quick one. Two parts for the idler wheel axle.
Instructions
Parts
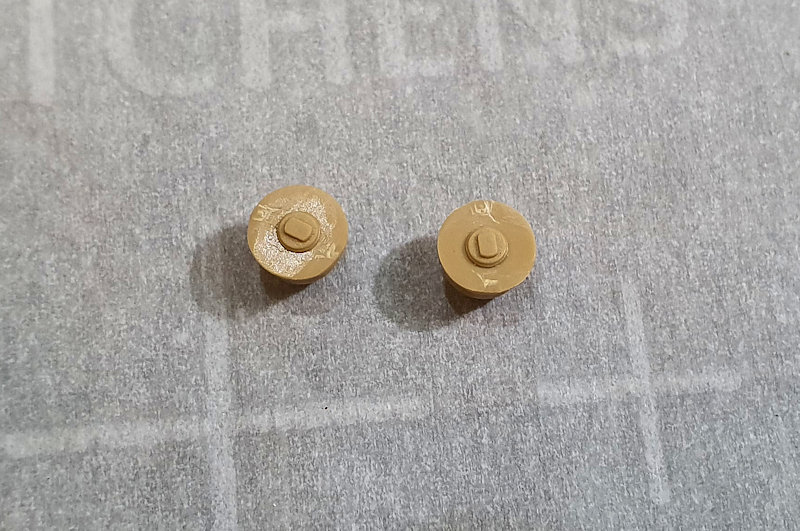
Installed
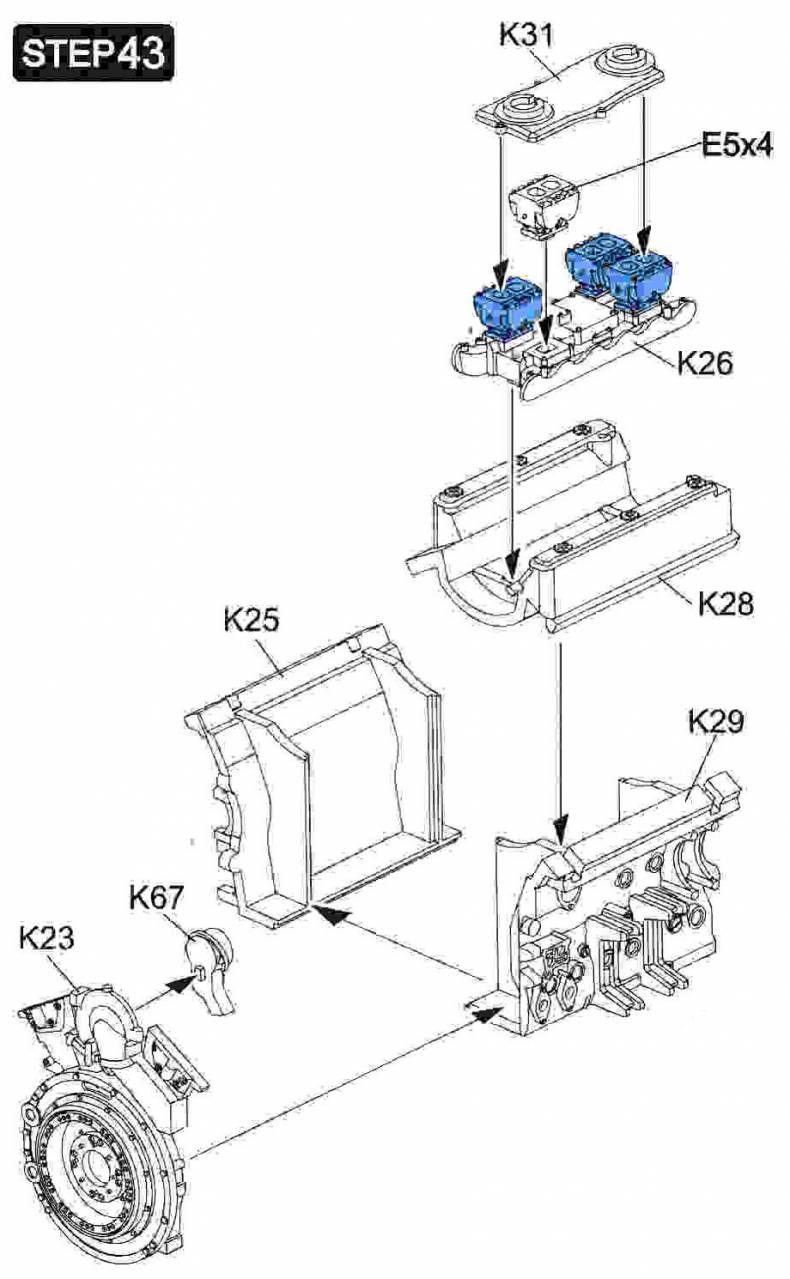
Next starts assembly of the engine.
#456
Oklahoma, United States
Joined: September 22, 2016
KitMaker: 654 posts
Armorama: 638 posts
Posted: Thursday, September 05, 2019 - 01:04 PM UTC
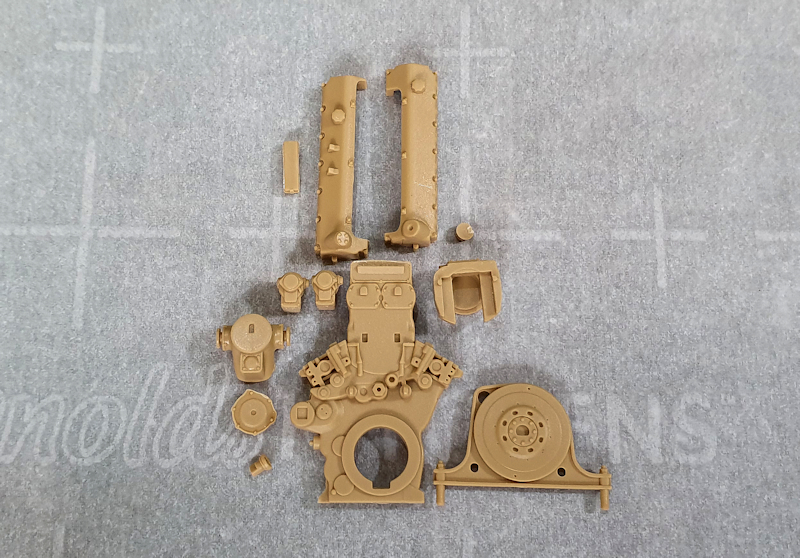
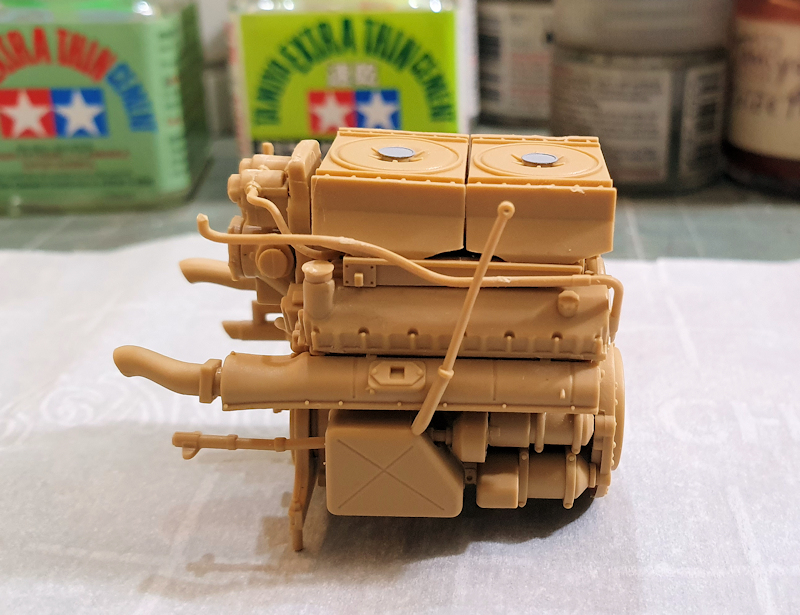
Time to start building the Maybach HL230 P30 that powers this vehicle.
Instructions
Parts
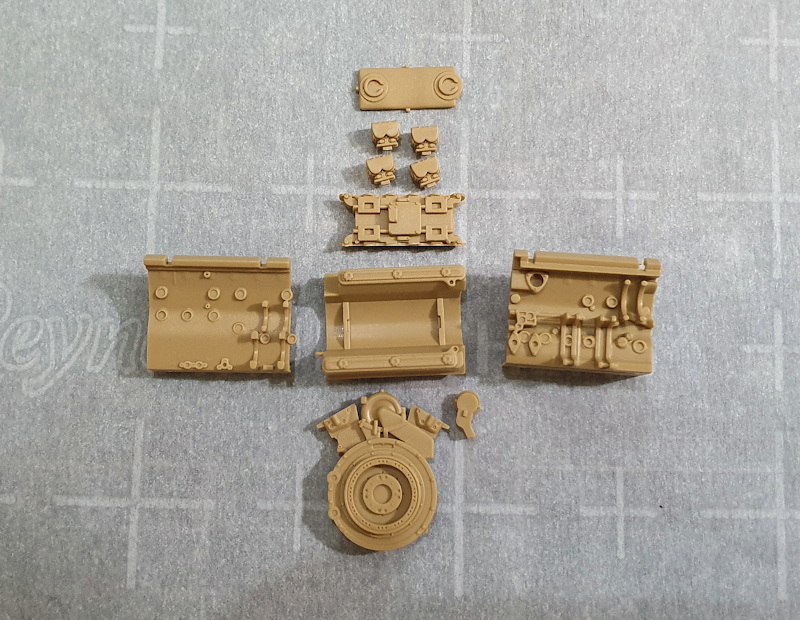
No issues with assembling these parts. Everything fit together nicely.
#456
Oklahoma, United States
Joined: September 22, 2016
KitMaker: 654 posts
Armorama: 638 posts
Posted: Friday, September 06, 2019 - 12:18 AM UTC
Continuing the engine build with Step 44
Instructions
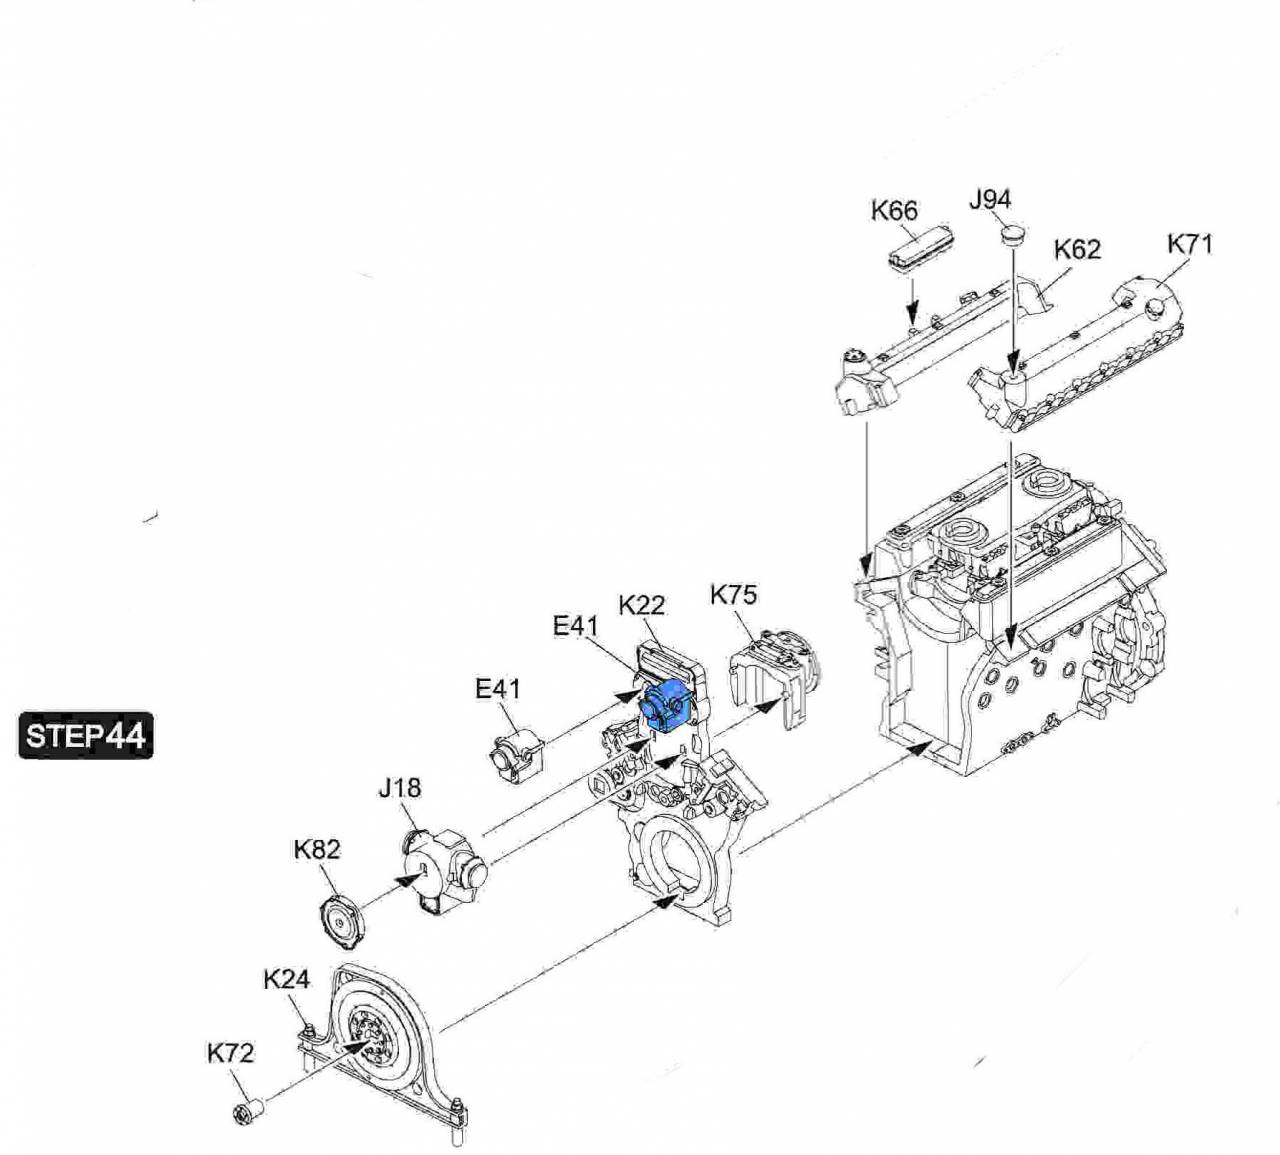
Parts
Assembled
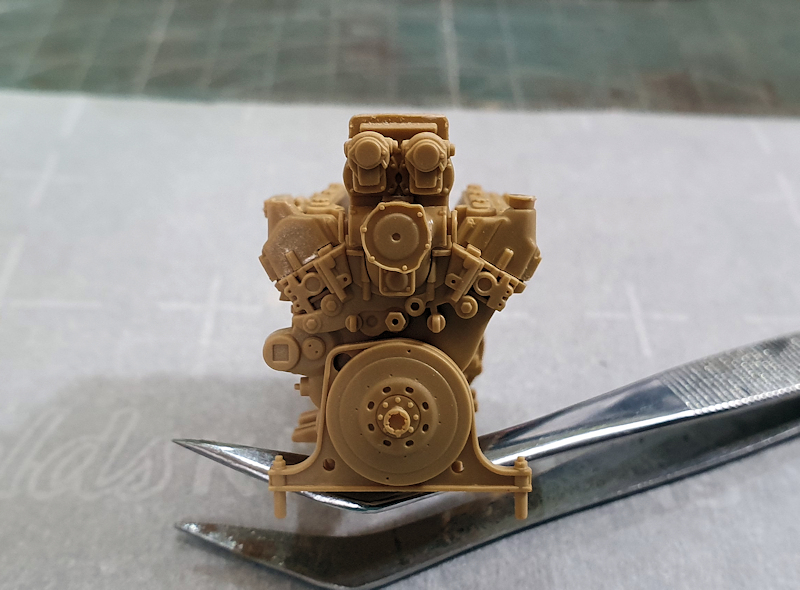
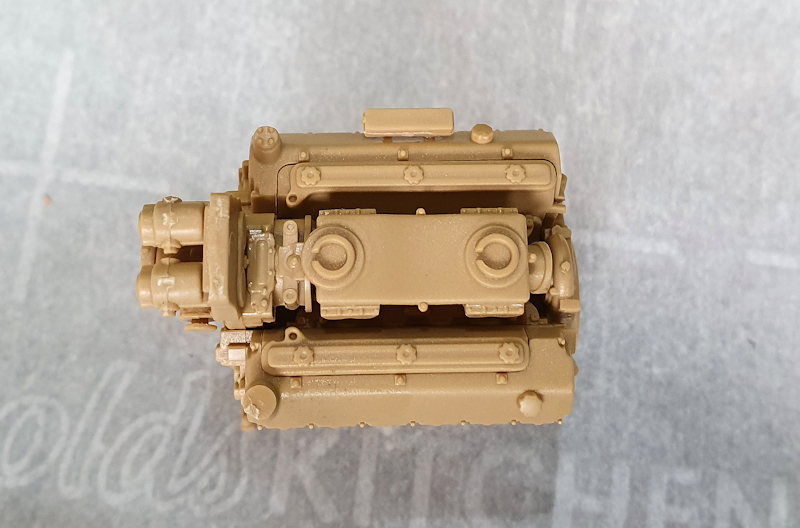
So far, everything is going together easily.
#456
Oklahoma, United States
Joined: September 22, 2016
KitMaker: 654 posts
Armorama: 638 posts
Posted: Friday, September 06, 2019 - 01:14 AM UTC
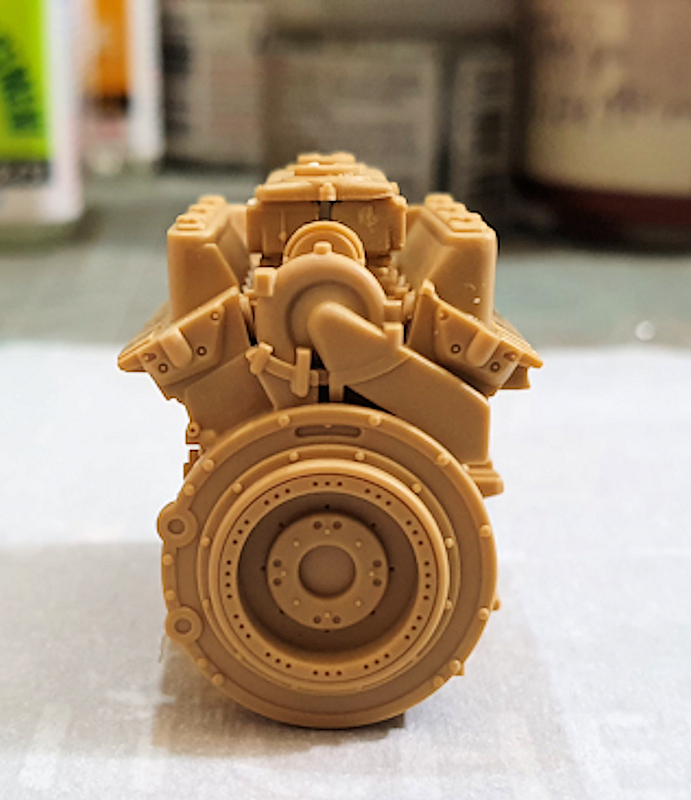
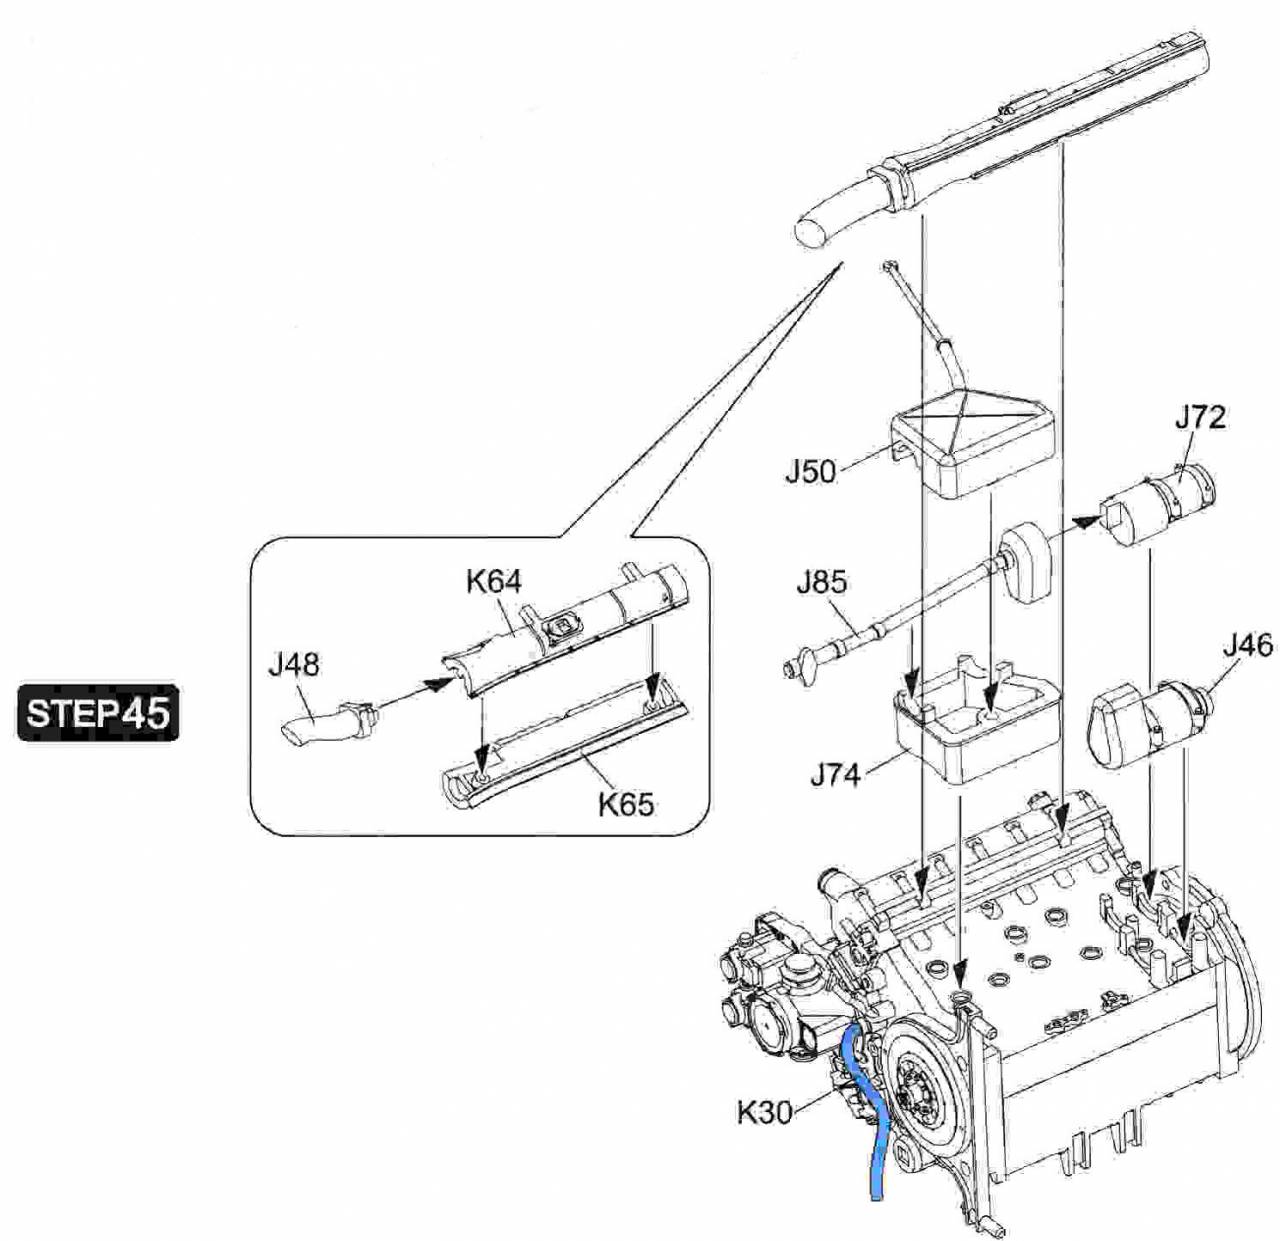
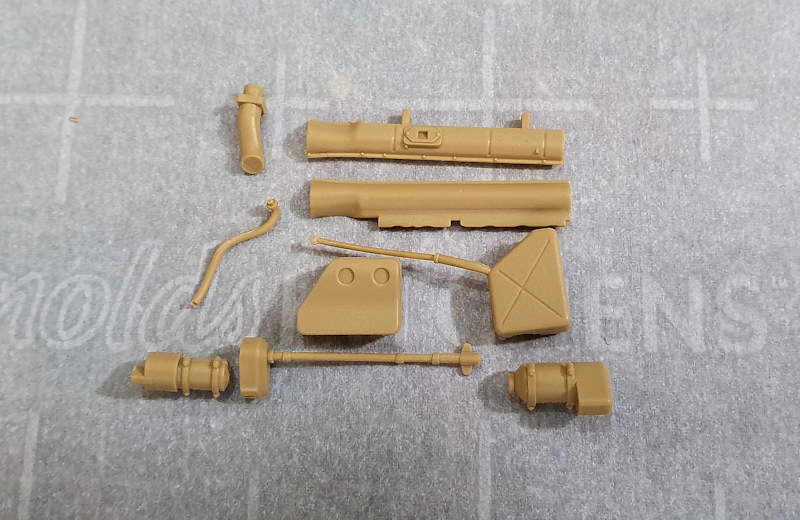
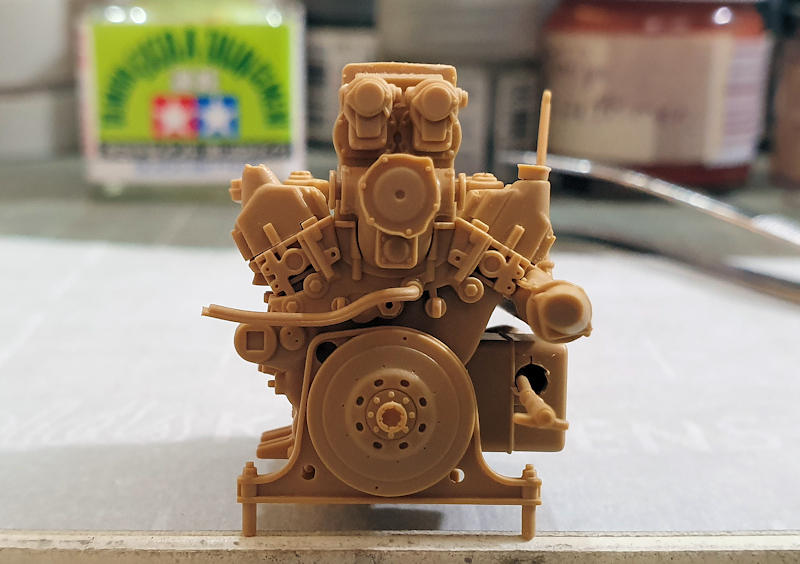
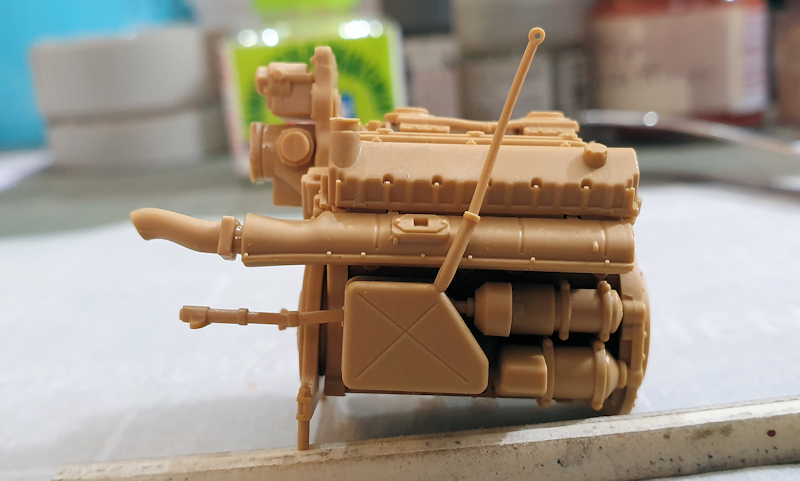
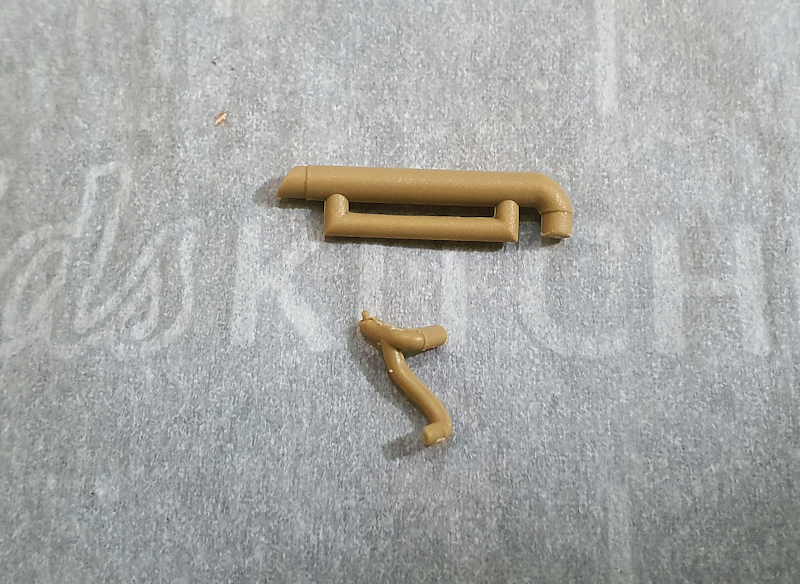
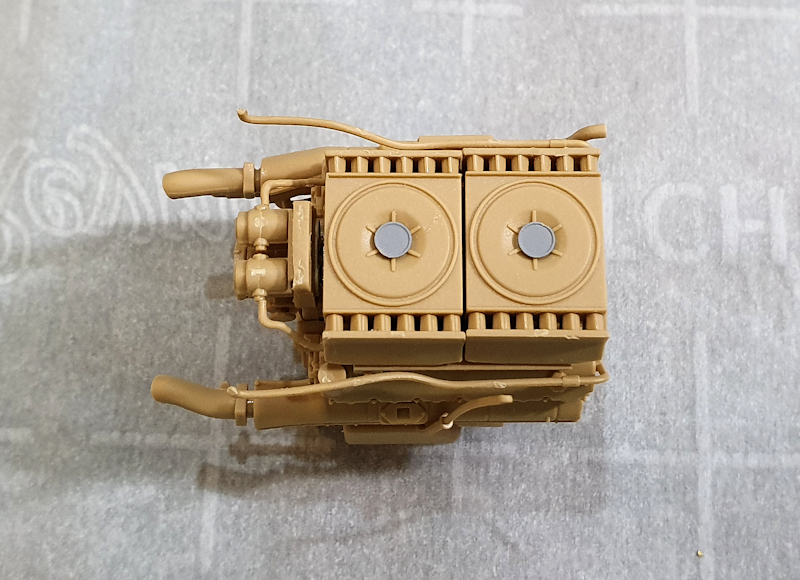
The engine goes together quickly. Step 45 adds the oil tank, starters, and exhaust manifold for the left side of the engine.
Instructions
Parts
Assembled
When fitting the exhaust manifold (K64/65), I had to open the notches on the engine where it fits to get it to seat properly.
Also, make sure you install J85 between the oil tank halves.
#456
Oklahoma, United States
Joined: September 22, 2016
KitMaker: 654 posts
Armorama: 638 posts
Posted: Friday, September 06, 2019 - 01:53 AM UTC
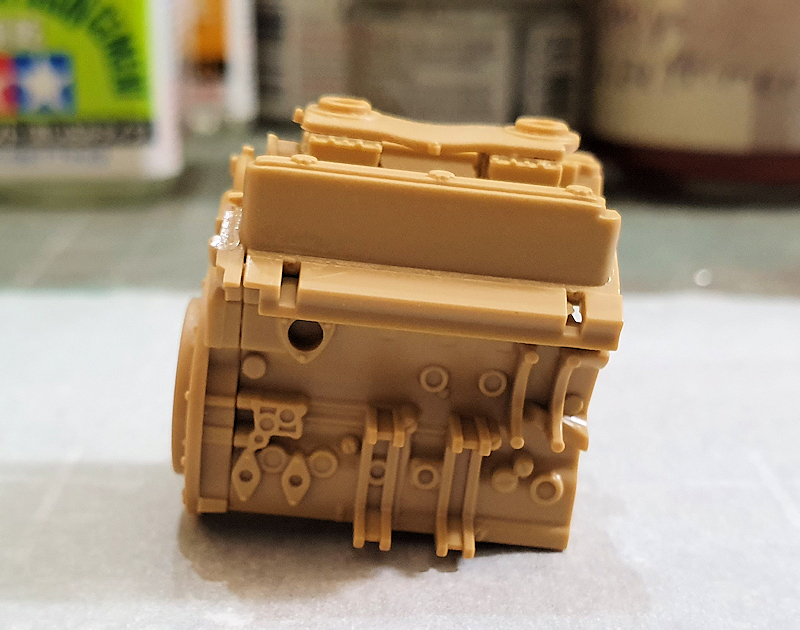
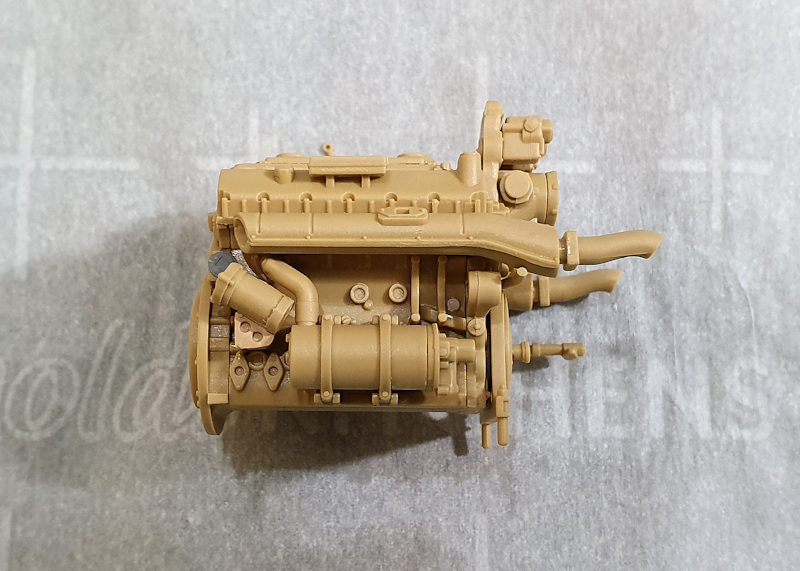
Step 46 starts adding parts to the right side of the engine. On this side, the exhaust manifold fit into the slots without any problems.
Instructions
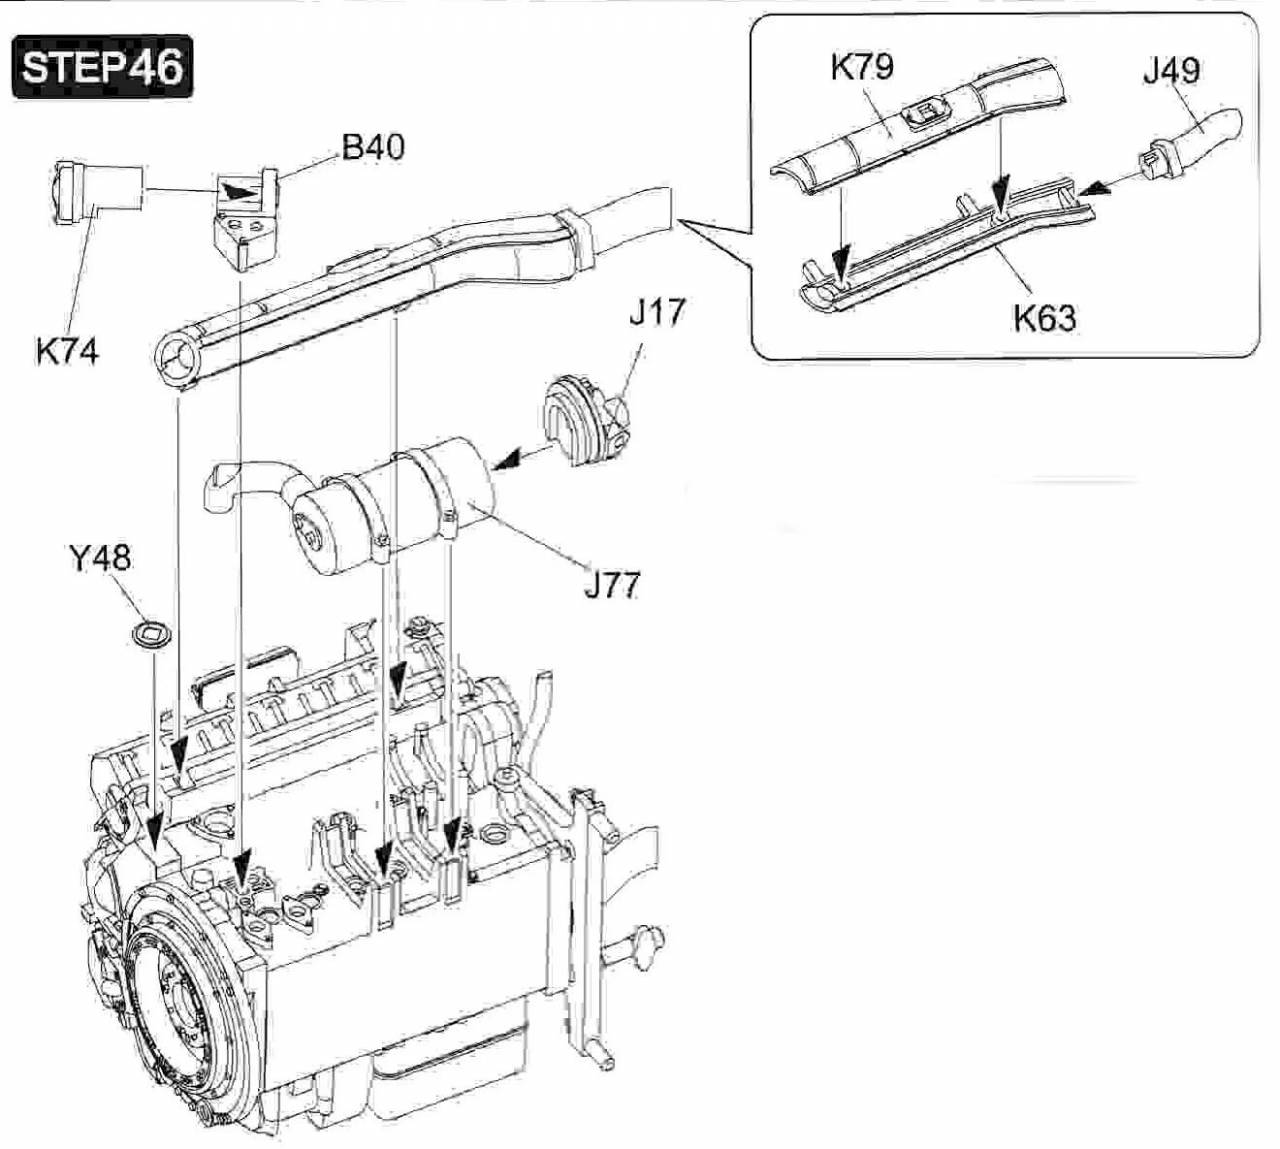
Parts
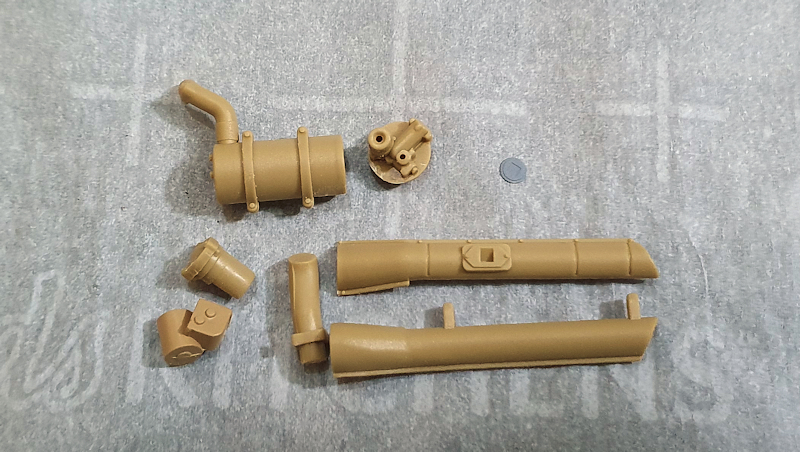
Installed
Virginia, United States
Joined: April 03, 2006
KitMaker: 1,158 posts
Armorama: 950 posts
Posted: Friday, September 06, 2019 - 01:55 AM UTC
Mark, great work! The detail in the kit is amazing! You have my undivided attention on this build!
#456
Oklahoma, United States
Joined: September 22, 2016
KitMaker: 654 posts
Armorama: 638 posts
Posted: Friday, September 06, 2019 - 01:59 AM UTC
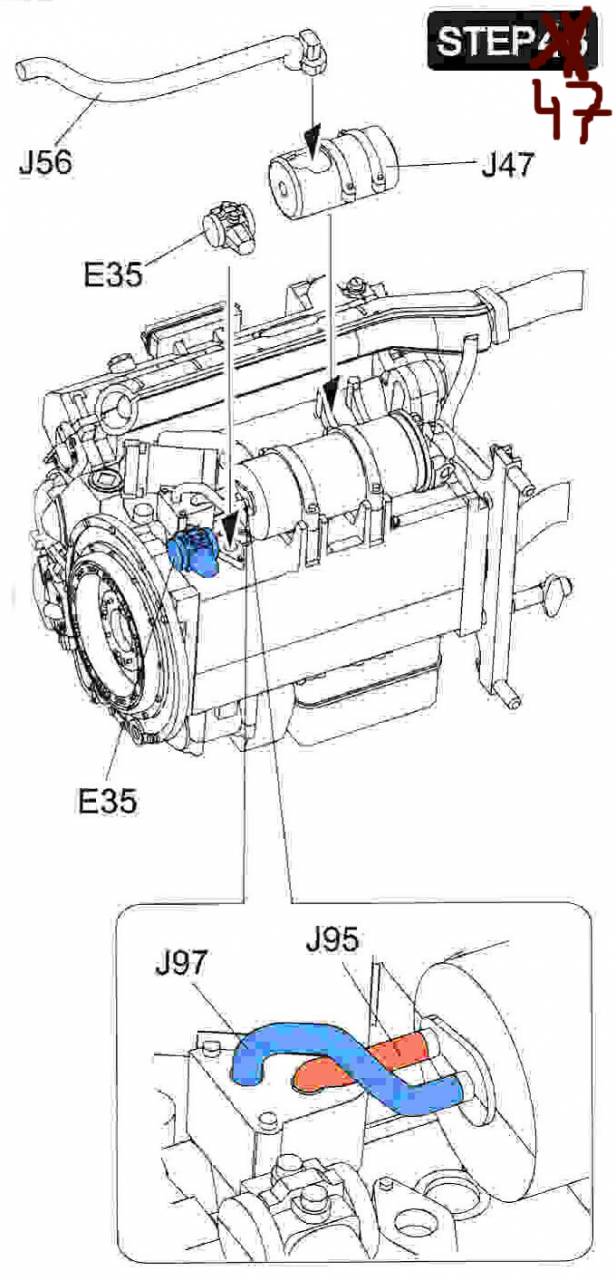
Before moving on to the next step. We have a problem with the instructions. RFM has made a mistake.
The manual has Step 47 as shown below. The parts, circled in red, have to be installed before you can install J22 and J73.
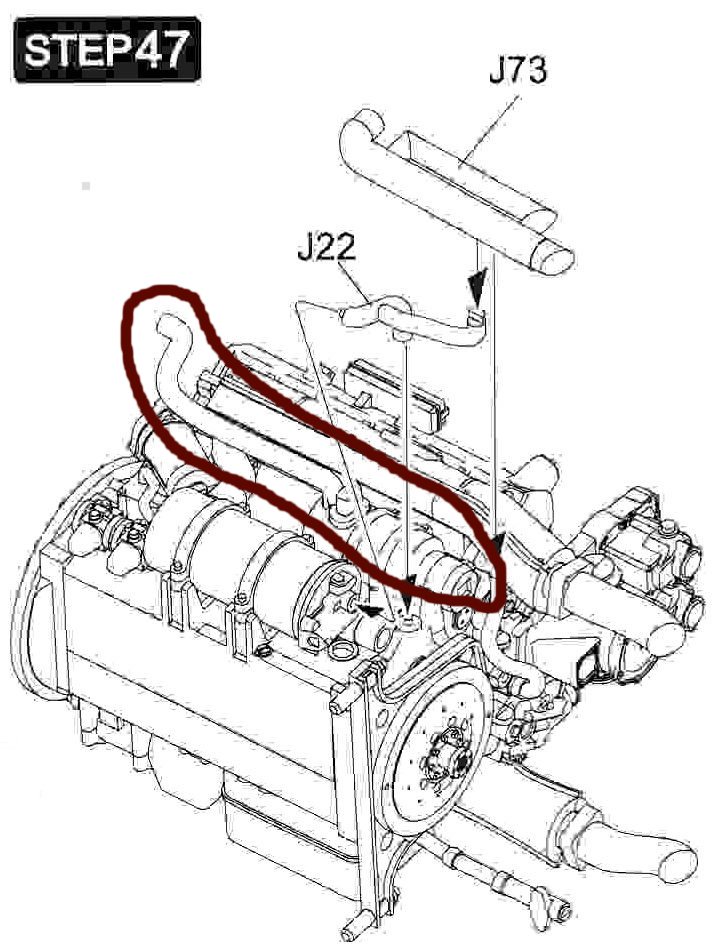
Now, the problem is that you haven't installed the parts circled. The manual has you install them in Step 48.
Basically, RFM have Steps 47 and 48 reversed. You might want to re-identify these two steps so you don't get caught out.
#456
Oklahoma, United States
Joined: September 22, 2016
KitMaker: 654 posts
Armorama: 638 posts
Posted: Friday, September 06, 2019 - 04:13 AM UTC
Thanks Thomas
As I have mentioned, you need to flip steps 47 & 48. So, here is Step 47
Instructions
Parts
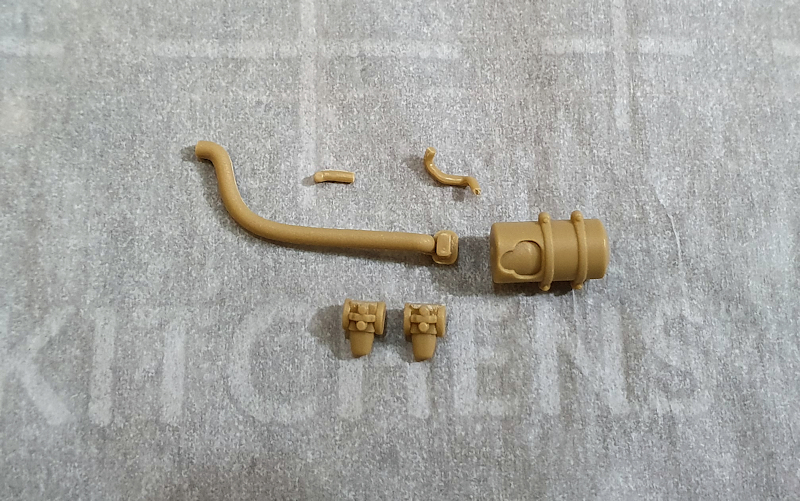
Installed
#456
Oklahoma, United States
Joined: September 22, 2016
KitMaker: 654 posts
Armorama: 638 posts
Posted: Friday, September 06, 2019 - 04:33 AM UTC
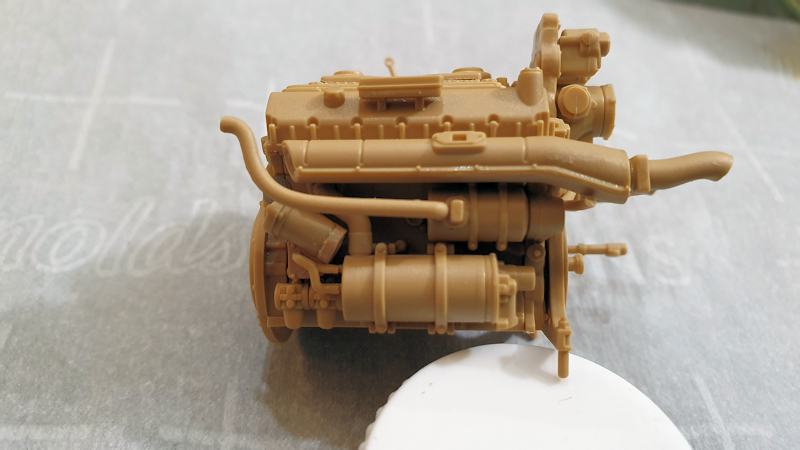
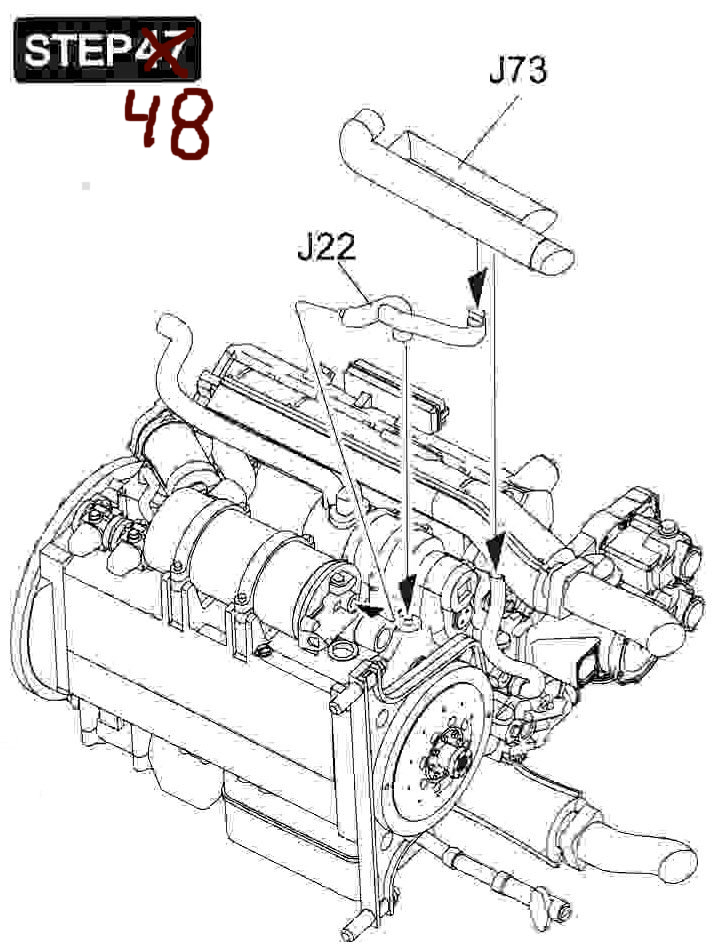
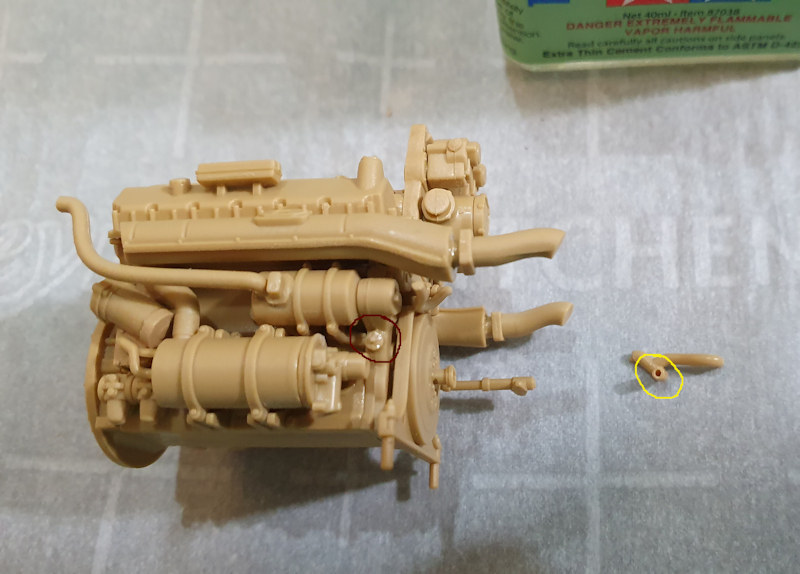
And now the reidentifed Step 48.
Instructions
Parts
When fitting part J22, the end, yellow circle, doesn't fit properly on the pin, red circle. The hole isn't deep enough. So, I used a .6mm drill bit to make the hole deep enough to fit cleanly over the pin.
#456
Oklahoma, United States
Joined: September 22, 2016
KitMaker: 654 posts
Armorama: 638 posts
Posted: Friday, September 06, 2019 - 05:54 AM UTC
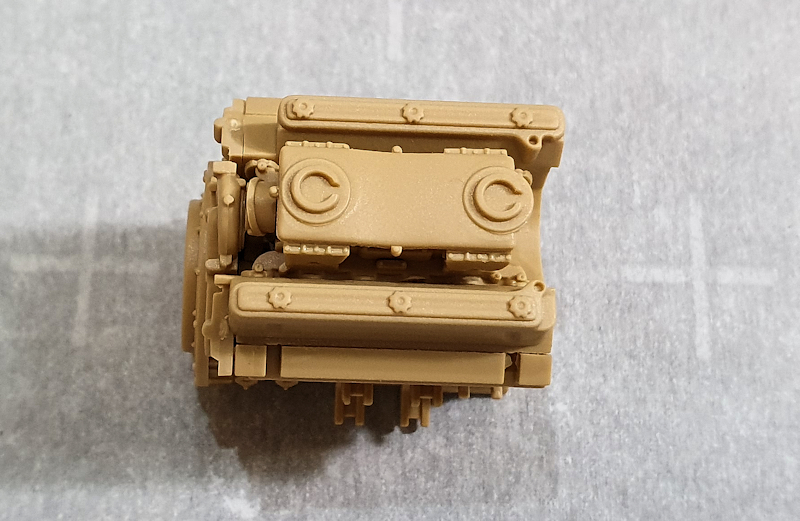
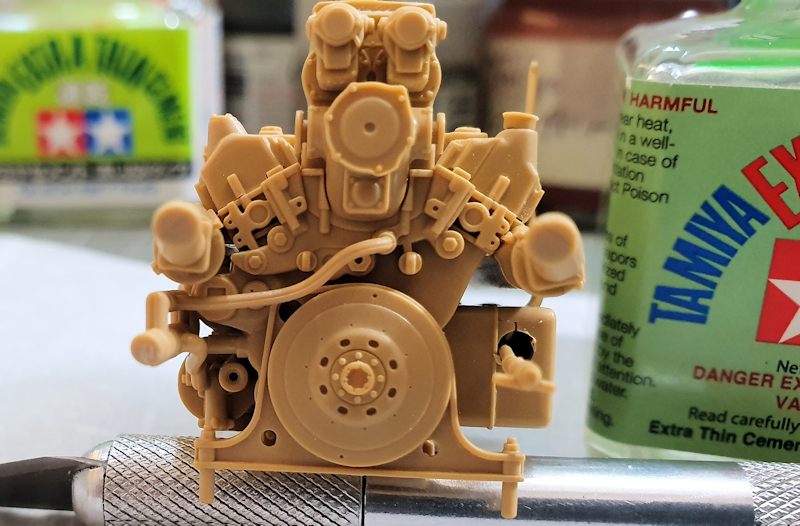
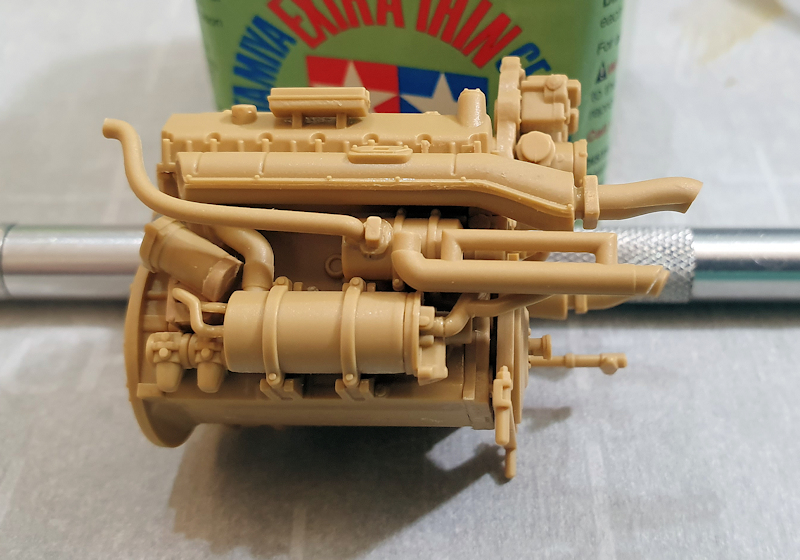
Step 49 finishes the assembly of the engine. Be careful when removing the lines from the sprue. It's easy to break them.
Instructions
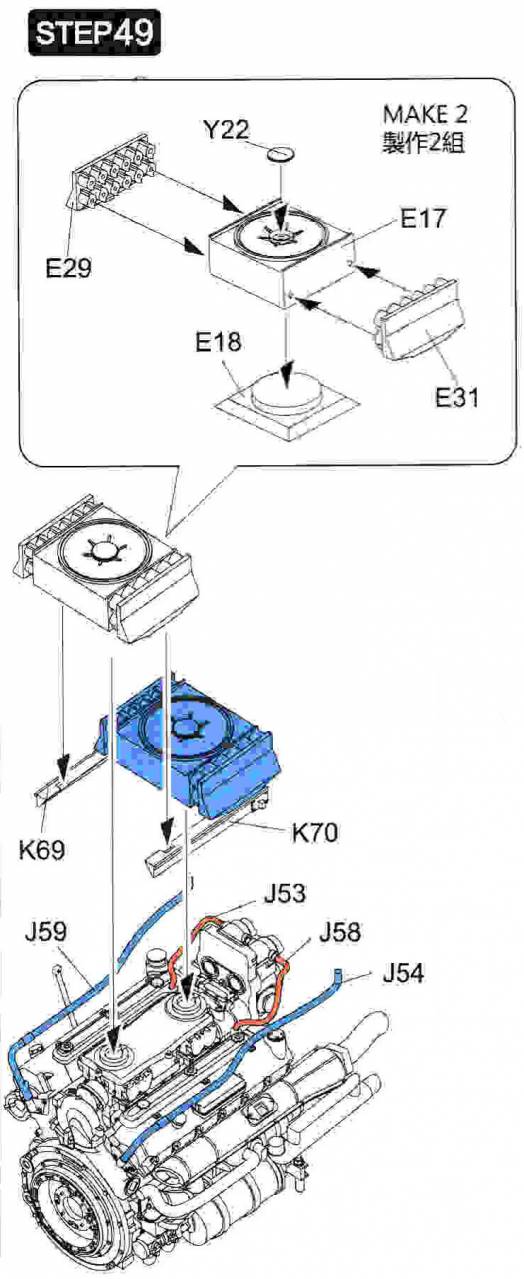
Parts
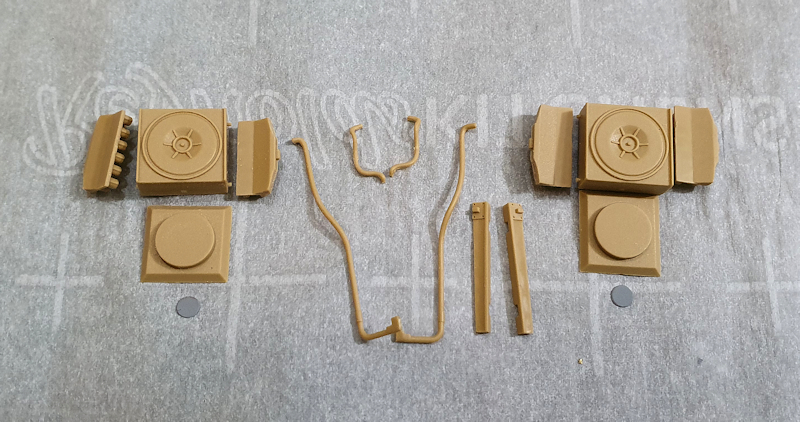
Installed
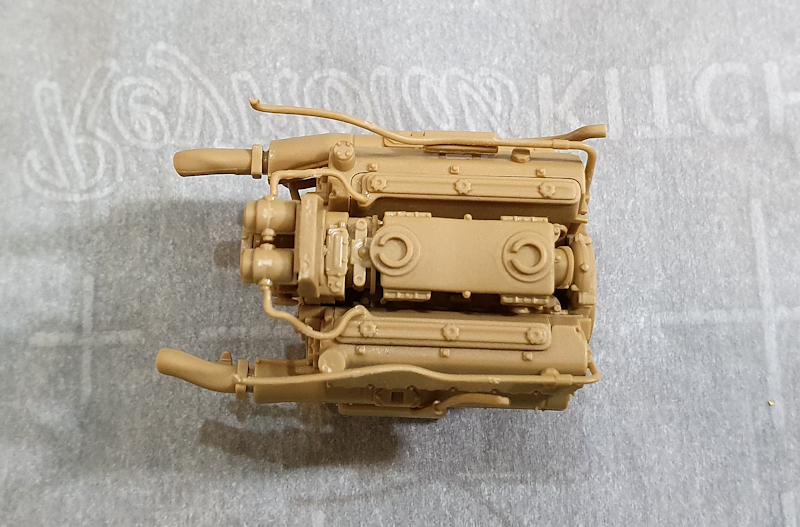
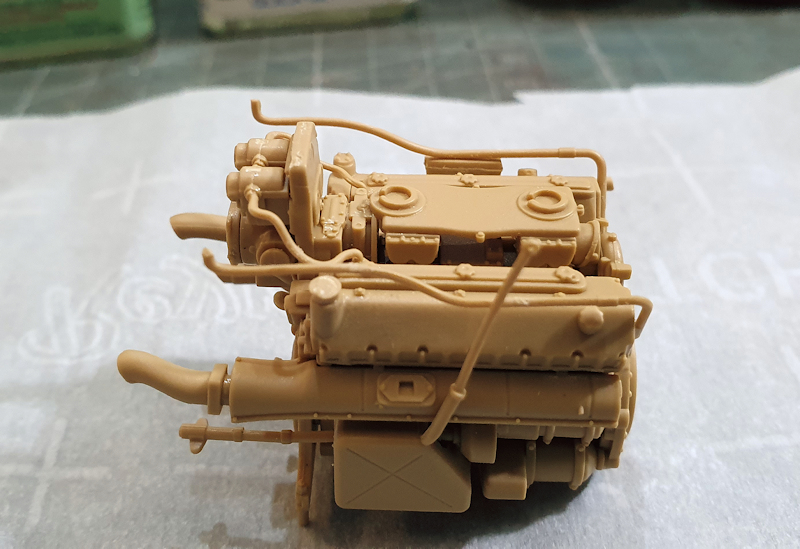
Test fit in the engine compartment.
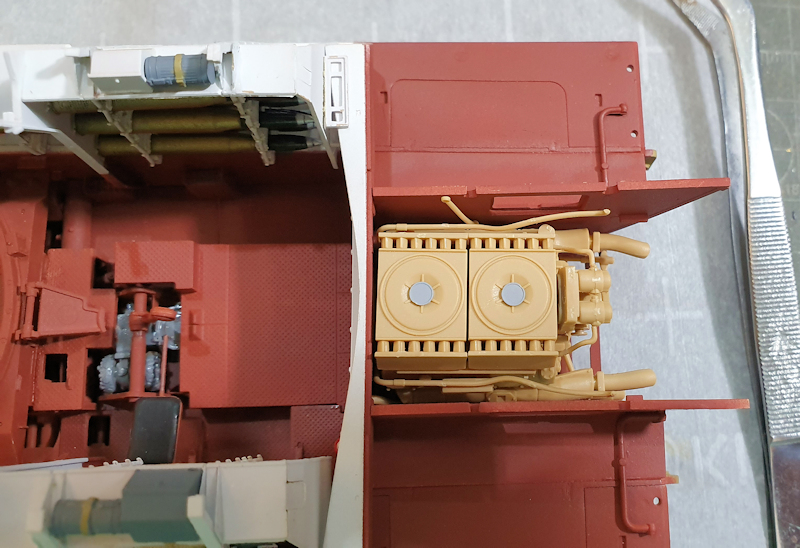
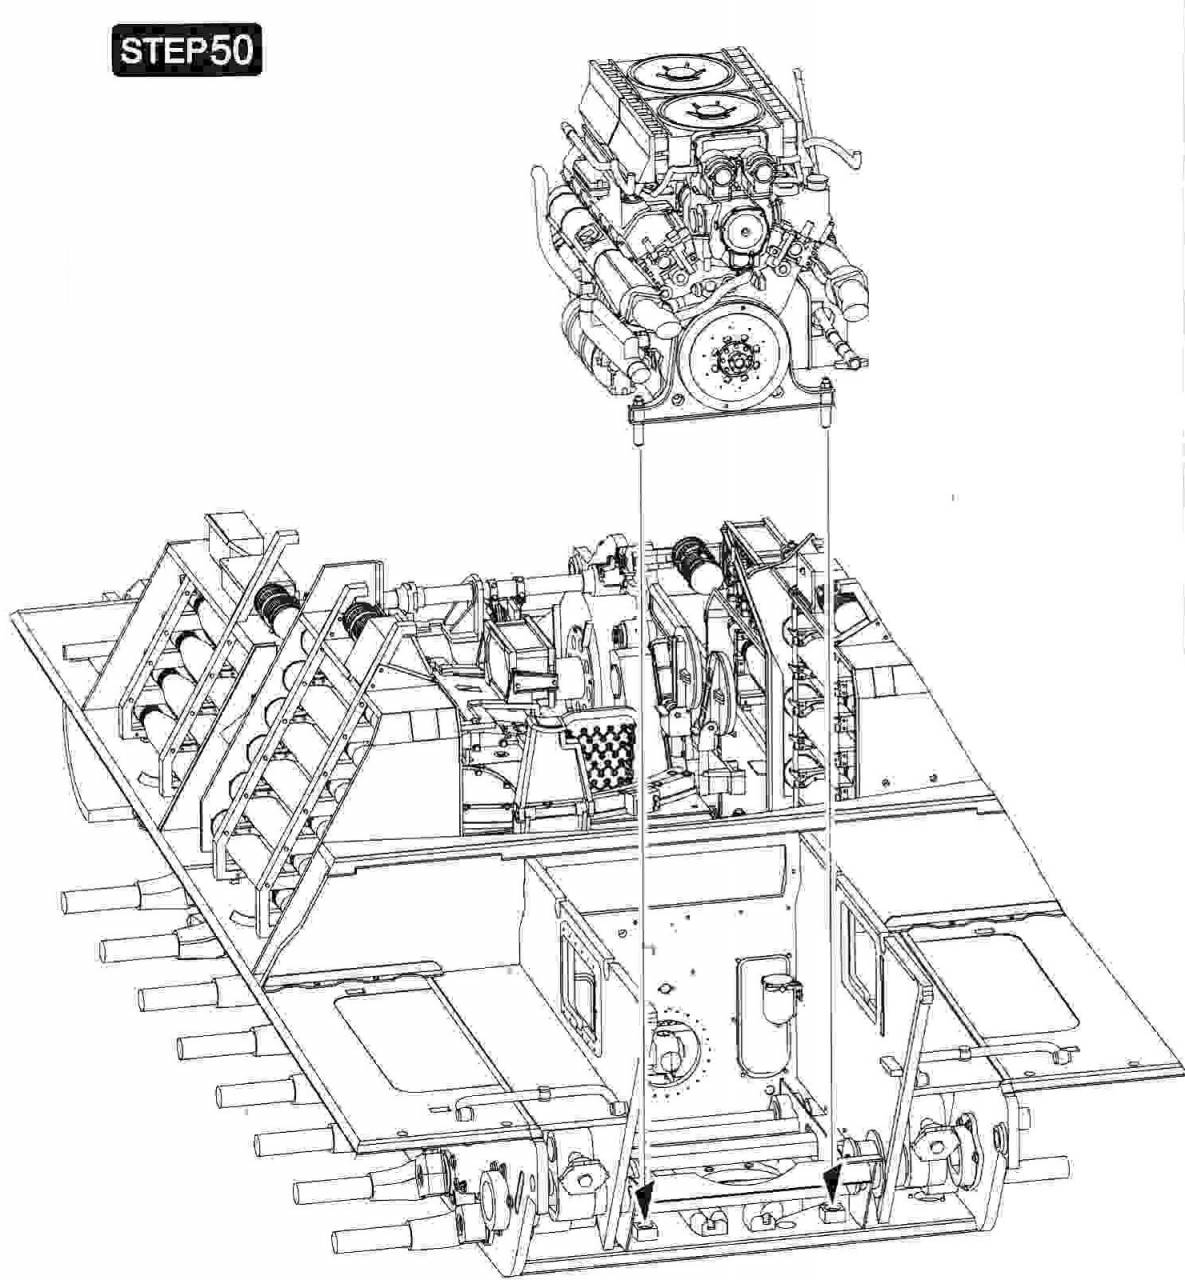
Time to paint then install the engine in Step 50.
varanusk
 Managing Editor
Santa Cruz de Tenerife, Spain / España
Joined: July 04, 2013
KitMaker: 1,288 posts
Armorama: 942 posts
Posted: Friday, September 06, 2019 - 10:35 AM UTC
wow. The engine is a kit by itself... and most will be hidden, I am afraid
#456
Oklahoma, United States
Joined: September 22, 2016
KitMaker: 654 posts
Armorama: 638 posts
Posted: Friday, September 06, 2019 - 04:17 PM UTC
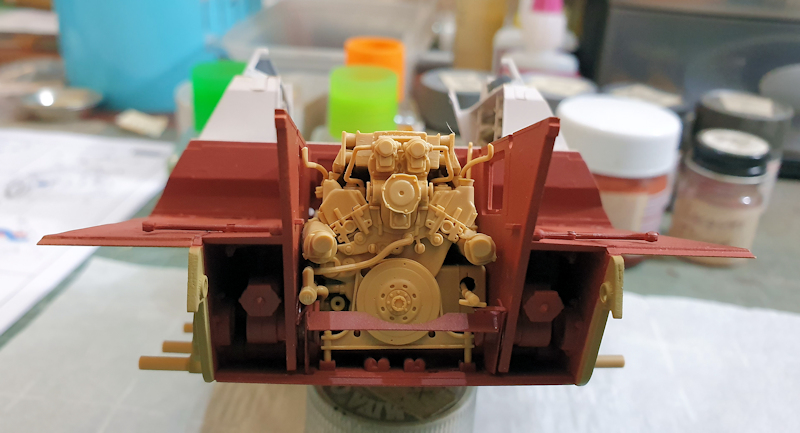
Step 50 installs the engine. However, I'll do this as part of Step 51.
Instructions
#456
Oklahoma, United States
Joined: September 22, 2016
KitMaker: 654 posts
Armorama: 638 posts
Posted: Friday, September 06, 2019 - 08:41 PM UTC
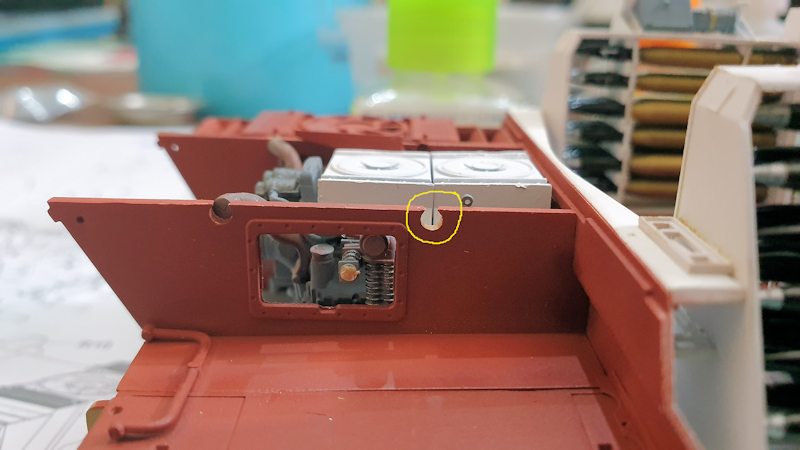
Step 51 add more parts to the engine.
Instructions
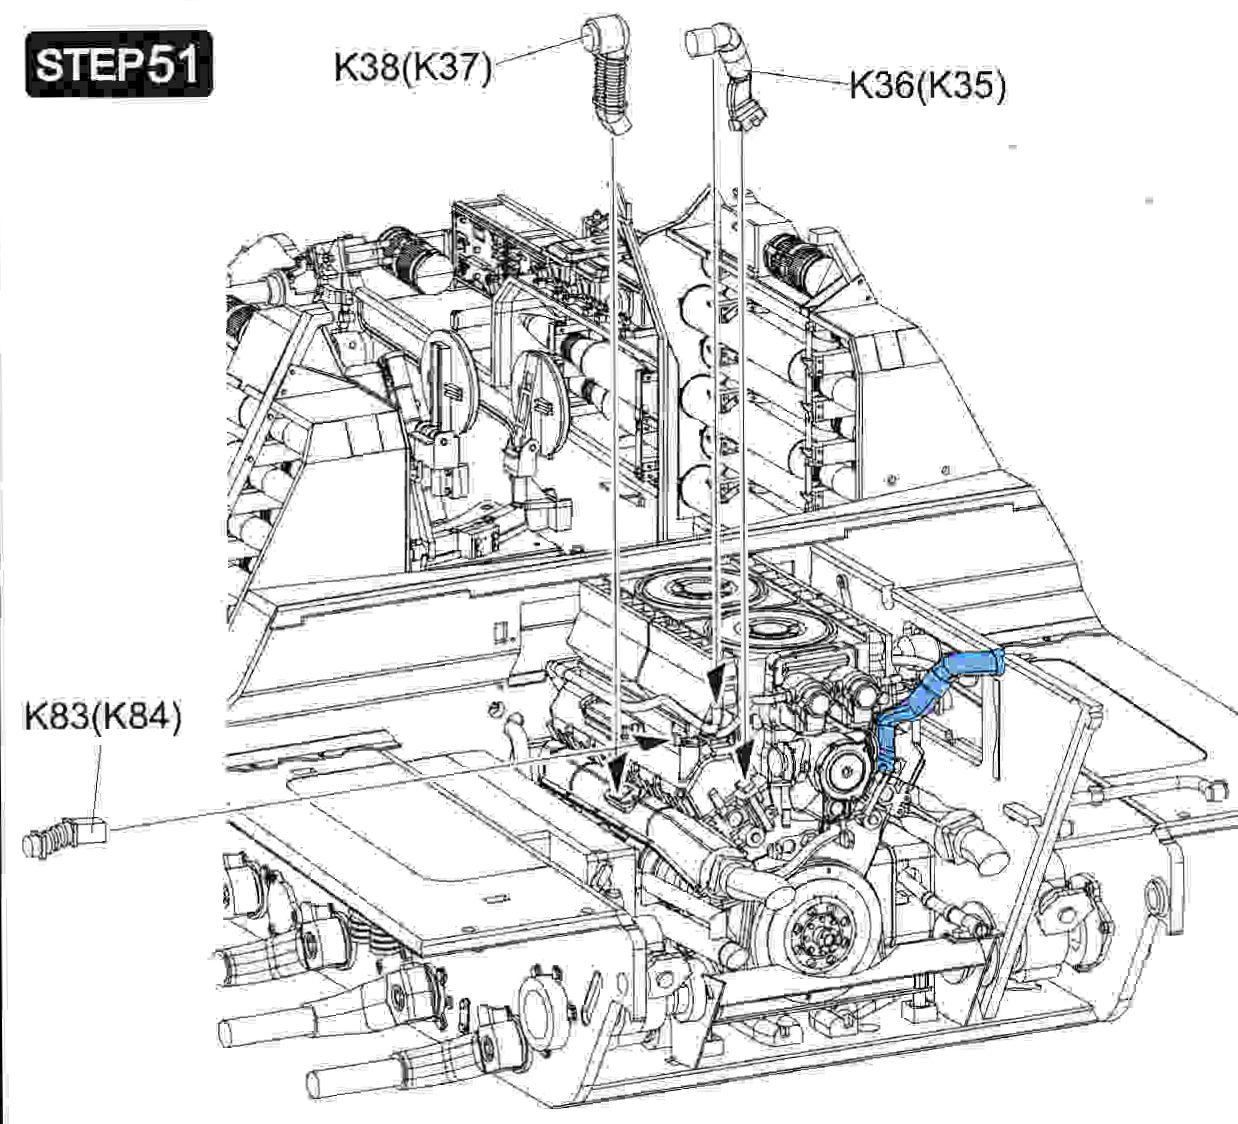
Parts
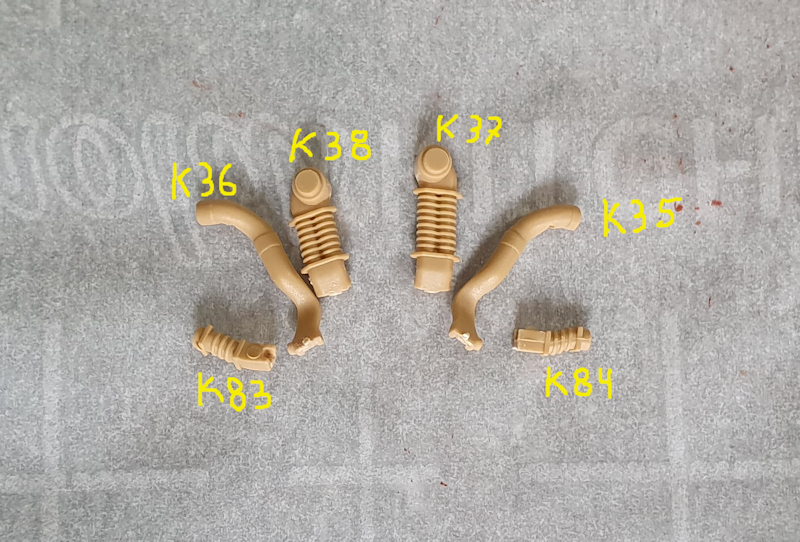
I first installed parts K35 and K36. Once the glue set-up, I then installed the engine into the chassis.
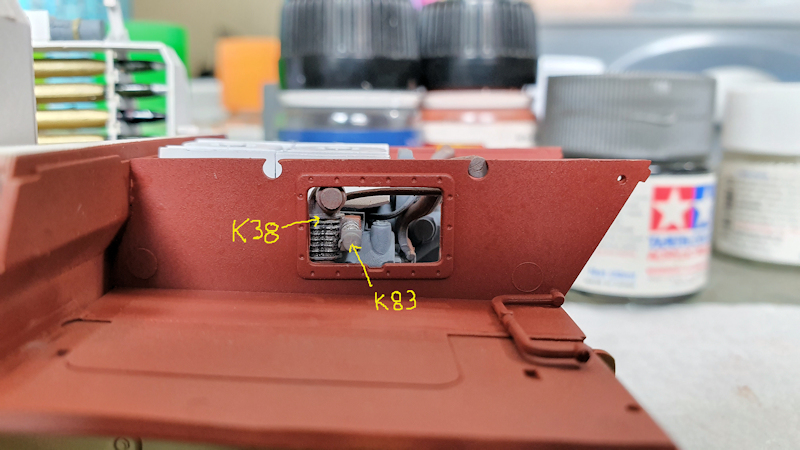
On the left side, I then installed K38 then K83. these have to be installed through the opening in the sidewall. K38 is not easy to get into place. Patience is required to get it into place. I'll find out in a few steps if I have it correct.
Repeat the procedure for the right side to install K37 and K84.
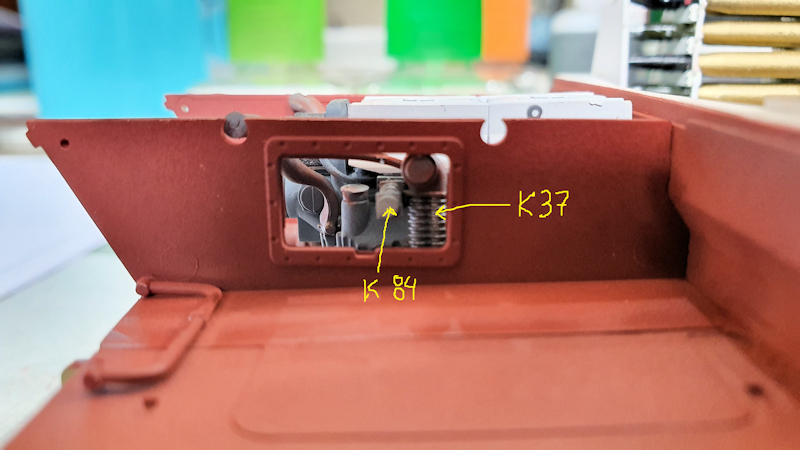
The upper ends of K35 and K36 snap into the cutouts in the sidewalls. (yellow circles)
#456
Oklahoma, United States
Joined: September 22, 2016
KitMaker: 654 posts
Armorama: 638 posts
Posted: Friday, September 06, 2019 - 09:47 PM UTC
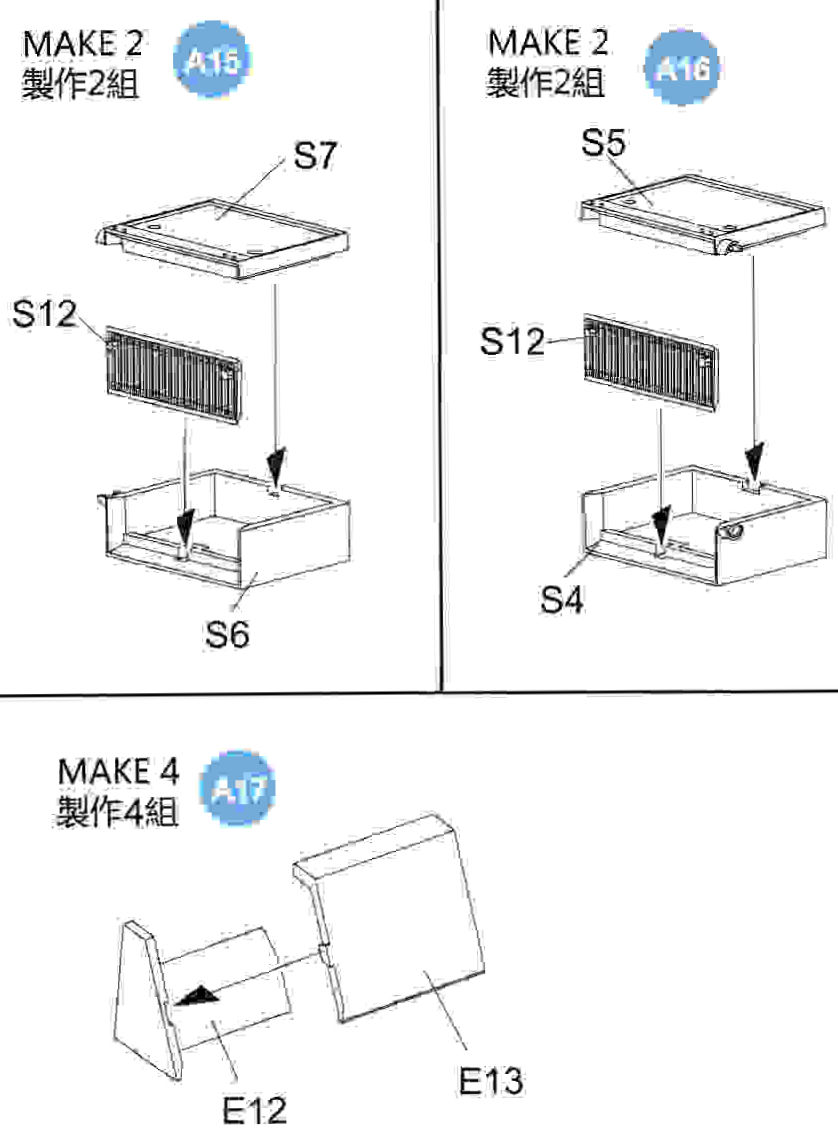
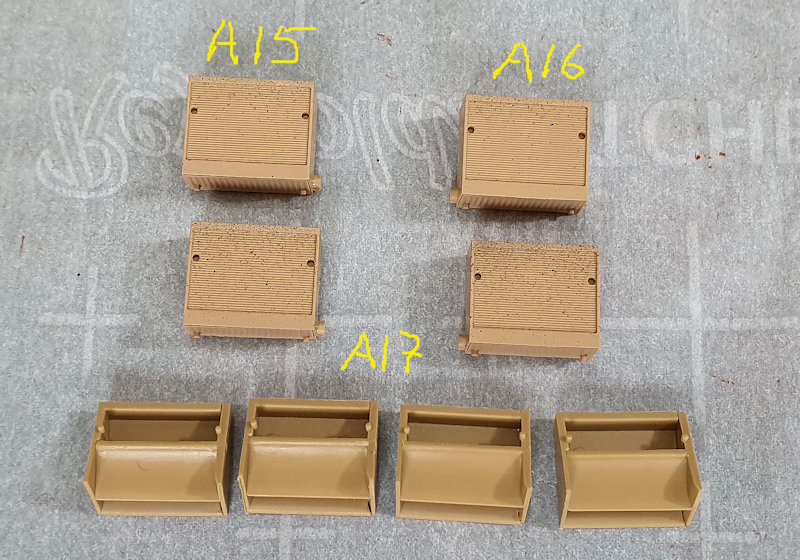
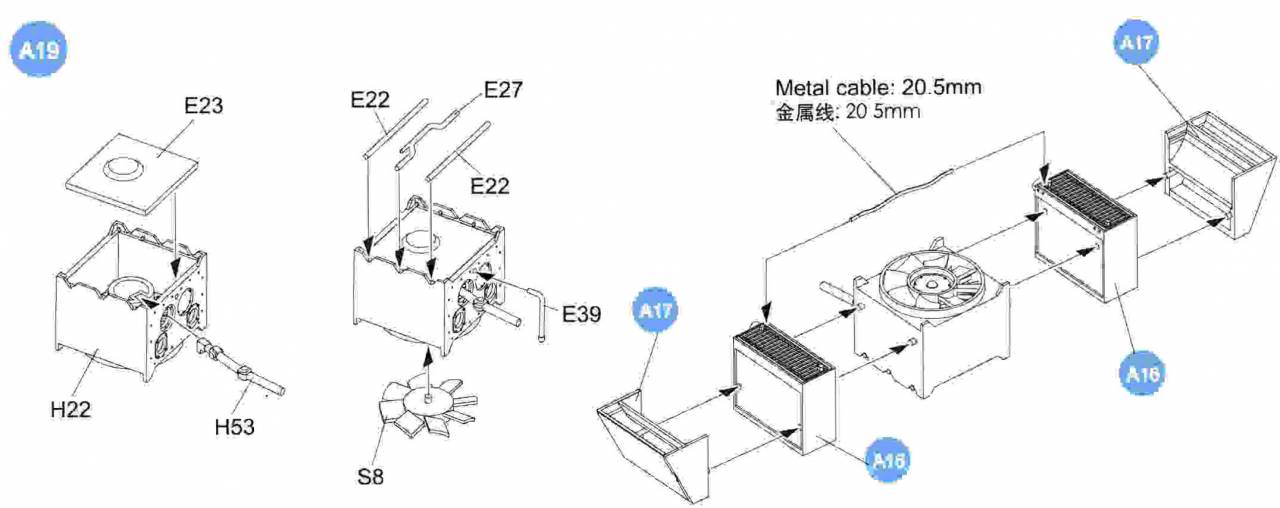
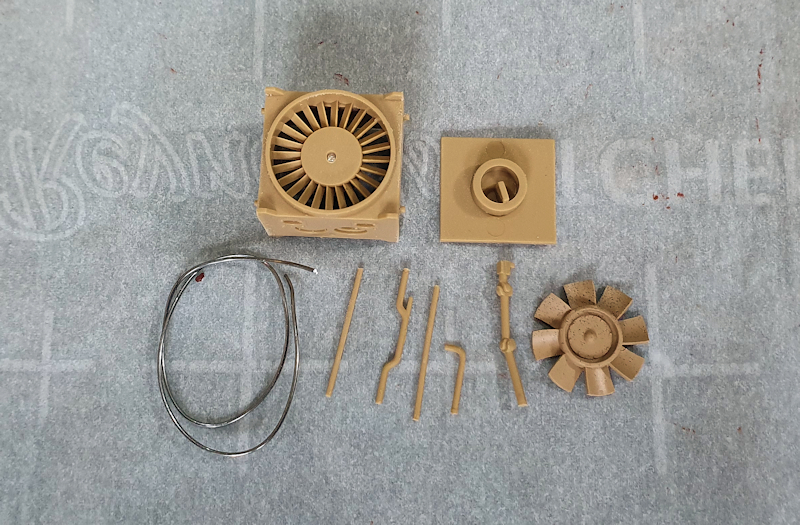
The radiator assemblies are next. They are put together through several sub-steps. Here are Steps A15, A16, and A17
Instructions
Parts
Assembled
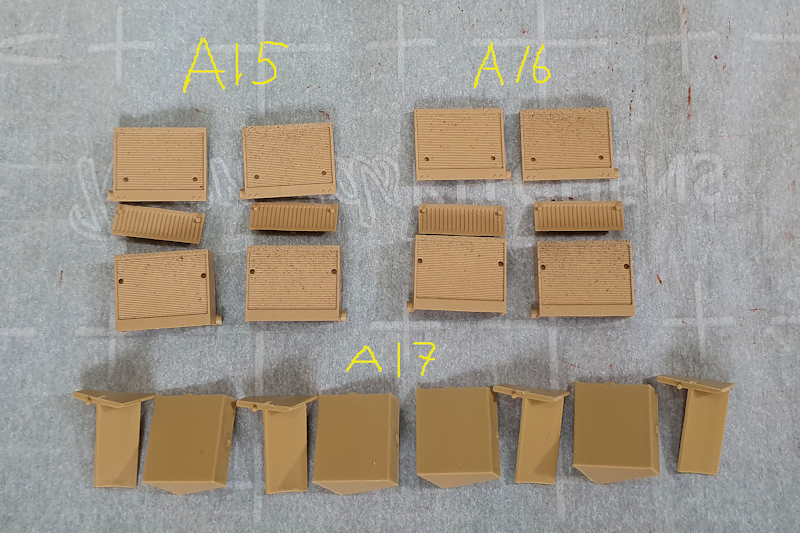
Don't get the parts from A15 and A16 mixed-up.
#456
Oklahoma, United States
Joined: September 22, 2016
KitMaker: 654 posts
Armorama: 638 posts
Posted: Friday, September 06, 2019 - 09:54 PM UTC
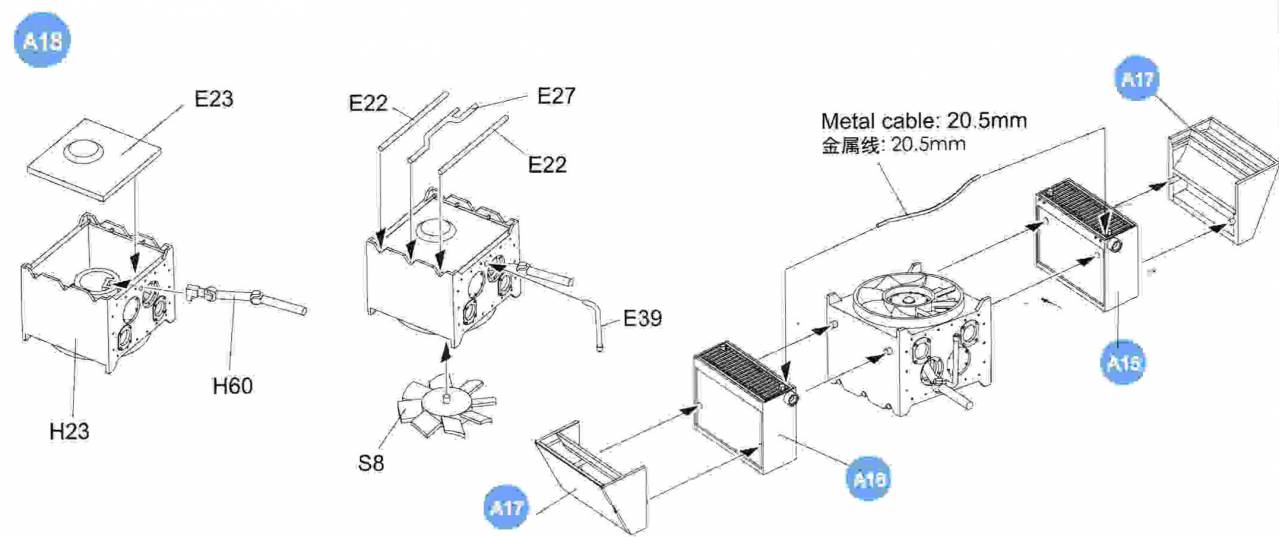
Time to start assembling the left side radiator assembly. As you can see, you will use parts from the previous steps along with additional ones to complete the assembly.
Instructions
Parts
Be careful when removing parts E22, E27, and E39. They are easy to brake when cutting from the sprue.
Make sure to install H60 before installing E23.
Assembled
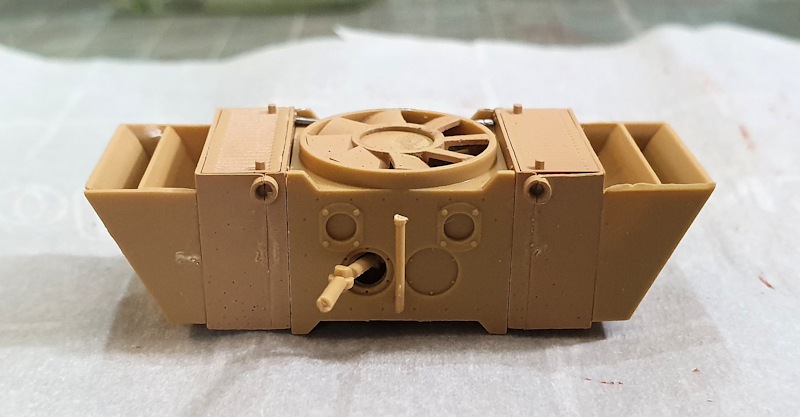
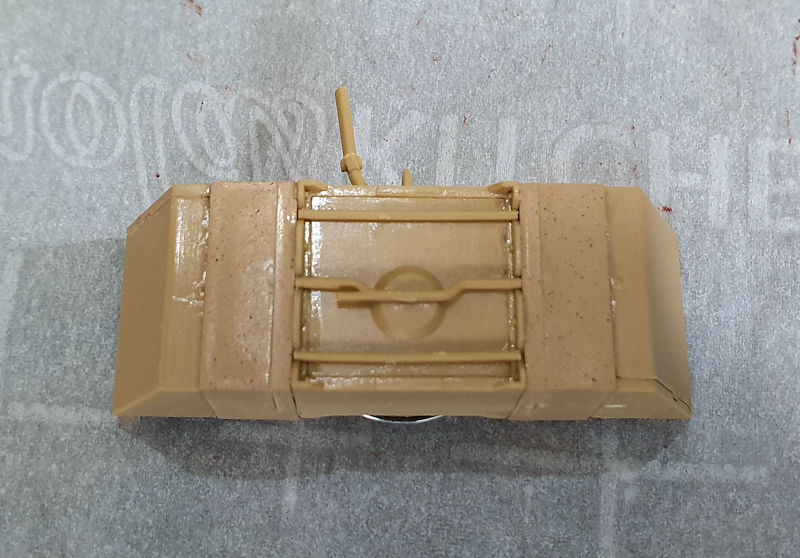
Next, the right side radiator assembly.
#456
Oklahoma, United States
Joined: September 22, 2016
KitMaker: 654 posts
Armorama: 638 posts
Posted: Friday, September 06, 2019 - 11:05 PM UTC
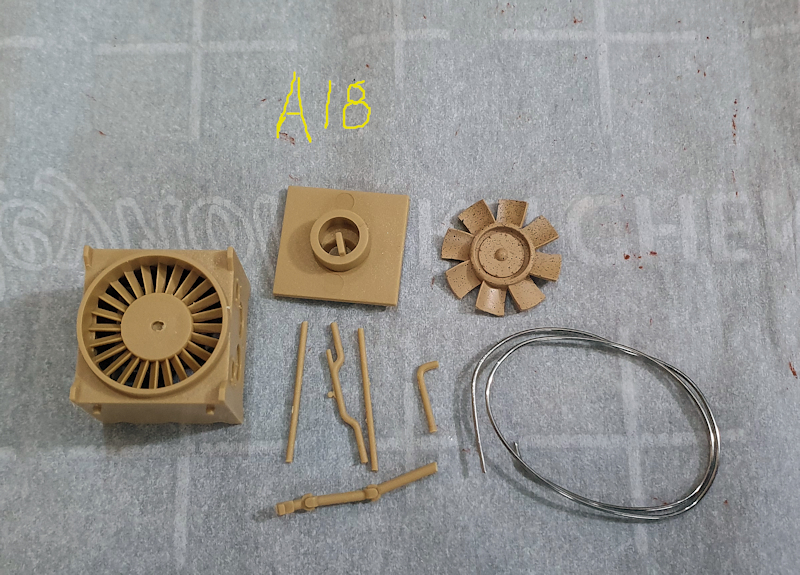
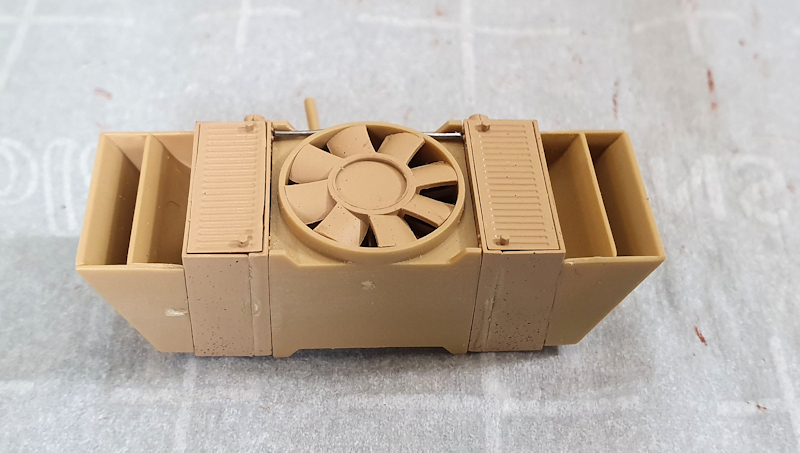
Step A19 is just a repeat of Step A18, only for the right side.
Instructions
Parts
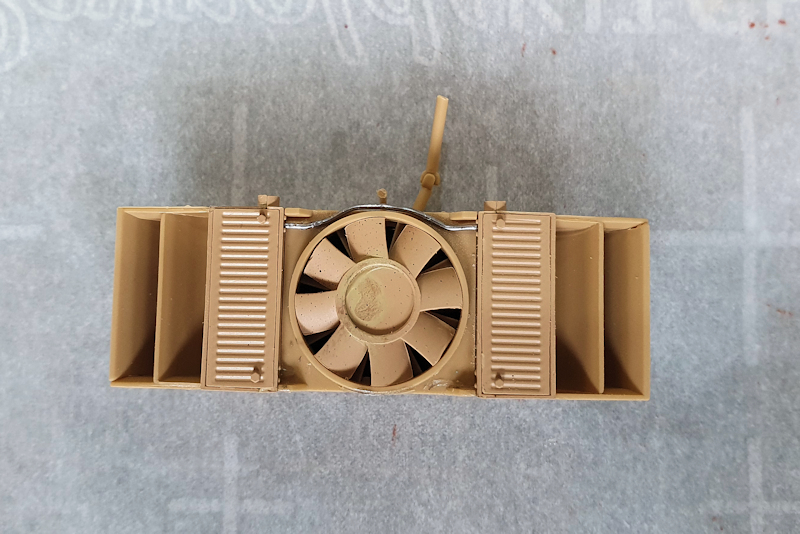
Assembled
Singapore / 新加坡
Joined: August 30, 2012
KitMaker: 265 posts
Armorama: 186 posts
Posted: Saturday, September 07, 2019 - 12:15 AM UTC
Looks like the radiator fans were driven by the engine through the shaft visible on the last photo. Interesting.
God created Arrakis to train the faithful.
#456
Oklahoma, United States
Joined: September 22, 2016
KitMaker: 654 posts
Armorama: 638 posts
Posted: Saturday, September 07, 2019 - 12:32 AM UTC
Quoted Text
Looks like the radiator fans were driven by the engine through the shaft visible on the last photo. Interesting.
Yes, they were engine driven.
England - East Midlands, United Kingdom
Joined: November 06, 2005
KitMaker: 753 posts
Armorama: 378 posts
Posted: Saturday, September 07, 2019 - 01:29 AM UTC
Without doubt, this is one of the best, most detailed and informative 'build -along' reviews I have ever seen on this site (or any others). Just brilliant work and attention to details.
Kudos Mark!
Gary
#456
Oklahoma, United States
Joined: September 22, 2016
KitMaker: 654 posts
Armorama: 638 posts
Posted: Saturday, September 07, 2019 - 01:50 AM UTC
Quoted Text
Without doubt, this is one of the best, most detailed and informative 'build -along' reviews I have ever seen on this site (or any others). Just brilliant work and attention to details.
Kudos Mark!
Gary
Gary,
I appreciate the comments. Always good to know that this build log is useful.
#456
Oklahoma, United States
Joined: September 22, 2016
KitMaker: 654 posts
Armorama: 638 posts
Posted: Saturday, September 07, 2019 - 02:07 AM UTC
Step 52 is a very busy step, so, I'll break it down into a few parts.
Instructions
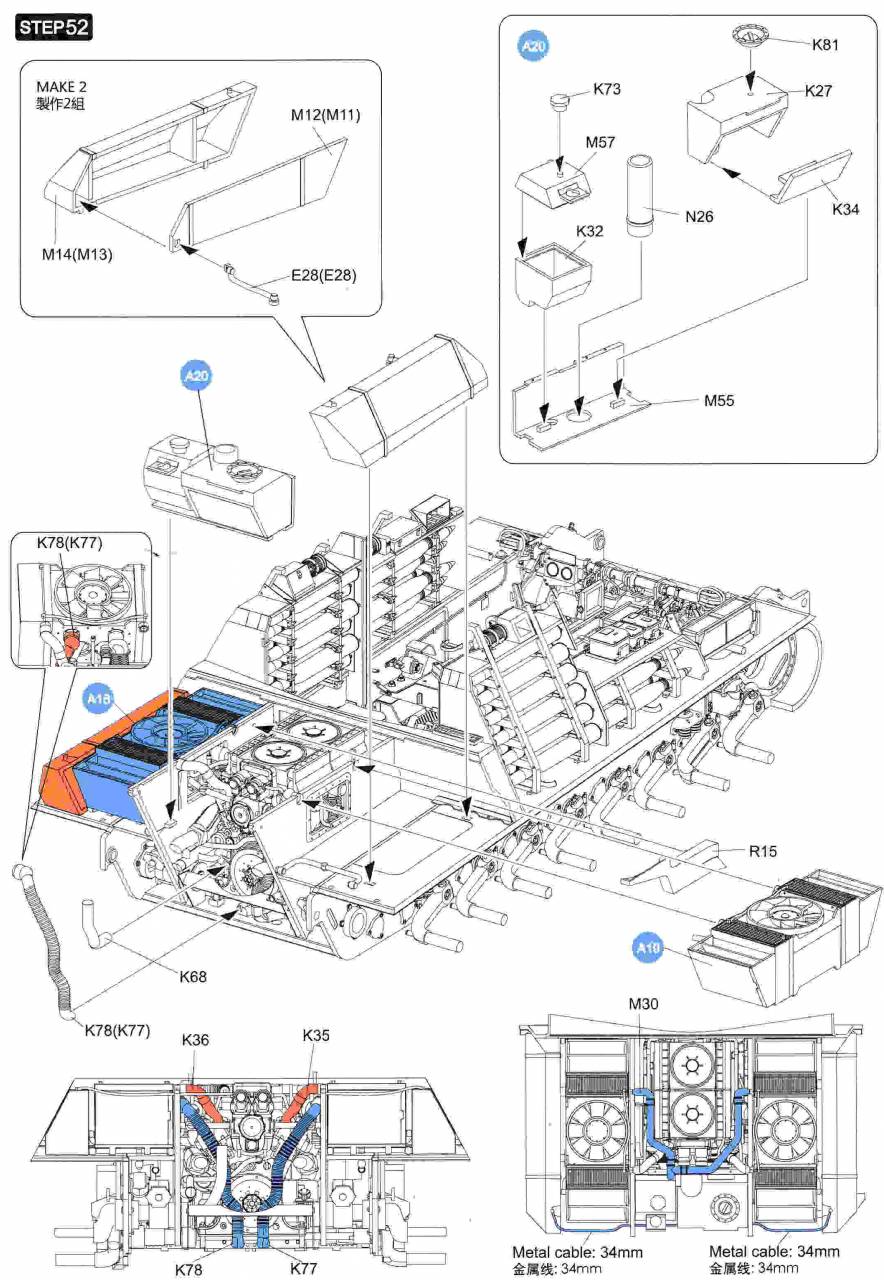
Parts
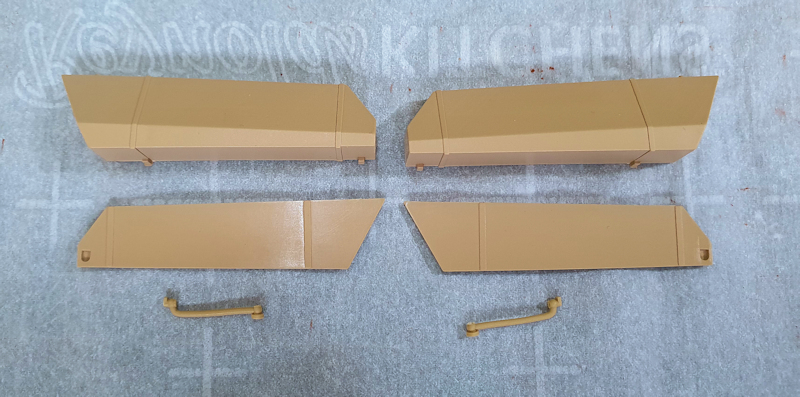
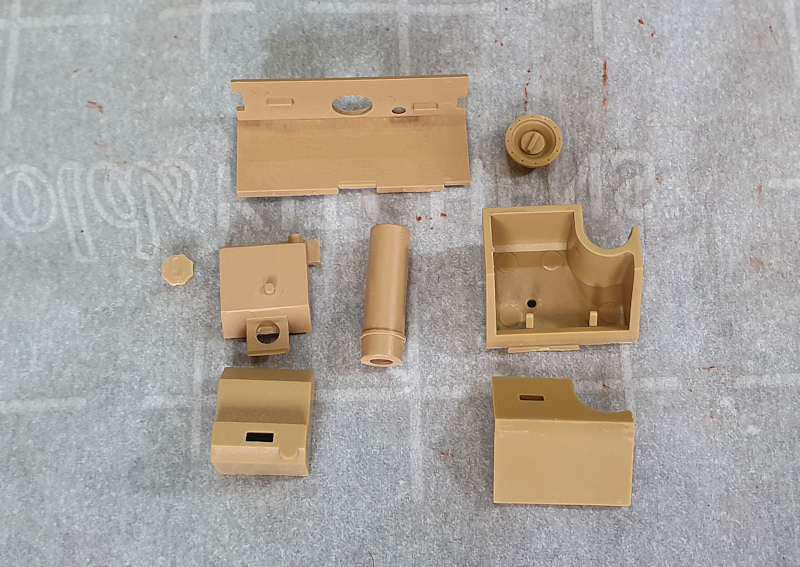
I started with the fuel tanks. This is straight forward. No issues here.
Next, I put together the coolant tank/fuel filler assembly.
Again, no issues to be concerned with here.
Everything painted and ready for install.
#456
Oklahoma, United States
Joined: September 22, 2016
KitMaker: 654 posts
Armorama: 638 posts
Posted: Saturday, September 07, 2019 - 03:38 AM UTC
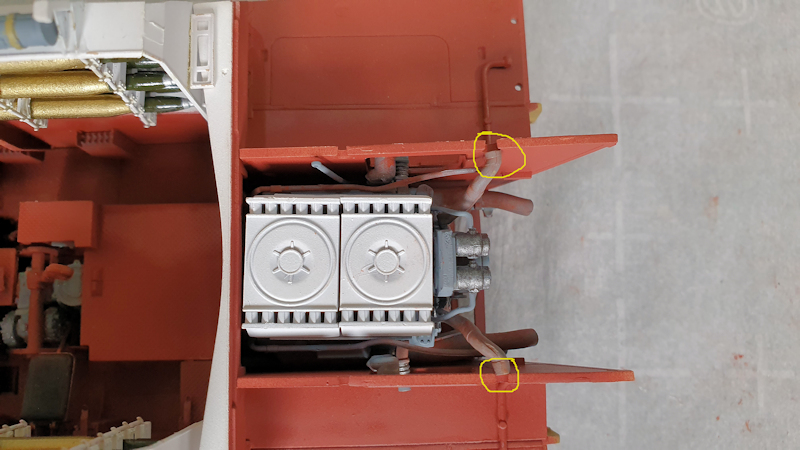
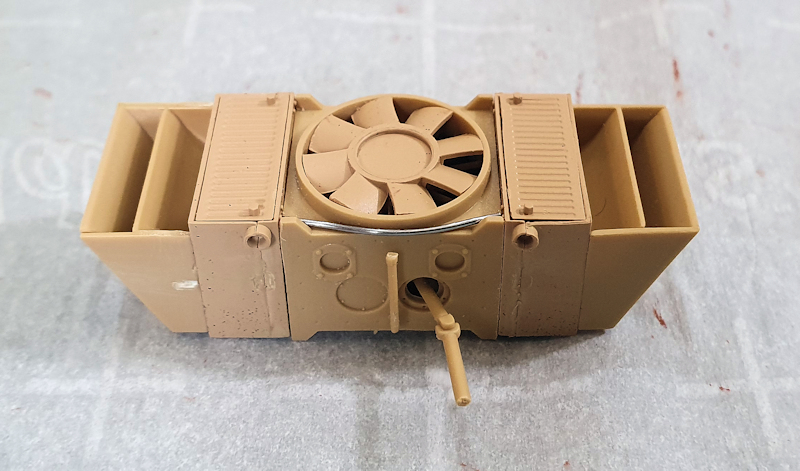
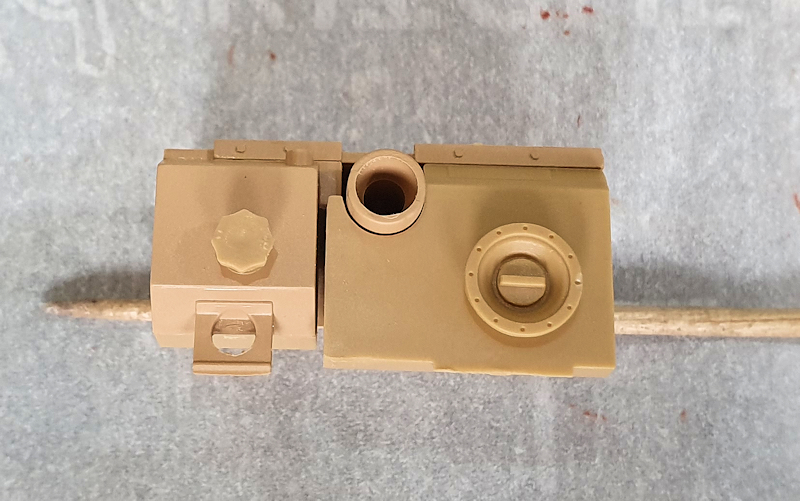
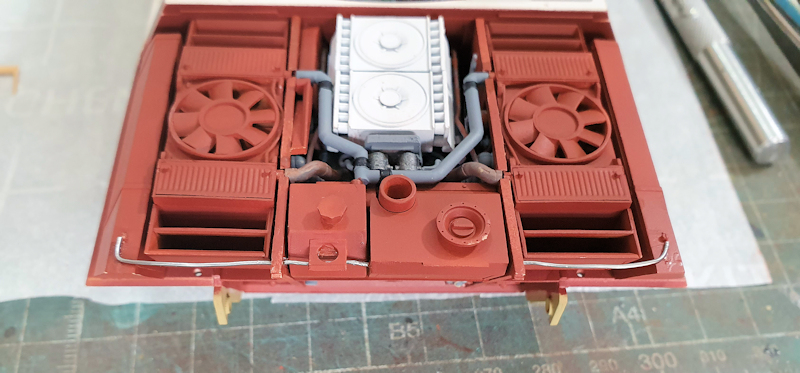
Continuing with Step 52. Time to install the radiators and fuel tanks.
In order to get the radiators to fit properly, you probably will have to enlarge the yellow circled opening on both sides.
Everything installed.
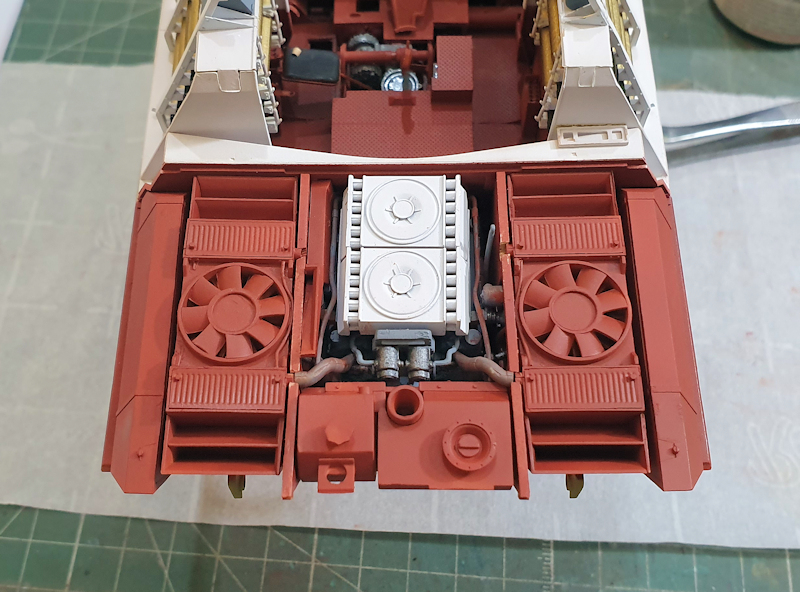
The coolant/fuel filler tank assembly is only dry fitted. You need to install the pipes first.
The left pannier is slightly warped, that's why it sits lower.
#456
Oklahoma, United States
Joined: September 22, 2016
KitMaker: 654 posts
Armorama: 638 posts
Posted: Saturday, September 07, 2019 - 05:10 PM UTC
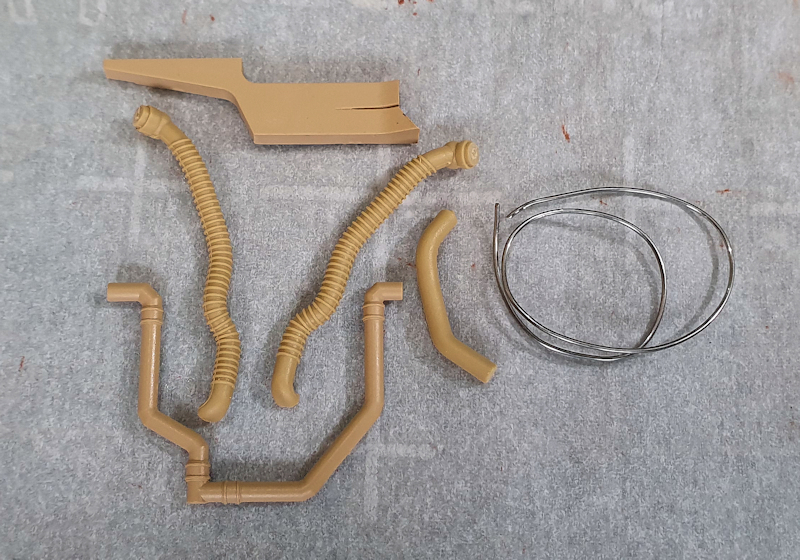
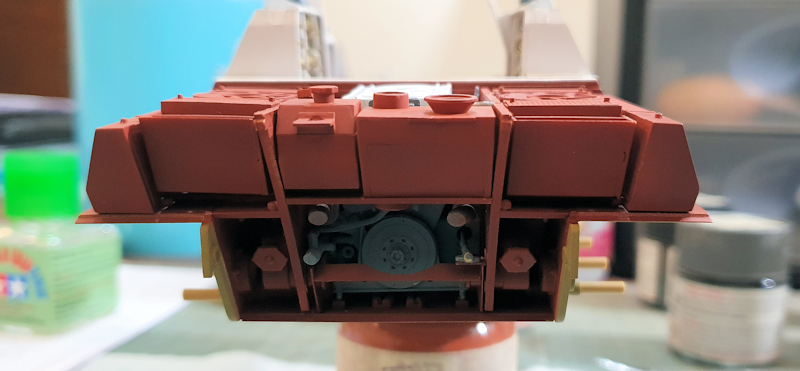
Complete Step 52 by installing the additional plumbing and vent lines.
You need to carefully work K77 and K78 into position without knocking anything loose.
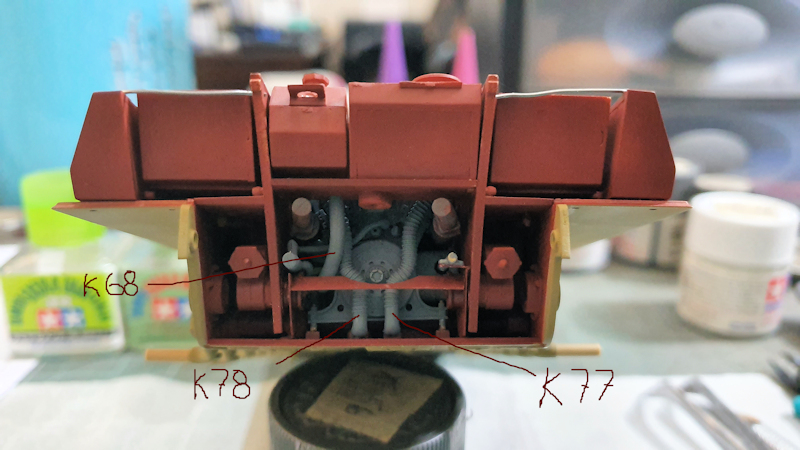
The lower hull interior is now complete. Next up is the rear panel.
#456
Oklahoma, United States
Joined: September 22, 2016
KitMaker: 654 posts
Armorama: 638 posts
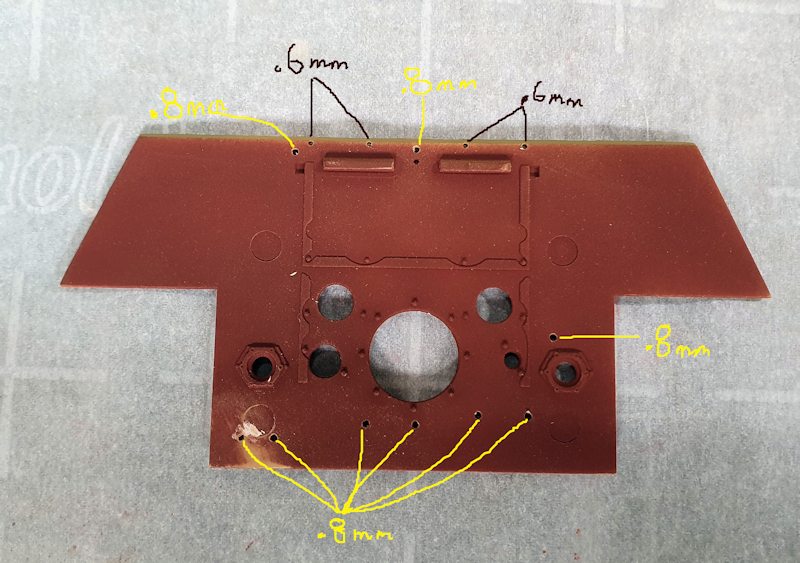
Posted: Saturday, September 07, 2019 - 05:23 PM UTC
Before starting Step 53, you need to drill some holes in the rear panel for attaching hardware. The instructions show you the size and location from the outside.In addition, you need to remove the raised features indicated in red.
Instructions
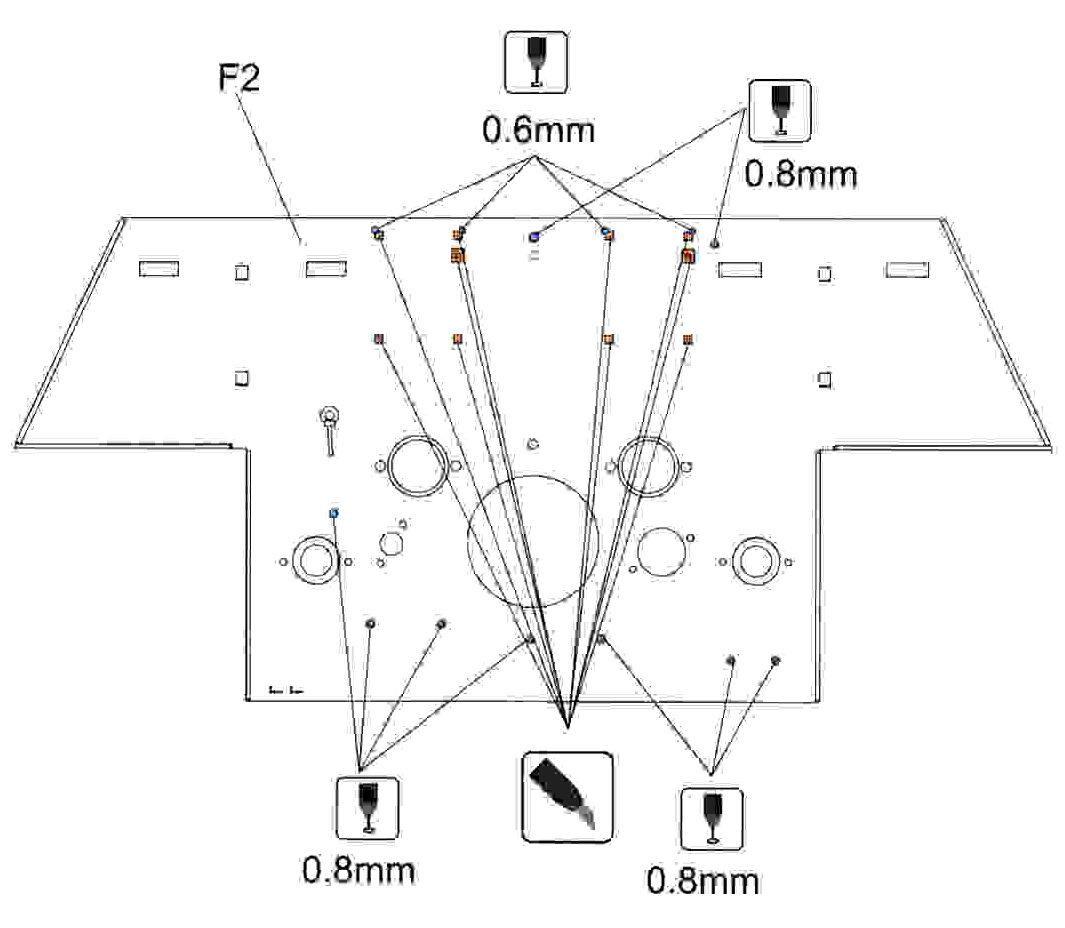
A view on the actual part.
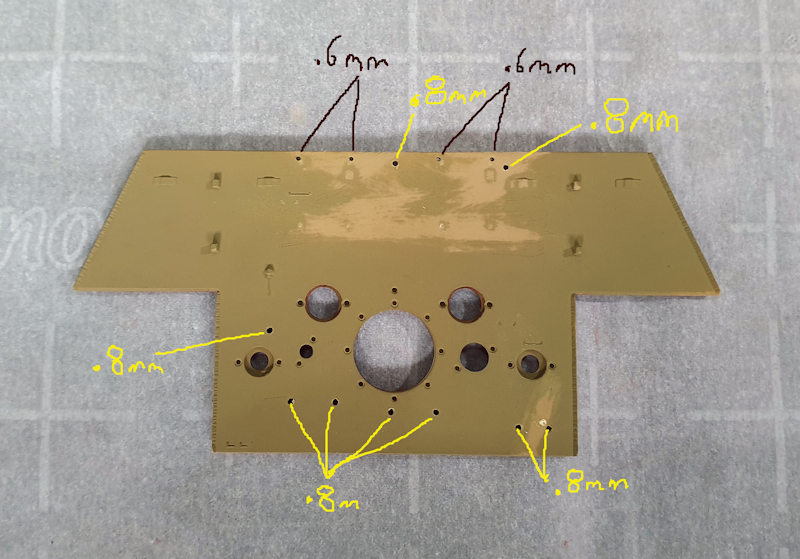
However, you will actually drill the holes from the backside where there are marks for these holes. Here is a view of where to drill the holes from the backside.
#456
Oklahoma, United States
Joined: September 22, 2016
KitMaker: 654 posts
Armorama: 638 posts
Posted: Saturday, September 07, 2019 - 05:45 PM UTC
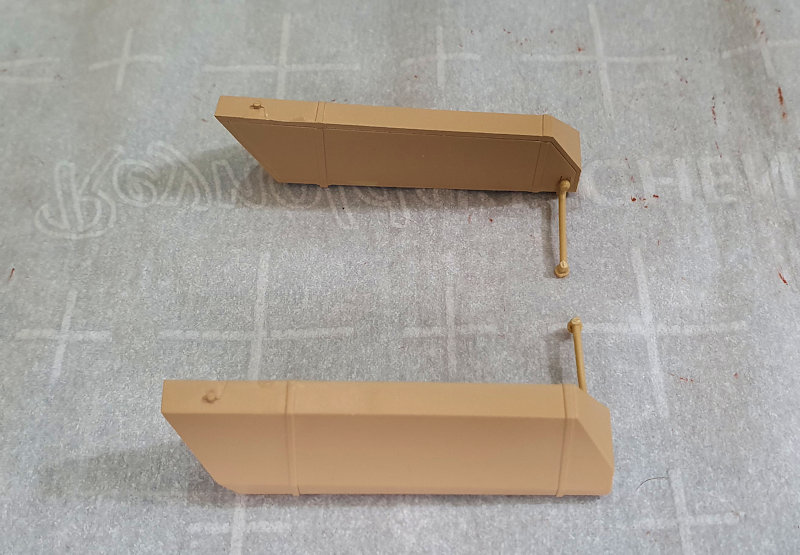
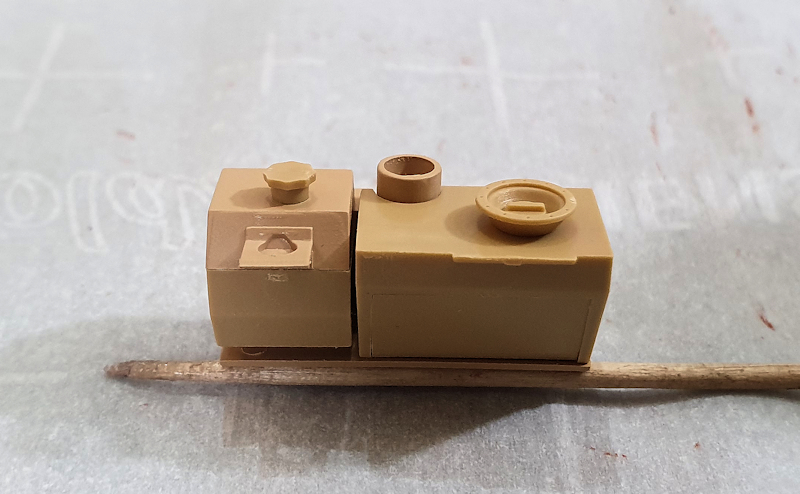
A number of sub-steps are completed first, prior to attaching to the rear plate. The first of these is Step A21, Tow Bracket Assembly.
Instructions
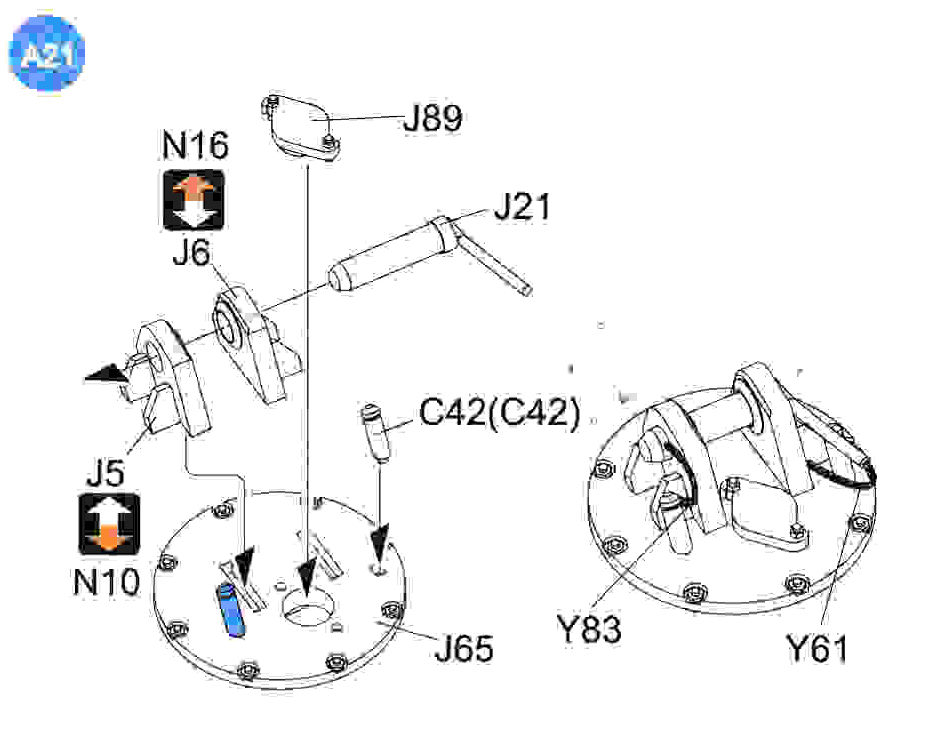
Parts

You have two options for the tow brackets. The early version (N10 & N16) and the final version (J5 & J6) The later version includes stiffeners to strengthen the tow brackets. Since this build is a late model G2, I'll be using J5 & J6.
You also have two sizes of PE chains. Y83 is the shorter one, in case you forget which is which.
Assembled
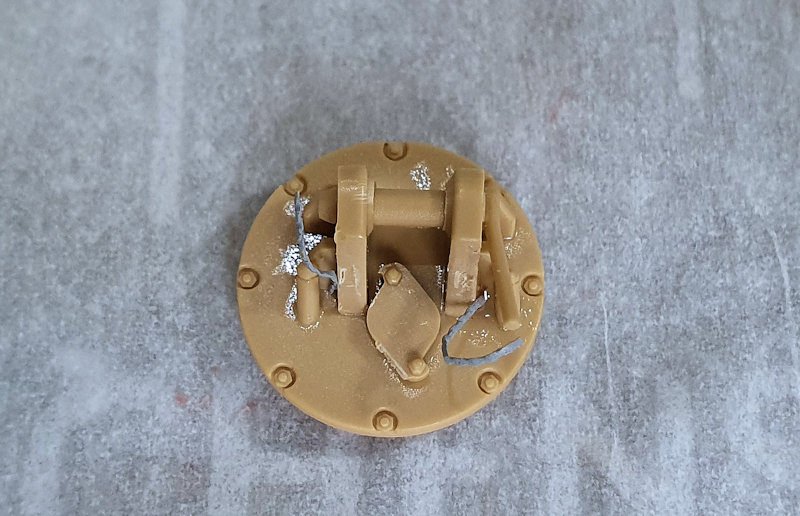
I'll attach the PE chains to the pin after painting.