Campaigns: Active Campaigns
Campaigns that are either in planning or underway should be grouped here.
Hosted by Richard S.
Israel Defense Forces Campaign - Active
petbat
Visit this Community
Queensland, Australia
Joined: August 06, 2005
KitMaker: 3,353 posts
Armorama: 3,121 posts
Posted: Friday, February 21, 2020 - 09:24 AM UTC
Welcome aboard David.

Like I said... a lot of work Russel. If this is what 'floats your boat' - keep adding more 'water' I say!!!

Welcome to the forums Shawn. I'm sorry but I can't answer your question. I don't visit the Armorama Facebook page myself.
Kc2gmb1976
Visit this Community
New York, United States
Joined: January 13, 2020
KitMaker: 5 posts
Armorama: 5 posts
Posted: Friday, February 21, 2020 - 10:27 AM UTC
Hello can I join the build group build
kunjuro
Visit this Community
Philippines
Joined: October 27, 2013
KitMaker: 520 posts
Armorama: 488 posts
Posted: Friday, February 21, 2020 - 11:50 PM UTC
Hi lads. Here's my current progress.

The kit built easily enough. The running gear was a bit finnicky and the HVSS bogies needed care to glue to the hull and align properly. I also puttied the joint on the turret halves as they did not align properly.


I then addressed one of the biggest issues of the kit for me: The casting effect was too exaggerated; the cast effect looked like holes in the armor. I decided to experiment with a technique I saw online with vallejo putty: I stippled on the white putty after thinning it with water. You can see the result below. I also had to fix the gun mantlet of the kit: it would not fit together properly. I glued the two halves together with super glue, then glued that on to the turret. I then added on Tamiya two piece putty to shimmy up the mantlet canvas and blend in the mantlet to the turret. I might add a bit more detail with stretched sprue if I feel like it.

petbat
Visit this Community
Queensland, Australia
Joined: August 06, 2005
KitMaker: 3,353 posts
Armorama: 3,121 posts
Posted: Saturday, February 22, 2020 - 10:01 AM UTC

Quoted Text

Hello can I join the build group build


Of Course you can Shawn.

Go to this page:
https://armorama.kitmaker.net/modules.php?op=modload&name=Campaigns&file=index&req=showcontent&id=1025

Read the build rules to make sure what you want to build fits in. If it does, then click on the 'Enlist' button on the right hand side and once that takes, you are in!

You will need to post your finished pics in the designated campaign gallery to receive the award ribbon. The link to the gallery is here:
https://gallery.kitmaker.net/showgallery.php/cat/31929

To upload to the gallery you must be logged in to the gallery (being logged in here does not mean you are logged in there). On the right hand side of the screen is a button 'upload photos' Click on that and you should be able to work out how to upload from there. HOWEVER, only upload pics one at a time or you are likely to have issues.

Hope this helps.
petbat
Visit this Community
Queensland, Australia
Joined: August 06, 2005
KitMaker: 3,353 posts
Armorama: 3,121 posts
Posted: Saturday, February 22, 2020 - 10:04 AM UTC
Seems to have come out with a rash Nigel. Must be the Philippine heat

You are doing a great job on that one.
kunjuro
Visit this Community
Philippines
Joined: October 27, 2013
KitMaker: 520 posts
Armorama: 488 posts
Posted: Tuesday, February 25, 2020 - 03:50 PM UTC

Quoted Text

Seems to have come out with a rash Nigel. Must be the Philippine heat

You are doing a great job on that one.


Thanks Peter!

I managed to put more time in the bench. Here she is at the moment.

Question: what kind of terrain did these tanks operate in? Were they in the desert or would it still be in a muddy/grassy terrain? I'm wondering what kind of weathering I should execute.

MichaelSatin
Staff MemberCampaigns Administrator
AEROSCALE
Visit this Community
Colorado, United States
Joined: January 19, 2008
KitMaker: 3,909 posts
Armorama: 510 posts
Posted: Wednesday, February 26, 2020 - 02:11 PM UTC
More likely desert (Sinai) for the M51s.

Michael
ComradeMP
#0
Visit this Community
United States
Joined: July 31, 2011
KitMaker: 472 posts
Armorama: 453 posts
Posted: Thursday, February 27, 2020 - 10:44 AM UTC
Finally started building, did mostly just the main hull parts. Road wheels and suspension arms come next. Working on the Tiran along with a T-62 BDD for the Trumpeter campaign.
petbat
Visit this Community
Queensland, Australia
Joined: August 06, 2005
KitMaker: 3,353 posts
Armorama: 3,121 posts
Posted: Thursday, February 27, 2020 - 02:40 PM UTC
Non-identical twins... nice Comrade.
rfbaer
Visit this Community
Texas, United States
Joined: June 12, 2007
KitMaker: 1,866 posts
Armorama: 1,696 posts
Posted: Friday, February 28, 2020 - 12:51 PM UTC
Twinkies! I think I have a T-62 on the shelf of shame that's been there for at least four years......
Suspension is begun, just trying to make it look a little more like the actual thing without too much work, so far so good.
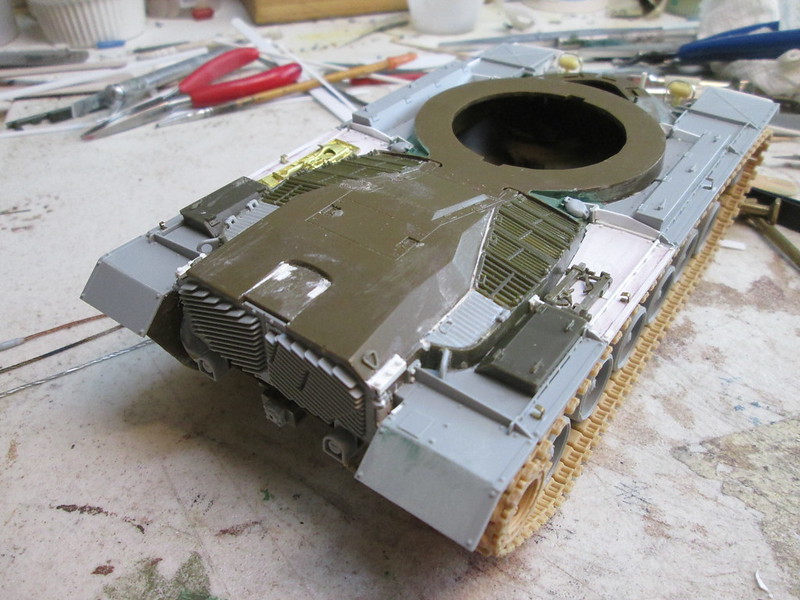
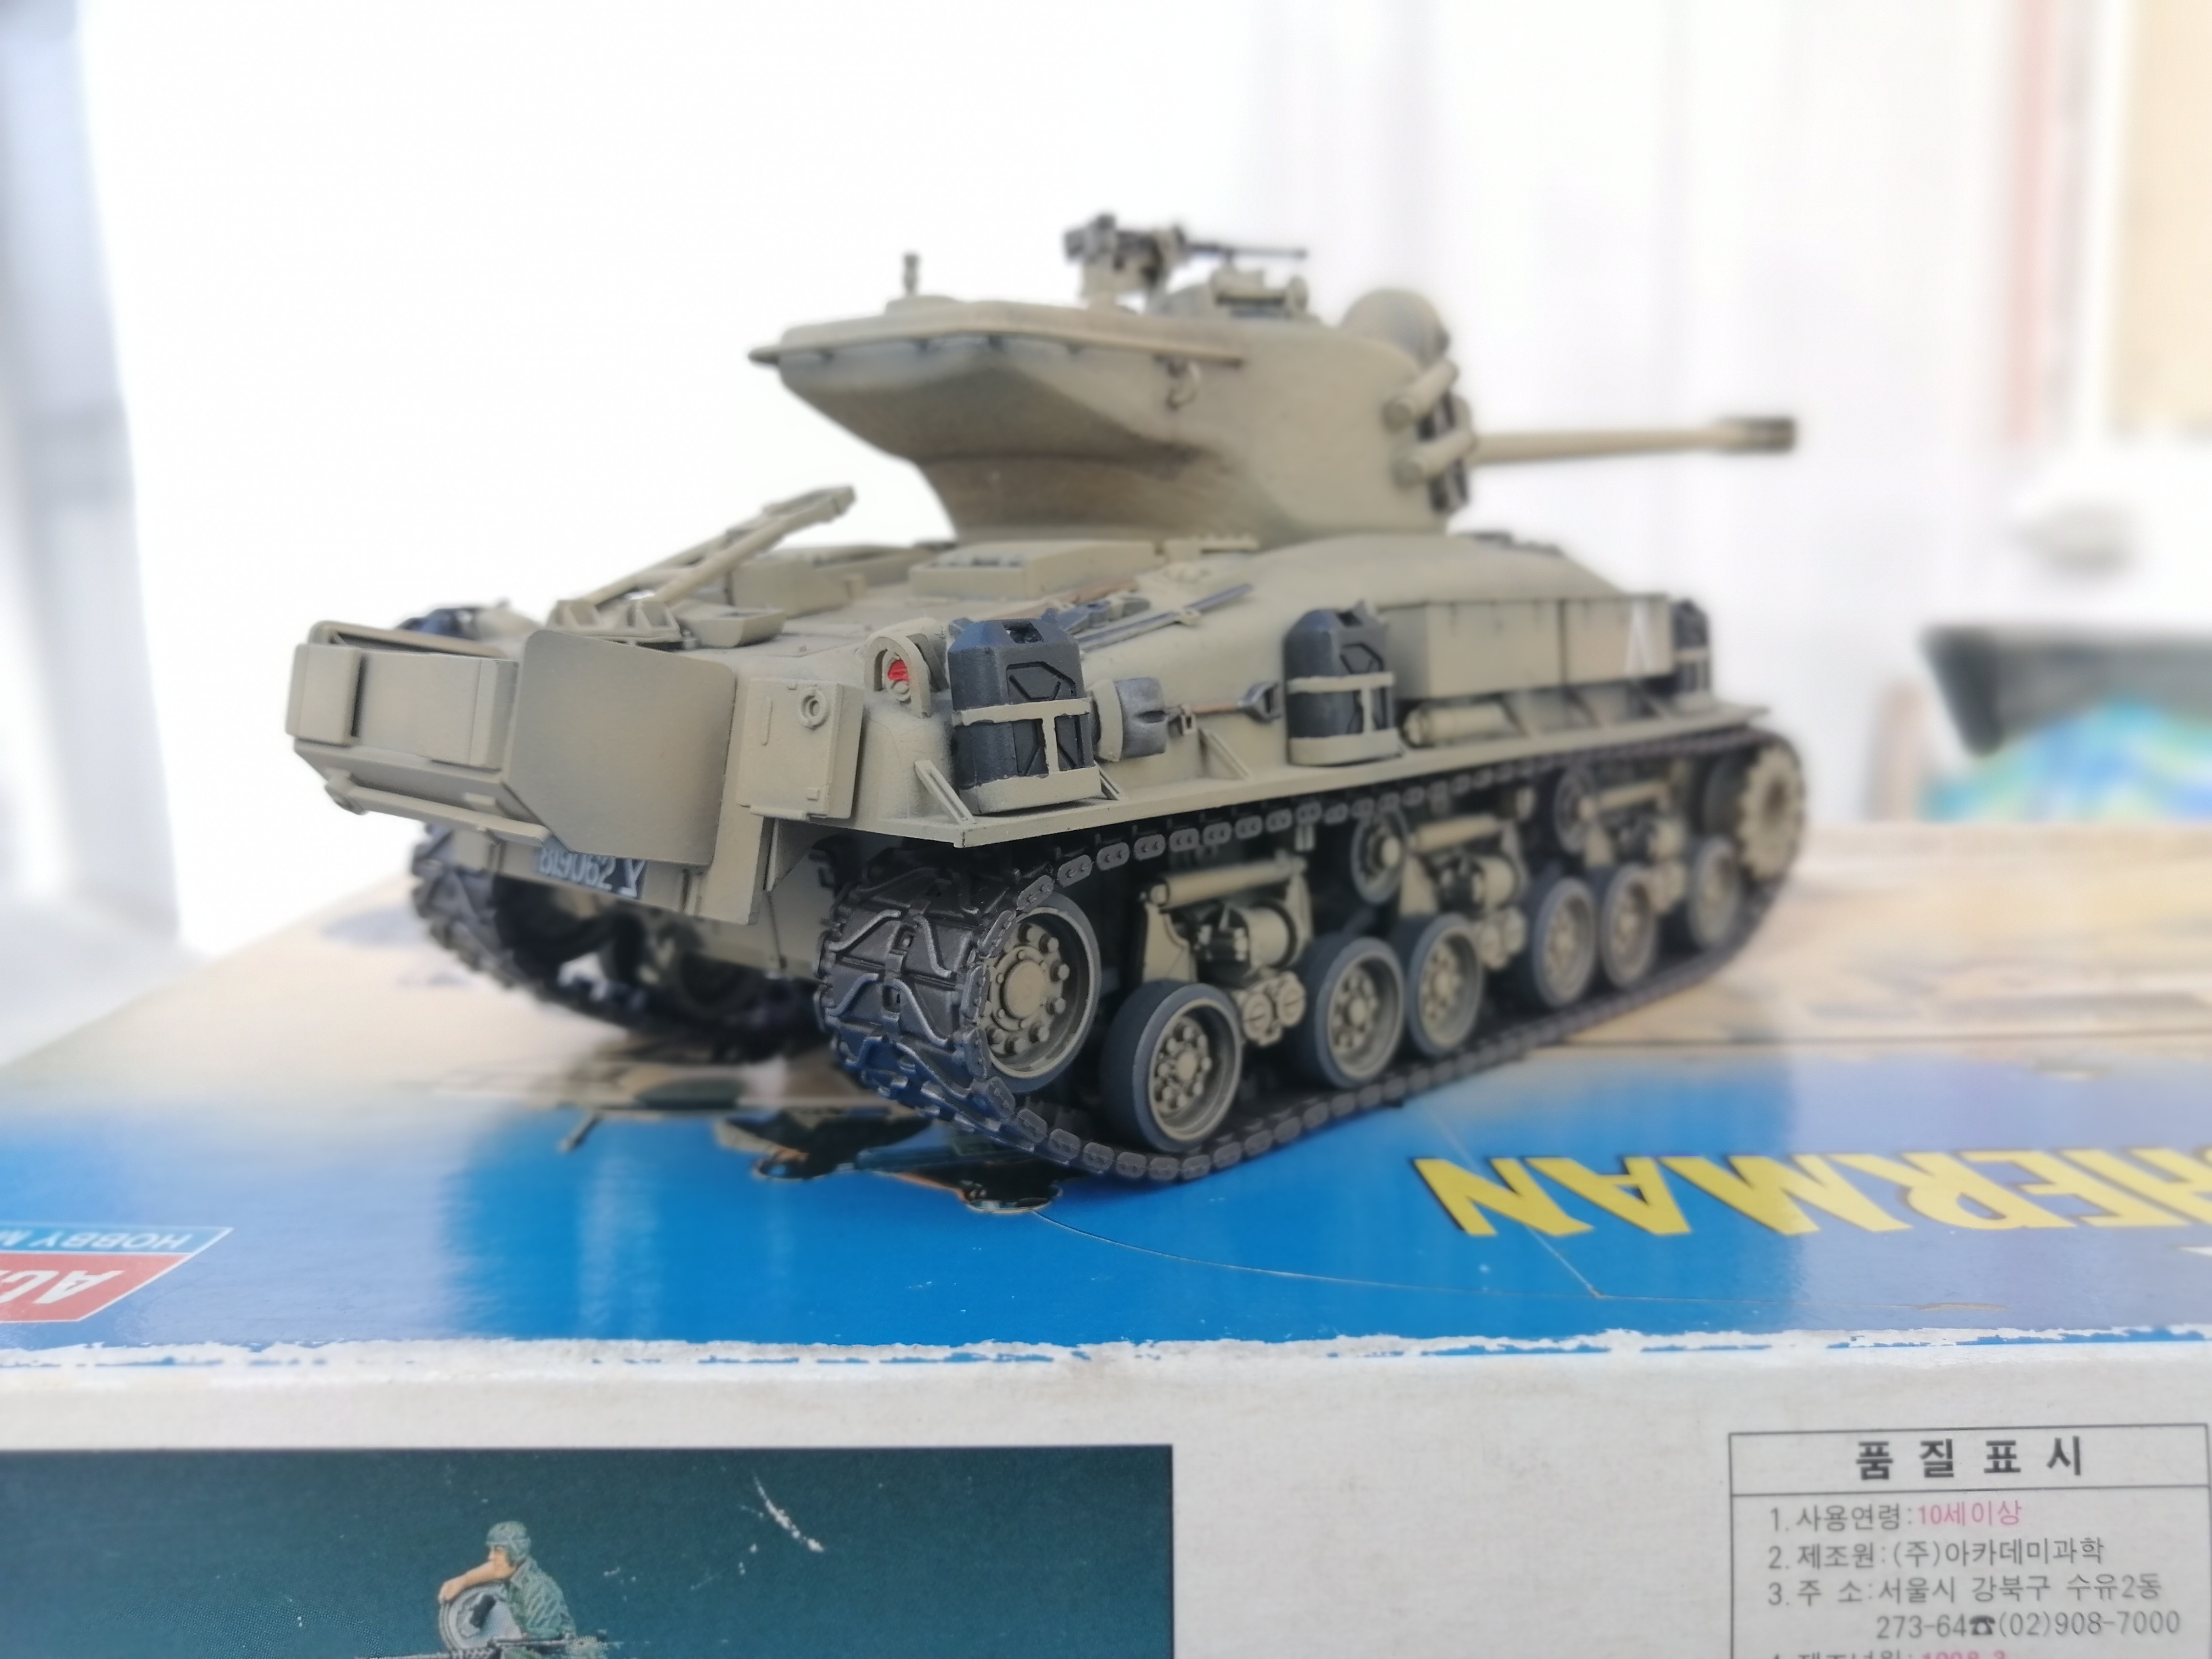
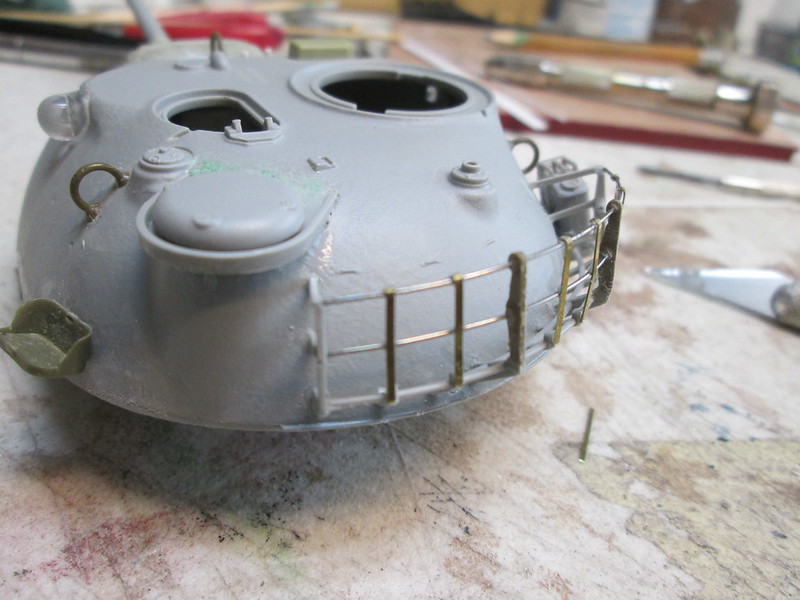
IMG_9580 by Russel Baer, on Flickr
The gray parts are Dragon, but I'm short six of the individual bump stops, so I'll have to cut some kit parts down, at least make them look similar. I tried to make the idler mounts look a little better too, but again, I'm not trying to spend the rest of the year on this model. Scoring another box of miscellaneous Dragon M48 parts would help, I've pretty much used up the suspension parts, except for shocks.
kunjuro
Visit this Community
Philippines
Joined: October 27, 2013
KitMaker: 520 posts
Armorama: 488 posts
Posted: Saturday, February 29, 2020 - 01:13 PM UTC
Hey lads. I think I'm nearly done with my M51. I'm just debating weather to apply a dust coat over her.


rfbaer
Visit this Community
Texas, United States
Joined: June 12, 2007
KitMaker: 1,866 posts
Armorama: 1,696 posts
Posted: Monday, March 02, 2020 - 11:02 AM UTC
Looks very good Nigel. Personally, I think a very light application of dust would be appropriate.
petbat
Visit this Community
Queensland, Australia
Joined: August 06, 2005
KitMaker: 3,353 posts
Armorama: 3,121 posts
Posted: Tuesday, March 03, 2020 - 08:30 AM UTC
I agree Nigel. A light dusting here and there. And maybe see if you can glue the track down on the drive sprocket a little more. These two aspects would really make the model pop.
Milatrydioarmour
Visit this Community
England - West Midlands, United Kingdom
Joined: January 04, 2020
KitMaker: 3 posts
Armorama: 3 posts
Posted: Wednesday, March 04, 2020 - 07:36 AM UTC
hi guys great work going on unfortunately im out cant upload photos for what ever reason happy modelling
rfbaer
Visit this Community
Texas, United States
Joined: June 12, 2007
KitMaker: 1,866 posts
Armorama: 1,696 posts
Posted: Thursday, March 05, 2020 - 03:16 AM UTC
I have some small progress to report, suspension largely finished, ready to do the detail stuff on the rear hull plate, and probably fenders too.
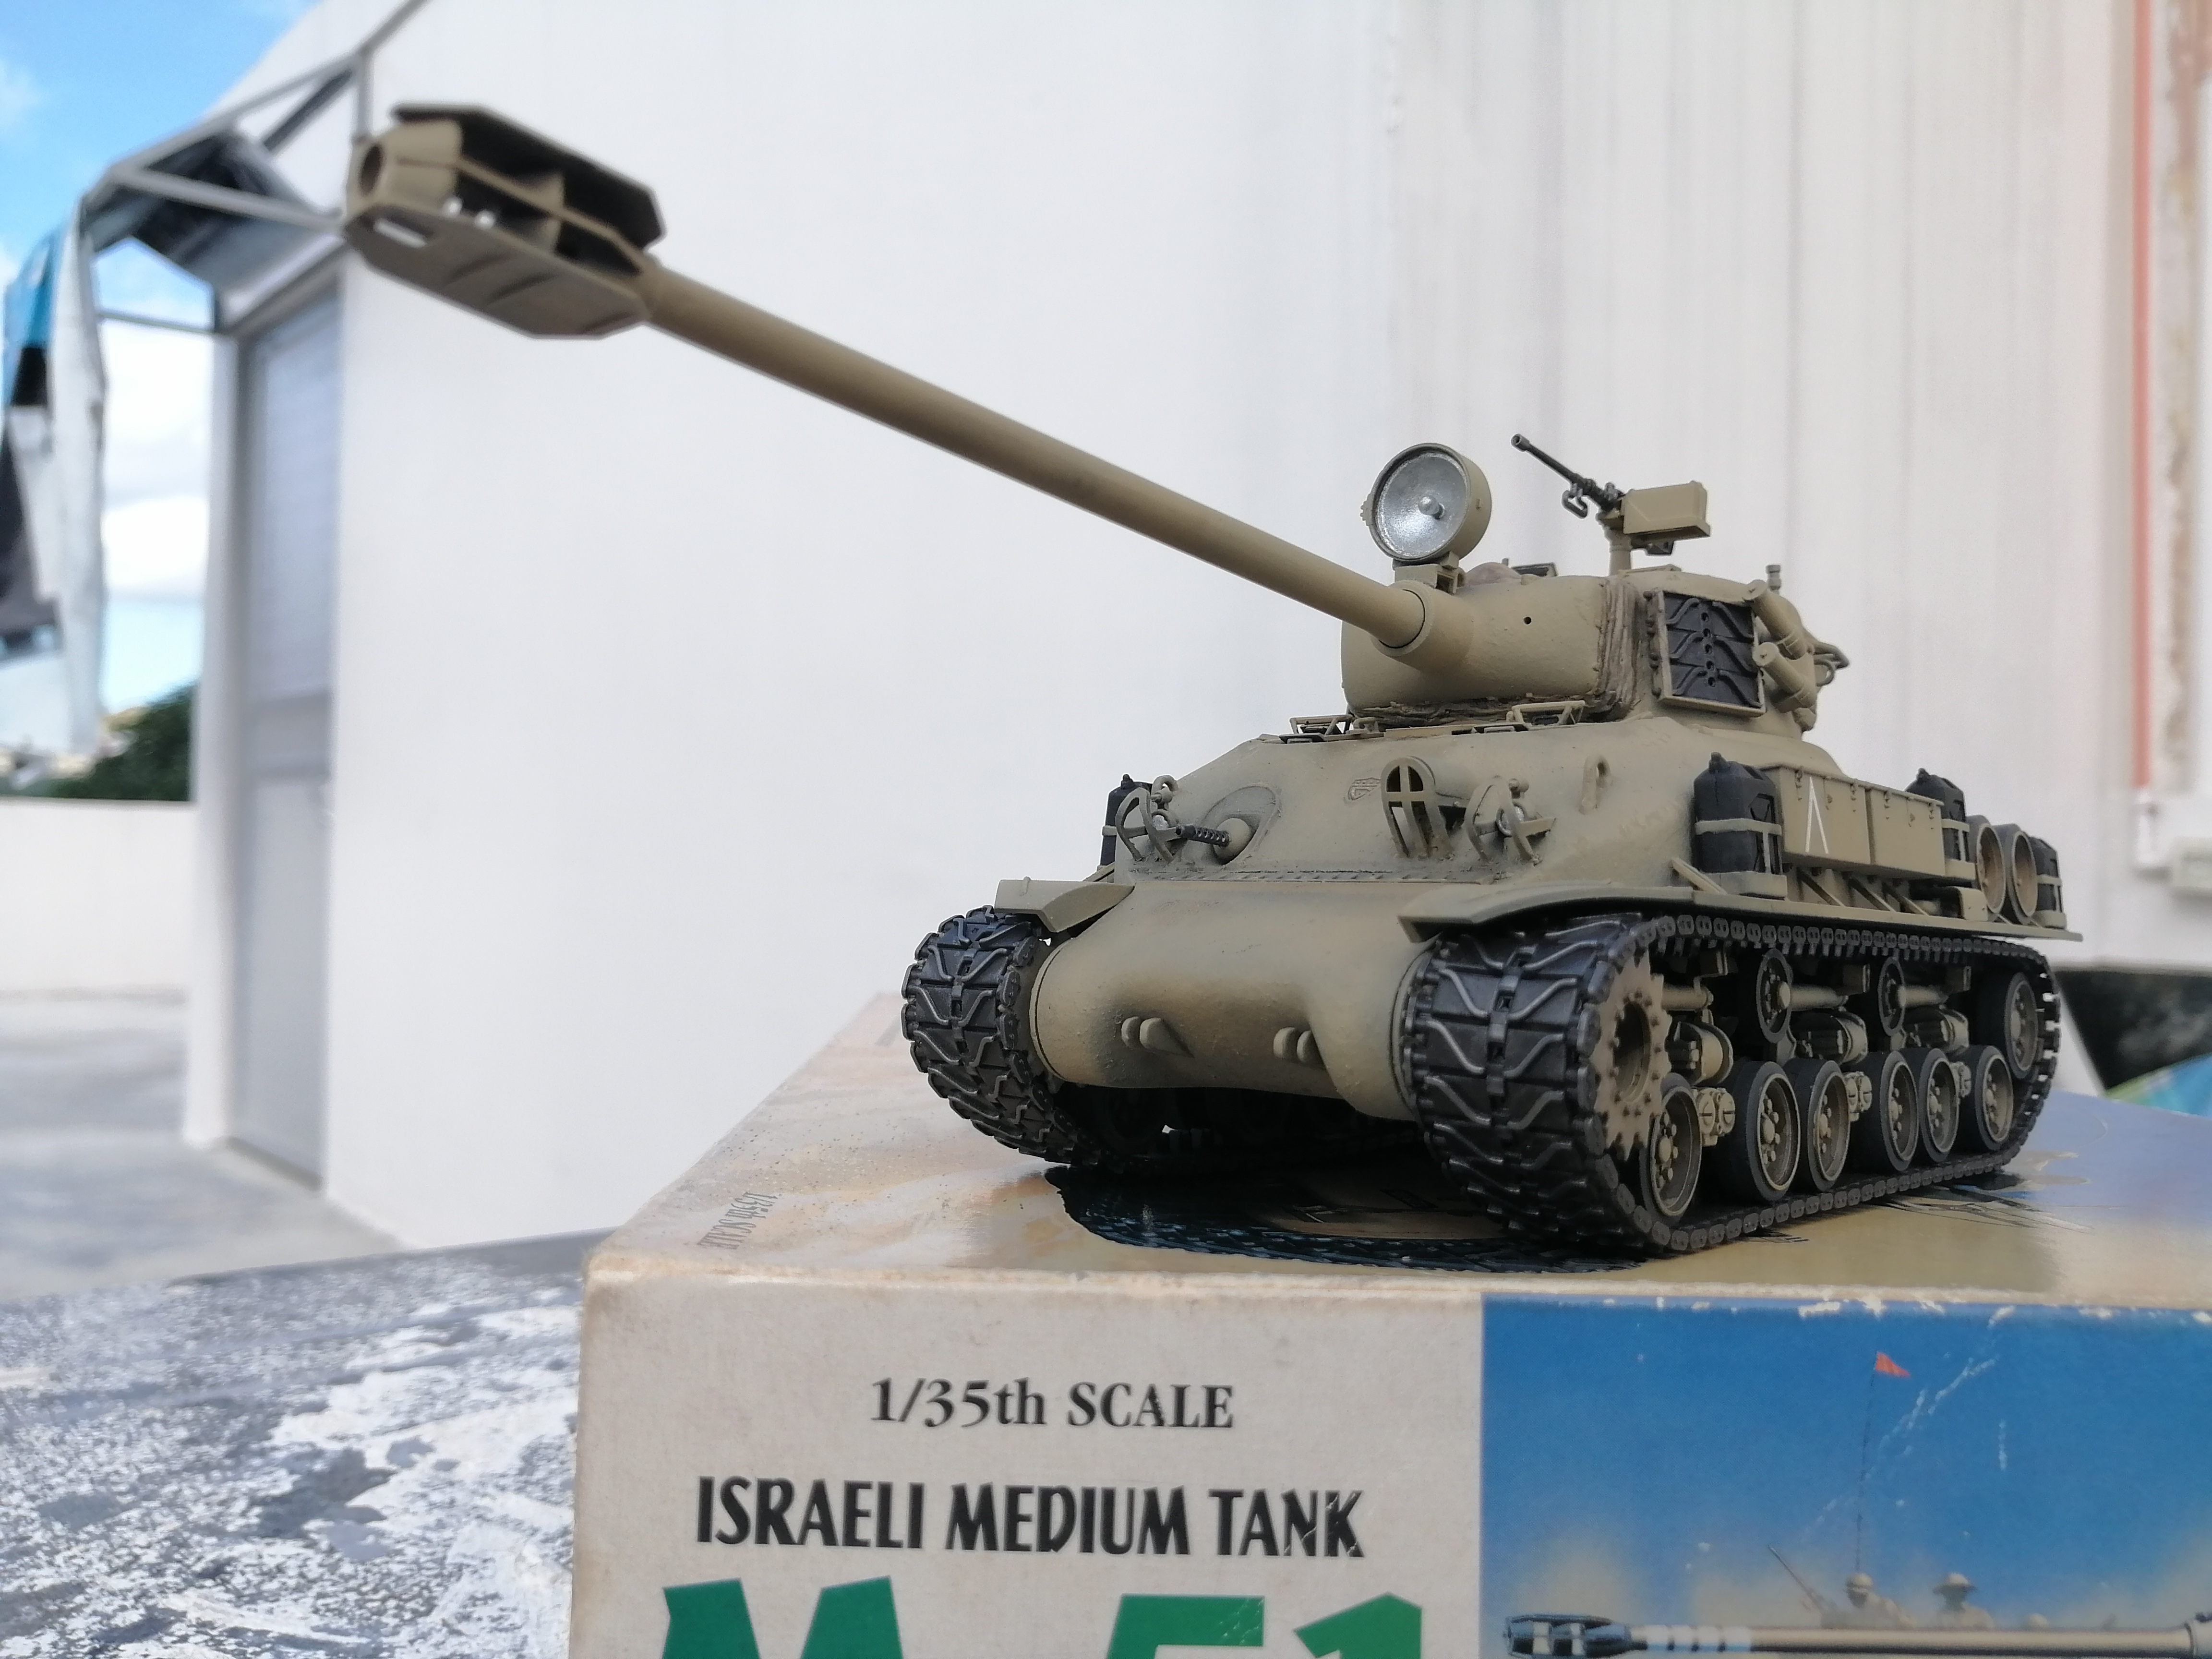
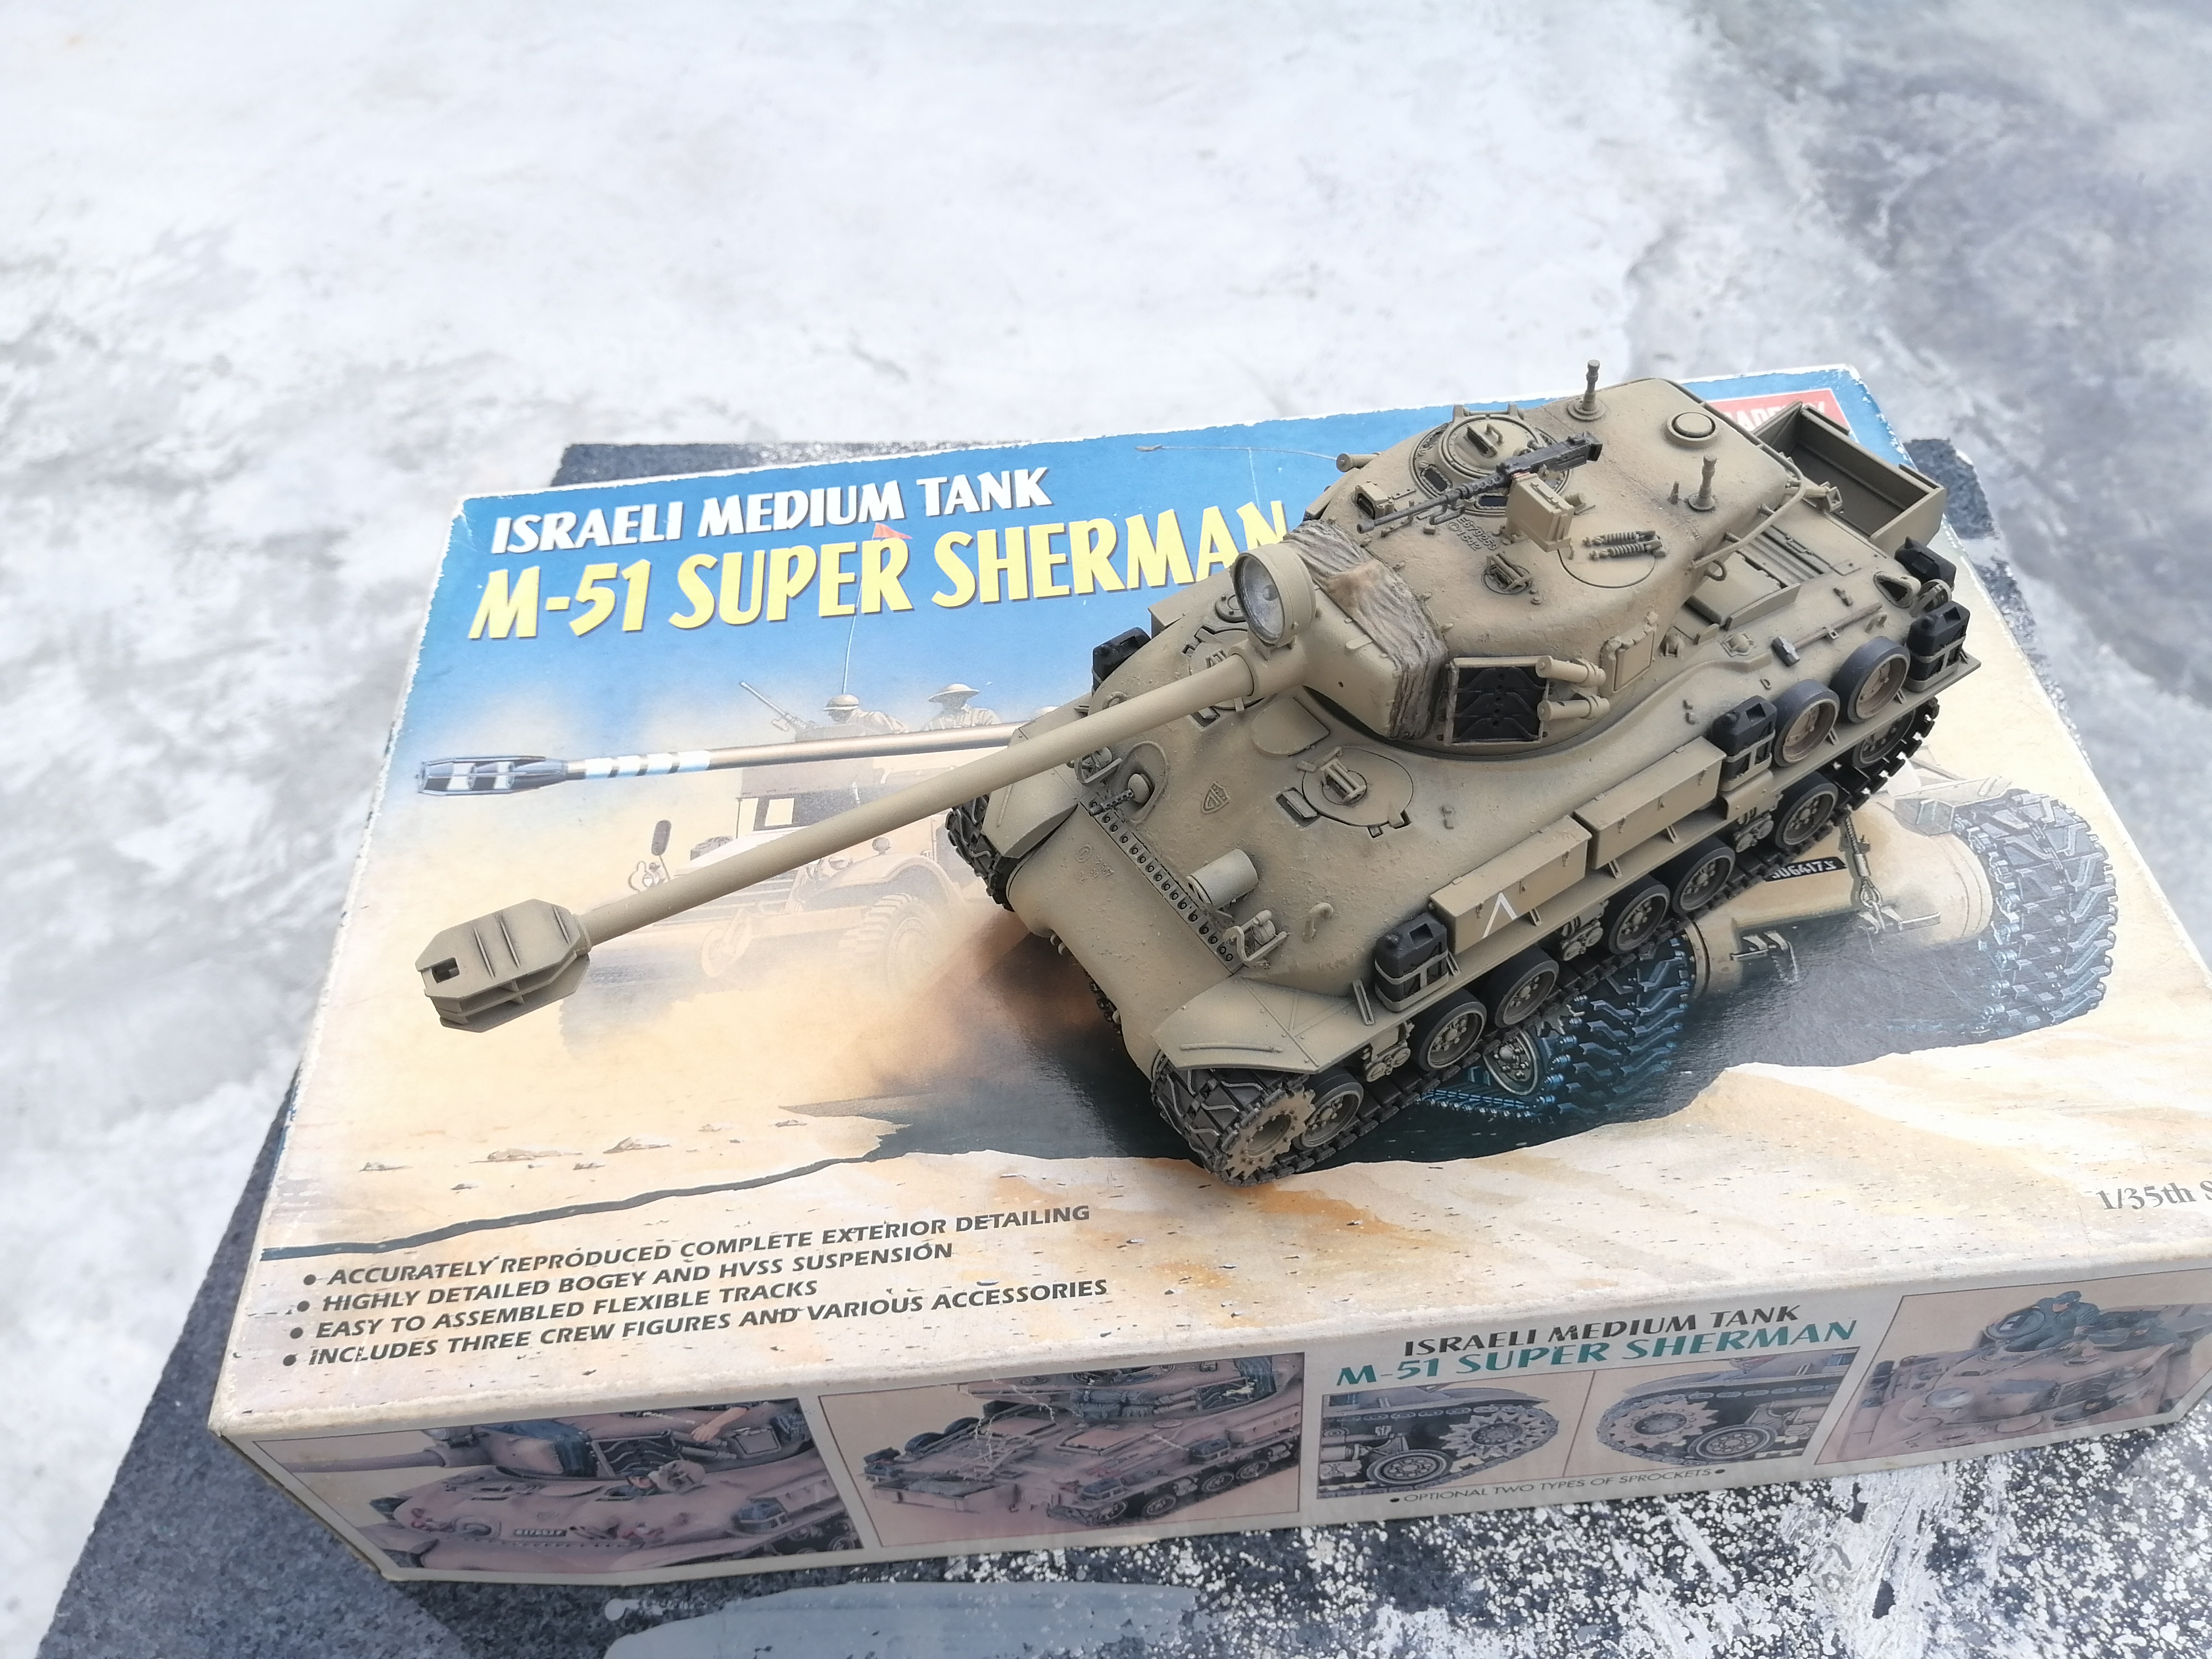
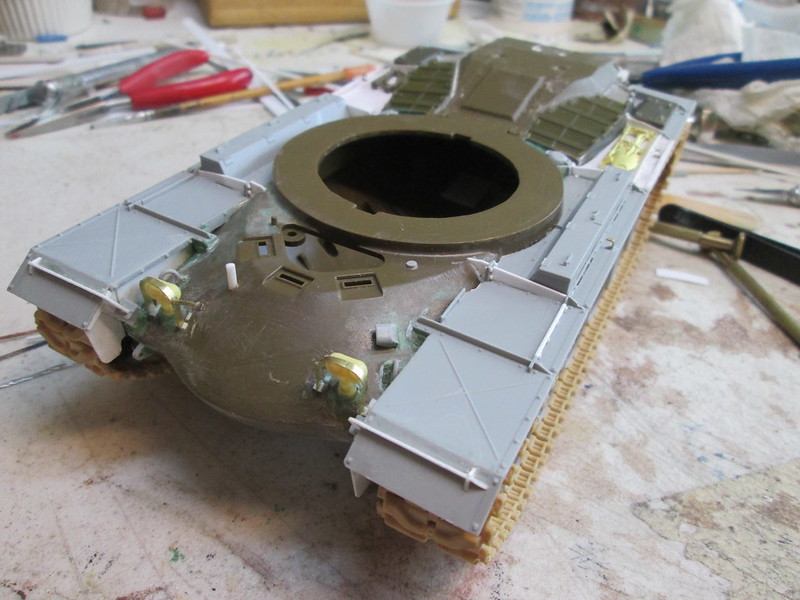
Russ images 3.4.20 by Russel Baer, on Flickr
I went ahead and used Tamiiya/Academy bump stops, except the very front, and used plastic stock and lots of Squadron green stuff to simulate the mount fairings. There's also a lot of sliced hex rod for bolt heads....
And just to check, with wheels:
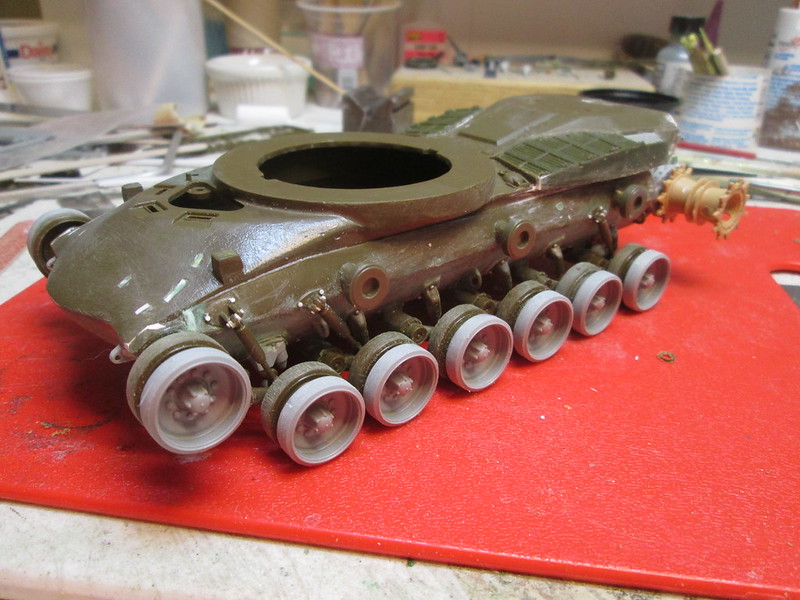
russ images 3.4.20.2 by Russel Baer, on Flickr
MichaelSatin
Staff MemberCampaigns Administrator
AEROSCALE
Visit this Community
Colorado, United States
Joined: January 19, 2008
KitMaker: 3,909 posts
Armorama: 510 posts
Posted: Sunday, March 08, 2020 - 03:54 AM UTC
Great work going on here, lots of excellent armor!

But now for something completely different.

I have a pretty large number of kits in the stash of IDF AFVs and IAF aircraft. What I don't have are any Israeli Navy models. Let's face it, kits of IN vessels are pretty thin on the ground. However, this kit recently showed up from Kitty Hawk:


Now, what does that have to do with the hole in my collection or the theme of this campaign, you might ask? Well, I answer, I just happen to have an older IsraDecal sheet in dungeon:


and wait, what's that up at the top? Bingo!

The Israeli Navy bought two USCG Dauphins to test out the idea of using helicopters on their new missile boats in the '90s, which came equipped with provisions for operating 'choppers. Turned out it was a good idea, and they later acquired updated versions called Panthers. I'll be doing one of the first two with this kit as a review over on AeroScale, and figured I'd also use it for this campaign to (hopefully) help keep me on track. Fingers crossed!

Michael
rfbaer
Visit this Community
Texas, United States
Joined: June 12, 2007
KitMaker: 1,866 posts
Armorama: 1,696 posts
Posted: Monday, March 09, 2020 - 02:04 AM UTC
I'm looking forward to seeing that Michael, IDF helicopters are neat.
I have a pic of the fenders coming along, and some turret progress.
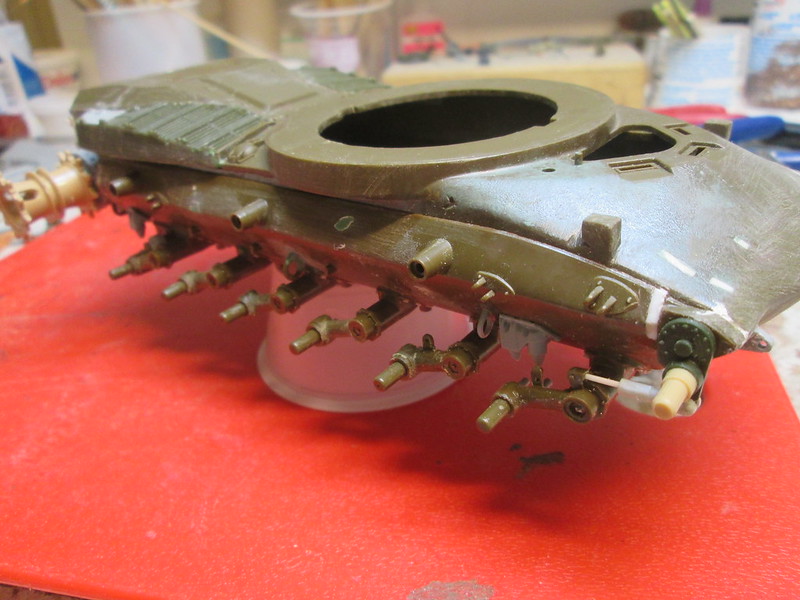
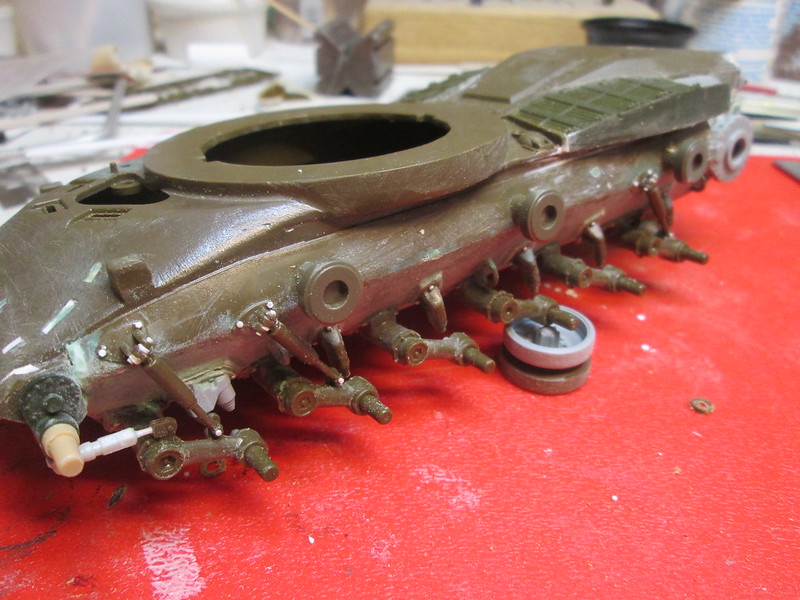
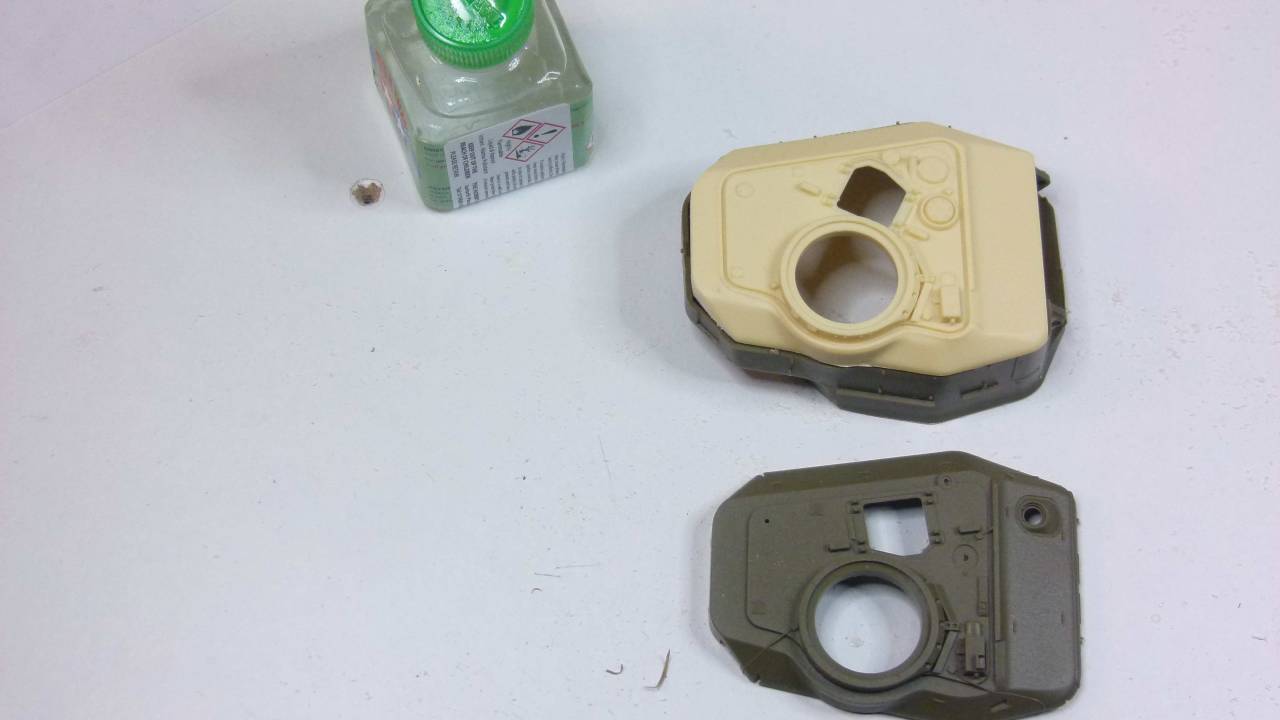
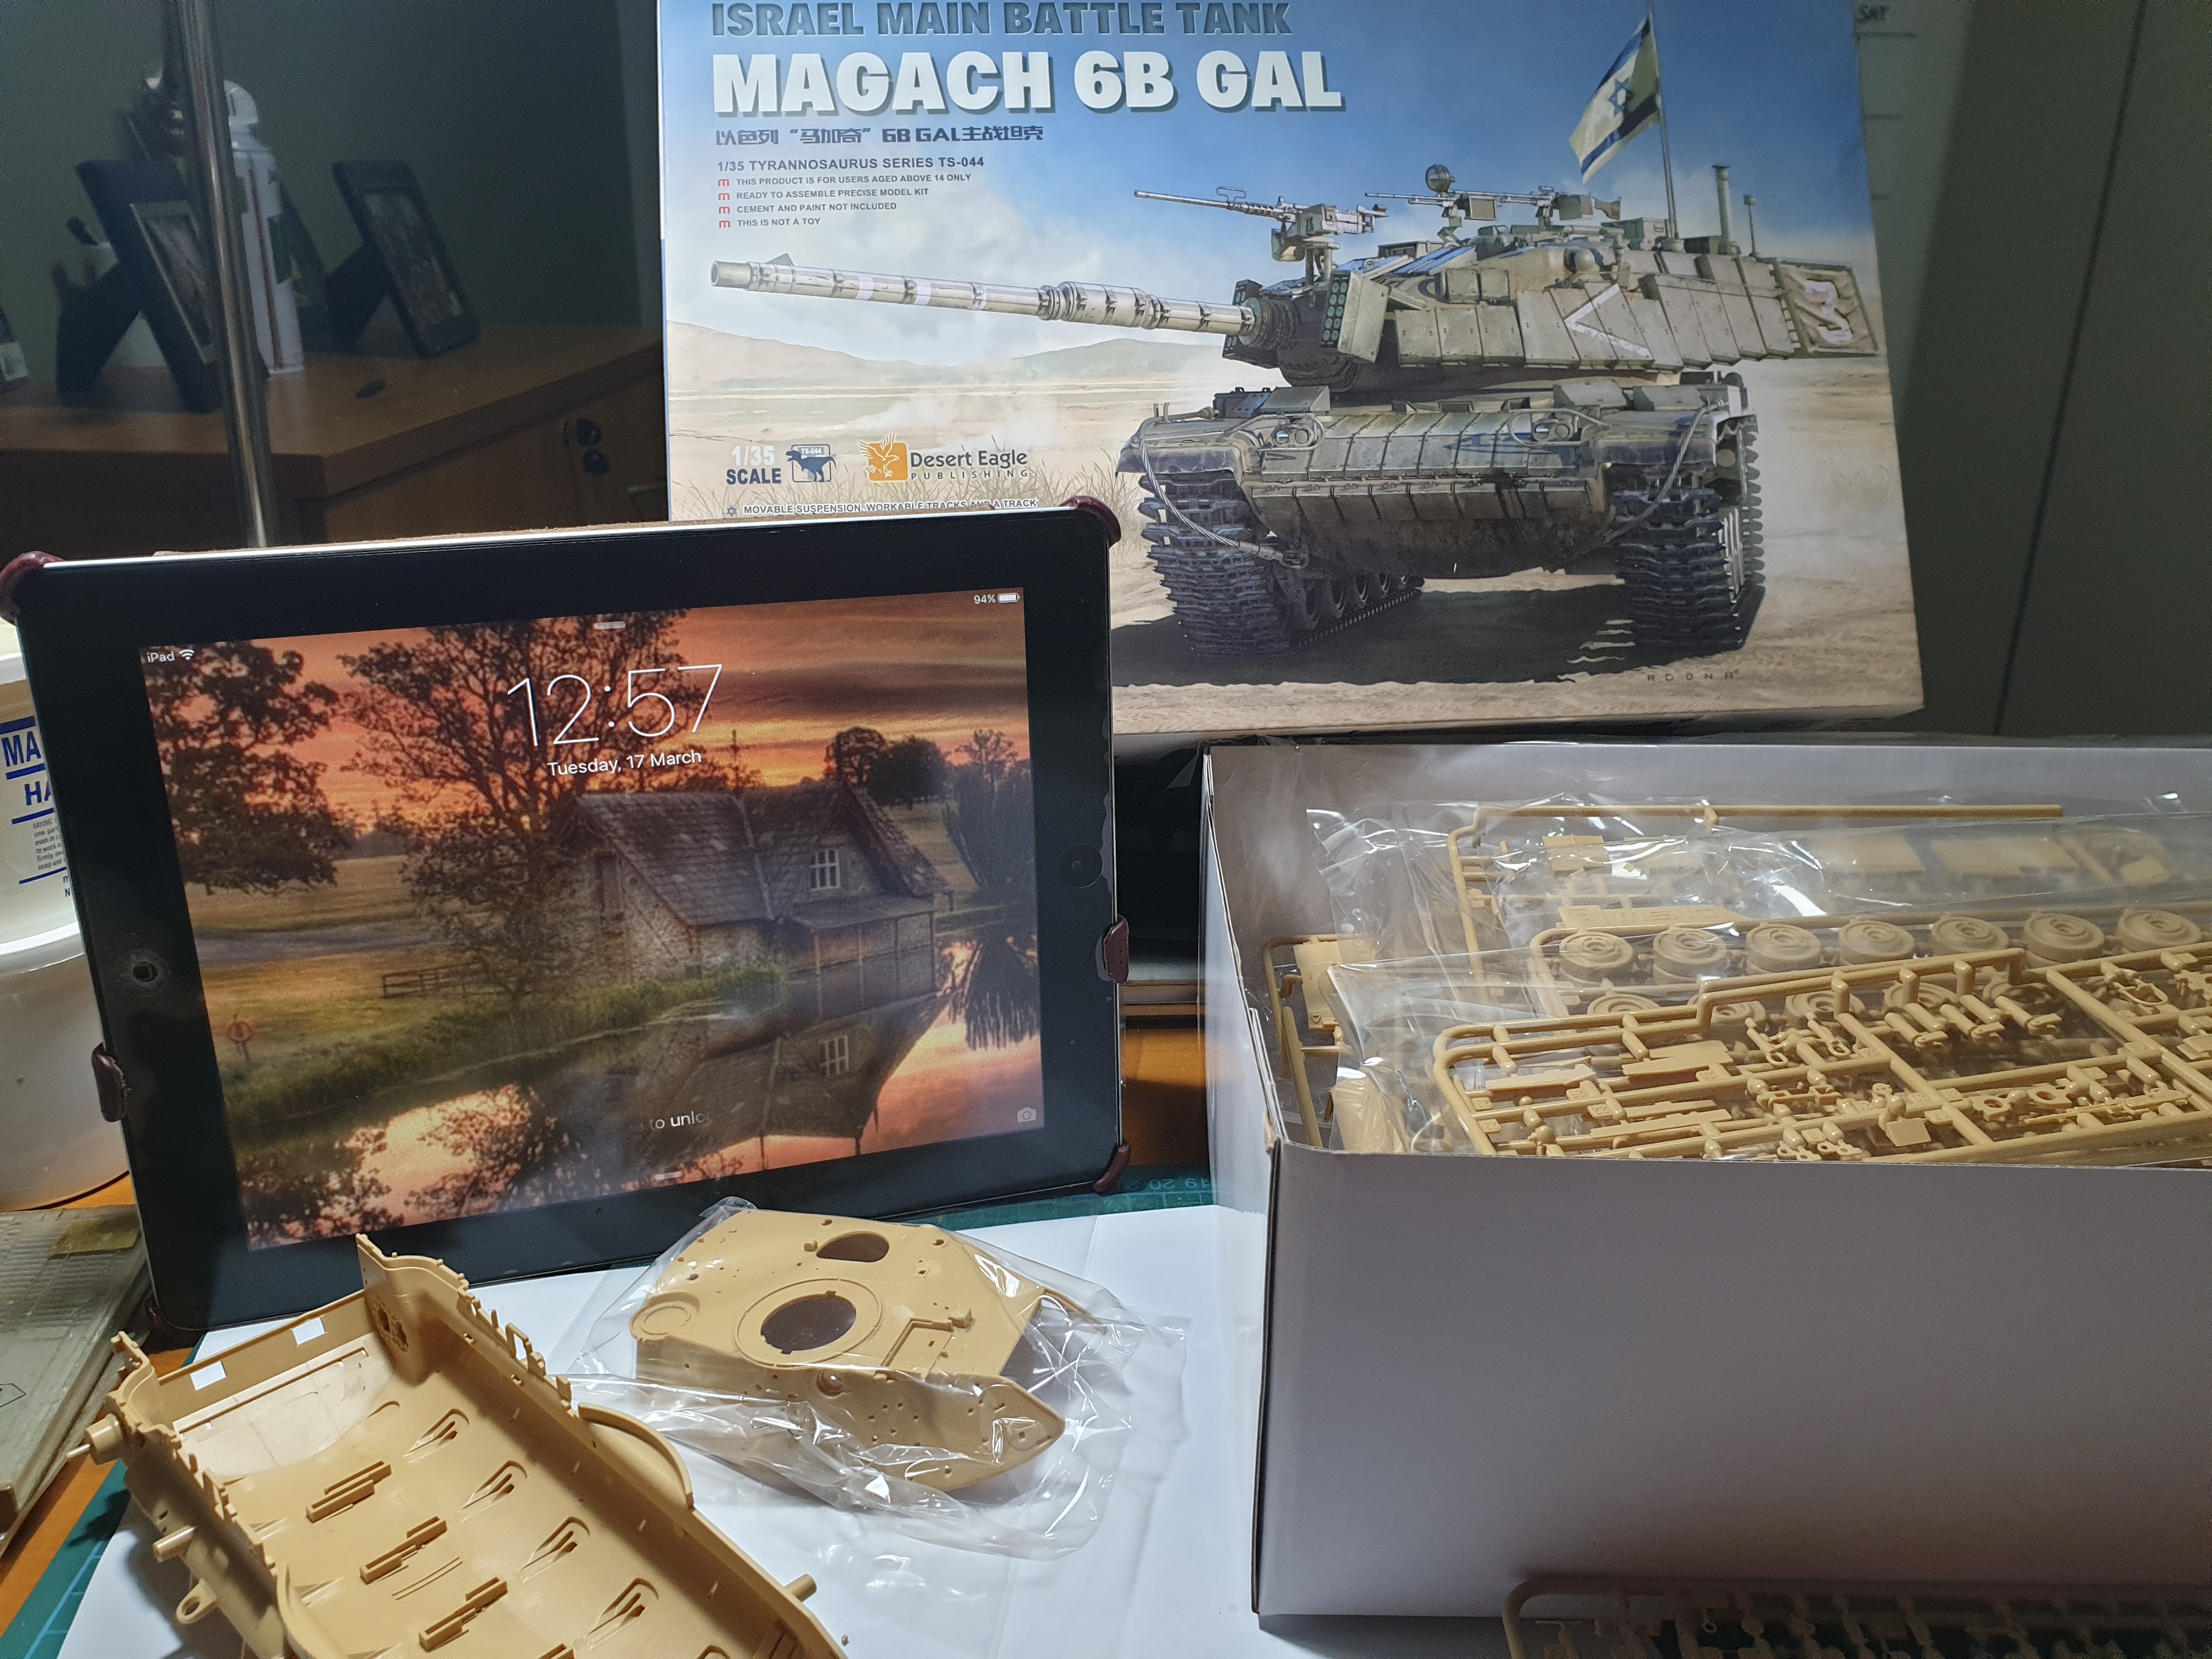
IMG_9773 by Russel Baer, on Flickr
I've added to the DEF mantlet cover, going for the burlap-sack look the early Magachs had, not sure if it's attached over the original cover, or a home-brew cover used on those early M48s that came from Germany that may not have had a cover, using Aves 2-part putty. I'm using the Dragon turret and original cupola, modifying the hatch to remove the "bump" added later, pics of that to come. I was originally intending to use a Sherman cupola, but I can't find any pics of them in use on M48s in the 6 Day War, apparently still being used on Shermans, which makes sense.
rfbaer
Visit this Community
Texas, United States
Joined: June 12, 2007
KitMaker: 1,866 posts
Armorama: 1,696 posts
Posted: Monday, March 09, 2020 - 08:47 AM UTC
No work today, lucky me. Today has been fender day.
IMG_9775 by Russel Baer, on Flickr
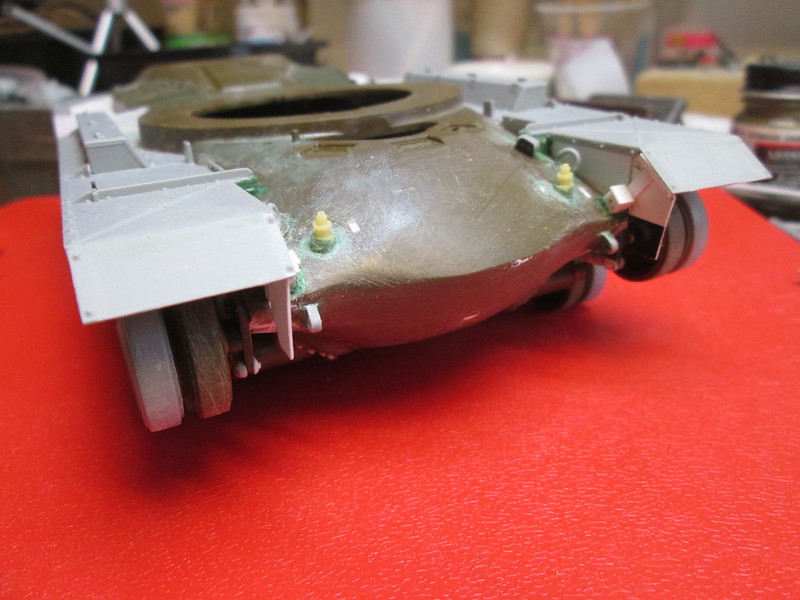
IMG_9776 by Russel Baer, on Flickr
And the modified cupola hatch, next to a stock one, what I started with:
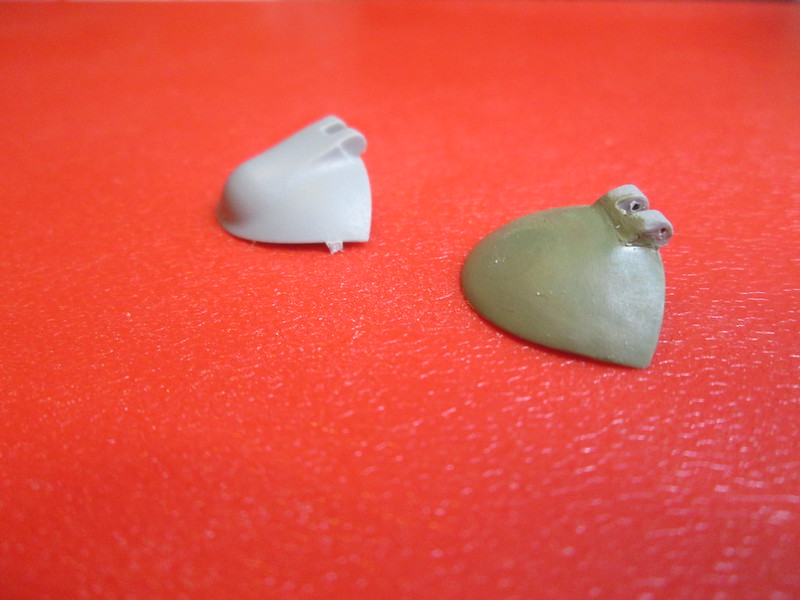
IMG_9774 by Russel Baer, on Flickr
I have some bits to add the two periscopes in it, after a final sanding to check for booboos.
rfbaer
Visit this Community
Texas, United States
Joined: June 12, 2007
KitMaker: 1,866 posts
Armorama: 1,696 posts
Posted: Saturday, March 14, 2020 - 07:22 AM UTC
Still at it:
IMG_0143 by Russel Baer, on Flickr
IMG_0142 by Russel Baer, on Flickr
Kc2gmb1976
Visit this Community
New York, United States
Joined: January 13, 2020
KitMaker: 5 posts
Armorama: 5 posts
Posted: Saturday, March 14, 2020 - 10:30 AM UTC
Hello how are you I would like to join the build group but won't let me post and pictures I have been working on the miniart tiran 4 early for almost two months now
petbat
Visit this Community
Queensland, Australia
Joined: August 06, 2005
KitMaker: 3,353 posts
Armorama: 3,121 posts
Posted: Saturday, March 14, 2020 - 10:36 AM UTC
Nice choice Michael. Something unusual for sure. Looking forward to seeing that.

Sensational work there Russel. All the hard work is really paying off for you. Although I don't acknowledge each post, be assured I am loving them all.
petbat
Visit this Community
Queensland, Australia
Joined: August 06, 2005
KitMaker: 3,353 posts
Armorama: 3,121 posts
Posted: Saturday, March 14, 2020 - 10:48 AM UTC

Quoted Text

Hello how are you I would like to join the build group but won't let me post and pictures I have been working on the miniart tiran 4 early for almost two months now


Hi Shawn. If you explain what your issues are in a bit more detail, we maybe able to help you.

Some basics first - Where are you hosting your pictures? You can't copy and paste or link to your PC. You need to use a hosting site like Imgur
https://imgur.com/
Put the pic up on the hosting site and copy the URL address of the pic. Then open a Reply thread here.

To post your pics, use the button that looks like [ img ] in the bar just under the text field in your reply on the thread. That will set up image tags that looks like this (without the spaces I have added so you can see the text):
[ I m g]h t t p://put.url.here/image.file[/ I m g ]

Delete the 'h t tp://put.url.here/image.file' and replace that with the URL of the pic from your hosting site. Make sure the picture type (.jpg,.gif,.png, etc) is at the end of the URL address - you need to add that part yourself if you use Imgur hosting.
Repeat the click on the [ im g] button and fill in the URL for each additional pic you want to upload.

That should then show the picture/s in your reply when you hit the 'Ready to Reply' button.
Milatrydioarmour
Visit this Community
England - West Midlands, United Kingdom
Joined: January 04, 2020
KitMaker: 3 posts
Armorama: 3 posts
Posted: Monday, March 16, 2020 - 05:47 AM UTC
finally worked it out. well ive made a lot more progress and will upload some more pictures.

Russel Baer that a lot of work going on there looks good


rfbaer
Visit this Community
Texas, United States
Joined: June 12, 2007
KitMaker: 1,866 posts
Armorama: 1,696 posts
Posted: Monday, March 16, 2020 - 10:40 AM UTC
Gotcha Peter, no worries. David, thanks. Just buying the Dragon kit would have been easier, but where's the fun in that?
I think the last "hurdle" is finished, the turret basket:
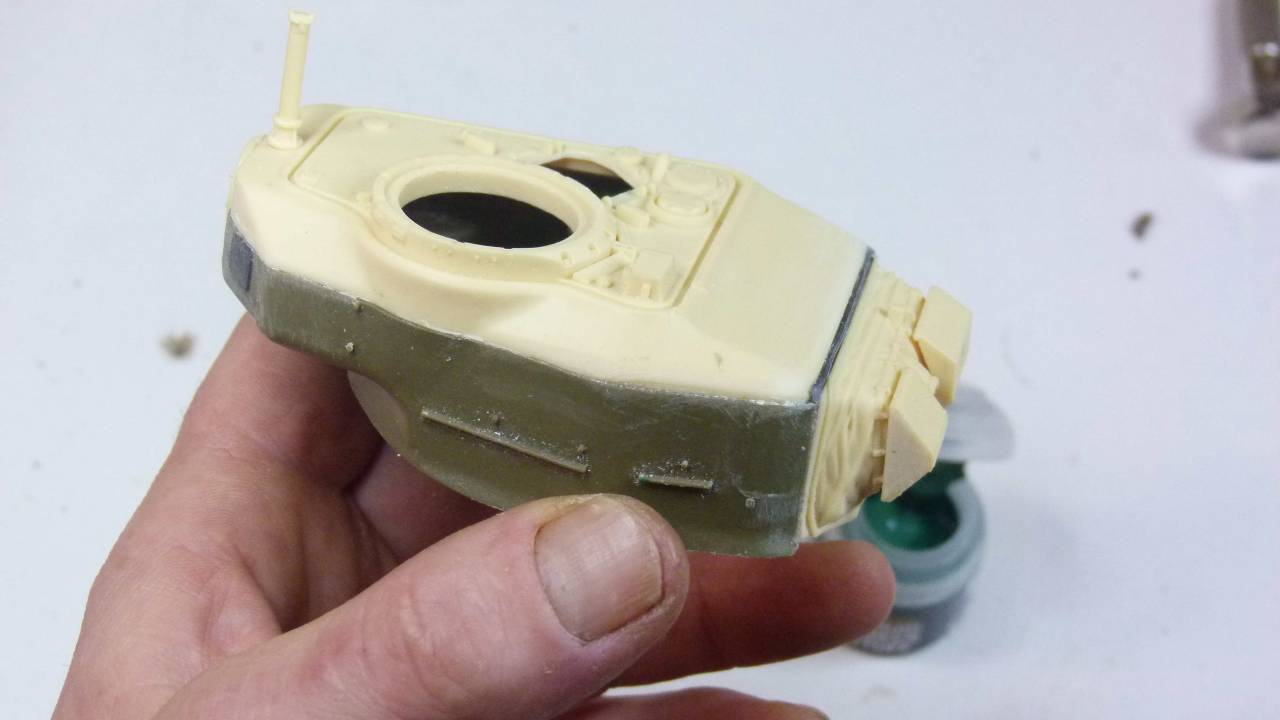
IMG_0144 by Russel Baer, on Flickr
I didn't have the complete Dragon part set, and I wasn't keen on another fragile basket after struggling with two AFV Club M60 assemblies, so I used as much wire and brass and I'm comfortable with. I think it'll work. And the hull is in primer:
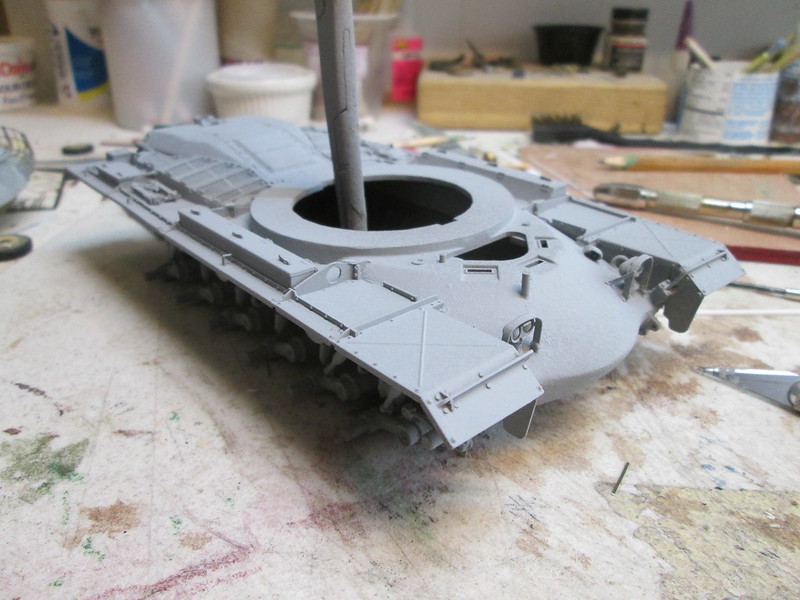
IMG_0145 by Russel Baer, on Flickr
sinsling
Visit this Community
Singapore / 新加坡
Joined: January 16, 2007
KitMaker: 86 posts
Armorama: 85 posts
Posted: Tuesday, March 17, 2020 - 03:25 AM UTC
Hi gents,

Finally getting started on this GB. Sorry to change my choice again but I've heard only good things about this kit so thought I'd give this, my first MENG kit a try.


Looking forward to this build!

Regards,
Johanan