Got Wheels? Campaign 2020
barkingdigger
 Associate Editor
#013
England - East Anglia, United Kingdom
Joined: June 20, 2008
KitMaker: 3,981 posts
Armorama: 3,403 posts
Posted: Sunday, August 30, 2020 - 03:02 AM UTC
"Glue, or Glue Not - there is no Dry-Fit" - Yoda (original script from Return of the Jedi...)
Queensland, Australia
Joined: August 06, 2005
KitMaker: 3,353 posts
Armorama: 3,121 posts
Posted: Sunday, August 30, 2020 - 08:53 AM UTC
Nigel, Comrade and Tom. All great builds guys. You are giving me the incentive to go back and finish the Horror Boss Dana...
On the Bench:
Dust, styrene scraps, paint splotches and tears.
Removed by original poster on 08/30/20 - 21:16:31 (GMT).
Removed by original poster on 08/30/20 - 21:14:53 (GMT).
France
Joined: February 20, 2012
KitMaker: 1,932 posts
Armorama: 1,907 posts
Posted: Sunday, August 30, 2020 - 09:16 AM UTC
Quoted Text
Nigel, Comrade and Tom. All great builds guys. You are giving me the incentive to go back and finish the Horror Boss Dana...
LOL, nice pun !

Uusimaa, Finland
Joined: October 01, 2016
KitMaker: 514 posts
Armorama: 171 posts
Posted: Tuesday, September 08, 2020 - 07:14 AM UTC
Better get busy with my build:
#491
Missouri, United States
Joined: April 06, 2016
KitMaker: 602 posts
Armorama: 191 posts
Posted: Sunday, September 13, 2020 - 07:11 AM UTC
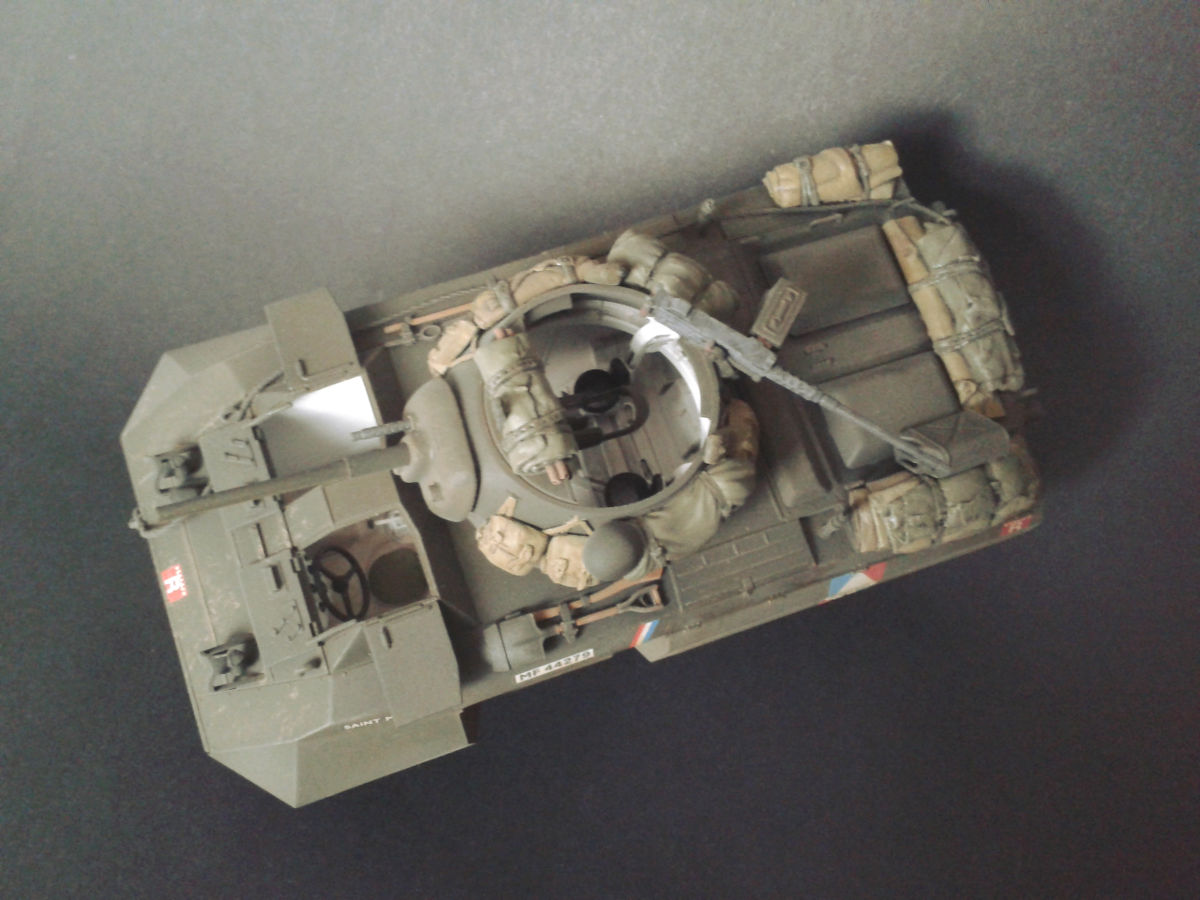
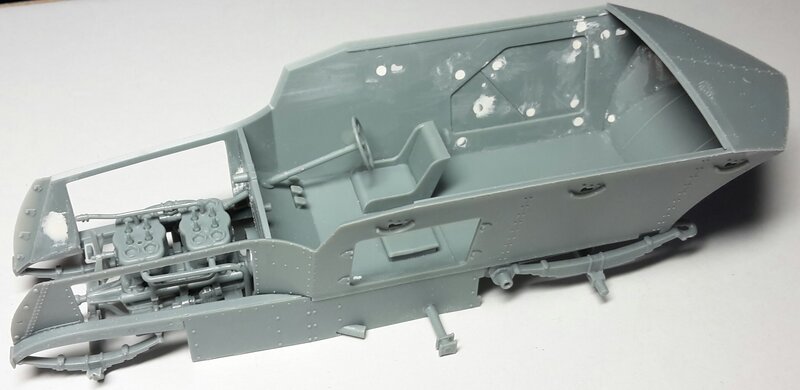
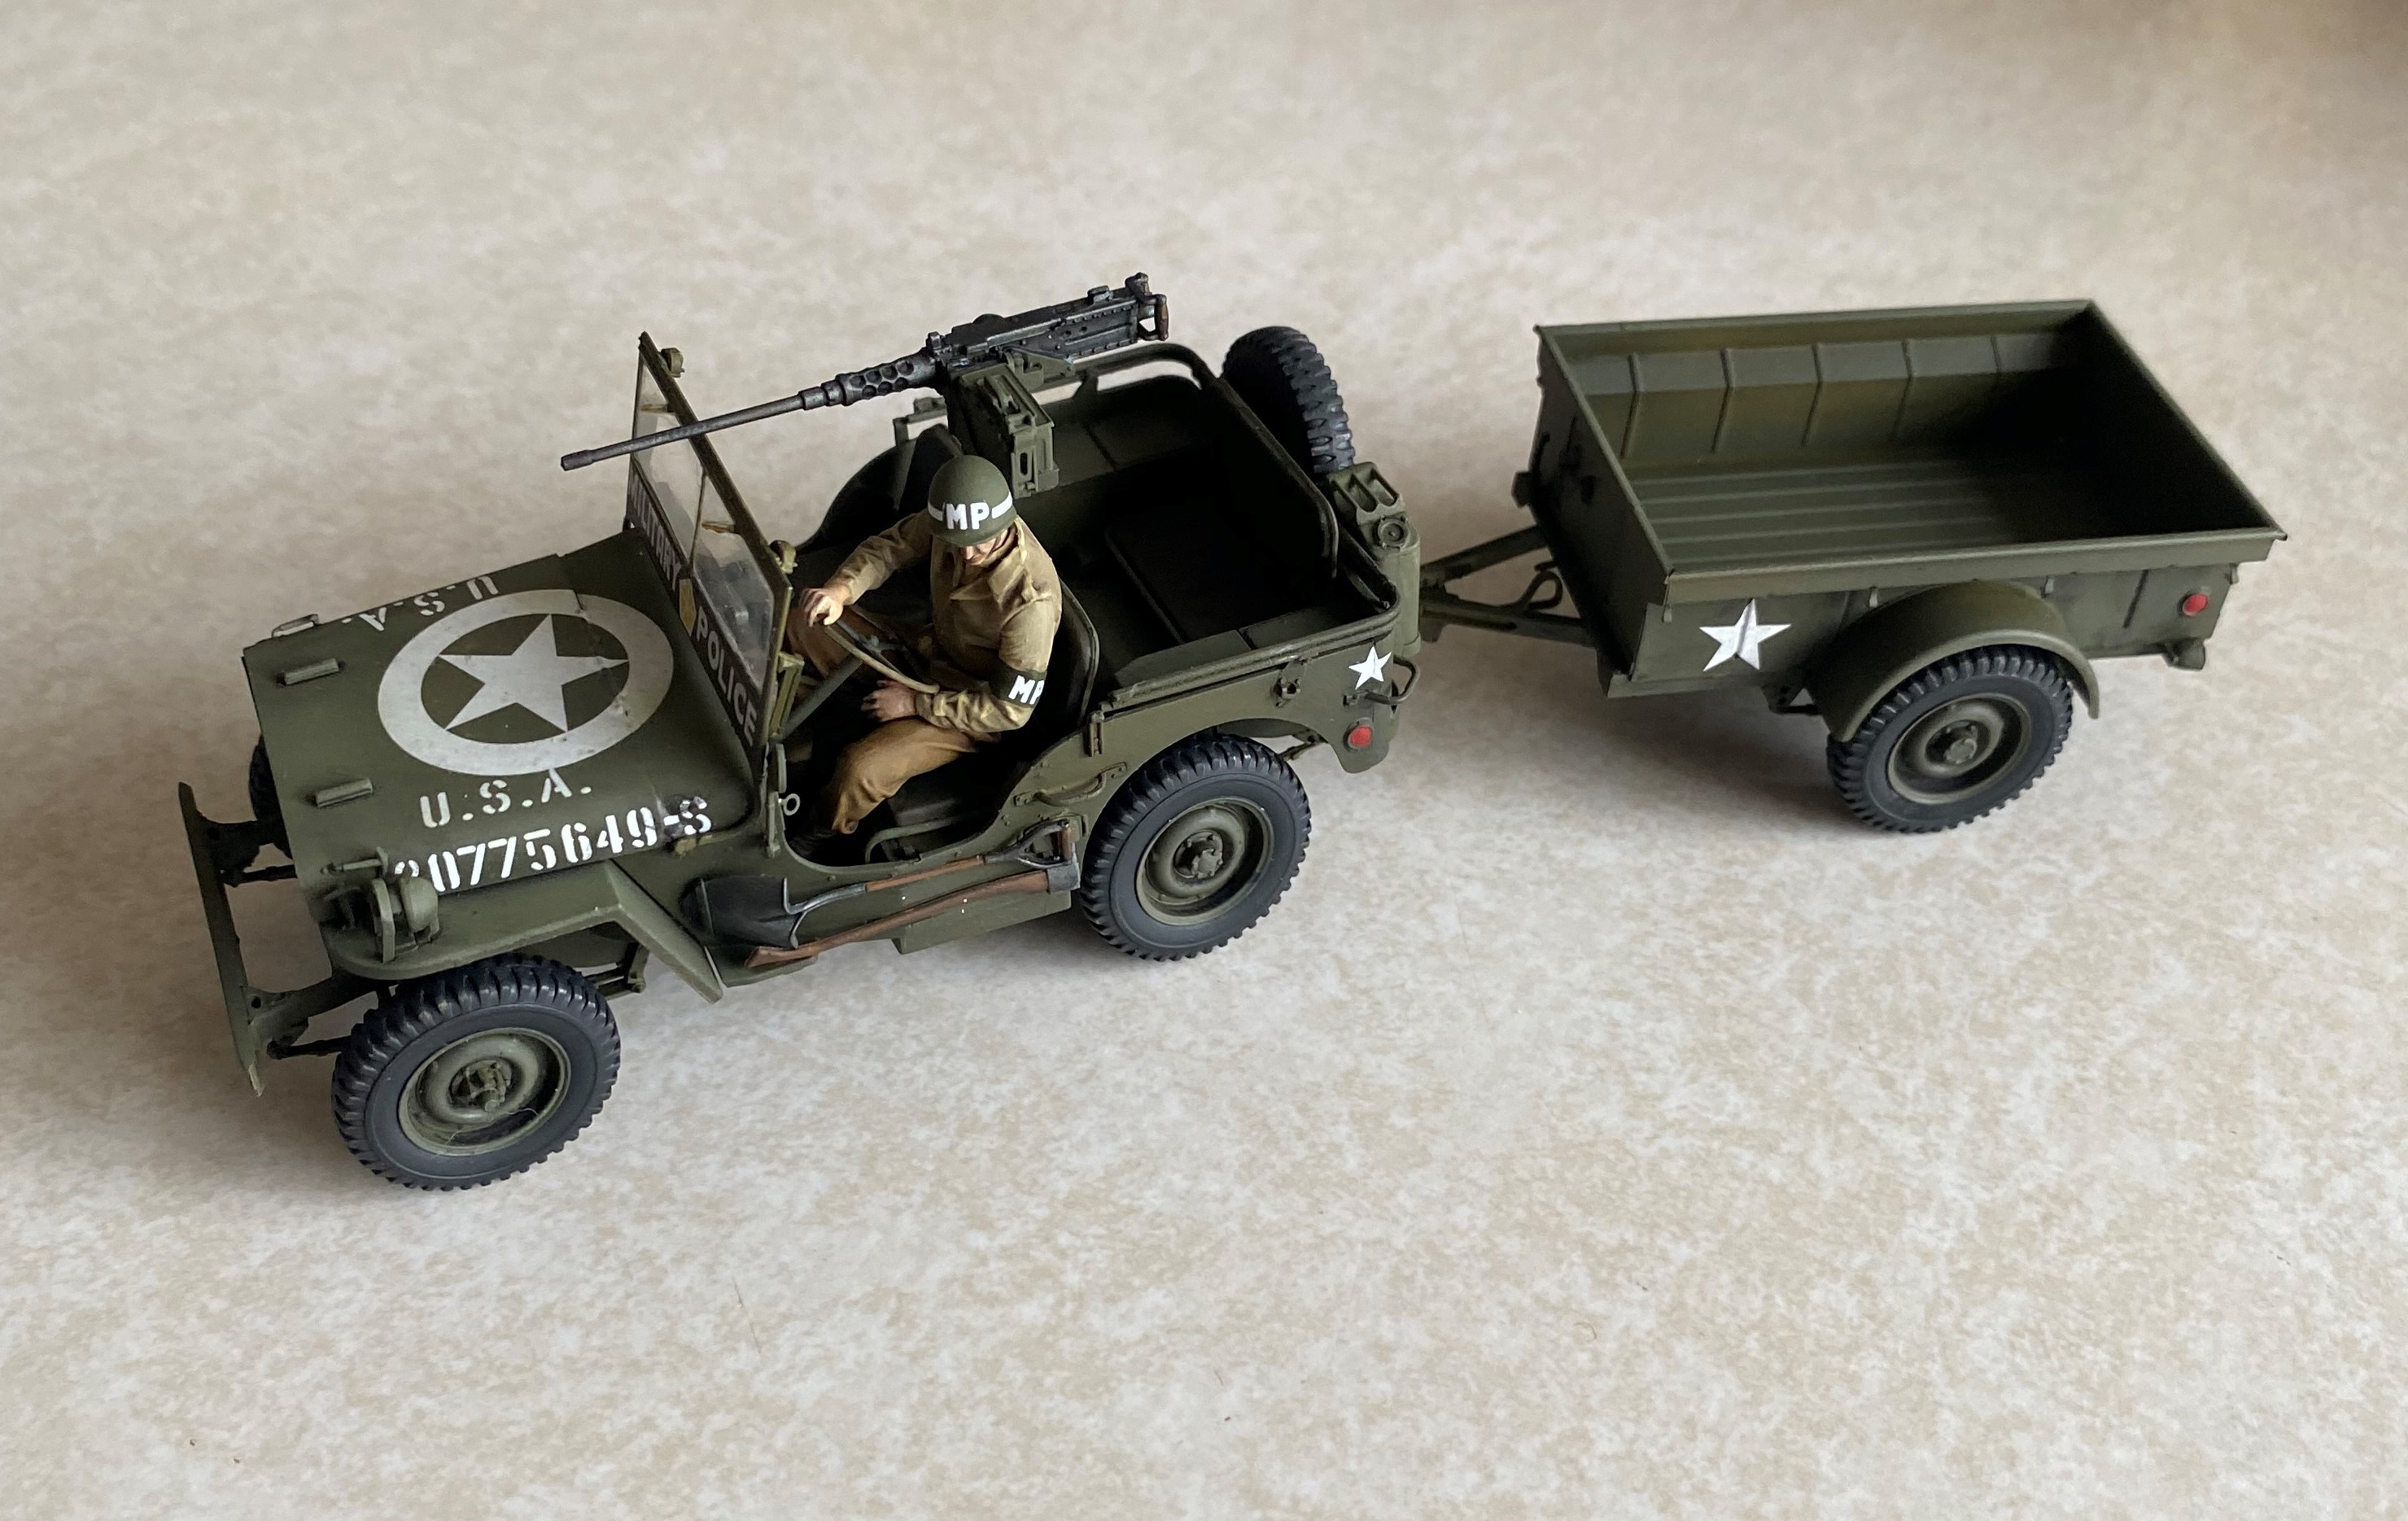
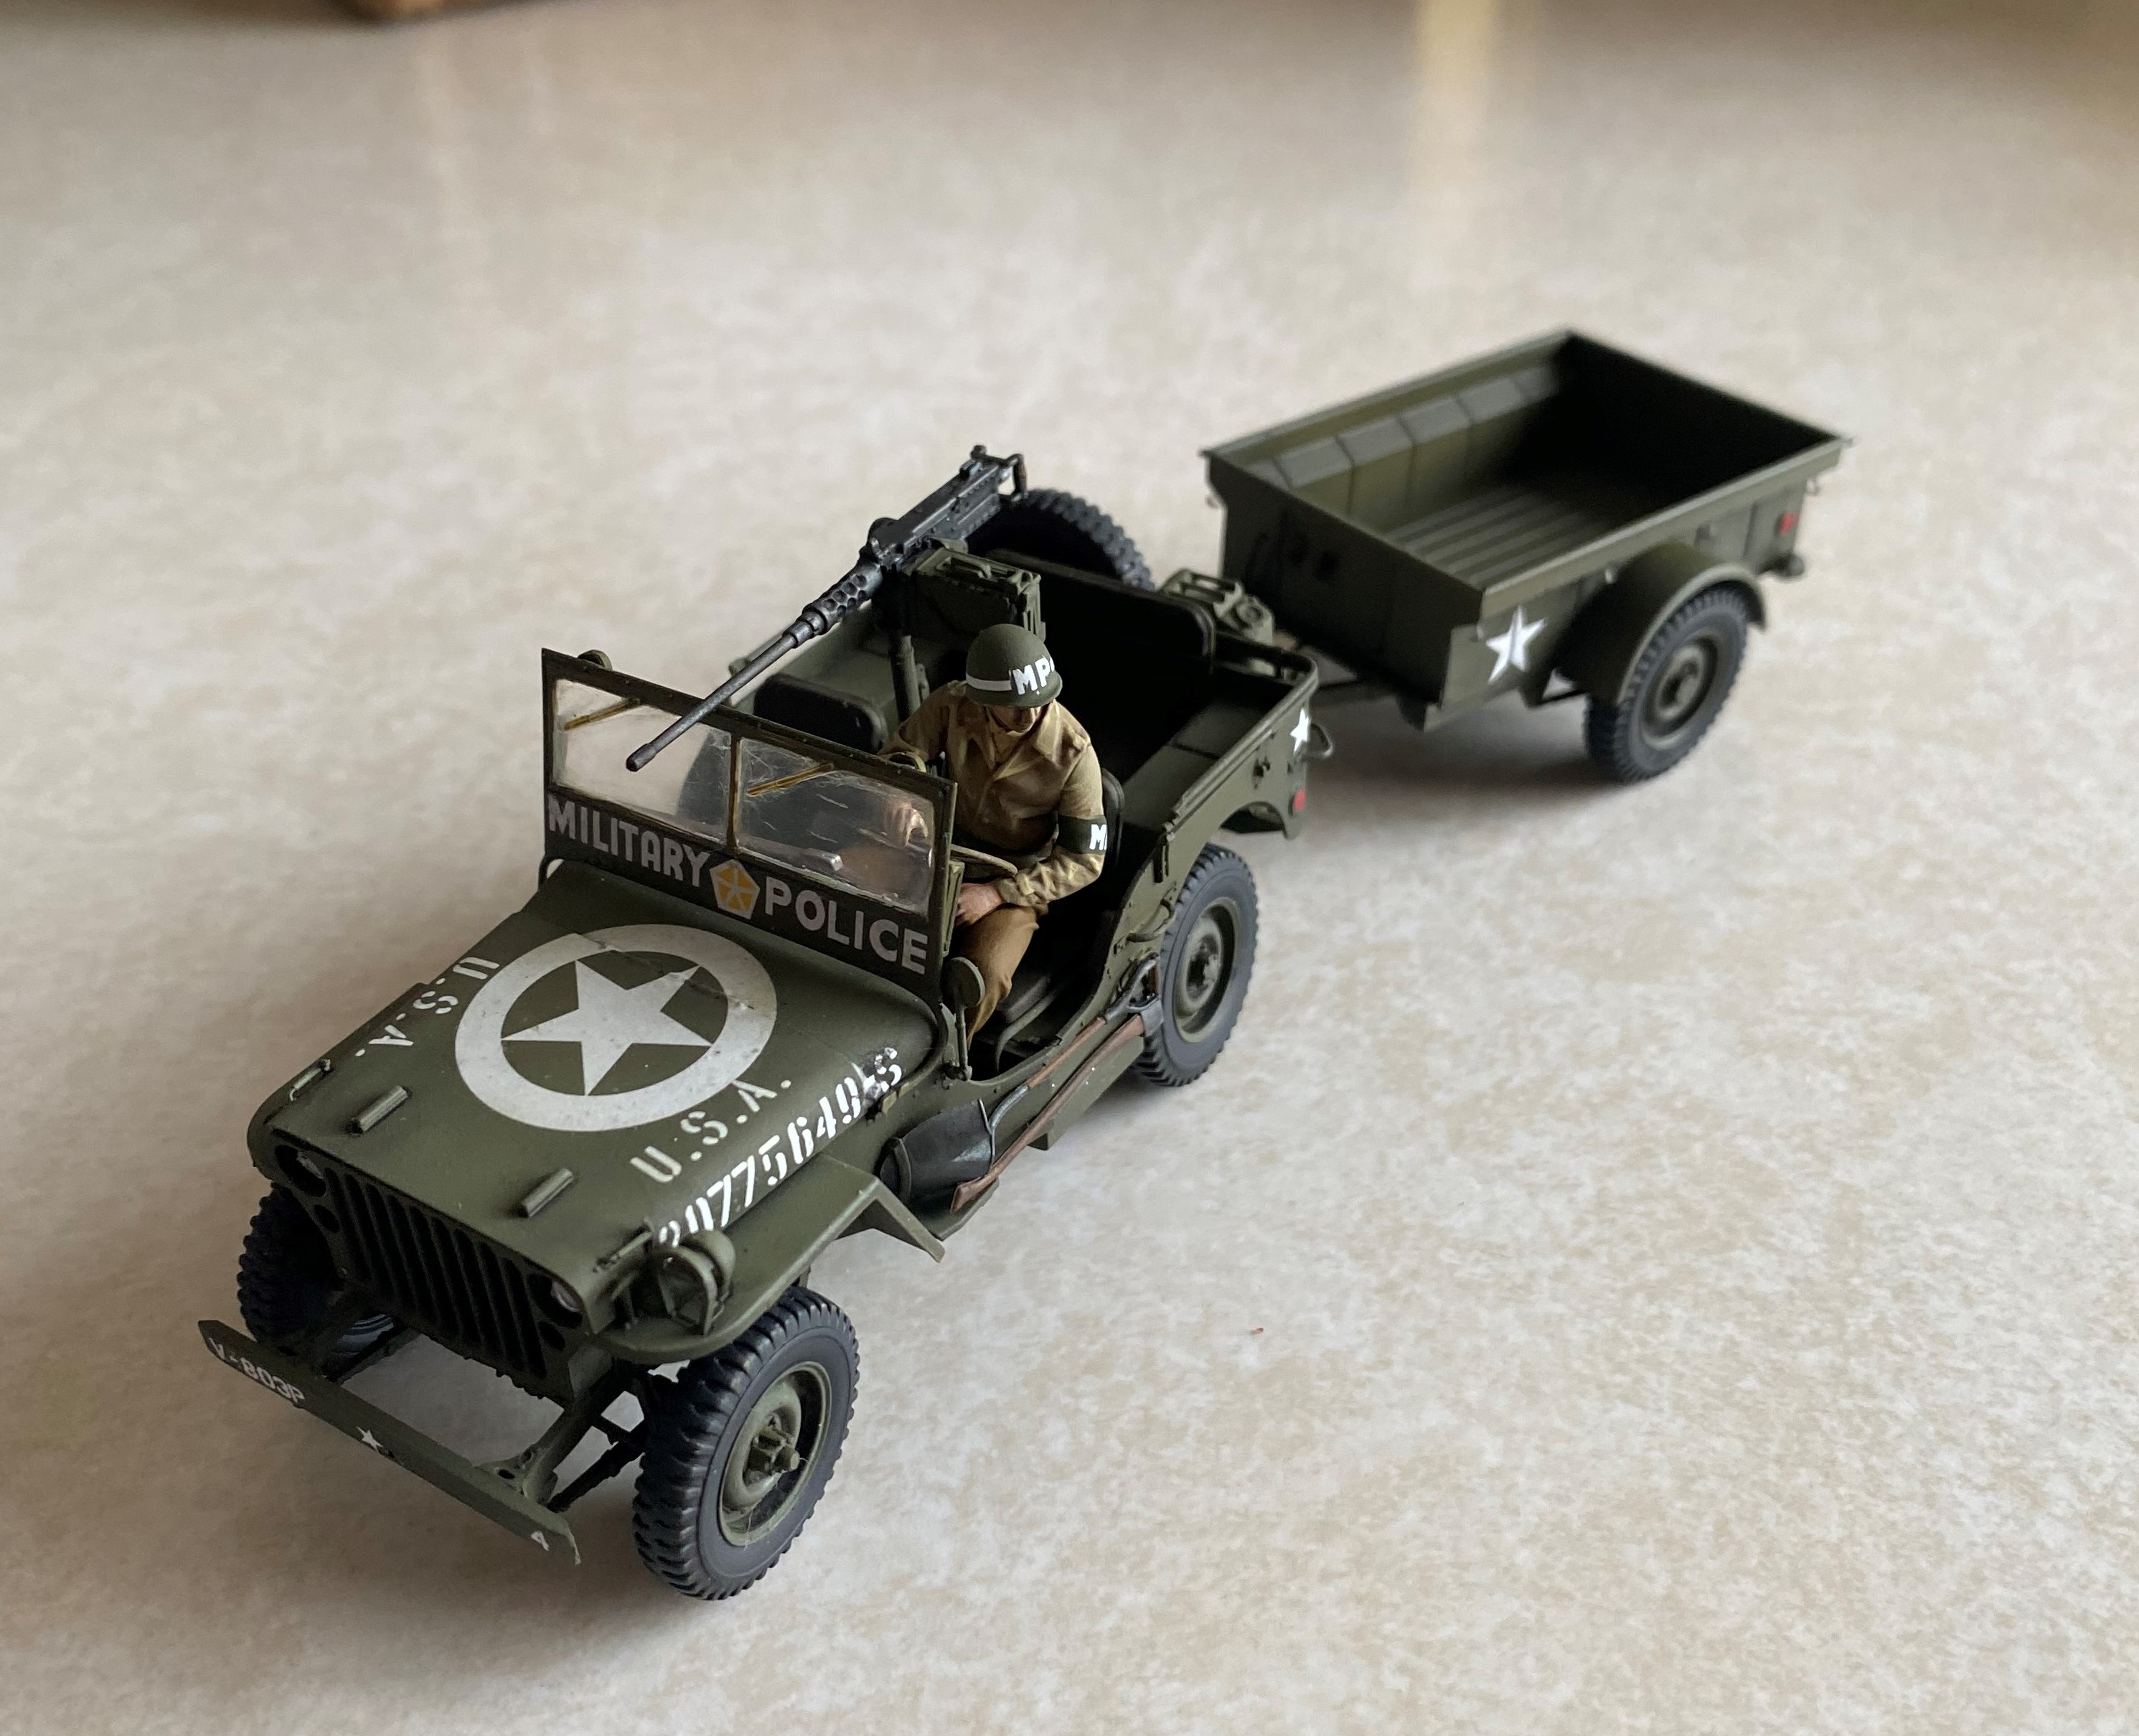
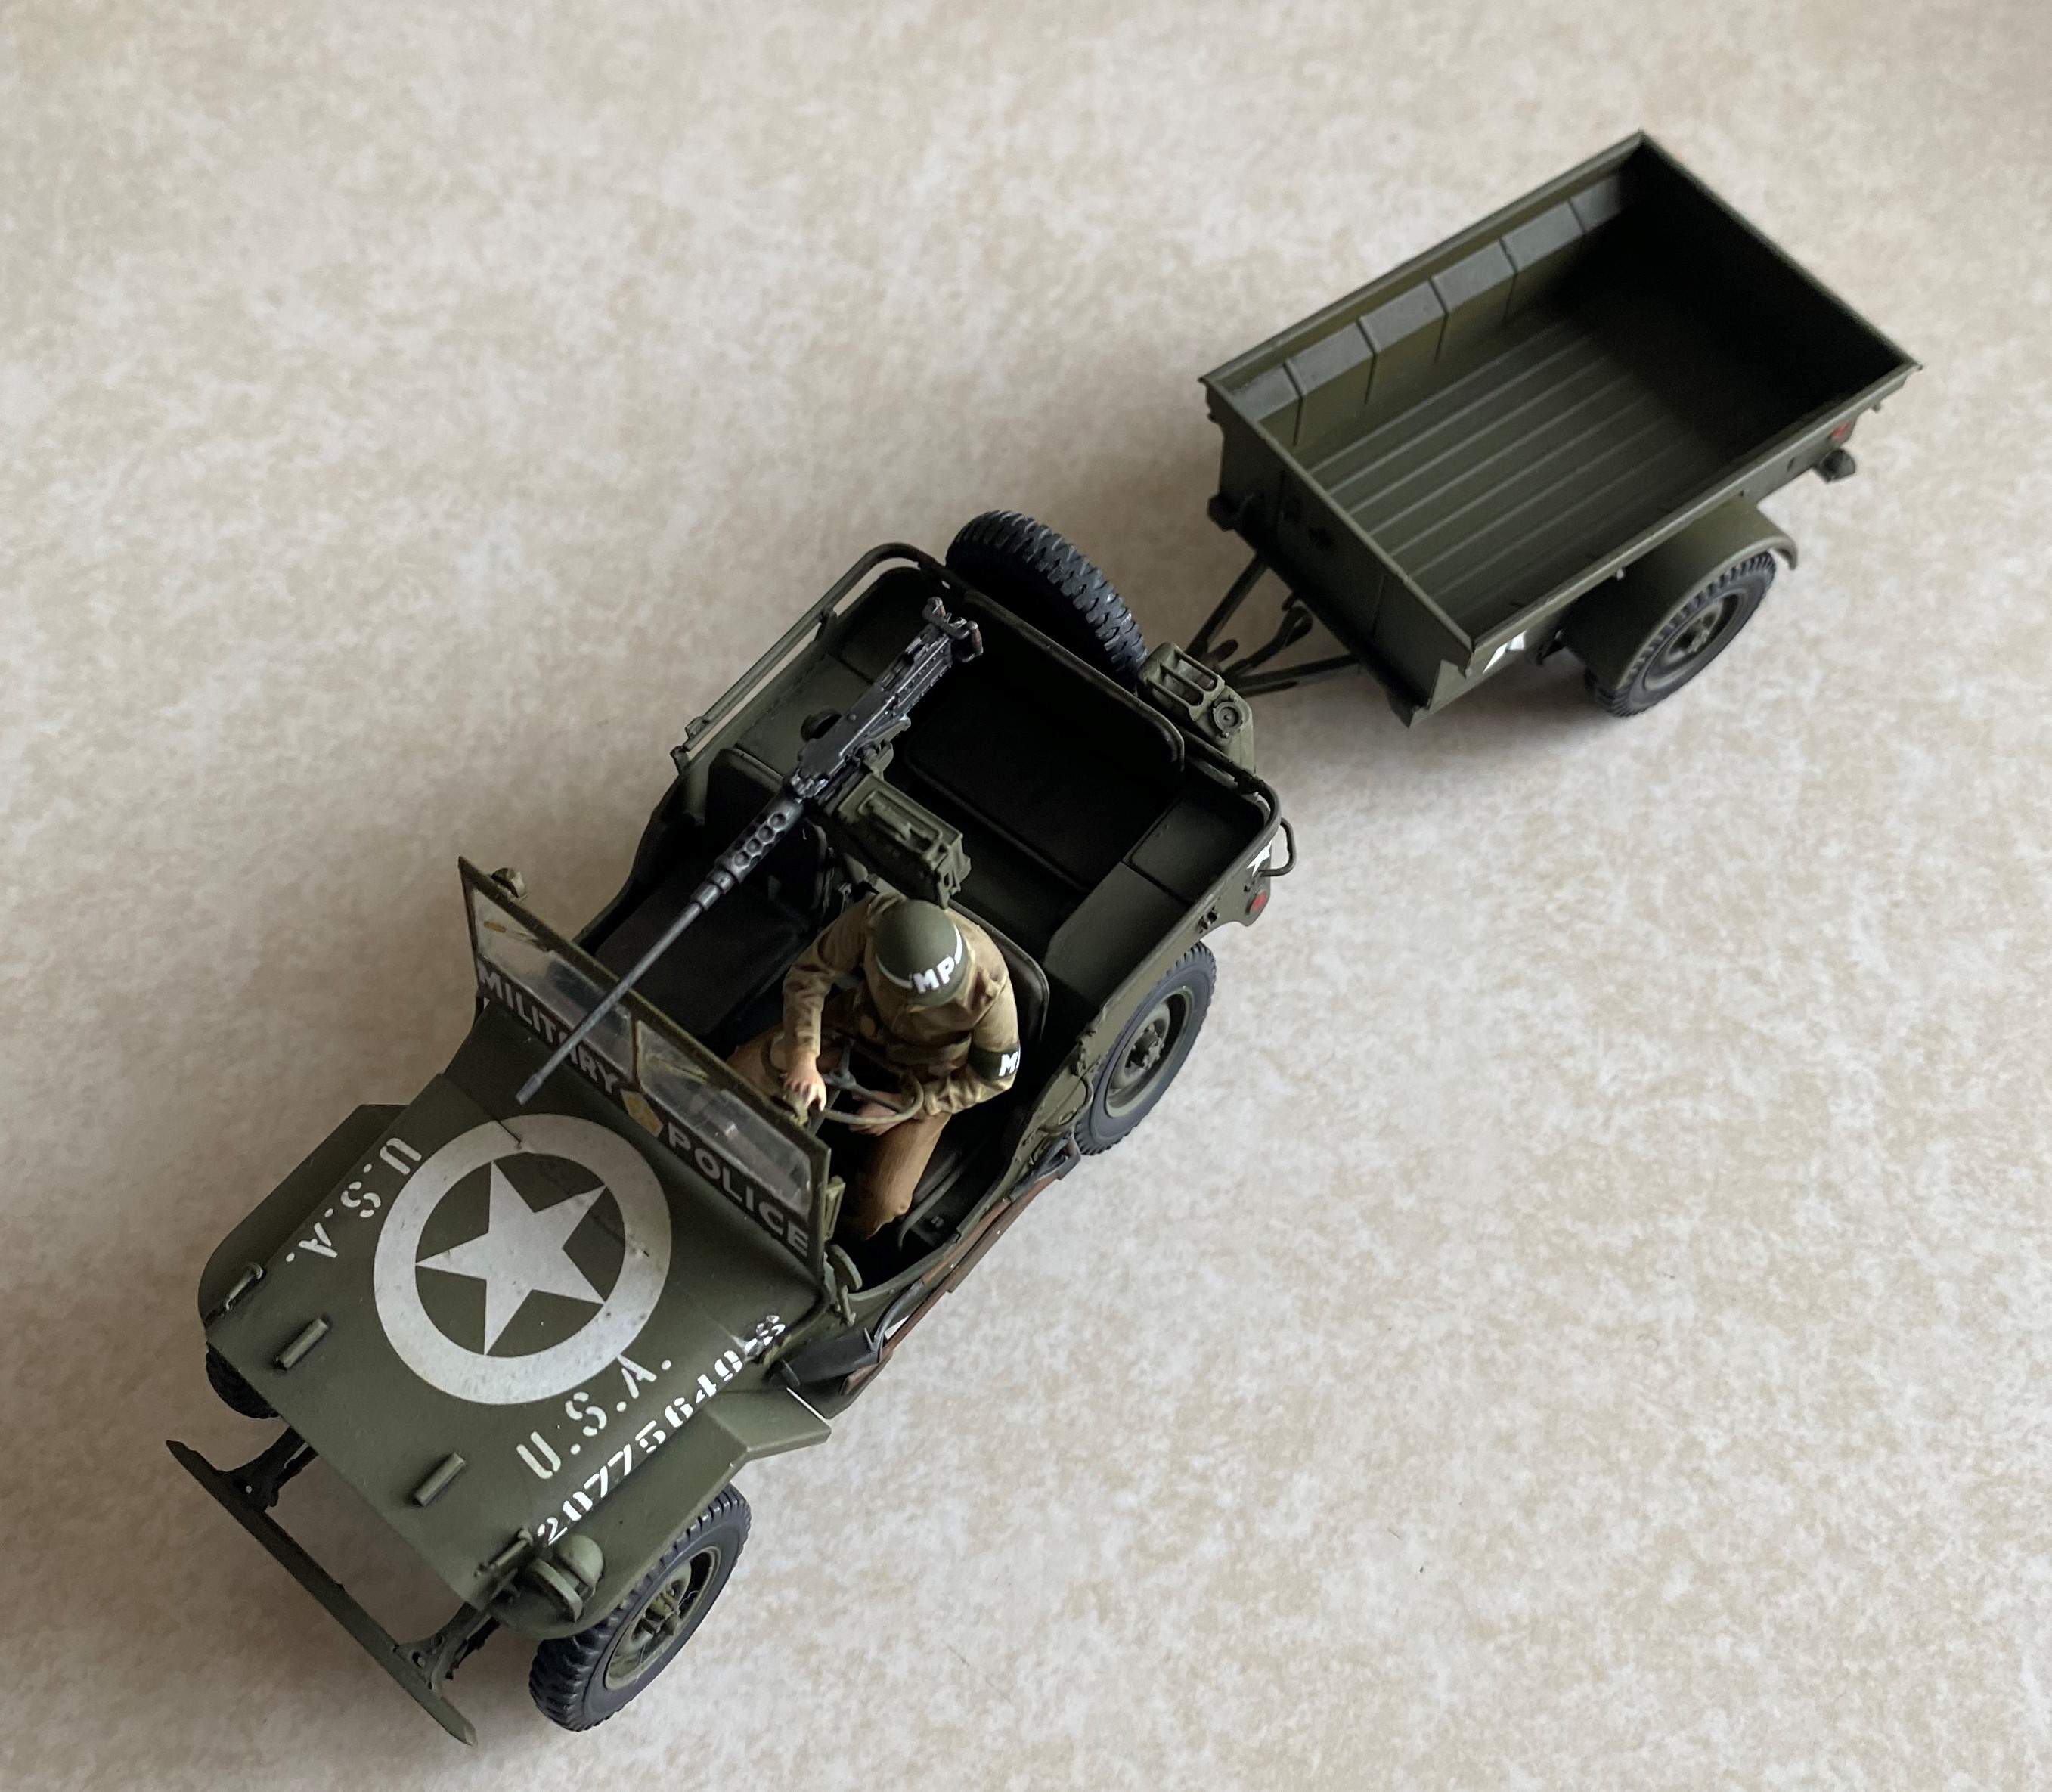
My 1/35 Takom 1/4 ton truck (aka Willies Jeep) is completed.
In all honesty I did not enjoy this build nearly as much as I thought I would. Kit had way too much flash/mold lines for a newly molded kits. The way it went together also did not foster building and painting in sub-assemblies.
The scratches and murkiness on the windscreen are purely down to user error. I masked it to paint but in a complete brain fart I pulled the masks off before I sprayed dull-coat over the kit...

Still, it looks pretty good in the end and I got to practice my figure painting which is always a bonus (painting figures is not my strong suit)
I may at some point go back and paint up some stowage for the trailer.
Images are up in the gallery.
Thank you everyone for the campaign!
Currently working on: Multiple Campaigns :P
Queensland, Australia
Joined: August 06, 2005
KitMaker: 3,353 posts
Armorama: 3,121 posts
Posted: Sunday, September 13, 2020 - 09:22 AM UTC
I think the dusty scratched finish on the windscreen adds character Rory. Nice build overall.

Plenty of time Pasi. You are well under way.
On the Bench:
Dust, styrene scraps, paint splotches and tears.
Klaus-Adler
Campaigns Administrator Scotland, United Kingdom
Joined: June 08, 2015
KitMaker: 1,505 posts
Armorama: 840 posts
Posted: Monday, September 14, 2020 - 12:48 AM UTC
well the wheels are on the bus so to speak, at long last. sorry for the poor quality picture i was using my mobile phone.
Colorado, United States
Joined: December 25, 2004
KitMaker: 3,770 posts
Armorama: 2,263 posts
Posted: Wednesday, September 16, 2020 - 12:11 PM UTC
My, there are some FINE lookin' builds ya'll!! Not to mention some serious inspiration!
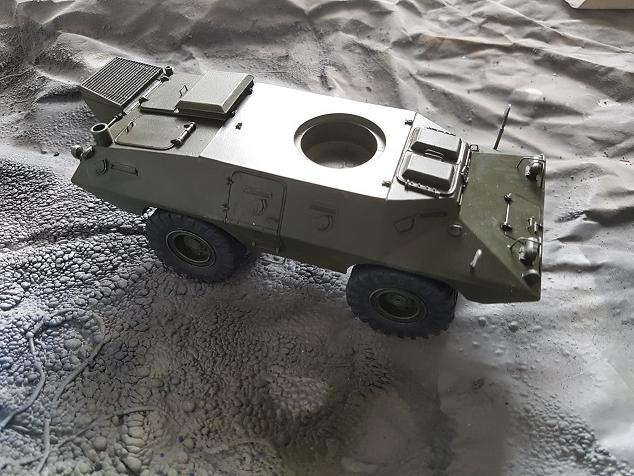
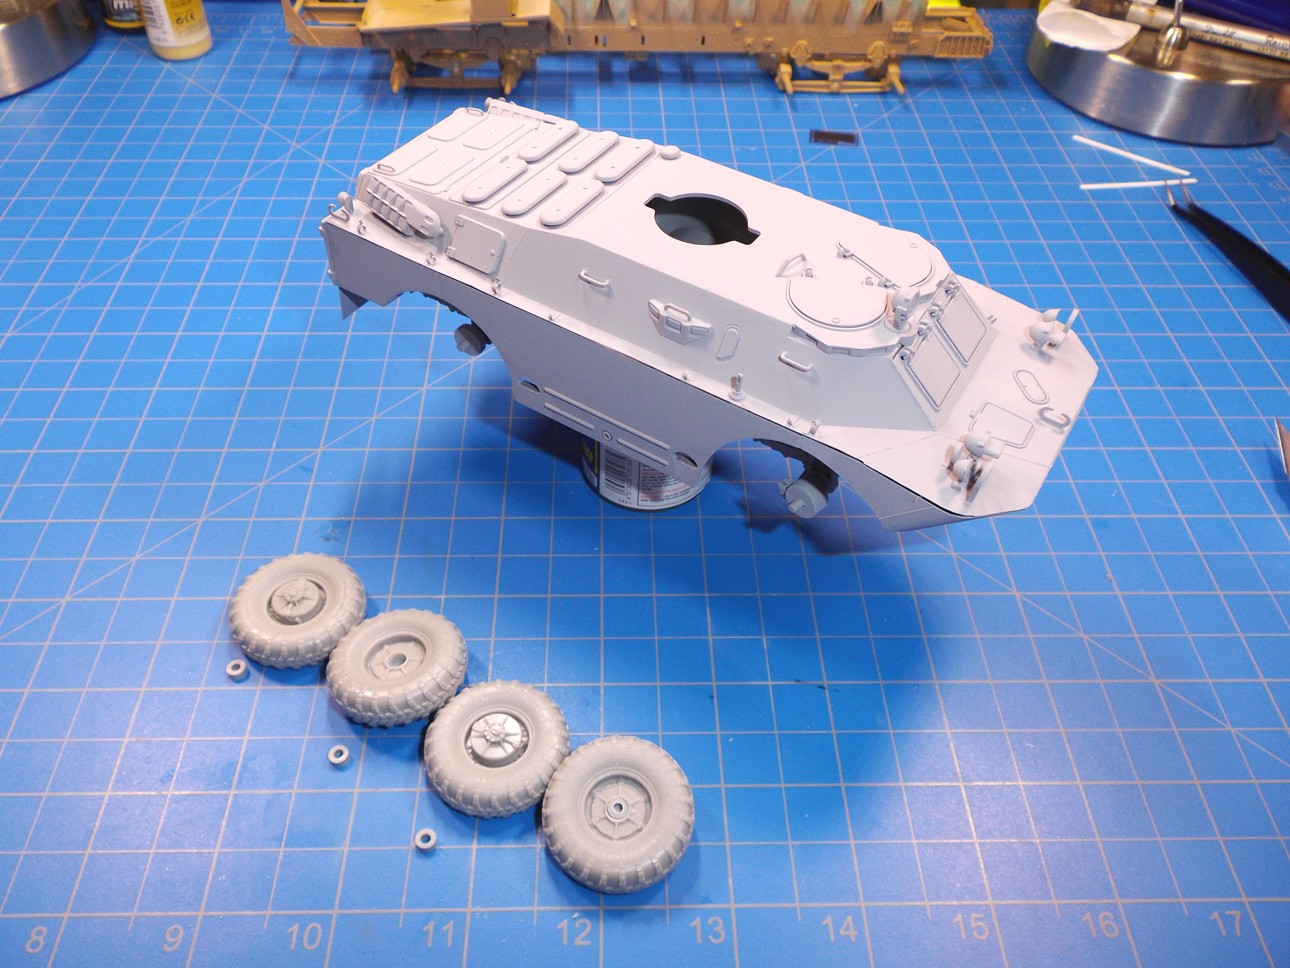
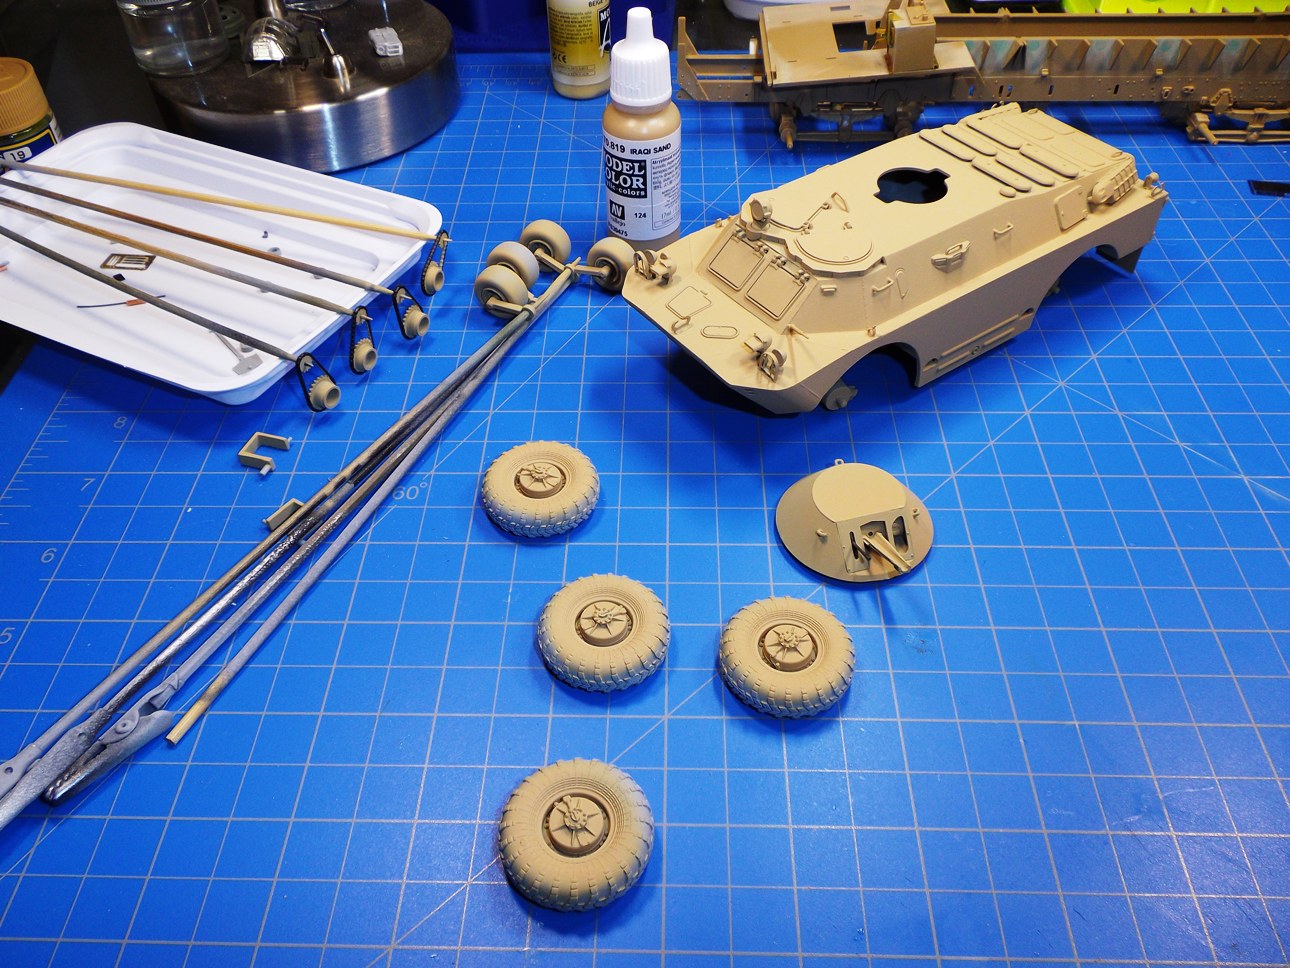
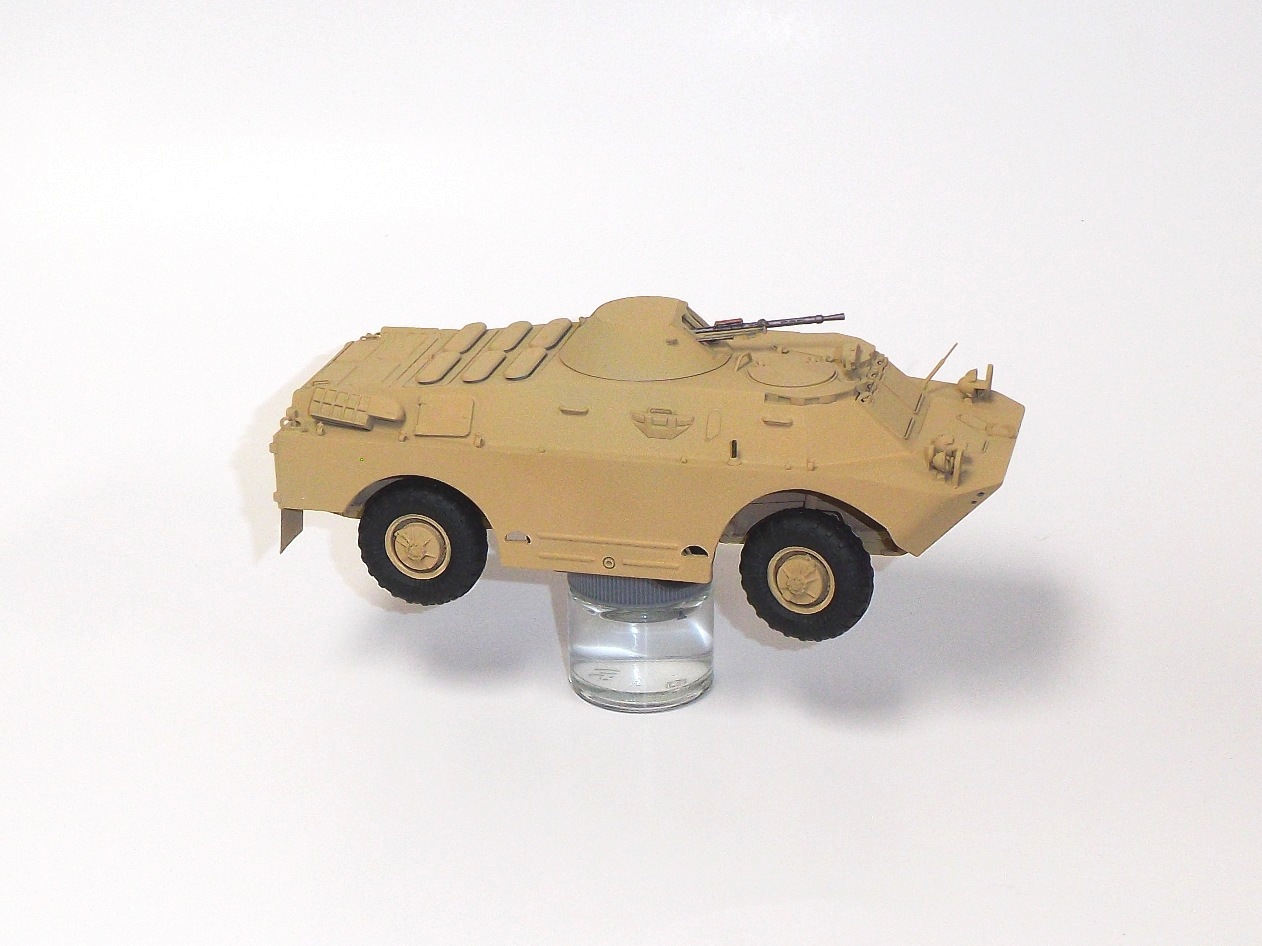
My BRDM's hull halves have been primed. Most likely tomorrow I'll seal 'em up. So, what's left? Mirror, trim vane on the front, paint and attach the main gun and paint the secondary after I shoot the "Iraqui Sand," whatever that is, and the main wheels and secondary wheels, oh, I have some 3/64th's copper tube coming to remake the exhaust pipes. 'Bout it I think.
Mike

Colorado, United States
Joined: December 25, 2004
KitMaker: 3,770 posts
Armorama: 2,263 posts
Posted: Tuesday, September 22, 2020 - 05:53 AM UTC
Queensland, Australia
Joined: August 06, 2005
KitMaker: 3,353 posts
Armorama: 3,121 posts
Posted: Tuesday, September 22, 2020 - 07:59 AM UTC
Nothing perks up the spirit like a delivery Mike.

On the Bench:
Dust, styrene scraps, paint splotches and tears.
England - South West, United Kingdom
Joined: April 28, 2020
KitMaker: 38 posts
Armorama: 35 posts
Posted: Tuesday, September 22, 2020 - 11:09 PM UTC
Well despite being a troublesome kit for you, it's come out very well. I'm not so sure figure painting isn't your strong suit as you claim, the figure looks great.
Last built: Tamiya Matilda Mk III/IV
On the Bench: Queen of the desert diorama, Revell P204(f)
In the stash: MiniArt SU-122 mid production, Revell Hawker Hunter FGA 9, Hobbyboss King Tiger (Henschel 1944 production) w/zimmerit
England - South West, United Kingdom
Joined: April 28, 2020
KitMaker: 38 posts
Armorama: 35 posts
Posted: Tuesday, September 22, 2020 - 11:16 PM UTC
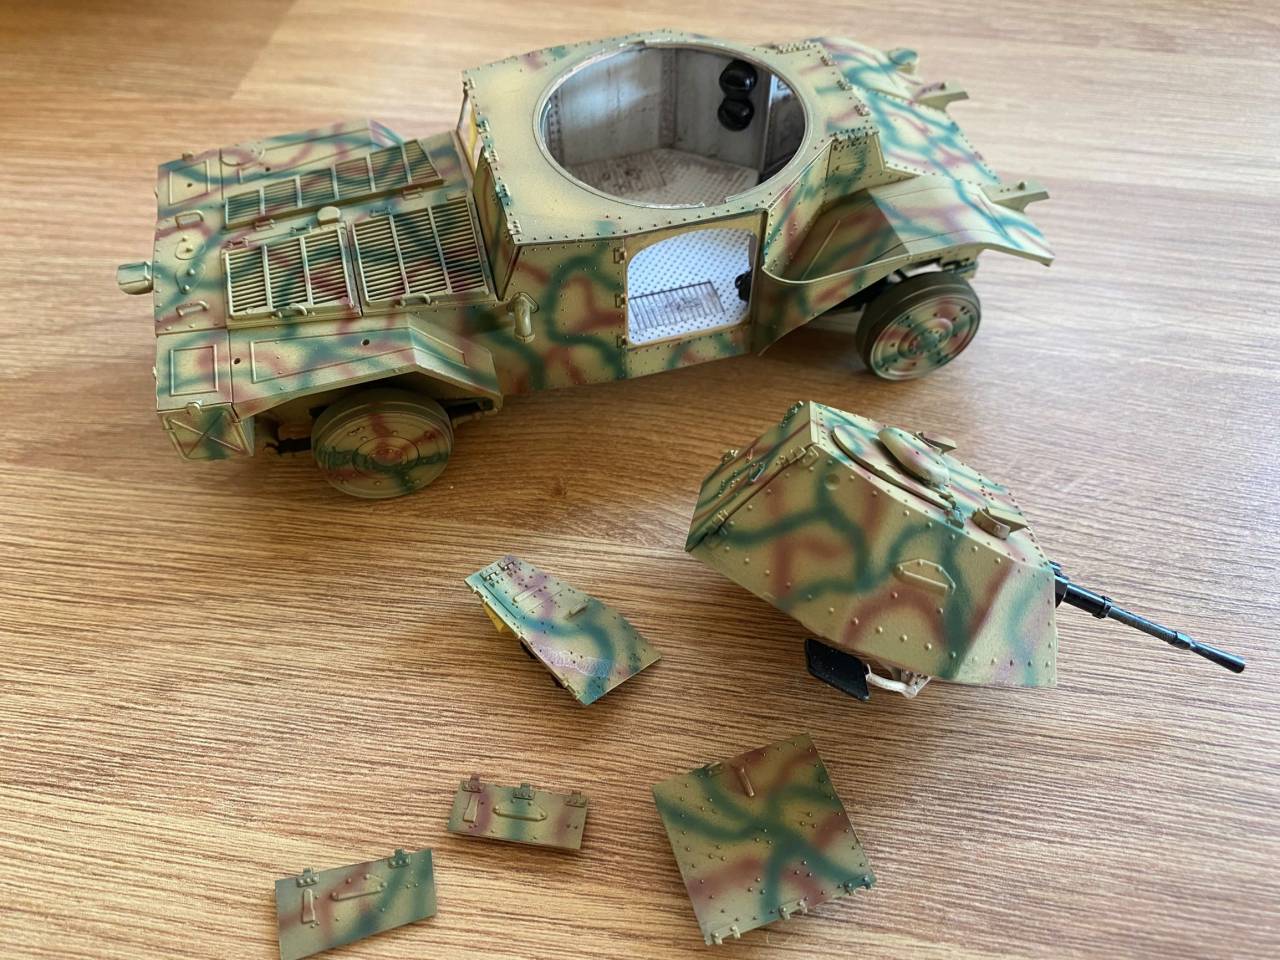
Well for as few reason's, fell behind on my build a bit, but got the base coat down now. Weathering next.
The coarseness of the paintjob is of course for added realism as would be field applied and in no way connected whatsoever to my first attempt at free handing a camo pattern with an airbrush!

Last built: Tamiya Matilda Mk III/IV
On the Bench: Queen of the desert diorama, Revell P204(f)
In the stash: MiniArt SU-122 mid production, Revell Hawker Hunter FGA 9, Hobbyboss King Tiger (Henschel 1944 production) w/zimmerit
#491
Missouri, United States
Joined: April 06, 2016
KitMaker: 602 posts
Armorama: 191 posts
Posted: Wednesday, September 23, 2020 - 02:57 AM UTC
Quoted Text
I'm not so sure figure painting isn't your strong suit as you claim, the figure looks great.
Thank you. I try to do every figure just a bit better than the one previously. I have also been watching a lot of youtube tutorials, especially for painting faces.
Currently working on: Multiple Campaigns :P
Queensland, Australia
Joined: August 06, 2005
KitMaker: 3,353 posts
Armorama: 3,121 posts
Posted: Wednesday, September 23, 2020 - 07:52 AM UTC
Quoted Text
... and in no way connected whatsoever to my first attempt at free handing a camo pattern with an airbrush!
[/img]
Well, the crew member was probably not a spray painter by trade, so he did a very good job on his ride, for a novice...

On the Bench:
Dust, styrene scraps, paint splotches and tears.
England - South West, United Kingdom
Joined: April 28, 2020
KitMaker: 38 posts
Armorama: 35 posts
Posted: Thursday, September 24, 2020 - 09:38 AM UTC
Quoted Text
Quoted Text
... and in no way connected whatsoever to my first attempt at free handing a camo pattern with an airbrush!
[/img]
Well, the crew member was probably not a spray painter by trade, so he did a very good job on his ride, for a novice...
youre too kind.
Last built: Tamiya Matilda Mk III/IV
On the Bench: Queen of the desert diorama, Revell P204(f)
In the stash: MiniArt SU-122 mid production, Revell Hawker Hunter FGA 9, Hobbyboss King Tiger (Henschel 1944 production) w/zimmerit
United States
Joined: June 02, 2013
KitMaker: 202 posts
Armorama: 199 posts
Posted: Saturday, September 26, 2020 - 01:36 AM UTC
Finished up my unfinished business with the FT, and now I'm back with my 39M CSABA
Here's the turret, mostly done
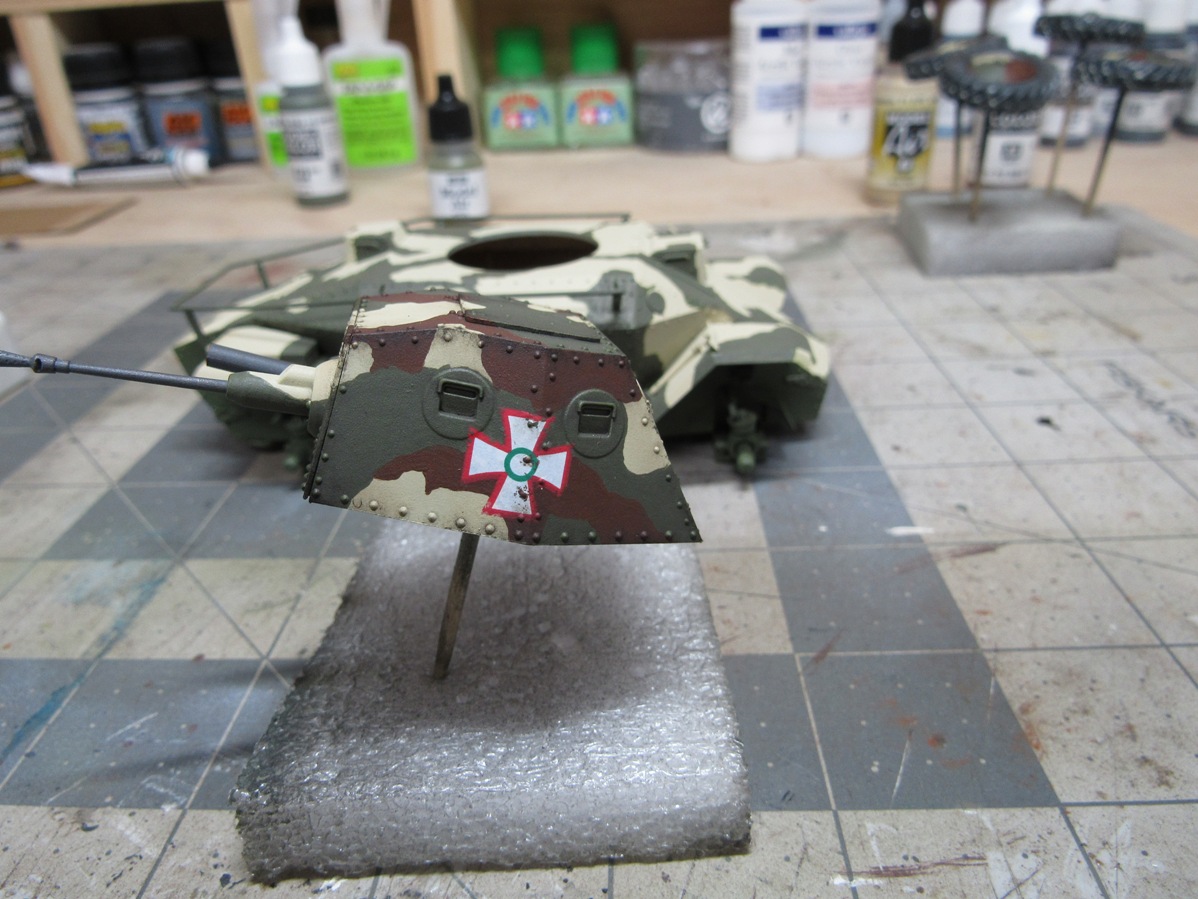
I have to say these decals were horrible. I've built plenty of HobbyBoss kits before and never had issues with their decals. Don't know if I got a bad batch or they had a new supplier for the kit or something, but these were just bad. Would not come off the paper and ripped easily. Tried hiding it with some chipping and oil paint blending, it's meh. Other side is about the same too. I'll add a little streaking, and then I'll call the turret done.
The main body still needs another coat of green, then I need to mark out the brown + do two coats. Hopefully the decals go better on the body since there are a few of them. On to more painting...
Colorado, United States
Joined: December 25, 2004
KitMaker: 3,770 posts
Armorama: 2,263 posts
Posted: Sunday, September 27, 2020 - 04:01 AM UTC
Vallejo's "Iraqi Sand."
What's left? Paint the tires - main and secondary, make and install the little exhaust pipes, install the main gun, detail painting here and there, determine what, if any, decals to apply. Weathering?
Mike
Queensland, Australia
Joined: August 06, 2005
KitMaker: 3,353 posts
Armorama: 3,121 posts
Posted: Sunday, September 27, 2020 - 09:20 AM UTC
Mike and James. They look fantastic guys.
On the Bench:
Dust, styrene scraps, paint splotches and tears.
Colorado, United States
Joined: December 25, 2004
KitMaker: 3,770 posts
Armorama: 2,263 posts
Posted: Monday, September 28, 2020 - 05:47 AM UTC
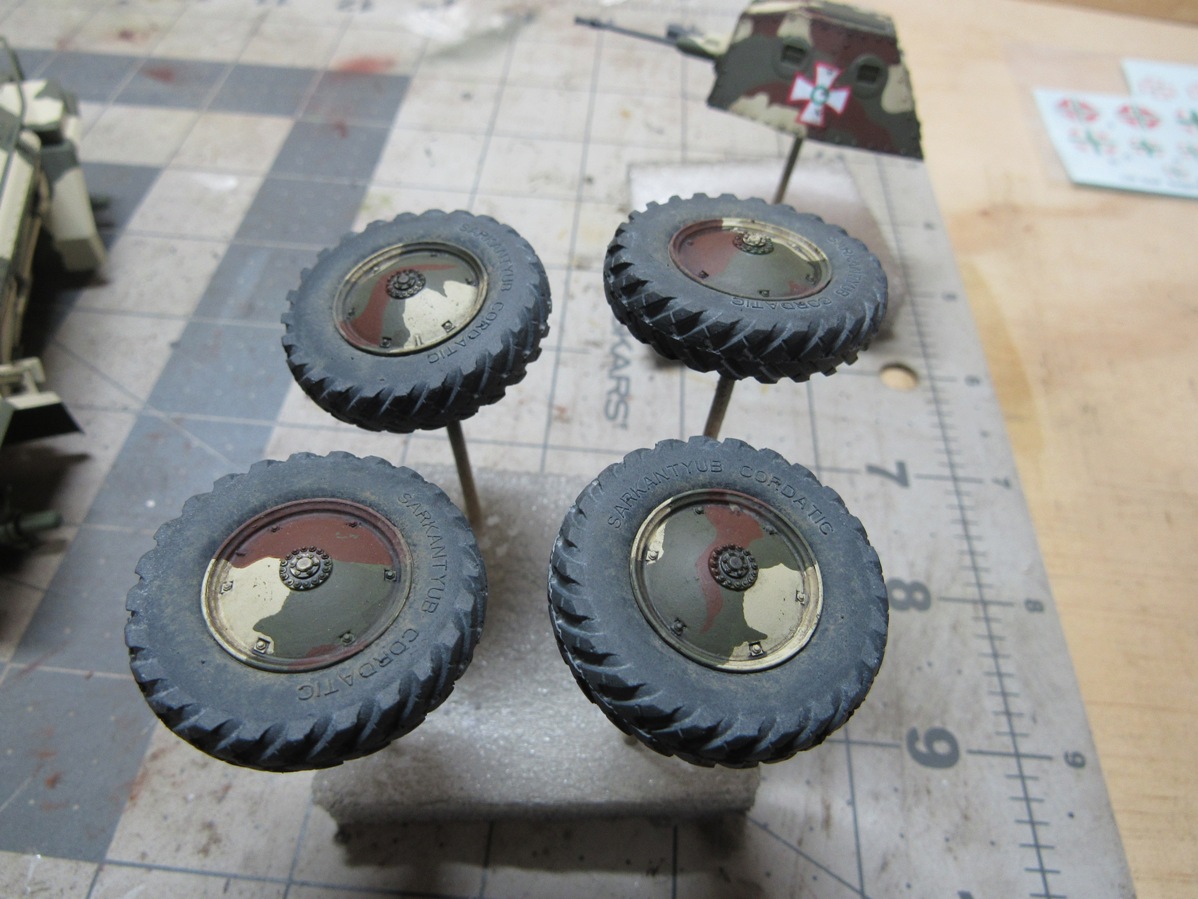
The fun of painting tires.
Mike

United States
Joined: June 02, 2013
KitMaker: 202 posts
Armorama: 199 posts
Posted: Monday, September 28, 2020 - 11:55 AM UTC
Quoted Text
The fun of painting tires.
I had the bright idea of painting vinyl tires, and then placing them on the rims. Needless to say there was a lot of flaking and touch up painting to do. So it could always be less fun! On the plus side, I now understand why people go for resin tires and will use them for future builds.
Came out alright in the end
Going through my references I was inspired by a picture of a fascine attached to the front tow hooks. So I decided to recreate it
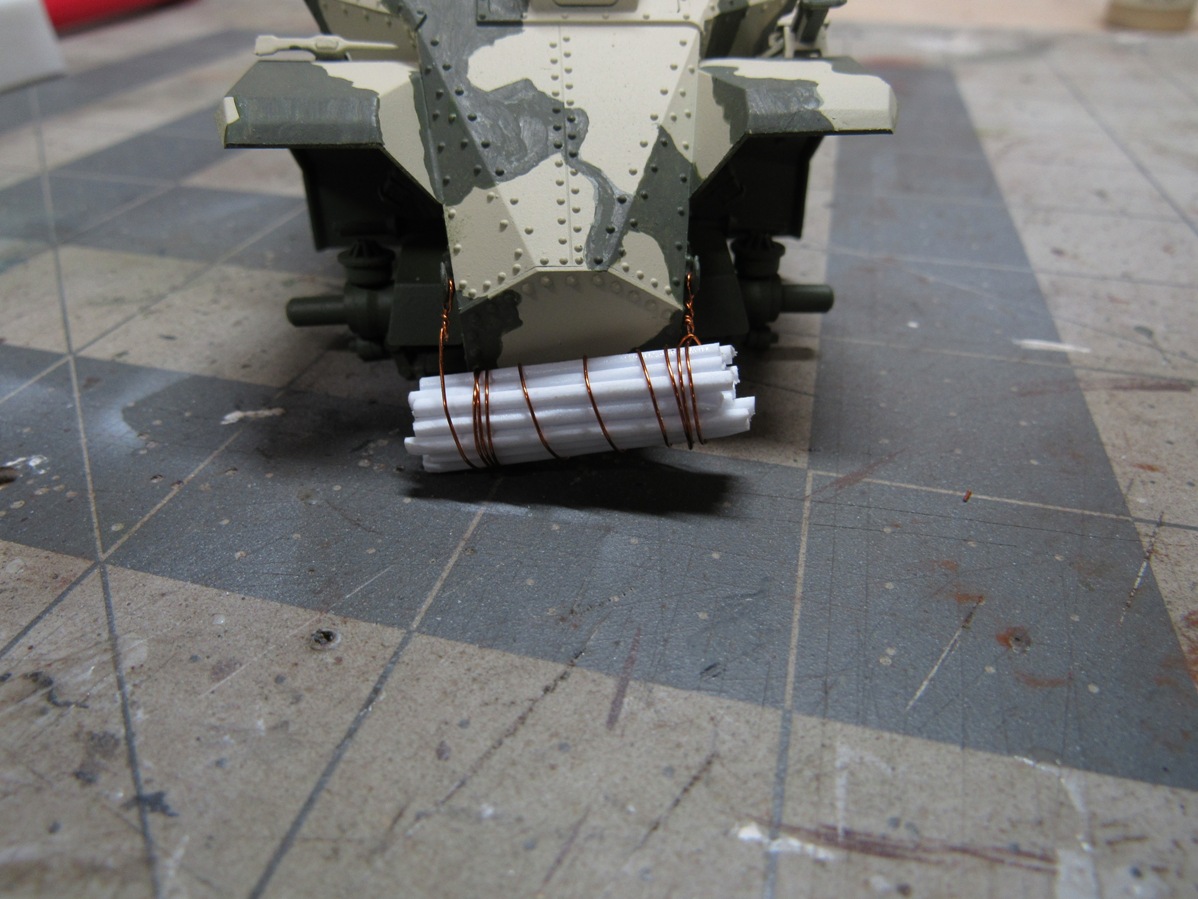
Just styrene rods in random lengths with rough spots sanded into them, wrapped in copper wire. A little springy right now, but when I glue it in place I'll take care to get the wires tight off the hooks.
I think I may be doing this to avoid painting more camo...
Queensland, Australia
Joined: August 06, 2005
KitMaker: 3,353 posts
Armorama: 3,121 posts
Posted: Tuesday, September 29, 2020 - 09:07 AM UTC
Quoted Text
Quoted Text
The fun of painting tires.
I mostly use resin replacements, but when I do use vinyl, my method of attack is to just rough them up with a nylon kitchen scourer to take off the shine. Make sure all the rim has a good primer coat and solid base coat to make sure no vinyl touches bare plastic (high probability that they will react with each over time and the vinyl will eat into the plastic), then fit the tyre. A good scrub with pigment powder, using a pigment fixer to hold the pigment in the tyre recesses and you are done. This avoids all the flaking and possible 'tacky forever' issues a lot of people get in painting vinyl.
On the Bench:
Dust, styrene scraps, paint splotches and tears.
United States
Joined: June 02, 2013
KitMaker: 202 posts
Armorama: 199 posts
Posted: Thursday, October 01, 2020 - 11:55 AM UTC
Quoted Text
Quoted Text
Quoted Text
The fun of painting tires.
I mostly use resin replacements, but when I do use vinyl, my method of attack is to just rough them up with a nylon kitchen scourer to take off the shine. Make sure all the rim has a good primer coat and solid base coat to make sure no vinyl touches bare plastic (high probability that they will react with each over time and the vinyl will eat into the plastic), then fit the tyre. A good scrub with pigment powder, using a pigment fixer to hold the pigment in the tyre recesses and you are done. This avoids all the flaking and possible 'tacky forever' issues a lot of people get in painting vinyl.
That's typically the method I had been following, except for the scouring part. I'll use that next time I'm stuck with vinyl tires though.
Colorado, United States
Joined: December 25, 2004
KitMaker: 3,770 posts
Armorama: 2,263 posts
Posted: Thursday, October 01, 2020 - 01:14 PM UTC
BRDM's got new shoes (PanzerArt):
Mike