

help!!!!!
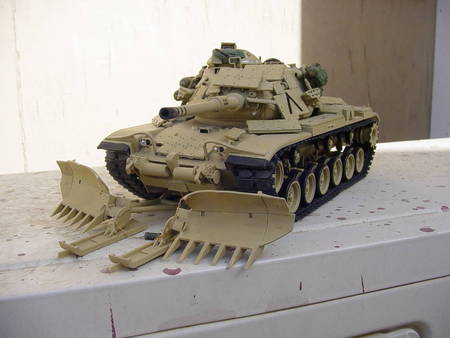
I was given the DML track width Mine Plow for the M60/ M1
However the "directions" on the box aren't giving me much info on how to put it on or if I need to cut the hooks off of the front tow hooks
Any help would be great!!!
Campaigns
Where Armorama group builds can be discussed, organized, and updates posted.
Where Armorama group builds can be discussed, organized, and updates posted.
Hosted by Darren Baker, Richard S.
OBG - The Official Thread

Darktrooper

Joined: November 05, 2004
KitMaker: 581 posts
Armorama: 351 posts

Posted: Wednesday, May 10, 2006 - 12:16 PM UTC

Erik67

Joined: July 31, 2005
KitMaker: 1,871 posts
Armorama: 1,423 posts
Posted: Wednesday, May 10, 2006 - 02:12 PM UTC
Quoted Text
Great work as allways Steve
Is the main gun some sort of big calibre howizter ?
Steve, as allways you deliver a quality product, even though it is not a "bang-bang" (but you are pretty close this time :-) )
If my memory serves me right (and it has a tendency to shut down sometimes), I seem to recall that the primary function of the gun on the M728 was obstacle clearing. Somebody around here probably got the right info
Erik

rebelsoldier
Joined: June 30, 2004
KitMaker: 1,336 posts
Armorama: 757 posts

Posted: Wednesday, May 10, 2006 - 07:56 PM UTC
hot damn!!!!!!!!!!!!!
lookin good!!!!!!!!!!!!!!!!!!!!
resting reb
lookin good!!!!!!!!!!!!!!!!!!!!
resting reb

barv

Joined: December 24, 2004
KitMaker: 1,594 posts
Armorama: 973 posts

Posted: Wednesday, May 10, 2006 - 07:59 PM UTC

Think its a 165mm "dust-bin "type chucker :-)
Not really a "B" -thing
 --ooops!! just about said that bad word :-) :-)
 aye
 BARV[:::]
 (GOSMG)

dexter059

Joined: July 28, 2005
KitMaker: 1,569 posts
Armorama: 1,385 posts
Posted: Wednesday, May 10, 2006 - 08:42 PM UTC
Thanks for the info Barv
Darktrooper
Joined: November 05, 2004
KitMaker: 581 posts
Armorama: 351 posts
Posted: Saturday, May 20, 2006 - 06:01 PM UTC
My ODS USMC M60A1 Patton with reactive armor plates.

Clanky44

Joined: September 15, 2005
KitMaker: 1,901 posts
Armorama: 553 posts
Posted: Saturday, May 20, 2006 - 08:43 PM UTC
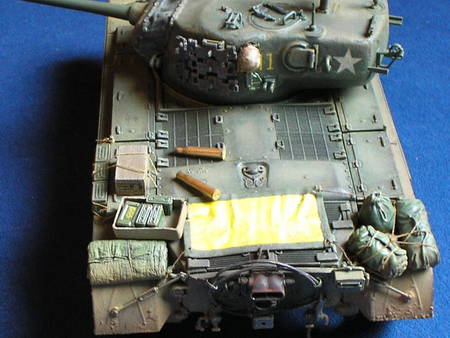
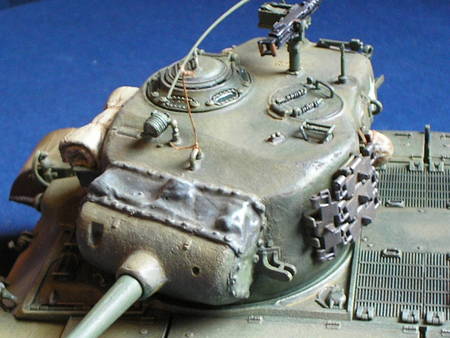
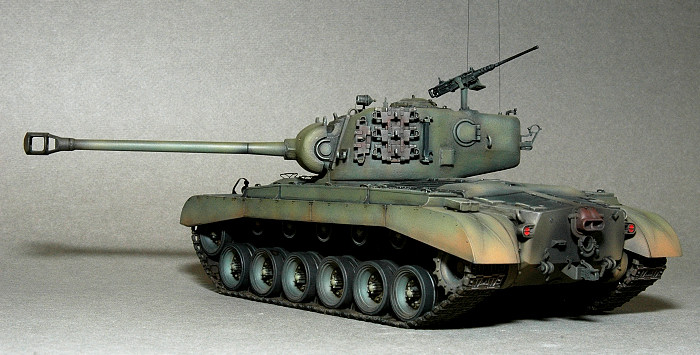
Finally started painting my Pershing last night. Started off with a coat of flat black as my primer coat, and then preshaded with the following three paints, Polly Scale British Interior Green, Polly Scale Doped Linen and Polly Scale Panzer Red Brown. This morning I put on the blending coat, Polly Scale Olive Drab, thinned out by about 80% Tamiya thinner.


The next step will be to mask and paint the stars and to mask the areas around the spare tracks and spray them with a dark reddish brown, mottled with a dark gray. Once this is completed, I'll start weathering.
Frank
The next step will be to mask and paint the stars and to mask the areas around the spare tracks and spray them with a dark reddish brown, mottled with a dark gray. Once this is completed, I'll start weathering.
Frank
Erik67
Joined: July 31, 2005
KitMaker: 1,871 posts
Armorama: 1,423 posts
Posted: Sunday, May 21, 2006 - 03:25 AM UTC
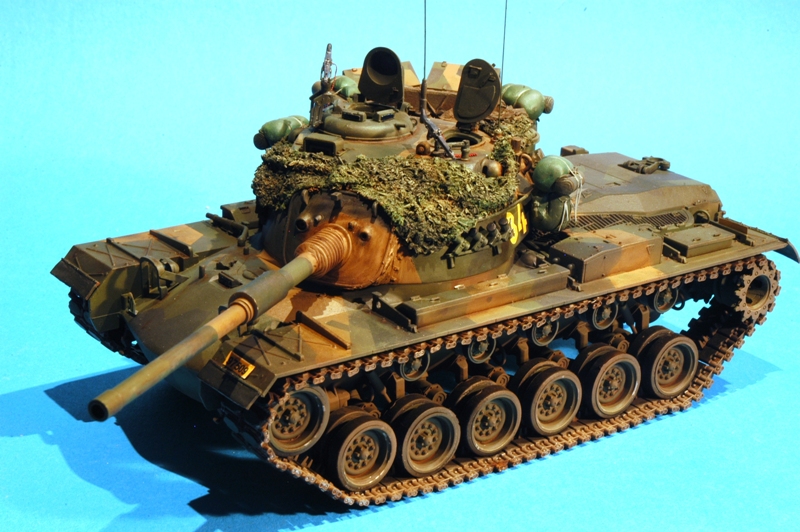
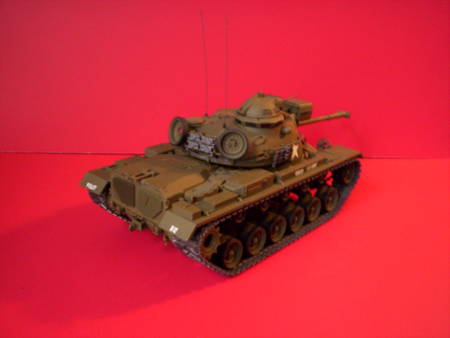
I have added a cam net to my M-48. I guess this will be a close race, but I'm still optimistic about finishing in time.


Still some work to do, and each time I take a pic I discover a new seam...
Erik
Still some work to do, and each time I take a pic I discover a new seam...
Erik

bf443
Vendor
Joined: May 16, 2003
KitMaker: 895 posts
Armorama: 283 posts

Posted: Thursday, May 25, 2006 - 11:01 AM UTC
OBG M247 Project finished
Hi Everyone,
Here is my finished M247 in Nato Three Tone. A sort of "What could be" had it entered service. Sorry about the pictures its not as shiny in person. Maybe I used to much light.


Hope you enjoy.
Brian
Hi Everyone,
Here is my finished M247 in Nato Three Tone. A sort of "What could be" had it entered service. Sorry about the pictures its not as shiny in person. Maybe I used to much light.
Hope you enjoy.
Brian
Erik67
Joined: July 31, 2005
KitMaker: 1,871 posts
Armorama: 1,423 posts
Posted: Saturday, May 27, 2006 - 11:02 PM UTC
Joker
Joined: May 28, 2004
KitMaker: 813 posts
Armorama: 522 posts

Posted: Sunday, May 28, 2006 - 06:13 PM UTC
Jokers Entry - M48 Dozer
Here's my M48 Dozer - old Tamiya resurrection (was at one time an IDF AFV), an Academy M9 blade ( Thanks Andy) and some references from various places,accurate maybe not so much, but it was more a painting exercise with the salt treatment on the blade, eventually it'll have a base and some figgies.
As always thanks to all who helped with advice and encouragment. Comments and critiques always welcome
Regards
Joker
generalzod
Joined: December 01, 2001
KitMaker: 3,172 posts
Armorama: 2,495 posts

Posted: Sunday, May 28, 2006 - 06:34 PM UTC
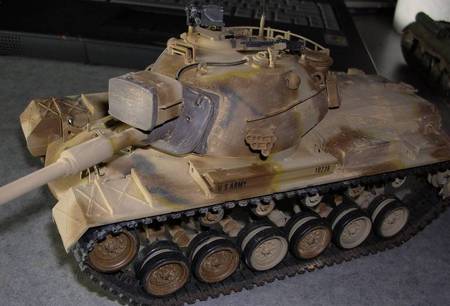
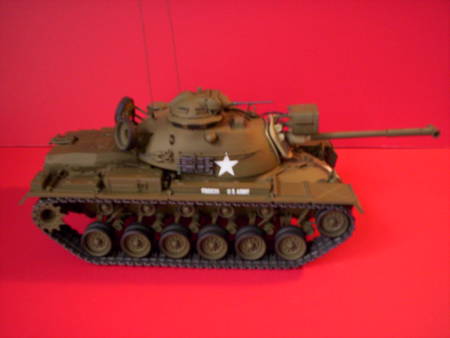
Academy M48A5 AFV Club tracks Old 4 tone MERDEC desert scheme Mig pigments were applied to make it look dusty
AngryDog

Joined: March 27, 2004
KitMaker: 1,114 posts
Armorama: 900 posts
Posted: Sunday, May 28, 2006 - 09:11 PM UTC
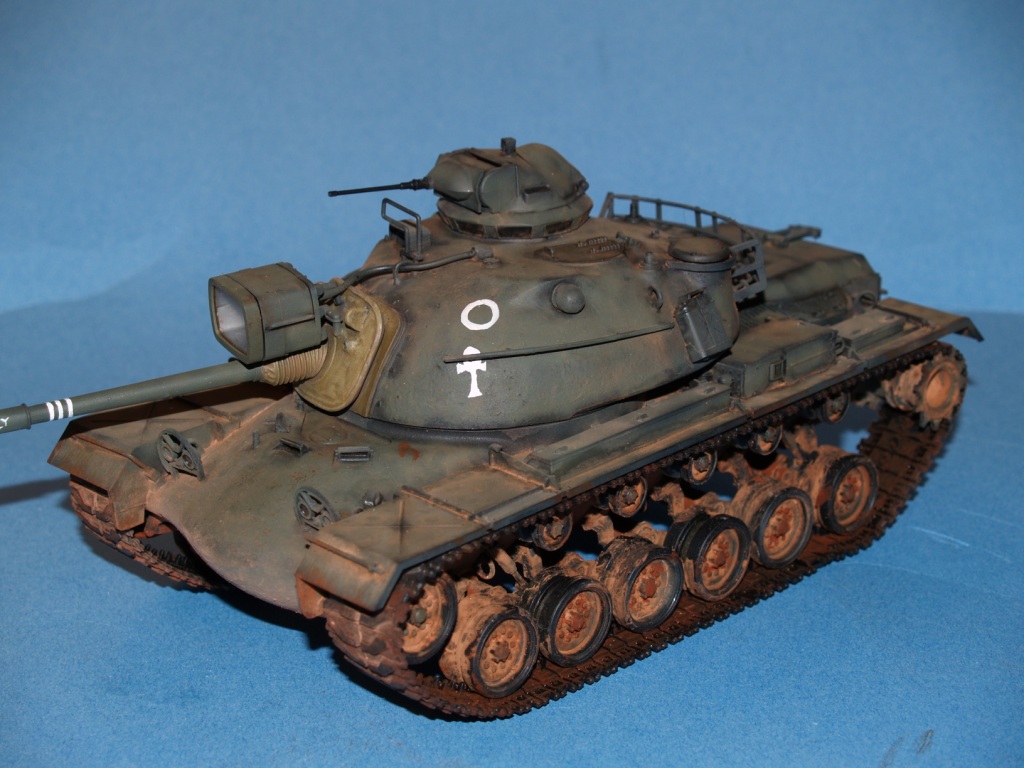
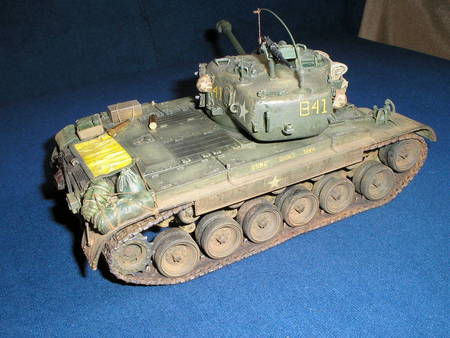
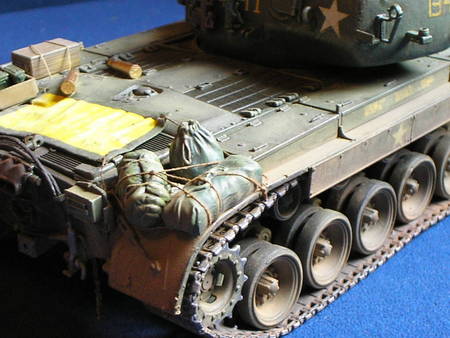
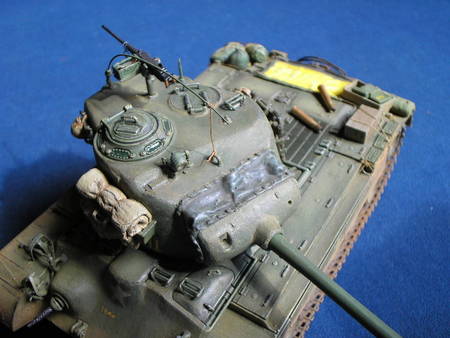
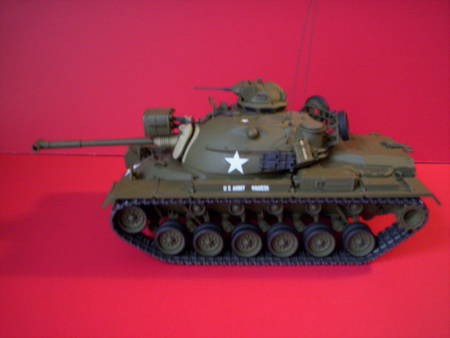
Academy IDF M60A1 Patton, built as the Magach 6B. Based on information from the internet , the Magach 6B version is Israel's first major upgrades that were made to the M60A. It incorporated the RISE automative modifications and mounting of Blazer armor, retains the round turret basket, added low profile urdan cupola, 105mm main gun without thermal sleeve and upgraded with Merkava tracks. Also added were the .50 cal machine gun mounted the the barrel with remote control firing system, 7.62mm machine guns for both commander and loader's station and a 60mm mortar mounted to the right of the commander's cupola. Two 10-shot smoke grenade launch systems were added to the front of the turret.
Crew's gear and equipment are from Verlinden and Legend , tie-downs are made from dental floss, rope from twine. The cloth with markings made from brass sheet, secured with thread. Antennas made from brass wire and secured with the IDF characteristc V shape tie-down made using the coiled copper wire from a small motor. Chains are from those cosmetic jewelery shops. Added sheet styrene to simulate the canvas covers for the smoke grenade boxes. Food ration boxes are from verlinden "Safe to eat during Passover"!
Main painting was airbrushed with humbrol enamels using a custom mix of kakhi drill, scratches made with a a fine brush. under hull weathering accomplished with a mix of acrylic gels and paints, further brushed on with MIG pigments and artist pastels. Overall weathering was done with acrylic oils and MIG pigemnts and artist pastels fixed with terpertine.

airwarrior
Joined: November 21, 2002
KitMaker: 2,085 posts
Armorama: 1,227 posts
Posted: Sunday, May 28, 2006 - 11:43 PM UTC
Finshed my M-48

MonkeyGun

Joined: August 07, 2005
KitMaker: 943 posts
Armorama: 825 posts

Posted: Monday, May 29, 2006 - 08:54 PM UTC
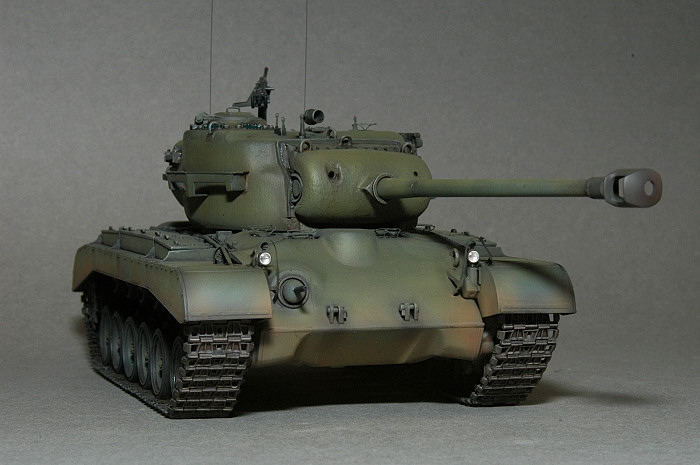
Heres my finished entry for "OBG" its Tamiya's Pershing in USMC markings as seen in the Korea war
Big thankyou to Frank ( Clanky44 ) for the mudguard stays
Thanks Ian
Big thankyou to Frank ( Clanky44 ) for the mudguard stays
Thanks Ian
Clanky44
Joined: September 15, 2005
KitMaker: 1,901 posts
Armorama: 553 posts
Posted: Tuesday, May 30, 2006 - 11:42 PM UTC
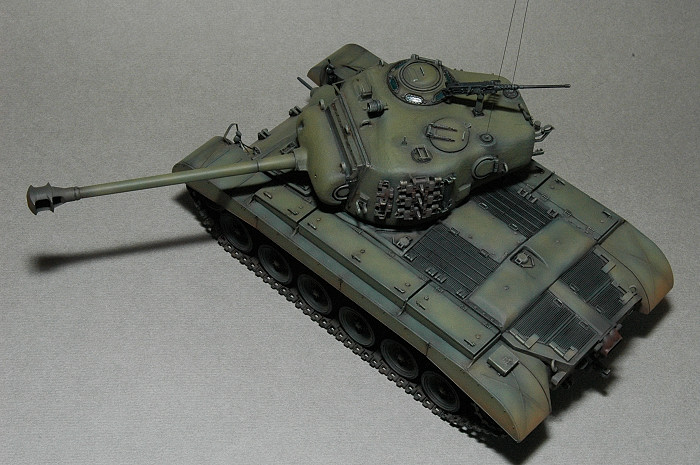
Here is my 90% completed Pershing, it'll have to do as is, for the campaign. My kit decals fell apart on me as I tried to soften them up, so I need to adorn this T26E3 with some stars and then do some final weathering.
MonkeyGun
Joined: August 07, 2005
KitMaker: 943 posts
Armorama: 825 posts
Posted: Wednesday, May 31, 2006 - 01:34 AM UTC
Your Pershing looks great Frank , the preshading and the shade of OD you used looks fantastic.
Ian
Ian
Clanky44
Joined: September 15, 2005
KitMaker: 1,901 posts
Armorama: 553 posts
Posted: Wednesday, May 31, 2006 - 02:19 AM UTC
Thanks Ian,.. as you can imagine by the amount of time it took me to paint this model..... I just plain lost interest in it. It sat built up and unpainted for about 3 months, collecting dust and losing parts. If you take a look at the back end, there are missing P.E. bits. It was an effort to complete it. I can say with all certainty, that your Korean Pershing kicked my WW2 Pershing butt!!! 
Frank
Frank
MonkeyGun
Joined: August 07, 2005
KitMaker: 943 posts
Armorama: 825 posts
Posted: Wednesday, May 31, 2006 - 02:46 AM UTC
Thanks Frank , but i dont want to start an argument
but i think the way you have painted your Pershing looks far superior , Im not 100% happy with how mine came out , it was the first time i have used mig pigments to weather a vehicle and i think i went a little overboard :-)
But live and learn
Ian
but i think the way you have painted your Pershing looks far superior , Im not 100% happy with how mine came out , it was the first time i have used mig pigments to weather a vehicle and i think i went a little overboard :-)
But live and learn
Ian

Elad

Joined: June 19, 2004
KitMaker: 458 posts
Armorama: 269 posts
Posted: Wednesday, May 31, 2006 - 04:23 AM UTC
just wanted to tell everybody that the campaign has been extended in two weeks so the ending date is now the 15th of june.
Elad.
Elad.

Red4
Joined: April 01, 2002
KitMaker: 4,287 posts
Armorama: 1,867 posts

Posted: Thursday, June 08, 2006 - 08:01 AM UTC
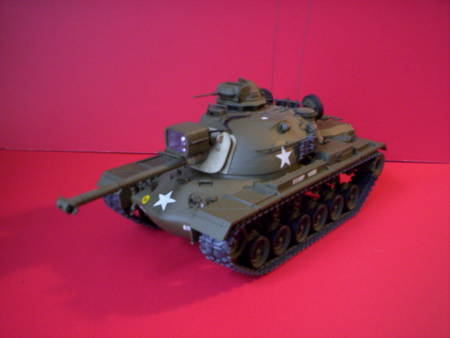
I joined late, but luck be with me I have something to enter. M-60A3 with hand painted markings. Epoxy putty sand bags and Dremel damaged track pads. Extra goodies came fromthe spares box. Thanks "Q"


MonkeyGun
Joined: August 07, 2005
KitMaker: 943 posts
Armorama: 825 posts
Posted: Thursday, June 08, 2006 - 08:36 AM UTC
Great work Matthew
The sandbags and extra stowage look great and the markings on the turret are really well done
Ian
The sandbags and extra stowage look great and the markings on the turret are really well done
Ian

SgtWilhite
Joined: July 07, 2004
KitMaker: 470 posts
Armorama: 362 posts

Posted: Tuesday, June 13, 2006 - 01:03 AM UTC
Finally able to post the pics of my M48A3 Patton. I built it clean and I appologize for the quality of the pictures. I've moved over the last two months and can't find my good camera.
Hopefully the pics posted.
Hopefully the pics posted.
SgtWilhite
Joined: July 07, 2004
KitMaker: 470 posts
Armorama: 362 posts
Posted: Tuesday, June 13, 2006 - 01:05 AM UTC
Missed one:
Guess I got it. Thanks for having this campaign. I really enjoyed building this kit. I didn't have the first problem with it. Not bad for a Tamiya kit.
Guess I got it. Thanks for having this campaign. I really enjoyed building this kit. I didn't have the first problem with it. Not bad for a Tamiya kit.
Red4
Joined: April 01, 2002
KitMaker: 4,287 posts
Armorama: 1,867 posts
Posted: Friday, June 16, 2006 - 04:20 AM UTC
Since the campaign is over, is there a time the participants can expect too receive their "Do-dad aka ribbon?" Just wonderin'. Great job to all who finished. I know I squeaked in under the wire. Thanks. "Q"
 |

WEB HOSTING BY


Copyright ©2021 Armorama and Kitmaker Network, a subsidiary of Silver Star Enterprises
All Rights Reserved. Please read our Conditions of Use and Privacy Policy.
All Rights Reserved. Please read our Conditions of Use and Privacy Policy.