I'm reasonably sure the changeover to the Tsyklon type took place sometime in 1943, and that some of the later 76mm gun tanks had them fitted. All the SU-100 interiors I can remeber seeing are post-war so that's not a lot of help.
An extract from a translation of the T-34 manual (dated 1942) mentions but doesn't show the new filters
http://www.gjames.com.au/chris/t34/t34-service-2.html
David
Яusso-Soviэt Forum
Russian or Soviet vehicles/armor modeling forum.
Russian or Soviet vehicles/armor modeling forum.
Hosted by Darren Baker, Jacques Duquette
Build - Log Review of DML SU-100 Premium kit
Drader

Joined: July 20, 2004
KitMaker: 3,791 posts
Armorama: 2,798 posts

Posted: Wednesday, April 23, 2008 - 08:30 PM UTC
Jacques

Joined: March 04, 2003
KitMaker: 4,630 posts
Armorama: 4,498 posts

Posted: Thursday, May 01, 2008 - 04:28 PM UTC
Hooray, I can take pictures again.
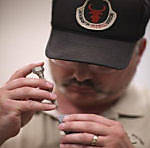
Here is what I have planned for the more battered SU-100. The figures are from Tamiya with hornet heads. The helmet less one will be getting a cap, just not sure which style yet.

Time to finish up the pre-shading and get the weathering and wheels/tracks on these things!
Here is what I have planned for the more battered SU-100. The figures are from Tamiya with hornet heads. The helmet less one will be getting a cap, just not sure which style yet.
Time to finish up the pre-shading and get the weathering and wheels/tracks on these things!

panamadan

Joined: July 20, 2004
KitMaker: 1,513 posts
Armorama: 1,449 posts

Posted: Friday, May 02, 2008 - 04:02 AM UTC
Just found this-great job! Dan from Buffalo. 

Pavlovsdog

Joined: June 05, 2006
KitMaker: 438 posts
Armorama: 352 posts

Posted: Friday, May 02, 2008 - 07:12 AM UTC
Jacques,
really fantastic work love your preshading looking foward to seeing the progress with
best wishes,
Jerry
really fantastic work love your preshading looking foward to seeing the progress with
best wishes,
Jerry
210cav

Joined: February 05, 2002
KitMaker: 6,149 posts
Armorama: 4,573 posts

Posted: Friday, June 20, 2008 - 07:32 AM UTC
Jacques-- after looking at your work specifically the detailed PE, I recommend that you consider going into micro surgery. You'll make millions...how do you do it? Your magnification must look like the Hubbell telescope complex....great work!
DJ
DJ

martyncrowther

Joined: September 12, 2007
KitMaker: 1,548 posts
Armorama: 1,407 posts

Posted: Monday, July 07, 2008 - 02:58 AM UTC
great build so far mate!!!!! it looks great!!!!!!!!!!!!!!!!!!!!!!
keep it up!
keep it up!

whittman181

Joined: December 30, 2006
KitMaker: 646 posts
Armorama: 473 posts

Posted: Tuesday, July 08, 2008 - 08:51 AM UTC
The paint job looks great.  Going to be a nice one and I like the figures
  Bob
Bob
 Going to be a nice one and I like the figures
  Bob
Bob
koenele

Joined: January 17, 2006
KitMaker: 4,194 posts
Armorama: 408 posts

Posted: Sunday, September 21, 2008 - 10:13 PM UTC
nice work jacques
keep those updates coming
keep those updates coming
Rambo44

Joined: November 27, 2008
KitMaker: 55 posts
Armorama: 54 posts

Posted: Tuesday, December 02, 2008 - 02:56 AM UTC
Absolutely astounding workmanship Jacques!!!I love your tutorial.Nice engine work even if the compartment looks a little empty.I say this because in reality there would be other things in there such as radiator,hoses,etc...RIGHT??I love those weld seams you added.I think I'm going to try that putty method of doing them as well.
Loooking foreward to your updates,
Ron.
Loooking foreward to your updates,
Ron.

Jacques

Joined: March 04, 2003
KitMaker: 4,630 posts
Armorama: 4,498 posts

Posted: Friday, December 05, 2008 - 03:55 PM UTC
Glad to be of help. I really have to finish this build up. Really. Maybe I will take the 24 hrs challenge... 


Bigrip74

Joined: February 22, 2008
KitMaker: 5,026 posts
Armorama: 1,604 posts

Posted: Thursday, January 01, 2009 - 06:33 PM UTC
Jacques:
Your tutorial is astounding and a great help, I for one have enjoyed this thread and learned much on how to better my own builds. Your way of describing the build process has been easy to read and understand, making it valuable to use as a guide. Thanks for the thread and please continue since I cannot wait to see the end results.
Robert

lewbud

Joined: February 28, 2009
KitMaker: 2 posts
Armorama: 1 posts

Posted: Sunday, March 01, 2009 - 11:50 AM UTC
Jacques,
I needed help on my SU-100 and a member of another forum posted a link to your build. All I've got to say is Wow and Thanks! Not only did some pics from your build tell me what I needed to know (had a part placement question) but thanks to you, I now have engine compartment envy and will order the Verlinden engine bay when I get a chance. Hope to see more pics soon.
Buddy
EagleSmack

Joined: February 03, 2006
KitMaker: 228 posts
Armorama: 225 posts

Posted: Thursday, March 26, 2009 - 02:21 AM UTC
I am building the same exact kit and I have been coming back to this thread to get tips and ideas. It has been so helpful and thanks.
I am going to hold off until I see how you do the tracks!
I am going to hold off until I see how you do the tracks!
TuomasH

Joined: September 10, 2008
KitMaker: 470 posts
Armorama: 175 posts

Posted: Thursday, March 26, 2009 - 04:19 AM UTC
Jacques did you never finish this? Or is it sitting on your shelf waiting for "24hrs challenge"? 
Tuomas

Tuomas

Jacques

Joined: March 04, 2003
KitMaker: 4,630 posts
Armorama: 4,498 posts

Posted: Saturday, March 28, 2009 - 04:02 AM UTC
Ok guys, I have the challenge.
The kit is still sitting in the box, with a nice coat of dark green paint awaiting my attention.
Let me just say that "PHEW!" have I been buried in work (new career and regular home stuff).
I also have at least 10 kits demanding my attention.
BUT...things are getting nicer here. Yes, in MN , nicer weather makes it easier to model! (I can send the mopy, crabby kids outside to play and have some peace...)
I also have an idea for this model involving a friend of mine who sculpted his own face for new 1/35 heads many years ago...most of them in full charge screaming mode. So I thought I could put at least 4 figures, each with a slightly different version of the "screaming Mikey" head, all yelling at each other over the broken down vehicle. I thought I would call it something like "4 Brothers."
But I have to get the vehicle done, and honestly, Ron (Goins) SU-85 build has really shamed me into finishing this build.
Now, for some info: I MUCH prefer the Magic tracks of DML to the older sprue bound ones. It is like night and day. I used the older tracks on the 6075 build and I did not enjoy the experience...lots of clean up for the attachment points. I have only been dry fitting the magic tracks at this point, but they clean up a LOT better and the detail is just as good. I will try to post pics later to give you and idea.
Hope to get this done soon and up as a feature.
Jurjen

Joined: September 21, 2003
KitMaker: 3,040 posts
Armorama: 1,016 posts

Posted: Saturday, March 28, 2009 - 08:56 AM UTC
We started very long time ago our Strela en SU-100 thread at the same time and we said; 'Let's see who finishes first" Never thought it would take that long!! 

I'd love to see your SU finished!
Cheers,
Jurjen


I'd love to see your SU finished!

Cheers,
Jurjen

bobman331

Joined: April 13, 2009
KitMaker: 177 posts
Armorama: 142 posts

Posted: Saturday, April 25, 2009 - 05:16 AM UTC
pretty cool. 


flugwuzzi

Joined: November 02, 2007
KitMaker: 633 posts
Armorama: 599 posts

Posted: Monday, June 01, 2009 - 03:01 AM UTC
Excellent work, Jaques. Also the photos you take from your build are great!!! Thanks for all this good stuff.
Cheers
Walter
Cheers
Walter

Jacques

Joined: March 04, 2003
KitMaker: 4,630 posts
Armorama: 4,498 posts

Posted: Monday, June 01, 2009 - 08:41 AM UTC
I will make this solemn pledge: When I return from Europe in July, I will finish the SU-100 and submit it as a feature, or die trying, by the END of July. I WILL beat Jurjen, even if he did kill the Strela he was working on. It will be done or else...I don't know. Maybe I will give up my B-day or something. 


Jacques

Joined: March 04, 2003
KitMaker: 4,630 posts
Armorama: 4,498 posts

Posted: Sunday, January 17, 2010 - 06:18 PM UTC
Ha ha. Well, all craziness aside, I am actually working on the kits again. I have been experimenting with painting the monotone green color and new ways to break it up. I am not sure how well this is working, but I will also get pictures up to be seen.
The biggest problem I am having right now is how to depeict them...what is the story behind them? I find this to be the biggest inspiration before painting/weathering. Still working on thier stories, then the finiishing will come...
The biggest problem I am having right now is how to depeict them...what is the story behind them? I find this to be the biggest inspiration before painting/weathering. Still working on thier stories, then the finiishing will come...


Jacques

Joined: March 04, 2003
KitMaker: 4,630 posts
Armorama: 4,498 posts

Posted: Sunday, January 31, 2010 - 05:13 PM UTC
Here is where I stand at the moment:
#6075 - Black primer, base coat of Polly S Black Green, lighter shade with Model Master Dark Green, lightened MM Dark Green with MM Tan for more fading. Tracks have had a preliminary coat of cheap acrylic paint (walmart hobby paint) thinned out.


#6359 - Pretty much where I left it. A few of the small tie-downs have broken off the right fender side, under the commanders coupola. Not sure if I will just replace them or do a little damage there after all.


#6075 - Black primer, base coat of Polly S Black Green, lighter shade with Model Master Dark Green, lightened MM Dark Green with MM Tan for more fading. Tracks have had a preliminary coat of cheap acrylic paint (walmart hobby paint) thinned out.
#6359 - Pretty much where I left it. A few of the small tie-downs have broken off the right fender side, under the commanders coupola. Not sure if I will just replace them or do a little damage there after all.

alfa10

Joined: January 15, 2009
KitMaker: 121 posts
Armorama: 120 posts

Posted: Monday, February 01, 2010 - 09:19 AM UTC
Good to see some action in this thread. Very fine work there, Jacques. Looking forward to more in the near future.

Yoni_Lev

Joined: September 20, 2007
KitMaker: 861 posts
Armorama: 394 posts

Posted: Monday, February 01, 2010 - 09:33 AM UTC
Back from the model graveyard and looking good!
-YL

exer

Joined: November 27, 2004
KitMaker: 6,048 posts
Armorama: 4,619 posts

Posted: Wednesday, February 03, 2010 - 12:10 AM UTC
Just reread most of this thread after reading the T34 review thread. Brilliants work Jacques. I look forwrd to hearing the story you comee up withto depict the SU 100

Jacques

Joined: March 04, 2003
KitMaker: 4,630 posts
Armorama: 4,498 posts

Posted: Sunday, February 07, 2010 - 10:46 AM UTC
6075 - started on washes. So far I have done a Lamp Black wash, then a Burnt Umber Wash, then a Van Dyke Brown wash.


Decals are from the 6359 kit set as the ones in 6075 did not look too good. Since it is hard to put any tacticle markings to any Soviet WWII tank, I simply went with the decals I liked since I am not modeling anything specific.
Tracks are still brown with green overpaint from hull touchups...I will have to deal with them soon, after the hull washes though.
 |


