Campaigns
Where Armorama group builds can be discussed, organized, and updates posted.
Where Armorama group builds can be discussed, organized, and updates posted.
Hosted by Darren Baker, Richard S.
White-Washed
WARLORD

Joined: April 23, 2003
KitMaker: 1,923 posts
Armorama: 868 posts

Posted: Sunday, September 30, 2007 - 11:27 PM UTC
We can officially start the campaign so grab your tools and jar of white paint. We're going to prepare our models for winter!
Martinnnn

Joined: April 26, 2004
KitMaker: 5,435 posts
Armorama: 2,762 posts

Posted: Monday, October 01, 2007 - 12:13 AM UTC
Great. I'll start a build log and hopefully my effort will be usefull enough for a feature as suggested in this thread 
Martin
edit: here's my thread:
http://armorama.kitmaker.net/modules.php?op=modload&name=SquawkBox&file=index&req=forums/106742&page=1

Martin
edit: here's my thread:
http://armorama.kitmaker.net/modules.php?op=modload&name=SquawkBox&file=index&req=forums/106742&page=1
Posted: Tuesday, October 02, 2007 - 06:34 PM UTC
Looks good, Martin. I am looking forward to see how this works out when you get started.
I am just about to start on my Tamiya Leopard 1A4 as well. The kit is a little basic, but considering it is from 1979 it has good details. It looks like the build will be quick although the painting and weathering might be another story.
More to follow in a few days
I am just about to start on my Tamiya Leopard 1A4 as well. The kit is a little basic, but considering it is from 1979 it has good details. It looks like the build will be quick although the painting and weathering might be another story.

More to follow in a few days

Posted: Thursday, October 04, 2007 - 06:29 PM UTC
I have made a little progress on my Leopard 1A4 for this campaign.
The lower hull has been assembled along with the wheels. Taking into account this kit is from 1979 the level of detail is very good.
Also it was a trip down memory lane putting those small poly caps into the wheels Actually I think this will be quite handy when I get around to painting the tank
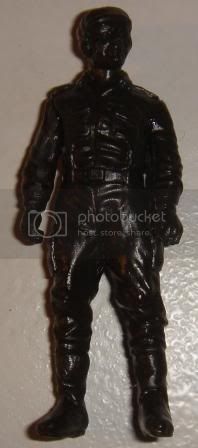
A crew figure is included although I do not think he will fit into any of the hatches and he also looks a little bulky by todays standards. He will probably go to the spares box....
More to follow...
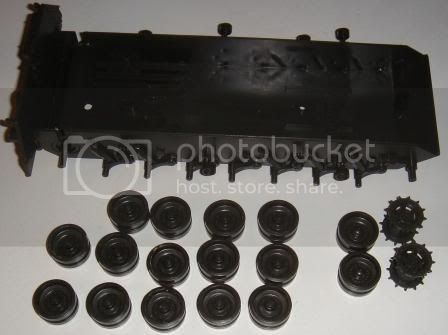
The lower hull has been assembled along with the wheels. Taking into account this kit is from 1979 the level of detail is very good.
Also it was a trip down memory lane putting those small poly caps into the wheels
 Actually I think this will be quite handy when I get around to painting the tank
A crew figure is included although I do not think he will fit into any of the hatches and he also looks a little bulky by todays standards. He will probably go to the spares box....
More to follow...


Posted: Sunday, October 07, 2007 - 07:10 PM UTC
A little update.
Construction on my Leopard 1A4 is now almost finished. Construction is easy, fast and straight forward. The cool thing about these old Tamiya kits are that you can disassemble the main parts for painting again due to these small poly caps.
The only areas that need a little filler are the back of the plates for the front head lights. Otherwise no extra filler is needed.
Next will be the basecoat.
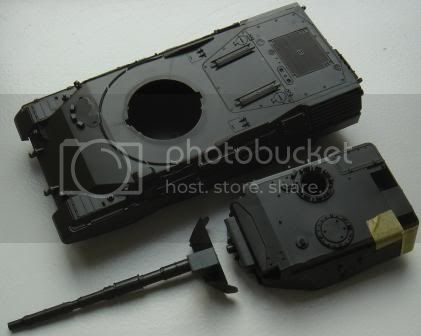
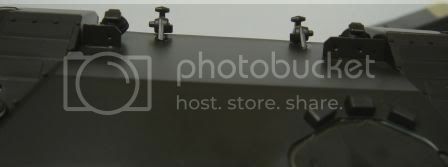
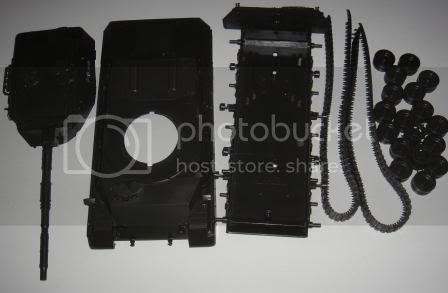
Construction on my Leopard 1A4 is now almost finished. Construction is easy, fast and straight forward. The cool thing about these old Tamiya kits are that you can disassemble the main parts for painting again due to these small poly caps.

The only areas that need a little filler are the back of the plates for the front head lights. Otherwise no extra filler is needed.
Next will be the basecoat.

Martinnnn

Joined: April 26, 2004
KitMaker: 5,435 posts
Armorama: 2,762 posts

Posted: Monday, October 08, 2007 - 11:33 PM UTC
Nice progress so far mate! Good luck with the paint job, looking forward to see more pics 

jam2727

Joined: June 28, 2007
KitMaker: 171 posts
Armorama: 37 posts

Posted: Wednesday, October 10, 2007 - 08:09 PM UTC
Hey all, this was my progress this week. I have all the base coat on and decals also, but they have not stayed on well even with my decal solution. i will cover up the decals and start my spraying of white this weekend 
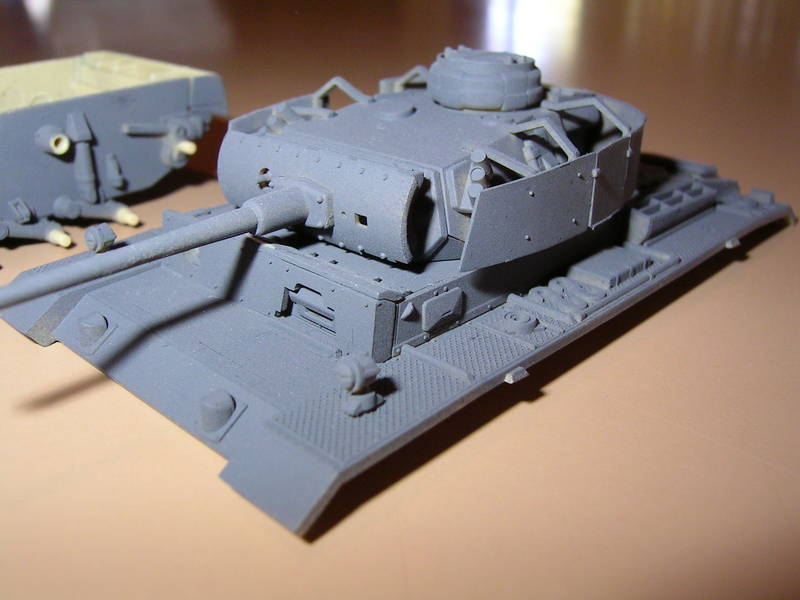
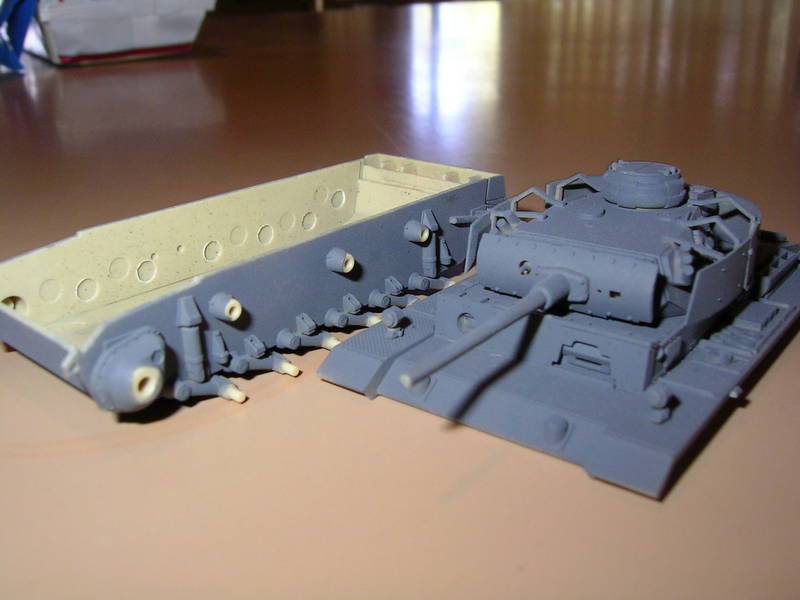
it is A 1/72 panzer III ausf.M by revell


it is A 1/72 panzer III ausf.M by revell
Posted: Wednesday, October 10, 2007 - 10:01 PM UTC
Thanks for the comments, Martin 
A short update on my build. I have now applied the base coat of Nato green and the first layer of white wash. I am going for the scruffy looking application of white wash as pr. the picture I have posted earlier in this tread. It was a little difficult to determine the pattern of the white wash camouflage, but I simply went with broad white areas on the tank. I assume this would have been the easiest way to do it for the crew. Next some of the details for the tools were done.
Not bad for three evenings work
Over the weekend is more detail painting and then the decals. This is a very pleasurable build and throughoutly uncomplicated - at least so far. More updates after the weekend.
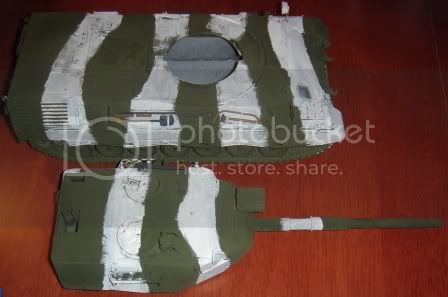
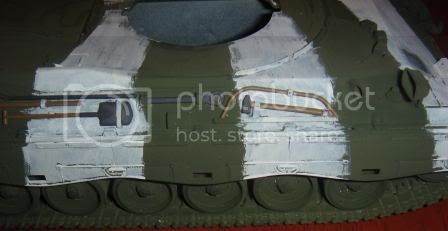

A short update on my build. I have now applied the base coat of Nato green and the first layer of white wash. I am going for the scruffy looking application of white wash as pr. the picture I have posted earlier in this tread. It was a little difficult to determine the pattern of the white wash camouflage, but I simply went with broad white areas on the tank. I assume this would have been the easiest way to do it for the crew. Next some of the details for the tools were done.
Not bad for three evenings work

Over the weekend is more detail painting and then the decals. This is a very pleasurable build and throughoutly uncomplicated - at least so far.
 More updates after the weekend.

WARLORD

Joined: April 23, 2003
KitMaker: 1,923 posts
Armorama: 868 posts

Posted: Thursday, October 11, 2007 - 10:13 PM UTC
Nice progress so far. I haven't even started my project 

Martinnnn

Joined: April 26, 2004
KitMaker: 5,435 posts
Armorama: 2,762 posts

Posted: Saturday, October 13, 2007 - 08:23 AM UTC
Hi all,
Progress on my Pzkfw IV is slow but it's starting to look like a tank. The ausf.H kit is really on of the better Tamiya kits I've build so far: great fit, easy to build, clear instructions, and detailled/clean parts.
I'll take some new pics tomorrow and post them in my campaign thread. After next week I'll have a week vacation (well, vacation....enough to do but I SHOULD have some more time for myself than usual ) so hopefully I can finish building and start painting then!
Martin
Progress on my Pzkfw IV is slow but it's starting to look like a tank. The ausf.H kit is really on of the better Tamiya kits I've build so far: great fit, easy to build, clear instructions, and detailled/clean parts.
I'll take some new pics tomorrow and post them in my campaign thread. After next week I'll have a week vacation (well, vacation....enough to do but I SHOULD have some more time for myself than usual
 ) so hopefully I can finish building and start painting then!
Martin
jam2727

Joined: June 28, 2007
KitMaker: 171 posts
Armorama: 37 posts

Posted: Saturday, October 13, 2007 - 08:01 PM UTC
Hey all i finished today after 7 hours straight of modelling 
 at least its not spent on the computer games
  I am very very pleased with my result of my first tank
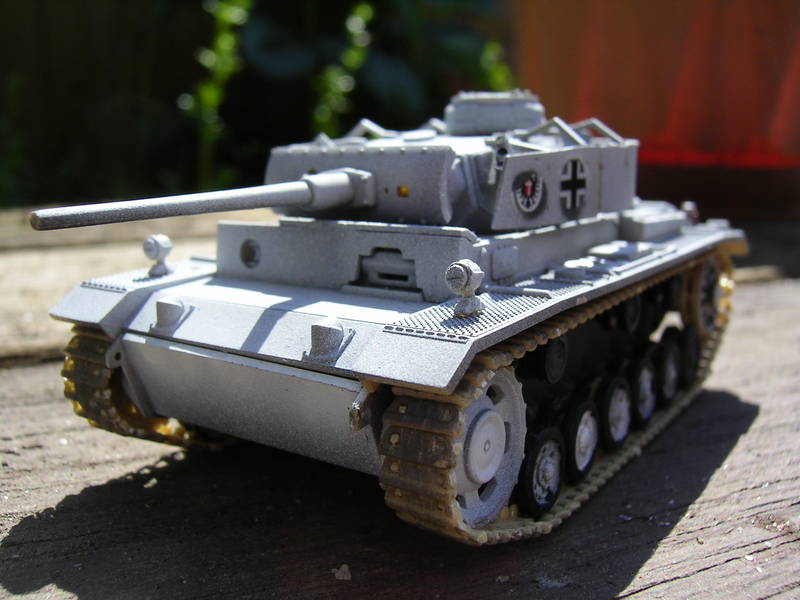
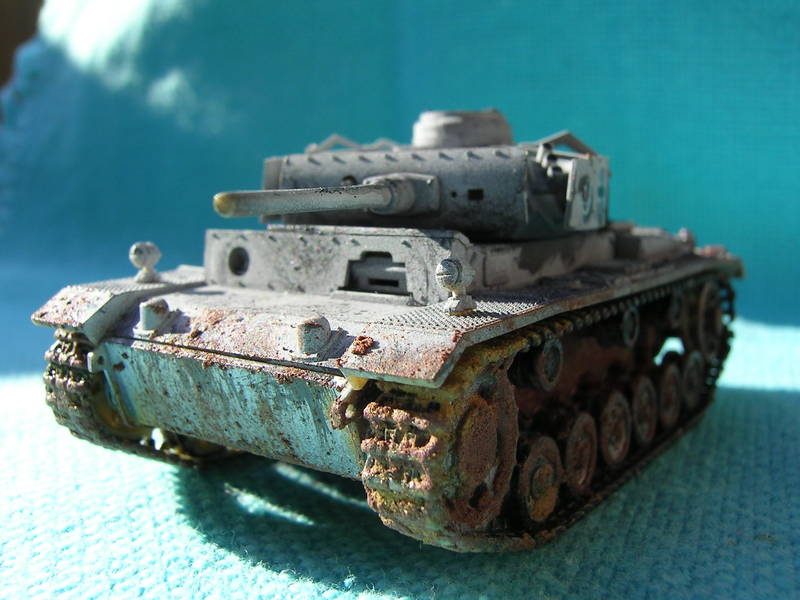
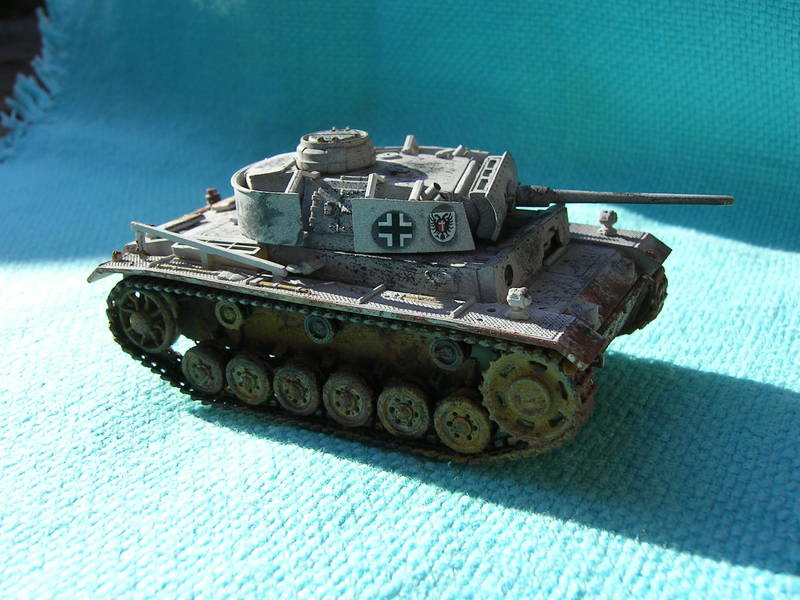
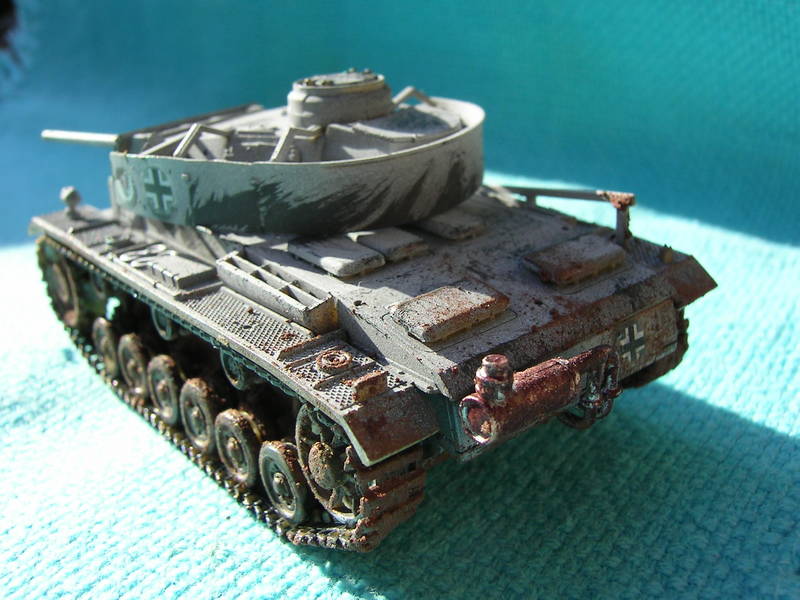
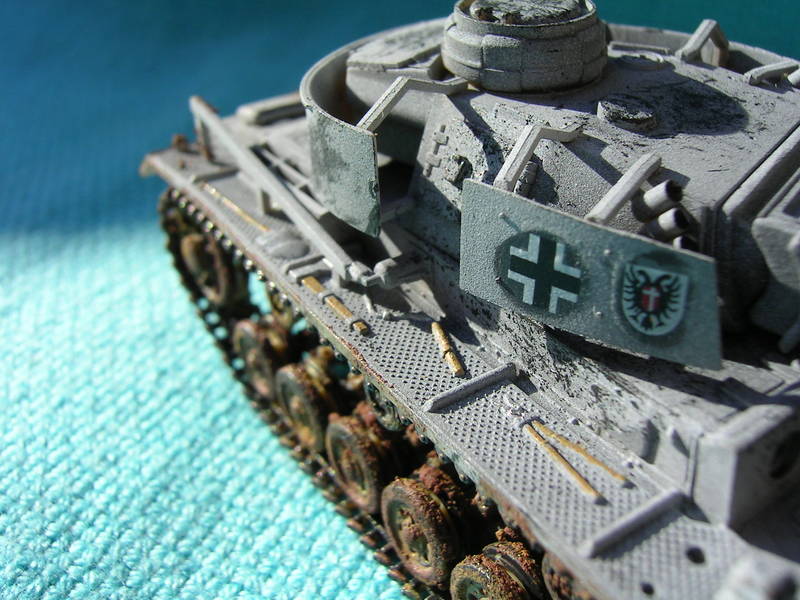
This is my next tank for the campaign
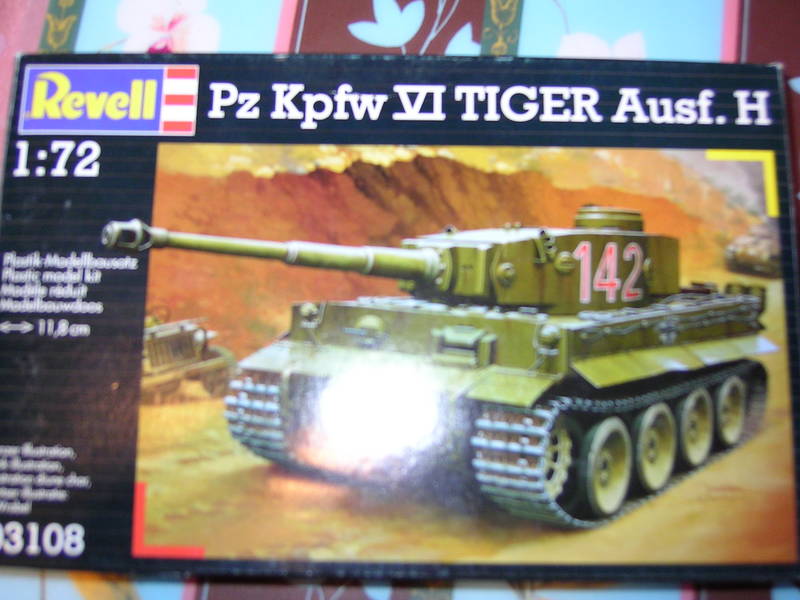

 at least its not spent on the computer games
  I am very very pleased with my result of my first tank


This is my next tank for the campaign


emroglan

Joined: December 16, 2004
KitMaker: 1,163 posts
Armorama: 842 posts

Posted: Saturday, October 13, 2007 - 11:35 PM UTC
James, are you going to build the Tiger I Ausf H for this campaign? I am not entirely sure but far as I can remember the Ausf H Tigers were either sent to Africa or Italy. Be sure that they saw action around Eastern Front to receive a winter wash. I repeat, this information is not 100% sure but be sure to check.
jam2727

Joined: June 28, 2007
KitMaker: 171 posts
Armorama: 37 posts

Posted: Sunday, October 14, 2007 - 12:10 AM UTC
Oh okay. I dont know whether my Pz.III operated in the winter either. i just thought it was an oportunity to paint ur tank white. I cant find annything like this on the internet that says annythhing about what typed of tigers operated where, can you help me out?
Posted: Sunday, October 14, 2007 - 12:28 AM UTC
Nice Pzr III James, good job on the whitewash and mud. Just two things to fix, the gap/misalignment at the front of the glacis, and the inside of the barrel needs a bit of paint.
Good job on the on board tools too.
Cheers
Henk
Good job on the on board tools too.
Cheers
Henk

Tojo72

Joined: June 06, 2006
KitMaker: 4,691 posts
Armorama: 3,509 posts

Posted: Sunday, October 14, 2007 - 01:26 AM UTC
It's not much,but here is my Whitewash Campaign entry,Tamiya's 1/48 SU-122 built OOB with Testors Acrylics and Mig Pigments.
Thanks


Thanks


jam2727

Joined: June 28, 2007
KitMaker: 171 posts
Armorama: 37 posts

Posted: Sunday, October 14, 2007 - 10:02 AM UTC
Ok Henk Ill look into that. I just cant seem to get that gap but ill see what i can do. and ill put a hole in the end of the turret and finish that off.
Anthony that looks brilliant mate, looks like you have put alot of work into, looks like alot to me nice job.
Anthony that looks brilliant mate, looks like you have put alot of work into, looks like alot to me nice job.
Posted: Sunday, October 14, 2007 - 08:22 PM UTC
Hi James, I have the same comments as Henk on the small corrections. However, oveall it is a very good build. You should be proud of this one - especially since it is your first tank!
Anthony, Good job on the SU. I like your white wash and the dirty suspension.
Anthony, Good job on the SU. I like your white wash and the dirty suspension.
Posted: Sunday, October 14, 2007 - 08:34 PM UTC
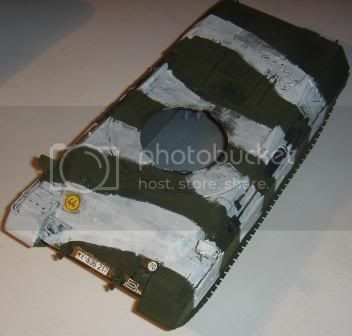
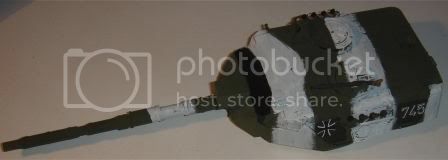
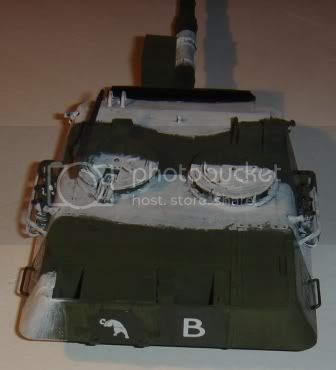
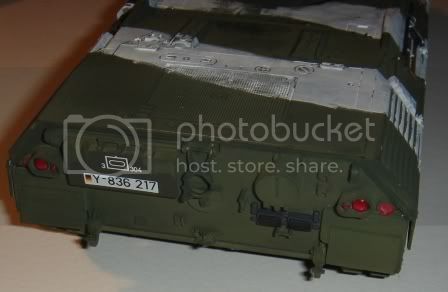
Here is a small updae on my kit. I have painted almost all the details. Also my Leopard 1A4 has gotten its decals on with a layer of gloss varnish as base and mat varnish to get them to blend in. They are not complete mat, but hopefully the weathering wll fix that.


Tojo72

Joined: June 06, 2006
KitMaker: 4,691 posts
Armorama: 3,509 posts

Posted: Monday, October 15, 2007 - 12:19 AM UTC
James+Jesper thank you for the look and the kind words.......

Tojo72

Joined: June 06, 2006
KitMaker: 4,691 posts
Armorama: 3,509 posts

Posted: Monday, October 15, 2007 - 12:22 AM UTC
James,very nice I like the tracks and the rust buildup on the muffler
mcky

Joined: May 22, 2006
KitMaker: 12 posts
Armorama: 9 posts

Posted: Monday, October 15, 2007 - 10:57 AM UTC
I've put some photos of my entry here. Not sure if it meets the criteria for the build, but...
http://photos.kitmaker.net/showgallery.php/cat/500/ppuser/18094
http://photos.kitmaker.net/showgallery.php/cat/500/ppuser/18094
jam2727

Joined: June 28, 2007
KitMaker: 171 posts
Armorama: 37 posts

Posted: Monday, October 15, 2007 - 06:06 PM UTC
Thanks Jesper Henk and Anthony for the kind words  I happen to really like what you have done to your wheels with the dirt Anthony. And i Like the shading you have done also, once again really nice looking tank. Jesper how have you applied your white? Looks stunning. Would like to see more
 I happen to really like what you have done to your wheels with the dirt Anthony. And i Like the shading you have done also, once again really nice looking tank. Jesper how have you applied your white? Looks stunning. Would like to see more
Posted: Tuesday, October 16, 2007 - 09:41 PM UTC
Thanks, James. I appreciate your feed back.
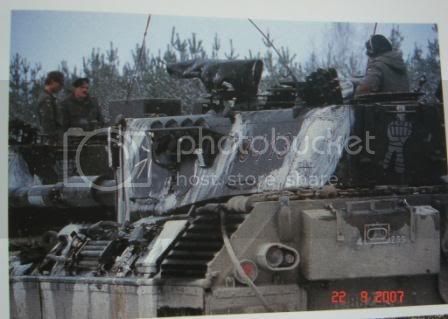
The white wash was applied with white acrylic paint. I used a wide square ended brush. I wiped of some of the white paint and then painted the tank in small strokes to simulate how the crew would have done it. That gave it the look of a semi worn quickly applied paint job that was a little sloppy as the crew did not seem to take much care about the white wash as it was to be removed later anyway.
It is actually quite difficult to replicate the sloppy white wash paint work of the tank crew without making it look like youself as a modeller has also made a sloppy paint job Anyway, I am quite satisfied about the result so far.
  Below you can see the picture I have based my work on - it is the same picture as poset previously in this tread - just repeated here for convenience.
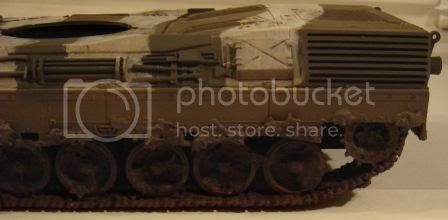
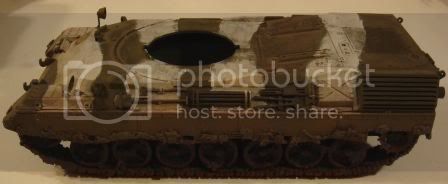
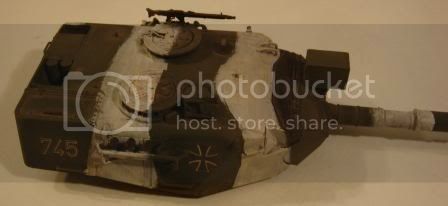
I have now started the weathering on the Leopard 1 A4. I am using a structural paint mixed with different pgiments, static grass, miniature leaves and some brown paint. This is applied the the supension, side skirts, fenders etc. After this had dried I have given it the first coat of dark brown paint. Next is various washes and drybrushing.
The idea is to give the appereanse of wet mud, mixed with various ground work. The top edge of the mud should be a little lighter to show mud partlially dried.
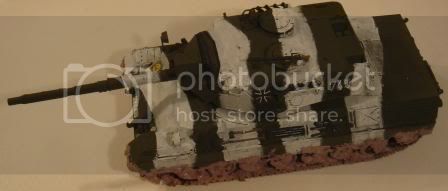
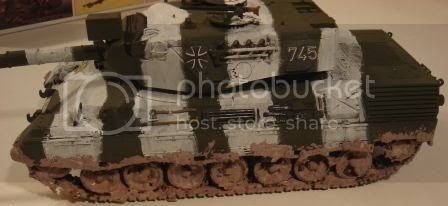
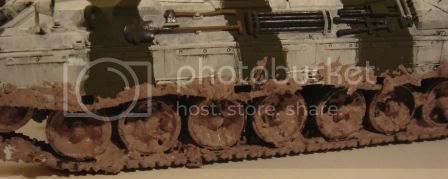


The white wash was applied with white acrylic paint. I used a wide square ended brush. I wiped of some of the white paint and then painted the tank in small strokes to simulate how the crew would have done it. That gave it the look of a semi worn quickly applied paint job that was a little sloppy as the crew did not seem to take much care about the white wash as it was to be removed later anyway.
It is actually quite difficult to replicate the sloppy white wash paint work of the tank crew without making it look like youself as a modeller has also made a sloppy paint job
 Anyway, I am quite satisfied about the result so far.
  Below you can see the picture I have based my work on - it is the same picture as poset previously in this tread - just repeated here for convenience.
I have now started the weathering on the Leopard 1 A4. I am using a structural paint mixed with different pgiments, static grass, miniature leaves and some brown paint. This is applied the the supension, side skirts, fenders etc. After this had dried I have given it the first coat of dark brown paint. Next is various washes and drybrushing.
The idea is to give the appereanse of wet mud, mixed with various ground work. The top edge of the mud should be a little lighter to show mud partlially dried.


Posted: Wednesday, October 17, 2007 - 08:40 PM UTC
More work done on my Leopard 1 A4. I have painted more on the mud and added some more weathering in form of washes to the whole tank and some only for the lower parts. Here are some pictures of the current status. Not much more to do - just a few finishing touches later today and the Leopard is done.
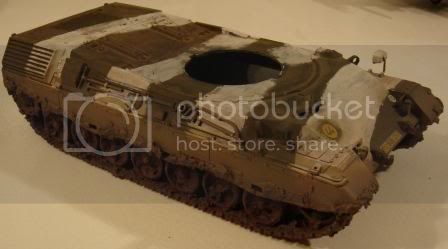


jam2727

Joined: June 28, 2007
KitMaker: 171 posts
Armorama: 37 posts

Posted: Thursday, October 18, 2007 - 12:17 AM UTC
Thanks Jesper for showing me your technique.
you have replicated it realy well it looks stunning , i like your weathering progress as well. looking forward to more
you have replicated it realy well it looks stunning
 , i like your weathering progress as well. looking forward to more
 |


