Florida, United States
Joined: August 09, 2006
KitMaker: 1,008 posts
Armorama: 847 posts
Posted: Tuesday, April 21, 2009 - 04:29 AM UTC
Thanks acav,
I’m using this as a reference photo and am trying to recreate this tank.
The photo is from the IWM and a close up follows.
You can see the hull gunner position hatch open and a part of a face. So I went ahead and open the hatch. I was wondering how he is sitting there but to save some time I might just go ahead and close it.
Thanks again,
Bob


Kimmo, nice details on the SU-85m, were those PE fenders?
Hame, Finland
Joined: February 04, 2009
KitMaker: 702 posts
Armorama: 665 posts
Posted: Tuesday, April 21, 2009 - 04:53 AM UTC
Thanks Bob. No, those are original fenders, just made them look thinner using abrasive paper and then added some battle damage.

An anti-modulation modelist.
Connecticut, United States
Joined: December 28, 2007
KitMaker: 34 posts
Armorama: 30 posts
Posted: Wednesday, April 22, 2009 - 05:33 AM UTC
It looks good Bob. I am looking forward to seeing how you handle the Hessian tape.

#041
Kobenhavn, Denmark
Joined: July 20, 2006
KitMaker: 10,069 posts
Armorama: 4,677 posts
Posted: Friday, April 24, 2009 - 11:01 PM UTC
Great entries, Marcin and Matthew.
Interesting project, Bob. The Hessian tape is going to be a real challenge.
Looking forward to see more

Campaign'oholic - 252+ campaigns completed

#041
Kobenhavn, Denmark
Joined: July 20, 2006
KitMaker: 10,069 posts
Armorama: 4,677 posts
Posted: Monday, April 27, 2009 - 05:54 AM UTC
A small update on my FW 190 D-9. I have now started painting with numerous problems with my airbrush along the way. This one is definitely struggeling not to be finished.
I am building Walter Hohenberg's FW 190D-9. He was shoot down by US AA positions during the new Year 1944-45 during operation Bodenplatte. He spend the rest of the war in a POW camp.
Apparently there are many different opinions on the colours for this aircraft and whether it was sprayed on or also brushpainted on.
More to follow as the build continues....


Campaign'oholic - 252+ campaigns completed

#023
Zurich, Switzerland
Joined: March 13, 2009
KitMaker: 2,058 posts
Armorama: 1,656 posts
Posted: Tuesday, April 28, 2009 - 08:11 AM UTC
Hi all!
Some great Projects on here! What I like most about this campaign is that it covers all themes, scales and times. Might get me motivated to finish a plane for once...
Had some progress over the last few weekends:

More here:
https://armorama.kitmaker.net/forums/138515#1155809Cheers and keep up the flow!

Too many models - too little time...
Ontario, Canada
Joined: January 09, 2005
KitMaker: 577 posts
Armorama: 446 posts
Posted: Tuesday, April 28, 2009 - 01:50 PM UTC
My Argentine Repotenciado (1995). Its the Italeri front upper hull mated to a Tamiya rear upper hull. The gun is from a Heller AMX-13 (105) extended with plastitube, the turret is Tamiya with Dragon, Academy etc parts. The thickened cheek armour was added. The engine deck and hull rear were scratch built as was the turret rear basket(drove me nuts


). Painted with Tamiya acrylics (Nato Green and a custom mixed Tan) weathered with oil wash, dusting of Deck Tan and flat coated. I will install aerials and maybe figures later.

Rear hull mods


Cheers,
Doug

#041
Kobenhavn, Denmark
Joined: July 20, 2006
KitMaker: 10,069 posts
Armorama: 4,677 posts
Posted: Tuesday, April 28, 2009 - 08:10 PM UTC
Excellent build, Doug. Nice to see a Sherman in other than overall olive drab.
Thanks for sharing

Campaign'oholic - 252+ campaigns completed
California, United States
Joined: April 01, 2002
KitMaker: 4,287 posts
Armorama: 1,867 posts
Posted: Wednesday, April 29, 2009 - 03:57 AM UTC
Quoted Text
Nice to see a Sherman in other than overall olive drab.
I concur. very nicely done. "Q"

"Don't fear the night, fear what hunts at night"
California, United States
Joined: April 01, 2002
KitMaker: 4,287 posts
Armorama: 1,867 posts
Posted: Thursday, April 30, 2009 - 05:28 AM UTC
"Don't fear the night, fear what hunts at night"

#041
Kobenhavn, Denmark
Joined: July 20, 2006
KitMaker: 10,069 posts
Armorama: 4,677 posts
Posted: Thursday, April 30, 2009 - 08:30 PM UTC
Great job on the camouflage, Matt. Especially considering the scale of this little one.
My FW 190D9 is struggeling. It just does not want to get finished. I had quite some problems both with getting the colours right and with my airbrush. Nonetheless I have made some progress and finished the camouflage.
More to follow....

Campaign'oholic - 252+ campaigns completed
California, United States
Joined: April 01, 2002
KitMaker: 4,287 posts
Armorama: 1,867 posts
Posted: Saturday, May 02, 2009 - 06:37 AM UTC
"Don't fear the night, fear what hunts at night"
Saskatchewan, Canada
Joined: April 23, 2006
KitMaker: 140 posts
Armorama: 46 posts
Posted: Saturday, May 02, 2009 - 07:34 PM UTC
I'm going to try and finish my Trumpeter Ariete that I started a few years ago. It never got farther than a coat of paint. There are some issues with the kit decals that put me off it, then I got caught up with "winged things"


#041
Kobenhavn, Denmark
Joined: July 20, 2006
KitMaker: 10,069 posts
Armorama: 4,677 posts
Posted: Monday, May 04, 2009 - 02:46 AM UTC
Nice FW 190, Matt. Great job on the masking. What geschwader is this? I do not remember seeing this striking red nosed Ramjaeger before?
Nice shading job on the Ariete, Ryan!
Campaign'oholic - 252+ campaigns completed
California, United States
Joined: April 01, 2002
KitMaker: 4,287 posts
Armorama: 1,867 posts
Posted: Monday, May 04, 2009 - 06:10 AM UTC
Jesper, thanks for the kudos. Aeromaster decal instruction sheet states
IV/JG3 flown by Feldwebel Willi Unger out of Ansbach. Later became the Staffel Kapitan of 12/JG3. Shot down at least once and was credited with 22 victories, 19 being four engine bombers. It is coming together now. I got my washes applied this morning, and flat coated it. Will get some pics up soon. I also concur on the Ariete, nicely done and so close to being completed too!

Thanks, "Q"

"Don't fear the night, fear what hunts at night"

#041
Kobenhavn, Denmark
Joined: July 20, 2006
KitMaker: 10,069 posts
Armorama: 4,677 posts
Posted: Tuesday, May 05, 2009 - 12:28 AM UTC
Interesting info, Matt. I have read about Willi Unger before. One of the great viermot aces. It will be interesting to see this build finished.

Campaign'oholic - 252+ campaigns completed
California, United States
Joined: April 01, 2002
KitMaker: 4,287 posts
Armorama: 1,867 posts
Posted: Tuesday, May 05, 2009 - 05:54 AM UTC
And finished it is.

From what I have gathered the paint scheme is fictional, but regardless, it does grabs your attention. Thanks, "Q"
"Don't fear the night, fear what hunts at night"

#041
Kobenhavn, Denmark
Joined: July 20, 2006
KitMaker: 10,069 posts
Armorama: 4,677 posts
Posted: Tuesday, May 05, 2009 - 11:23 PM UTC
Great job, Matt. A really beautiful Wurger! Definitely one of the most colourful FW 190s I have ever seen. A real head turner.
Thanks for sharing

Campaign'oholic - 252+ campaigns completed

#023
Zurich, Switzerland
Joined: March 13, 2009
KitMaker: 2,058 posts
Armorama: 1,656 posts
Posted: Sunday, May 10, 2009 - 07:13 AM UTC
Hi all!
Great FW 190s! Nice Ariete!
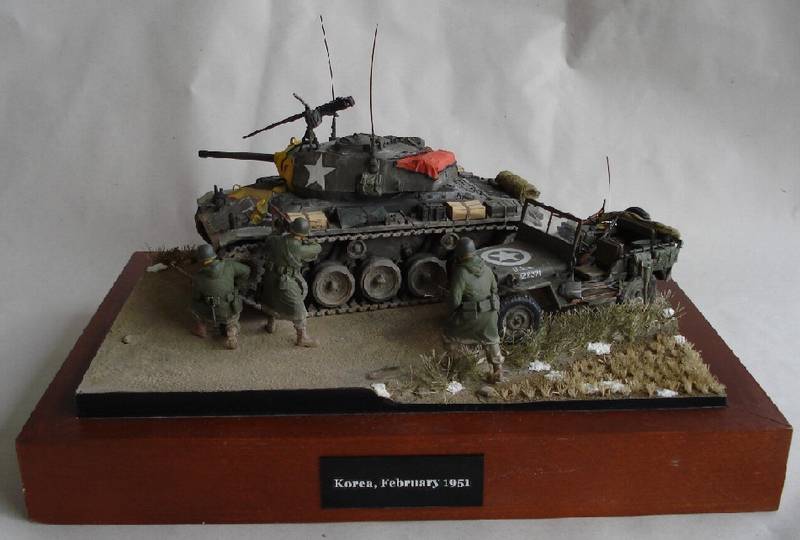
My Project's done:


Next up is an italian AB 41. Cammo is in early stages...
Cheers
Stef
PS: Do I have to do anything special to make it "count"?
Too many models - too little time...
California, United States
Joined: April 01, 2002
KitMaker: 4,287 posts
Armorama: 1,867 posts
Posted: Sunday, May 10, 2009 - 09:33 AM UTC
Quoted Text
Do I have to do anything special to make it "count"?
Nope. posting your pics here is good enough for me. Will help keep the gallery space down as well. Even though I only have a few pics in assorted galleries, my limit is almost exceeded. I can track them easy enough right here in the forum. Just don't delete them from your hosting site and all should be well. Looks like your dio came out well. Well done and thanks for sharing. "Q"
ps. Thanks for the kudos on the 190 guys, much appreciated

"Don't fear the night, fear what hunts at night"
Connecticut, United States
Joined: December 28, 2007
KitMaker: 34 posts
Armorama: 30 posts
Posted: Sunday, May 10, 2009 - 09:38 AM UTC
This is the progression of the Panther to date.


" BORDER="0">


" BORDER="0">


" BORDER="0">
California, United States
Joined: April 01, 2002
KitMaker: 4,287 posts
Armorama: 1,867 posts
Posted: Sunday, May 10, 2009 - 10:30 AM UTC
"Don't fear the night, fear what hunts at night"
Michigan, United States
Joined: February 11, 2008
KitMaker: 311 posts
Armorama: 13 posts
Posted: Sunday, May 10, 2009 - 02:39 PM UTC
Blew the dust off of the S-199 and got some work done. This conversion has fought me since the beginning and this campaign may be just what i need t get it done.


Taylor
Current Builds:
FW 190 D (Butcher Bird)
P61A (Night Stalkers)
P47D (CaveTonitrum)
Sea Fury ( Airedale Navy)
S-199 for finish the job again on Armorama
California, United States
Joined: April 01, 2002
KitMaker: 4,287 posts
Armorama: 1,867 posts
Posted: Sunday, May 10, 2009 - 03:31 PM UTC
Looks good taylor. "Q"

"Don't fear the night, fear what hunts at night"

#041
Kobenhavn, Denmark
Joined: July 20, 2006
KitMaker: 10,069 posts
Armorama: 4,677 posts
Posted: Monday, May 11, 2009 - 12:10 AM UTC
Nice looking Mule, Taylor.
I have made some more progress on my FW 190D9. The markings are now on. They went on without any problem with Microsol set.
Next is a little weathering and a final coat of varnish.

Campaign'oholic - 252+ campaigns completed


 " BORDER="0">
  " BORDER="0">
  " BORDER="0">


