Hi Eddy,
Wow! It looks great. So get her painted and weathered ASAP! Can hardly wait for the end result.
Campaigns
Where Armorama group builds can be discussed, organized, and updates posted.
Hosted by Darren Baker, Richard S.
The Workhorse: Panzer IV
PadrePete
Ontario, Canada
Joined: May 18, 2010
KitMaker: 219 posts
Armorama: 213 posts
Joined: May 18, 2010
KitMaker: 219 posts
Armorama: 213 posts
Posted: Sunday, January 30, 2011 - 05:04 AM UTC
Jedge3
Michigan, United States
Joined: July 17, 2010
KitMaker: 258 posts
Armorama: 208 posts
Joined: July 17, 2010
KitMaker: 258 posts
Armorama: 208 posts
Posted: Sunday, January 30, 2011 - 08:12 AM UTC
Eddy,
I should have it done soon. I tried to do some pin washes yesterday with oils, first time trying out that technique. I haven't checked to see how it turned out, been busy with the to do list at home. I will say that when i hit with the Tamiya flat it toned it down a lot. I may just hit it with some pigments and call it good. I have a bunch of these old Tamiya kits from i stopped modeling about 10 years ago, might sell some, really like the newer kits, except for the Dragon Wagon I am determined to build that thing.
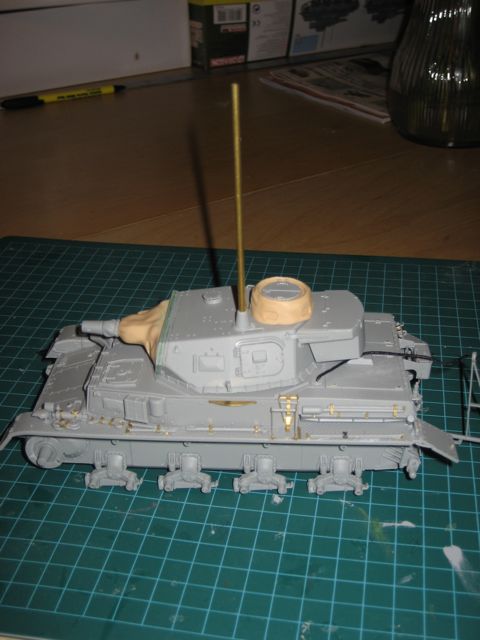
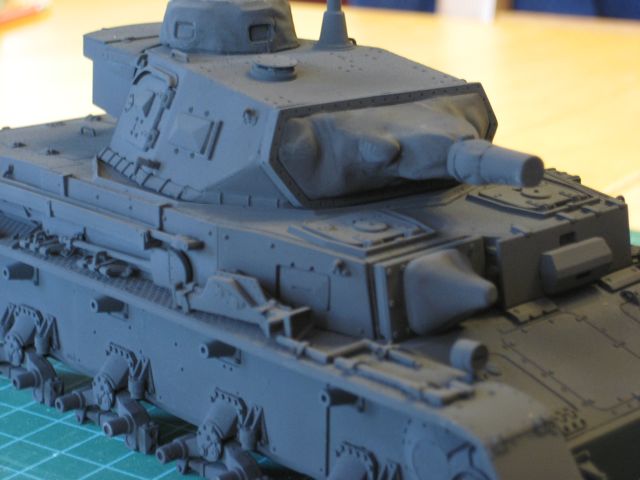
Did you scratch build most of that Eddy or was it an AM resin kit or something? Just wondering from all the white parts. It looks great can't wait to see the paint on it.
Jeff
Marnix
Gelderland, Netherlands
Joined: July 29, 2008
KitMaker: 799 posts
Armorama: 63 posts
Joined: July 29, 2008
KitMaker: 799 posts
Armorama: 63 posts
Posted: Monday, January 31, 2011 - 08:25 AM UTC
Hi all,
I've been enjoying this campaign ever since it began. There are some impressive builds going on here and there's much to been learned from all these builds.
So here's where I am standing at this moment. I'm building the ancient Panzer IV J (late) by Dragon. It's kit number #6022. I know there are some issues concerning the accuracy of this kit, but that's OK with me. I'm using these old kits to gain experience, so I'm building this kit out of the box. However, when I started the paint job I decided to update the frontal armor to a more correct thickness. Yes, I've got some planning issues...
Pictures:
The upper and lower hull are not glued together yet. I'm finishing the running gear and lower hull first, because it will later be inaccessible due to the Thoma Schürzen. When I have fixed the frontal armor, I can put the lower and upper hull together. Then paint the frontal armor again and then I can finally move on to the camouflage scheme.
With only four weeks to go in this campaign, I know I will have to speed up. I really want to finish this project, so more updates will follow soon.
Greetings,
Max
Jedge3
Michigan, United States
Joined: July 17, 2010
KitMaker: 258 posts
Armorama: 208 posts
Joined: July 17, 2010
KitMaker: 258 posts
Armorama: 208 posts
Posted: Monday, January 31, 2011 - 04:40 PM UTC
@ Max, looks very nice, looking forward to seeing it all painted and weathered.
Here is my status. I am about to try to chip the paint and use pigments for the first time. This picture is after washes and filters. My pin washes need work but that is for the next model, can't obsess about this or nothing will ever get done!
Also testing if I can post from Flickr.
Here is my status. I am about to try to chip the paint and use pigments for the first time. This picture is after washes and filters. My pin washes need work but that is for the next model, can't obsess about this or nothing will ever get done!
Also testing if I can post from Flickr.
Removed by original poster on 02/01/11 - 06:05:42 (GMT).
Tojo72
North Carolina, United States
Joined: June 06, 2006
KitMaker: 4,691 posts
Armorama: 3,509 posts
Joined: June 06, 2006
KitMaker: 4,691 posts
Armorama: 3,509 posts
Posted: Thursday, February 03, 2011 - 12:06 AM UTC
Hello everyone,Great campaign we had here,lots of particaption and many great completed builds !! Have the Campaign Ribbons been awarded yet ?
thanks
thanks
GaryKato
California, United States
Joined: December 06, 2004
KitMaker: 3,694 posts
Armorama: 2,693 posts
Joined: December 06, 2004
KitMaker: 3,694 posts
Armorama: 2,693 posts
Posted: Thursday, February 03, 2011 - 02:37 AM UTC
Quoted Text
Hello everyone,Great campaign we had here,lots of particaption and many great completed builds !! Have the Campaign Ribbons been awarded yet ?
thanks
The campaign was extended to the end of this month.
Tojo72
North Carolina, United States
Joined: June 06, 2006
KitMaker: 4,691 posts
Armorama: 3,509 posts
Joined: June 06, 2006
KitMaker: 4,691 posts
Armorama: 3,509 posts
Posted: Thursday, February 03, 2011 - 04:43 AM UTC
Quoted Text
Quoted TextHello everyone,Great campaign we had here,lots of particaption and many great completed builds !! Have the Campaign Ribbons been awarded yet ?
thanks
The campaign was extended to the end of this month.
Never mind
tread_geek
Ontario, Canada
Joined: March 23, 2008
KitMaker: 2,847 posts
Armorama: 2,667 posts
Joined: March 23, 2008
KitMaker: 2,847 posts
Armorama: 2,667 posts
Posted: Thursday, February 03, 2011 - 09:20 AM UTC
Greetings all. I made some more progress on the JPz. With the exception of the tow cable, the bulk of the detail painting is complete. I started the weathering and noticed that one pair of stripes do not meld with the same colour to my liking (in the middle on the drivers (port) side). I'll touch that up when another build that requires similar colours goes into the spray area. Here's the progress shots.
Cheers,
Jan
Cheers,
Jan
spacewolfdad
England - West Midlands, United Kingdom
Joined: May 23, 2010
KitMaker: 642 posts
Armorama: 593 posts
Joined: May 23, 2010
KitMaker: 642 posts
Armorama: 593 posts
Posted: Monday, February 07, 2011 - 01:56 PM UTC
Hi Folks,
I have got a bit more done on the Stug IV, it is now ready for the painting stage, so it should be ready by the deadline.
Here is the progress so far:
With the schurzen attatched -
With a commander figure -
And finally undercoated with Tamyia grey fine surface primer -
That's it for now, I shall commence painting tomorrow (hopefully).
All the best,
Paul
Marnix
Gelderland, Netherlands
Joined: July 29, 2008
KitMaker: 799 posts
Armorama: 63 posts
Joined: July 29, 2008
KitMaker: 799 posts
Armorama: 63 posts
Posted: Thursday, February 10, 2011 - 08:27 AM UTC
Hi all,
I started to get a bit irritated by some of the incosistencies of my Panzer IV J (late) and decided to correct them.
I corrected the lower frontal armor on the hull to a more correct thickness and I corrected the way it is attached to the steelplate covering the engine compartment. I emplaced a new MG 42 barrel and added two hoisting eyes to the upper frontal armor.
(By the way: Sorry for the dutch JIBBA-JABBA on the pictures)
On the turret I added two grabhandles above the small hatches on the sides of the turret. I also added a bracket on top of the vent exhaust. At the beginning of the barrel I added a small steel plate on which a gas detection paper could be placed.
I understand that there are other things that need to be corrected to make this a true Panzer IV J (late), but for now I think I've captured the looks of the real thing. I need to proceed and repaint this machine to get it finished in time. The clock is ticking and time stops for no one...
Greetings,
Max
Marnix
Gelderland, Netherlands
Joined: July 29, 2008
KitMaker: 799 posts
Armorama: 63 posts
Joined: July 29, 2008
KitMaker: 799 posts
Armorama: 63 posts
Posted: Friday, February 11, 2011 - 04:28 AM UTC
Hi all,
Again a quick update. Just prior to priming the verhicle again, I decided to add the electrical cable that runs from the headlight into the engine compartment. Then I primed most of the vehicle again. I skipped repriming the running gear so I could save time. I had alreay painted the tracks in their basecolor, no need nor time to do that again. The primer I used is Tamiya XF-9 (Hull Red). Later on, I will basecoat the Panzer with Gunze Sangyo's Hobby Color H 404 (Khaki Brown).
You can see that I have the next paint allready thinned and at ready status... On to the next steps: spraying the basecoat and spraying the camouflage pattern. I hope I will make some progress with that during this weekend. In the meantime I will also continue with the running gear.
So much work, yet so little time...
Greetings,,
Max
tread_geek
Ontario, Canada
Joined: March 23, 2008
KitMaker: 2,847 posts
Armorama: 2,667 posts
Joined: March 23, 2008
KitMaker: 2,847 posts
Armorama: 2,667 posts
Posted: Sunday, February 13, 2011 - 07:24 AM UTC
Greetings all! Some more progress on the JPz-IV. The detail painting is pretty much complete and I added some textured acrylic medium to the suspension and a bit on the skirts to simulate a touch of dried mud. Didn't want to overdo it (but still might add a tad more). I tried something new and covered it with an overspray of Future and Tamiya X-21 Flat Base mixed at a mixture of 4 to 1. Seems to work quite well at removing any shine. I still want to add a few more highlights and mild shadows and maybe fix a spot or two. I finally got my photo area back to normal so I think the pictures are better.
@spacewolfdad - Paul, your StuG really looks like a nice kit. Far superior to the Italeri/ESCI offerings.
Cheers,
Jan
@spacewolfdad - Paul, your StuG really looks like a nice kit. Far superior to the Italeri/ESCI offerings.
Cheers,
Jan
Marnix
Gelderland, Netherlands
Joined: July 29, 2008
KitMaker: 799 posts
Armorama: 63 posts
Joined: July 29, 2008
KitMaker: 799 posts
Armorama: 63 posts
Posted: Sunday, February 13, 2011 - 08:57 AM UTC
Hi all,
@Jan: Nice work on that Jagdpanzer IV.
This weekend I managed to finish the basecoat and the camouflage pattern.
Got some work to do to let the colors contrast a little less. I think about placing some filters to do this, but any tips will be welcome!
Greetings,
Max
@Jan: Nice work on that Jagdpanzer IV.
This weekend I managed to finish the basecoat and the camouflage pattern.
Got some work to do to let the colors contrast a little less. I think about placing some filters to do this, but any tips will be welcome!
Greetings,
Max
tread_geek
Ontario, Canada
Joined: March 23, 2008
KitMaker: 2,847 posts
Armorama: 2,667 posts
Joined: March 23, 2008
KitMaker: 2,847 posts
Armorama: 2,667 posts
Posted: Sunday, February 13, 2011 - 09:19 AM UTC
Max, your Panzer's painting looks almost too good. It's even and consistent but the one thing about the German camo during the war was that almost anything goes. Most of the books I have show pretty sloppy and rushed jobs. Some photos show a very distinct definition between colours while in others they can hardly be seen. I guess what I am trying to say again is that almost anything goes, including how you have it now.
To tone things down, if you really want to, try a very light spray of the base sand colour over the brown stripes. What can also work is using a colour such as Tamiya Buff XF-57, again in a very light spray. It can give the vehicle an overall dusty look. In some cases a wash of the same colours applied with a brush can also work.
Cheers,
Jan
Posted: Sunday, February 13, 2011 - 11:43 AM UTC
I’m currently painting on my build and thought that I’d drop by to see how everyone’s coming along.
@ PadrePete – Thanks for the inspiration and kind words it is much appreciated. I’m going as fast (turtle with watermelon on its back) as I can.
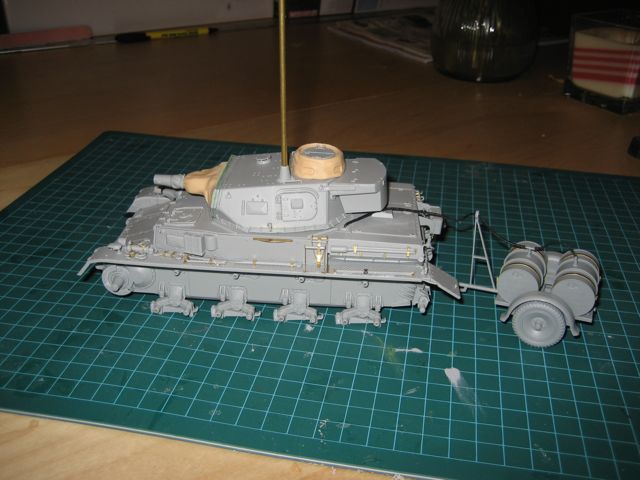
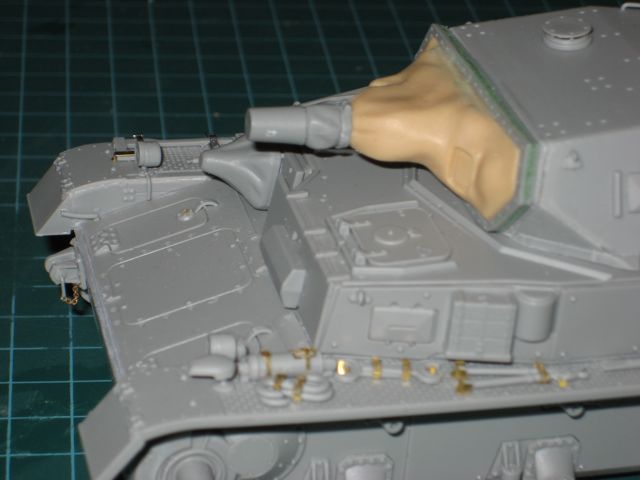
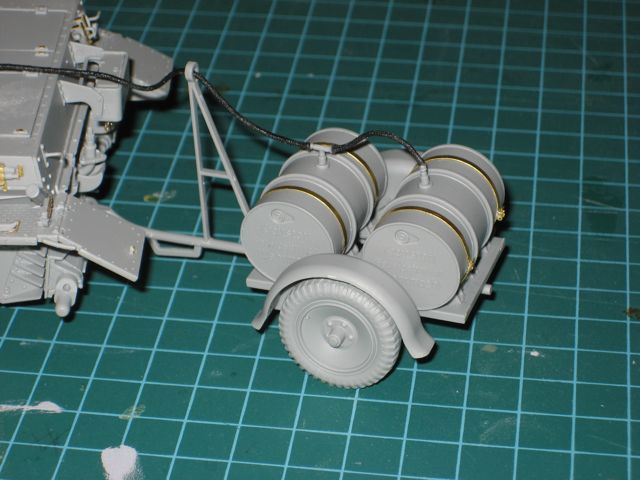
@Jedge3 – I scratch build most of the small bits and pieces along with using the oldie DML #9020 Panzer IV Ausf. G (Kursk 1943) kit, for the entire rear armor section, drive sprockets, wheels, idler, antenna, turret splash guards and various tools and turret pieces. The tracks, spare track links, rear fenders, machine gun and front towing eyes came from the current DML Panzer IV Ausf. F2 kit. I also used tools from Tamiya, Trumpeter and DML. The exhaust muffler is scratch built as the kit supplied one is to short in length and diameter. Note the scale difference between the DML’s turret side hinged armored vision ports and Tamiya’s hull side armored vision ports!
Your Panzer IV has that nice sheen to the finish. This is the way I like the paint to be just before I start the weathering process. Your on the way!
@Marnix – Your doing a step-by-step painting update. Good job on the camouflage scheme it looks so nice and neat. Ohhhh! Is that THE Mr. T sporting his fancy mohawk? I remember him on A TEAM. LOL
@ spacewolfdad – That is a really menacing looking vehicle. I like the cover you’ve added between the gun and hull housing. That’s one of the most overlooked items on these kits and difficult to render in any scale. You did a super job on it and on the build so far. That crew figure will really add to the hunter – killer business aspect of these vehicles. Is your machine gun shield 180° off?
@ tread_geek – Your Stug IV is looking really good. I like the dirt on the vehicle and running gear. Good tip on overspray mixture, I’ll have to give that a try!
-Eddy
@ PadrePete – Thanks for the inspiration and kind words it is much appreciated. I’m going as fast (turtle with watermelon on its back) as I can.
@Jedge3 – I scratch build most of the small bits and pieces along with using the oldie DML #9020 Panzer IV Ausf. G (Kursk 1943) kit, for the entire rear armor section, drive sprockets, wheels, idler, antenna, turret splash guards and various tools and turret pieces. The tracks, spare track links, rear fenders, machine gun and front towing eyes came from the current DML Panzer IV Ausf. F2 kit. I also used tools from Tamiya, Trumpeter and DML. The exhaust muffler is scratch built as the kit supplied one is to short in length and diameter. Note the scale difference between the DML’s turret side hinged armored vision ports and Tamiya’s hull side armored vision ports!
Your Panzer IV has that nice sheen to the finish. This is the way I like the paint to be just before I start the weathering process. Your on the way!
@Marnix – Your doing a step-by-step painting update. Good job on the camouflage scheme it looks so nice and neat. Ohhhh! Is that THE Mr. T sporting his fancy mohawk? I remember him on A TEAM. LOL
@ spacewolfdad – That is a really menacing looking vehicle. I like the cover you’ve added between the gun and hull housing. That’s one of the most overlooked items on these kits and difficult to render in any scale. You did a super job on it and on the build so far. That crew figure will really add to the hunter – killer business aspect of these vehicles. Is your machine gun shield 180° off?
@ tread_geek – Your Stug IV is looking really good. I like the dirt on the vehicle and running gear. Good tip on overspray mixture, I’ll have to give that a try!
-Eddy
spacewolfdad
England - West Midlands, United Kingdom
Joined: May 23, 2010
KitMaker: 642 posts
Armorama: 593 posts
Joined: May 23, 2010
KitMaker: 642 posts
Armorama: 593 posts
Posted: Sunday, February 13, 2011 - 09:13 PM UTC
Quoted Text
@ spacewolfdad – That is a really menacing looking vehicle. I like the cover you’ve added between the gun and hull housing. That’s one of the most overlooked items on these kits and difficult to render in any scale. You did a super job on it and on the build so far. That crew figure will really add to the hunter – killer business aspect of these vehicles. Is your machine gun shield 180° off?
Hi Eddy,
Thanks for the kind comments. The gun shield on the Stug III/IV was folded down when the loader's hatch was closed. Apparently the shield was fixed to the front hatch cover, when open, to hold it in position. I can't find where I got this information at the moment though.
All the best,
Paul
Posted: Monday, February 14, 2011 - 06:54 PM UTC
Hello friends!
@ Byron
@ PadrePete
@ Eddy
@ Bob
Thanks for your kind comments and very sorry for delay in reply, I have problems with my sugar (I am diabetic), today I re-start my project working with PE in the tools, soon I will ad more pics. Nice works friends!
Regards,
Rodolfo
@ Byron
@ PadrePete
@ Eddy
@ Bob
Thanks for your kind comments and very sorry for delay in reply, I have problems with my sugar (I am diabetic), today I re-start my project working with PE in the tools, soon I will ad more pics. Nice works friends!
Regards,
Rodolfo
GregCloseCombat
California, United States
Joined: June 30, 2008
KitMaker: 2,408 posts
Armorama: 2,394 posts
Joined: June 30, 2008
KitMaker: 2,408 posts
Armorama: 2,394 posts
Posted: Monday, February 14, 2011 - 06:57 PM UTC
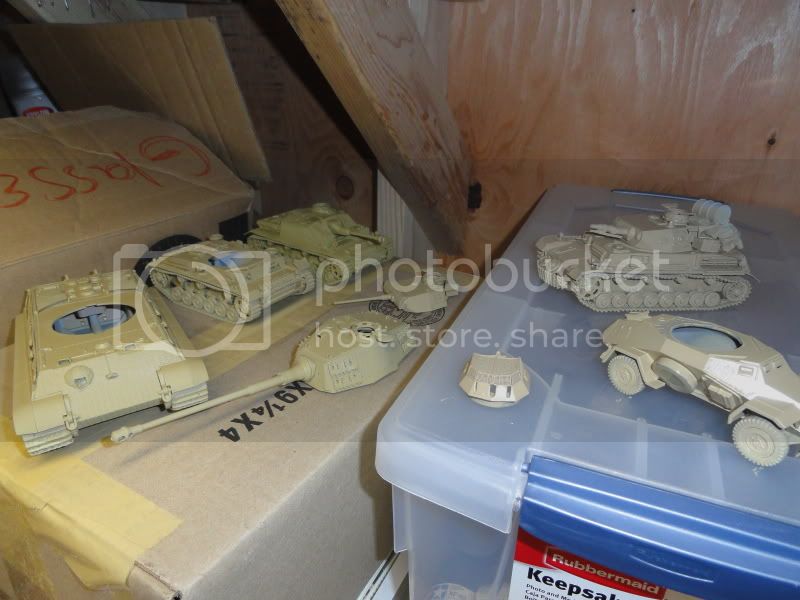
Well, maybe I will have something finished by the end of the month after all. I got the barrel the other day, and primed tonight. Just a base coat of yellow, a few details, and a couple decals and we have a campaign build. I can weather it some other day when I have a scene to put it in.
Nice work everyone
Nice work everyone
Bigrip74
Texas, United States
Joined: February 22, 2008
KitMaker: 5,026 posts
Armorama: 1,604 posts
Joined: February 22, 2008
KitMaker: 5,026 posts
Armorama: 1,604 posts
Posted: Monday, February 14, 2011 - 07:30 PM UTC
Rodolfo, be sure to take care of your insulin levels I am sure that most of us here enjoy your building and tips
Bob
Bob
Posted: Tuesday, February 15, 2011 - 05:17 AM UTC
Hi Guys
sorry for not posting for a while, a new baby can seriously put a cramp in free time for hobbys... i have finished the building and put an undercoat on it, hopefully i can get the grey on it today or tomorrow
cheers mark
sorry for not posting for a while, a new baby can seriously put a cramp in free time for hobbys... i have finished the building and put an undercoat on it, hopefully i can get the grey on it today or tomorrow
cheers mark
madmax5510
Hunedoara, Romania
Joined: May 06, 2008
KitMaker: 354 posts
Armorama: 343 posts
Joined: May 06, 2008
KitMaker: 354 posts
Armorama: 343 posts
Posted: Tuesday, February 15, 2011 - 07:40 AM UTC
Great work all around,guys,congrats to all !
Unfortunatelly,for me,the time enter in a bag. .But i catch 2 free days,and i made an Ostwind for a good friend[it was his birthday].No time for pictures of build in progress,nothing special...just fun.So, Ostwind in Ardennes 1945,Zvezda 1/35 kit[ugly kit,ugly tracks],Academy tracks,Agama acrylics and pigments:
If is ok,i will post pictures in campaign gallery...i don't know when i catch other 2 free days to finish my F1.
Goodluck to all,
Dani
Unfortunatelly,for me,the time enter in a bag. .But i catch 2 free days,and i made an Ostwind for a good friend[it was his birthday].No time for pictures of build in progress,nothing special...just fun.So, Ostwind in Ardennes 1945,Zvezda 1/35 kit[ugly kit,ugly tracks],Academy tracks,Agama acrylics and pigments:
If is ok,i will post pictures in campaign gallery...i don't know when i catch other 2 free days to finish my F1.
Goodluck to all,
Dani
GregCloseCombat
California, United States
Joined: June 30, 2008
KitMaker: 2,408 posts
Armorama: 2,394 posts
Joined: June 30, 2008
KitMaker: 2,408 posts
Armorama: 2,394 posts
Posted: Wednesday, February 16, 2011 - 06:25 PM UTC
Nice build Mark and congrats on finishing Dani - looks very nice!
Sprayed an army tonight. Camo coming next
Bigrip74
Texas, United States
Joined: February 22, 2008
KitMaker: 5,026 posts
Armorama: 1,604 posts
Joined: February 22, 2008
KitMaker: 5,026 posts
Armorama: 1,604 posts
Posted: Wednesday, February 16, 2011 - 08:53 PM UTC
Greg, you are as sick as I am nice looking lot.
Bob
Bob
GregCloseCombat
California, United States
Joined: June 30, 2008
KitMaker: 2,408 posts
Armorama: 2,394 posts
Joined: June 30, 2008
KitMaker: 2,408 posts
Armorama: 2,394 posts
Posted: Thursday, February 17, 2011 - 04:01 PM UTC
Bob, judging by this site, I'd say this sickness is contagious