Campaigns
Where Armorama group builds can be discussed, organized, and updates posted.
The Workhorse: Panzer IV
Ruffus
Visit this Community
Guatemala
Joined: April 12, 2005
KitMaker: 343 posts
Armorama: 223 posts
Posted: Friday, July 23, 2010 - 01:59 PM UTC

Quoted Text

I am out sick from work recovering from ankle reconstruction surgery,:p


nice excuse!!, will have to come out with something like that some day soon

Byron
ltb073
Visit this Community
New York, United States
Joined: March 08, 2010
KitMaker: 3,662 posts
Armorama: 3,078 posts
Posted: Saturday, July 24, 2010 - 01:31 AM UTC
Ok guys,
I put a photo into the gallery,

thanks for all the tips, comments and help and Byron thanks for running the campaign.
I'll keep watching and reading hear lots of good builds going on and like I said I may build that Flakpanzer Mobelwagen thats calling out 2 me
Still got 2 weeks before I have to go back to work but then I think I go on vacation
Jedge3
Visit this Community
Michigan, United States
Joined: July 17, 2010
KitMaker: 258 posts
Armorama: 208 posts
Posted: Sunday, July 25, 2010 - 05:29 PM UTC
Hi all,
I am just getting back in the hobby after about a 10 year break. This is my first campaign and I will be building the Tamiya Panzer Kampfwagen IV Ausf. D like a few others. I found the old Eduard kit on eBay for a good price so I will give that try.

Does anyone know of a good AM gun barrel for this kit? I searched for a 75mm KwK 37 L/24 which is what I think is correct but all the entries are for a Pz.Kpfw. III Ausf.N.

Thanks,
Jeff
SGTJKJ
#041
Visit this Community
Kobenhavn, Denmark
Joined: July 20, 2006
KitMaker: 10,069 posts
Armorama: 4,677 posts
Posted: Sunday, July 25, 2010 - 09:24 PM UTC
Hi Jeff

Welcome back to the hobby. You will not regret it. The quality of the kits have gone up incredibly over the last 10 years.

Good choice for a starting kit. I believe the gun for the Pz. III ausf. N is the same as for the Pz. IV ausf. D, so I believe you can use the Pz. III ausf. N gun barrel.
SGTJKJ
#041
Visit this Community
Kobenhavn, Denmark
Joined: July 20, 2006
KitMaker: 10,069 posts
Armorama: 4,677 posts
Posted: Monday, July 26, 2010 - 12:05 AM UTC
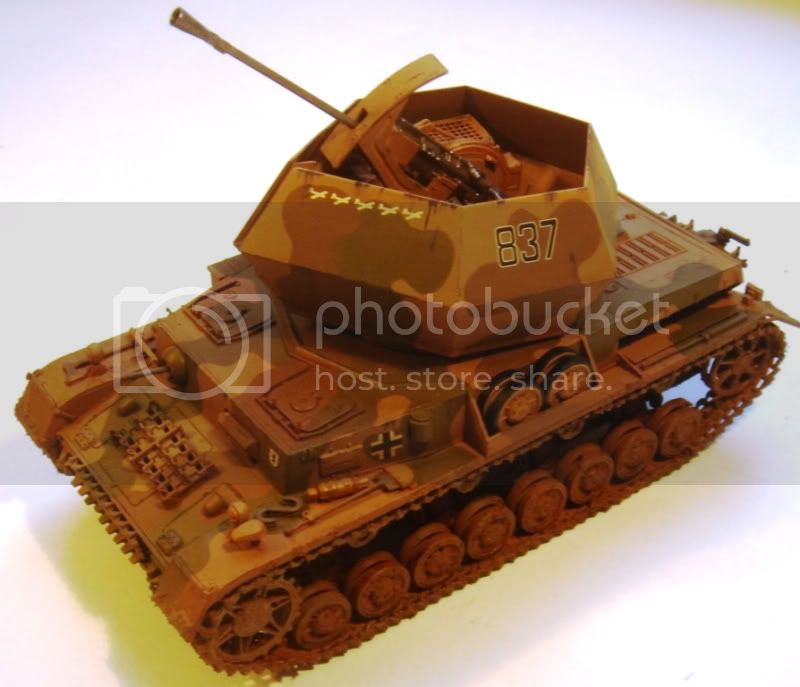
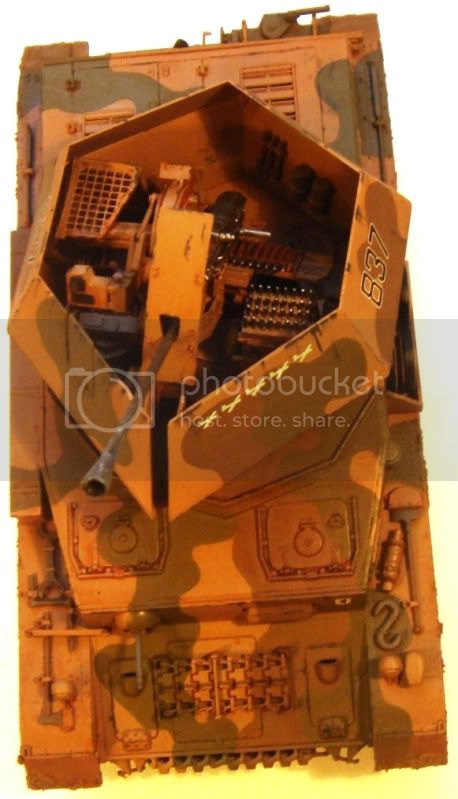
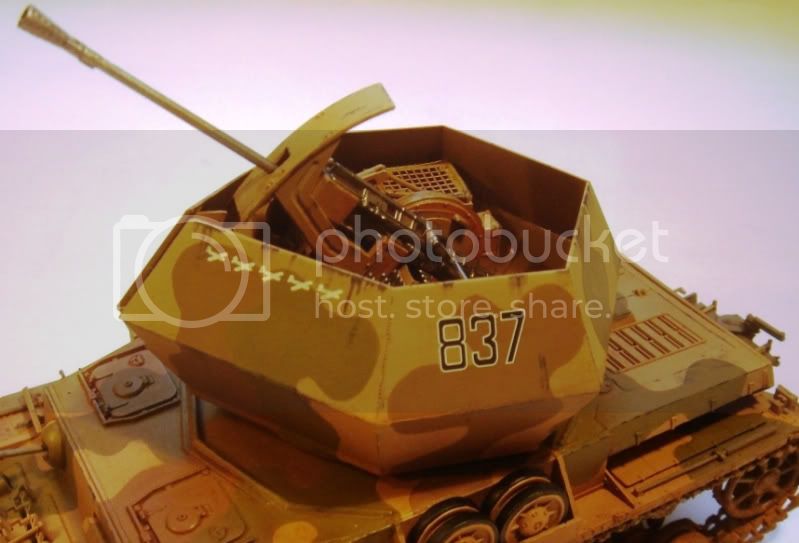
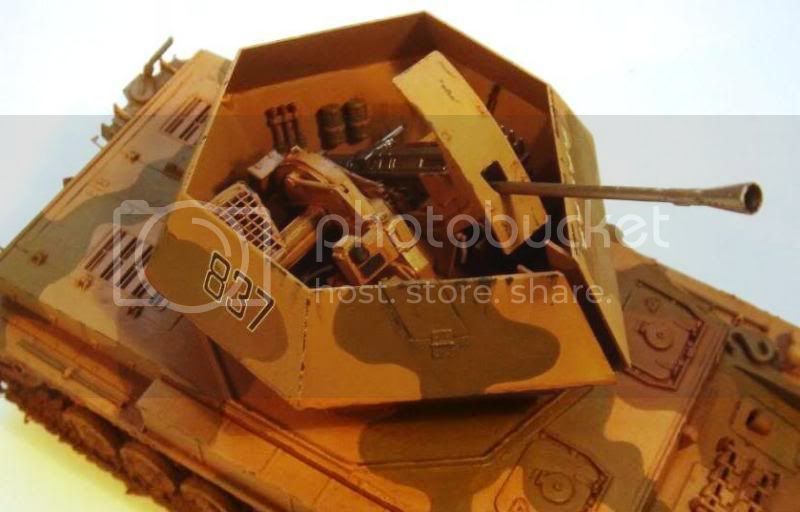
Here are the pictures of my finished Ostwind. Build as a Panzer '46 with generic markings and numbers.
I am not too satsified with the pictures, so I will take some new ones outside with better light conditions soon and post them.

Comments welcome


panzerbob01
Visit this Community
Louisiana, United States
Joined: March 06, 2010
KitMaker: 3,128 posts
Armorama: 2,959 posts
Posted: Monday, July 26, 2010 - 03:15 AM UTC
Greetings!

I have just enlisted (and here I woulda thought I had long ago learned not to volunteer...), and this is my first-ever "campaign". Hope I'm not too late! Looks like some a you have really got things going... even, it looks to me, finished! Yikes!. I am sure glad that the end-date has been pushed back to DEC 2010. At least then I have a chance of getting something done!

I have a couple of options for a campaign build:

I started the following "potential" Pz. IV project on 14 JULY- so I am hoping this can be accepted here.

The project: I have this Panzer IV-C hull from a CyberHobby "Raketenwerfer auf Pz.Kpfw. IV" kit. I am thinking of building some conversion off of this- I have no turret for it, so... I am LOOKING FOR IDEAS on what this conversion could be. A couple of candidate ideas have popped up:

One is to build it as a "fahrschule" vehicle (have a few pics of one in use at one of the panzer training establishments early war- maybe pre- 1939?).

Another- and I have only one pic- from the right-rear- of this vehicle- is to build it as what has been labelled as an "artillery panzer" (as it consists of the hull plus some sort of low armored box in place of the turret, I am thinking it to have been a field-mod artillery observation vehicle, or maybe a muni-panzer?) photo'd by the Russians in Berlin in 1945.

I would rather NOT hack the hull up a lot- and do not have any 88 gun to use, anyway- and there is already that (Really UGLY) 88 on Pz. IV kit out, so, NO, to that idea.

I'd really like to do a test-bed or field-mod vehicle- putting a Flak 38 or Flak 43 37mm or maybe a "jaboschreck 3cm flak" on top seems attractice, but I don't have any photo-docs to these effects. Scratch-building is IN, by me... SO- ANYONE have any ideas?

Here's the kit:


And here's my start- from 14 JULY I built the basic hull, some of the attachments, and the running gear... as seen in this pic, I did that with a "novel rearrangement" (since corrected) of the bogies... Other progress has included prepping up muffler bits, various things to go on fenders, etc. My approach has been, to-date, to build the hull as a substantially OOTB Pz. IV-C hull- I will use all of the kit PE bits for same, plus add a little bit of scratch tweaking for completing details. Depending on what it will become... I will add further stuff and, maybe, remove or change some of what is done.

Colour scheme? Depends on what it becomes!

Meanwhile- this is about the most spectacular kit I've started up since returning to the Hobby 18 months back! And only the second Pz.IV I've attempted (have a Tamiya Wirbelwind almost done...). Hope someone has some cool idea that I can implement!


The other option I might have is the recent Dragon Brummbar mid with zim kit- along with some Magic Tracks (mid-version 40cm hollow-horn) to replace those DS solid-horn tracks. Being no sort of DS fan, I plan to use MT and a little scratch tweaking to build this Brummie as a "2-sided" "brand new and used vehicle". This build is planned for the local club-show...

Comment and suggestion is much hoped for!
Plasticbattle
#003
Visit this Community
Donegal, Ireland
Joined: May 14, 2002
KitMaker: 9,763 posts
Armorama: 7,444 posts
Posted: Monday, July 26, 2010 - 03:26 AM UTC

Quoted Text

and by popular demand the time frame will be from july 01 to december 30, 2010.


Hi Guys. I originally skipped this as the dates didn´t suit me, but having gone through the thread from the start, I see the time frame has changed ... and I joined in today. I will be building Tristars early Sturmpanzer IV ... mostly OOB ... but maybe a few little touches to bring up the detail level, and a small base for it.
This will be the first campaign Ive done in at least 3 years.
Tojo72
Visit this Community
North Carolina, United States
Joined: June 06, 2006
KitMaker: 4,691 posts
Armorama: 3,509 posts
Posted: Monday, July 26, 2010 - 05:39 AM UTC
You made quick work of that one Jesper,Lots of good work going on here,can't wait to get started.
grayghost666
#021
Joined: August 02, 2007
KitMaker: 2,458 posts
Armorama: 656 posts
Posted: Monday, July 26, 2010 - 06:09 AM UTC
Hello Bob,
With the start date of July 1, 2010 and you started July 14, 2010 your build is allowed.
As for suggestions I like the artillery panzer Berlin 1945. Just my 2 cents.
Cheers,
Bruce
Ruffus
Visit this Community
Guatemala
Joined: April 12, 2005
KitMaker: 343 posts
Armorama: 223 posts
Posted: Monday, July 26, 2010 - 06:29 AM UTC
welcome aboard Frank and Bob, let's see what you have.
Jesper, your Ostwind came out looking very good, when you say you were going to build it with hard edge camo, I think you where going to use some candy stripes; nice build non the less; now go, and post yor model in the gallery.

My Kugelblitz is already painted, but the road whells are still atach to the tree, I really like the Pz IV, but all those little suckers makes me mad. will post some pictures tomorrow.

Regards

Byron
GaryKato
Visit this Community
California, United States
Joined: December 06, 2004
KitMaker: 3,694 posts
Armorama: 2,693 posts
Posted: Monday, July 26, 2010 - 08:36 AM UTC

Quoted Text


My Kugelblitz is already painted, but the road whells are still atach to the tree, I really like the Pz IV, but all those little suckers makes me mad. will post some pictures tomorrow.


I thought about enlisting with my Monogram 1/32 "Sturmpanzer 43" kit but seeing all those road wheels made me remember why this kit is still unbuilt (though my road wheels are no longer attached to the tree).
SGTJKJ
#041
Visit this Community
Kobenhavn, Denmark
Joined: July 20, 2006
KitMaker: 10,069 posts
Armorama: 4,677 posts
Posted: Friday, July 30, 2010 - 07:32 AM UTC
Welcome to the campaign, Frank and Bob. Looking forward to follow your builds.

Bob, I would go for the Brummie idea. It sounds like a cool idea although a bit ambitous, but sure you can pull it of.

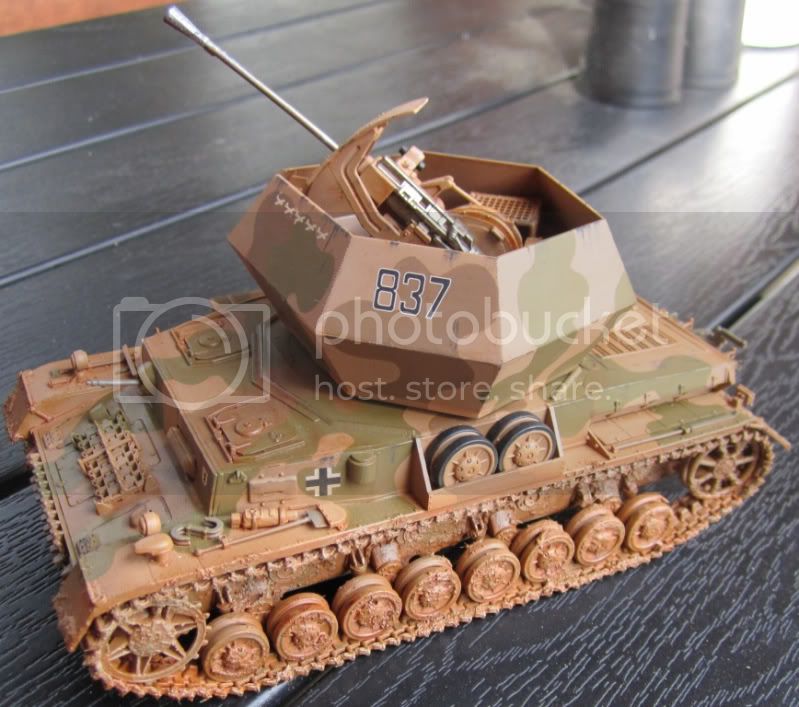
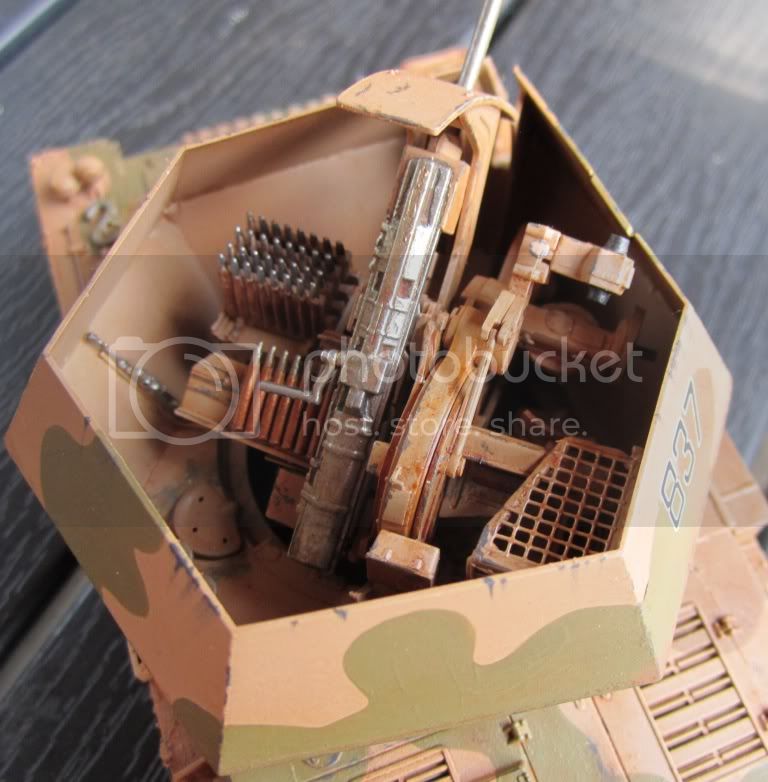
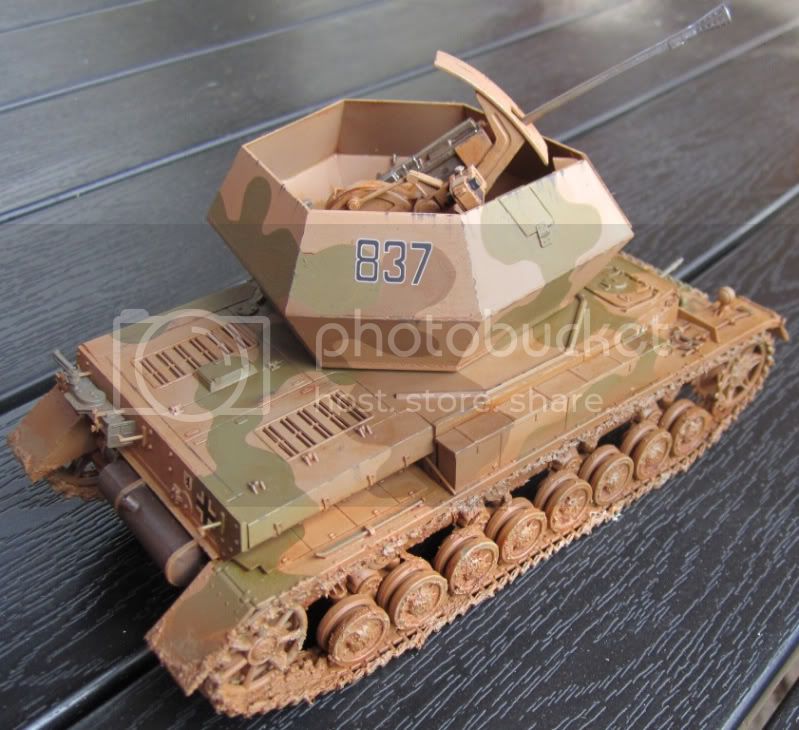
Thanks for all the comments on my Ostwind. I appreciate it. As promised I shot some better pictures outside in daylight.
Byron, I considered the hard edge stripes, but was inspired by some of the last King Tiger camouflage schemes coming out before the end of the war. So went for that instead as this is sort of a "Wehrmacht 1946" camouflage scheme.


rtvmodeler
#136
Visit this Community
Distrito Federal, Mexico
Joined: April 06, 2002
KitMaker: 437 posts
Armorama: 391 posts
Posted: Saturday, July 31, 2010 - 05:50 PM UTC
Nice works friends!. Jesper, the camo looks great!.

Here are some of my current work.

I am drilling the fighting zone and I will add some damage of laminate neglected


The resin of verlinden not includes the accelerator and brake pedal, I made them using styrene. Adding a connection tothe lever of the transmission.


Soon more pics!.
Regards,
Rodolfo
barkingdigger
Staff MemberAssociate Editor
ARMORAMA
#013
Visit this Community
England - East Anglia, United Kingdom
Joined: June 20, 2008
KitMaker: 3,981 posts
Armorama: 3,403 posts
Posted: Sunday, August 01, 2010 - 06:16 AM UTC

Quoted Text

I thought about enlisting with my Monogram 1/32 "Sturmpanzer 43" kit


Gary, you mean the vernerable Monogram Brummbar? You HAVE to build it! I had one a long time ago, and remember it fondly. (Also had their Wirbelwind...)

I've made a start on my Tamiya Stug IV and will take some pics soon.

Tom
barkingdigger
Staff MemberAssociate Editor
ARMORAMA
#013
Visit this Community
England - East Anglia, United Kingdom
Joined: June 20, 2008
KitMaker: 3,981 posts
Armorama: 3,403 posts
Posted: Tuesday, August 03, 2010 - 01:29 AM UTC
Well, I finally got some time on my Tamiya StuG IV. (Actually it was an atempt to clear "modeller's block"...) After careful thinking I decided this would be an OOB build rather than a detailing project - the base kit simply would require too much in the way of AM goodies and there are newer kits that would be better value. Still, as a plain build the old StuG holds up reasonably well.

I didn't add any zimmerit, but with the mix of early & late features I felt it was Hobson's Choice. Instead, I intend to use this kit to play with camoflage, perhaps a weathered soft-edged 2-tone body and bright new hard-edged 3-tone ambush scheme on the skirts... (I was captivated by shots of a StuG with disc scheme on the skirts, but not sure how to do that one!)


Tom
ltb073
Visit this Community
New York, United States
Joined: March 08, 2010
KitMaker: 3,662 posts
Armorama: 3,078 posts
Posted: Tuesday, August 03, 2010 - 01:54 AM UTC
Tom,
Im watching your Stug build here. I built the same kit 2 years ago and Just had it in my hands last night saying to myself that this would make a great overhaul project The way mine is now it is still in the original plastic yellow color with a little OD rattle can camo on it.
Plasticbattle
#003
Visit this Community
Donegal, Ireland
Joined: May 14, 2002
KitMaker: 9,763 posts
Armorama: 7,444 posts
Posted: Tuesday, August 03, 2010 - 06:44 AM UTC
Hi Guys.
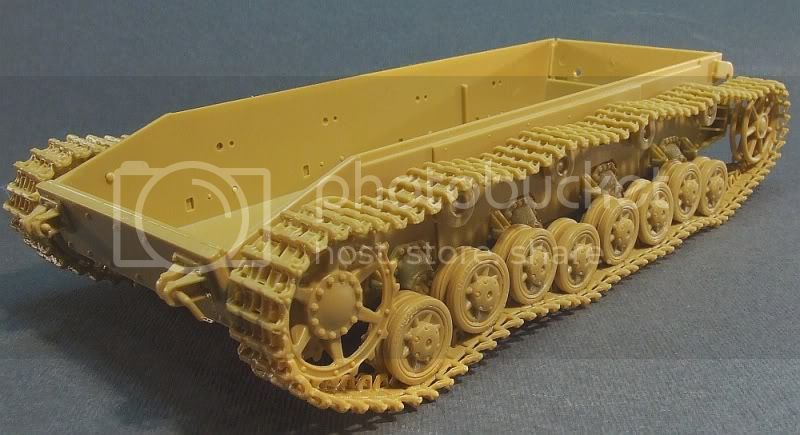
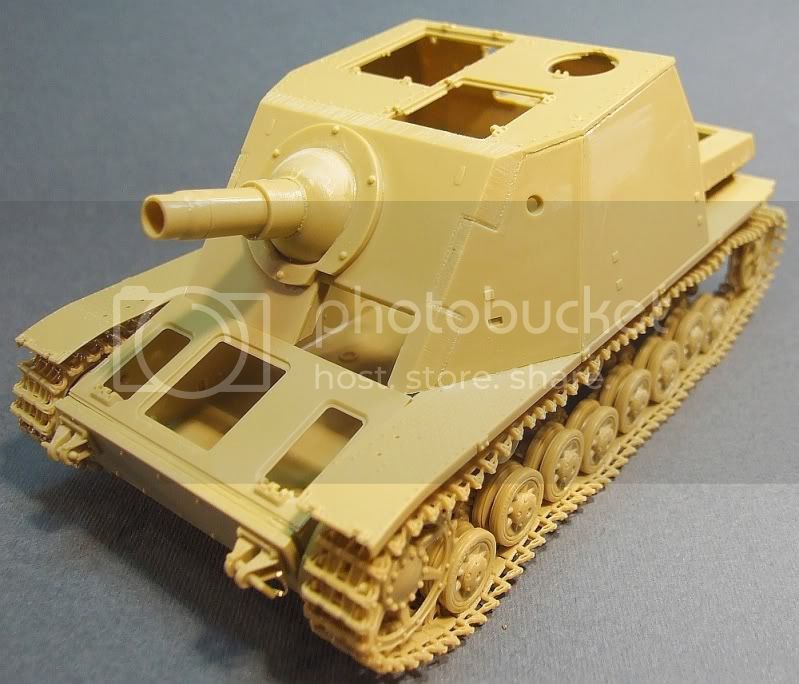
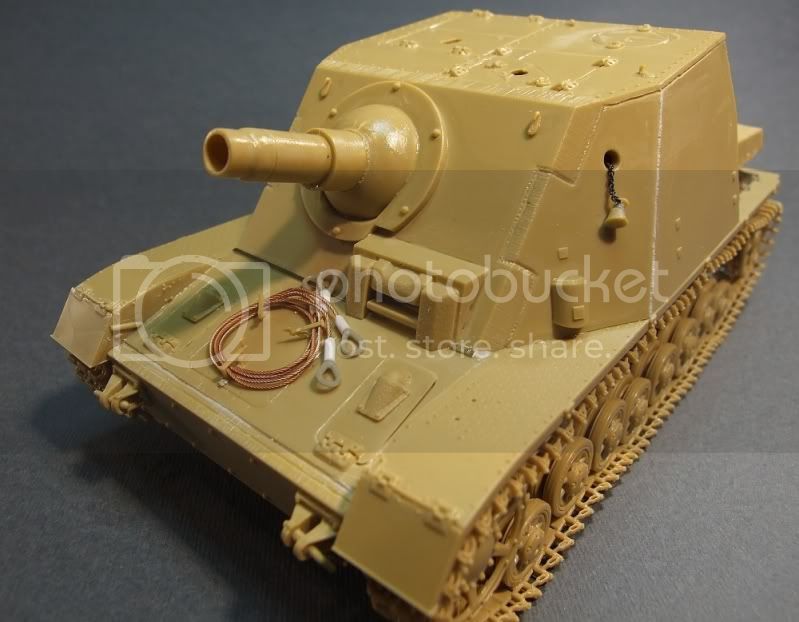
I have the Tristar Brummbär kit built now. Below are images from the first two steps. More images and build info can be found on The Assembly. Please feel free to comment and/or critic, and also feel free if you have any questions.


Cheers.
Tojo72
Visit this Community
North Carolina, United States
Joined: June 06, 2006
KitMaker: 4,691 posts
Armorama: 3,509 posts
Posted: Tuesday, August 03, 2010 - 08:03 AM UTC
Hello Frank,Nice progress,it looks real good !

I have one question for Frank or anyone,I have the DML Jagdpanzer with Magic Tracks,Which is considered the left or right side ?? use your last picure as refrence.

thanks
Removed by original poster on 08/03/10 - 20:17:04 (GMT).
Plasticbattle
#003
Visit this Community
Donegal, Ireland
Joined: May 14, 2002
KitMaker: 9,763 posts
Armorama: 7,444 posts
Posted: Tuesday, August 03, 2010 - 09:16 AM UTC
Thanks Anthony.

Quoted Text

Which is considered the left or right side ??


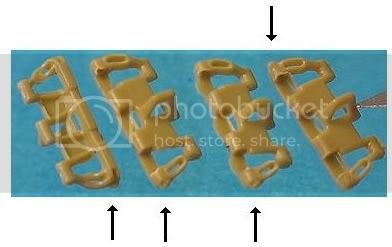
If you look at a single track link, you will see that the moulded pin is more protruding on one side of the link than the other. Thats the outside of the link. The arrows point to the holding pin on the outside of each track. Understand? The difference is not much, but it is visible.
The tracks are "handed" which means that both left and right tracks when assembled facing the proper direction, will have the pin head on the outside
The image below is from Terry Ashley´s Brummbär review.

Look for this image on the review on PMMS (Live link) and you´ll see the tracks assembled on the drive wheel below it. The assembled and placed tracks are how they should look when facing the front of the pzr IV.


greywolf
Visit this Community
Quebec, Canada
Joined: February 17, 2002
KitMaker: 20 posts
Armorama: 20 posts
Posted: Tuesday, August 03, 2010 - 01:35 PM UTC
My progress so far, lower hull completed

Hosted on Fotki

now on to the upper hull
milvehfan
Visit this Community
North Carolina, United States
Joined: June 26, 2007
KitMaker: 2,116 posts
Armorama: 1,080 posts
Posted: Tuesday, August 03, 2010 - 05:04 PM UTC
Great Question about the left/right tracks, I was wondering the same thing as I am about ready to start on the tracks for my build and these are my 1st Magic tracks. Thanks for the answer. I am slowly makeing progress and will post some pics soon. I am very impressed with the quality of the builds in this campaign/Great Job all.. milvehfan
Tojo72
Visit this Community
North Carolina, United States
Joined: June 06, 2006
KitMaker: 4,691 posts
Armorama: 3,509 posts
Posted: Wednesday, August 04, 2010 - 10:43 AM UTC
thanks Frank,that should prove helpful with the tracks.
Plasticbattle
#003
Visit this Community
Donegal, Ireland
Joined: May 14, 2002
KitMaker: 9,763 posts
Armorama: 7,444 posts
Posted: Wednesday, August 04, 2010 - 03:19 PM UTC
Well the next stages are complete and My Blog has been updated. More info and images can be found there. Thanks for checking it out.


rtvmodeler
#136
Visit this Community
Distrito Federal, Mexico
Joined: April 06, 2002
KitMaker: 437 posts
Armorama: 391 posts
Posted: Thursday, August 05, 2010 - 03:17 AM UTC
Nice WIP's friends!.

The compartment of driver and fighting is loose into of the chassis: I added Styrene in order to fix them. I added some " box of connection " (or transforming?) for the connections in the walls made with styrene and screws of PE. Added supports of PE for the frontal cables and others will be put after of the assembly. The radio will be put during the final assembly.


Regards,
Rodolfo