#003
Donegal, Ireland
Joined: May 14, 2002
KitMaker: 9,763 posts
Armorama: 7,444 posts
Posted: Thursday, August 12, 2010 - 03:39 PM UTC
Theres some very fast builders in this campaign ... can´t believe some are finished already. Great work guys.
The next addition to my scene is the figures. One Tamiya and one from Legends. More images and text can be found
HERE.


IPMS Stockholm
"The problem with common sense, is that it is not that common"
New York, United States
Joined: March 08, 2010
KitMaker: 3,662 posts
Armorama: 3,078 posts
Posted: Friday, August 13, 2010 - 10:27 AM UTC
Frank,
Your Dio is looking good. Looking forward to seeing it completed.

Active Campaigns on the bench:
Operation Fall Gelb - Pz.Kpfw. IV Ausf. C
Engineering the Future - M-26 Recovery Vehicle
115 Campaigns completed
England - East Midlands, United Kingdom
Joined: February 07, 2004
KitMaker: 911 posts
Armorama: 348 posts
Posted: Friday, August 13, 2010 - 08:12 PM UTC
Looking good Frank, especially the "active" suspension

Meanwhile, basic colours have been blocked in on my Tommy

And I took one for the team whilst cleaning up the resin road wheels!


"Nelson be damned.......Lets get the hell out of here!"
Texas, United States
Joined: July 30, 2010
KitMaker: 52 posts
Armorama: 45 posts
Posted: Friday, August 13, 2010 - 09:12 PM UTC
Greetings!
I'm brand new to armor modeling and now that my first build, a
M1A1 TUSK is nearing paint I thought I'd join my first campaign! I just received the AFV Club Nashorn kit today and I also have a Dragon Ausf.C kit in the stash. Not sure which I want to tackle so... anyone got an opinion?
I 'enlisted' on the campaign page as well. Let me know if there's anything else I'm supposed to do?
Dave
Time flies like an arrow. Fruit flies like a banana.
England - West Midlands, United Kingdom
Joined: May 23, 2010
KitMaker: 642 posts
Armorama: 593 posts
Posted: Saturday, August 14, 2010 - 01:31 AM UTC
'And I took one for the team whilst cleaning up the resin road wheels! '
Hi Neil,
A good friend of mine (now sadly deceased) used tosay:
"It ain't a proper job unless it's got blood on it!"
Now it's a 'proper job'

All the best,
Paul
barkingdigger
 Associate Editor
#013
England - East Anglia, United Kingdom
Joined: June 20, 2008
KitMaker: 3,981 posts
Armorama: 3,403 posts
Posted: Sunday, August 15, 2010 - 01:58 AM UTC
Quoted Text
I 'enlisted' on the campaign page as well. Let me know if there's anything else I'm supposed to do?
Dave
The other two essential tasks in any campaign are to post often on your progress, and to have fun! Of course you'll need to add a pic or two to the Campaign galllery once your build is finished, but worry about that later...
Tom
"Glue, or Glue Not - there is no Dry-Fit" - Yoda (original script from Return of the Jedi...)

#136
Distrito Federal, Mexico
Joined: April 06, 2002
KitMaker: 437 posts
Armorama: 391 posts
Posted: Sunday, August 15, 2010 - 08:09 AM UTC

Thanks for your kind comments friends. The engine is ready, soon I will add more pics.
Frank.- Fortunately I not have problem because is fixed in the center. I made the proof and all in okay!. Your WIP looks great!
Regards,
Rodolfo
Current Project:
I am building a Kingtiger Ausf. B, Version: March 1945 - AMMO/MIG, 1/35
barkingdigger
 Associate Editor
#013
England - East Anglia, United Kingdom
Joined: June 20, 2008
KitMaker: 3,981 posts
Armorama: 3,403 posts
Posted: Sunday, August 15, 2010 - 11:21 PM UTC
Hi all,
Finally made some more progress on my Stug IV, and it is now waiting for its turn in the spray booth. I wanted to make it pretty much straight from the box, but added a couple of details to give it character. On the front I added angled plate armour as seen in a photo I found on the web. (I didn't like Tamiya's concrete armour...) Note that it covers the steering-brake access panel on the driver's side, so it needed to be hinged to allow maintenance. On the back I added a fuel can rack from the Italeri set, and some pegs for the tow cable to be wound around. And on the side I added a wire rack for the extra spare wheels (the kit has four, but only space for two) in pale imitation of the ones seen on Pz IVs. It might be a week or three before I get paint on it...


Tom
"Glue, or Glue Not - there is no Dry-Fit" - Yoda (original script from Return of the Jedi...)

#041
Kobenhavn, Denmark
Joined: July 20, 2006
KitMaker: 10,069 posts
Armorama: 4,677 posts
Posted: Tuesday, August 17, 2010 - 01:33 AM UTC
Nice StuG IV so far, Tom. Some really nice additions you have made. They make the vehicle rather unique.
Looking forward to see it with some paint on.
Campaign'oholic - 252+ campaigns completed
North Carolina, United States
Joined: June 06, 2006
KitMaker: 4,691 posts
Armorama: 3,509 posts
Posted: Tuesday, August 17, 2010 - 07:41 AM UTC
I wanted to post some progress shots of my project.The detail level of these DML kits are outstanding.So far there have been no fit issues and things are moving along nicely.I have avoided the dreaded, monotonous road wheels up to now,but the time is getting close.


Fighting compartment not yet glued,just sitting on top.

#016
England - East Anglia, United Kingdom
Joined: March 18, 2009
KitMaker: 142 posts
Armorama: 138 posts
Posted: Thursday, August 19, 2010 - 09:09 AM UTC
strange thing just realized my panzer IV entry is a panzer III so will have to start a new kit but all is no lost will enter it in axis armour instead silver lining and all that.
New York, United States
Joined: March 08, 2010
KitMaker: 3,662 posts
Armorama: 3,078 posts
Posted: Thursday, August 19, 2010 - 09:46 AM UTC
Quoted Text
strange thing just realized my panzer IV entry is a panzer III so will have to start a new kit but all is no lost will enter it in axis armour instead silver lining and all that.
David,
Thats the best excuse I have heard in a while for starting a new kit


Active Campaigns on the bench:
Operation Fall Gelb - Pz.Kpfw. IV Ausf. C
Engineering the Future - M-26 Recovery Vehicle
115 Campaigns completed
Guatemala
Joined: April 12, 2005
KitMaker: 343 posts
Armorama: 223 posts
Posted: Thursday, August 19, 2010 - 10:56 AM UTC
Hi fellows, how are you doing? I have been kind of busy this past days, have to work, you know?.
the other day I was browsing and found a building log on a Panzer IV, it was a guy from New Zeland I think; the thing is that I have been unable to find it again, I even don't remember if it was in this forum (too many windows open), seems to be a "pro". can someone tell me where is this building log?
Regards
Byron

If you are not part of the solution, Don't be a part of the problem.

#041
Kobenhavn, Denmark
Joined: July 20, 2006
KitMaker: 10,069 posts
Armorama: 4,677 posts
Posted: Thursday, August 19, 2010 - 08:18 PM UTC
Quoted Text
strange thing just realized my panzer IV entry is a panzer III so will have to start a new kit but all is no lost will enter it in axis armour instead silver lining and all that.
That was a new one


Did the kit come with a box and name on it?

Anyway, great excuse for starting more plastic kits. Good that your kit will still fit into the Axis armour campaign.
Campaign'oholic - 252+ campaigns completed

#016
England - East Anglia, United Kingdom
Joined: March 18, 2009
KitMaker: 142 posts
Armorama: 138 posts
Posted: Friday, August 20, 2010 - 03:11 AM UTC
That was a new one


Did the kit come with a box and name on it?

Anyway, great excuse for starting more plastic kits. Good that your kit will still fit into the Axis armour campaign. [/quote]
I got it of ebay it was sold as a panzer IV but when I started it I realized it was a III. but is save me having to start a kit for axis armour.
California, United States
Joined: June 30, 2008
KitMaker: 2,408 posts
Armorama: 2,394 posts
Posted: Saturday, August 21, 2010 - 05:38 PM UTC
I'm not too optimistic about finishing this campaign, but here is the start at least.
Another Stug IV to add to the group but in 1/48.


New York, United States
Joined: March 08, 2010
KitMaker: 3,662 posts
Armorama: 3,078 posts
Posted: Sunday, August 22, 2010 - 03:08 PM UTC
Hi Guys,
Lots of great work going on here. This campaign has inspired me to do an overhaul of a Stug IV that i built 2 years ago. Build was all I really did to it, it still had plastic nibs where the parts were cut off the spruces

Well anyway its all cleaned up and sprayed in the tri color ambush camo to sort of match the Jagdpanzer that I built for this campaign.

So now here is the question I have. Do I cut the Armor plating into 5 separate pieces or leave it as 1 whole piece

I have seen photo where it appears to be 1 piece. So what would be more accurate

Active Campaigns on the bench:
Operation Fall Gelb - Pz.Kpfw. IV Ausf. C
Engineering the Future - M-26 Recovery Vehicle
115 Campaigns completed
California, United States
Joined: June 30, 2008
KitMaker: 2,408 posts
Armorama: 2,394 posts
Posted: Sunday, August 22, 2010 - 04:02 PM UTC
Hi, I believe the plates were actually overlapping, so with the plastic I would leave it as is. You could do the PE sort of thing if you want to show it otherwise. Another option is to cut the plastic and just leave 1 or 2 sheets hanging as knocked off skirts. keep having fun
Florida, United States
Joined: March 30, 2006
KitMaker: 3,736 posts
Armorama: 3,697 posts
Posted: Sunday, August 22, 2010 - 06:18 PM UTC
They are five separate plates hung on a girder made of a section of L-beam with triangular plates welded to the upper edge. The skirt plates had U-shape pieces of steel rod welded to their inner faces that fitted over the triangle plates. There were also L shaped stand off bumpers added to the edges of the fenders to keep the plates the right distance from the tracks.
barkingdigger
 Associate Editor
#013
England - East Anglia, United Kingdom
Joined: June 20, 2008
KitMaker: 3,981 posts
Armorama: 3,403 posts
Posted: Sunday, August 22, 2010 - 11:40 PM UTC
Sal,
The other thing to add is the real plates were only about 5mm thick, so in 1:35 scale you wouldn't notice the overlap too much. The plastic parts are way too thick, so unless you go the etched-metal replacement route I'd just leave them as is. Of course, you could cut thinner ones from 0.015" Evergreen sheet to get a better look with individual panels, but they'll be very fragile...
I chose just to live with mine!
Tom
"Glue, or Glue Not - there is no Dry-Fit" - Yoda (original script from Return of the Jedi...)
New York, United States
Joined: March 08, 2010
KitMaker: 3,662 posts
Armorama: 3,078 posts
Posted: Monday, August 23, 2010 - 12:43 AM UTC
Hi Guys,
Thanks for the information. Being that they are all painted I'm not gonna make new 1's and as Tom said they were thin and overlapped I guess I'll just leave them whole.

Thanks again keep the builds going


Active Campaigns on the bench:
Operation Fall Gelb - Pz.Kpfw. IV Ausf. C
Engineering the Future - M-26 Recovery Vehicle
115 Campaigns completed
North Carolina, United States
Joined: June 06, 2006
KitMaker: 4,691 posts
Armorama: 3,509 posts
Posted: Monday, August 23, 2010 - 05:58 AM UTC
England - East Midlands, United Kingdom
Joined: February 07, 2004
KitMaker: 911 posts
Armorama: 348 posts
Posted: Monday, August 23, 2010 - 06:06 AM UTC
I feel your pain Anthony having just finished assembling the road wheels & bogies.....now I've got to scratchbuild 4 sets of rubber-less return rollers

"Nelson be damned.......Lets get the hell out of here!"

#144
Alberta, Canada
Joined: February 18, 2005
KitMaker: 268 posts
Armorama: 111 posts
Posted: Tuesday, August 24, 2010 - 05:40 AM UTC
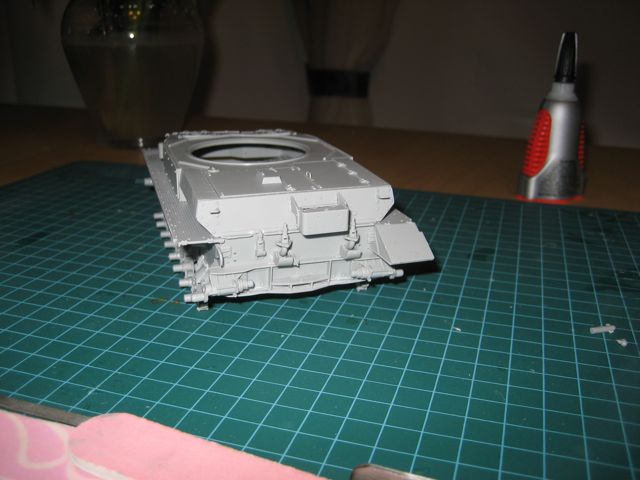
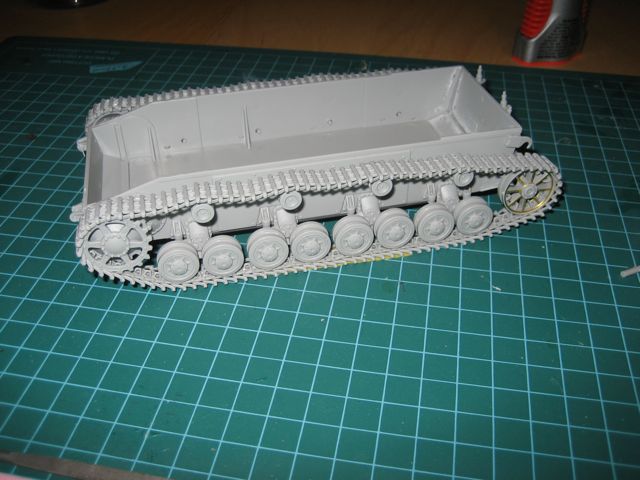
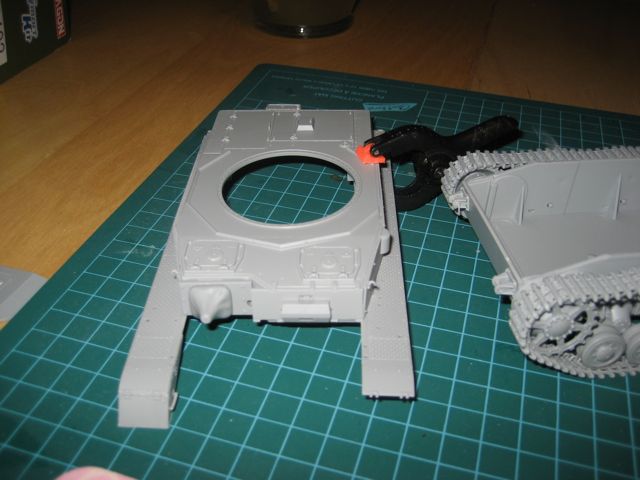
Hi Guys, sorry no posts for a while, we had a new addition to the family (baby boy born aug 11,) so been kind of busy, trying to catch up with sleep etc,
so managed to get the tracks built up, i use liquid glue and build the track complete in one run, and then wait till the glue is almost dry and then put over the wheels and rollers,and use pennys/dimes as weight between each roller to shape the track,
moved on to the main body, got quite a bit done, will do more once i rest up a bit
cheers


Removed by original poster on 08/24/10 - 19:31:11 (GMT).


 Thanks for your kind comments friends. The engine is ready, soon I will add more pics.


 Did the kit come with a box and name on it?

 Did the kit come with a box and name on it?


 Well anyway its all cleaned up and sprayed in the tri color ambush camo to sort of match the Jagdpanzer that I built for this campaign.
 I have seen photo where it appears to be 1 piece. So what would be more accurate


Well anyway its all cleaned up and sprayed in the tri color ambush camo to sort of match the Jagdpanzer that I built for this campaign.
I have seen photo where it appears to be 1 piece. So what would be more accurate


