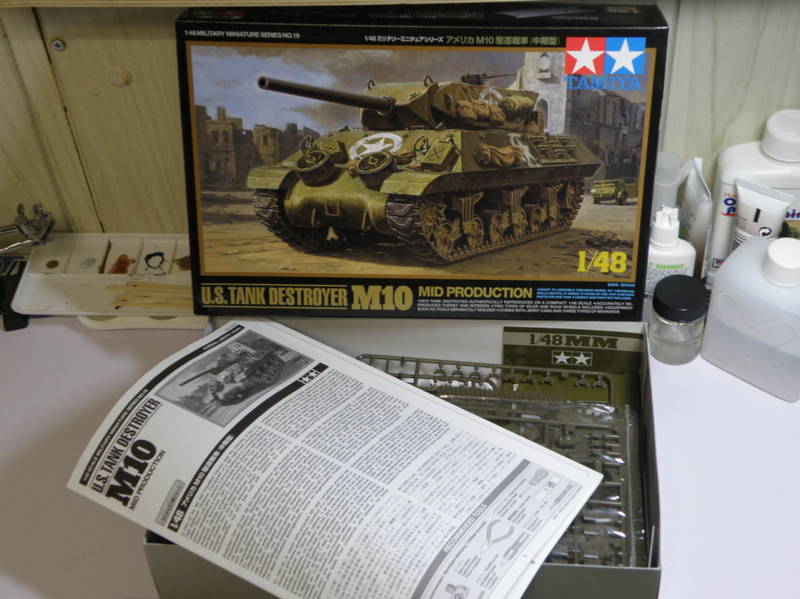
Sorry I'm late getting to the party, but I've done one of Tamiya's 1/48 scale kits (StuG IIIB, a great kit) as an intro back into the hobby after being out for a couple of years. I enlisted and will be building this:
I also have the 1/48 scale US Infantry kit so I might be throwing a couple of figures in with this as well, as the time will allow. Looking at some of the other builds, I'm almost afraid to put up any build photos, but I will as any constructive criticism is more than welcome.
Campaigns
Where Armorama group builds can be discussed, organized, and updates posted.
Hosted by Darren Baker, Richard S.
1/48 Scale
BigSmitty
Minnesota, United States
Joined: October 01, 2008
KitMaker: 597 posts
Armorama: 439 posts
Joined: October 01, 2008
KitMaker: 597 posts
Armorama: 439 posts
Posted: Monday, December 13, 2010 - 10:17 AM UTC
zontar
Hawaii, United States
Joined: August 27, 2006
KitMaker: 1,646 posts
Armorama: 1,557 posts
Joined: August 27, 2006
KitMaker: 1,646 posts
Armorama: 1,557 posts
Posted: Monday, December 13, 2010 - 11:50 AM UTC
Matt, welcome aboard.
I built that kit recently and found it a nice easy build. Also, have no fear about posting here. The criticism is friendly and helpful.
Happy modeling, zon
I built that kit recently and found it a nice easy build. Also, have no fear about posting here. The criticism is friendly and helpful.
Happy modeling, zon
GregCloseCombat
California, United States
Joined: June 30, 2008
KitMaker: 2,408 posts
Armorama: 2,394 posts
Joined: June 30, 2008
KitMaker: 2,408 posts
Armorama: 2,394 posts
Posted: Monday, December 13, 2010 - 03:46 PM UTC
Hi Matt, welcome. That is an awesome kit you're about to start! Adding the gear on it is a lot of fun too. There's nothing to fear, but trying to get it done by March
BigSmitty
Minnesota, United States
Joined: October 01, 2008
KitMaker: 597 posts
Armorama: 439 posts
Joined: October 01, 2008
KitMaker: 597 posts
Armorama: 439 posts
Posted: Tuesday, December 14, 2010 - 10:43 AM UTC
First update on the M-10. Let me start by saying I really am enjoying this build. It is an easy build, as the progress I made over the past couple of days has been pretty remarkable.
The lower hull assembly went off without a hitch, although I never can get the link and length tracks to fit exactly, but I'm getting the hang of them. Also, why manufacturers don't include blanking plates for under the sponsons of the upper hull continues to mildly annoy me.
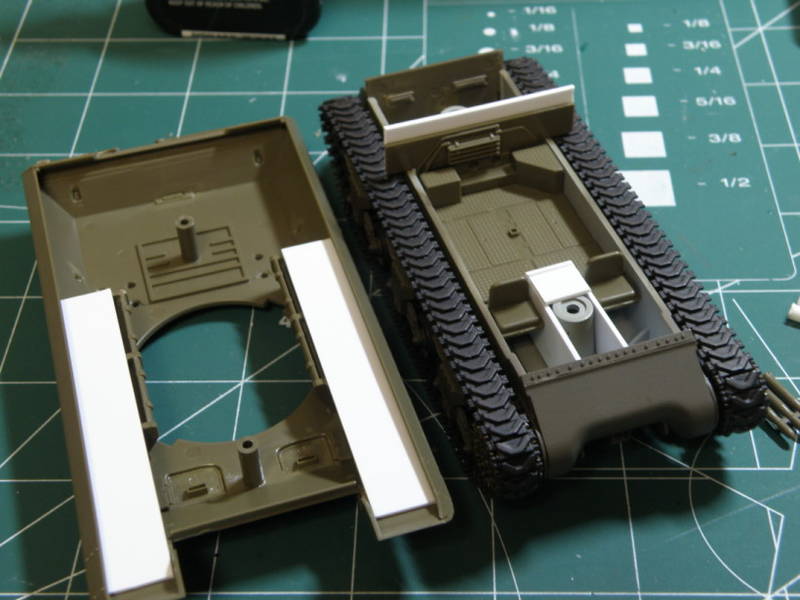
The above photo shows some of my pathetic scratch building prowess. I have a large stash of Evergreen strip/sheet/rod that I never have thrown away, so I roughed out the sponson blanking plates, built up the rear wall of the interior to keep any light from showing through the turret, and tried to close off the area between the two front seats where the posts to mate the upper and lower hull are. I also have the tracks on, painted flat black with a burnt umber drybrush applied as a start to the tracks. Figured it would be easiest to finish them after on the kit. The lower hull has already been airbrushed OD so I'm not worried about overspraying the tracks with them on.
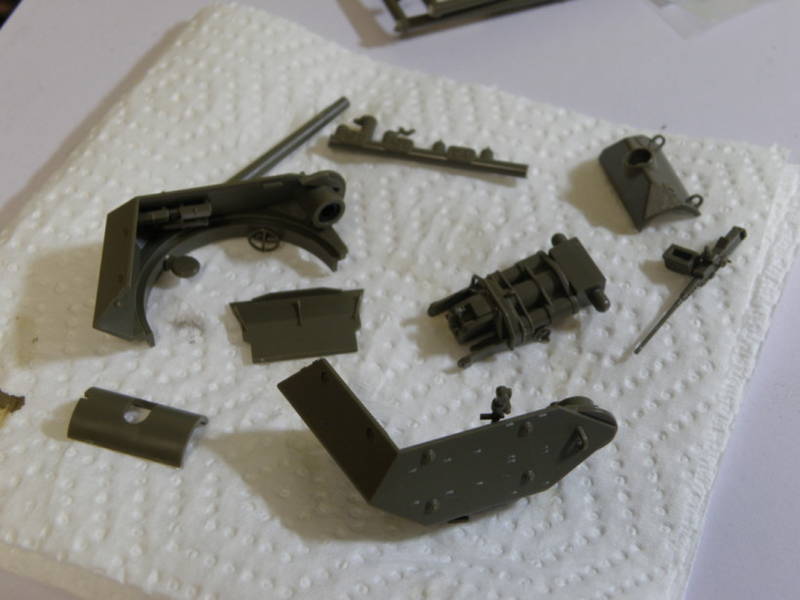
Here are the major subassemblies of the turret. Nothing too spectacular. I shaved off the hand holds and plan on replacing them with wire, but got to thinking that they are AWFULLY small in 1/48 scale. Will hunt around and replace them with something I can find from my spares.
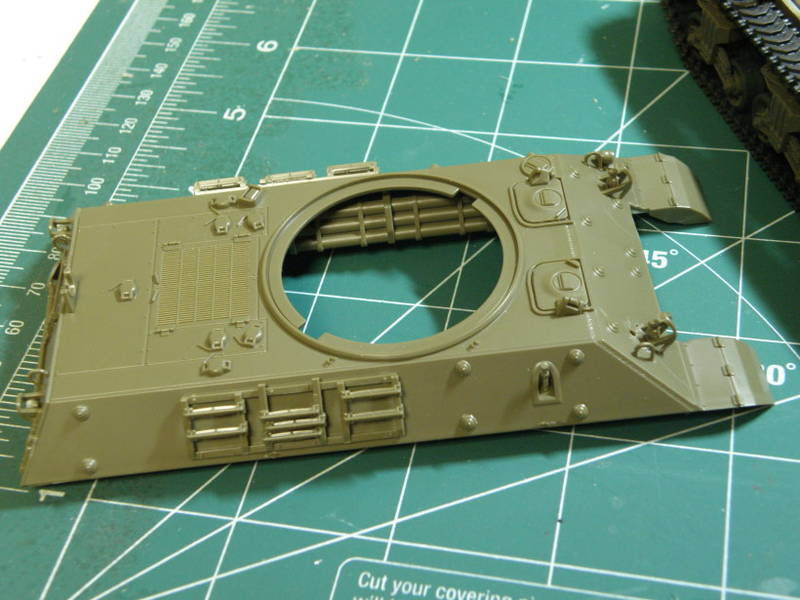
Upper hull, all the extra pieces are on, and I plan on picking out the details (pioneer tools, etc) after painting the whole thing.
Thanks for looking and I hope to have some more updates soon.
CMOT70
Victoria, Australia
Joined: August 23, 2007
KitMaker: 629 posts
Armorama: 26 posts
Joined: August 23, 2007
KitMaker: 629 posts
Armorama: 26 posts
Posted: Tuesday, December 14, 2010 - 11:41 AM UTC
I finally made it back to my AB41 this week and got it finished. This one is actually out of Italeri's other branding "Supermodel" boxing, but same model that comes in their own and the Tamiya boxes.
Andrew
Andrew
koschrei
California, United States
Joined: September 21, 2004
KitMaker: 147 posts
Armorama: 134 posts
Joined: September 21, 2004
KitMaker: 147 posts
Armorama: 134 posts
Posted: Tuesday, December 14, 2010 - 05:15 PM UTC
Great build Matt - a couple thoughts in response to your comments:
"why manufacturers don't include blanking plates for under the sponsons of the upper hull continues to mildly annoy me. "
If you want to give it a try, I have some templates for M-10 fender blanking plates at:
http://track48.com/articles/techniques/sponsons-schreier/Sponson%20Fillers.doc
"I shaved off the hand holds and plan on replacing them with wire, but got to thinking that they are AWFULLY small in 1/48 scale."
You can probably get the .010" wire you need for these at a model railroad shop - also you can use 28 Gauge soft brass craft wire - it is .0126" diameter and works well.
Whatever you do, keep going, love those M-10s!
HTH
Konrad
koschrei
California, United States
Joined: September 21, 2004
KitMaker: 147 posts
Armorama: 134 posts
Joined: September 21, 2004
KitMaker: 147 posts
Armorama: 134 posts
Posted: Tuesday, December 14, 2010 - 05:36 PM UTC
Great builds going on since I last popped in - congrats all! Meanwhile back at the Crab Shack, progress is moving if ever so slowly:
With these stowage boxes on, it is nearing time to add the smaller details, so stay tuned for more Crab packed fun !
Best,
Konrad
With these stowage boxes on, it is nearing time to add the smaller details, so stay tuned for more Crab packed fun !
Best,
Konrad
Blueheeler
New South Wales, Australia
Joined: March 18, 2008
KitMaker: 347 posts
Armorama: 79 posts
Joined: March 18, 2008
KitMaker: 347 posts
Armorama: 79 posts
Posted: Tuesday, December 14, 2010 - 09:08 PM UTC
Hi all! This is my entry, its a Kitech kit (dont hold that against me) that I picked many moons ago. I mainly did the kit to practise my airbrushing free hand camo on her for my entry for the miltary engineering campaign. Anyway, its lacking many details but still think it scrubbed up alright.
Cheers
Cheers
Removed by original poster on 12/15/10 - 14:18:02 (GMT).
Removed by original poster on 12/15/10 - 14:26:16 (GMT).
Removed by original poster on 12/15/10 - 14:29:16 (GMT).
Removed by original poster on 12/15/10 - 14:33:15 (GMT).
Kallin168
England - North, United Kingdom
Joined: December 13, 2010
KitMaker: 20 posts
Armorama: 14 posts
Joined: December 13, 2010
KitMaker: 20 posts
Armorama: 14 posts
Posted: Wednesday, December 15, 2010 - 02:35 AM UTC
Matty_K
Nordrhein-Westfalen, Germany
Joined: January 31, 2010
KitMaker: 103 posts
Armorama: 28 posts
Joined: January 31, 2010
KitMaker: 103 posts
Armorama: 28 posts
Posted: Wednesday, December 15, 2010 - 03:09 AM UTC
Hi Andy,
When using photobucket it‘s quite easy to integrate photo links here.
1. Just log in to your photobucket account or click on the link in your last post.
2. Draw the cursor to the pict you want to share (just mouse-over, no clicking).
3. Immediately a pulldown menu should be visible below the pict.
4. Go to the last row called „IMG code“.
5. Copy or just click on the given code in the light yellow field (it should start with [IMG]http://....).
6. Include the copied IMG code in your post.
7. Voilà!
Cheers
Matty
Posted: Wednesday, December 15, 2010 - 03:19 AM UTC
Goodness! Quite some progress here! Where do you find the time so close to christmas...
Stephen: Thanks for the tutorial, I will check out working with clay sometime.
Matt: Welcome to the campaign! Good to see an M10. Open sponsons is - to my knowledge - only a problem of Tamiya. Mystery to me... Your progress so far looks good, keep it coming!
Andrew: great to see another AB-41 finished. Congrats. Looks great, great weathering. Any word on what your methods are?
Konrad: Your crab is getting better all the time. Still looking forward to the chains...
Nick: Looking good, never heard of "Kitech". Now I'm not sure, but have you posted progress and pre-build pics? Don't want to be a pest, but it is a requirement for the campaign after all...
Andy: Posting is quite simple actuially. Go to the link you posted, move the pointer over the pic and you will get four different codes. Click into IMG code and it will copy that code. Paste it into the forum post and you will get this:
As you will have guessed from the first sentence of this post I have had absolutely no time at the bench since the last post, so no progress report unfortunately...
Cheers!
Stefan
Kallin168
England - North, United Kingdom
Joined: December 13, 2010
KitMaker: 20 posts
Armorama: 14 posts
Joined: December 13, 2010
KitMaker: 20 posts
Armorama: 14 posts
Posted: Wednesday, December 15, 2010 - 05:05 AM UTC
Thanks very much for the advice much appreciated, i kinda lost my way after they got rid of wax tablets and carrier pigeons.
Right all i have to do now is build some models worth photgraphing lol.
BigSmitty
Minnesota, United States
Joined: October 01, 2008
KitMaker: 597 posts
Armorama: 439 posts
Joined: October 01, 2008
KitMaker: 597 posts
Armorama: 439 posts
Posted: Wednesday, December 15, 2010 - 06:54 PM UTC
Evening Update (12/16/10)
Some photos to update the M-10 TD build:
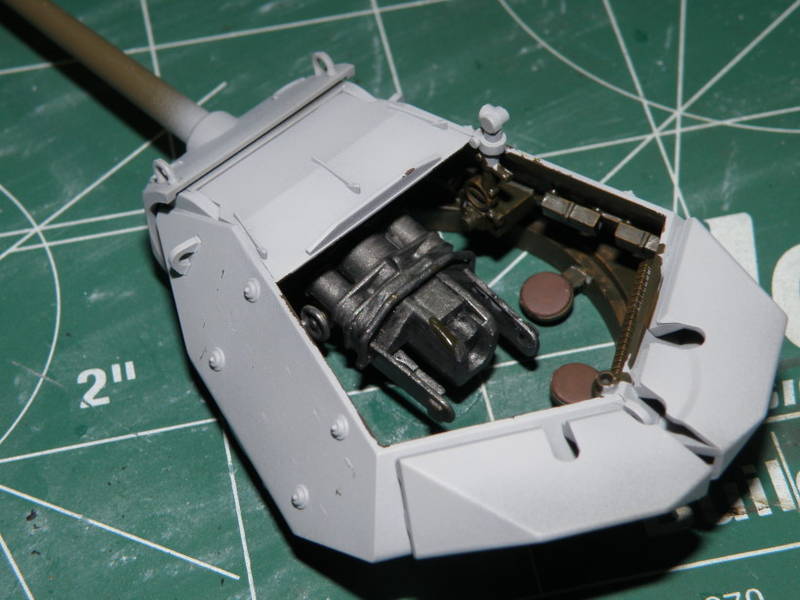
Turret assembled, interior painted, breech assembly painted and washed. I painted all of this AFTER assembling the turret. Call it a "duh" moment. Will be using a small brush to clean up the interior a bit:
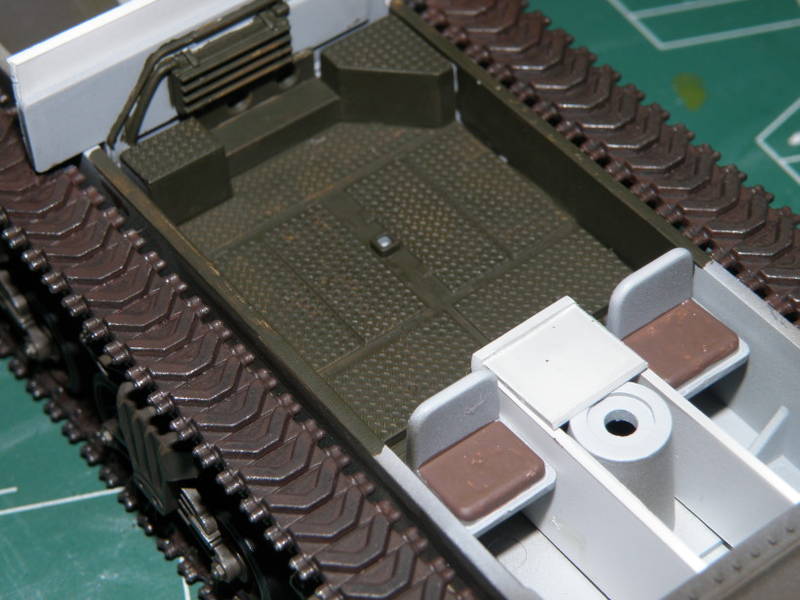
Hull interior painted, installed, mounting posts blocked off (as best as possible), tracks painted and given a thin rust/burnt umber overcoat over the flat black I did a couple of nights ago:
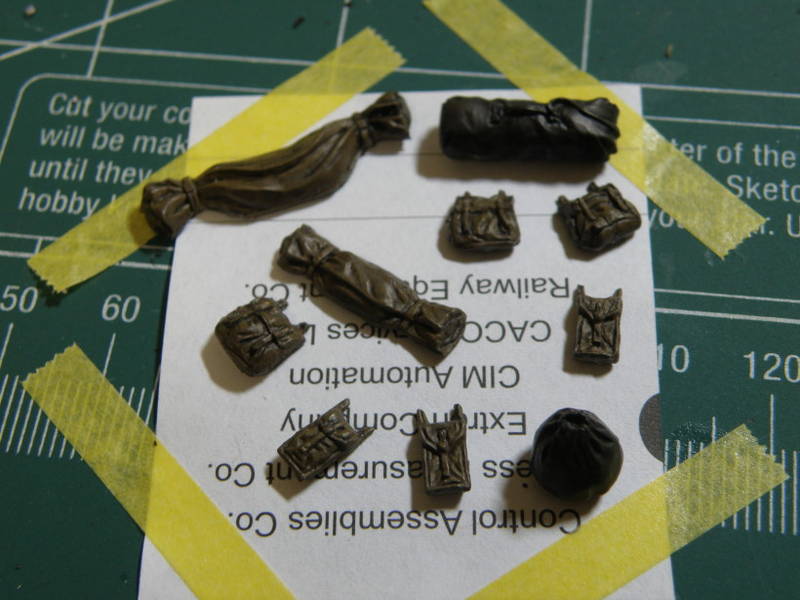
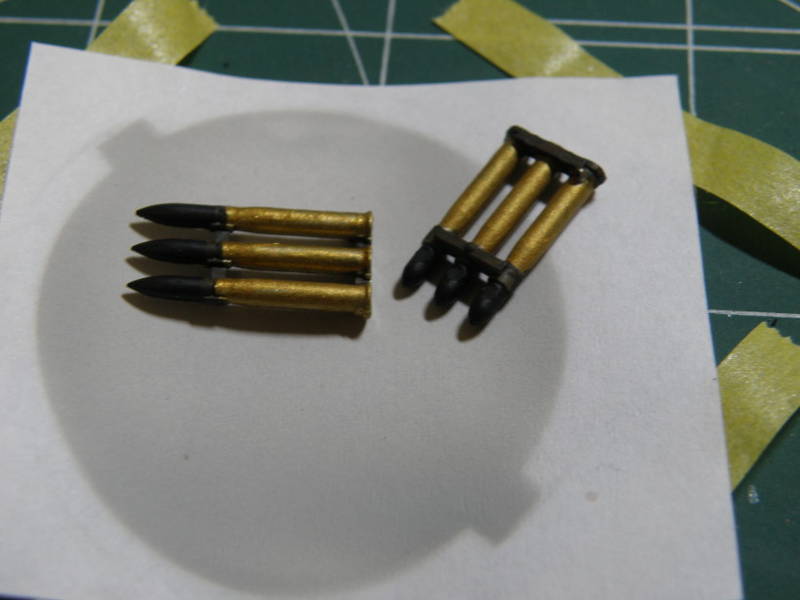
Ammo and stowage gear painted and prepped:
Building one of these has got me on the lookout for a 1/35 scale one, probably the Academy kit, with some aftermarket interior stuff. I love these things!
Posted: Wednesday, December 15, 2010 - 10:34 PM UTC
Very nice AB 41, Andrew. Looks great and has a nice "desert" weatherbitten look to it.
Thanks for sharing
Thanks for sharing
Posted: Wednesday, December 15, 2010 - 11:55 PM UTC
Hi all
I just noticed that there is this 48 scale campaign running. Normally I am more into aircraft, but I do some ground military stuff too. Since this campaign started I finished three 48 scale armour subjects, that I would like to enter (one of them). I woudl like to ask if that is possible?
First was this Luftwaffe fuel tank car:
Kfz 385 (Italeri)
I have no WIP shots (finished it in just over 2 days), but as it is just out I cannot have started it earlier See also here
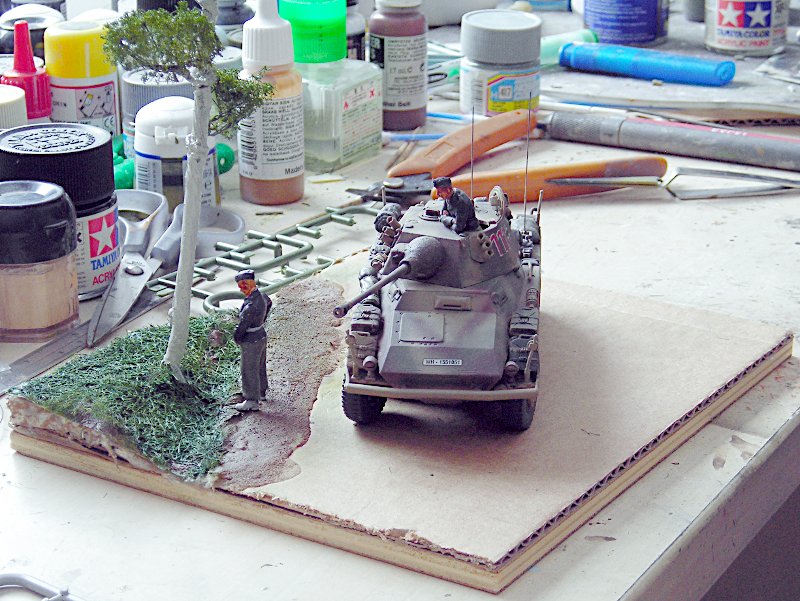
The next was Italeri's Puma
Armorama BLog
and just recently I finished this little vignette, though I must confess, that the body was already a bit built, so I only added 96 track links at each side, some small parts, paint, crew, weathering and scenery.
Some WIP in my thread about how to make a cornfield
all the best
Steffen
Posted: Thursday, December 16, 2010 - 01:04 AM UTC
Matt, nice progress, keep it up.
Steffen, good to have you on board, and some very nice models. As I told Nick in my last post, progress and a pre-build pics are a requirement for this campaign. I'd say your Puma is in and I'm inclined to look the other way ("ein Auge zudrücken" as we say in German...) on the pre-build pic since your blog was started at the end of November. But at your current build rate you will probably finish another 3 kits by the end of this campaign anyway, right?
Cheers!
Stefan
Posted: Thursday, December 16, 2010 - 01:15 AM UTC
Steffen,
Nice work. The Puma is very well done and I especially like the Tiger trying its best to hide in the tall grass. Excellent work.
Stephen
Nice work. The Puma is very well done and I especially like the Tiger trying its best to hide in the tall grass. Excellent work.
Stephen
Posted: Thursday, December 16, 2010 - 02:08 AM UTC
Quoted Text
Steffen, good to have you on board, and some very nice models. As I told Nick in my last post, progress and a pre-build pics are a requirement for this campaign. I'd say your Puma is in and I'm inclined to look the other way ("ein Auge zudrücken" as we say in German...) on the pre-build pic since your blog was started at the end of November. But at your current build rate you will probably finish another 3 kits by the end of this campaign anyway, right?
Cheers!
Stefan
Hallo Stefan
Many thanks! I am not sure I will progress at this pace because I will probably switch to aircraft again (sooner or later). So I am really happy the Puma counts! As for prebuild I have done reviews of the Italeri kits on the IPMS Deutschland site and as they are just out I cannot cheat .. besides I do not want to.
I put a Schwimmwagen with BlackDog stowage and a AS-2 (soviet a/c starter truck) with Hauler wheels and PE in my luggage for the Christmas travel home, but I am not sure I will have the time to build anything. I am working on a small vignette for the Puma, but i still need some stuff for this. Title: "Na, wie läufts?"
@Stephe: Many thanks mate!
all the best
Steffen
GregCloseCombat
California, United States
Joined: June 30, 2008
KitMaker: 2,408 posts
Armorama: 2,394 posts
Joined: June 30, 2008
KitMaker: 2,408 posts
Armorama: 2,394 posts
Posted: Thursday, December 16, 2010 - 04:31 AM UTC
Andrew - Congrats on finishing - I like the weathering on it.
Nick - The spray job is looking good.
Steffen - that teddy bear fur looks great and nice paint job on the Tiger too.
Nick - The spray job is looking good.
Steffen - that teddy bear fur looks great and nice paint job on the Tiger too.
Posted: Thursday, December 16, 2010 - 06:40 AM UTC
Thanks Greg!
Yep, that dio is really fluffy I will tell my nephew I slaughtered a Teddy Bear to make that ... not sure how long the dio will survive
Love your KT ... btw Atak produces resin Zimmerit for that kit (I have the set for the Pz.IV and it is pretty nice) but as you are done glueing the PE on it would be probably just wasted money for the MG bulge.
Did you finish your Bagdad street scene (Hummers) already?
all the best
Steffen
Tojo72
North Carolina, United States
Joined: June 06, 2006
KitMaker: 4,691 posts
Armorama: 3,509 posts
Joined: June 06, 2006
KitMaker: 4,691 posts
Armorama: 3,509 posts
Posted: Thursday, December 16, 2010 - 09:40 AM UTC
Nice Puma dio !! that guy in the hatch looks a little too interested in what the other guy is doing