Targets Shoot Back: Self-propelled flak/ AA
Cork, Ireland
Joined: April 30, 2010
KitMaker: 232 posts
Armorama: 134 posts
Posted: Sunday, October 03, 2010 - 01:38 AM UTC
Hi folks,
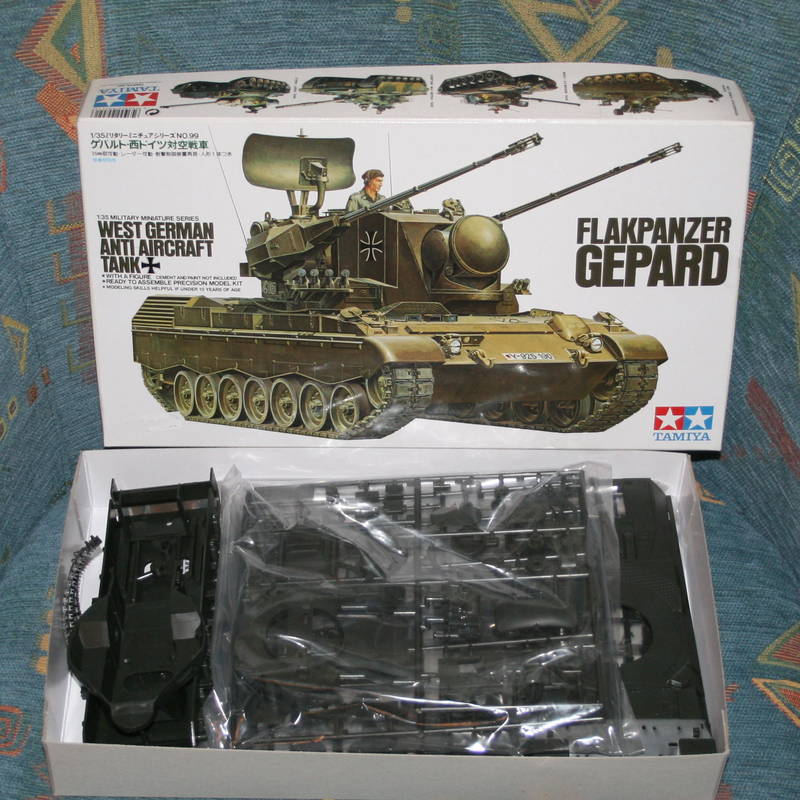
I've been looking forward to this campaign for ages! Here's my build, the Gepard:

Good luck with your builds!
Eoin
You don't learn nothing unless you make mistakes
Hawaii, United States
Joined: August 27, 2006
KitMaker: 1,646 posts
Armorama: 1,557 posts
Posted: Monday, October 04, 2010 - 11:40 AM UTC
Aloha All,
I might regret this later, but I'm coming in with a SAM-6, most likely as an Iraqi piece. It is slowly settling in on me that the kit is 292 pieces, with few left-overs.


Have a good one.

-zon
"Certainty of death.
Small chance of sucess.
What are we waiting for?"
-Gimli, Return of the King.
New York, United States
Joined: March 08, 2010
KitMaker: 3,662 posts
Armorama: 3,078 posts
Posted: Monday, October 04, 2010 - 03:52 PM UTC
Hi Guys,
I got cranking on my Sd.Kfz7/1 this weekend. Gotta love the Tamiya kits clear instructions and they go together so quickly. So fa r the only issue I have is that there are quite a few pin marks, some wont be seen others will have to be cleaned up like these on the inside of the gun shields

I sanded down the 1 side and I'll clean them up a little more.
Here is the gun mount minus the guns

and the chassie

all the main component are dry fitted on

putty and primer next hope its nice out tommorrow


Active Campaigns on the bench:
Operation Fall Gelb - Pz.Kpfw. IV Ausf. C
Engineering the Future - M-26 Recovery Vehicle
115 Campaigns completed
Texas, United States
Joined: June 29, 2010
KitMaker: 5,854 posts
Armorama: 4,817 posts
Posted: Monday, October 04, 2010 - 05:11 PM UTC
That kit's been around for a while if my memory serves me correctly. Looking forward to your next update Sal

New York, United States
Joined: March 08, 2010
KitMaker: 3,662 posts
Armorama: 3,078 posts
Posted: Monday, October 04, 2010 - 05:24 PM UTC
Quoted Text
That kit's been around for a while if my memory serves me correctly. Looking forward to your next update Sal 
Yeah, I think its from 1975. Almost as old as me

It going to be an OOB as usual for me not to much into the AM stuff. But it still seams to be building up nicely

Active Campaigns on the bench:
Operation Fall Gelb - Pz.Kpfw. IV Ausf. C
Engineering the Future - M-26 Recovery Vehicle
115 Campaigns completed

#041
Kobenhavn, Denmark
Joined: July 20, 2006
KitMaker: 10,069 posts
Armorama: 4,677 posts
Posted: Monday, October 04, 2010 - 10:23 PM UTC
Nice choice Eoin. It will be an oldie, but a goodie I think. Looking forward to see the result.
Zon, I have build the SA-6 not so long ago. It is a very nice kit and goes together quite well. A little care is necessary for the missiles, but otherwise it is pretty straight forward.
Nice progress, Sal. Looking forward to see more.

Campaign'oholic - 252+ campaigns completed
Florida, United States
Joined: June 03, 2003
KitMaker: 1,095 posts
Armorama: 743 posts
Posted: Tuesday, October 05, 2010 - 02:31 AM UTC
Hey sal, that is a great start! I havent even pulled out my box yet (DML M16 MGMC)
Zon, you will enjoy that SA-6 kit. I built that when it first came out over 2 weekends. Its a great kit...few in accuracys with the roadwheel/arm spacing, but it still builds into a really great looking model.
Andy
Fideli Certa Merces -- "to the faithful there is certain reward"
Hawaii, United States
Joined: August 27, 2006
KitMaker: 1,646 posts
Armorama: 1,557 posts
Posted: Tuesday, October 05, 2010 - 03:30 PM UTC
Aloha,
Jesper and Andy: Thanks for the encouragement. Did the tracks go together well for you guys? I've been getting OK with link and length from the 1/48th Tamiya kits, but I'm concerned with this one because the "fender" blocks direct top access. I looked at Fruil's, but I'm not up to spending that much. Any insight would be appreciated. Thanks in advance.
Happy Modeling. -zon

"Certainty of death.
Small chance of sucess.
What are we waiting for?"
-Gimli, Return of the King.

#041
Kobenhavn, Denmark
Joined: July 20, 2006
KitMaker: 10,069 posts
Armorama: 4,677 posts
Posted: Tuesday, October 05, 2010 - 09:56 PM UTC
Zon, I had no big problems with the tracks. They look pretty nice when finished.
A little care is needed to get everything to fit without any gaps, but Trumpeter did a good job on aligning everything from the start according to the instructions.
I agree with you that it is not worth going all out for Fruil. tracks.


Campaign'oholic - 252+ campaigns completed
Hawaii, United States
Joined: August 27, 2006
KitMaker: 1,646 posts
Armorama: 1,557 posts
Posted: Wednesday, October 06, 2010 - 10:52 AM UTC
Aloha Jesper,
Thanks for sharing your SAM-6. It looks great!!
Take care, -zon

"Certainty of death.
Small chance of sucess.
What are we waiting for?"
-Gimli, Return of the King.
England - North West, United Kingdom
Joined: January 02, 2007
KitMaker: 781 posts
Armorama: 676 posts
Posted: Friday, October 08, 2010 - 01:34 AM UTC
hi there guys im signed up to this campaign but am wondering what is there in the braille scale range that would be suitable for this campaign?
i know of matchbox's m16 kit reboxed by revell
and italeri do an italian truck with a howitzer on the back but im a little confused as to whether this is an SP AA or SP artillery? can anyone help me
im looking mainly to do allied.
ino millicast do alot of resin vehicles but with resin there aint much of a build
so if anyone knows of any kits i could use to do a wip on here would be great
any help appreciated in advance
tony

#020
Illinois, United States
Joined: December 28, 2006
KitMaker: 278 posts
Armorama: 231 posts
Posted: Thursday, October 14, 2010 - 11:55 AM UTC
I have begun my build for the campaign.
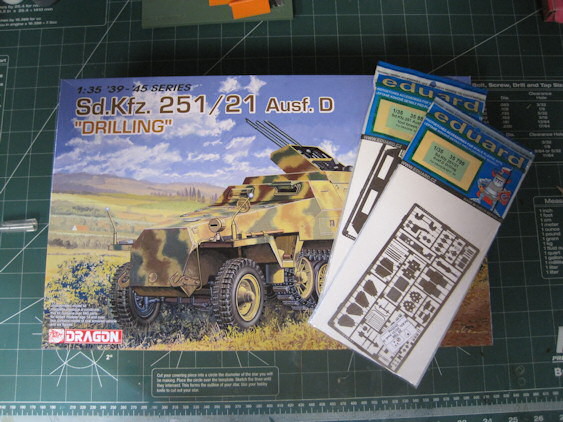
1:35 Dragon SdKfz 251/21 Ausf D Schutzenpanzerwagen - Drilling MG 151 w/ Bonus Features #6217
Eduard ED35799 Sd.Kfz.251/21 Ausf.D Drilling (designed to be used with Dragon DN6217 kits)
Eduard ED35885 Sd.Kfz.251 Ausf.D tool boxes (designed to be used with Dragon kits)

I also ordered what I thought was the Great Wall Hobby engine for your 251/21. However upon arrival I found I hit the wrong selection and ordered the Sdkfz250 one. A look at the images shows there are differences. So now I have to wait for the correct one to arrive.

Why in the world did Eduard nickel plate these pe sets. I prefer to solder many of the parts together as it gives a much stronger bond. Solder also allows me to file and sand the solder joints to give a smoother surface.
I have started building some of the pe parts while I wait for the correct engine set to arrive. Will be putting up some images of the pe soon.
Mike
"The price of freedom is eternal vigilance."
- Thomas Jefferson
Texas, United States
Joined: June 29, 2010
KitMaker: 5,854 posts
Armorama: 4,817 posts
Posted: Thursday, October 14, 2010 - 01:04 PM UTC
My guess would be that it is to add rigidity to the parts so that they remain flat and crisp as opposed to warping. Just a thought....

#041
Kobenhavn, Denmark
Joined: July 20, 2006
KitMaker: 10,069 posts
Armorama: 4,677 posts
Posted: Thursday, October 14, 2010 - 09:16 PM UTC
Great choice, Michael. A really nice version of the 251. I love the way the barrels are arranged and the look of the flash suppressors.
Looking forward to see more

Campaign'oholic - 252+ campaigns completed
New York, United States
Joined: March 08, 2010
KitMaker: 3,662 posts
Armorama: 3,078 posts
Posted: Tuesday, October 19, 2010 - 05:28 AM UTC
Hi Guys,
Just a quick update here of my progress. I haven't glued the body on to the frame yet but I think the body is a little warped. Any suggestions on how to correct this

Also I will try and find a small drill bit and drill out the barrels a bit

Next up some touching up of paint, white wash and some weathering

Comments are more then welcome

Active Campaigns on the bench:
Operation Fall Gelb - Pz.Kpfw. IV Ausf. C
Engineering the Future - M-26 Recovery Vehicle
115 Campaigns completed
New York, United States
Joined: March 08, 2010
KitMaker: 3,662 posts
Armorama: 3,078 posts
Posted: Sunday, October 24, 2010 - 02:41 PM UTC
Here is the latest update
Added White wash winter camo made from watered down acrylic craft store paint


Added several acrylic washes to the treads to get rid of that gray rubber look

Also glued down the top of the tread behind the front sprocket gear to give it a sag look.
I added some more weathering and mud will get some more picks up soon

Active Campaigns on the bench:
Operation Fall Gelb - Pz.Kpfw. IV Ausf. C
Engineering the Future - M-26 Recovery Vehicle
115 Campaigns completed
Texas, United States
Joined: June 29, 2010
KitMaker: 5,854 posts
Armorama: 4,817 posts
Posted: Sunday, October 24, 2010 - 03:02 PM UTC
Nice progress Sal! Did you address the warped body issue? I was going to suggest using hot water to gently warp it back into shape, but not sure you would want to try that with the paint on. You may be able to get by with forcing it in place with glue.
New York, United States
Joined: March 08, 2010
KitMaker: 3,662 posts
Armorama: 3,078 posts
Posted: Sunday, October 24, 2010 - 03:49 PM UTC
Quoted Text
Nice progress Sal! Did you address the warped body issue? I was going to suggest using hot water to gently warp it back into shape, but not sure you would want to try that with the paint on. You may be able to get by with forcing it in place with glue.
Jeremy, Thanks for the comment. I tried softening up the plastic by holding it over a candle to soften it. That coupled with holding it down with tape after it was glued seemed to close the opening up a bit. The resulting gap now looks more like a natural gap caused by use of the equipment

Active Campaigns on the bench:
Operation Fall Gelb - Pz.Kpfw. IV Ausf. C
Engineering the Future - M-26 Recovery Vehicle
115 Campaigns completed
Florida, United States
Joined: June 03, 2003
KitMaker: 1,095 posts
Armorama: 743 posts
Posted: Monday, October 25, 2010 - 02:02 AM UTC
did you try just clamping it down with some superglue? Make sure the two surfaces are clear of paint.
Good progress though! Thanks for participating! I need to get crackin on my entry!
Andy
Fideli Certa Merces -- "to the faithful there is certain reward"
New York, United States
Joined: March 08, 2010
KitMaker: 3,662 posts
Armorama: 3,078 posts
Posted: Sunday, October 31, 2010 - 11:53 AM UTC
Hi Guys,
After working 18:30 hrs straight and being up for almost 24 hrs. I got a few hours of sleep and went back to work on my Sd,Kfz7/1 Flakvierling. Here is where I'm at. The crew is set in place and most of the weathering is finished


This is a totally OOB build. I still need to add some equipment on to the deck and hanging from the sides. Then it needs a coat of dull. Any comments or constructive feedback is welcome. I know that I forgot to weather the interior of the cab. Oh well

Still working on improving my figures

Active Campaigns on the bench:
Operation Fall Gelb - Pz.Kpfw. IV Ausf. C
Engineering the Future - M-26 Recovery Vehicle
115 Campaigns completed
Texas, United States
Joined: June 29, 2010
KitMaker: 5,854 posts
Armorama: 4,817 posts
Posted: Sunday, October 31, 2010 - 02:20 PM UTC
Sal bud, your pictures aren't coming through, says they were moved or deleted. Look forward to seeing them.
New York, United States
Joined: March 08, 2010
KitMaker: 3,662 posts
Armorama: 3,078 posts
Posted: Sunday, October 31, 2010 - 02:36 PM UTC
Quoted Text
Sal bud, your pictures aren't coming through, says they were moved or deleted. Look forward to seeing them.
Jeremy, I don't know why they are showing up on my page and still on my photobucket page lets try again

a href="http://s836.photobucket.com/albums/zz283/ltb073/SdKfz71/?action=view¤t=P1030769.jpg" target="_blank">


Active Campaigns on the bench:
Operation Fall Gelb - Pz.Kpfw. IV Ausf. C
Engineering the Future - M-26 Recovery Vehicle
115 Campaigns completed
Texas, United States
Joined: June 29, 2010
KitMaker: 5,854 posts
Armorama: 4,817 posts
Posted: Sunday, October 31, 2010 - 02:54 PM UTC
I don't know either, photobucket seems to have some issues regarding such things sometimes.
Pictures look good, the uniforms on the crew are very striking with how white they are. I love the sloppiness of the whitewash. The one thing that stands out to me are the "clean rubber" areas on the front tires. It looks a bit unnatural, especially for the environment this is supposed to be in, and you may want to hit it with an overspray of buff or something to address that. Just a thought.

New York, United States
Joined: March 08, 2010
KitMaker: 3,662 posts
Armorama: 3,078 posts
Posted: Sunday, October 31, 2010 - 03:10 PM UTC
Jeremy, Thanks for the comments. My flash is making the uniforms look brighter than they are, I'll try to take the photos in natural sunlight for the next go around

I didn't notice the tires, i'll take a look at that and correct it, Thank

Active Campaigns on the bench:
Operation Fall Gelb - Pz.Kpfw. IV Ausf. C
Engineering the Future - M-26 Recovery Vehicle
115 Campaigns completed
Texas, United States
Joined: June 29, 2010
KitMaker: 5,854 posts
Armorama: 4,817 posts
Posted: Sunday, October 31, 2010 - 03:48 PM UTC
No problem, I look forward to seeing more pics

Regarding the figures, I meant it in a good way. They are supposed to be quite white, and most modelers have a hard time keeping that look during the weathering process ending up instead with a muddy gray finish.


 It going to be an OOB as usual for me not to much into the AM stuff. But it still seams to be building up nicely


 Comments are more then welcome


 Still working on improving my figures


 I didn't notice the tires, i'll take a look at that and correct it, Thank


