Campaigns
Where Armorama group builds can be discussed, organized, and updates posted.
Light Tank campaign
panzerbob01
Visit this Community
Louisiana, United States
Joined: March 06, 2010
KitMaker: 3,128 posts
Armorama: 2,959 posts
Posted: Saturday, November 24, 2012 - 09:04 AM UTC
Pete;

And nice progress on the Panz! Yeah... those are tiny hooks with tiny holes and battle-damage is a high probability! But every tweak helps!

I do notice that your's is that early kit without a floor for that sponson on the left side... It's totally OK - unless you maybe leave that turret hatch open and someone looks in and sees the light! With all hatches closed, this is one of those non-issues which only you, the builder, know about. It may be pretty easy to stick a thin piece of styrene sheet (even 0.005 would do) on the under-the-fender side while those tracks are off...

I see the kit provides those conduits up behind the headlamps... I think that there was also a separate wire for that tiny horn, just in case you "feel the need" to do a little (operative word) tweak in this area!

So, are you going for a DAK scheme on this boy?

@Delbert: Looking just a tad closer, we do NOT actually have exactly the same Pz 1B going! Mine is that Dragon DAK version with the can-rack on the rear left, for wiiw. Still... it's a 1B! Looking good.

The Bellman looks sharp (OK, also mighty cute! I love small, riveted boxy-looking little tanks Great job on that camo scheme!)

All in all, there's been a load of sharp small tanks!

Black cats are, as some might say, already pre-shaded... I'd see this a a real opportunity for some creative painting!

Bob
Delbert
#073
Visit this Community
Pennsylvania, United States
Joined: October 05, 2002
KitMaker: 2,659 posts
Armorama: 1,512 posts
Posted: Saturday, November 24, 2012 - 09:31 AM UTC
Hey Bob..

Nope I have the earlier kit, prob going to do it up as either a Poland 1939 or France 1940..

I wanted a panzer gray tank for this build as I wanted to try the modulation style. I've never managed to make a gray tank that didn't just look.. monotone.

I have a couple of other panzer I's, but not the DAK version yet.

Delbert
PeteDoc
Visit this Community
Northern Ireland, United Kingdom
Joined: April 10, 2012
KitMaker: 164 posts
Armorama: 130 posts
Posted: Saturday, November 24, 2012 - 10:06 AM UTC
@ Bob - yeah DAK it is. Thanks for the wire tip - I'll def look at that. Prob leave the top down. Just realised lookin at the pics that I forgot the hook holes on the turret - do that tomorrow.
Thanks for the other tip - amazing what you can do to a black cat with an AB!!


btw - that headland just over the snout is the famous Giants Causeway. Nothin' between here & the North Pole!
panzerbob01
Visit this Community
Louisiana, United States
Joined: March 06, 2010
KitMaker: 3,128 posts
Armorama: 2,959 posts
Posted: Saturday, November 24, 2012 - 11:17 AM UTC

Quoted Text

Hey Bob..

Nope I have the earlier kit, prob going to do it up as either a Poland 1939 or France 1940..

I wanted a panzer gray tank for this build as I wanted to try the modulation style. I've never managed to make a gray tank that didn't just look.. monotone.

I have a couple of other panzer I's, but not the DAK version yet.

Delbert


Del:

OK... Poland or France... Then you shall be thinking of Brown over Gray, same as I'll be doing to my Panzer II A (France, MAY 1940). I have the 1B DAK kit 6207 almost ready for the paint... and it'll probably go in for DAK scheme, unless I default over to Russia 1941! I was admiring those idlers of yours... did you swap in some later "corrected" idlers (the earlier 6186 kit having had awful idlers with what looked like some erroneous rubber tires) for your build? You probably said something about this earlier in your build, but I must have missed it!

@Pete: Seize the opportunity, man! Gotta say your AB techniques do look great, and the color-scheme looks mighty nice - pretty early-season whitewash? And you caught that sloppiness often seen in field painting, where crews might miss some areas in their haste! Good Job! ... But that paint you used... I don't know... It looks like it reacted rather badly with the base kit materials, leaving things a bit deformed and all!

Bob
Delbert
#073
Visit this Community
Pennsylvania, United States
Joined: October 05, 2002
KitMaker: 2,659 posts
Armorama: 1,512 posts
Posted: Saturday, November 24, 2012 - 11:38 AM UTC
Bob.

Funny thing about the kit the box art shows the "correct" Idlers and then the kit actually has the earlier Idlers found mostly on the IA's.

I robbed a set from a Panzerjager I I have in the stash. There are a resin set out there, but I couldn't find any available for a reasonable price, which is why I'm keeping it on my e-bay watch list.. LOL


here you can really see the difference.

Delbert
Delbert
#073
Visit this Community
Pennsylvania, United States
Joined: October 05, 2002
KitMaker: 2,659 posts
Armorama: 1,512 posts
Posted: Saturday, November 24, 2012 - 02:42 PM UTC
Ok Everyone,

Here we go with step 2 with the Ak Interactive PanzerGrau modulation set.

today I applied Dunklegrau Dark Base.

This Ak stuff needs to be very well shaken up.. it also takes a while to dry, and next time I think I will find a primer because its fairly fragile when sprayed straight on the plastic. It was also fairly thin as I sprayed at about 10 to 12 psi straight out of the bottle.

It is hard to see in the photos, but there is some darker shading from the previous dark shadow color.

So far I like the colors that it is becoming.


later
Delbert
panzerbob01
Visit this Community
Louisiana, United States
Joined: March 06, 2010
KitMaker: 3,128 posts
Armorama: 2,959 posts
Posted: Saturday, November 24, 2012 - 05:39 PM UTC
Del;

Yeah - Dragon (and probably other makers) have often lied in the cover-art about what's in the box. They know better, but just suffer laziness in mold-making, I guess! I was just wondering about where you had sourced the idlers for your's! Those old Dragon idlers were quite the pits! I couldn't stand them when I saw them in my DAK version kit... So I cadged a set of "corrected" idlers from a Dragon 1B "Kleiner" kit 6222. I picked up a couple for 10 bucks each at a show and got whole piles of spare stuff to be used in projects... the current crop of 1B derivatives idlers are better still (I needed to do some thinning surgery on that 6222 idler). Way I saw this, I could have new idlers plus lots of stuff - track sets, etc. -, for the cost of resin replacements! I actually picked up a "spare" panzerjager 1B kit for like price at a show... but couldn't drag myself to robbing it of running gear for my 1B tank! That one just screamed too loudly for me to keep it and build it "as is"

Your first go with the gray looks pretty nice for the start!

And, as long as you have mentioned "primer"... I've come across some of this "fragile" acryl coating and took to doing two things: First, I wash all my sprues in warm soap water to get the release oil off (not that all kits are equally greasy) and second, I "prime" and pre-shade my kits with Floquil railroad enamels - create a super-fine-grain thin primer coat which is awesomely well-stuck to the styrene and to the PE! I've never used these AK Interactive products... so don't take my comments as having any bearing on how they perform!

so handle things with care and paint away!

Cheers!

Bob
jerem25
Visit this Community
Metro Manila, Philippines
Joined: December 08, 2007
KitMaker: 35 posts
Armorama: 34 posts
Posted: Sunday, November 25, 2012 - 06:45 PM UTC

Quoted Text

Jeremmiah, congratulations on one finishing your 1st ever build. Now display it proudly my friend.
Joel


Thanks Joel, I appreciate it. Cheers!
GaryKato
Visit this Community
California, United States
Joined: December 06, 2004
KitMaker: 3,694 posts
Armorama: 2,693 posts
Posted: Monday, November 26, 2012 - 07:06 AM UTC
Lionmarc Design made a set of correct Panzer Ib idlers. I'm just not sure where to find any.
PeteDoc
Visit this Community
Northern Ireland, United Kingdom
Joined: April 10, 2012
KitMaker: 164 posts
Armorama: 130 posts
Posted: Monday, November 26, 2012 - 07:12 AM UTC
Bob - I don't think there's a horn on this kit?

Turret very tight - removed the paint as it turned into place!

Question about the tool colours? Wooden shafts? painted or natural? Jack colour? Should that stowage box behind the turret be painted, or wooden? It's just that I have seen conflicting versions of all these points!

Thanks if anyone can advise.
Pete
panzerbob01
Visit this Community
Louisiana, United States
Joined: March 06, 2010
KitMaker: 3,128 posts
Armorama: 2,959 posts
Posted: Monday, November 26, 2012 - 08:33 AM UTC

Quoted Text

Bob - I don't think there's a horn on this kit?

Turret very tight - removed the paint as it turned into place!

Question about the tool colours? Wooden shafts? painted or natural? Jack colour? Should that stowage box behind the turret be painted, or wooden? It's just that I have seen conflicting versions of all these points!

Thanks if anyone can advise.
Pete


Pete:

I was being slightly cheeky about that horn and wire ! For which I sincerely apologize! Actually, it does look like that older kit you are working on does not have one - on early versions of Pz II, there was typically a small "beeper type" horn mounted on a fitting down and to the right of the Notek light on that left front fender. The more recent Tamiya II A/B/C "France" kit I am working does have the fitting and the horn (and yes, I did add a tiny "wire" to it last night ). Don't worry! You are going great guns as it is!

Turret tightness: Yeah - I tried mine on early on in this build... found it pretty snug even before any paint. So I shaved out the ring a bit and opened up those key-clips (cut off the lock tabs) so that the turret fits a little loose and eliminates paint-scraping.

Tool handle colors: Tools on German tanks were essentially commercial stock items with varnished wooden handles (shovels, etc.) They probably often got a new color during crew repaint jobs...(on later tanks and later in the war when dunkelgelb base-coats and camo came out, tools often got camo-painted by crew eager to get their painting done and maybe not concerned with whether a shovel handle was brown-striped - lots of pics show partially-camo'd tools and gear on later tanks!). I personally favor the wood handles, with "black enamel blades" and suitable dirt-and-wear. The wire-cutters had insulated handles made of impregnated cardboard "plastic". This was variably orange-brown to deep red-brown in color. The metal parts were again often black enamel but sometimes also base-coated in dunkelgrau or on later vehicles, in dunkelgelb. Pinch and pry-bars were black enamel and probably dirty and banged-up by use.

The jack: It seems to me that mostly these were painted the base color of the tank - that is, either dunkelgrau (earlier war) or dunkelgelb (later) when first issued. Again, a later war field camo job could well add colors to that jack. Of course a used jack could be pretty banged-up and it does have bearing surfaces which would be scraped metal and / or rusted and grimy metal. I am sure that a DAK tank could have had a dunkelgrau jack - as most such tanks were repainted for use in NA... kit box art and many builders appear to favor a "black" or dunkelgrau type color for jacks.

Turret stowage box: I would go with whatever color the rest of the turret and tank gets. It's not a temporary item just hung on the back or strapped on.

Them's my 2 c on this!

Cheers!

Bob
PeteDoc
Visit this Community
Northern Ireland, United Kingdom
Joined: April 10, 2012
KitMaker: 164 posts
Armorama: 130 posts
Posted: Monday, November 26, 2012 - 11:43 AM UTC
Thanks for the info Bob. I'm still pretty green in the mysterious ways of tanks!
Got a bit more done tonight. painted the heavily distressed wheels and rims, and made a start on the tracks.

I forgot I also drilled out the exhaust - def helps the look of it. Also lost the small hook from the rear of the turret to the carpet monster. Will either fabricate something or sand it smooth.
PeteDoc
Visit this Community
Northern Ireland, United Kingdom
Joined: April 10, 2012
KitMaker: 164 posts
Armorama: 130 posts
Posted: Wednesday, November 28, 2012 - 11:45 AM UTC
Bombing on now. here's where she's at.
Most tools on. Coat of Future, decals on, another light coat of future. Oil wash & pin washes. Need to tone some bits down that are more apparent in the picture than to my bad eyes. Not happy with the headlamps, might replace. The exhaust was an experimental hairspray technique, but I didn't let the coats all properly dry, so it developed the texture. Might knock that back a bit as well. Next up, finish the tracks and get them on, and fade the whole thing down a bit. Some Tamiya smoke might not go amiss around the engine grills etc. All comments & suggestions are welcome... indeed, encouraged. I'm learning as I go.
Cheers,
Pete

Oops - need to re attach that towing(?) hook!


PeteDoc
Visit this Community
Northern Ireland, United Kingdom
Joined: April 10, 2012
KitMaker: 164 posts
Armorama: 130 posts
Posted: Wednesday, November 28, 2012 - 11:55 AM UTC
Oops - I just noticed that the inside of the drive & idler wheels will be visible!
Photos definitely help me to see stuff I otherwise miss. I really need better lighting at my bench. What do other folks use?
panzerbob01
Visit this Community
Louisiana, United States
Joined: March 06, 2010
KitMaker: 3,128 posts
Armorama: 2,959 posts
Posted: Wednesday, November 28, 2012 - 03:02 PM UTC
"Whoa, Pete! That idler has a conspicuous access port on the inner face!" Just funnin', Pard! Actually, I would almost bet that the blem would not be visible once tracks were on. Maybe you can rotate the idler a little to better obscure that issue?

It is otherwise looking quite nice! I'll guess that you will add some dust after you mount your tracks on - which should pick out some of that neat tire-wear you got going!

Bench lighting... probably a problem for many of us! I often find stuff in WIP pics that I did not see in real-time while building - I've actually taken to doing photos and then examining the images for stuff! (Not that I fix everything I find therein!) I do try to get a couple of halogen lights on over the L or R shoulder into the work area, to offset the overhead lighting and its shadows. But beware of too much light and heat!

Bob
barkingdigger
Staff MemberAssociate Editor
ARMORAMA
#013
Visit this Community
England - East Anglia, United Kingdom
Joined: June 20, 2008
KitMaker: 3,981 posts
Armorama: 3,403 posts
Posted: Thursday, November 29, 2012 - 12:53 AM UTC
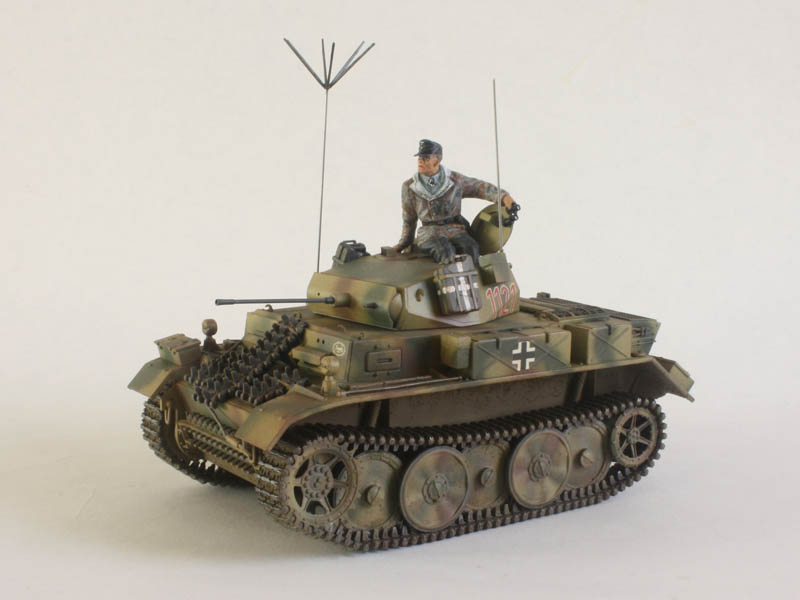
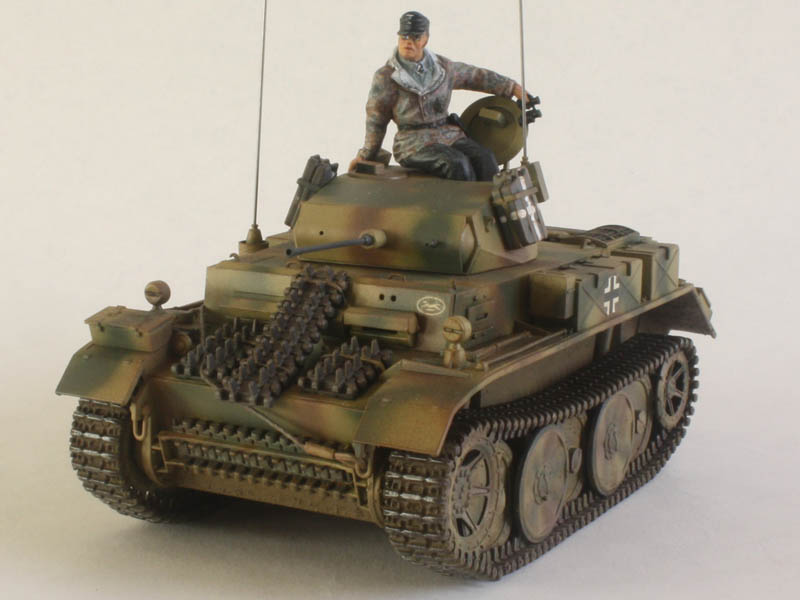
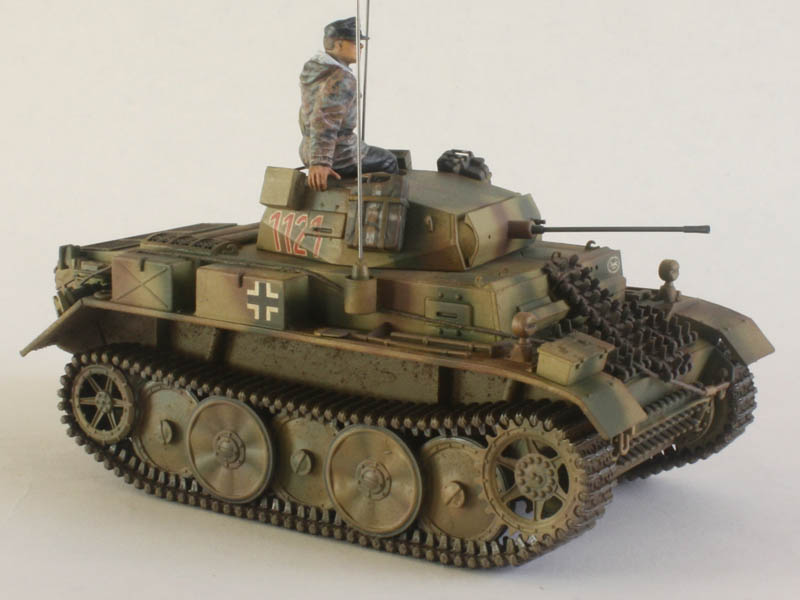
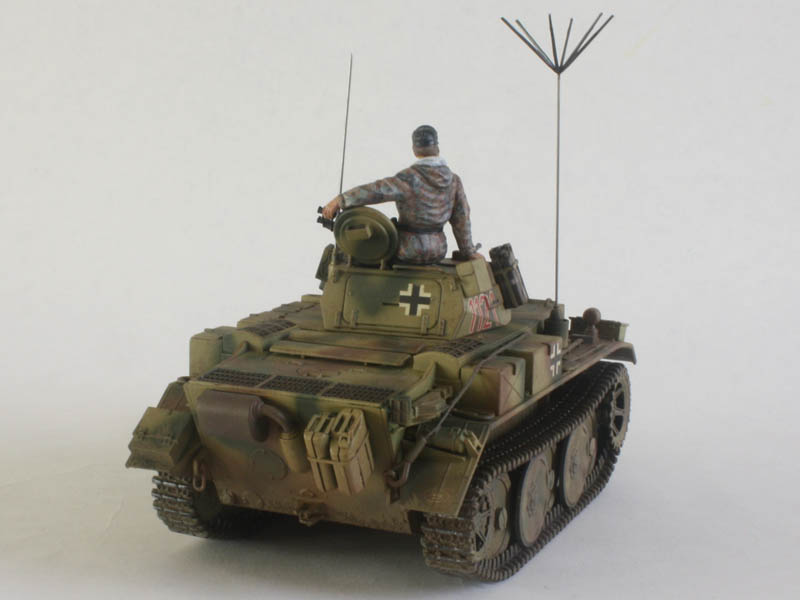
Pete, I'd scrape the raised ring off and then coat the inside face of the sprocket with some goop mixed from paint and filler powder. (I bought some texture powder at a doll-house show, but you could add chalk dust or similar - it just has to make the paint go a little lumpy!) These areas would be greasy from the bearings (and from slippage with the grease gun) and would attract crud, so it's an easy fix for an already-painted tank.

In fact, here is my completed entry (ICM's Pz II Luchs), complete with a little "crud" to hide the ejector-marks on the underside of the fenders! (Oops! Shoulda noticed before I painted...) My mix was texture powder in Humbrol enamel "earth" paint, slapped on with a brush.


A fine campaign! (And one I actually finished! Mustn't set a precedent... )

Tom
Delbert
#073
Visit this Community
Pennsylvania, United States
Joined: October 05, 2002
KitMaker: 2,659 posts
Armorama: 1,512 posts
Posted: Thursday, November 29, 2012 - 02:50 PM UTC
Hi everyone.

Here are my latest pics showing my attempt at using a color modulation with Ak Interactives Panzergrau set.

I am trying to make a gray tank that isn't all one color gray.

So far I don't know if the results are what they are suppose to be, but I like the AK set's color better than the Tamiya or Model Master colors..

here are the photos.


not quite there yet but getting there.

and Pete looking good. the Panzer II kit was my first tank I ever did, and no where near as good as yours.

Tom thats a great little build. I only hope my offering comes out half as good.. but in gray.. LOL

Delbert
Hangelafette
Visit this Community
Pennsylvania, United States
Joined: April 22, 2012
KitMaker: 344 posts
Armorama: 315 posts
Posted: Thursday, November 29, 2012 - 03:50 PM UTC
Pete - Nice wash and weathering work on the Pz II, the details really pop out. I actually like the texture on the muffler.

Tom - Great looking paint work on the Luchs, I like the figure pose as well. One of my favorite little tanks, I hope to build one for the big cat campaign next year.

Delbert - Following this modulation work with interest. Well done on the magic tracks and the overall build looks very clean. I'm working my down on magic tracks, I started with a Ferdinand, to a Panther F, I currently working on StuG III tracks. I have a couple Dragon Pz I tanks in the stash, so someday...

My Pz 35 is on ice at the moment as I try to move some other models to completion. I just picked up the WWP in Detail book on the Pz 35(t) during a Squadron sale. A really excellent resource with a nice mix of period photos, diagrams, detail photos. It even has some 1/35 examples that puts my work to shame.

Nate
Delbert
#073
Visit this Community
Pennsylvania, United States
Joined: October 05, 2002
KitMaker: 2,659 posts
Armorama: 1,512 posts
Posted: Thursday, November 29, 2012 - 04:39 PM UTC
thanks Nathan,

The build part was fairly interesting. Except for the tracks. Someday I hope to try some of those "Magic Tracks", LOL the only thing magical about the tracks on this particular kit was when I reached the end..


but I was happy how they turned out.

Delbert
PeteDoc
Visit this Community
Northern Ireland, United Kingdom
Joined: April 10, 2012
KitMaker: 164 posts
Armorama: 130 posts
Posted: Thursday, November 29, 2012 - 09:32 PM UTC
Thanks guys.
Delbert ... LOL your comment about the tracks!
Tom... nice Luchs.. you've now got me thinking about an antenna for the Pz.II??
I took you advice and mixed up a "crud", or as we call it here in N.I. "glar", from some Vallejo model air & talc. It really looked like a thick dirty grease. I slapped it on liberally... not sure if I've gone a bit over the top, but it certainly smells nice!!. As it was a dark colour, it all got toned down with an all over "dusting" as per Bob's suggestion. Perhaps some dry brushing now & chipping?


Joel_W
Staff MemberAssociate Editor
AUTOMODELER
Visit this Community
New York, United States
Joined: December 04, 2010
KitMaker: 11,666 posts
Armorama: 1,143 posts
Posted: Friday, November 30, 2012 - 02:43 AM UTC
Jeremiah, your Stewart came out great. Just a solid build. congrats.
Joel
Joel_W
Staff MemberAssociate Editor
AUTOMODELER
Visit this Community
New York, United States
Joined: December 04, 2010
KitMaker: 11,666 posts
Armorama: 1,143 posts
Posted: Friday, November 30, 2012 - 02:47 AM UTC
Pete, the weathering is looking really good at this point.
Joel
JackG
Visit this Community
Ontario, Canada
Joined: May 28, 2006
KitMaker: 172 posts
Armorama: 122 posts
Posted: Friday, November 30, 2012 - 04:34 AM UTC
Pete, your Panzer II is looking really good. The mud effects looks fine as the desert region occasionally did experience some rain, particularly Tunisia. Not sure what question you have about the antenna, but your build does have one - it's on the port side in the down position in it's protective trough.

regards,
Jack
PeteDoc
Visit this Community
Northern Ireland, United Kingdom
Joined: April 10, 2012
KitMaker: 164 posts
Armorama: 130 posts
Posted: Friday, November 30, 2012 - 04:48 AM UTC
Jack - ah! thanks, I wondered what that thing was!!
Hangelafette
Visit this Community
Pennsylvania, United States
Joined: April 22, 2012
KitMaker: 344 posts
Armorama: 315 posts
Posted: Friday, November 30, 2012 - 01:48 PM UTC

Quoted Text

LOL the only thing magical about the tracks on this particular kit was when I reached the end..


Ahhh, I forgot it was an older kit... Even more power to you then.
I have some of the newer Dragon Pz.I kits with the magic tracks... and the Tristar Pz.I A with links on sprues...


Pete - I would use a light touch if you do any chipping, she looks lovely as is.

Nate