Thanks Jeff that will help loads, just needed an idea of the patern. You are a gent.
Pete
Campaigns
Where Armorama group builds can be discussed, organized, and updates posted.
Where Armorama group builds can be discussed, organized, and updates posted.
Hosted by Darren Baker, Richard S.
Large Scale Build Campaign 1/24 ~ 1/6
Posted: Thursday, May 30, 2013 - 11:12 PM UTC
imatanker

Joined: February 11, 2011
KitMaker: 1,654 posts
Armorama: 1,565 posts

Posted: Friday, May 31, 2013 - 08:05 AM UTC
Quoted Text
Thanks Jeff that will help loads, just needed an idea of the patern. You are a gent.
Pete
No problem Peter,just don't let it get around.I have a rep to maintian you know
 Jeff T.
 Molentik

Joined: May 22, 2012
KitMaker: 112 posts
Armorama: 97 posts

Posted: Wednesday, June 05, 2013 - 11:00 PM UTC
I finally managed to take a starter pic of my Schwimmwagen. As you can see the previous owner did just a few bits and pieces, like the front axle. I really should have checked better 

The motorcycle in the back is the Cyberhobby resin R-75, it will join the Schwimmy to replicate this scene;


The Schwimmy in the photos looks like it has the narrow wheels fitted, but the spare wheels looks like the broad type to me. And I don't really recognise the pattern on the spare wheel in the back, it's too 'fine' for a lack of better words to be a Schwimmy wheel. Any thoughts?
Also, I'd love to have ANY information on the location or unit in these photos you guys might know.


The motorcycle in the back is the Cyberhobby resin R-75, it will join the Schwimmy to replicate this scene;


The Schwimmy in the photos looks like it has the narrow wheels fitted, but the spare wheels looks like the broad type to me. And I don't really recognise the pattern on the spare wheel in the back, it's too 'fine' for a lack of better words to be a Schwimmy wheel. Any thoughts?
Also, I'd love to have ANY information on the location or unit in these photos you guys might know.
Posted: Wednesday, June 05, 2013 - 11:23 PM UTC
Molentik

Joined: May 22, 2012
KitMaker: 112 posts
Armorama: 97 posts

Posted: Wednesday, June 05, 2013 - 11:53 PM UTC
Really nice job on the Zimm! And you are right about the schurtzen, they didnt have any Zimmerit.

PantherF

Joined: June 10, 2005
KitMaker: 6,188 posts
Armorama: 5,960 posts

Posted: Wednesday, June 05, 2013 - 11:58 PM UTC
Beautiful choice there Robbert! I have the 1/16th version and thought mine was neat.
~ Jeff
~ Jeff
Posted: Thursday, June 06, 2013 - 12:32 AM UTC
Wow Rob your Swimwagon is gonna need mucho paint, and a big brush for any dry brushing lol. Can't wait to see it finito.
Pete
Pete
Molentik

Joined: May 22, 2012
KitMaker: 112 posts
Armorama: 97 posts

Posted: Thursday, June 06, 2013 - 01:00 AM UTC
Quoted Text
Wow Rob your Swimwagon is gonna need mucho paint, and a big brush for any dry brushing lol. Can't wait to see it finito.
Pete
I must admit that when I bought it I didn't think of the logistics of such a project

Posted: Thursday, June 06, 2013 - 02:46 AM UTC
Rob I built the desert raider 1/6 and used about 5 bottles of paint, but weathering was actually easier, as you have more room to rectify any mistakes. I used my airbrush, but you could use cans, might be cheaper.
Pete
Pete
Molentik

Joined: May 22, 2012
KitMaker: 112 posts
Armorama: 97 posts

Posted: Thursday, June 06, 2013 - 05:14 AM UTC
The plan is to use Tamiya rattlecans for the basecoat, with Vallejo paints for modulation because I think the Tamiya color is a bit too yellow and dark.
imatanker

Joined: February 11, 2011
KitMaker: 1,654 posts
Armorama: 1,565 posts

Posted: Thursday, June 06, 2013 - 10:43 AM UTC
Great work every one.It looks like it's about 3 days of rain coming up around here so I should be able to get the Centurion finished up  Jeff T.
 Jeff T.
PantherF

Joined: June 10, 2005
KitMaker: 6,188 posts
Armorama: 5,960 posts

Posted: Thursday, June 06, 2013 - 10:47 AM UTC
FIVE BOTTLES OF PAINT?!!!  I never used that much rattle cans for a project that big!
~ Jeff
 I never used that much rattle cans for a project that big!
~ Jeff
imatanker

Joined: February 11, 2011
KitMaker: 1,654 posts
Armorama: 1,565 posts

Posted: Thursday, June 06, 2013 - 11:24 AM UTC
Quoted Text
FIVE BOTTLES OF PAINT?!!!I never used that much rattle cans for a project that big!

~ Jeff
Jeff S.I used a lot of paint on the Cent.The green I used was a three color mix.So I bought 3 new Tamiya mini's and thought that would be enough.I ended up getting a second bottle of the most used color,and just squeeked by with the other two.Jeff T.

PantherF

Joined: June 10, 2005
KitMaker: 6,188 posts
Armorama: 5,960 posts

Posted: Thursday, June 06, 2013 - 11:30 AM UTC
Wow... you see I know nothing about AB usage.
Good to know so I can expect it!
~ Jeff
Good to know so I can expect it!

~ Jeff
imatanker

Joined: February 11, 2011
KitMaker: 1,654 posts
Armorama: 1,565 posts

Posted: Saturday, June 08, 2013 - 08:53 AM UTC
Quoted Text
Wow... you see I know nothing about AB usage.
Good to know so I can expect it!
~ Jeff
If I do an other Big Boy,I think I will use spray cans.If I hadn't had a Paasche Talon with a huge tip and a wide fan aircap,I would not have been able to paint it.My regular AB worked O.K. for the smaller parts,but there was just no way I could have painted the hull with it,I tried.It was just too big to get a smooth finish.Jeff T.
P.S.The Centurion is back on the bench,and should be done this week end.....Maybe

imatanker

Joined: February 11, 2011
KitMaker: 1,654 posts
Armorama: 1,565 posts

Posted: Saturday, June 08, 2013 - 09:28 PM UTC
O.K. Boys.Here it is.The moment you have all been waiting for......or maybe not,I don't know 
The Centurion is DONE
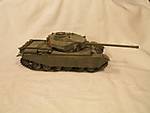
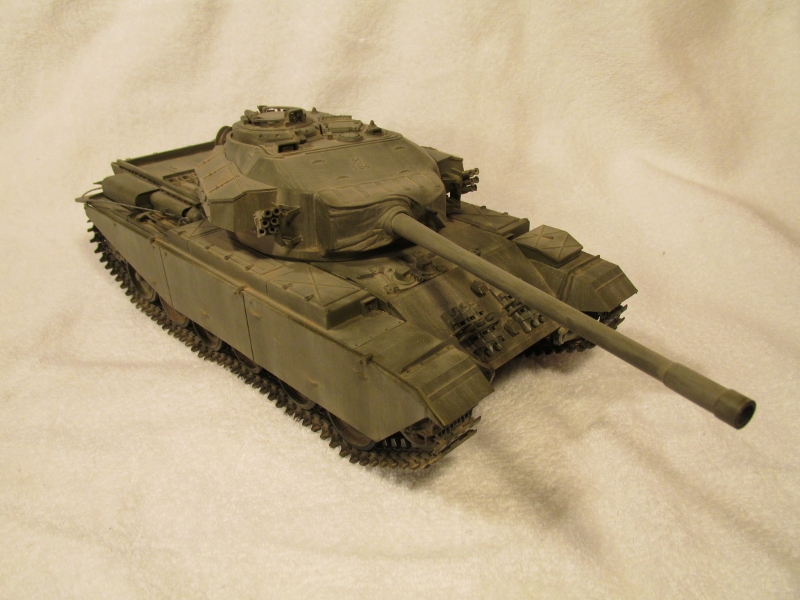
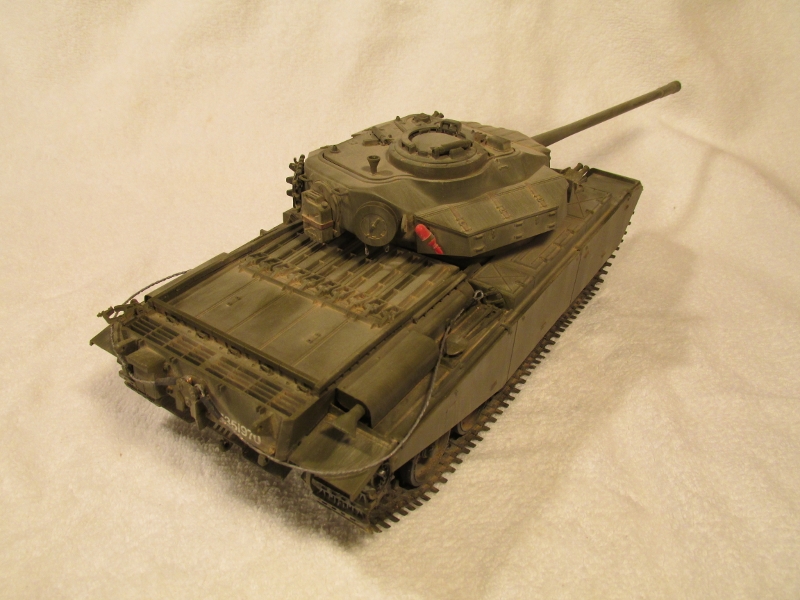
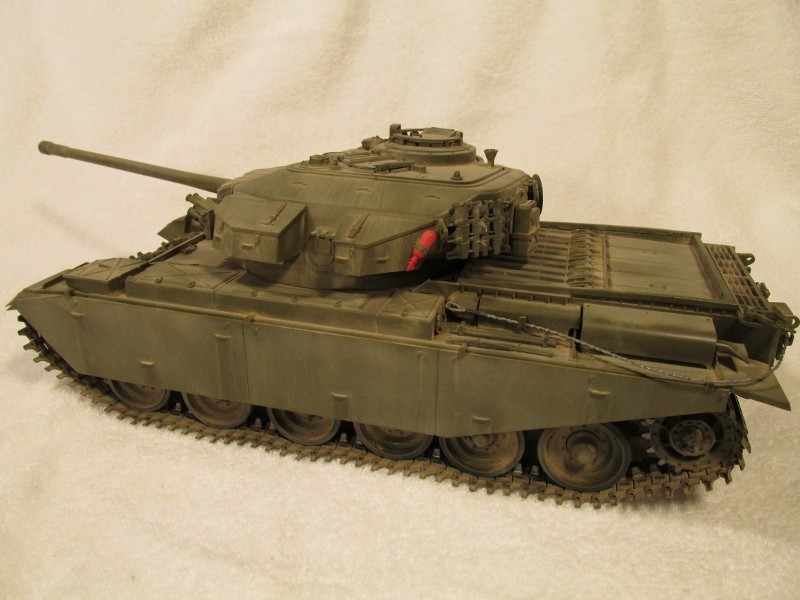
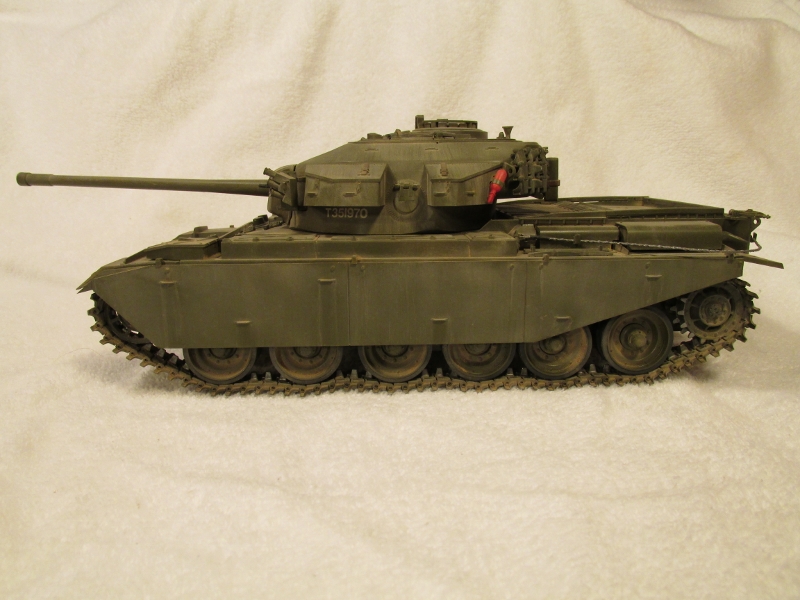
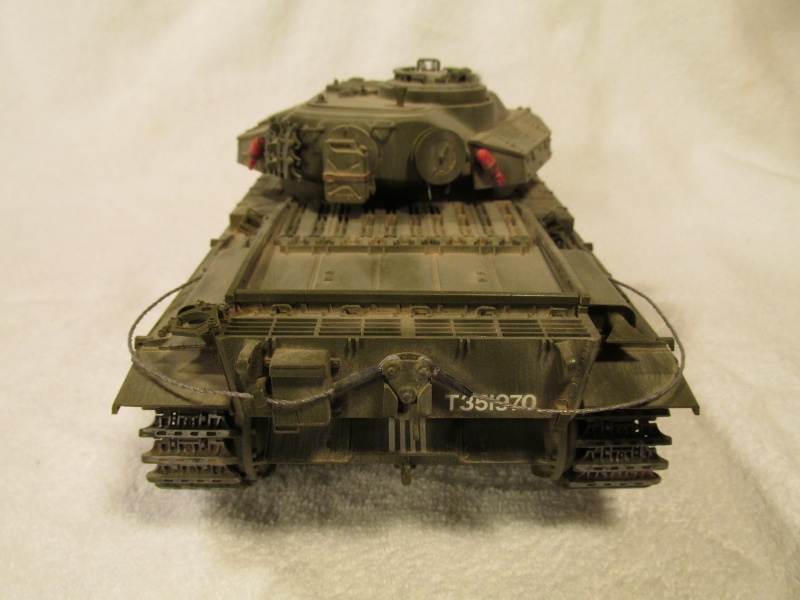
And here He is,making his last Campaign Appearance........
Mr.Humber
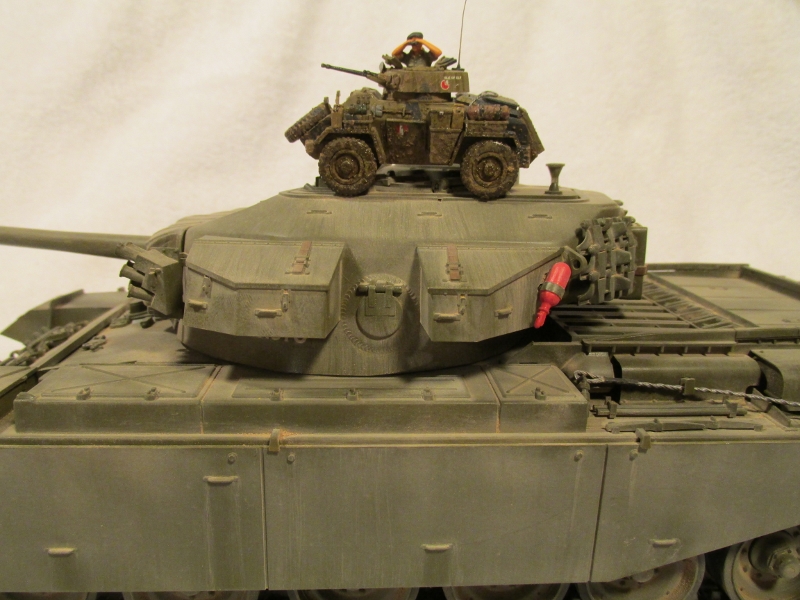
And there you have it.One large scale build.It has been a good,if not lonely at times campaign.It's good to see the thread picking up,and I will stop in frome time to time,to keep you Guys on the up and up.Model on,Jeff T.

The Centurion is DONE


And here He is,making his last Campaign Appearance........
Mr.Humber


And there you have it.One large scale build.It has been a good,if not lonely at times
 campaign.It's good to see the thread picking up,and I will stop in frome time to time,to keep you Guys on the up and up.Model on,Jeff T.
 Posted: Sunday, June 09, 2013 - 09:43 AM UTC
Quoted Text
O.K. Boys.Here it is.The moment you have all been waiting for......or maybe not,I don't know
The Centurion is DONE
And here He is,making his last Campaign Appearance........
Mr.Humber
And there you have it.One large scale build.It has been a good,if not lonely at timescampaign.It's good to see the thread picking up,and I will stop in frome time to time,to keep you Guys on the up and up.Model on,Jeff T.
Sweet build Jeff, really looks good, and the Cent too
 just kiddin, really shows the scale off with the dingo on it.
Pete

imatanker

Joined: February 11, 2011
KitMaker: 1,654 posts
Armorama: 1,565 posts

Posted: Sunday, June 09, 2013 - 08:46 PM UTC
Thanks Pete,the little guy made a couple of appearances for size reference in this campaign,so it was only fair to include him in the closing ceremonies  Jeff T.
 Jeff T.

D_J_W

Joined: December 30, 2005
KitMaker: 436 posts
Armorama: 367 posts

Posted: Sunday, June 09, 2013 - 09:44 PM UTC
Great work Jeff, far better than the one I built when it first came out 
 The colour and weathering looks just right.
cheers
David

 The colour and weathering looks just right.
cheers
David
imatanker

Joined: February 11, 2011
KitMaker: 1,654 posts
Armorama: 1,565 posts

Posted: Monday, June 10, 2013 - 07:48 AM UTC
Hey Dave,Thanks a lot,and I'm sure the one you did was not that bad  Jeff T.
 Jeff T.
 blake_500ci

Joined: January 09, 2012
KitMaker: 37 posts
Armorama: 30 posts

Posted: Tuesday, June 11, 2013 - 09:52 PM UTC
jeff she is a beautiful thing, im sad to see her done as i always loved logging on and seeing your progress on the big girl. infact u have inspired me to get one and do an australian 1ST armoured regiment vietnam dozer tank. we only had 4 in service, so thanks very much mate and all the best.
Cheers blake
Cheers blake

Posted: Wednesday, June 12, 2013 - 04:21 AM UTC

PantherF

Joined: June 10, 2005
KitMaker: 6,188 posts
Armorama: 5,960 posts

Posted: Wednesday, June 12, 2013 - 06:27 AM UTC
Good job Jeff! 
~ Jeff

~ Jeff
imatanker

Joined: February 11, 2011
KitMaker: 1,654 posts
Armorama: 1,565 posts

Posted: Wednesday, June 12, 2013 - 12:38 PM UTC
Peter,Nice zimm.How did you do it?
Jeff S. Thanks Man.It was a long haul. Nice to be first finished for a change
  Jeff T.
Jeff S. Thanks Man.It was a long haul.
 Nice to be first finished for a change
  Jeff T.
 Posted: Wednesday, June 12, 2013 - 08:10 PM UTC
Hi Jeff thanks buddy, I did in stages using milliput. I looked at a few pictures of how Zimm looks, and sort of 2nd guessed how it was applied. It seems they whacked the paste on then used a tool to give it the pattern, but when you look at it close it seems they sort of pushed it back on itself to lift it up, thus making it an uneven surface. I used a screw driver and did the same thing. If there is enough interest I could do a little video but don't know how to put it on. You just have to look at the scale and choose a screw driver that has a blade the right size for the zimm/scale. Hoping it looks okay once the paint is on it. Will see today 
Pete

Pete
 |


