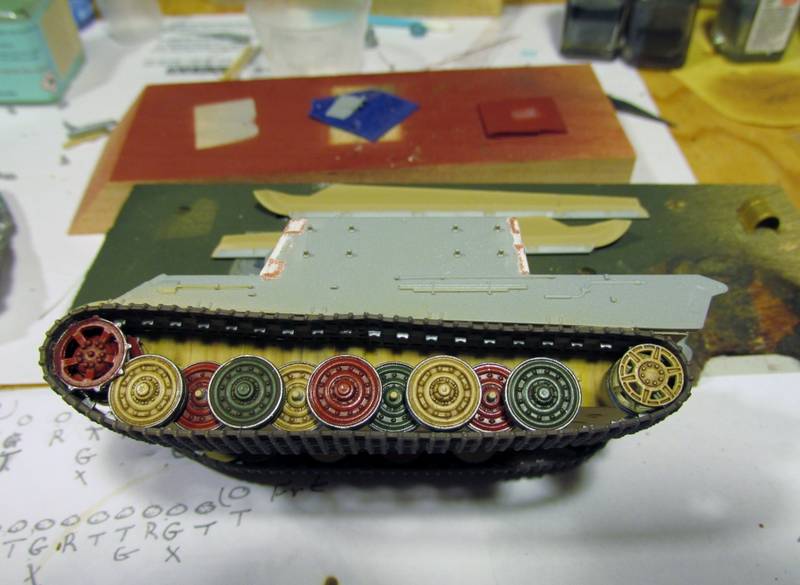
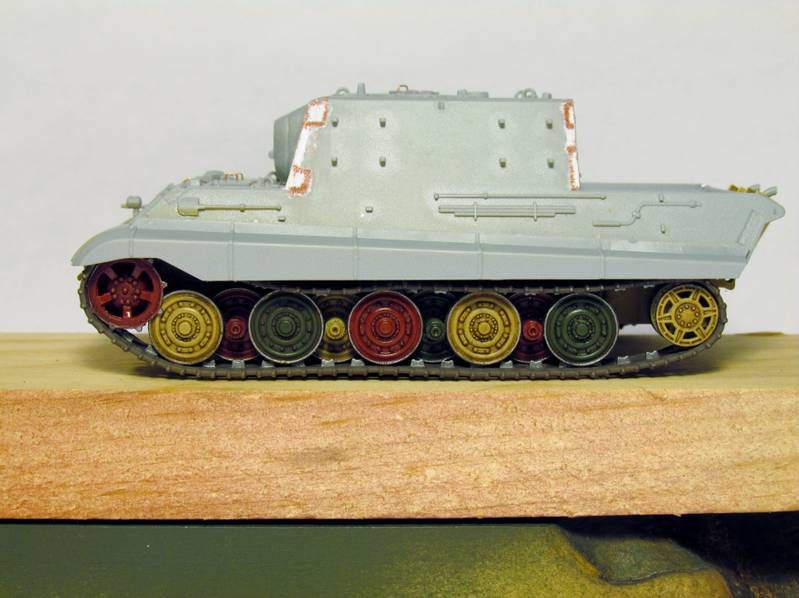
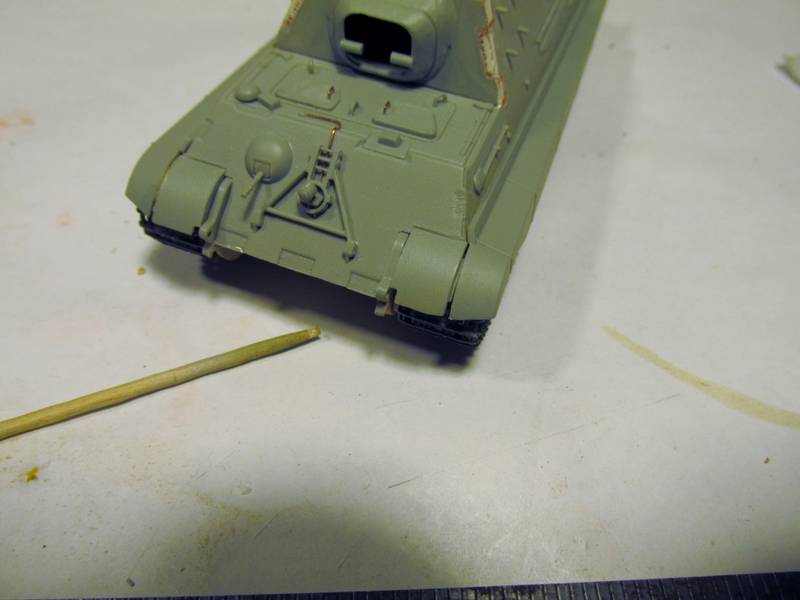
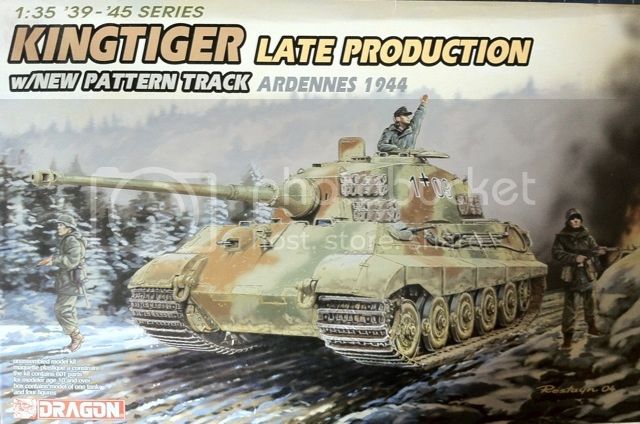
All these builds are progressing so quickly and I'm still stuck taking baby steps:
I'm hoping to reach the toddler stage and get more done, and then some day move up to taking full-length strides!
Keith
Campaigns
Where Armorama group builds can be discussed, organized, and updates posted.
Hosted by Darren Baker, Richard S.
King Campaign
woltersk
Utah, United States
Joined: May 27, 2003
KitMaker: 1,026 posts
Armorama: 654 posts
Joined: May 27, 2003
KitMaker: 1,026 posts
Armorama: 654 posts
Posted: Thursday, November 29, 2012 - 01:10 AM UTC
ltb073
New York, United States
Joined: March 08, 2010
KitMaker: 3,662 posts
Armorama: 3,078 posts
Joined: March 08, 2010
KitMaker: 3,662 posts
Armorama: 3,078 posts
Posted: Thursday, November 29, 2012 - 01:28 AM UTC
Quoted Text
All these builds are progressing so quickly and I'm still stuck taking baby
I'm hoping to reach the toddler stage and get more done, and then some day move up to taking full-length strides!
Keith
Hey Keith this tread is moving so fast I can't keep up with it and I haven't even cracked the box yet on my build here 1st semester back in school in a long time and that cutting into my modeling time
Nito74
Lisboa, Portugal
Joined: March 04, 2008
KitMaker: 5,386 posts
Armorama: 4,727 posts
Joined: March 04, 2008
KitMaker: 5,386 posts
Armorama: 4,727 posts
Posted: Thursday, November 29, 2012 - 01:32 AM UTC
Here's a dry fit of the hull & turret with the ambush scheme.
Next I'll be taking care of the wheels & tank equipment.
Stay tuned.
Pics:
Next I'll be taking care of the wheels & tank equipment.
Stay tuned.
Pics:
imatanker
Maine, United States
Joined: February 11, 2011
KitMaker: 1,654 posts
Armorama: 1,565 posts
Joined: February 11, 2011
KitMaker: 1,654 posts
Armorama: 1,565 posts
Posted: Thursday, November 29, 2012 - 11:15 AM UTC
John and Sal... I thought for a moment that there was something wrong with My screen.All I could see where spots Nice work by both you guys
Keith...Don't worry Bub,you'll catch up.Before you know it you'll be running marathons.Jeff T.
Posted: Thursday, November 29, 2012 - 02:06 PM UTC
John love the paint job so far very impressive.
jhooper
Ohio, United States
Joined: May 02, 2012
KitMaker: 28 posts
Armorama: 28 posts
Joined: May 02, 2012
KitMaker: 28 posts
Armorama: 28 posts
Posted: Thursday, November 29, 2012 - 06:19 PM UTC
Wow there are a lot of people moving along quickly. Every time I look on here I feel like such a novice and I learn so much! Thanks for the comments on the tracks.
So here is the long version
They are HobbyBoss non workable. I first tried to glue them up in sections to be taken down and painted and reassembled. That was a mess. I actually glued them up with some testers model master in a straight line for painting.
I put a coat of Vallejo Steel on after grey primer. I then painted them with a fine coat of light brown. I left the inside center steel. Once that was dry I used some AK track wash. They looked so clean I had to mess them up a little .
I used 3 pigments. Light dust, European dust and rust. Fixed them with some Matt varnish and then dry bushed them with Vallejo Oily steel.
I found they were somewhat flexible after the painting and if I used light steady pressure they would mold around the wheels. Some did separate which were glued back in place. I actually took the weak spots and pulled them apart as it made installation easier.
That's it!
ltb073
New York, United States
Joined: March 08, 2010
KitMaker: 3,662 posts
Armorama: 3,078 posts
Joined: March 08, 2010
KitMaker: 3,662 posts
Armorama: 3,078 posts
Posted: Friday, November 30, 2012 - 01:29 AM UTC
Quoted Text
John and Sal... I thought for a moment that there was something wrong with My screen.All I could see where spots Nice work by both you guys
Jeff T.
Jeff, thanks for the complements but I havent started my build yet but John's paint job is looking excellent
Hopefully I will be getting started this weekend on my Tamiya KT production turret and I'll be using J's Work Camo-Mask for 1st time
imatanker
Maine, United States
Joined: February 11, 2011
KitMaker: 1,654 posts
Armorama: 1,565 posts
Joined: February 11, 2011
KitMaker: 1,654 posts
Armorama: 1,565 posts
Posted: Friday, November 30, 2012 - 11:23 AM UTC
Sal... How the heck did I do that? Sorry Man,it must have been the Single Malt
Look at it this way.You know it's going to be a great build if you're getting compliments on it before You even start it Good luck with the masking kit.I've never used one either so it will be good to see how it works.Jeff T.
wedgetail53
Queensland, Australia
Joined: October 02, 2008
KitMaker: 658 posts
Armorama: 629 posts
Joined: October 02, 2008
KitMaker: 658 posts
Armorama: 629 posts
Posted: Friday, November 30, 2012 - 11:29 AM UTC
Sal
I'll be interested to see how the camo masks work, as I have a set for my KT too and am just about to start using them.
Regards
Rob
I'll be interested to see how the camo masks work, as I have a set for my KT too and am just about to start using them.
Regards
Rob
Snorri23
Ontario, Canada
Joined: March 25, 2010
KitMaker: 514 posts
Armorama: 261 posts
Joined: March 25, 2010
KitMaker: 514 posts
Armorama: 261 posts
Posted: Friday, November 30, 2012 - 03:23 PM UTC
I am at the point now that I need to decide if I want to add camouflage to the base colour. The painting diagram from dragon looks promising with streaks of a few other colours which drag onto the road wheels. Any suggestions? Here is my progress so far. Barrel is painted grey just to add some contrast. Tracks are from Hobby Boss which are harder to get now. Ran short of the end caps had to scrounge around for them luckily I had a few laying about.
Posted: Friday, November 30, 2012 - 08:52 PM UTC
looking good Trevor with the wheels being eye catching
imatanker
Maine, United States
Joined: February 11, 2011
KitMaker: 1,654 posts
Armorama: 1,565 posts
Joined: February 11, 2011
KitMaker: 1,654 posts
Armorama: 1,565 posts
Posted: Friday, November 30, 2012 - 09:24 PM UTC
Nice work Trevor,what color did you use for the base? Jeff T.
Snorri23
Ontario, Canada
Joined: March 25, 2010
KitMaker: 514 posts
Armorama: 261 posts
Joined: March 25, 2010
KitMaker: 514 posts
Armorama: 261 posts
Posted: Saturday, December 01, 2012 - 01:58 AM UTC
I used Humbrol 83 (ochre) which is a good match for the late war dunkelgleb nach Muster 882. RAL 7028. Colour hues changed a lot during the last few years. Though that was quite common from batch to batch, depending upon the company and stocks available.I used a dark wash thus darkening the tint some what as well. I play around with colours to an extent not wanting to have tanks all in the same colour sitting on my shelf. Any suggestions for camouflage?
SaxonTheShiba
United States
Joined: February 01, 2009
KitMaker: 1,233 posts
Armorama: 557 posts
Joined: February 01, 2009
KitMaker: 1,233 posts
Armorama: 557 posts
Posted: Saturday, December 01, 2012 - 09:32 AM UTC
Hey everybody and hope you are all doing well. I am going to jump in the ring with one of my favorite Tiger II kits, the Dragon 1/35th scale late version Tiger II. I will be using Bison decals to depict #100 from the fighting in the final days of WWII. Looking forward to it.
Best wishes, Ian
Best wishes, Ian
Posted: Saturday, December 01, 2012 - 10:10 AM UTC
Get those plastic parts glued together Ian and how did you get hold of my glasses?
imatanker
Maine, United States
Joined: February 11, 2011
KitMaker: 1,654 posts
Armorama: 1,565 posts
Joined: February 11, 2011
KitMaker: 1,654 posts
Armorama: 1,565 posts
Posted: Saturday, December 01, 2012 - 12:14 PM UTC
Ian... Nice choice,Man. Are the tracks indy link or one piece?
You guys are lucky that those are all you wear for glasses.They make Mine out of the bottoms of Coke bottles
Here's what I've gotten done through the week and this week end.
Lower hull weathered,tracks and roadwheels mounted
Fenders mounted and tracks "sagged"
Fitting the tracks and fenders was a challenge,and I did end up with a small gap at the front fenders
What should I do with this? I've looked at all kind of pics on the net.Some look like they are one piece,some look welded,some look like they have brackets holding them together.Does any one know what the most common practice was?
Mounting the exhaust shields and priming the upper hull is up next.Jeff T.
Posted: Saturday, December 01, 2012 - 01:00 PM UTC
Jeff I would remove the fender and thin the part that connect to the body of the tank.
SaxonTheShiba
United States
Joined: February 01, 2009
KitMaker: 1,233 posts
Armorama: 557 posts
Joined: February 01, 2009
KitMaker: 1,233 posts
Armorama: 557 posts
Posted: Saturday, December 01, 2012 - 03:54 PM UTC
Jeff-----They are individual links but they fit pretty well in this kit. There just happen to be a ton of them.
Darren----Downside of being 40+....the old eyeballs start to go. So far I am fine with reading glasses but I will see how long that lasts.
Best wishes, Ian
Darren----Downside of being 40+....the old eyeballs start to go. So far I am fine with reading glasses but I will see how long that lasts.
Best wishes, Ian
woltersk
Utah, United States
Joined: May 27, 2003
KitMaker: 1,026 posts
Armorama: 654 posts
Joined: May 27, 2003
KitMaker: 1,026 posts
Armorama: 654 posts
Posted: Saturday, December 01, 2012 - 05:16 PM UTC
Stupid question time.
I'm enjoying this Dragon kit, and all of its optional parts, but I am not thrilled with their instructions. How difficult would it be to describe each optional part as "early" or "late", or put tank version numbers next to each so that we know which parts go together, or which widgets go with which doohickeys?
My queries: does anyone know which parts to use to build a late, non-zimm, KT?
Or can I just pick and choose by which parts look the coolest?
I've looked around the Internet for detailed photos but can't find many close-up shots for what I need.
Thanks,
Keith
imatanker
Maine, United States
Joined: February 11, 2011
KitMaker: 1,654 posts
Armorama: 1,565 posts
Joined: February 11, 2011
KitMaker: 1,654 posts
Armorama: 1,565 posts
Posted: Saturday, December 01, 2012 - 07:55 PM UTC
Keith... Ah yes,the very techincal, wigdits and doohickey question I had the same problem with Cyber-Hobbies Panther F kit #6403.That one had a lot of choices too that where not explained What I did was ask questions here,to get the answers I needed,and then if no one could answer them,I went with what I thought looked good.It all depends on what you're trying to accomplish I guess.Jeff T.
imatanker
Maine, United States
Joined: February 11, 2011
KitMaker: 1,654 posts
Armorama: 1,565 posts
Joined: February 11, 2011
KitMaker: 1,654 posts
Armorama: 1,565 posts
Posted: Saturday, December 01, 2012 - 08:03 PM UTC
Quoted Text
Jeff I would remove the fender and thin the part that connect to the body of the tank.
Darren,I thought of that,but the problem is,there is not enough space with the tracks in place to move the skirt inward.Jeff T.
SaxonTheShiba
United States
Joined: February 01, 2009
KitMaker: 1,233 posts
Armorama: 557 posts
Joined: February 01, 2009
KitMaker: 1,233 posts
Armorama: 557 posts
Posted: Sunday, December 02, 2012 - 04:44 AM UTC
Jeff, can you shim it? I would think some rod or strip blended with some MEK or other liquid cement would get it blended nicely after a few passes with a sanding stick. Just a thought and your project looks really cool so far.
Regards, Ian
Regards, Ian
SaxonTheShiba
United States
Joined: February 01, 2009
KitMaker: 1,233 posts
Armorama: 557 posts
Joined: February 01, 2009
KitMaker: 1,233 posts
Armorama: 557 posts
Posted: Sunday, December 02, 2012 - 04:48 AM UTC
Keith, my understanding is that this kit represents an "early-late" model Tiger II...another words it has the late two piece track links but still has the four piece track stowage on each turret side instead of six. I think Dragon actually came out with the "late-late" version with the six piece track link stowage on the turret a few months ago.
Regards, Ian
Regards, Ian
Snorri23
Ontario, Canada
Joined: March 25, 2010
KitMaker: 514 posts
Armorama: 261 posts
Joined: March 25, 2010
KitMaker: 514 posts
Armorama: 261 posts
Posted: Sunday, December 02, 2012 - 07:11 AM UTC
I have the Waldemar Trojca books which are quite informative, ask away and I will try and get you the answers. A friend of mine told me not to worry about models for they will always be around books will not. Thus I focused my limited funds on books and the odd kit.
panzerbob01
Louisiana, United States
Joined: March 06, 2010
KitMaker: 3,128 posts
Armorama: 2,959 posts
Joined: March 06, 2010
KitMaker: 3,128 posts
Armorama: 2,959 posts
Posted: Sunday, December 02, 2012 - 10:30 AM UTC
Keith:
Regarding the "early-late" KT and Dragon's choices...
Just my 2 cents worth: IF you have done a fair survey across the internet and viewed a bunch of photos, and maybe you have gone around and viewed pics given in some of the nice "wartime survey pic books" - maybe such as various volumns in the Concord Military series - and you have NOT come up with much info to actually direct you to go to feature and detail "A" versus "B"... I think you will have given things a fair inning! I personnally would go with pretty much whatever I like, and get on building.
That is: you have NOT seen any definitive photo answer to a specific detail question. This means that little or no real photo evidence lies around to be easily found, for that specific item. As we are dealing with details on actually uncommon machines used by a vanquished foe in a war which ended 67 years ago, one has to happily accept that there may be no actual RIGHT answer for some questions! I get increasingly dubious when folks pull out the very last reference or note somewheres and toute this as being the real truth. NO. Probably it's just the last item pulled and one ends up constructing an argument that this one must be the real authority...
In a different vein: YOU will never know which of these rare "final" authorities offered is actually correct. So, IMO, it is not worth any emotional energy to get vested in something which becomes increasingly rarified and esoteric! How do we actually sort out whether a crew or shop altered something, etc.? German Tigers and KT were pretty much hand-built and individuals. At some point, we must step back, remember that we cannot achieve absolute knowledge nor accuracy, and have fun and build our model!
My suggestion (and how I would go on an upcoming KT build for this campaign) is to aim for getting things pretty much right, and not sweat some tinier and less-well-documented versional details! I want to get fairly accurate and have fun getting there! That's me, of course!
PS: Dragon does this fairly often - offers choices without explanation. Sometimes one must wonder where they get their "information" as to the offered choice... so we ask these questions here! But I'll bet that sometimes these Dragon choices become red herrings- maybe a part of marketing! Offer those guys something to stir around and angst over and they'll feel they are getting more bang for their modeling buck!
Bob