Keith...See? What did I tell you.There are two offers to help right there.Don't worry Dude you're in good hands,the guys around here are top rate.
Ian...Thanks.I pretty much came up with the same idea,after I thought about it for awhile.In the process still,but I think it will be fine.Jeff T.
Campaigns
Where Armorama group builds can be discussed, organized, and updates posted.
Where Armorama group builds can be discussed, organized, and updates posted.
Hosted by Darren Baker, Richard S.
King Campaign
imatanker

Joined: February 11, 2011
KitMaker: 1,654 posts
Armorama: 1,565 posts

Posted: Sunday, December 02, 2012 - 10:37 AM UTC
Nito74

Joined: March 04, 2008
KitMaker: 5,386 posts
Armorama: 4,727 posts

Posted: Sunday, December 02, 2012 - 10:41 AM UTC
This weekend I finished the side skirts, equipment & wheels are this weeks task.
Pics soon.
Great builds so far everyone !
Pics soon.
Great builds so far everyone !

wedgetail53

Joined: October 02, 2008
KitMaker: 658 posts
Armorama: 629 posts

Posted: Sunday, December 02, 2012 - 11:14 AM UTC
Keith
I agree with the previous replies, particularly Bob W's. The other "out" is that parts were stockpiled in the factories, having been delivered from various sub-contractors, and it was apparently not unusual for new parts to be piled on top of old, or late on top of early.
Of course, what would then happen would be that they were assembling late version tanks, and run out of, for example, late tracks and have to use some of the early versions which had been at the bottom of the stockpile.
In other words, unless you are modelling a particular and well documented vehicle, a combination of early and late parts is usually not a problem.
Have fun and don't sweat the little things.
Regards
Rob
jhooper

Joined: May 02, 2012
KitMaker: 28 posts
Armorama: 28 posts

Posted: Sunday, December 02, 2012 - 01:42 PM UTC
Trevor, I really like the paint on yours. It really makes the tank "pop". I used the same tracks. I really wish they were easier tto manipulate.
Here are some updates as assembly is coming together. Still lots to do.


Here are some updates as assembly is coming together. Still lots to do.


ltb073

Joined: March 08, 2010
KitMaker: 3,662 posts
Armorama: 3,078 posts

Posted: Sunday, December 02, 2012 - 02:35 PM UTC
Hey Guys 
Some really great work going on here hope that I can do justice to my KT
I was hoping to get started this weekend on my kit

But it was not to be oh well here is my start up photo and we will look to start it this week now

Some really great work going on here hope that I can do justice to my KT

I was hoping to get started this weekend on my kit

But it was not to be
 oh well here is my start up photo and we will look to start it this week now

SaxonTheShiba

Joined: February 01, 2009
KitMaker: 1,233 posts
Armorama: 557 posts

Posted: Sunday, December 02, 2012 - 03:47 PM UTC
Jeff, that weathering job is absolutely beautiful.
Regards, Ian
Regards, Ian

woltersk

Joined: May 27, 2003
KitMaker: 1,026 posts
Armorama: 654 posts

Posted: Sunday, December 02, 2012 - 04:08 PM UTC
Re: my Dragon optional parts quandary question: quick replies with suggestions, ideas, offers of assistance, general support, etc. All reasons why I love this site and this community!
I was already leaning towards Bob W's idea to "just go for it" and the rivet counters be darned.
It may be a moot point now, but these are the 'either or' parts I was referring to. Trevor, if your reference books can shed any insight into which ones go with what, I'd greatly appreciate it. If not, no biggie, I'll just go with what feels right.


Thanks Everyone!
Keith
I was already leaning towards Bob W's idea to "just go for it" and the rivet counters be darned.
It may be a moot point now, but these are the 'either or' parts I was referring to. Trevor, if your reference books can shed any insight into which ones go with what, I'd greatly appreciate it. If not, no biggie, I'll just go with what feels right.


Thanks Everyone!
Keith

SaxonTheShiba

Joined: February 01, 2009
KitMaker: 1,233 posts
Armorama: 557 posts

Posted: Sunday, December 02, 2012 - 04:28 PM UTC
Keith, I looked in "The Modellers Guide to the Tiger Tank" by Military Miniatures which features builds of a late Tiger II from the Bulge and a final version Tiger II from March of 1945, which are both zimmerit-less machines. Both show the flat piece on the turret top which would be C-22. The cover over the drivers periscope looks to be the wider piece. The circular piece on the engine deck looks to be identical to D-22 on both tanks also. The other round piece on the front deck by the drivers hatch looks like it will be O-19 since it doesn't look like they have the indentation in the photos like on O-20. The gun mantlets on both looked like O-17. I think both those builds are pretty accurate and it looks like they did a lot of research for the articles. Should be a good guide for later version Royal Tigers. Hope that helps.
Regards, Ian
Regards, Ian
Posted: Sunday, December 02, 2012 - 05:03 PM UTC
Keith I know you don't want to hear this but unless you are building a specific tank and have ref showing these specific items you are free to pick and choose. I have just been looking through several KT books and the mix of parts is surprising with repaired tanks being the worst of the lot for mix and match.
wedgetail53

Joined: October 02, 2008
KitMaker: 658 posts
Armorama: 629 posts

Posted: Sunday, December 02, 2012 - 06:19 PM UTC
Keith
I agree with Ian regarding those parts. D22 is the cover for the hole left for the engine snorkel attachment, which IIRC, was only used on the first few KTs.
Darren's thoughts re repaired vehicles are also absolutely correct.
Regards
Rob
I agree with Ian regarding those parts. D22 is the cover for the hole left for the engine snorkel attachment, which IIRC, was only used on the first few KTs.
Darren's thoughts re repaired vehicles are also absolutely correct.
Regards
Rob
jkb_sprint

Joined: April 23, 2012
KitMaker: 402 posts
Armorama: 394 posts

Posted: Monday, December 03, 2012 - 12:27 AM UTC
Hi guys. I see there is very nice work going on here.
Jeff. H That KT looks great!
Jeff. T Nice work. Interesting choise of colors.
After 2 weeks of no modelling time, yesterday i managed to do some work. Made some mesh covers for the engine deck. The dunkelgelb is very light toned, but i did that in order to keep it lighter after the filters. Usually it goes too dark after the weathering process. What do you think guys? Here are some pics.


asmodeuss

Joined: November 19, 2011
KitMaker: 1,389 posts
Armorama: 1,388 posts

Posted: Monday, December 03, 2012 - 02:27 AM UTC
Keith, I'm with Darren on this one...as often. But I'm no rivet counter. When I build a kit oob I always want to squeez the juice out of the part and I pick the option that are good looking to me since it is going to be displayed in my cabinet of curiosity 
John, Nice start on the paint, very smooth and even. Plan on preshading it?
Phil.

John, Nice start on the paint, very smooth and even. Plan on preshading it?
Phil.

Posted: Monday, December 03, 2012 - 04:51 AM UTC
Here is a quick update on the KT; I have added the headlight and I must say I was very impressed with the shaped wire for the power feed and its fit, I have also started adding the tools but you will not that I have not used the brass tool clamps and there is a very good reason for that, as this model will be white washed and then using the hairspray method scrubbed I was concerned they would be damaged and also fly off never to be seen again.
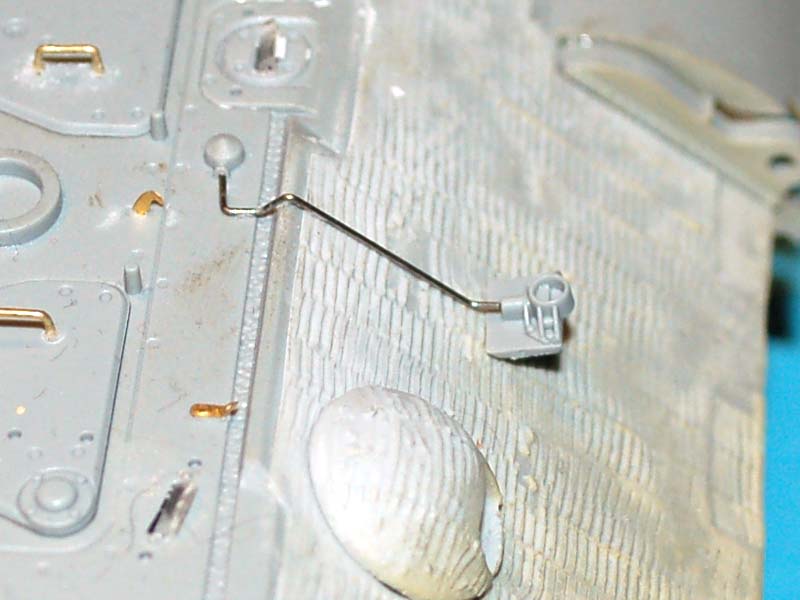
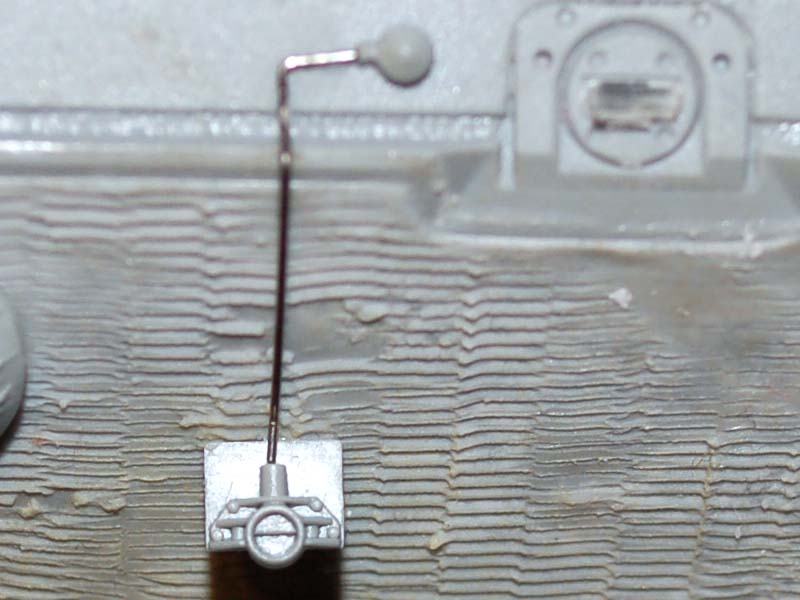
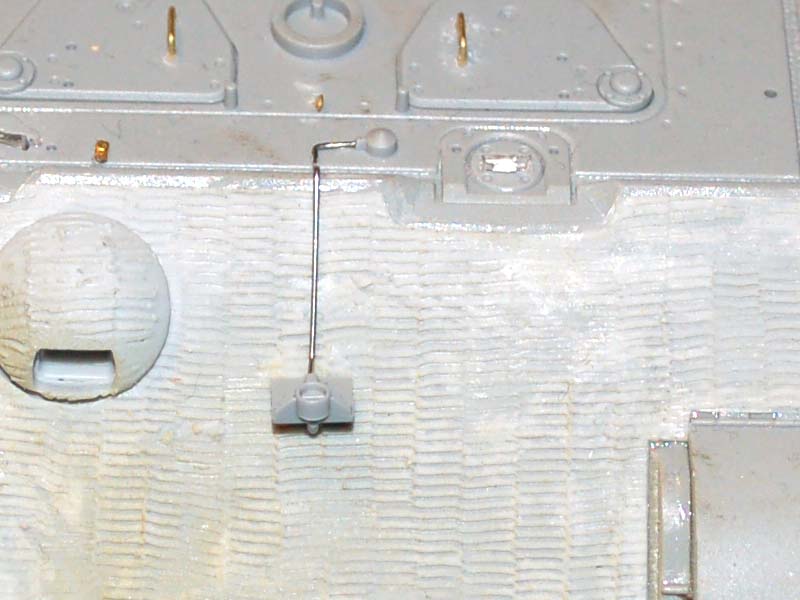
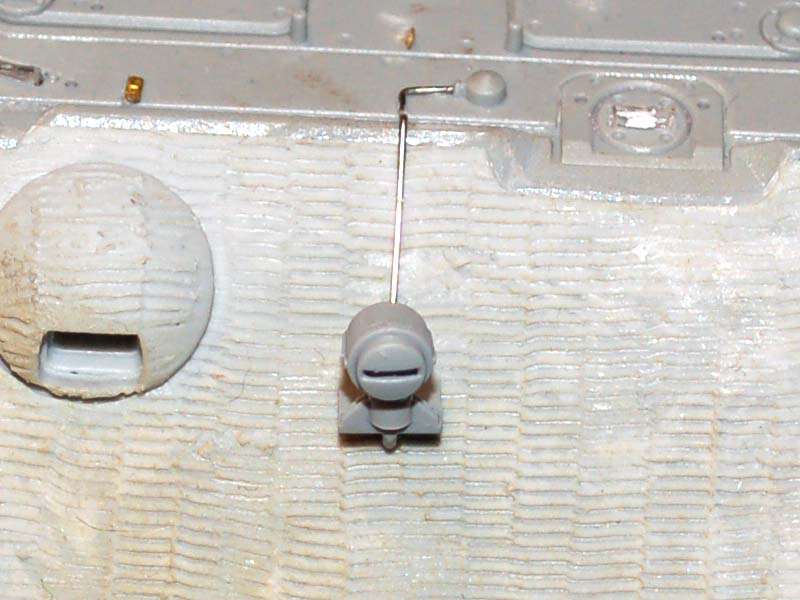
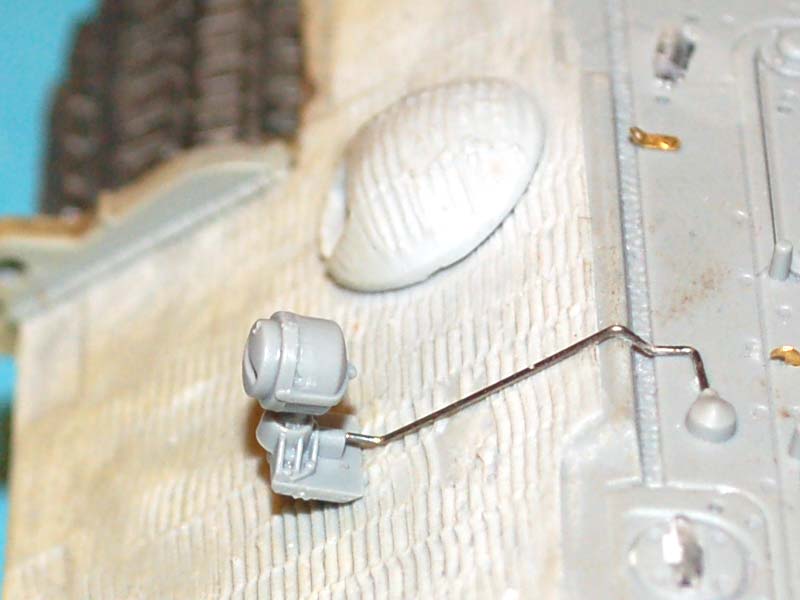
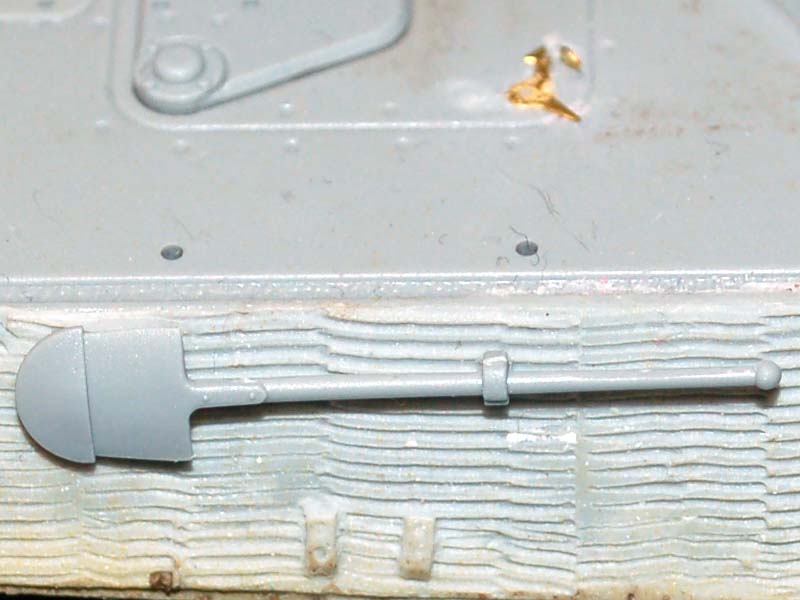
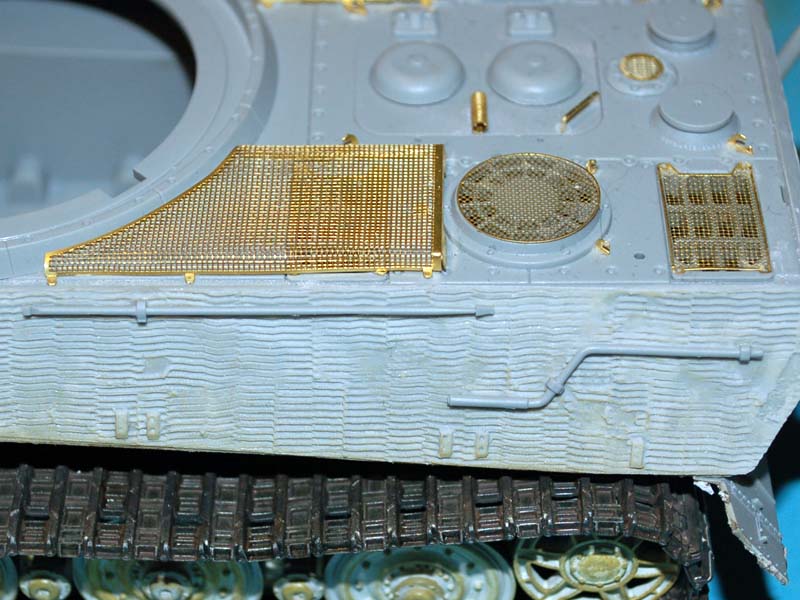
Jeff I really like your build and excellent paintwork.


Jeff I really like your build and excellent paintwork.

jkb_sprint

Joined: April 23, 2012
KitMaker: 402 posts
Armorama: 394 posts

Posted: Monday, December 03, 2012 - 05:13 AM UTC
Nice work so far Darren. Those PE look great.
Philippe thanks a lot. I dont think i'll do any preshading. Hopefully later tonight i'll do the rest of the camo with dark green and then it's weathering time!
I do have a question guys about something that i am not sure about. Underneath the zimm coat what color should it be? Some say they were painted and zimm was placed later, others that only the red primer should be under the zimm coating. What do you think?

Nito74

Joined: March 04, 2008
KitMaker: 5,386 posts
Armorama: 4,727 posts

Posted: Monday, December 03, 2012 - 05:34 AM UTC
John & Darren great work guys !!! Congrats !!
Here the KT side skirts.


This week I'll work on the wheels & equipment.
Stay tuned !
Here the KT side skirts.


This week I'll work on the wheels & equipment.
Stay tuned !
Posted: Monday, December 03, 2012 - 05:35 AM UTC
John the KT at Bovington had problems with some person plucking off Zimm cote, where it had been removed it looked to be base metal but there are spots where it looks to be yellow. I will admit I believe that the base cote should be red lead.
panzerbob01

Joined: March 06, 2010
KitMaker: 3,128 posts
Armorama: 2,959 posts

Posted: Monday, December 03, 2012 - 05:47 AM UTC
@ Darren B.;
Mighty cool!
I see all sorts of small PE bits stuck on that thing! I would guess that those tool-clamps wouldn't be any worse for getting knocked off and donated to the floor... but! Still, maybe any easy improve on those tools w/ clamps? I almost never use the PE clamps - I'm all intimidated and stuff by some of this fiddle, so... I make a small handle - loop to add onto those molded-on tools - just to add a bit. generally, this is a U-shaped strip of can-tin or thin styrene and just glued onto the extant clamp-bump on whichever side would typically have that lift-handle part of the clamp. Easy to make and add and easy to replace when I knock them off during painting and dusting!
Just an idea.
This will look great when all done!
Bob

Posted: Monday, December 03, 2012 - 06:05 AM UTC
That's an interesting suggestion Bob and one I will give some more thought to.
imatanker

Joined: February 11, 2011
KitMaker: 1,654 posts
Armorama: 1,565 posts

Posted: Monday, December 03, 2012 - 01:45 PM UTC
John... Thanks for the wheel comment.I'm not sure if I like it though,it may be a bit over done???
Darren... Your PE rules,and you are right about the headlamp power cable,it fits very well.I'm assuming thats right out of the box?
Got some base down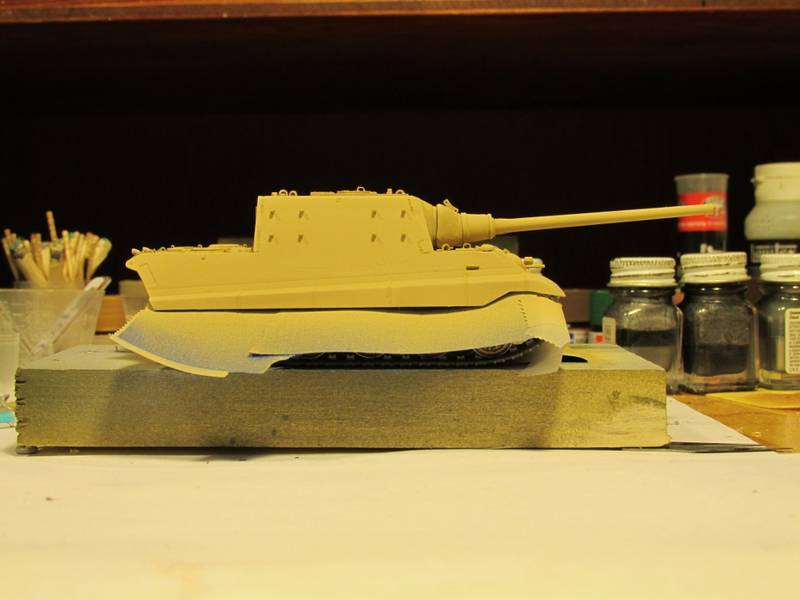
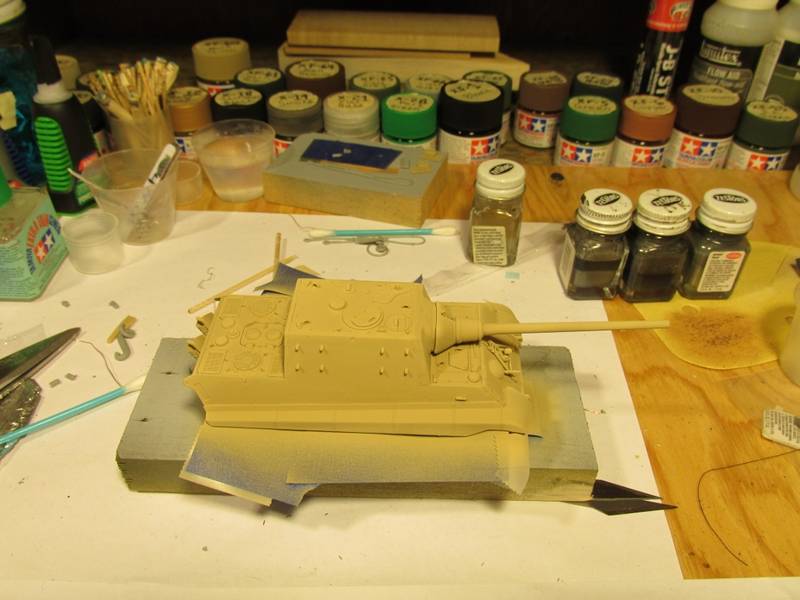
Now all I have to do is figure out what I'll do for camo Jeff T.
Darren... Your PE rules,and you are right about the headlamp power cable,it fits very well.I'm assuming thats right out of the box?
Got some base down


Now all I have to do is figure out what I'll do for camo
 Jeff T.
woltersk

Joined: May 27, 2003
KitMaker: 1,026 posts
Armorama: 654 posts

Posted: Tuesday, December 04, 2012 - 02:47 AM UTC
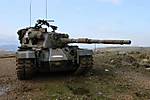
Gents--I've decided to go with Ian's suggested list (Thanks Ian!!) and have started populating the kit with those parts. Also started adding wire grab handles and lifting loops.

I also separated a few of the fender/skirt panels with a razor saw to replicate the gaps as seen in this photo (my apologies for any copyright infringement, but hey, it's s really old picture) and to give the kit a little more 'character':

I'm also thinking of painting it like that vehicle--it looks pretty cool.
Thank to everyone for your input and help.
Keith

I also separated a few of the fender/skirt panels with a razor saw to replicate the gaps as seen in this photo (my apologies for any copyright infringement, but hey, it's s really old picture) and to give the kit a little more 'character':

I'm also thinking of painting it like that vehicle--it looks pretty cool.
Thank to everyone for your input and help.
Keith

SaxonTheShiba

Joined: February 01, 2009
KitMaker: 1,233 posts
Armorama: 557 posts

Posted: Tuesday, December 04, 2012 - 03:56 AM UTC
Cool picture Keith!! Those hard-edge ambush schemes are really cool. That's the scheme I am going to do with some white wash remnants on the vehicle. Glad the info helped but like everybody said, probably no steadfast rules with those parts, especially in the chaos of late war production. Just have fun with it and enjoy the build. Confusing instructions aside, those Dragon Royal Tigers are fun!
Best wishes, Ian
Best wishes, Ian

Snorri23

Joined: March 25, 2010
KitMaker: 514 posts
Armorama: 261 posts

Posted: Tuesday, December 04, 2012 - 04:09 AM UTC
Jeff H. ever figure out what those two small triangles per sprue are for? Thanks for the comments, still a work in progress.
jhooper

Joined: May 02, 2012
KitMaker: 28 posts
Armorama: 28 posts

Posted: Tuesday, December 04, 2012 - 05:08 AM UTC
Quoted Text
Jeff H. ever figure out what those two small triangles per sprue are for? Thanks for the comments, still a work in progress.
In my not so professional opinion, the recycling bin! I couldn't find a use for them. I too searched the almighty internet to no avail. Maybe they will be recycled into another King Tiger?
If you figure it out I would love to know.
Posted: Tuesday, December 04, 2012 - 05:24 AM UTC
Jeff H: Please can you provide a picture.
Keith: that is an ambitous camoflage pattern.
Jeff T: the build looks good and it should be a nice model when finished.
Keith: that is an ambitous camoflage pattern.
Jeff T: the build looks good and it should be a nice model when finished.
jhooper

Joined: May 02, 2012
KitMaker: 28 posts
Armorama: 28 posts

Posted: Tuesday, December 04, 2012 - 03:30 PM UTC
Darren, I actually already put the sprues out with the recycling. Perhaps Trevor can put up a picture of his.
 |


