Matt,I'm not sure I understand,where you able to get all 5 J6 pieces in place?
Kevin, man that's looking BA Dude. The figgy is just right. And I love the stowage. It's gonna be sweet all painted up.
Campaigns
Where Armorama group builds can be discussed, organized, and updates posted.
Where Armorama group builds can be discussed, organized, and updates posted.
Hosted by Darren Baker, Richard S.
Panzers Return!
imatanker

Joined: February 11, 2011
KitMaker: 1,654 posts
Armorama: 1,565 posts

Posted: Saturday, June 29, 2013 - 11:10 AM UTC

retiredyank

Joined: June 29, 2009
KitMaker: 11,610 posts
Armorama: 7,843 posts

Posted: Saturday, June 29, 2013 - 11:31 AM UTC
Found out, those parts are not supposed to be used. The only option is a closed turret, that is not called out in the instructions. So, problem solved. Maybe it won't rain, tomorrow. I only have a few pieces left to glue and would like to primer it.
ElCapitan

Joined: May 14, 2007
KitMaker: 219 posts
Armorama: 217 posts

Posted: Saturday, June 29, 2013 - 12:35 PM UTC
Jeff; thanks. I just gave everything a primer coat of flat black. Tomorrow morning before the day becomes haywire, I'll try to get some base coat on the vehicle.

retiredyank

Joined: June 29, 2009
KitMaker: 11,610 posts
Armorama: 7,843 posts

Posted: Saturday, June 29, 2013 - 12:57 PM UTC
I dry fitted the fenders and they are garbage. They don't mount firmly, you have to removed ridges(this destroys the tread) and there are large gaps. I assembled the barrel and thought I wouldn't have to order anything. So, I'll be a while in posting as I look for new fenders. Here's where I am at.


papakilo

Joined: December 23, 2007
KitMaker: 54 posts
Armorama: 54 posts

Posted: Saturday, June 29, 2013 - 02:27 PM UTC
Nice Kevin, sucks that it has some problems but overall it's looking good. I had the same kit but my dog ate the instructions so I never built it. Got the update smart kit ones so i guess I will use it as extra parts. If you need replacement parts I don't mind sending them to you if you need it.
Kevin that on sweet panzer III ausf L. I'm tempted to buy the same kit and build one myself. The figure and stowage is a nice touch.
Kevin that on sweet panzer III ausf L. I'm tempted to buy the same kit and build one myself. The figure and stowage is a nice touch.

Thundergrunt

Joined: November 01, 2009
KitMaker: 657 posts
Armorama: 481 posts

Posted: Saturday, June 29, 2013 - 05:06 PM UTC
Kevin
Your PZIII looks awesome but you figure is flipping cool looking none of my kits have figures that look like that. did that kit come with that guy??
Euge
Your PZIII looks awesome but you figure is flipping cool looking none of my kits have figures that look like that. did that kit come with that guy??
Euge
imatanker

Joined: February 11, 2011
KitMaker: 1,654 posts
Armorama: 1,565 posts

Posted: Saturday, June 29, 2013 - 08:31 PM UTC
Quoted Text
Found out, those parts are not supposed to be used. The only option is a closed turret, that is not called out in the instructions. So, problem solved. Maybe it won't rain, tomorrow. I only have a few pieces left to glue and would like to primer it.
Gotta love those Dragon instructions
 But I'm glad you solved your dilemma. I would think you would be able to find some fenders for that fairly easily. Jeff T.
retiredyank

Joined: June 29, 2009
KitMaker: 11,610 posts
Armorama: 7,843 posts

Posted: Saturday, June 29, 2013 - 09:16 PM UTC
I have the kit fenders aligned and attached. There is no detail on the bottom of them. But, I'm not doing a competition build. So, no rivet counting. I may build another of these, with the appropriate etch.
imatanker

Joined: February 11, 2011
KitMaker: 1,654 posts
Armorama: 1,565 posts

Posted: Saturday, June 29, 2013 - 09:41 PM UTC
Quoted Text
Nice works guys. Jeff, how the soldering was done?
I clean up the chassis and wheels, for my III E. Sadly no photos yet. Next week end, works in the superstructure and turret.
Keep Walking

Alvaro: I was going back through the thread and saw this.I don't know how I missed it, and I apologize for not responding sooner.
It's pretty easy really. I take some scrap sprue heat it and stretch it to a size that I think looks right . Cut it to length, place it in the seam, and then take a VERY small amount of Tamiya Extra Thin Cement and place it with the brush where the sprue and body touch. It is so thin that it runs along the seam and starts softening the rod and the hull. After I have done that, I wait a little bit and then take a hobby knife with a # 11 blade that has a very small part of the tip broken off and start poking the rod with it to get the weld bead marks. This part is kind of tricky. If you start poking the plastic too soon, you will pull strings, wait too long and the plastic gets too hard. In that case just add some more cement. It doesn't take very long to do in 1/72nd,but at 1/35th it takes a little longer.
Sounds a lot harder than it is. Practice on some scrap first, and you'll get the hang of it fast

You can even use the same method to fill in some fairly large gaps almost any where on your build like this.
Before......
And after.....
And there you have it
 It takes a lot longer to explain than to do. Again, practice on some scrap first. Hope that's what you were looking for. Jeff T.
ElCapitan

Joined: May 14, 2007
KitMaker: 219 posts
Armorama: 217 posts

Posted: Sunday, June 30, 2013 - 05:13 AM UTC
Euge; thanks. The figure is from Evolution with a Hornet head. The Evolution head wasn't cutting the mustard, so its now in the spare parts box.
I was able to get the base coat on today, so I'll post photos later today or tomorrow.
Thanks for the complements, keep up the good work everyone.
I was able to get the base coat on today, so I'll post photos later today or tomorrow.
Thanks for the complements, keep up the good work everyone.

ElCapitan

Joined: May 14, 2007
KitMaker: 219 posts
Armorama: 217 posts

Posted: Sunday, June 30, 2013 - 07:33 AM UTC
Here's the status shot so far.
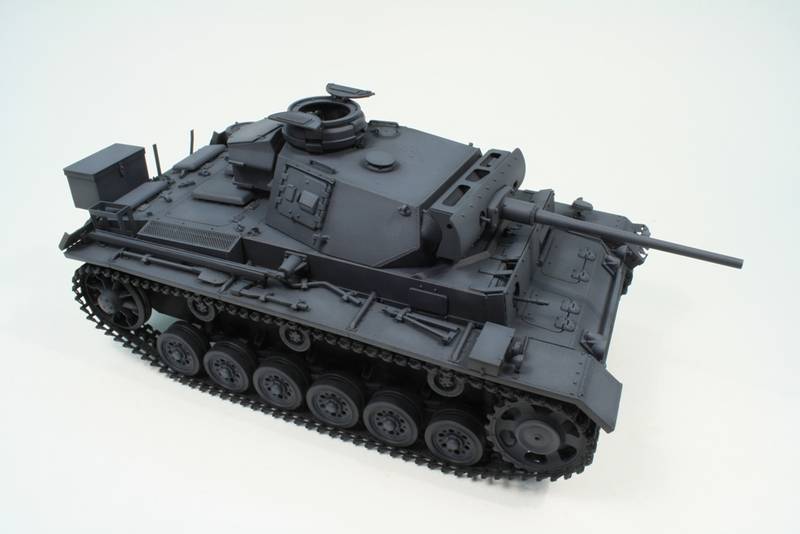
Now for all the details and possibly a winter white coat.
thanks

Now for all the details and possibly a winter white coat.
thanks

retiredyank

Joined: June 29, 2009
KitMaker: 11,610 posts
Armorama: 7,843 posts

Posted: Sunday, June 30, 2013 - 11:48 AM UTC
Got it primered. But, the humidity is passed 65% (I think closer to 75%). So, no more painting today. Turret is primed, just not dry enough to touch.


A small mishap. Don't think it will affect the paint job.

Will also be building this one. I'm going to order the etch, for the IV F1 and Tristar's running gear. From what I understand, the etch should work for the vorpanzer.


A small mishap. Don't think it will affect the paint job.

Will also be building this one. I'm going to order the etch, for the IV F1 and Tristar's running gear. From what I understand, the etch should work for the vorpanzer.


BBD468

Joined: March 08, 2010
KitMaker: 2,465 posts
Armorama: 2,383 posts

Posted: Sunday, June 30, 2013 - 02:00 PM UTC
Hello Gentlemen,
Outstanding builds you guys! Great Campaign.
Kevin - Love the Paint job my friend.
Fellas, I think the Modulation looks cool but i just dont like the stark contrast so i add a filter to tone it down a bit and blend. I also painted and glossed the parts. Im gonna do the Hairspray thing on the muffler.


Cheers,
Gary
Outstanding builds you guys! Great Campaign.

Kevin - Love the Paint job my friend.

Fellas, I think the Modulation looks cool but i just dont like the stark contrast so i add a filter to tone it down a bit and blend. I also painted and glossed the parts. Im gonna do the Hairspray thing on the muffler.

Cheers,
Gary

imatanker

Joined: February 11, 2011
KitMaker: 1,654 posts
Armorama: 1,565 posts

Posted: Sunday, June 30, 2013 - 08:01 PM UTC
And it just gets better and better. Well done Boys 
Here's a quick update from me.
Got some hinges made for the right side cupola
They didn't come out as well as I had hoped
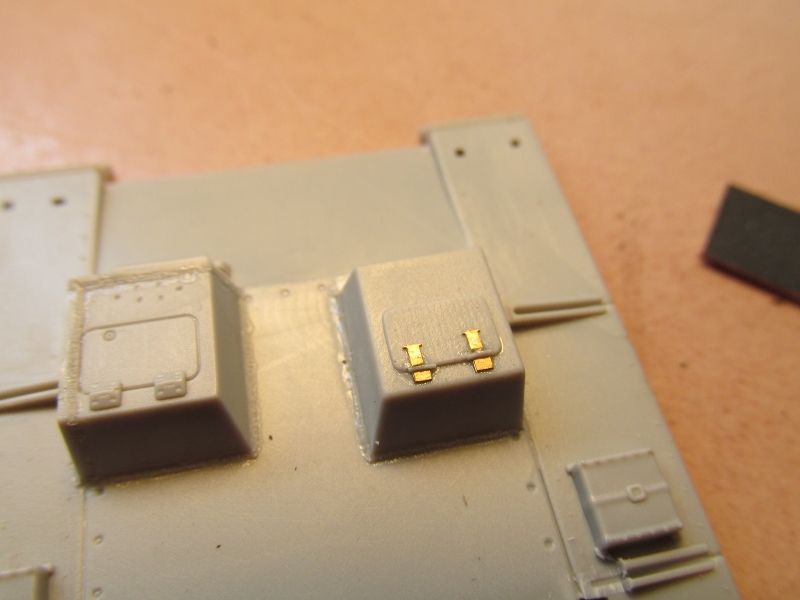
Couple of grab handles made
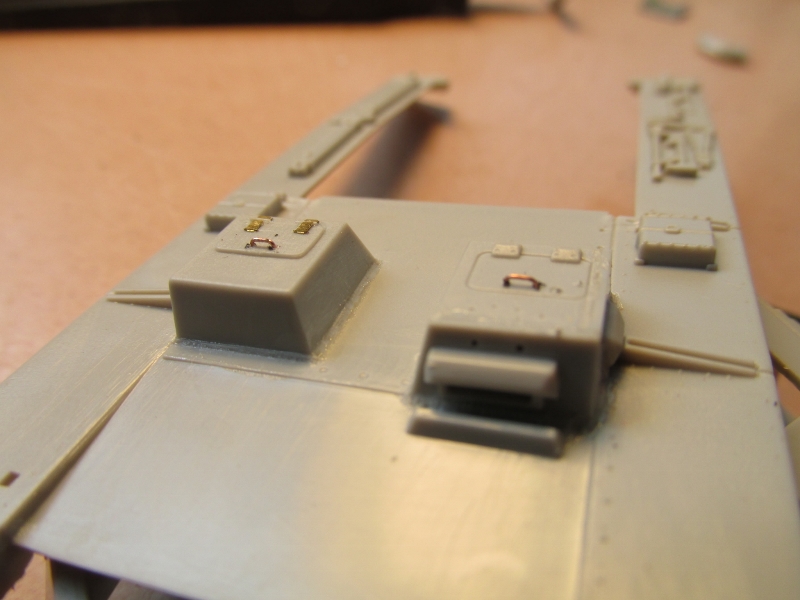
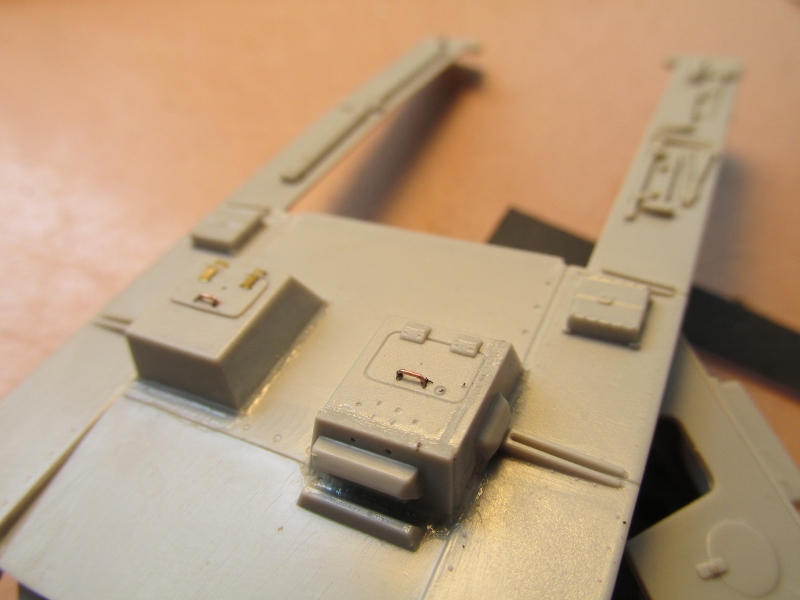
And primed
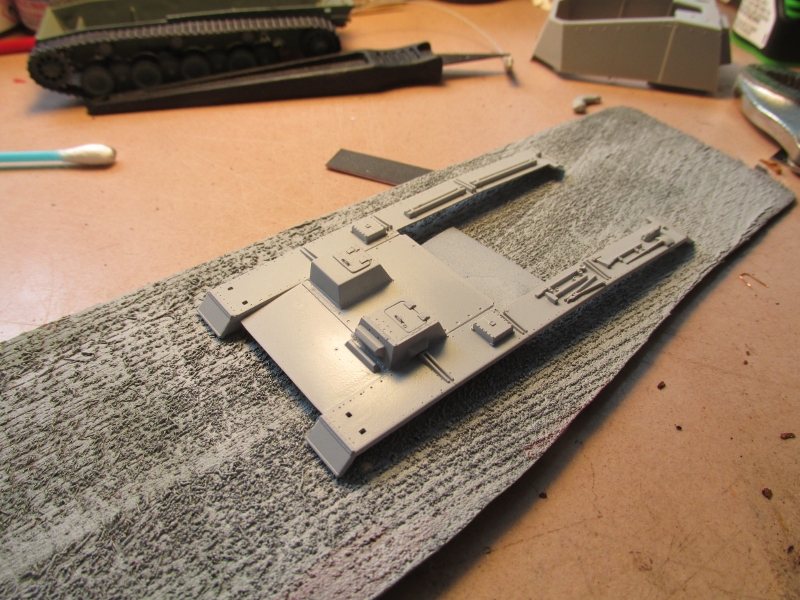
some good progress at last. Jeff T.

Here's a quick update from me.
Got some hinges made for the right side cupola
They didn't come out as well as I had hoped

Couple of grab handles made


And primed

some good progress at last. Jeff T.

retiredyank

Joined: June 29, 2009
KitMaker: 11,610 posts
Armorama: 7,843 posts

Posted: Sunday, June 30, 2013 - 08:15 PM UTC
Jeff T: Are the hinges supposed to be workable?
imatanker

Joined: February 11, 2011
KitMaker: 1,654 posts
Armorama: 1,565 posts

Posted: Sunday, June 30, 2013 - 09:26 PM UTC
Quoted Text
Jeff T: Are the hinges supposed to be workable?
Good morning Matt. No My friend, they are not workable

It was all I could do to get 'em on there
 , it is, after all, 1/72nd Looking at the pics, I think next time I will turn the top straps around so the studs are at the pivot point. I kinda did it on the fly and I'll make some changes next time. Did I see that you found some fenders that will fit your build? Jeff T.
retiredyank

Joined: June 29, 2009
KitMaker: 11,610 posts
Armorama: 7,843 posts

Posted: Sunday, June 30, 2013 - 09:40 PM UTC
Quoted Text
Quoted TextJeff T: Are the hinges supposed to be workable?
Good morning Matt. No My friend, they are not workable
It was all I could do to get 'em on there, it is, after all, 1/72nd Looking at the pics, I think next time I will turn the top straps around so the studs are at the pivot point. I kinda did it on the fly and I'll make some changes next time. Did I see that you found some fenders that will fit your build? Jeff T.
And, here I am about to ask you just how strong a magnifying glass you used. Yes, I was able to get the kit fenders looking decent. My real trial will be the Vorpanzer. I have sourced the running gear and etch, for it. Hopefully, I will be able to start by the end of July.
alewar

Joined: December 27, 2006
KitMaker: 773 posts
Armorama: 765 posts

Posted: Monday, July 01, 2013 - 02:20 AM UTC
Thanks Jeff for the tip.
Gary,Kevin...well....envy!!!!!
Great job!
I only can add the aft plate to my III E, nice winter w.end, and the "boss - wife", want to go outdoors....
Regards, from the cold south
Gary,Kevin...well....envy!!!!!
Great job!
I only can add the aft plate to my III E, nice winter w.end, and the "boss - wife", want to go outdoors....

Regards, from the cold south
JSoltoft

Joined: December 09, 2008
KitMaker: 95 posts
Armorama: 79 posts

Posted: Monday, July 01, 2013 - 07:55 AM UTC
Hi guys. Seeing all these beautiful models on panzer return, make me feel way behind, so therefore:

And the mess.

- Johan

And the mess.

- Johan


retiredyank

Joined: June 29, 2009
KitMaker: 11,610 posts
Armorama: 7,843 posts

Posted: Monday, July 01, 2013 - 08:28 AM UTC
Johan: Don't fret. I don't even have all of the media ordered, for my build. Nice kit choice, by the way.
Posted: Monday, July 01, 2013 - 09:09 AM UTC
 Great works friends!
Mission acomplished!
Well, I finished my Stug. I lost the final pics of weathering because the memory of my camera was damaged, sorry.
It represents a Stug Abandoned in the Gothic Line, Italy, 1944 - Unknow Unit.
Regards!
Rodolfo
imatanker

Joined: February 11, 2011
KitMaker: 1,654 posts
Armorama: 1,565 posts

Posted: Monday, July 01, 2013 - 10:52 PM UTC
Johan: Good progress Man, at that pace you'll catch up in no time 
Rodolfo: A good finish. I like the mis-aligned side armor.
My latest update.
The under side of the hull has been painted. It needs one more coat, and like Matt, I did not fix the push marks
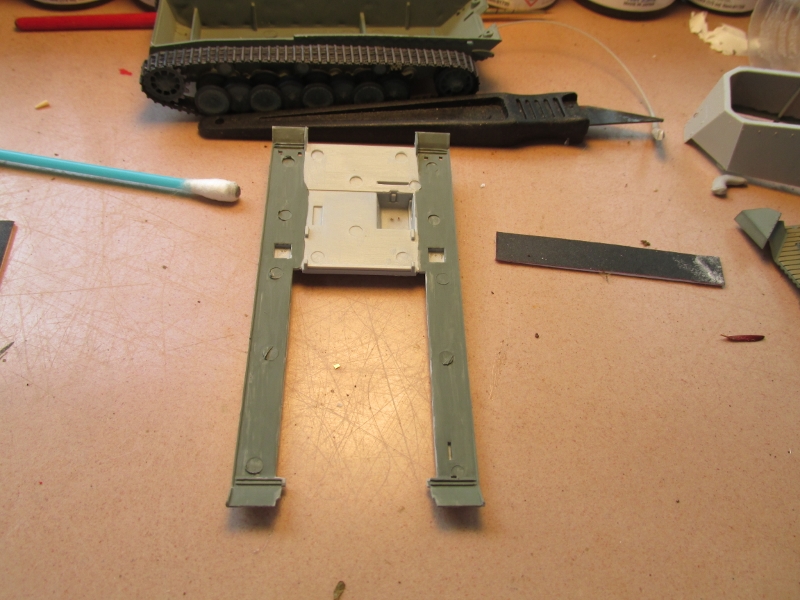
Inside extinguisher painted. Not sure if it's the right color, but Oh well
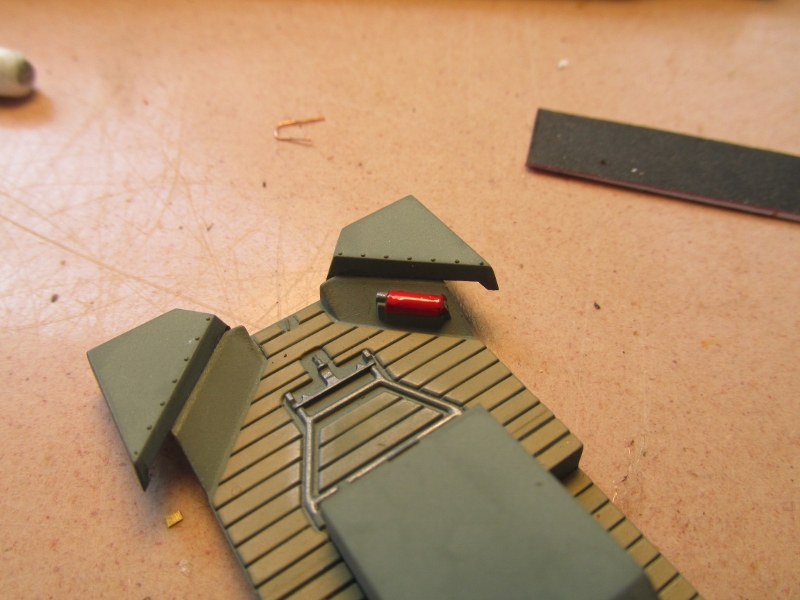
Looks like the Cannon will be a challenge.
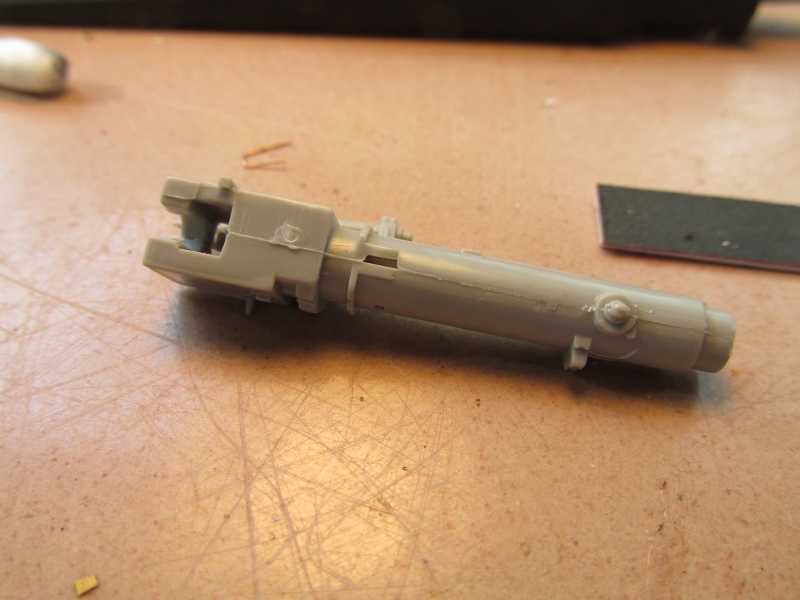
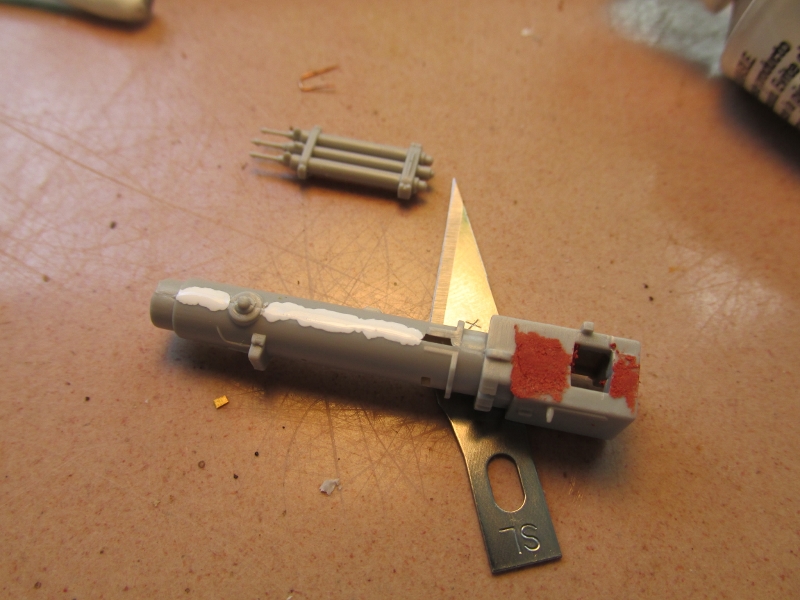
And now we wait.... Jeff T.

Rodolfo: A good finish. I like the mis-aligned side armor.
My latest update.
The under side of the hull has been painted. It needs one more coat, and like Matt, I did not fix the push marks


Inside extinguisher painted. Not sure if it's the right color, but Oh well


Looks like the Cannon will be a challenge.


And now we wait.... Jeff T.
Nito74

Joined: March 04, 2008
KitMaker: 5,386 posts
Armorama: 4,727 posts

Posted: Tuesday, July 02, 2013 - 03:11 AM UTC
@Matt
Nice progress on your PzIII !
@Johan
Great choice !
I'll follow that one for sure, having the same kit in stash for sometime.
@Rodolfo
Congrats on that Stug, I like the weathering on the back of the hull, maybe you should add some more to the wheels, they seem a bit to clean comparing to the rear of the tank.
The camo stripes look very good too.
@Jeff
I did the Emil in 1:35, the gun didn't have any issues or problems.
I like the colours for the interior.
I still have some references I used for the interior, let me know if you need them
Great work everyone !!


retiredyank

Joined: June 29, 2009
KitMaker: 11,610 posts
Armorama: 7,843 posts

Posted: Tuesday, July 02, 2013 - 04:47 AM UTC
Something happened, with the paint. I gave it two cotes of grey. As it dried, the grey turned into a thousand little polka dots. Hit it with oven cleaner and hoping I can respray, tomorrow.
robw_uk

Joined: June 22, 2010
KitMaker: 1,224 posts
Armorama: 1,207 posts

Posted: Tuesday, July 02, 2013 - 06:42 PM UTC
Nice work all. Great stug Rodolfo...
Mine is now ready for the paint shop. Hoping primer tonight....
Mine is now ready for the paint shop. Hoping primer tonight....
 |


