Received a smallish pkg, that was fast!
Will be using the seated Officer and saving the other figs for a future endeavor...
Only the shine boy and the Officer on the left from the lower two sets....
The leaning gentleman and the children...
The smallest youngin' and maybe/maybe not the seated wiseman...
The prone Rifleman...
The Officer and Feldgendarmerie on the far right...
The Misc. bits and farm paraphenelia shot...
..and what "Challenge" would be complete w/o these uninvited marauders?...
I had started on the arm conversion from a 'HALT!' signal holder to a chained restraint pose, but Tamiya's G.Shepard outsized the older ICM Feldgendarmerie, so he was sacked for the newer MiniArt recruit and slotted right in.
I would rather pick-up another versatile fig set than another animal set!
A simple comparison-
Now back to the bench!
Thanks for any and all feedback.
Cheers
Dave
Campaigns
Where Armorama group builds can be discussed, organized, and updates posted.
Hosted by Darren Baker, Richard S.
The Postcard challenge
strongarden
Florida, United States
Joined: May 14, 2012
KitMaker: 730 posts
Armorama: 624 posts
Joined: May 14, 2012
KitMaker: 730 posts
Armorama: 624 posts
Posted: Sunday, September 01, 2013 - 10:04 AM UTC
turkeyshot
New South Wales, Australia
Joined: February 06, 2012
KitMaker: 138 posts
Armorama: 133 posts
Joined: February 06, 2012
KitMaker: 138 posts
Armorama: 133 posts
Posted: Sunday, September 01, 2013 - 10:49 AM UTC
Dave - That's a lot of figures you have there (at least 11 by my count), I am curious to see what you are going to do with them all.
Pater -I love the work that you have done on that guttering. That should come out looking great.
Posted: Sunday, September 01, 2013 - 08:57 PM UTC
Ola Guys
Hope everybody had a nice weekend. I see a load of great progress again. Great job guys your are doing really well.
@ Jeff
I knew it about the buff... The moment I saw it I thought.. Those colors are so well tied in together it must be... And other wise I want to know his secret. It is exactly the same trick I do as well allthough most of my paints I use have a little Buff added to the mix standard which gives pretty much the same result.
@ Jason
That update set really adds to your DKW. I love it. When you look at the left side you indeed get the idea not much happened. But the right side is tremendous. Makes me want to detail one of those bikes again. Superb details. And the beginnings of your figure also look very good. Looking forward how this progresses.
@ Charles
I had to look up that Fuso Ship and to my surprise found out that that huge tower was a real thing and not the imagination of a scalemodeler. It never ceases to amaze me what people think of designwise.
I can be equally impressed by the size of those cranes. They are massive. I have been around a fair bit of big industrial mechanics but this is definately on a whole different level.
About the bankrobbery dio. That one is on hold still. I probably will try to make my own spoked wheels as the Shipping costs vs the Maquette Spoked wheels are not very good.
@ Dave
Thanks for the compliments mate really appreciated.
Your pictures seem to have dissapeared. But I saw them this weekend. SO I am typing this from memory.
I really like the multilayer facet with the winecellar. Very good use of the no height restriction. Looking forward to the progress on that.
@ Peter
Pitty you had to start over again but looking at it I think you did a really wise decision. Great work so far. It absolutely looks like a building from the 20's. Even the rooftiles look pretty good like the old Dutch rooftile. Nice gutter. Looking forward how that is going to take shape.
@ Tat
Part of a burnt out panther? that was pretty ambitious would loved to have seen that.
To answer your question. A Sprengpanzer Goliath fits in perfectly as a vehicle. so no problems there.
Whatever you decide I'm looking forward to it.
@ Dave
That is going to be one crowded diorama. Really looking forward how that is going to progress. You have enough figures to populate a small village there
Superb work so far guys.
I got a little progress as well
This is the wall with all the corkwork done just before the weekend
And this is how it looks now. Completely grouted.
Next up the styrene bits and bobs.
velotrain
Massachusetts, United States
Joined: December 23, 2010
KitMaker: 384 posts
Armorama: 320 posts
Joined: December 23, 2010
KitMaker: 384 posts
Armorama: 320 posts
Posted: Monday, September 02, 2013 - 07:34 PM UTC
Robert – I understand your experience; on first seeing the photo I thought it was some designer’s fantasy, and the media helped reinforce that. I looked at a lot of photos, and although this tower style seemed globally popular around ~1910-1930, no other country came close to the Japanese battleship “Pagoda” towers. Other countries might build towers as tall, but without the superstructure continuing to the top, or perhaps just a small lookout post there.
I found these Pagoda towers so appealing as architecture and sculpture that yesterday I wrote an e-letter to a representative of Aoshima, which produces 1:350 and 1:700 models of the Fuso and her sister ship Yamashiro. I suggested that they introduce a “Pagoda Edition” of just the forward tower, which was fortunately isolated on the deck from other superstructure. Looking at this side view of Fuso after renovations in the early 30’s, one can only think that she must have carried an awful lot of ballast not to tip over ;-)
I think the ideal scale might be 1:200 or even 1:144, but mentioned if they start with a 1:350 version that minimal investment would be required, as they already have the design work and masters done, and should only need to organize new sprues. I suspect I’m not the only one who finds this by far the most interesting aspect of these ships, and I believe I’ve heard that Tokyo has the highest per square foot real estate prices in the world, so these could work well with their small footprint. They might be considered the “Postcard” versions of early 20th century battleships.
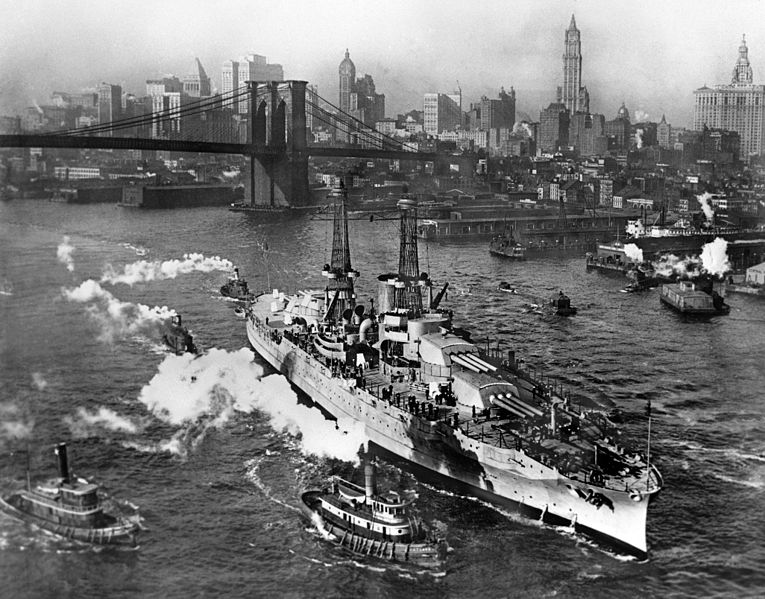
Apparently Fuso’s “over the top” superstructure was not limited to Japan. Curious, I just looked at the Wiki article on the Arizona. I first noticed this wonderful image of her on NYC’s East River in 1916. I lived about a mile upriver from there until I was 8 years old, and there was still plenty of traffic on the river at that time.
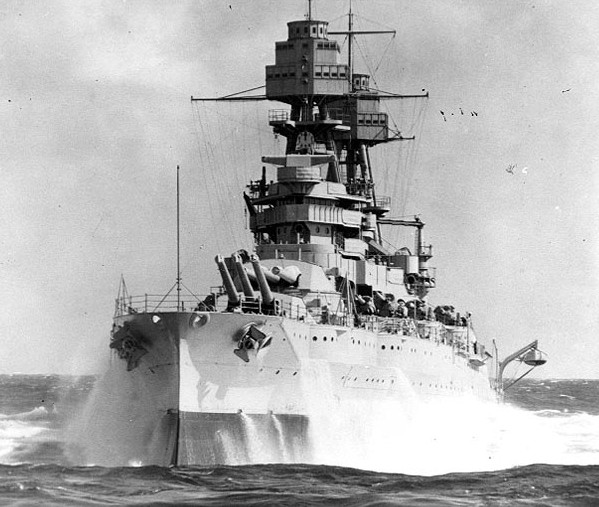
Compare that to how she looked in the early 30’s, after a rebuild at about the same time as the Fuso. The towers went from frail-looking latticework, to tripods of large-diameter steel tubing, with additional levels of superstructure top and bottom.
/=/=/=/=/=/=/=/=/=/
Peter – Your cross-section is quite interesting. I’m curious how you created the profile on your gutter supports – a round file or something else? Now we all know the Dutch words for window and door ;-)
Dave – you must have some memory! Just kidding, you obviously took notes.
I see you sussed out my inclination toward industrial architecture – it’s taking all of my minimal self-control not to include images of some of my favorites right now.
I agree with Jason, that’s going to be some rocking, crowded basement.
Tat – You don’t know a Cold Sweat until you’ve heard James Brown’s version:
First two minutes @
http://www.youtube.com/watch?v=sIxVWNPeRJY
Robert – what is your grout technique? I thought Jason lost some of the cork’s texture when he did his, but your’s looks better preserved. I think I'm seeing a lot of fine sand, or something similar.
Posted: Monday, September 02, 2013 - 07:51 PM UTC
Ola Charles
I never had much interest in Ships so I never noticed those towers but I have to say that I love those steampunk/modern-ish structures. And even I would be interested if they would be sold separately. Maybe with a bit of PE railings and such.
I uploaded an SBS on my deviantart account where people were asking the same question. It is quite a long image and I hope it will work. It shows all the steps. I think whiping it off with a wet cloth is probably the step that retrieved the most detail from the bricks. Also the material used is quite important. I used plasterboard filler. Without further ado... Here is the SBS
With friendly greetz
Robert Blokker
bronzey
England - South East, United Kingdom
Joined: January 06, 2012
KitMaker: 300 posts
Armorama: 256 posts
Joined: January 06, 2012
KitMaker: 300 posts
Armorama: 256 posts
Posted: Monday, September 02, 2013 - 08:40 PM UTC
Robert,
And THIS is why im addicted to thus site! You never know what you will learn, the picture works first class, it reminds me of little flash cards used to help remember things, in fact.... That's a brilliant idea! Release a collection of flash cards, linked together with say a ring in the top corner, that give you quick clear informative steps on the 100's of different tools that a modeller can use, the idea is to have them on the bench near by so you can grab them at any time, make them waterproof so that thry don't get ruined, no make them able to be written on with a dry wipe pen so you can add and remove your own notes!
So sorry guys, I have abit of a wild business mind, my wife hates listening to all these ideas that pop up in my head, as I was saying Robert thank you for sharing, its a great tool to have stored and easy to save on my computer as its a picture so can find it again, nothing worse than trying to find a random site page that now has a 'broken link'.
Bronzey
turkeyshot
New South Wales, Australia
Joined: February 06, 2012
KitMaker: 138 posts
Armorama: 133 posts
Joined: February 06, 2012
KitMaker: 138 posts
Armorama: 133 posts
Posted: Monday, September 02, 2013 - 09:25 PM UTC
That brickwork looks fantastic Robert! As others have already said, the texture in the grout really comes out and makes the wall come alive. Will you be painting it, or are you happy with the colour it already is? I personally think that the colour is great as is, although think that you might need to throw a little colour on some of the larger sections such as the windowsill and the stone lintel along the base of the wall. I look forward to seeing where you will go with this next. Excellent work mate.
Posted: Monday, September 02, 2013 - 09:38 PM UTC
@ Alex B
Thanks for the compliments And I'm glad you like the SBS. Hopefully someday it will come in handy for you. The idea for one of those flash cards is not that weird. Maybe something like that can be worked out in the future.
@ Jason.
Thank you for the compliments. Really appreciated. Well I'm currently working hard on finishing the wall, the roof, the planks, the big window and some other accesories and then I will shoot primer at it. And it is kinda odd to say but how it will progress from there is a bit of a riddle to me. As I have unexpectedly been approached by a company that has interest in bringing out the factory wall. So the factory wall will most likely be replaced by a resin casting in the very near future.
velotrain
Massachusetts, United States
Joined: December 23, 2010
KitMaker: 384 posts
Armorama: 320 posts
Joined: December 23, 2010
KitMaker: 384 posts
Armorama: 320 posts
Posted: Tuesday, September 03, 2013 - 11:33 AM UTC
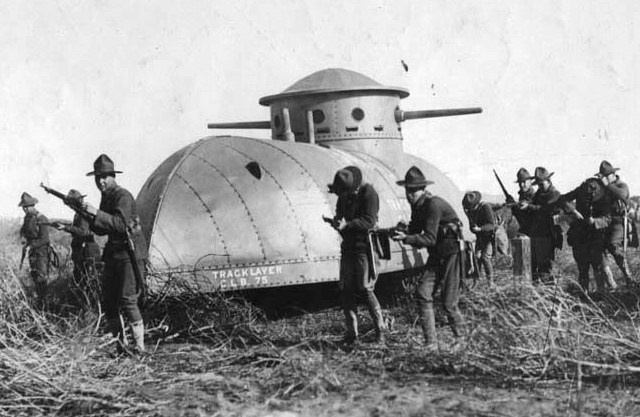
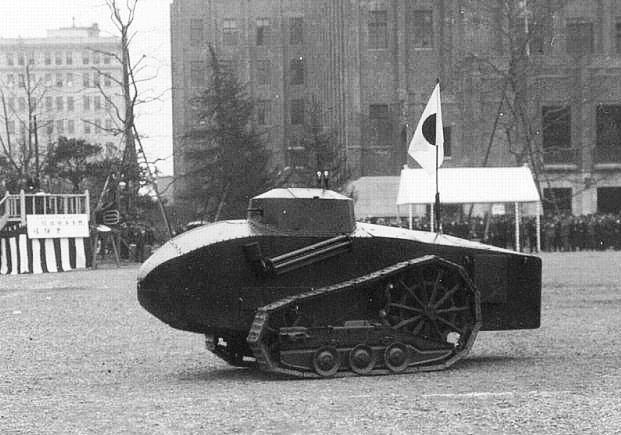
Sorry to so often be OT, but Robert’s steampunk comment made me think of these guys.
First is a WW1-era C.L. Best Company tracked mock-up with faux guns, posing with the California National Guard. Perhaps more Jules Verne than steampunk – or are they basically the same?
Our next entry is a ~1930 Japanese RC tank. I can’t decipher those tubes mounted under the turret, if anyone has ideas; they do look vaguely weaponish.
Robert – thanks for the SBS. If white plasterboard filler is available, or you can tone down the one you used, I’d say to paint/stain/finish the bricks as one wanted, and then apply the filler and be done. Jason’s build interested me in using cork, and now you’ve “cemented” it. Is the cork ~5 mil?
Posted: Tuesday, September 03, 2013 - 09:16 PM UTC
@ Charles
Yeah there have been some interesting vehicle designs through the years. Sometimes even designs that even in these days could be regarded as being modern.
This has always been one of my favorites
The popular science covers are litterally filled with these cool designs.
@ Charles
White plasterboard filler is available in the shops sadly I did not have it. I had a bucket of grey plasterboard filler left over from my bedroom renovation 2 years ago and that generally works for every need I have diorama wise. So that means I have to do some more painting which I don't mind really because I like painting. I'm by the way normally not a big fan of white cement in scale it always looks a bit odd. The building I live doesn't have pure white grouting, the buildings opposite from me don't have it... The house I grew up in didn't have white cement. None of the houses in my village as far as I recall. It was always a light grey. Actually just a tad lighter then the stuff I used after drying.
turkeyshot
New South Wales, Australia
Joined: February 06, 2012
KitMaker: 138 posts
Armorama: 133 posts
Joined: February 06, 2012
KitMaker: 138 posts
Armorama: 133 posts
Posted: Wednesday, September 04, 2013 - 04:03 PM UTC
Quoted Text
Well I'm currently working hard on finishing the wall, the roof, the planks, the big window and some other accesories and then I will shoot primer at it. And it is kinda odd to say but how it will progress from there is a bit of a riddle to me. As I have unexpectedly been approached by a company that has interest in bringing out the factory wall. So the factory wall will most likely be replaced by a resin casting in the very near future.
Robert - Congrats on the wall developments. I hope that something comes out of your current discussions. Credit well deserved.
velotrain
Massachusetts, United States
Joined: December 23, 2010
KitMaker: 384 posts
Armorama: 320 posts
Joined: December 23, 2010
KitMaker: 384 posts
Armorama: 320 posts
Posted: Wednesday, September 04, 2013 - 04:40 PM UTC
Robert – I’ve ridden a Penny Farthing (no idea how they’re known in Europe) and it was terrifying to dismount. Of course you use the brake to partially stop, but you want to get off it while rolling slowly, rather than have it fall over on you from lack of speed. I can’t imagine dismounting from a motorized, much heavier one. However, the dynamism reminds me of your WIP motorcycle dio.
My first thought was – another Postcard! I found some “models”, but they were 3D printing with only renderings and no photos. I knew the spokes and other details were imaginary, so gave up on that idea; I won’t buy anything printed in 3D without a photo of the actual product.
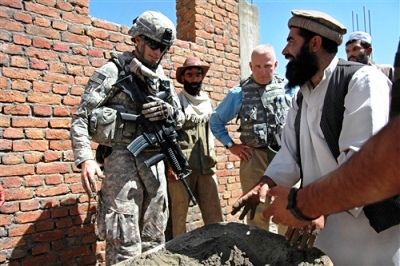
Your medium grey filler would work in Afghanistan.
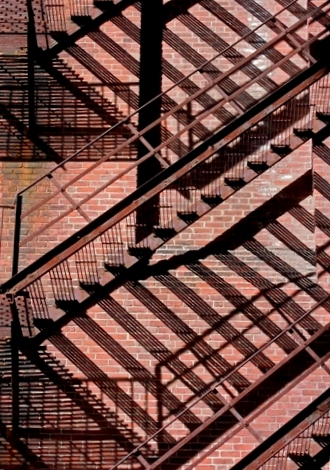
But not for most of the U.S. Location and age are of course criteria for grout coloring. This is a building in Boston that is over a century old. I’m using my own photo, as I decided I couldn’t trust the reality of images I found searching for “brick”.
BTW – it was bad enough back when you searched for “model”, and 3/4 of the hits were modeling agencies and escorts, but now with 3D modeling you’re lucky if 5% of the hits are for the kind of modeling that we want. Has anyone here found a search phrase that works?
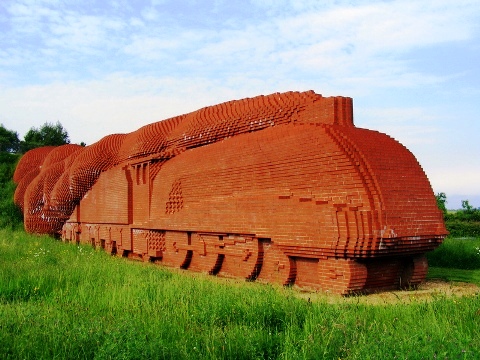
Here is a brick sculpture in England that I like – especially the billowing smoke – but I read that the locals hate it. The grout here seems fairly white also.
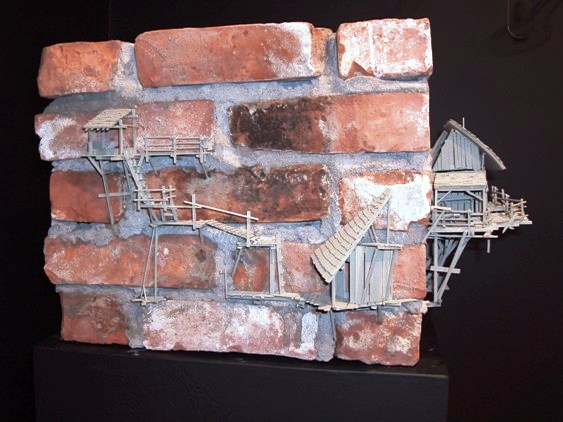
And lastly we have a large-scale brick diorama.
OK – the brick is life size, but the dio is maybe 1:24.
When I said white, I only meant that it is a lot easier to add color to white than tone down your grey, although I don’t know if we’ve seen it dried or not.
If painting after you add the grout, I’m wondering how you restrict the color to just the brick? That’s why I mentioning getting the final brick color first, then grout of the desired color. In small scales such as 1:87, I spray paint the brick sheet and then wipe with cornstarch or similar; acrylic paint would work also.
steph2102
Isere, France
Joined: April 23, 2011
KitMaker: 735 posts
Armorama: 606 posts
Joined: April 23, 2011
KitMaker: 735 posts
Armorama: 606 posts
Posted: Wednesday, September 04, 2013 - 08:08 PM UTC
Posted: Wednesday, September 04, 2013 - 10:31 PM UTC
@ Jason
Thanks for the compliments. Hopefully I can reveal more soon. I'm pretty excited.
@ Charles
Well the best way to keep the color to the bricks is using a very small brush, a lot of patience and painting the bricks one by one. This is also the perfect way to add color variation in the bricks themselves as fire baked bricks usually have. None is the same. I have done a load of Plaster and vacuform buildings and the MO really isn;t much different there.
On the subject of the brick train I have to say I can admire the workmanship in it and I know that beauty is in the eye of the beholder but I would probably complain as well if they erected that ugly thing in front of my house.
@ Steph
Congratulations on being the first one to finish in this campaign. Very nice result. I like the muddy appearance of the whole scene from the road to the vehicle and the figures. I like the red cross flag on the branch. Great job and thanks for participating.
steph2102
Isere, France
Joined: April 23, 2011
KitMaker: 735 posts
Armorama: 606 posts
Joined: April 23, 2011
KitMaker: 735 posts
Armorama: 606 posts
Posted: Thursday, September 05, 2013 - 12:06 AM UTC
thank you ,Robert
steph
steph
turkeyshot
New South Wales, Australia
Joined: February 06, 2012
KitMaker: 138 posts
Armorama: 133 posts
Joined: February 06, 2012
KitMaker: 138 posts
Armorama: 133 posts
Posted: Friday, September 06, 2013 - 09:39 AM UTC
Great work Steph! The whole scene has come together really well. Congrats.
velotrain
Massachusetts, United States
Joined: December 23, 2010
KitMaker: 384 posts
Armorama: 320 posts
Joined: December 23, 2010
KitMaker: 384 posts
Armorama: 320 posts
Posted: Friday, September 06, 2013 - 03:33 PM UTC
Quoted Text
Well the best way to keep the color to the bricks is using a very small brush, a lot of patience and painting the bricks one by one. This is also the perfect way to add color variation in the bricks themselves as fire baked bricks usually have. None is the same.
I worked with a gas-fired clay kiln, and have seen how position related to heat source, air source and other objects being fired can impact the color. The color variation on model brick can easily go too far, such as when a building has bricks of a half-dozen totally different colors ;-) I suspect that even when Amsterdam was first started, the builders may not have used bricks that were extremely different from the majority.
I was suggesting coloring the bricks first so you don't need to take so long or be concerned with getting paint on the grout - perhaps a technique for people like me without "a lot of patience". One thing I liked about your technique was how effective the clean-up of the grout is; and if a little remains in low points of the bricks, it doesn't seem a problem.
Is there perhaps some downside of painting the bricks first that I'm not seeing?
turkeyshot
New South Wales, Australia
Joined: February 06, 2012
KitMaker: 138 posts
Armorama: 133 posts
Joined: February 06, 2012
KitMaker: 138 posts
Armorama: 133 posts
Posted: Friday, September 06, 2013 - 05:22 PM UTC
Hey guys,
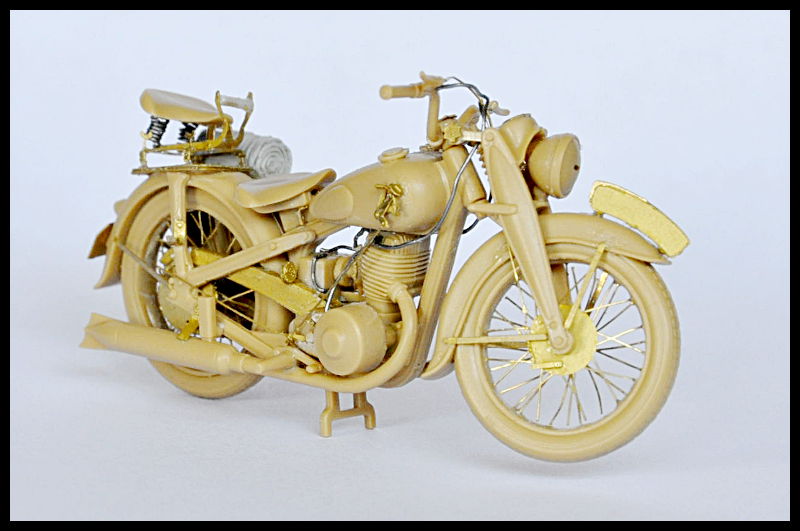
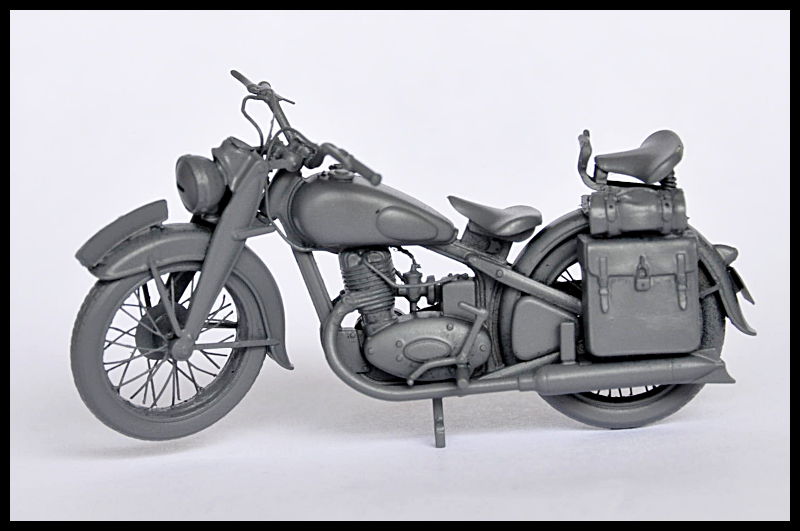
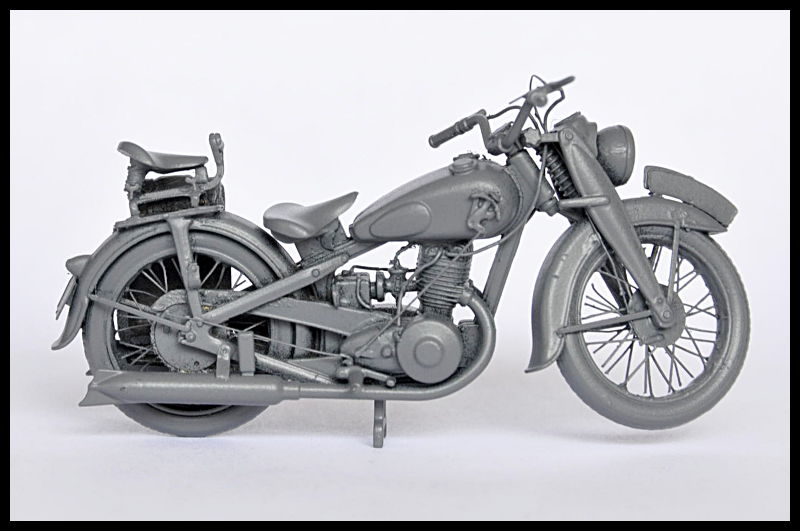
After much procrastination, I have worked up the courage to complete construction on the DKW by adding the wiring and cables. Construction on the bike is now finished and I have started to slap a little colour on her. The DKW was fielded in grey, tan, and camo... I have settled on the grey on account of the fact that I have a can of Tamiya German Grey in the drawer. I have also done some more work on the figure. He is now painted, uniform decals have been applied, and his head has been reunited with his body. I just need to dust him up a little with some pigments and I can call him done. I'll post some more photos of him and my progress on the base soon. For now it is just a few more photos of the DKW as she now looks.
PHOTO #19
Construction of the DKW is now finished. Adding all of the wires was a pain in the ass, but thankfully it was not as difficult as building the passenger seat.
PHOTO #20
The left side of the bike with the base coat of German Grey applied.
PHOTO #21
The right side of the DKW with the base coat of German Grey.
PHOTO #22
The back of the bike the detail of the passenger seat springs and frame.
Now that the base coat has been laid down, I can break out the brushes and hand paint in all of the details. Cheers.
steph2102
Isere, France
Joined: April 23, 2011
KitMaker: 735 posts
Armorama: 606 posts
Joined: April 23, 2011
KitMaker: 735 posts
Armorama: 606 posts
Posted: Friday, September 06, 2013 - 10:50 PM UTC
hello, thank you Jason. very nice bike
steph
steph
strongarden
Florida, United States
Joined: May 14, 2012
KitMaker: 730 posts
Armorama: 624 posts
Joined: May 14, 2012
KitMaker: 730 posts
Armorama: 624 posts
Posted: Saturday, September 07, 2013 - 11:10 AM UTC
Thanks guys for the replies, I'm just getting back into this awesome hobby and my mind is literally "...squirming like a toad" (Doors song, haha) w/ ideas.
Everything on this site has become a perfect outlet!
-Jason, Very cool bike indeed! Yes those Update sets really set them apart.
-Steph, Yes Congrats on yours, nice job there!
-Robt, Thanks for brick wall 'HowTo', I have never attempted one using cork, but the results are convincing and this medium seems user-friendly!
Dude, I'm not kidding, the close-ups (2nd foto and the final one) look like real masonry!
-Charles, Love those vintage fotos you've taken the time to source, a different world we have now, huh?
-Bronzey, No apologies, I know exactly whatcha mean m8.
I'm the sort of bloke who will stop and pick up something off the ground I deem maybe possibly slightly useful for scratchbuilding etc in my miniature world of dreams.
Wifey's like "...what did you find this time?"
And I show her and she's like, wow, whatever
Been working on the figs and bldg, but still hashing out some things, like the roof and positioning here and there of bits.
This one is going strong, keep it up!
Cheers
Dave
Posted: Saturday, September 07, 2013 - 12:32 PM UTC
Quoted Text
Tat – You don’t know a Cold Sweat until you’ve heard James Brown’s version:
First two minutes @
http://www.youtube.com/watch?v=sIxVWNPeRJY
Wow, thanks Charles - "I feel good" now
Robert, thanks for confirming on the Goliath. Need to find some suiable figures now...
Cheers all
strongarden
Florida, United States
Joined: May 14, 2012
KitMaker: 730 posts
Armorama: 624 posts
Joined: May 14, 2012
KitMaker: 730 posts
Armorama: 624 posts
Posted: Monday, September 09, 2013 - 07:37 AM UTC
Robert, Greets...
Was there any previous inquiry to a bicycle being admissable as the vehicle? If this is unacceptable, no problem don't worry.
Thanks, Dave
Was there any previous inquiry to a bicycle being admissable as the vehicle? If this is unacceptable, no problem don't worry.
Thanks, Dave
Posted: Monday, September 09, 2013 - 06:55 PM UTC
Ola Guys
Great Progress
@Charles
You are right... I have seen it a lot of times when modelers paint so many colors of brick it looses it's reality a bit. What I meant was starting out with more or less the same color for all of the bricks and add tonal differences by means of washes and drybrushes. This can be done before the grout. sure but I didn;t have any white grout in the house so I have to do it the same way as I have done with the countless plaster and vacuform buildings I have made through the years.
By the way... Way back in the day when Amsterdam started not many people could afford brick and just as with every city of that age it started out with buildings mostly built out of wood. After a few big fires and floods through the centuries, the price of brick dropping and the wealth of the people growing (Amsterdam was at one point the trade center of the world) you saw gradually the wooden buildings being replaced by brick structures.
@ Jason
Sterling work on that DKW. I love all the intricate detail you added to it and the wires finish it off nicely. That rear seat is very well done. Looking forward to seeing that finished.
@ Tat
Your welcome mate. Looking forward how your work progresses.
@ Dave
Your welcome. Glad you like the little SBS on making a wall with cork. And to answer your question. A bike is perfectly fine to be a vehicle. In the end it is just a motorcycle without the motor
velotrain
Massachusetts, United States
Joined: December 23, 2010
KitMaker: 384 posts
Armorama: 320 posts
Joined: December 23, 2010
KitMaker: 384 posts
Armorama: 320 posts
Posted: Tuesday, September 10, 2013 - 04:07 AM UTC
> A bike is perfectly fine to be a vehicle. In the end it is just a motorcycle without the motor
Sorry, Robert - but I'm shocked by your saying that. You, living in the Netherlands, without a doubt the most bike-friendly country in the world, with bicycle traffic lights, and bicycle roundabouts, and very respectful drivers.
The bicycle came first, and a motorcycle is just what the word implies - a bicycle with a motor added.
Posted: Tuesday, September 10, 2013 - 09:25 PM UTC
I had to reread my words to see if I at any time implied that the motorcycle was there before the bike and I'm sorry to say that I could not detect any of such words. I only meant to say that if a motorcycle is a good pick for the challenge then a Bicycle is as well.
Believe me... I know about the love for the bicycle in the Netherlands and I probably spend more time on the twowheeler then most members here. I spend most of my school going years bent over the steer pushing into the wind... only to find out that when I had to go back to home the wind had turned. And I definately know a lot of the vehicles history.