Hello,
I prepared my startup pic ahead, then stepped back as I thought of getting the Goliath first cleared with Robert. Anyways, here it is:
A couple of days back, while trying to look for some suitable figures at the LHS, I stumbled upon this:
It was still in its shrink-wrap, looking quite new for its age. Knowing that it's OOP, I paid for it without much thought, forgetting to finish on what I was there for in the first place!
Anyways, that just gives me reason for another sortie at the LHS. I have some of the bits and pieces so I better get started on this.
Still thinking through the final look of my "postcard". I know there are pics out there depicting the Goliath being deployed with a bunch of soldiers around it or something. Much appreciated if anyone can refer me to a site that has some.
Cheers,
Tat
Campaigns
Where Armorama group builds can be discussed, organized, and updates posted.
Hosted by Darren Baker, Richard S.
The Postcard challenge
Posted: Saturday, September 14, 2013 - 10:24 PM UTC
Bluestab
South Carolina, United States
Joined: December 03, 2009
KitMaker: 2,160 posts
Armorama: 1,906 posts
Joined: December 03, 2009
KitMaker: 2,160 posts
Armorama: 1,906 posts
Posted: Sunday, September 15, 2013 - 03:35 AM UTC
Tat,
"Unusual Panzers" by Michael Sawodny (Schiffer Military History)has about 30 pictures of the Goliath. It's an older book so the pictures are probably out on the web and there's probably better sources out there.
A few of the pictures are of captured Goliaths being inspected by US troops. Speaking of inspection, you could even go with the Goliath being demonstrated for German officers.
Posted: Monday, September 16, 2013 - 02:54 AM UTC
Thanks Alex. Will try to dig into those. Cheers -- Tat
Bluestab
South Carolina, United States
Joined: December 03, 2009
KitMaker: 2,160 posts
Armorama: 1,906 posts
Joined: December 03, 2009
KitMaker: 2,160 posts
Armorama: 1,906 posts
Posted: Monday, September 16, 2013 - 03:41 AM UTC
I am not abandoning the Valentine idea yet, but I might be re-thinking aspects of it. I'm not really happy at how the grave markers are looking. Over the next few days, I'll give it some thought and see what I can come up with.
Posted: Monday, September 16, 2013 - 06:15 AM UTC
@ Tat
You have a whole stable of Goliaths at this rate . Looking good. You have some nice stuff gathered together. Looking forward how it is going to take shape.
@ Alex
Nothing wrong with rethinking aspects. Often that is needed to get the most out of the idea. Looking forward to the changes.
You have a whole stable of Goliaths at this rate . Looking good. You have some nice stuff gathered together. Looking forward how it is going to take shape.
@ Alex
Nothing wrong with rethinking aspects. Often that is needed to get the most out of the idea. Looking forward to the changes.
kurnuy
West-Vlaaderen, Belgium
Joined: August 22, 2009
KitMaker: 1,491 posts
Armorama: 997 posts
Joined: August 22, 2009
KitMaker: 1,491 posts
Armorama: 997 posts
Posted: Monday, September 16, 2013 - 06:52 AM UTC
Hello ,
I do not take part in the campaign but I have seen beautiful projects of all participants.
Good luck everyone !
Greets Kurt
I do not take part in the campaign but I have seen beautiful projects of all participants.
Good luck everyone !
Greets Kurt
Bluestab
South Carolina, United States
Joined: December 03, 2009
KitMaker: 2,160 posts
Armorama: 1,906 posts
Joined: December 03, 2009
KitMaker: 2,160 posts
Armorama: 1,906 posts
Posted: Monday, September 16, 2013 - 12:57 PM UTC
Thanks Robert. I'm having a change of attitude with my dioramas. In short, I'm simplifying them so that they are self-explanatory. I've got a few ideas floating around in my head so if needed I can shift gears.
I'll give it a few days to see where I stand on things.
Posted: Monday, September 16, 2013 - 08:18 PM UTC
@ Kurt
Thanks for the good luck wishes to all participants. And I can't agree with you more. There is some sterling work shown here. It pleases me to be the Campaign leader here.
@ Alex
A very good decision. If you have a diorama people should pick up the story in one go.
The fun thing is there are a bunch of rules to basic Diorama making that were established by the likes of Shep Paine, Tony Greenland, (recently) MIG and to some extent even Verlinden. And if you know them you can play with them. In one of my first dio's here... Made for the very first campaign that was kinda similar to the Postcard Challenge I decided to try to bend as many of those rules to actually enforce people to miss the hidden sniper the first go. The diorama (actually it was more a large vignette) was called "Distraction" And if you saw the sniper the second time you were already too late.
Thanks for the good luck wishes to all participants. And I can't agree with you more. There is some sterling work shown here. It pleases me to be the Campaign leader here.
@ Alex
Quoted Text
I'm simplifying them so that they are self-explanatory
A very good decision. If you have a diorama people should pick up the story in one go.
The fun thing is there are a bunch of rules to basic Diorama making that were established by the likes of Shep Paine, Tony Greenland, (recently) MIG and to some extent even Verlinden. And if you know them you can play with them. In one of my first dio's here... Made for the very first campaign that was kinda similar to the Postcard Challenge I decided to try to bend as many of those rules to actually enforce people to miss the hidden sniper the first go. The diorama (actually it was more a large vignette) was called "Distraction" And if you saw the sniper the second time you were already too late.
IamTJones
Niedersachsen, Germany
Joined: May 12, 2013
KitMaker: 128 posts
Armorama: 125 posts
Joined: May 12, 2013
KitMaker: 128 posts
Armorama: 125 posts
Posted: Tuesday, September 17, 2013 - 03:10 AM UTC
Some really great builds coming along in here from everyone.
Excellent work on those Bricks Robert!
Tat: I'm looking forward to the Goliath, It should make for a very interesting little Diorama.
I myself Have been hard at work behind the scenes, Here I have the diorama finaly layed out in a way that I like.
The bridge will be raised a little more over a little river, which will give me the opprtunity to try modelling water for the first time. The scene will be as the snow has mostly melted away, leaving only little patches here and there.
This also gave me the opportunity to try my first ever whitewash, I used the hairspray technique and must say I am pretty proud of the result. Please let me know what you guys think!
I do notice now that the lighting of the photo is not optimal, they always look better on my phone
I will take care to get better photos for my next update.
Cheers
Tristan
turkeyshot
New South Wales, Australia
Joined: February 06, 2012
KitMaker: 138 posts
Armorama: 133 posts
Joined: February 06, 2012
KitMaker: 138 posts
Armorama: 133 posts
Posted: Tuesday, September 17, 2013 - 08:39 PM UTC
Damn Tristan, where the hell did you come from with this? This looks awesome! Nice work on the whitewash BTW; I think it looks great. I look forward to seeing some more of this build.
Posted: Wednesday, September 18, 2013 - 07:29 PM UTC
@ Tristan
Thanks a lot for the compliments on my wall. I'm pretty pleased with it myself
Also your diorama is shaping up nicely. Very good height with that bridge. What is the blue stuff you used for the stonework?
And that is one battered white wash on the Flakpanzer. I love it. Very well done.
Thanks a lot for the compliments on my wall. I'm pretty pleased with it myself
Also your diorama is shaping up nicely. Very good height with that bridge. What is the blue stuff you used for the stonework?
And that is one battered white wash on the Flakpanzer. I love it. Very well done.
IamTJones
Niedersachsen, Germany
Joined: May 12, 2013
KitMaker: 128 posts
Armorama: 125 posts
Joined: May 12, 2013
KitMaker: 128 posts
Armorama: 125 posts
Posted: Wednesday, September 18, 2013 - 08:17 PM UTC
Thank you very much guys, the compliments are greatly appretiated.
Robert: The stones are cut from a thin sheet of a high density foam. At least that is how I would describe it, it's not the best material to work with but I think it was good enough here.
Cheers
Tristan
Robert: The stones are cut from a thin sheet of a high density foam. At least that is how I would describe it, it's not the best material to work with but I think it was good enough here.
Cheers
Tristan
Bluestab
South Carolina, United States
Joined: December 03, 2009
KitMaker: 2,160 posts
Armorama: 1,906 posts
Joined: December 03, 2009
KitMaker: 2,160 posts
Armorama: 1,906 posts
Posted: Thursday, September 19, 2013 - 02:50 AM UTC
Tristen,
Nice looking vehicle. The high density foam has me thinking about an alternative to using cork as well as some other applications. I was wondering how well does it take paint? DO you have to prime it? Does it work best with enamel or acrylic?
stoney
British Columbia, Canada
Joined: October 16, 2006
KitMaker: 480 posts
Armorama: 399 posts
Joined: October 16, 2006
KitMaker: 480 posts
Armorama: 399 posts
Posted: Sunday, September 29, 2013 - 04:54 AM UTC
Hey all, just wanted to poke my head in and say hi. Looks I've got some catching up to do joining so late but the fist fall rainstorms are a great motivator to get back to the bench
Pretty rusty as life has been hectic and I havent built seriously in about a year but this campaign seemed to perfect to resist, perfect project to get me back up to speed. I'll try to post pics in a bit, restricted to a camera phone for a bit sadly (shiny digital fell off my harness climbing)
After digging through piles of spare kits and half figure sprues I'm thinking of US infantry in the debris of St-Lô.
Awesome campaign idea, very excited, love the stuff I've seen so far!
Eric.
Posted: Sunday, September 29, 2013 - 05:14 AM UTC
Ola Eric
Sounds promising your idea. Really looking forward to that. Don't worry too much about the phonecam pics... I'm photographing all my modelpics with my Samsung Note for nearly 2 years now.
@ Tristan
Thanks for the explanation mate. Really looks good.
Sounds promising your idea. Really looking forward to that. Don't worry too much about the phonecam pics... I'm photographing all my modelpics with my Samsung Note for nearly 2 years now.
@ Tristan
Thanks for the explanation mate. Really looks good.
Posted: Sunday, September 29, 2013 - 08:18 AM UTC
Ola People
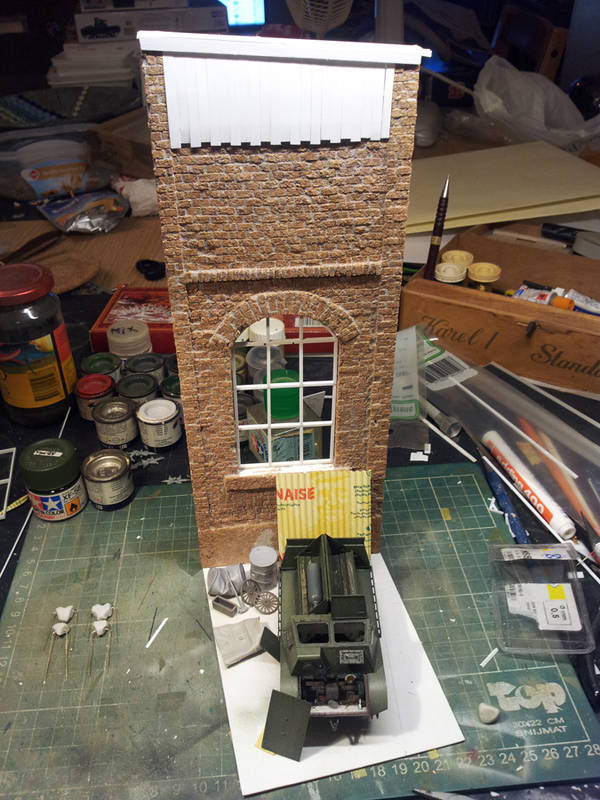
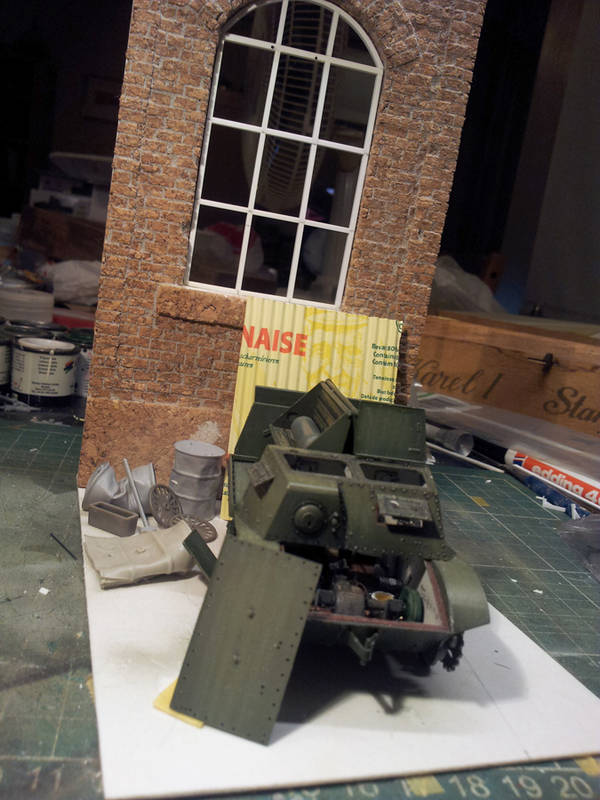
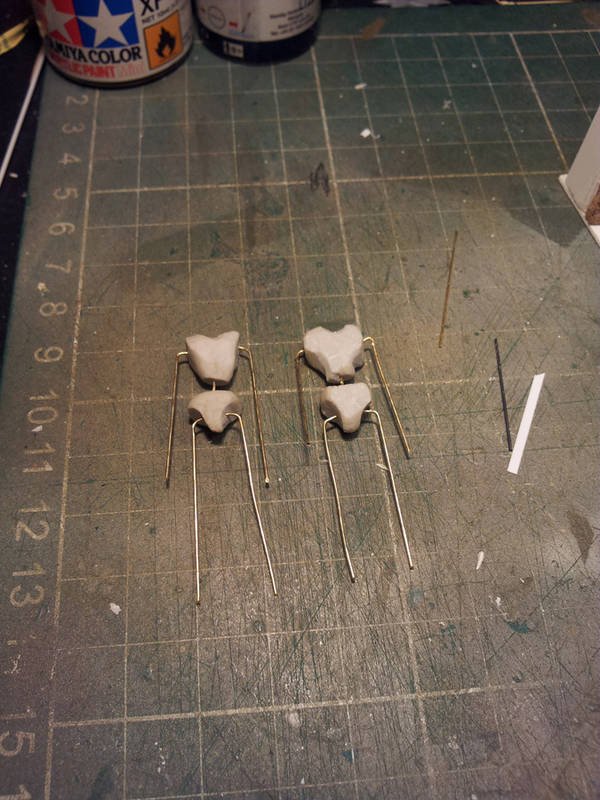
Apologies... I have been way too silent past time. Busy busy busy with other things and no inspiration slowed me down a bit. But in the past few days I have been at it again. The building is nearly finished. I need to go by the LHS to get some styrene profile to finish that window section and then it is off to the dio company. I made an extra corrugated sheet with my handy little device and Probably the least inpressive picture is that of the 2 armatures that will become the two figures of the diorama. More on that later.
turkeyshot
New South Wales, Australia
Joined: February 06, 2012
KitMaker: 138 posts
Armorama: 133 posts
Joined: February 06, 2012
KitMaker: 138 posts
Armorama: 133 posts
Posted: Tuesday, October 01, 2013 - 12:17 AM UTC
Damn Robert... that wall somehow just keeps looking better and better! Excellent work mate.
Posted: Wednesday, October 02, 2013 - 04:02 AM UTC
Thank you Jason for the compliments. Building is in it's finishin stages and then it goes on the mail. I'm really curious how that will turn out.
Got another bit of update. I gave the armatures for the figures more or less their final shape. And this is what it is going to be. 2 Artillery observers the one leaning on the fence is pointing at a map while he talks to the guy standing on the bench. That guy will hold binoculars.
I'm still contemplating if I'm going to add a 3rd figure that has some form of Communications equipment. Field Phone or wireless radio. But that is for later concern.
Bluestab
South Carolina, United States
Joined: December 03, 2009
KitMaker: 2,160 posts
Armorama: 1,906 posts
Joined: December 03, 2009
KitMaker: 2,160 posts
Armorama: 1,906 posts
Posted: Wednesday, October 02, 2013 - 04:42 PM UTC
Looks nice Robert. I'm interested to see you make those figures.
I've given my Postcard project some thought and I am really thinking about moving away from the Valentine. I think it just requires too much explanation and the graveyard isn't shaping up like I wanted.
I'm thinking about doing a Panzer Turm using a Panzer IV turret. I'm debating between doing it in an urban setting or out in the country. I figure the turret will suffice the vehicle aspect. The casement will work for the stone structure. The Turm will fill the requirement for the a human made structure. And the figure will be whatever figures I go with...it depends on what setting I go with.
Let me know if I'm alright with the criteria requirements. If it won't work, I've got a couple other ideas in mind.
Posted: Thursday, October 03, 2013 - 11:51 PM UTC
Ola Alex
Thanks a lot for the compliments. Don't worry the figures will get their regular update here.
Regarding your Panzer turm idea. I say go for it. All the rules required are covered. Pitty the Valentine idea did not work out for you. You did put some effort in it cutting it up but sometimes you find out halfway that an idea is not working out as you envisioned it. Have had it happen to me a lot of times.
Bluestab
South Carolina, United States
Joined: December 03, 2009
KitMaker: 2,160 posts
Armorama: 1,906 posts
Joined: December 03, 2009
KitMaker: 2,160 posts
Armorama: 1,906 posts
Posted: Friday, October 04, 2013 - 04:37 AM UTC
Thanks Robert.
I think I'm going to set it in the countryside. I might have its crew sitting outside, going about their daily activities. I tend to not model in-action scenes.
The Valentine will go back into the box with her sister. Even cut up, I think I can use it. Those two Valentines have been in and out of a half dozen diorama ideas. I think maybe what I'll do with them is place them in a larger scene.
I'll start gearing up for the Turm this weekend. I've got a couple of Panzer 4 turrets. I'll have to remove the cupola, stowage box, etc. It's a tight fit but I think it'll look good and work with the spirit of the campaign.
strongarden
Florida, United States
Joined: May 14, 2012
KitMaker: 730 posts
Armorama: 624 posts
Joined: May 14, 2012
KitMaker: 730 posts
Armorama: 624 posts
Posted: Saturday, October 05, 2013 - 10:24 AM UTC
Hey guys been awhile since posting but have been steadily making progress.
Tristan- Like the dio you have there, cool vehicle for this challenge and sweet little bridge.
Eric- Welcome to The Challenge! Look forward to your contribution.
Robert- wow! Excellent work my friend, looking for those figures to be positioned and finished.
Hope to have pics soon. On my phone now after "technical difficulties" with the desktop.
Cheers Dave
Bluestab
South Carolina, United States
Joined: December 03, 2009
KitMaker: 2,160 posts
Armorama: 1,906 posts
Joined: December 03, 2009
KitMaker: 2,160 posts
Armorama: 1,906 posts
Posted: Saturday, October 05, 2013 - 03:11 PM UTC
I jumped on the new concept and have made a lot of progress. The base and layout look to be coming together pretty good. I got the turret base made and coated. I'm letting it dry overnight. Tomorrow I'll start some work on the turret and maybe add the base underlay. I'll try to get some pictures up soon.
I've got to dig through the figure box and see if I can find a figure or two to work. I don't want to do the easy thing and pop a figure in the cupola. I want them to be more relaxed, like they are manning the defenses.
strongarden
Florida, United States
Joined: May 14, 2012
KitMaker: 730 posts
Armorama: 624 posts
Joined: May 14, 2012
KitMaker: 730 posts
Armorama: 624 posts
Posted: Sunday, October 06, 2013 - 06:45 AM UTC
Alex- That's awesome to go right into the new one, I thought your Matilda was coming along though.
Looking forward to your new idea
Cheers
Dave
Looking forward to your new idea
Cheers
Dave
Posted: Tuesday, October 08, 2013 - 03:42 AM UTC
Ola Guys
Got an update on my two sculpts.
Step 1 and 2
Step 1 is Fleshing out the Armature. I deliberately keep this to the minimum. Because the clothes layer needs enough depth to work in the folds.
Step 2 is the creation of the trousers.
Then onto step 3 and 4. Step 3 is the belt which is made from Evergreen Strip and a nice PE beltbuckle from Aber. Step 4 is the bottom part of the M39 tunic. Which later will be detailed with the big pockets on the front.
Basically the built up of my sculpts is always the same. I start with the Armature with Plastic and resin parts for hands, heads and footwear. Then I flesh it out, Sculpting the trousers. On to the belt. Then the bottom part of the tunic. Next is sculpting the collar, And the rest of the fieldblouse. Plus I have to do something I have never done before. Which is the Y strap harness. more on that later.