Campaigns
Where Armorama group builds can be discussed, organized, and updates posted.
Where Armorama group builds can be discussed, organized, and updates posted.
Hosted by Darren Baker, Richard S.
AFV Club Campaign
Posted: Sunday, October 30, 2016 - 07:22 PM UTC
Fresh out of the paint shop, the camouflage is on using Ammo British Brown. I masked with BlueTac, and am happy with how it came out, just need a few touch ups, then I can "string" the canvas sides, then finish detail painting.


Posted: Sunday, October 30, 2016 - 07:55 PM UTC
Great paint job, Kevin. It came out really great.
Posted: Monday, October 31, 2016 - 03:15 AM UTC
Indeed a nice camo job 👍

Ironclaw

Joined: May 20, 2016
KitMaker: 73 posts
Armorama: 58 posts

Posted: Monday, October 31, 2016 - 04:38 AM UTC
Interesting subject.
You are doing a great job on it as well.
You are doing a great job on it as well.
Thirian24

Joined: September 30, 2015
KitMaker: 2,493 posts
Armorama: 2,344 posts

Posted: Wednesday, November 02, 2016 - 06:26 AM UTC

LinusB

Joined: March 21, 2016
KitMaker: 247 posts
Armorama: 126 posts

Posted: Wednesday, November 02, 2016 - 10:49 AM UTC
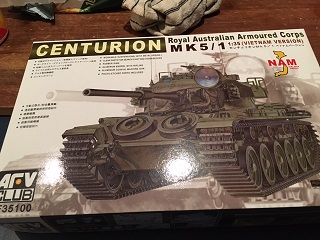
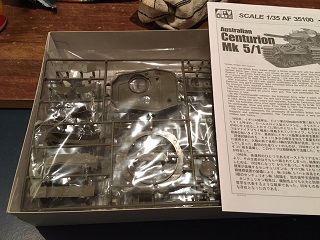
Received my Centurion Mk5/1 of the Royal Australian Armoured Corps


GaryKato

Joined: December 06, 2004
KitMaker: 3,694 posts
Armorama: 2,693 posts

Posted: Wednesday, November 02, 2016 - 08:07 PM UTC
I don't see your name as enlisted in the campaign. If you don't enlist, I can't award you a ribbon at the end of the campaign.
Enlist here.
Enlist here.
Posted: Wednesday, November 02, 2016 - 09:43 PM UTC
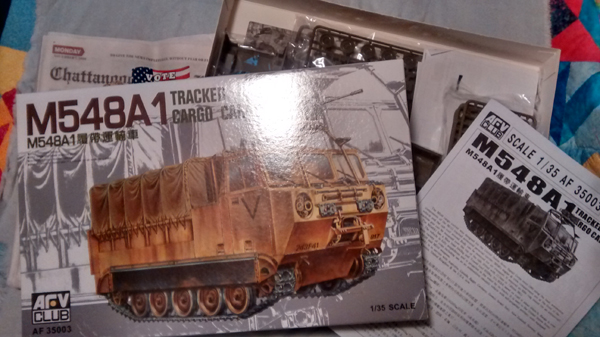
Hey Gary, any problem with me switching kits to a M548A1 Cargo Carrier? I just got a steal of a deal on one...;-)Plus, my dog ate my howitzer..........
GaryKato

Joined: December 06, 2004
KitMaker: 3,694 posts
Armorama: 2,693 posts

Posted: Thursday, November 03, 2016 - 12:15 AM UTC
Switching is no problem. Just remember to post a new start up picture.
It's been tempting for me to switch. I am thinking it would be easier on me to switch to a more modern AFV Club kit.
It's been tempting for me to switch. I am thinking it would be easier on me to switch to a more modern AFV Club kit.

Blespooky

Joined: June 03, 2014
KitMaker: 277 posts
Armorama: 66 posts

Posted: Saturday, November 05, 2016 - 03:40 AM UTC
AFV: IJN I-58
Hi Everyone, Im getting into the campaign with the AFV Japanese Navy I-58 Type B submarine with Kaiten Suicide Torpedoes. I received this model boxed with the USS Indianapolis from Academy, this is the infamous submarine that would catch that Cruiser on an unescorted speed run back to Pearl Harbor... Farewell and Adu to you fair Spanish Ladies...

Because the submarine is relatively simple compared to a 1/35 AFV, I thought I would try my hand at a Diorama. Picture a warm summer day, 1945, the newly refitted and resupplied I-58 is heading out of port for a final and lucky patrol. Here is the plan:

Since I'd never tried a diorama or water base I started with a lot of research. This turns out to be an incredibly rich and well discussed subject on Model Shipwrights. I chose the easiest possible solution which involves using silicon. Its pretty fun and easy, the special tool necessary is a simple plastic spoon, very hi-tech. Here is my practice piece:

With this new skill I started scratch building the extra parts necessary for the scene:
Palm Tree Construction (dont forget this is 1/350, my eyes hurt),

Objects (all scratch built): Hut on stilts, guard tower with antenna, traditional fishing boat, dock,

The next step I suppose is to actually build the model. I haven't really looked at it yet, Im sure it will be fine.
Thanks For Looking
Bryan
Hi Everyone, Im getting into the campaign with the AFV Japanese Navy I-58 Type B submarine with Kaiten Suicide Torpedoes. I received this model boxed with the USS Indianapolis from Academy, this is the infamous submarine that would catch that Cruiser on an unescorted speed run back to Pearl Harbor... Farewell and Adu to you fair Spanish Ladies...

Because the submarine is relatively simple compared to a 1/35 AFV, I thought I would try my hand at a Diorama. Picture a warm summer day, 1945, the newly refitted and resupplied I-58 is heading out of port for a final and lucky patrol. Here is the plan:

Since I'd never tried a diorama or water base I started with a lot of research. This turns out to be an incredibly rich and well discussed subject on Model Shipwrights. I chose the easiest possible solution which involves using silicon. Its pretty fun and easy, the special tool necessary is a simple plastic spoon, very hi-tech. Here is my practice piece:

With this new skill I started scratch building the extra parts necessary for the scene:
Palm Tree Construction (dont forget this is 1/350, my eyes hurt),

Objects (all scratch built): Hut on stilts, guard tower with antenna, traditional fishing boat, dock,

The next step I suppose is to actually build the model. I haven't really looked at it yet, Im sure it will be fine.
Thanks For Looking
Bryan

TacFireGuru

Joined: December 25, 2004
KitMaker: 3,770 posts
Armorama: 2,263 posts

Posted: Saturday, November 05, 2016 - 06:03 AM UTC

ColinEdm


Joined: October 15, 2013
KitMaker: 1,355 posts
Armorama: 1,229 posts

Posted: Sunday, November 06, 2016 - 09:45 AM UTC
Bryan, my eyes hurt just looking at that tiny stuff! You are a braver man than I.
With My Leopard and Wolverine builds down to some detail painting & weathering, time to start on my build for this campaign! It is AFV's Nashorn, with Eduard PE and Masterclub Tracks:

First order of business: Cleaning up all those road wheels with separate rubber!

With My Leopard and Wolverine builds down to some detail painting & weathering, time to start on my build for this campaign! It is AFV's Nashorn, with Eduard PE and Masterclub Tracks:

First order of business: Cleaning up all those road wheels with separate rubber!

JoeOsborne

Joined: October 08, 2013
KitMaker: 111 posts
Armorama: 67 posts

Posted: Monday, November 07, 2016 - 09:30 AM UTC
Posted: Monday, November 07, 2016 - 04:50 PM UTC
Joe - looking forward to seeing this one built.

Kanguroo

Joined: May 07, 2006
KitMaker: 416 posts
Armorama: 312 posts

Posted: Monday, November 07, 2016 - 06:05 PM UTC
Quoted Text
ok, Folks, I'm going to jump into this campaign with the Husky Mk III. I'll be adding the Legend resin VMMD and Def model resin wheel sets.
Will be posting first build shots this weekend.
A perfect combo, Joe.
Cheers,
K.
GaryKato

Joined: December 06, 2004
KitMaker: 3,694 posts
Armorama: 2,693 posts

Posted: Monday, November 07, 2016 - 06:51 PM UTC
And that makes 20 people building! That's 1/3 of the total enlisted!
Blespooky - 1/350 I-58
brekinapez - SdKfz 251/20 Uhu
ClaytonFromEllijay - M548A1
colinEdm - Nashorn
ComradeMP - Churchill Mk. VI (75mm QF)
Dukie99 - Churchill MK.III
easyco69 - SdKfz 251/22
GaryKato - Wiesel MK20A1
Ironclaw - M1128 Stryker MGS
JoeOsborne - Husky Mk.III
LinusB - Centurion Mk 5/1 RAAC Vietnam
Northern_Lad - M36
Pave-Hawk - Valentine Mk.II or T-34/85
PRH001 - M3A3 Stuart V
Ranger74 - YPR765-PRI
SgtRam - AEC Matador
TacFireGuru - 88mm Flak 18 *Done*
Templario - leFH 18M
Thirian - M1130 Stryker CV
tommedic - Shot Kal Gimel
Posted: Monday, November 07, 2016 - 07:39 PM UTC
Ok, this is my (re)start photo for the M548A1 Carrier...


No "Dog ate my homework" stories this time ;-)


No "Dog ate my homework" stories this time ;-)
Posted: Monday, November 07, 2016 - 07:47 PM UTC
@Clayton - nice choice, I have that kit in my stash, hoping to do a Canadian variant some day.

Blespooky

Joined: June 03, 2014
KitMaker: 277 posts
Armorama: 66 posts

Posted: Tuesday, November 08, 2016 - 02:18 PM UTC
There are some great looking new projects starting here, very exciting.
@Colin - Ill take scratch building in 1/350 over all the millions of road wheels on that Nashorn any day.
@Kevin - I really like that Matador, there is something slightly adorable about it even though its a military vehicle. The camo came out very well.
AFV: IJN I-58
Latest progress, I have secured a board big enough for the I-58. The Type Bs were huge submarines and the foam base had to be bigger than I would have liked. In any case we will have to assume that the sea bed really drops in depth from the beach to the straight quickly in order to allow such a big boat passage.
I also spent some time working on the wave/wake pattern from the ship. It is moving at low speed but after watching movies (Run Silent, Run Deep) and looking at pictures, these subs had a pretty interesting X-mas tree effect in the water even when moving slowly. Other elements are the rocks on the left of the land outcropping that will have to be sunk convincingly into the foam board.

Next step - sanding down the board to add wave action and making the land higher than the sea, im purposefully holding off on the sub itself because it is going to be handled alot during the base/water building phase.
Cheers,
Bryan
@Colin - Ill take scratch building in 1/350 over all the millions of road wheels on that Nashorn any day.
@Kevin - I really like that Matador, there is something slightly adorable about it even though its a military vehicle. The camo came out very well.
AFV: IJN I-58
Latest progress, I have secured a board big enough for the I-58. The Type Bs were huge submarines and the foam base had to be bigger than I would have liked. In any case we will have to assume that the sea bed really drops in depth from the beach to the straight quickly in order to allow such a big boat passage.
I also spent some time working on the wave/wake pattern from the ship. It is moving at low speed but after watching movies (Run Silent, Run Deep) and looking at pictures, these subs had a pretty interesting X-mas tree effect in the water even when moving slowly. Other elements are the rocks on the left of the land outcropping that will have to be sunk convincingly into the foam board.

Next step - sanding down the board to add wave action and making the land higher than the sea, im purposefully holding off on the sub itself because it is going to be handled alot during the base/water building phase.
Cheers,
Bryan
Posted: Tuesday, November 08, 2016 - 02:48 PM UTC
I really need to find me a kit and get cracking on this...just have three other active campaign builds to get through first.


Blespooky

Joined: June 03, 2014
KitMaker: 277 posts
Armorama: 66 posts

Posted: Tuesday, November 08, 2016 - 03:03 PM UTC
Come on Mark, elections over, no more excuses, time to focus on whats really important...

Blespooky

Joined: June 03, 2014
KitMaker: 277 posts
Armorama: 66 posts

Posted: Saturday, November 12, 2016 - 12:49 AM UTC
AFV: IJN I-58
Hello everyone,
This weekend I worked on sanding the base for the sea diorama. The idea is to make the land and beech as well as high points in the wake made by the ship higher than the flat sea everywhere else. The silicon used for the water also takes care of this but I have seen many models take advantage of the good effects of hi and low points in the base itself.
I had to make a number of decisions at this point (i hate decisions, so scary):
a) how fast the ship is going [slow],
b) how high are the waves [very mild],
c) how high does the ship ride out of the water [the red of the lower hull is often visible where water is being displaced by the ship
I wrapped sand paper around a deodorant stick to make the sanding smooth and even. It worked very well, I would draw with a marker where to sand, sand off the marker and repeat, each time adding a bit less marker.
In addition I used a fixed blade to cut down the lower hull, I didn't want to deal with the full hull but needed more than the upper piece because the lower would be visible.
Box art of the I-58, note that bow planes are retracted and the red hull is visible:

Steps of working on the hull of the ship and the highs and lows of the foam board:

Next steps will be adding the rocks to the beach and then painting the base.
Thanks for looking,
Bryan
Hello everyone,
This weekend I worked on sanding the base for the sea diorama. The idea is to make the land and beech as well as high points in the wake made by the ship higher than the flat sea everywhere else. The silicon used for the water also takes care of this but I have seen many models take advantage of the good effects of hi and low points in the base itself.
I had to make a number of decisions at this point (i hate decisions, so scary):
a) how fast the ship is going [slow],
b) how high are the waves [very mild],
c) how high does the ship ride out of the water [the red of the lower hull is often visible where water is being displaced by the ship
I wrapped sand paper around a deodorant stick to make the sanding smooth and even. It worked very well, I would draw with a marker where to sand, sand off the marker and repeat, each time adding a bit less marker.
In addition I used a fixed blade to cut down the lower hull, I didn't want to deal with the full hull but needed more than the upper piece because the lower would be visible.
Box art of the I-58, note that bow planes are retracted and the red hull is visible:

Steps of working on the hull of the ship and the highs and lows of the foam board:

Next steps will be adding the rocks to the beach and then painting the base.
Thanks for looking,
Bryan
Posted: Saturday, November 12, 2016 - 12:55 AM UTC
Looking great, Bryan, I love the guard tower!

TacFireGuru

Joined: December 25, 2004
KitMaker: 3,770 posts
Armorama: 2,263 posts

Posted: Sunday, November 13, 2016 - 02:37 AM UTC
Posted: Sunday, November 13, 2016 - 02:44 AM UTC
That looks great. Very well done.
 |


