

1⁄35Trakz German Staff Car
10
Comments
The Build Part 1
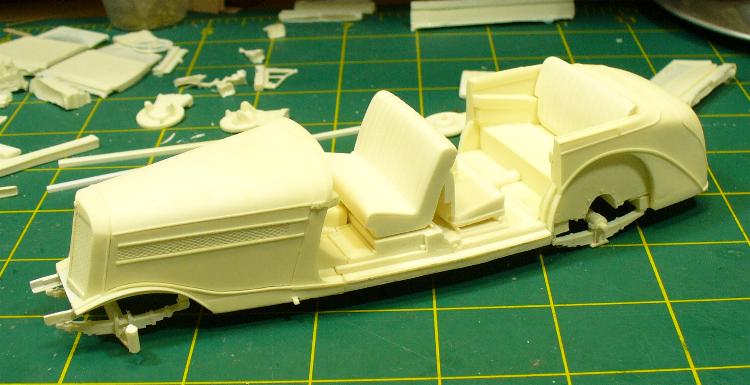
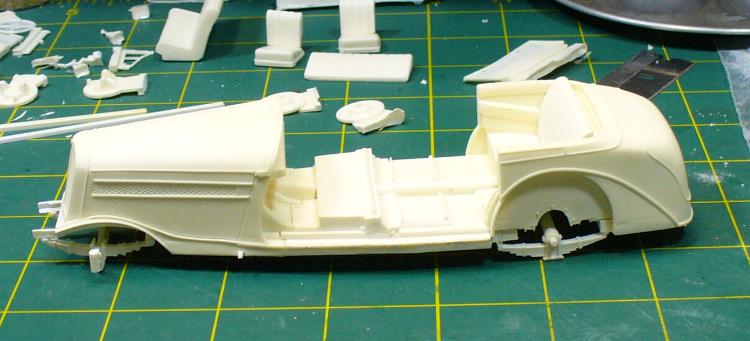
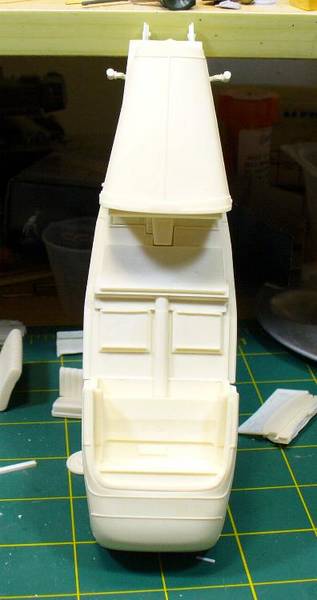
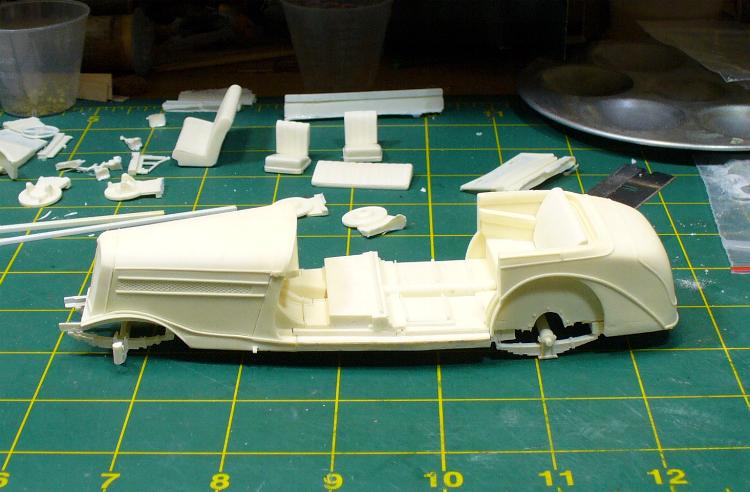
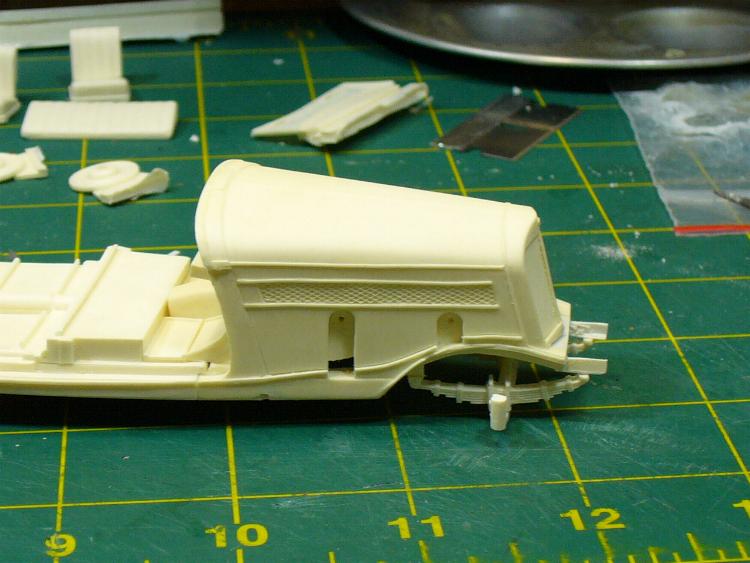
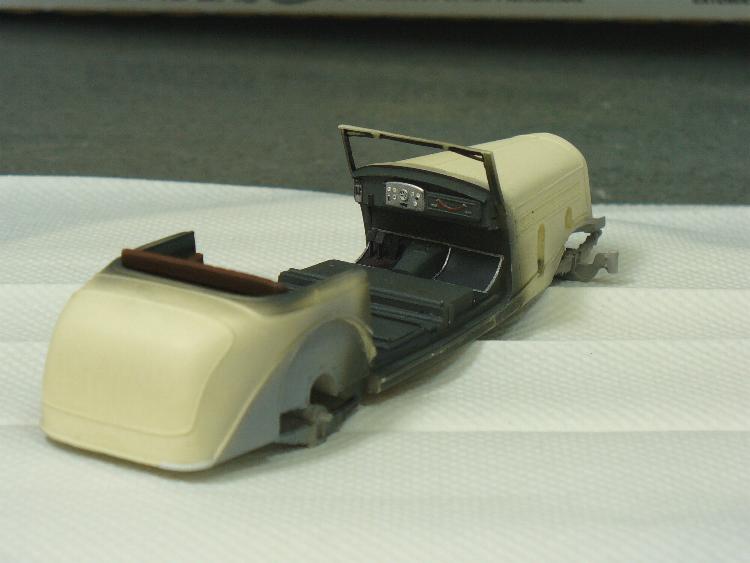
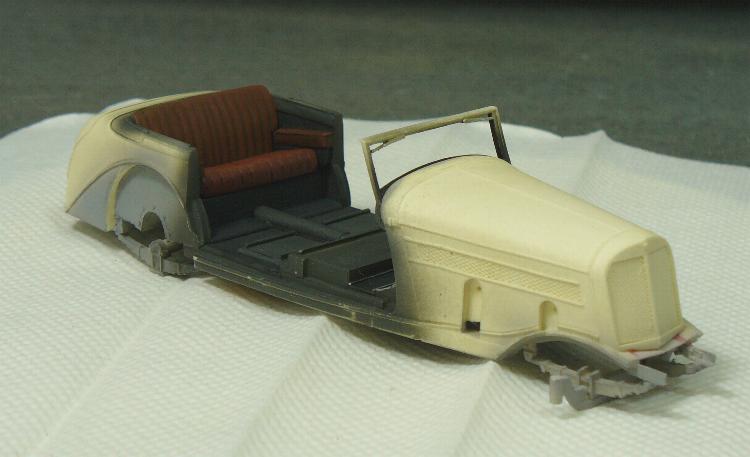
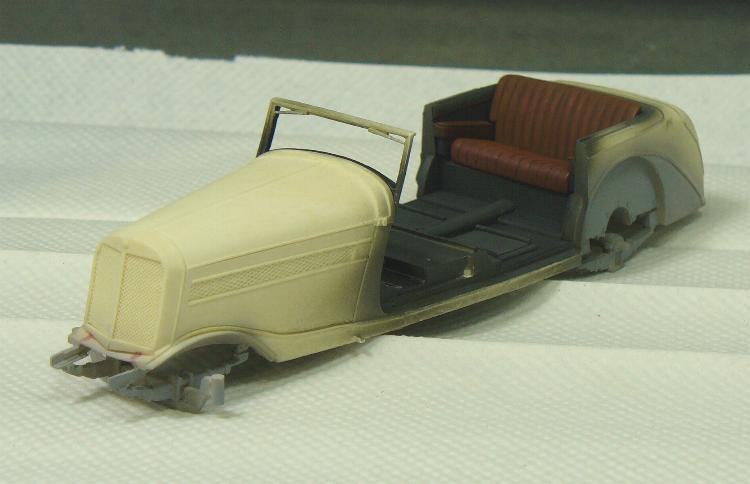
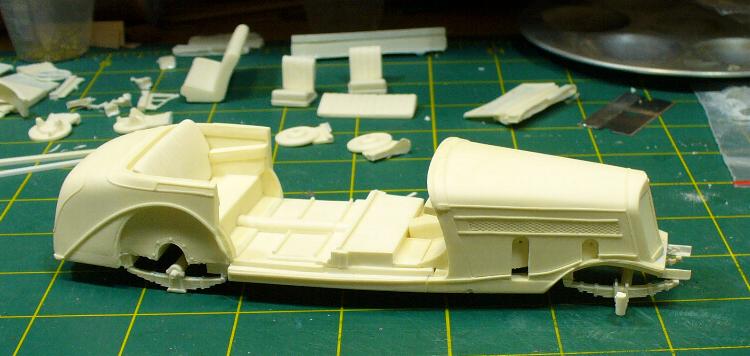
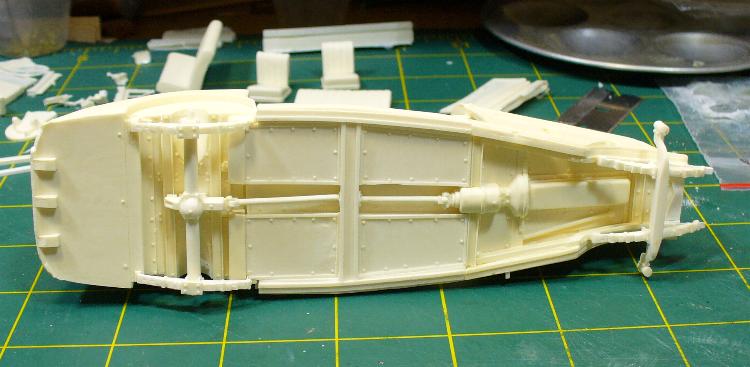
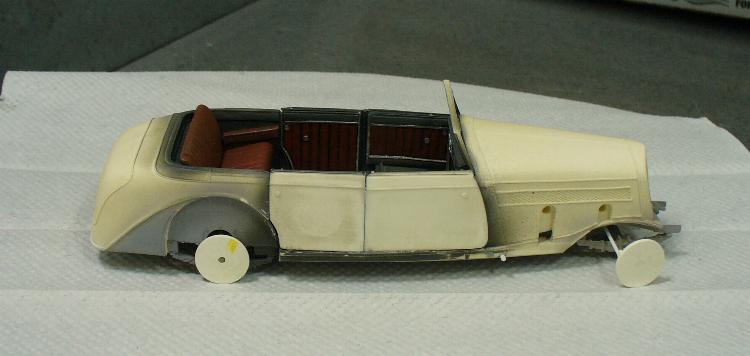
I proceeded to assemble the three parts that make up the main body. The hood section (bonnet to some), the centre section, and the trunk section (boot to some). I was amazed that they fit together perfectly level and straight, the joints were tight, and only need a run of thin CA along the joints. (See photos 1 to 6) The joints run along natural seams in the interior and needed no further work.I was off to a good start, and if the rest fitted this well, it would be a perfect resin kit. My enthusiasm was soon dashed as I attempted to fit the front axle. The front of the frame was Missing In Action (See my remarks above about its world tour!). Everything forward of the radiator was missing, not even the bits were left in the box. I had to scratch build the missing section of the frame. With not much to glue to for a good joint, I ended up slicing off part of the molded frame under the hood forward, to allow myself a better and stronger joint. I fashioned the missing section from plastic card stock cut to size, and glued to match the original kit frame. I also reinforced this joint with tiny plastic strips on the inside of the frame (Out of sight-out of mind you know). For lack of a better term, the small section of body trim between the frames directly in front of the radiator was also missing, and this was replaced with thin plastic sheet cut and bent to fit. Surprisingly it turned out to be a rather strong rebuild, a lot stronger than I expected, and didn't break during any further handling. The body, once assembled, is a solid chunk of resin, putting a lot of weight on the resin springs. I reinforced the rear end with a block of plastic under the differential. My attention next turned to the fenders. I really wish I could say these were a dream, but they actually turned into rather long hate secession. These were covered with tiny air holes. The more I filled, and sanded, the more came to the surface (See photo 7). I eventually ended up brushing on CA, letting it cure, and sanding with 600 wet/dry, basically just sanding the cured CA several times to get a somewhat OK surface. For some strange reason the hood has the openings for the supercharger pipes, but the fenders do not. Also no pipes come with the kit, nor are they pictured anywhere on the instructions. Yet most of the photos I found of the vehicles that look like this had the supercharger pipes (See Photo 4). Now these openings on the side of the hood arent exactly small, so I decided the best course would be to simply make up a set. Photos 8 and 9 show the seats being test fitted. The hardest part was removing the pour plugs from the bottoms to get them to sit properly. And Photo 10 shows the holes drilled into the right fender for the supercharger pipes. I made up a set of pedals for the interior, and then broke out the paints. I figured it would be harder to try to the paint the interior after the doors were glued into place. I used my normal Floquil primer, and I normally use enamels. For the majority of the interior, I used Model Masters, whatever dark greys were at hand. It was a simple matter of what looked good. For the leather parts I first airbrushed on some Model Masters Raw Umber, then dry brushed various leather browns (Model Masters, Humbrols). For the instrument cluster, and other chrome interior trim, I used Polly S Stainless Steel, and a sharpened toothpick to add the details to the gauges in black. A drop of Clear Hard as Nails was used for the glass (See Photos 11-14).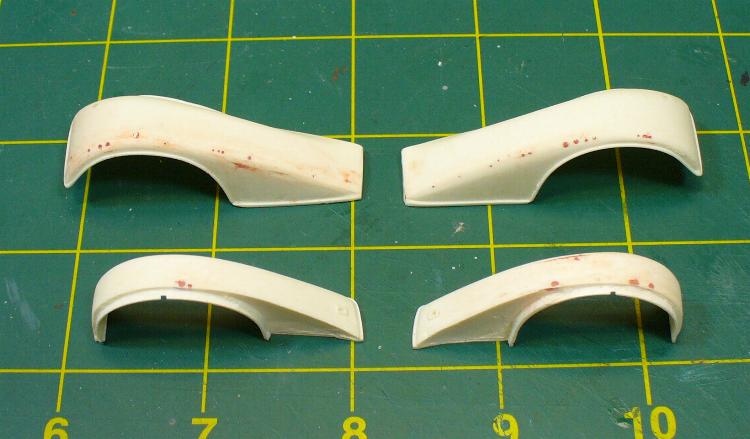


About the Author


FROM: FLORIDA, UNITED STATES
I'm rewriting this in a much more humoristic way, to help over inflate my ego, and place my self on a pedestal, because I don't have a life, and plastic models are the only thing I live for. I plead guilty as charged to excessive babble, light hearted humor, and continued encouragement to youngsters...
Comments
Ah, yes - the staffcar from hell - congratulations on a beautiful result Dave - your hard work really paid of ... but what took you so long
Good read!
Cheers/Jan
JAN 07, 2008 - 09:05 PM

I just realized I forgot to send the photos of it finished with the little Nazi flags!
JAN 07, 2008 - 11:58 PM

I'm glad to see this in a feature. I had fun watching the build threads.
Great figures.
Nice job Dave.
JAN 08, 2008 - 02:25 AM


Beautiful job !!!!
Wonderful work !!!
Amazing model !!!
Wow ...all is superlative ...
Congrats, Dave....
You rock !!!!
JAN 08, 2008 - 08:30 AM
Great job Dave,
I'd never have the patience for this one; it would have been in pieces long ago.
Turned out great, sharp looking trim, congrats,
Bob
JAN 08, 2008 - 09:32 AM
That's a nice feature Dave, i like it when it doesn't go alright
Next time, scratchbuilding such a little beggar could be an option!
JAN 09, 2008 - 09:35 PM
Thanks for the nice comments guys.
"The check is in the mail"....
JAN 09, 2008 - 09:46 PM
Nice model and something different from all those "Panzers" I like it a lot and you've done an absolutely great job on it!! Something nice for the showcase!
JAN 15, 2008 - 09:29 PM

Dave, Awesome Job, i've never seen this vehicle before. So your from Jersey, Originally I grew up in Bergen county, gotta say it , GO Giants ! LOOKING FORWARD to seeing more of your work...
JAN 30, 2008 - 03:32 PM
Copyright ©2021 by Dave O'Meara. Images and/or videos also by copyright holder unless otherwise noted. The views and opinions expressed herein are solely the views and opinions of the authors and/or contributors to this Web site and do not necessarily represent the views and/or opinions of Armorama, KitMaker Network, or Silver Star Enterrpises. All rights reserved. Originally published on: 2008-01-08 00:00:00. Unique Reads: 27737

WEB HOSTING BY


Copyright ©2021 Armorama and Kitmaker Network, a subsidiary of Silver Star Enterprises
All Rights Reserved. Please read our Conditions of Use and Privacy Policy.
All Rights Reserved. Please read our Conditions of Use and Privacy Policy.