1⁄35Sokol
35
Comments
Assembling the different bits together –the water
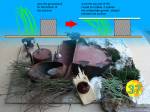
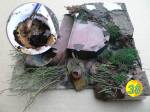
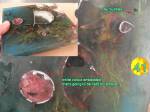
So now everything was painted, I had to start thinking of building the base that would eventually be drowned in the water.I fixed the underwater part of the Sokol on a glass sheet cut to the diorama’s dimension. I made a mix of plaster, twigs and moss that I applied on the right corners of the diorama according to the best top view. I embedded some more twigs and moss at this stage, and also glued the water lily roots that started to pop out above the underwater part for a special effect I wanted to create. (pic 37)
I built some glass walls to be sure that I would be able to control the level of the transparent mix while making sure those walls would be completely waterproof. I started to pour an opaque dark blue green mix on the bottom of the diorama. As every surface of the bottom would be far from being covered with groundwork, this first coat was used as some kind of colour sealer.
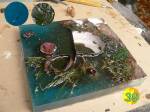
Then I poured several other coats of slightly tinted resin, including a few of them which were more opaque and very blue on the left edges of the diorama, far from the groundcover which would add to a feeling of depth to the water as you get more far from the river banks. (pic 38 -39)
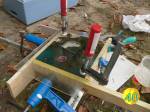
Okay I only had a few millimetres left to finish up the water, and this was nowhere close to getting any kind of flat surface. So I removed my glass walls and fixed some light wooden ones which would be stronger and easier to fix with some industrial strength clamps. I set them up to the level of the top of the submerged part of the Sokol. I then poured one last coat of untainted resin and pressed on the top of the resin covered Sokol a greased piece of glass. As I had poured a very generous coat of resin, it started to overflow everywhere on the wooden walls. Well, no problem at least the resin wouldn’t be able to retract as I managed to fix the glass top with some other clamps. (pic 40)
Of course all those operations led me to keep my nose very close to the fumes, thankfully I had invested in an effective gas mask.
I un-moulded the whole thing after two days of drying and here I had that perfect square of resin with all the underwater parts of the wreck perfectly embedded. (pic 41)
Assembling the different bits together –what’s above the water.
As I sensed earlier; I made a few mistakes. Indeed, to level the underwater parts didn’t match the top of the future water. I had to thoroughly sand some pieces like the 37mm base, or the lower part of the funnel which stood too high. And then I was stupid enough not to paint the exposed plastic parts black and there I had some white plastic embedded in my resin, often too deep to be efficiently painted back.When I dry fit the top elements, I noticed those white bits popping out of the diorama, as well as some big air bubbles that were trapped when I covered the resin with the glass sheet.
So I had to take my small drill and cut out some resin parts, paint the white plastic and covering the scar with some Clear Quote or with this Valejo’s Still Water.
It’s been now a few years/months that some companies have come out with some acrylic mixes of binder and stuff like sand, fine sand etc to help people build their bases –this stuff is currently being seen as the new Holy Grail for building bases. All very well, but for more than 15 years you have been able to buy exactly the same kind of stuff from art shops and all my early dioramas are done using it. The only difference is the name of the brand, and sometimes the price.
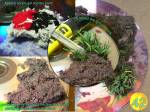
Anyway, I would say that the best stuff is the one whose grain is the finest for details. But it doesn’t hold its shape very well. So I have an older pot of sand mix that is almost dried out. I added a bit of water in it and pulled out some half dry lump. I then poured some black brown and red paint according to the dark coloured earth I wanted to get and proceeded to, half mix-half crush the stuff. (pic 42)
I then applied the very heavy mix on some plastic sheet that I had previously cut to the right dimensions for the sole reason that I didn’t want to put paint and dirt on the previously poured water.
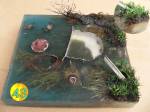
I then proceeded to put all the hyacinths very close to each other, trying to get the leaves to intertwine with each other. I also fixed the wood lump that serves as an access to the gun cradle and that I had built and painted earlier. (pic 43)
The stuff took a night to set and I then proceeded to glue the earth covered plastic lumps at the right places. I fixed the small bit of dead willow and made another batch of my earth mix to cover all the joints and to hide the small bits of white plastic that were still visible. Then I tried the best I could to drill some holes in the ground behind the boat so that I could fix the reeds one by one.
Finally I used some solvent free superglue (it’s not supposed to fog) to glue the top elements of the Sokol and suddenly, this diorama’s future looked quite bright. The question of light direction applied to the groundwork remained.
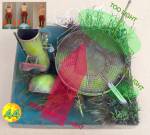
I created some darker mixes of green using more my inks, and proceeded to overpaint the rear and side places where the sun was not supposed to shine. I also added a fesh high highlight using some yellow green mixes on the most exposed areas of the leaves, which were near the 37mm gun.
I diluted some Future and painted each leaf so that the groundcover could take a satin appearance. Finally, I cut a good 40 extra leaves out of superglue covered paper that I painted in a mix of Chestnut Citadel ink and leather Vallejo paint. I glued those as dead leaves here and there (including some on the gun cradle) which added both colour and variation –even more because those dead leaves were painted in matt colours compared to the satin shades of the green leaves.
When all was ready, I put a very generous coat of Humbrol Clear Quote on the water (to get rid of finger prints, and even small bubbles) and placed my water lilies. What was pretty cool is that those fixed this way seem to be slightly touching the water, producing an effect which I think is very realistic. (pic 44)
Comments
Hi Claude -well this expo was at half an hour *walking* from my home so..
I arrived at the opening at 9am on saturday, left 10 mn later and took the dio back 10 mn before the closing on Sunday so you see, I am not very good at public relations
It was a fig show called Lugdunum, and no i didn't win anything -not that it was important indeed
plenty of pics of the show
thanks for asking anyway
here
FEB 29, 2008 - 02:44 AM
Simply superb, and forget taking your work to model shows, JBA, you need a studio of your own!
Peter F
MAR 26, 2008 - 08:06 PM
Thanks Peter, but honestly i 've always been knowing my own diorama promised land was certainly not paved with gold medals from shows
But i would still go for the friends. maybe see you at Telford in one year or 10!
MAR 28, 2008 - 12:54 AM
Jean-Bernard,
Your work as always is just spectacular. I hope to someday do a diorama so fully realized. I do follow my interests now and let them inspire me. I am growing very tired of the same old types of subjects. I am starting a figure company with my best friend and our subject matter is inspired by history, but civilian history rather then military history. Every one who has seen our first three figures has really liked them. I only hope that our figures add to the hobby the way your work does.
Best
Jeff
APR 17, 2008 - 03:24 PM
I just saw this, and JBA, my friend, all I can say is, you are a genius. While most dioramists try to faithfully replicate reality, you go much further, and try to replicate a moment of your self. Fantastic work.
APR 18, 2008 - 08:03 AM
So well, I just caught your comments while in a cybercafe in the "worse" kind of French wild west i could be stucked in and you can imagine those really cheers me up
Jeff I can only pray for your new company to be successful! And thanks David as always (very long time, very no see!!) may your inspiration still be there wherever in the world you are right now
bye for now my friends
JB
APR 22, 2008 - 01:53 AM
JBA I really admire your creative skills,such as using cigarette paper for clothes and such. Taking the time to explain your techniques and the reasons behind them is truly a learning experience for me. It would be a joy to see your projects in person. Keep it up! rR
APR 22, 2008 - 02:56 AM
HI JBA
For some reason I never replied/posted first time around ... so I´ll do so this time. Have always loved your models, and its always great to see them brought back again. Even the still water looks great!!
MAR 07, 2010 - 02:39 AM
Thanks Michael for unearthing such an old thing, it still looks okay after 3 years..
Than you Franck, the "reverse water" method is completely crazy to be honest and I wouldn't do this again. but i still like the way i treated the green colours.
Someday i might change the guy which is the weak point of the scene
MAR 07, 2010 - 11:30 PM
Copyright ©2021 by Jean-Bernard André. Images and/or videos also by copyright holder unless otherwise noted. The views and opinions expressed herein are solely the views and opinions of the authors and/or contributors to this Web site and do not necessarily represent the views and/or opinions of Armorama, KitMaker Network, or Silver Star Enterrpises. All rights reserved. Originally published on: 2008-02-16 00:00:00. Unique Reads: 60669


