

1⁄35Building the Churchill Mk III c/w Interior
13
Comments
Now onto the conversion.
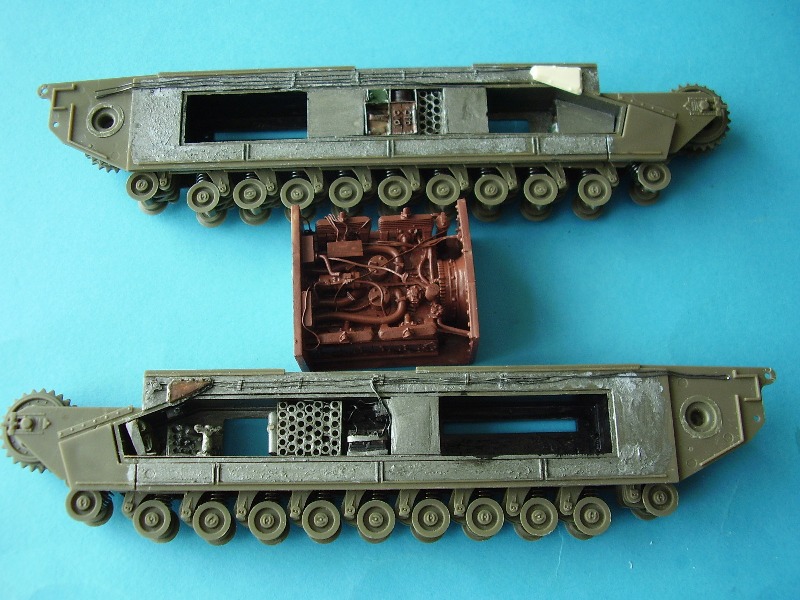
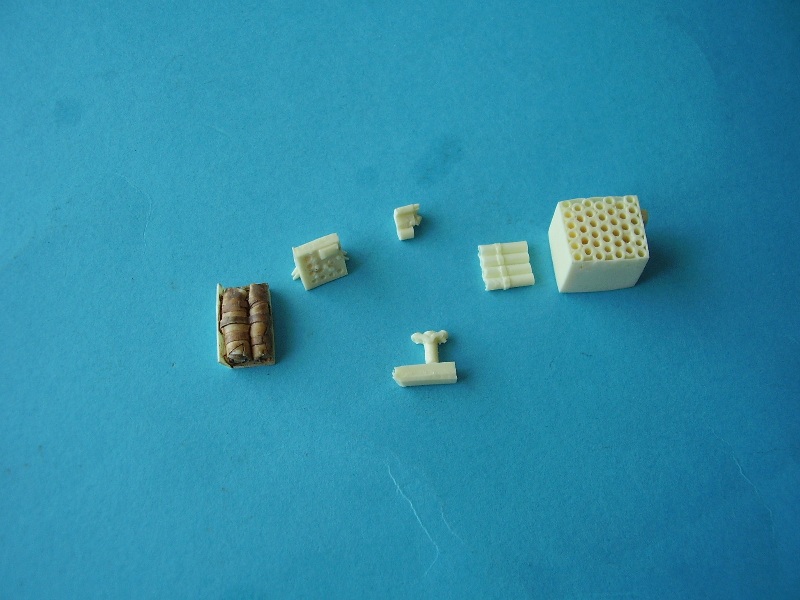
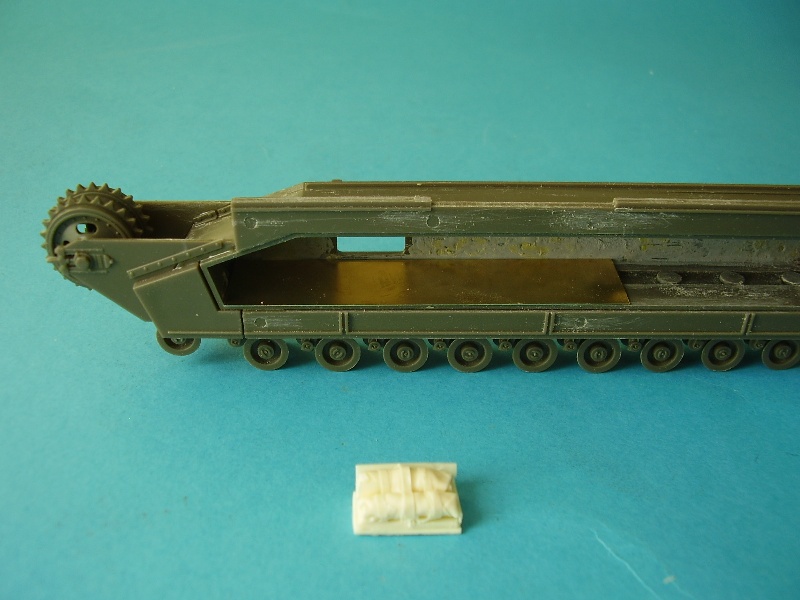
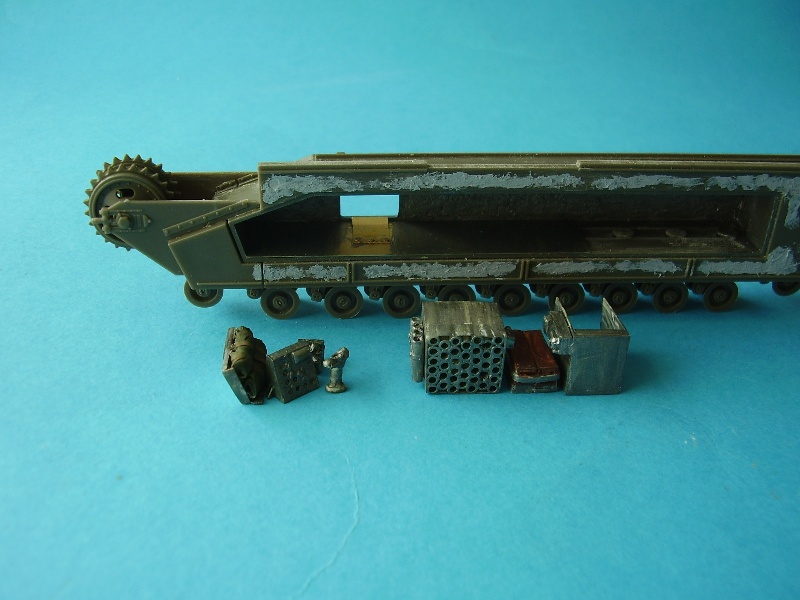
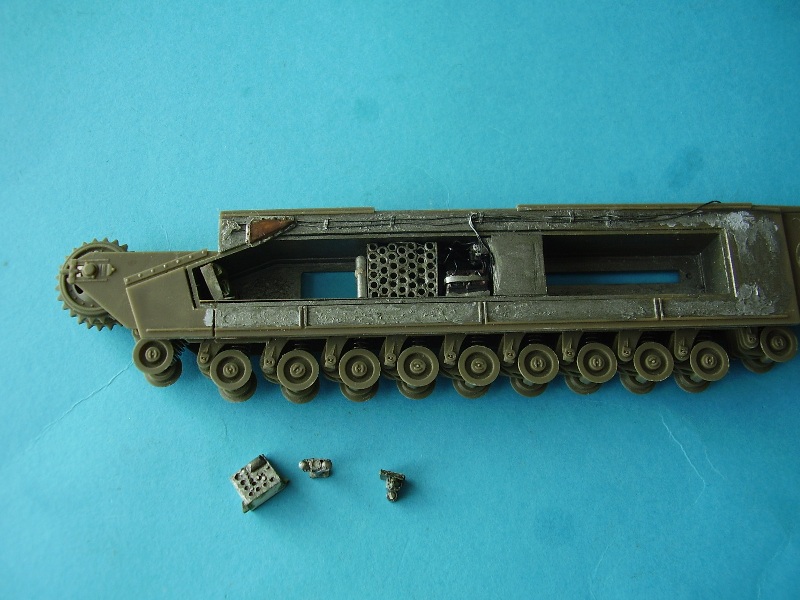
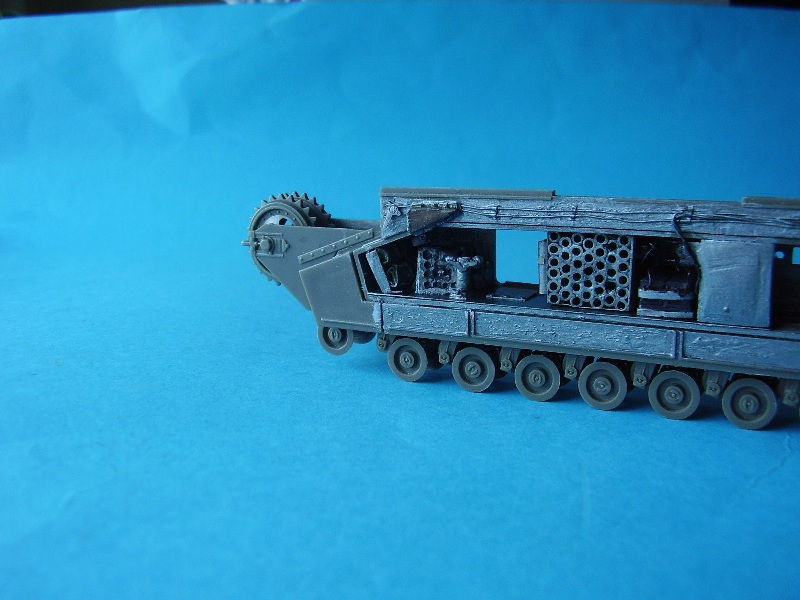
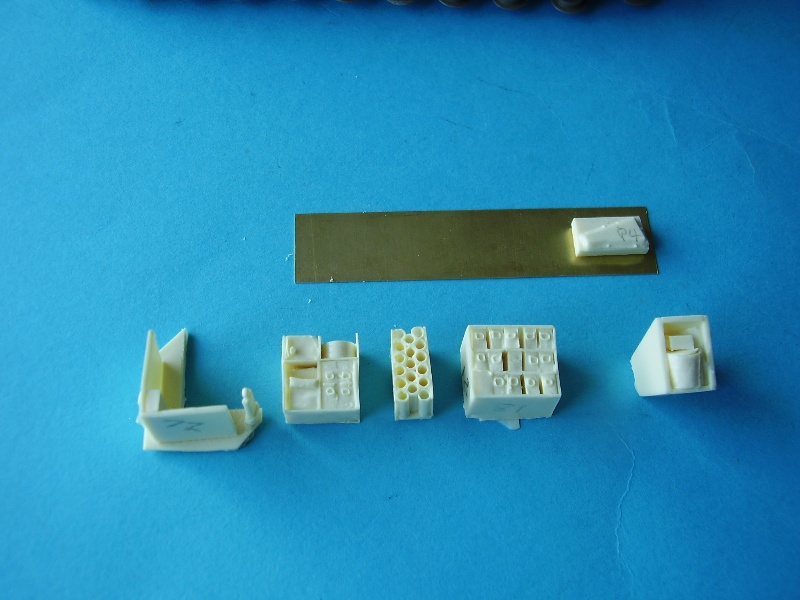
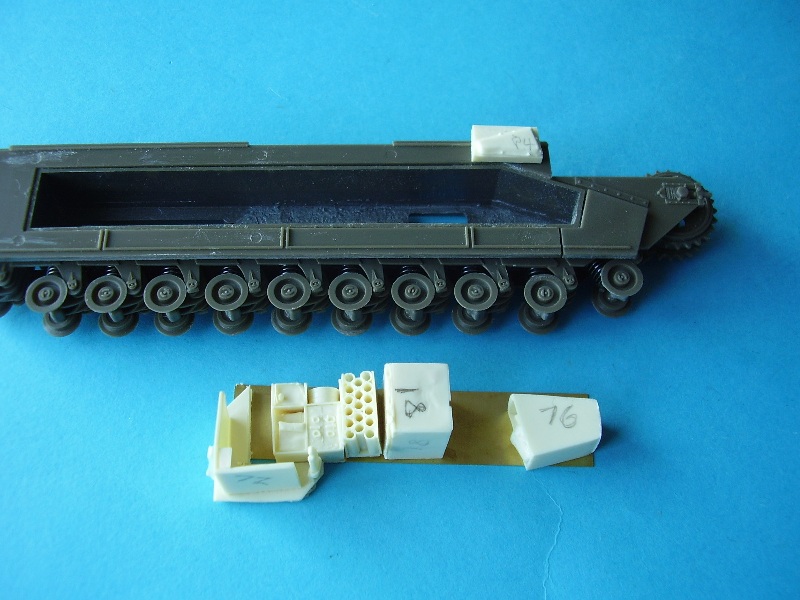
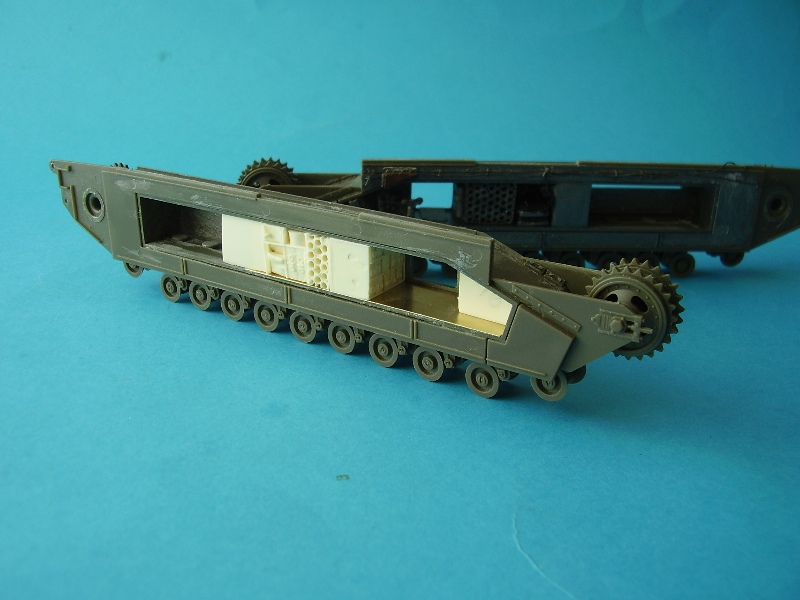
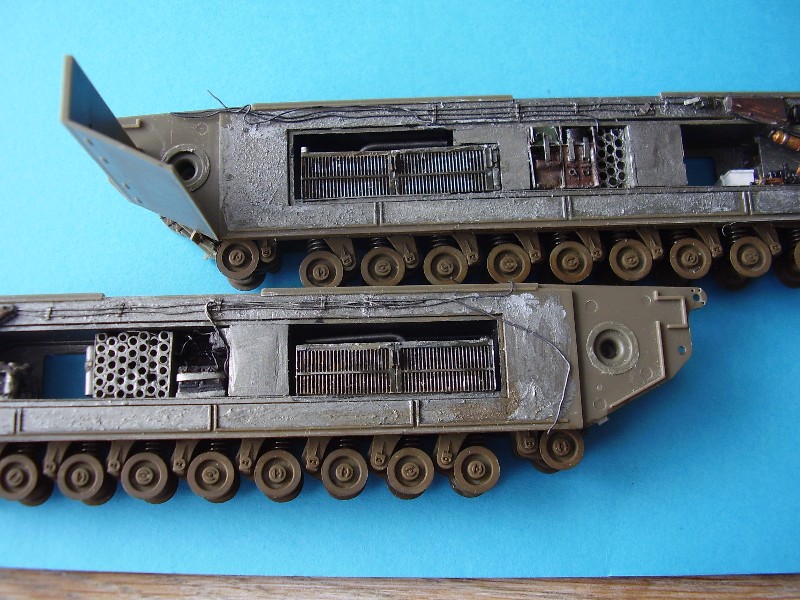
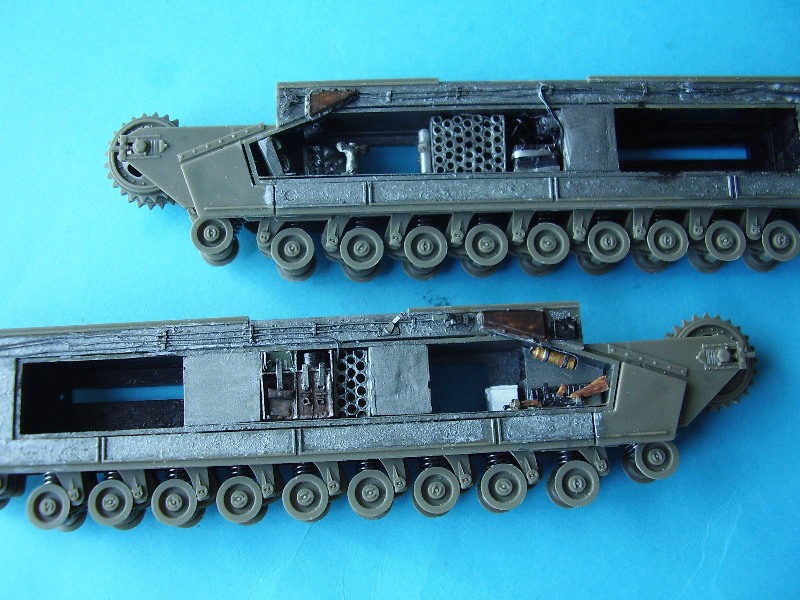
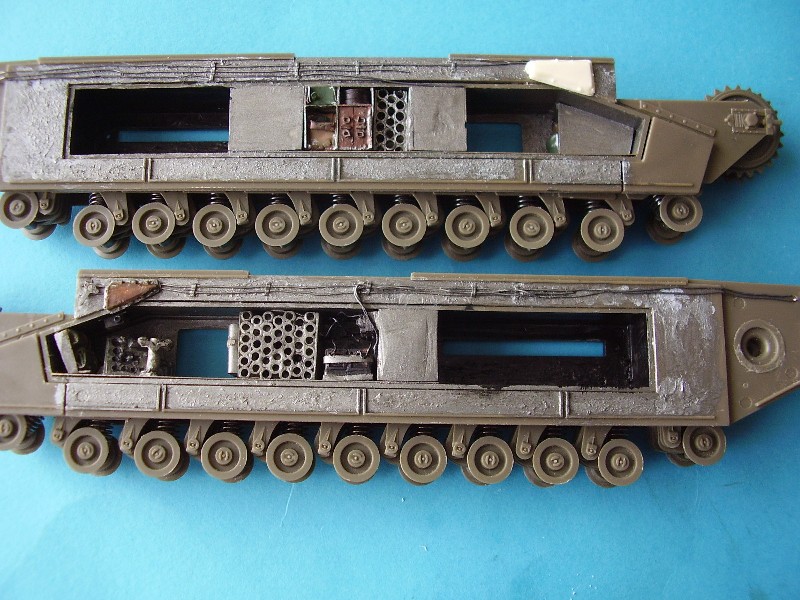
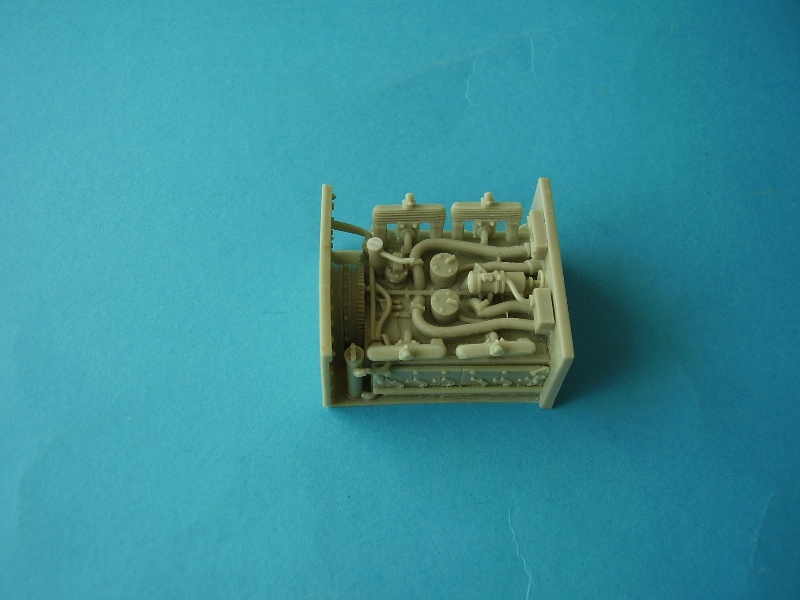
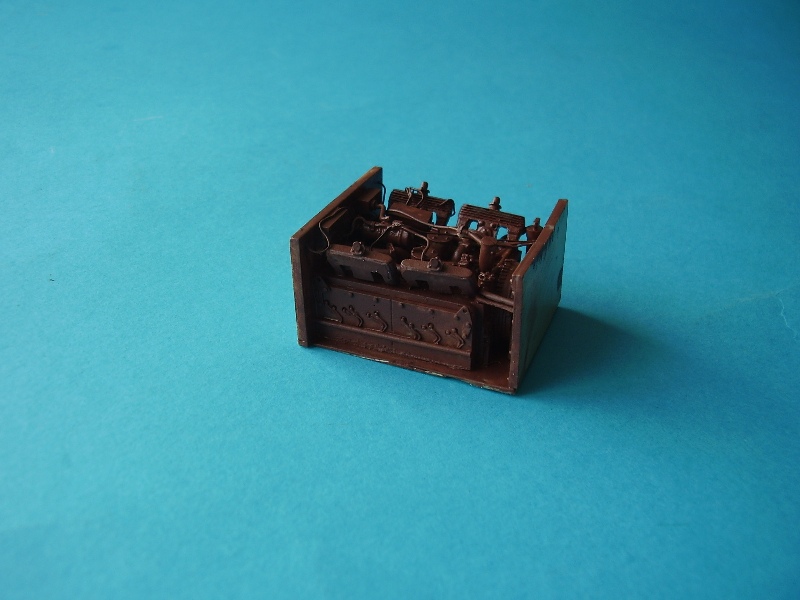
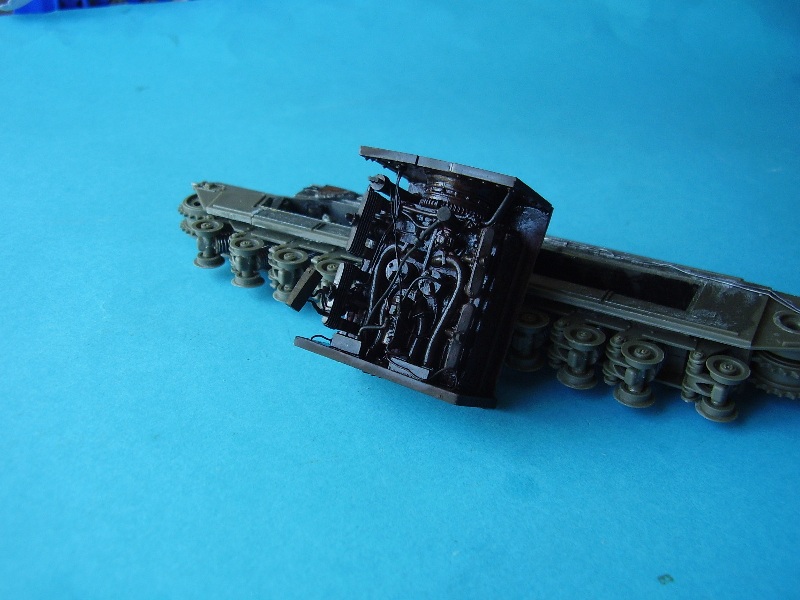
At the start of the interior conversion instructions is a reminder to remove 0.5mm from the top of parts D5 the suspension posts). Naturally I missed this, well I actually read it and then forgot about it, but it is not a problem as I just needed to sand down the tops of the suspension posts so that when I add part P 1 it sat flush within the pannier, already commented on above. A bit on the painting. The interiors of all British tanks up to 1942 were finished in a silver aluminum colour, after that they were painted white for a period up to the introduction of the Comet when things went 'silver' again. This was due to a shortage of paint and to a degree the interior finish also depended on who made the tank. Whether this change took place early, mid or late 42 I'm not sure. As this is going to be a pre Dieppe Canadian Churchill my thinking was on aluminum for the interior colour. Not as cool as white perhaps, but probably more accurate. Also it would make sense to me to paint this in subsections as I go along otherwise trying to get into the nooks and crannies might be a bit hard. The first part of the conversion I tackled was the right hand side pannier. With the tops of the suspension posts sanded down you add a broad strip of PE to form a flat base. I had roughened up the rear of the pannier and I painted it silver/metallic grey before I start adding the parts. Naturally a test fit or two is in order at this point and there are ejection marks on the AFV kit that need deal with too. The conversion parts are quite good but need a bit of sanding down to get a good fit. The bedrolls sit vertically and the ammo rack needs the top and bottom sanded down a little, to slide in easily. I squared it up at the rear and probably took a little too much off the inside end but I can add a piece of plastic card so that it sits flush to the inner wall, not a problem unless you intend to leave the side door open which I do. In the front stowage area there were 5 ground sheets, 1x 37 pattern haversack, 2 anti gas capes and a couple of pairs of gloves. On the right hand side of the instrument panel was a small container for spare bulbs. The small fitting is the jar/hose bleeding for the Lockheed system. The other the Binnacle. Also in this area were an oil can with angel spout , a 2pd hammer, wire cutters, intercom headset and harness, log book AB 413, instruction book and tool list, all this forward of the side door opening l These parts are fairly well catered for in the conversion set but obviously not absolutely everything can be catered for. Nothing got glued in at this point, I just test fitted the parts to get an idea where things went. There is a small sloped piece of PE to fit first at the door opening at this point too. I also painted the inside of the pannier and the parts before fitting, this may not be necessary if you use an air brush but as I paint by hand its pretty much an necessity. An early observation on the resin parts. You will need patience , a good sharp saw and a sanding block. The way the parts are cast it is not always immediately obvious where to cut so, take your time. The ammo rack was a little off square and the top and bottom need sanded down a good bit to get a fit. The front bin threw me as it actually needs to have the gas capes stacked up and because it has a flat back you are left with a little gap at the front which would have held kit. I don't think this is an issue as I believe when the front armour is fitted the gap may disappear but I put in a little plate, just in case. Make sure you have a copy of the internal stowage sketch as this will help a lot. Looking at the stowage sketch there appeared to be a intercom connecting box on the top of the front stowage area. The kit didnt provide any roof fittings but I add one anyway from the Formations Wireless Set. I also added a brass fire extinguisher as the kit doesn't include parts that were on the roof of the vehicle. You are provided with wiring and fittings to secure the wire/cable to the sides of the hull. I chose to used lead wire and rolled lead wire brackets as I find these easier to work with. I then added the wiring to the right hand side of the pannier and in and around the battery area. I then moved onto the left hand side pannier and repeated the process. I found it useful to mark the part numbers onto the parts, I used a pencil but a marker pen would have probably been better. At around this time I also started work on the Resicast Churchill Engine I was going to add. The build of the engine is fairly simple and you just need to add some plumbing for added effect. Once I had the main players in the left hand side pannier done I added the wiring and small PE handles that controlled the fuel links. I also added some additional items like the .45 Thompson SMG and a small First Aid box and another wireless junction box, all of which came from the spares box. With the left and right panniers complete the build moved into one of those odd stages where I was left with an empty rear area on both panniers, as the kit only supplies the interior parts for the fighting area. I got to thinking about fuel tanks and engine cooling radiators and decided to have a go at making these. I could only find partial pictures of the items so constructed two fuel tanks from plastic card, some piping from plastic rod and made some radiators from the engine grills of a left over Sherman part. These were not particularly accurate but they filled the gap that might get seen once the engine was in. As Murphys Law would have it having searched high and low for more information on the fuel tanks and radiators several weeks later after I had these fitted, I came across a site that had exactly the information I had been looking for but isnt that modelling to a tee!! A link to the Churchill Tank Project which is a very useful reference site can be found at the end of the article. It is worth noting here that Chris from Inside the Armour has since re-placeed the ammo bin stowage with more appropriate PE parts which should enhance this area of the build considerably. That said the illusion the fuel tanjks and radiators created when the engine got fitted was well worth the effort and the addition of these items in future kits would be a real plus. If you dont want to go this rather mad route just paint those areas matt black.


About the Author


FROM: ENGLAND - EAST ANGLIA, UNITED KINGDOM
Greying slightly, but young at heart. I've been teaching adults off and on for most of my life. Left the services in 85 and first started modelling in about 87 for a few years. Then I had a long spell when I didn't build anything (too busy) and really just got started again during the summer of ...
Comments

I just skimmed through this build feature and am already finding it helpful. Maybe this will be my next non-campaign project after I finish my MK IV? It's a good thing Darren likes British armour, or we may never get around to finishing some of these builds
SEP 01, 2010 - 05:31 PM
Looked like an interesting build Alan. Thanks for the article.
I may have to add another Churchill to my list by the looks of it - I'm beginning to love doing resin interiors.
SEP 01, 2010 - 11:07 PM

I've just started the MkIII Avre, hope i haven't already dropped a cod with how far i've progressed. Just about to read and find out....
Andy
SEP 02, 2010 - 01:22 AM


Hi Andy,
Here's a live link for the AVRE.
https://armorama.kitmaker.net//features/3168
Enjoy.
Al
SEP 04, 2010 - 12:00 AM
This kind of support and interaction is what makes this community great!
SEP 04, 2010 - 12:03 PM
Hi Jeremy,
Yes, there are a good bunch of helpful people around, they are what make most of my builds possible.
Al
OCT 01, 2010 - 11:17 PM
Copyright ©2021 by Alan McNeilly. Images and/or videos also by copyright holder unless otherwise noted. The views and opinions expressed herein are solely the views and opinions of the authors and/or contributors to this Web site and do not necessarily represent the views and/or opinions of Armorama, KitMaker Network, or Silver Star Enterrpises. All rights reserved. Originally published on: 2010-08-31 00:00:00. Unique Reads: 18992

WEB HOSTING BY


Copyright ©2021 Armorama and Kitmaker Network, a subsidiary of Silver Star Enterprises
All Rights Reserved. Please read our Conditions of Use and Privacy Policy.
All Rights Reserved. Please read our Conditions of Use and Privacy Policy.