

1⁄35Building the Churchill Mk III c/w Interior
13
Comments
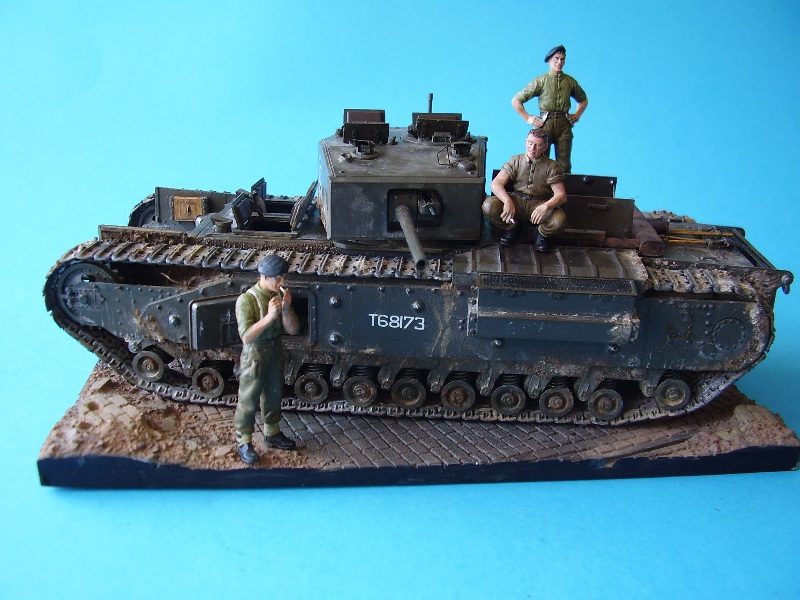
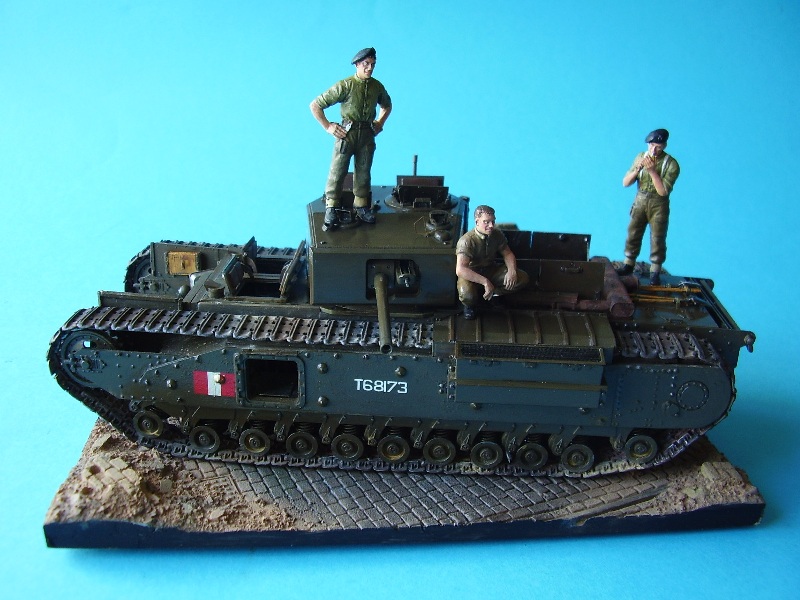
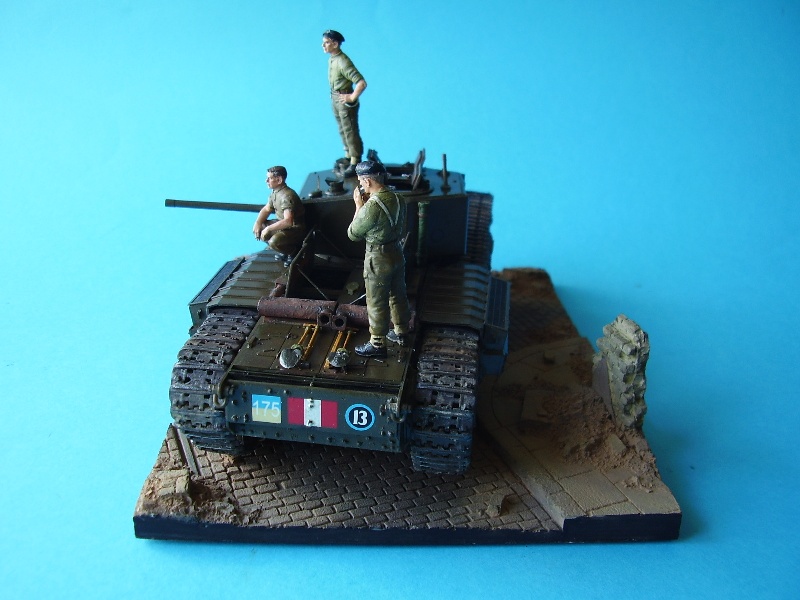
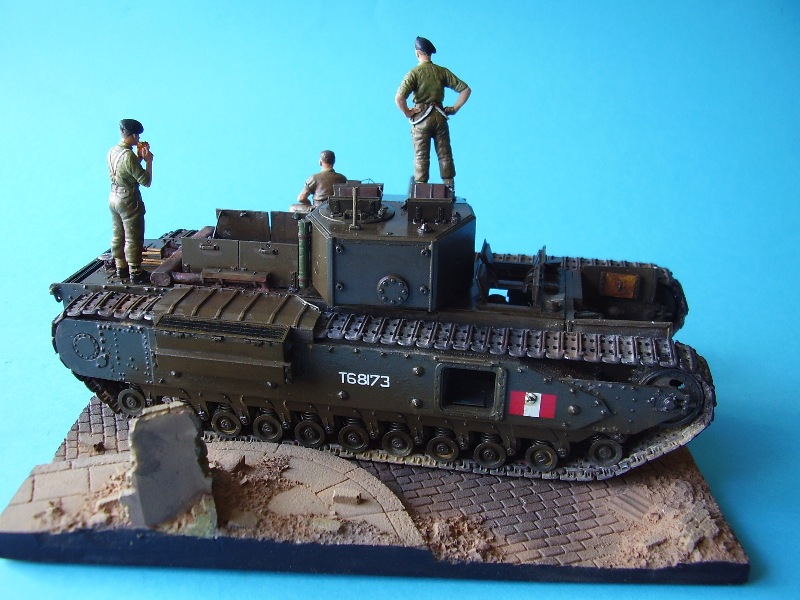
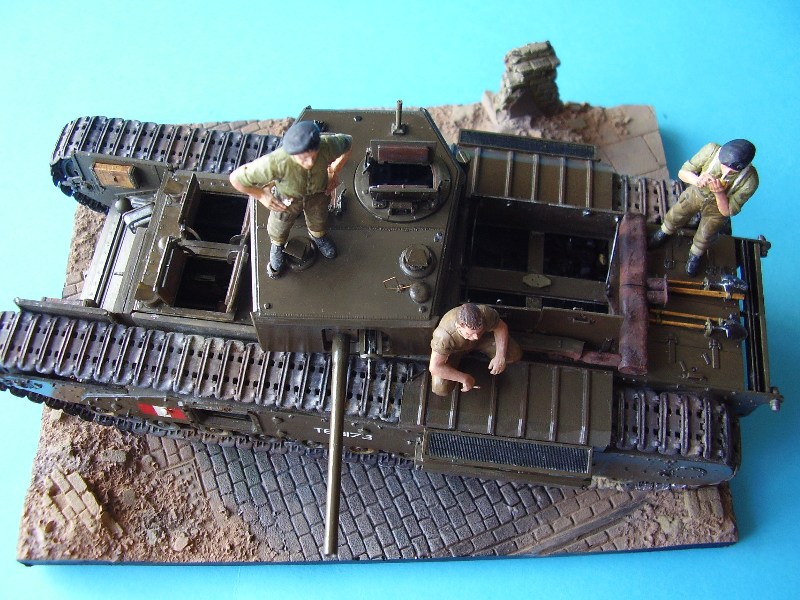
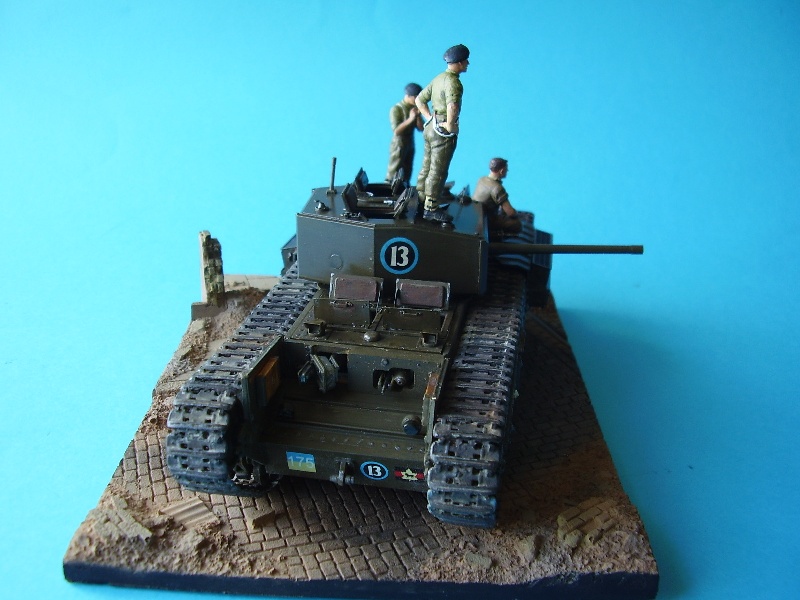
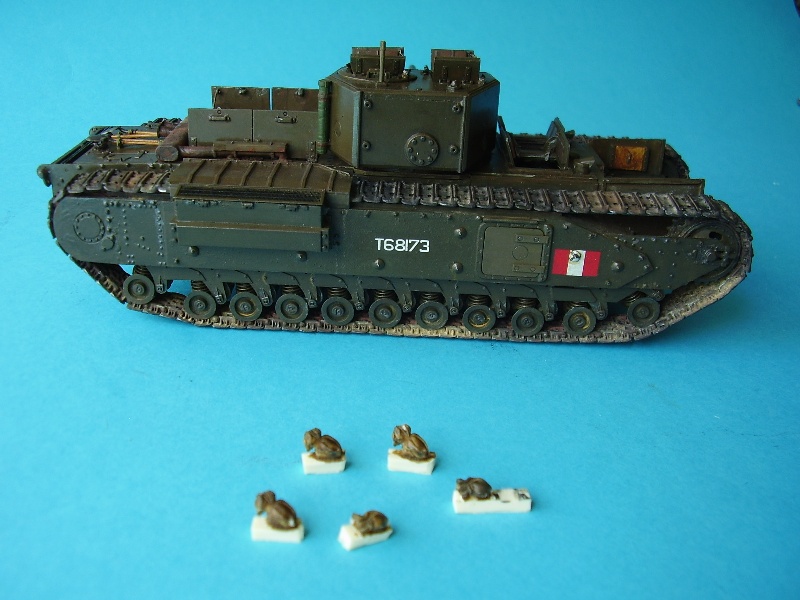
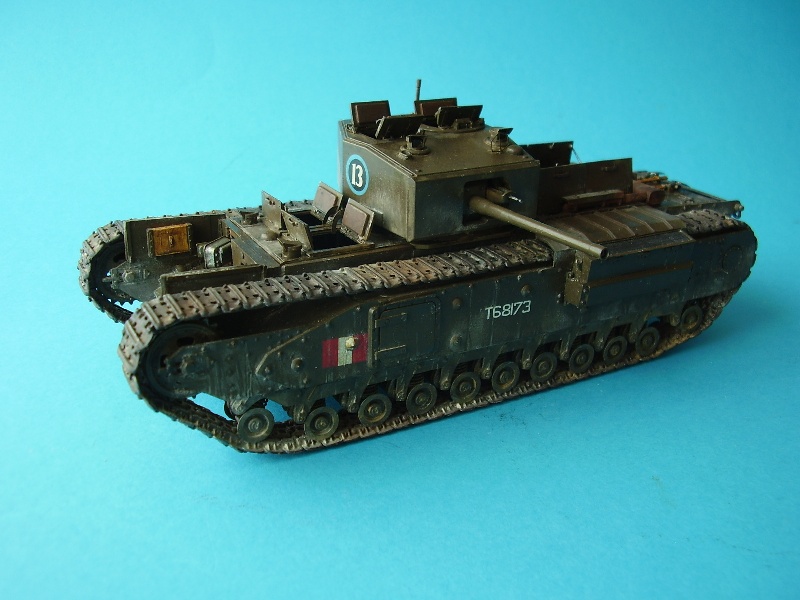
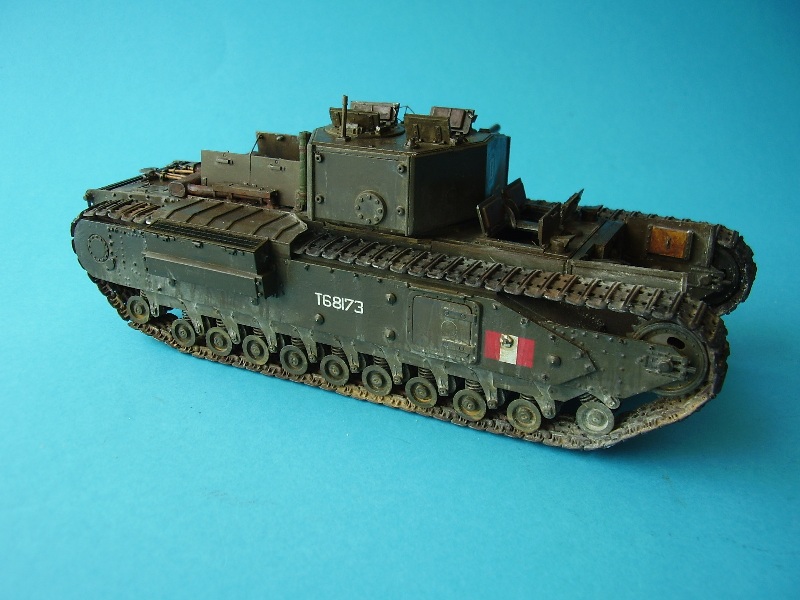
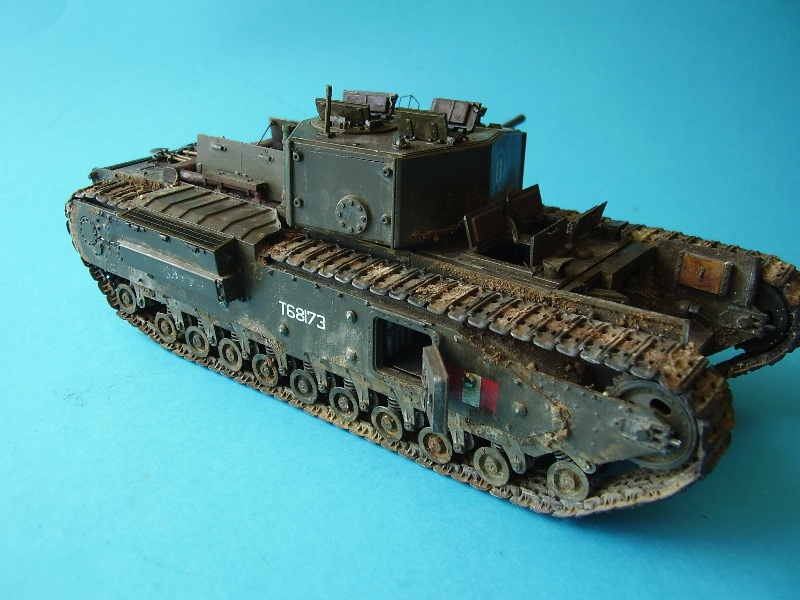
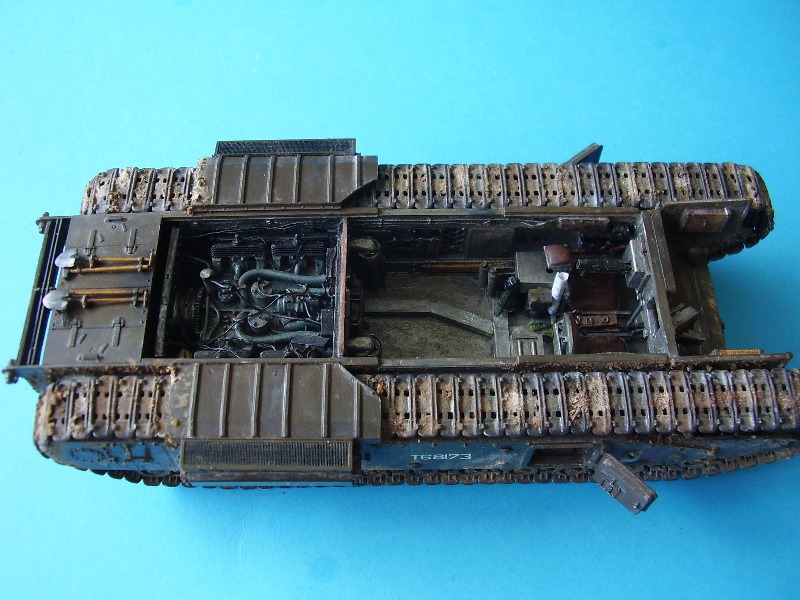
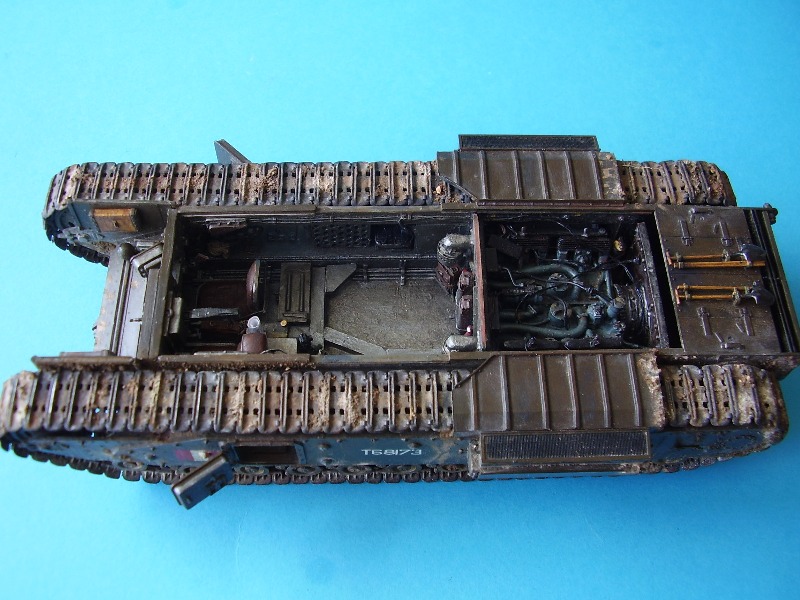
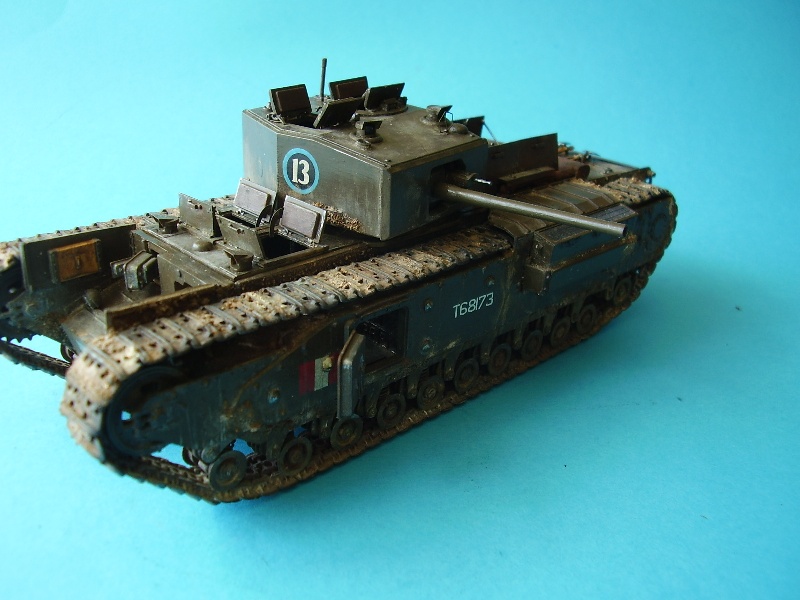
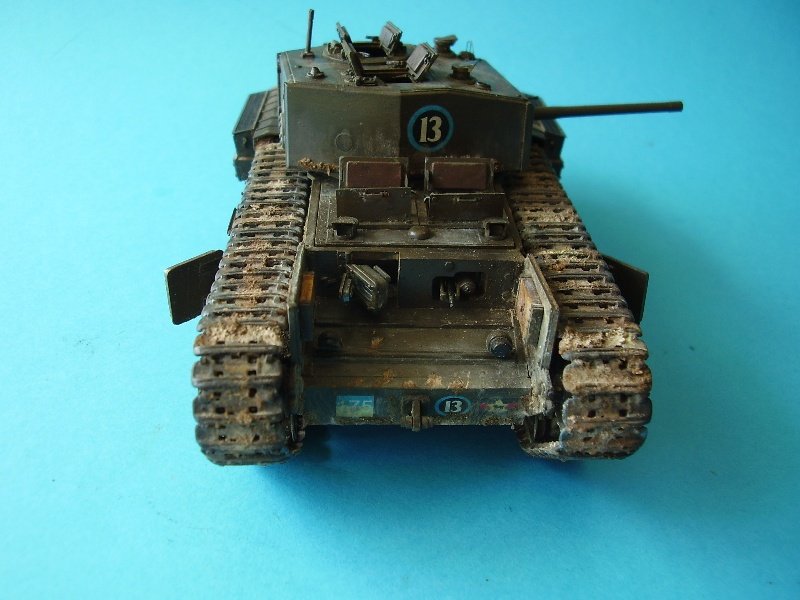
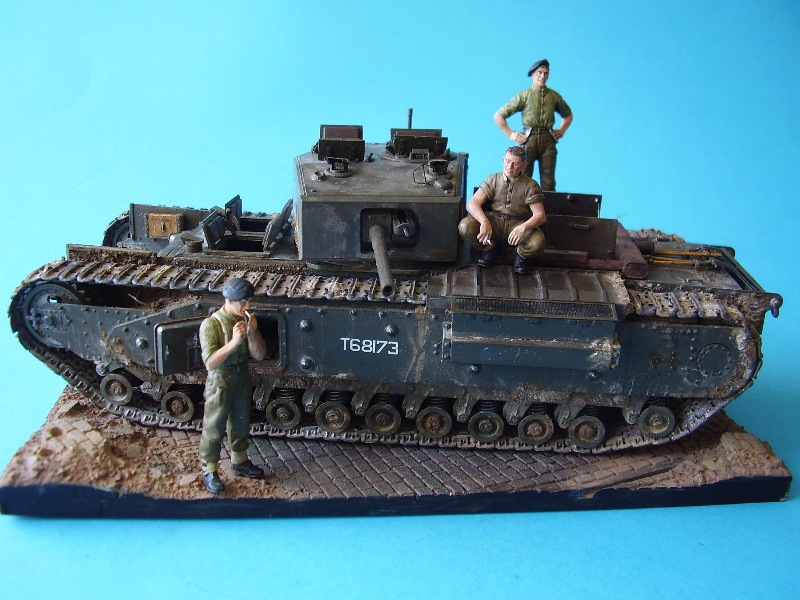
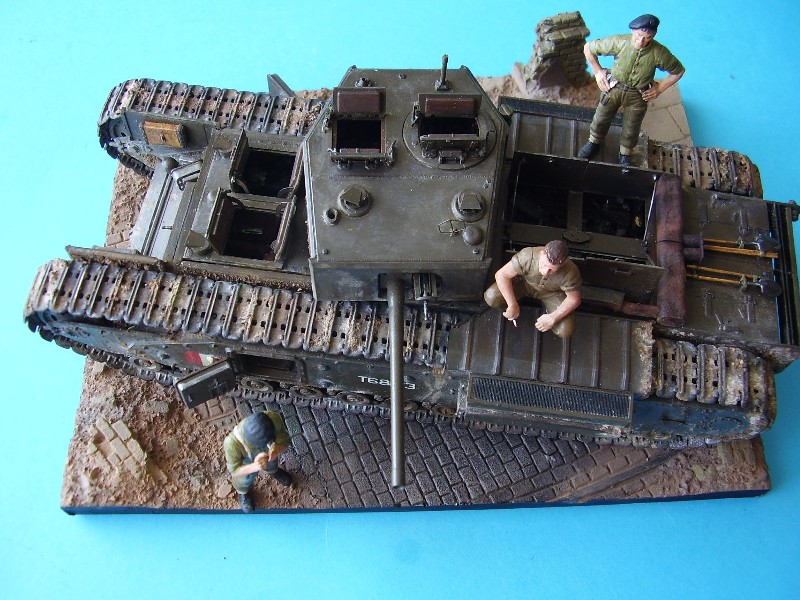
With all the main elements build then the fun part of painting the vehicle drew near. I finished adding the lower hull decals, I had already built 3 suitable crew figures using the excellent Ultracast tankers who had the right order of dress I was looking for. For the base colour I had previously mixed a couple of test paints, one based on Vallejo English Uniform (70921), Tamiya Khaki (XF49) and Dark Green (XF 61) and the other based on Tamiya Flat Earth (XF52) and Khaki (XF49), with Red Brown (XF64). The first option seemed closer to what I wanted so that was the one I used. I added numerous pin washed to the fine detail and some Klear to seal the who kit in. Additional washes of Mig Brown for Dark Green (P245) were used to dull things down a bit.
In added finely ground dried garden soil with PVA glue for mud effects and used a variety of Mig pigments to add contrasting tones to the mud.
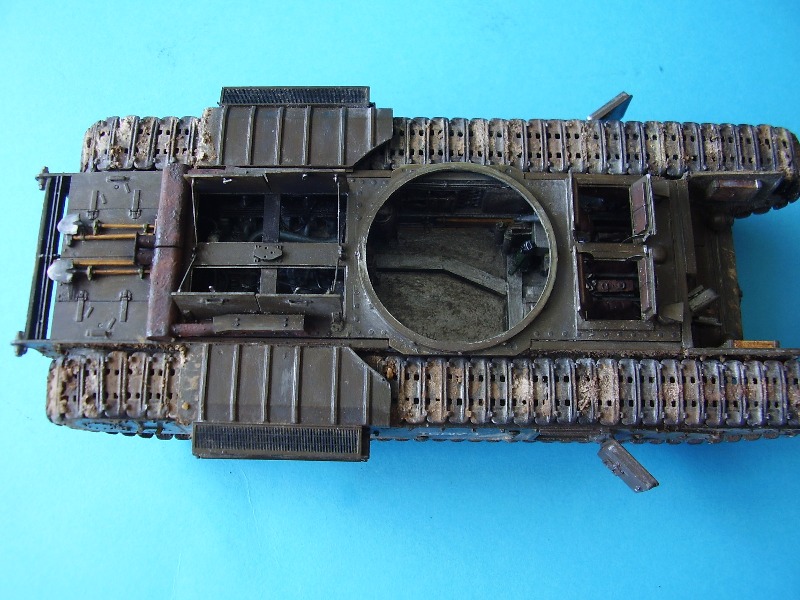
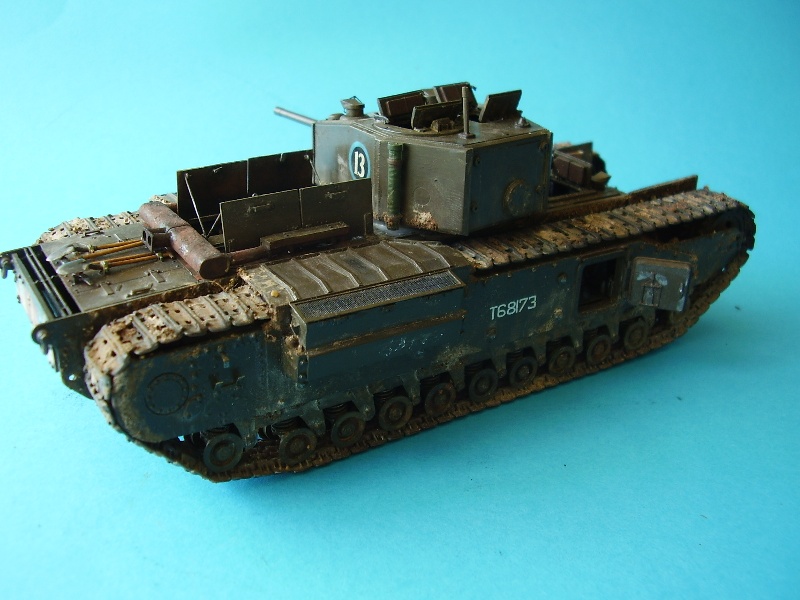
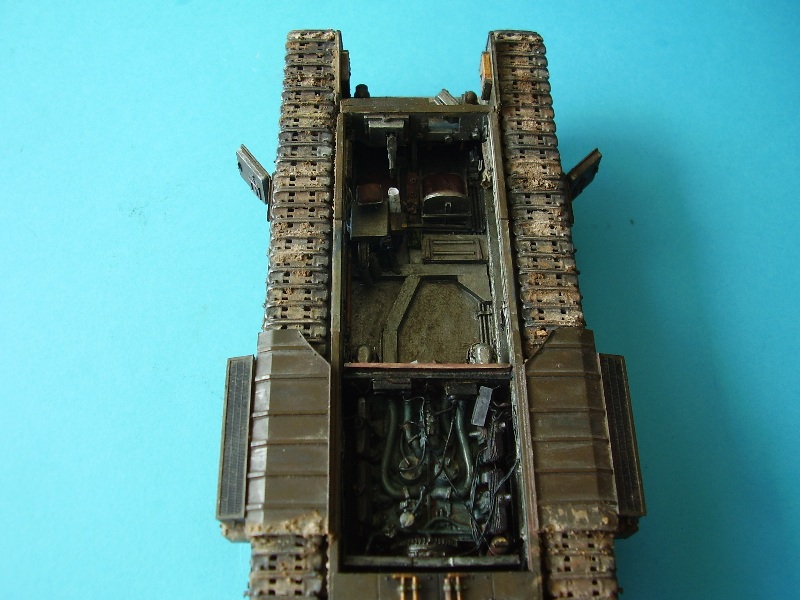
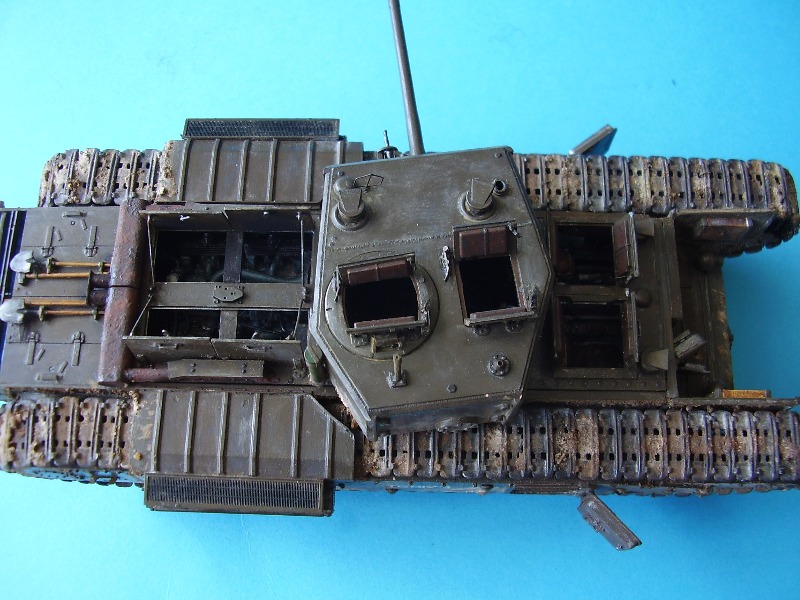
The last thing to get added were the open pannier side doors/hatches and the small bags that contained the wireless harness and headphones. You can hang these form the side of the interior, I just placed mine where I though they might live and that more or less brings the build to where you see it now. I used a generic base from SB Models to take some photos on, but eventually the tank will end up in a grassy field type setting.
The only items not yet completed are the tow cables, I have left these off for now until the final layout arrangement is decided and I may well substitute picture wire for the kit provided thread.
Churchill Tank Project Live links
Conclusion
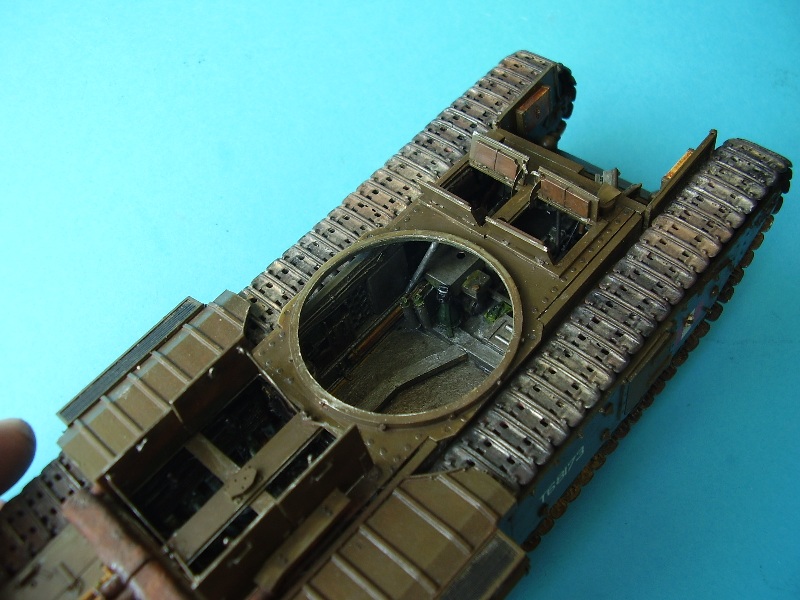
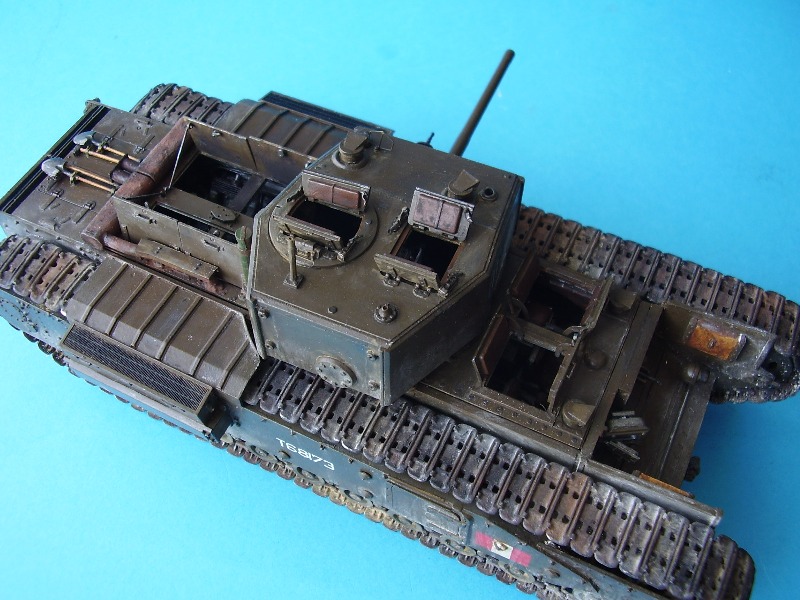
First I need to say a big thank you to a number of people who made the build possible by contributing their knowledge and advice: Chris Meddings for the kit and invaluable advice, Mike R for advice and support, and in general to all who contributed both support and comment during the blog. This was a very challenging and interesting build for me that provided a wealth of information and proved to a lot of fun. The AFV kit builds up well and following the instructions should allow you to produce a cracking kit, or as with this build use the bits you need and keep the rest in the spares box. If it does have a weakness then it's on the detail on the inside of the side hull dorrs, this is moulded on and coudl be better. The Resicast tracks and drop in engine also build up well and with minimal fuss, so two user friendly items there, both sets have excellent detail. Where errors have occurred they were usually made by me, and not everything is as accurate as I would have liked but its pretty close. No personal weapons are supplied with the conversion set and I added these in from the spares box. I choose to use lead wire for the wiring as I find it easier to work with. The interior build helped highlight some flaws in the first production run of the conversion set, but as this was Chriss first venture into becoming a resin manufacturer then I believe the blog helped him a lot in identifying improvements that could be and have been made to the set, so much kudos there for taking the time and effort to fix any problem areas. This one will test you skill level, give scope for being creative and certainly give a unique finish. The new tooled parts and PE for the side bins should make this set very enjoyable and I am aware that the instruction now come on CD disk and I believe have build pictures and a walkaround included. Would I build another, with the knowledge gained on this build the simple answer is: Yes. This was a hugh amount of fun, a challenge and a great learning experience. It is highly unlike that anyone other than Inside the Armour will bring out an interior set for the Churchill and there is scope for them to add to and develop this set. The addition of fuel tanks and a transmission would really compliment the interior set and the AFV Club Churchill. You can see the original blog warts and all here: Churchill Build Blog Live links Rererences: Mr Churchill's Tank by David Fletcher Churchill Infantry Tank 1941 - Osprey Publishing Modelling the Churchill Tank - Osprey Publishing Armour In Focus, Churchill Mk III Restoration Live linksChurchill Tank Project Live links


About the Author


FROM: ENGLAND - EAST ANGLIA, UNITED KINGDOM
Greying slightly, but young at heart. I've been teaching adults off and on for most of my life. Left the services in 85 and first started modelling in about 87 for a few years. Then I had a long spell when I didn't build anything (too busy) and really just got started again during the summer of ...
Comments

I just skimmed through this build feature and am already finding it helpful. Maybe this will be my next non-campaign project after I finish my MK IV? It's a good thing Darren likes British armour, or we may never get around to finishing some of these builds
SEP 01, 2010 - 05:31 PM

Looked like an interesting build Alan. Thanks for the article.
I may have to add another Churchill to my list by the looks of it - I'm beginning to love doing resin interiors.
SEP 01, 2010 - 11:07 PM

I've just started the MkIII Avre, hope i haven't already dropped a cod with how far i've progressed. Just about to read and find out....
Andy
SEP 02, 2010 - 01:22 AM


Hi Andy,
Here's a live link for the AVRE.
https://armorama.kitmaker.net//features/3168
Enjoy.
Al
SEP 04, 2010 - 12:00 AM
This kind of support and interaction is what makes this community great!
SEP 04, 2010 - 12:03 PM
Hi Jeremy,
Yes, there are a good bunch of helpful people around, they are what make most of my builds possible.
Al
OCT 01, 2010 - 11:17 PM
Copyright ©2021 by Alan McNeilly. Images and/or videos also by copyright holder unless otherwise noted. The views and opinions expressed herein are solely the views and opinions of the authors and/or contributors to this Web site and do not necessarily represent the views and/or opinions of Armorama, KitMaker Network, or Silver Star Enterrpises. All rights reserved. Originally published on: 2010-08-31 00:00:00. Unique Reads: 18992

WEB HOSTING BY


Copyright ©2021 Armorama and Kitmaker Network, a subsidiary of Silver Star Enterprises
All Rights Reserved. Please read our Conditions of Use and Privacy Policy.
All Rights Reserved. Please read our Conditions of Use and Privacy Policy.