1⁄24Rusting, Chipping and Weathering
47
Comments
let’s get started
At this point the hardest part for most will occur....the cut!!!
 Committing to actually cutting a perfectly good model is the hardest obstacle any modeler will encounter when building. My only advice is that first, anything can be fixed with enough plastic and glue and second is to just DO IT!! It gets easier. Before you know it you will want to cut apart that $70 Dragon kit and wreck something!!


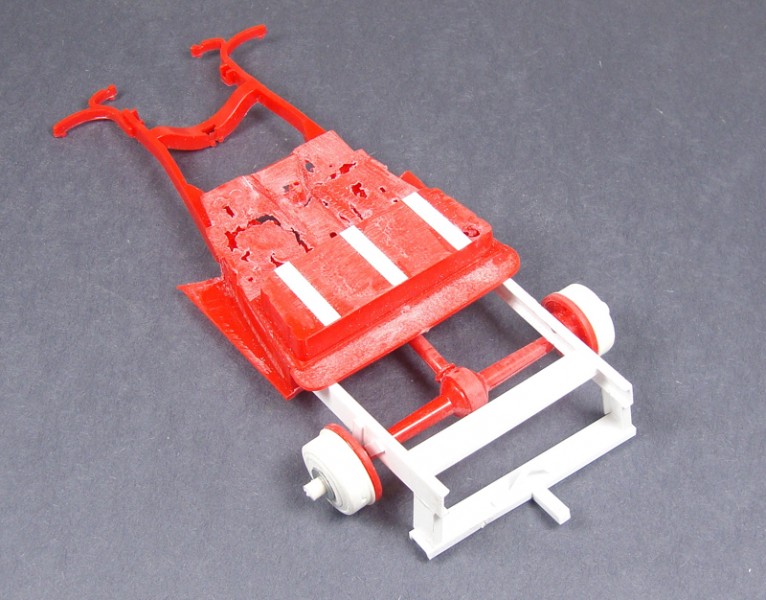
 After separating a few parts the building is soon to begin. We will need to add some damage to show rusting later on in the painting stages. I took my cordless Dremel and with an engraving tip ground various areas that would be damaged on the truck from being abandoned in the woods.
 The floor boards would be rotted out from sitting close to the ground, and using the picture as references for some other damages, I moved forward.
 At the moment I am attaching some parts instead of breaking them. I added the section of the chassis to the floorboards.
 I wanted to create the torn headliner that can be seen in one of the pictures. I cut apart a teabag and with a little PVA began gluing the headliner in place. Tea bags work great for this and even better for making tarps and blankets to add some realism to your builds.

 The Donkey...Lump...Motor, was next on the chopping block.
 In an effort to speed this up, I cut out the intake manifold section, drilled out the cylinders added some small bobbles and the motor was ready.
 In the pictures there are a couple of distinct features I will try and duplicate somewhat. You can see the open driver's side door with the hanging panel and the bars on the rear window.

 The rear window bars.
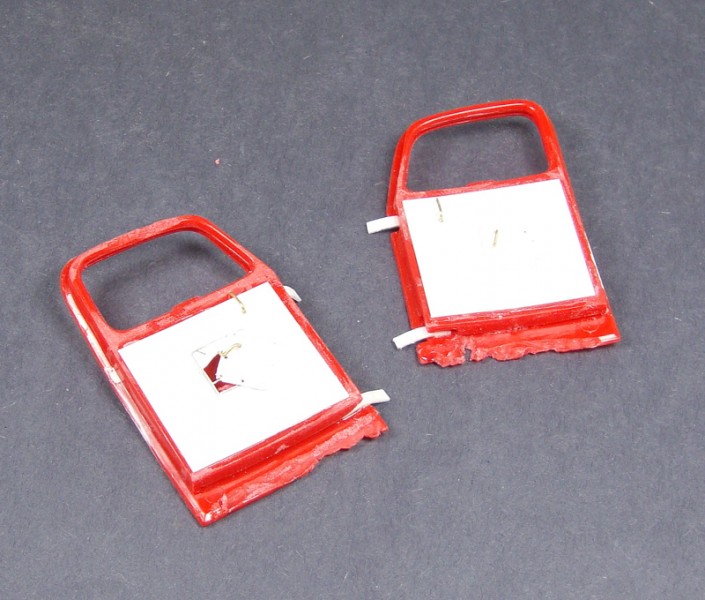
 Last, I began chopping away at the doors.

 Finally, for the moment, the homemade steel framework that was added and then someone attached the rear axle to it. A little scratch work and everything is pretty much ready for some primer.

Comments
I know it's been a while since the last post here, but I just wanted to let you know that I still refer people to your tutorial Todd and they have yet to give anything but very positive feedback on it regardless of what hobby discipline they come from.
JUN 25, 2013 - 05:08 AM
Thank you very much Jeremy! I am happy to see it useful for some. Most of the techniques are really simply to use they just take some practice to get the feel down. Even better, is when someone takes something and adapts their own way, maybe even coming up with newer techniques or just improving on the old ones. Circle of learning!! Thanks again!
JUN 25, 2013 - 07:55 AM
Hello Richard,
AK's Heavy Chipping Fluid works pretty much the same as other chipping medium layers:
1 - Make sure your base paint has been sealed with a clear coat.
2 - Spray on the chipping medium (Vallejo, AK, AMMO, Hair Spray...)and allow to dry (should only take a few minutes)
3 - Spray top coat of acrylic paint you desire to chip and allow to dry...not cure! 10 -15 minutes...enough to clean up your AB.
4 - Using a damp (Not Wet) with water brush apply a light single coat over the area you want to start in...typically no the entire model at once.
5 - Use any number of tools to aid in the removal of top coat paint to the desired effect you want; paint brushes, toothpicks, cotton swabs, etc
It is best to test things out on an old shelf queen until you get the hand of how to obtain different looks.
AUG 29, 2014 - 09:38 PM
I just spent a thoroughly enjoyable hour reading through this. Highly informative and well documented with word and pictures.
J
OCT 25, 2014 - 04:35 AM
I seemed to miss your post. Ace in Sept Richard. ..thanks
Thank you J. ..glad you enjoyed it!
OCT 25, 2014 - 05:35 AM
I realize this is an old thread. I was referred to it by a friend. There are several missing images on the first page. Is there a way you can edit the article and add the missing images?


AUG 15, 2015 - 11:22 PM
Thanks for the heads up on this Ivan! Not too sure what happened here as the pictures are loaded to the site's servers...I will dig a bit and see what I can turn up to correct his!
Cheers,
T
AUG 15, 2015 - 11:46 PM
Copyright ©2021 by Todd Michalak. Images and/or videos also by copyright holder unless otherwise noted. The views and opinions expressed herein are solely the views and opinions of the authors and/or contributors to this Web site and do not necessarily represent the views and/or opinions of Armorama, KitMaker Network, or Silver Star Enterrpises. All rights reserved. Originally published on: 2012-08-19 00:00:00. Unique Reads: 57192


