1⁄24Rusting, Chipping and Weathering
47
Comments
the base colors
This is one of my favorite stages...Priming!! There something really nice about the clean appearance of the primer. What a great feeling to start slinging some paint.


 Next up after the primer dries is laying down some base coat of rusting color. Any questions along the way on this, please feel free to ask. I will do my best to give, or get the answer!
It is time to apply a little base coat. This will be a rusty color that will show through in the form of scratches and chips and such.
Here I started out with just Tamiya Flat Brown.
 This is just a quick and easy rusty color straight out of the jar. Vallejo, Badger, LifeColor and countless other brands have this same color as well as specific "rust" colors. This is a preference call when choosing the color. Ask yourself if the rust needs to be lighter or darker, browner or more orange and so forth. This little planning will help later on when finishing your model.
 The rust base color is merely a stepping stone at this point. Most dark browns will work to start. I like to mix right in the paint cup on the airbrush or a separate jar, a drop or two of white or orange...or even a drop of each just to lighten the initial coat. This modulation is similar to how metal will fade and weather without paint.
 As you can see on the door and hood, the center of the panels are lightened. This is the same process as panel line shading with a black or dark grey and letting the darker section show to bring out the depth in the nooks and crannies.
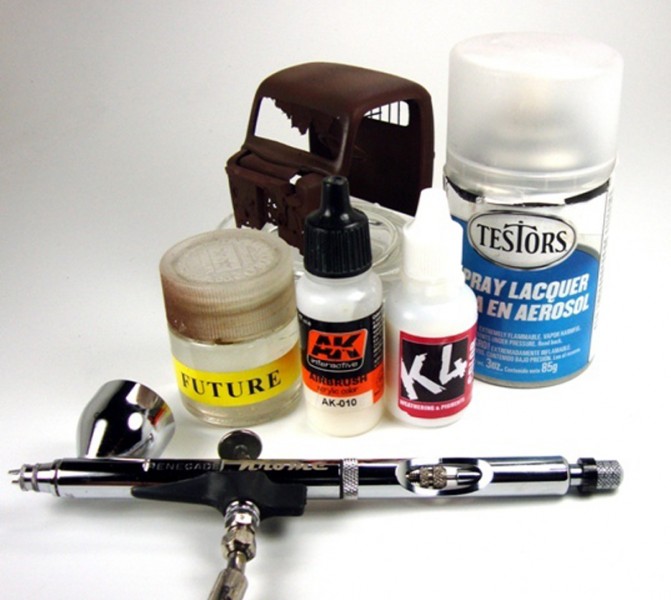
In not spending a bunch of time on the base colors, as these can still be manipulated even more in later stages, we can move on to some important steps in painting and chipping. First, after your base has dried completely, you will want to protect the work you have done with a clear coat.
 This is achieved many ways. Some like Future, others a matte finish and on and on. I like the old reliable Testor's in the rattle can. Whichever clear coat you choose, make sure it is fully cured before heading to the next stage.
 Comments
I know it's been a while since the last post here, but I just wanted to let you know that I still refer people to your tutorial Todd and they have yet to give anything but very positive feedback on it regardless of what hobby discipline they come from.
JUN 25, 2013 - 05:08 AM
Thank you very much Jeremy! I am happy to see it useful for some. Most of the techniques are really simply to use they just take some practice to get the feel down. Even better, is when someone takes something and adapts their own way, maybe even coming up with newer techniques or just improving on the old ones. Circle of learning!! Thanks again!
JUN 25, 2013 - 07:55 AM
Hello Richard,
AK's Heavy Chipping Fluid works pretty much the same as other chipping medium layers:
1 - Make sure your base paint has been sealed with a clear coat.
2 - Spray on the chipping medium (Vallejo, AK, AMMO, Hair Spray...)and allow to dry (should only take a few minutes)
3 - Spray top coat of acrylic paint you desire to chip and allow to dry...not cure! 10 -15 minutes...enough to clean up your AB.
4 - Using a damp (Not Wet) with water brush apply a light single coat over the area you want to start in...typically no the entire model at once.
5 - Use any number of tools to aid in the removal of top coat paint to the desired effect you want; paint brushes, toothpicks, cotton swabs, etc
It is best to test things out on an old shelf queen until you get the hand of how to obtain different looks.
AUG 29, 2014 - 09:38 PM
I just spent a thoroughly enjoyable hour reading through this. Highly informative and well documented with word and pictures.
J
OCT 25, 2014 - 04:35 AM
I seemed to miss your post. Ace in Sept Richard. ..thanks
Thank you J. ..glad you enjoyed it!
OCT 25, 2014 - 05:35 AM
I realize this is an old thread. I was referred to it by a friend. There are several missing images on the first page. Is there a way you can edit the article and add the missing images?


AUG 15, 2015 - 11:22 PM
Thanks for the heads up on this Ivan! Not too sure what happened here as the pictures are loaded to the site's servers...I will dig a bit and see what I can turn up to correct his!
Cheers,
T
AUG 15, 2015 - 11:46 PM
Copyright ©2021 by Todd Michalak. Images and/or videos also by copyright holder unless otherwise noted. The views and opinions expressed herein are solely the views and opinions of the authors and/or contributors to this Web site and do not necessarily represent the views and/or opinions of Armorama, KitMaker Network, or Silver Star Enterrpises. All rights reserved. Originally published on: 2012-08-19 00:00:00. Unique Reads: 57192


