1⁄35A Simple Diorama
24
Comments
Preparing the base
Now that I have my mdf cut to the proper dimensions I mark a border around the edge which is 10mm in from the outside edge. This will be the perimeter of the diorama materials. I then mark the rough locations of the diorama content. This image shows how the base is marked showing the position of the main components and where I will build up the different layers [figure 2].
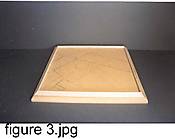
The next step is to put a border around the base using angled balsa wood. This will give the base a decorative look and allow me build the base to a solid edge (it also stops bits from falling out of the diorama). The edging trim is glued to the base using PVA glue [figure 3].
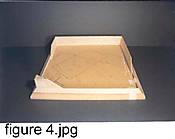
The next part to be added are the edges for any raised sections of the base. Like the border, this is done with balsa wood sheet and glued with PVA (white) glue. Again, make this a little taller than the actual height of the raised piece. Allow the glue on the edging trim to completely dry before starting the next stage. Use masking tape to hold the bevelled and raised edges in position while the glue dries [figure 4].
Raising the Ground
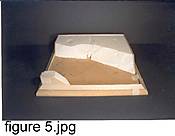
Now that the base has been prepared we need to introduce the raised areas of the ground work. This is done by using polystyrene ceiling tiles. These come in various thickness and can be shaped with a knife and secured using PVA glue. The polystyrene ceiling tile is cut to shape and glued to the base. The front edge is cut at an angle to give a sloped effect [figure 5].
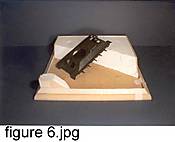
After the ceiling tile has been shaped and allowed to dry, it’s worth test fitting some of the components of the diorama to ensure it will still look as expected [figure 6].
Adding Features
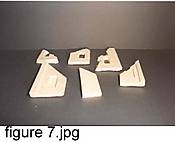
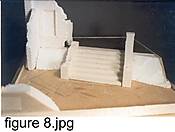
Now that the polystyrene has been added to the base to give the base some height and the models test fitted, we need to begin adding some features to the base. These can be from commercial companies or, in the case of plaster buildings, can be cast with the use of simple molds (this will form the basis of another article in the future) [figure 7]. As you begin to add features to the base you'll start to see the diorama coming together. A piece of matt board has been added to the back of the diorama, covering the polystyrene. This is to make the next stage a bit easier [figure 8].
Comments
Thanks Keith. I am now waiting in anticipation for the plaster mold article!!
AUG 16, 2005 - 08:03 PM
It is very nice to see this article again. This article helped me to form my basic skills for making a diorama once upon a time.
Thanks Keith for this great article.
AUG 24, 2005 - 01:00 AM
Hi Keith
You say in the article that teh raised ground is made of polystyrene ceiling tiles. However the only polystyrene ceiling tiles I can find are less than a centimetre thick!! Therefore I was wondering if either, do you stack lots on top of each other or do you use insulation blocks. Cheers. Nick
AUG 28, 2005 - 07:55 AM
i generally stack on top of ack other, as they are quite thin, it also easier if you wish to produce a slope as you can cut each individual tile slightly smaller to create the slope and it produces less mess
HTH
keith forsyth
AUG 28, 2005 - 08:24 AM
Fantastic! Awesome! This is all I can say about it!
Cheers and happy modelling!
Prato
AUG 28, 2005 - 09:37 AM
Hi Keith,
Well written and informative article and an excellent build.
Thanks for shaing.
Al
AUG 07, 2007 - 07:17 AM
Glad you resurrected this thread Alan and I hope a lot more members check this out it really is a classic.
AUG 07, 2007 - 07:31 AM
Copyright ©2021 by Keith Forsyth. Images and/or videos also by copyright holder unless otherwise noted. The views and opinions expressed herein are solely the views and opinions of the authors and/or contributors to this Web site and do not necessarily represent the views and/or opinions of Armorama, KitMaker Network, or Silver Star Enterrpises. All rights reserved. Originally published on: 2005-07-31 00:00:00. Unique Reads: 90057


