

1⁄35A Simple Diorama
24
Comments

Cobblestones
The next stage is to add cobblestones to areas where the road will be. The first thing that needs to be done is to cover areas where you want cobblestones with double sided sticky tape. This serves a double purpose (no pun intended ;-). First, it serves as a temporary fixative for the cobbles as you place them and second, it helps hold them in place as you apply the mortar between them [figure 9].
After the areas have been covered with double sided sticky tape, place lentils on the tape in rows. These will act as the base for your cobblestones [figure 10].
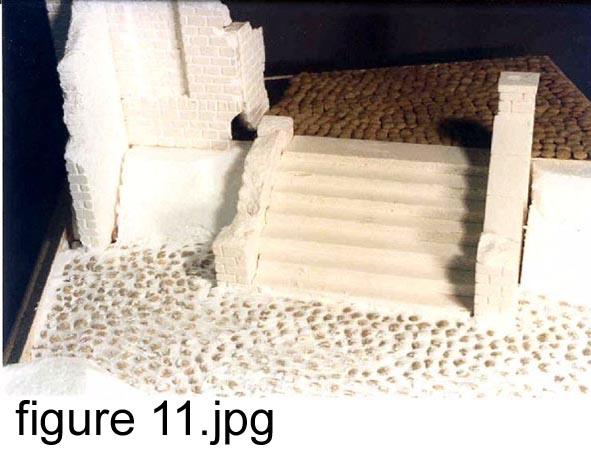
When you have covered the whole area with lentils youll need to mortar the joints and seal them into the base. For this I use ready mixed interior plaster (this plaster is used because it is relatively dry so it will not cause the lentils to swell). The plaster is placed onto the base and rubbed in between the lentils using your finger [figure 11].
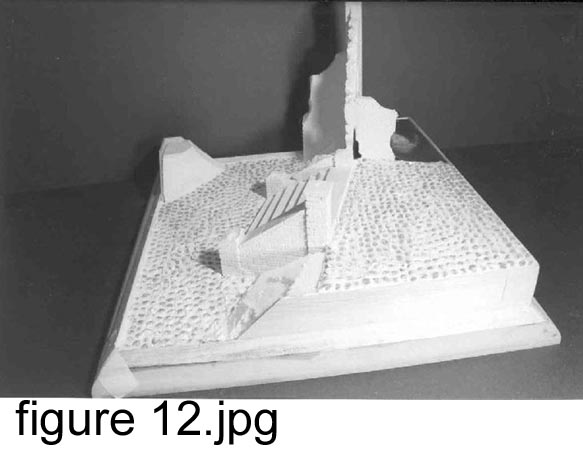
All the lentils need to be covered with the plaster and then left to dry. Remember to allow the tops of the lentils to show through; this will give the impression of cobble stones [figure 12].
Rubble and Debris
One of the things i enjoy most about building WWII dioramas is the addition of rubble to give the impression of destruction. Rubble is not that hard to do and makes your diorama especially convincing as long as you follow these easy steps.
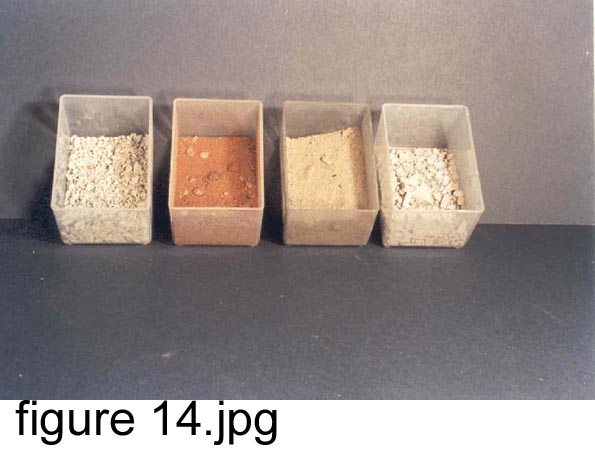
Destroyed or bombed buildings produce a lot of rubble, dust etc. These can easily be reproduced with sand, cat litter, resin bricks, dust, balsa wood and bits from the spares box. [figure 14]
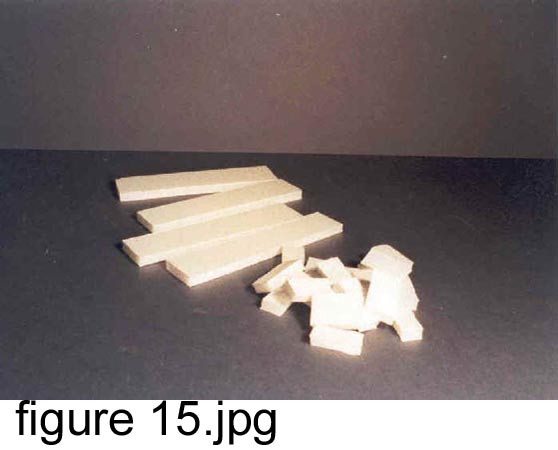
One of the first steps necessary to model debris convincingly is to create mounds of rubble around the diorama base. To do this I use strips of foam board that are then cut into smaller blocks. Foam board/card is basically polystyrene sandwiched between two pieces of poster card. It is available from most art stores [figure 15].
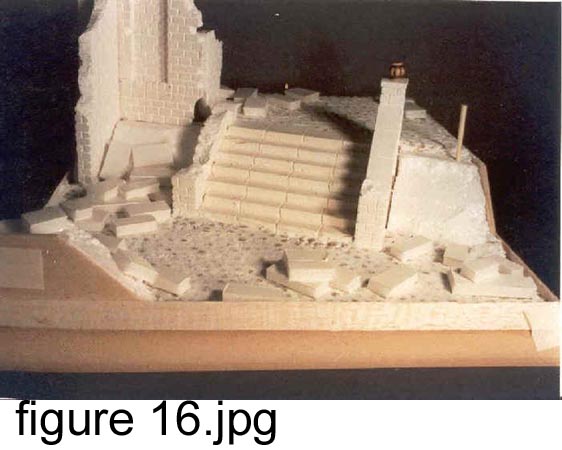
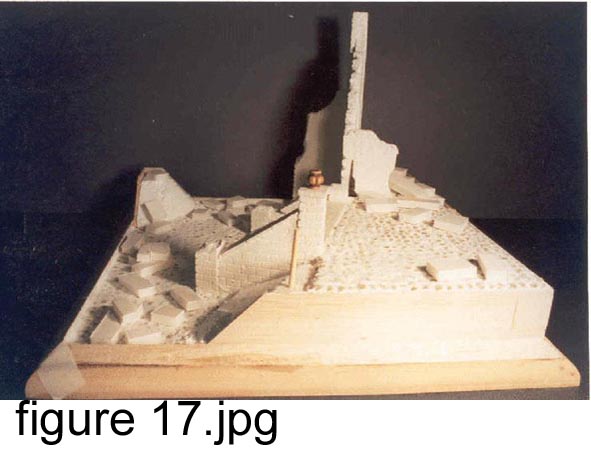
The blocks of foam board are glued in a random pattern around the base, with a larger build up around the buildings where larger piles of debris would naturally be found. [figure 16] [figure 17].
After the adhesive for the foam card blocks has set, the next stage is to give the rubble some basic shape. This is done by covering the foam card blocks with an interior plaster mix. For this I use the type that comes as a powder. Just add water to it and mix it so its like porridge. Don't worry if its a little lumpy.
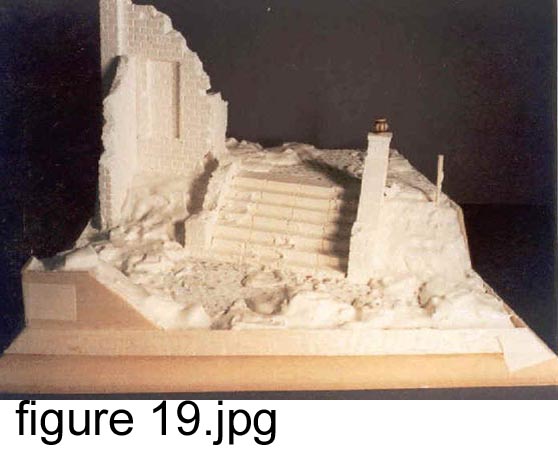
Now start to cover the foam blocks with this mix, ensuring you cover the whole mound. While you're at it, use this mix to cover the slopes and any other exposed areas. Allow the mixture to drift away from the foam card and place bits of the mix in open areas. This will give the impression of the rubble being thrown around during the explosion, adding to the realism of the scene. Pay particular attention to the areas around the buildings [figure 18] [figure 19] [figure 20].
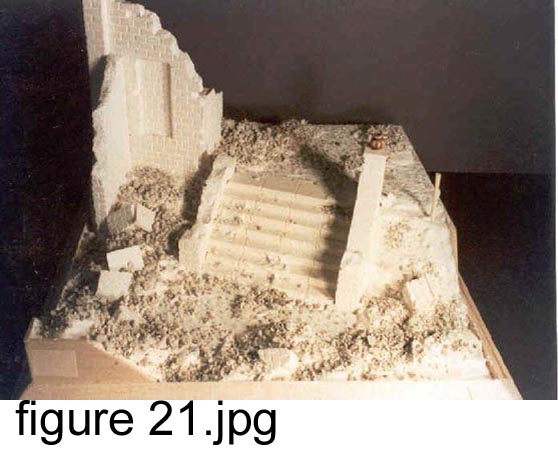
While the plaster mix is still wet, sprinkle the cat litter over the mounds and around the base using your finger to press it into the filler. At the same time push some larger plaster pieces into the mounds. This again will help the realism of the scene. Don't worry if the cat litter seems a little loose at this stage, it will be dealt with later [figure 21].
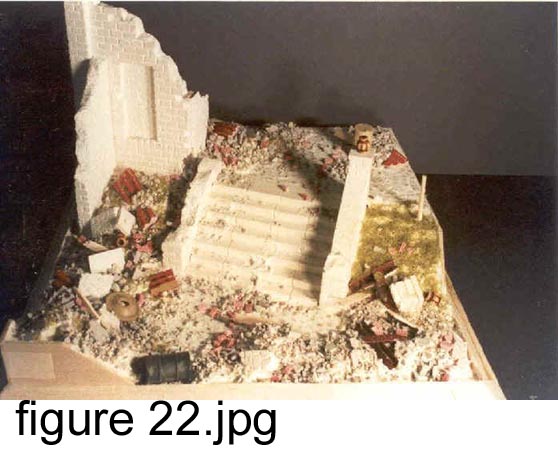
Now start to add the bricks and parts from the spares box. I have added some parts from the Custom Dioramics rubble packs as well as oil drums, broken boxes and a spare Panther tank wheel [figure 22].
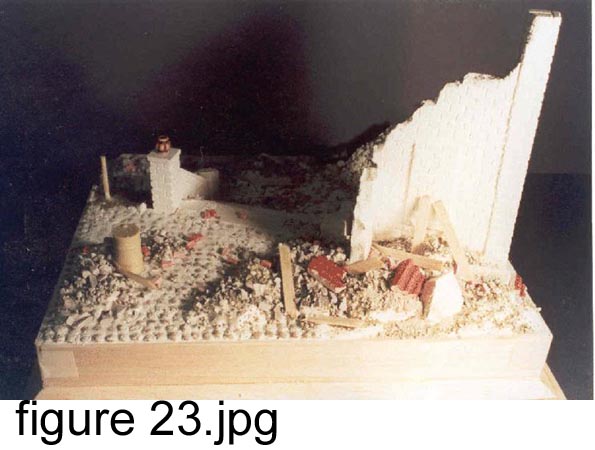
I have also added the static grass to the slope around the steps and some broken bits of balsa wood to represent damaged wood and lumber. The feature on the pillar at the top of the stairs is a bead from a local craft store [figure 23].
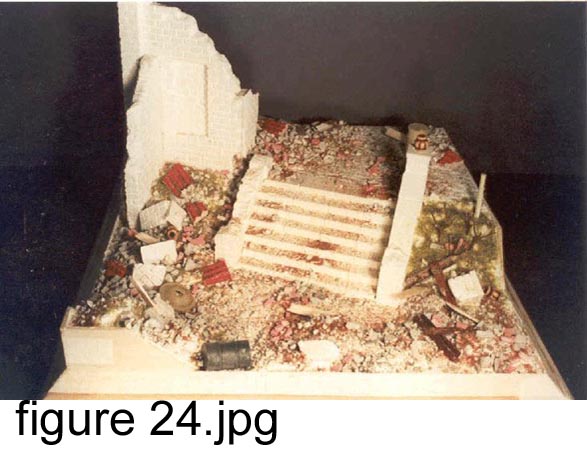
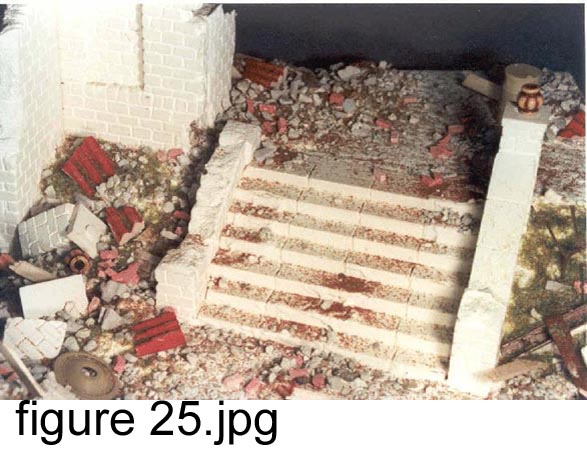
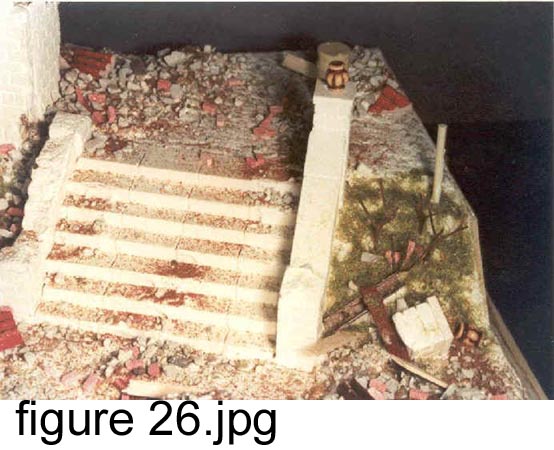
Now that we have the main parts of the rubble in place we need to add some texture. This will help with painting and dry-brushing later. To do this we sprinkle sand over the base, putting more sand around the mounds but allowing it to spread across the base [figure 24]. Blow the sand around the base. This will cause the sand settle naturally around the base. When you feel you need a little more sand STOP as you will find you now have plenty [figure 25]. Ensure the areas around the buildings have a good covering of sand and again allow this to spread around the base [figure 26]. Leave this all to dry for a day or so.
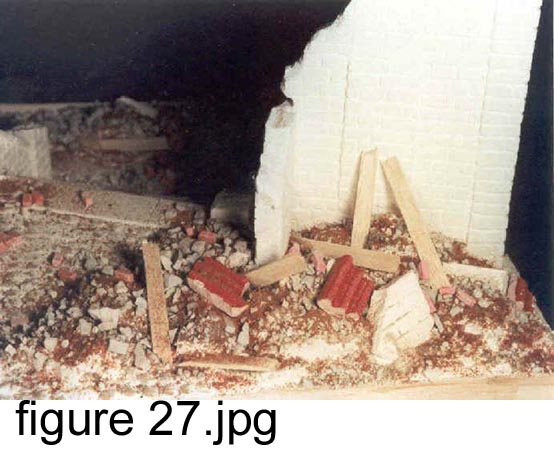
At this point I have added some small twigs to one of the slopes. This is because I will be adding a small hedge later that will use the twigs for support [figure 27].


About the Author


FROM: ENGLAND - WEST MIDLANDS, UNITED KINGDOM
Keith Forsyth (docdios) comes from the small town of Stafford in the United Kingdom. He began his interest in modeling at an early age with armor being the main focus. It was not until finding himself between jobs in 1995 that he really got hooked. It was during a shopping visit to another town when...
Comments

Thanks Keith. I am now waiting in anticipation for the plaster mold article!!
AUG 16, 2005 - 08:03 PM

It is very nice to see this article again. This article helped me to form my basic skills for making a diorama once upon a time.
Thanks Keith for this great article.
AUG 24, 2005 - 01:00 AM
Hi Keith
You say in the article that teh raised ground is made of polystyrene ceiling tiles. However the only polystyrene ceiling tiles I can find are less than a centimetre thick!! Therefore I was wondering if either, do you stack lots on top of each other or do you use insulation blocks. Cheers. Nick
AUG 28, 2005 - 07:55 AM

i generally stack on top of ack other, as they are quite thin, it also easier if you wish to produce a slope as you can cut each individual tile slightly smaller to create the slope and it produces less mess
HTH
keith forsyth
AUG 28, 2005 - 08:24 AM

Fantastic! Awesome! This is all I can say about it!
Cheers and happy modelling!
Prato
AUG 28, 2005 - 09:37 AM

Hi Keith,
Well written and informative article and an excellent build.
Thanks for shaing.
Al
AUG 07, 2007 - 07:17 AM

Glad you resurrected this thread Alan and I hope a lot more members check this out it really is a classic.
AUG 07, 2007 - 07:31 AM


Copyright ©2021 by Keith Forsyth. Images and/or videos also by copyright holder unless otherwise noted. The views and opinions expressed herein are solely the views and opinions of the authors and/or contributors to this Web site and do not necessarily represent the views and/or opinions of Armorama, KitMaker Network, or Silver Star Enterrpises. All rights reserved. Originally published on: 2005-07-31 00:00:00. Unique Reads: 90057

WEB HOSTING BY


Copyright ©2021 Armorama and Kitmaker Network, a subsidiary of Silver Star Enterprises
All Rights Reserved. Please read our Conditions of Use and Privacy Policy.
All Rights Reserved. Please read our Conditions of Use and Privacy Policy.