Singapore / 新加坡
Joined: November 12, 2007
KitMaker: 283 posts
Armorama: 177 posts
Posted: Thursday, November 12, 2009 - 11:30 PM UTC
Quoted Text
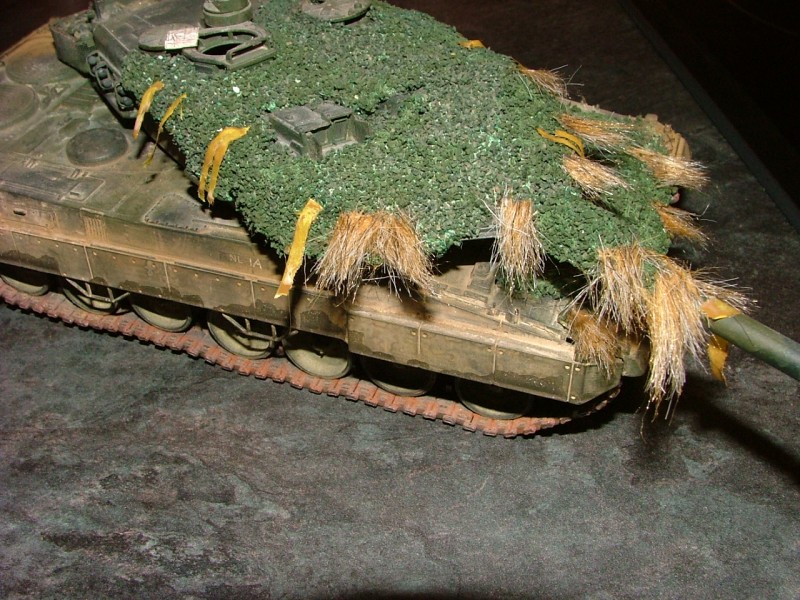
Just a quick 'in progress' shot. Been playing with this one for a few years now, I'll get there eventually.. 

:D while you're at it, add some daisies, a cockoo's nest full of little hatchlings and a setter dog which thinks it's the best when it comes to hunting cockoos... Nice work!
Btw, pardon my ignorance.... What does CCLEE stands for?
England - South West, United Kingdom
Joined: August 07, 2004
KitMaker: 6,391 posts
Armorama: 4,258 posts
Posted: Thursday, November 12, 2009 - 11:47 PM UTC
CC LEE is a Chinees manufacterer. I bought it of ebay to try it out, but won't buy another one.

The early bird may catch the worm, but the second mouse gets the cheese...
Newfoundland, Canada
Joined: February 04, 2007
KitMaker: 473 posts
Armorama: 467 posts
Posted: Sunday, November 15, 2009 - 04:31 PM UTC
Got a little work done on these Loepards. I've decided to add all the extra storage on the Finnish version.

Heres the 2A4NO turret nearing the end.

Singapore / 新加坡
Joined: November 12, 2007
KitMaker: 283 posts
Armorama: 177 posts
Posted: Sunday, November 15, 2009 - 06:34 PM UTC
Hi Chris,
Awesome detailing, particularly the scratch-built box for the Finnish version!
Btw, I remembered that there are knobs (I think rubber stoppers for the doors) and probably some bolt details on the inner side walls in front of the sighting box (right turret cheek)- check references for a better idea.
On the small rectangular hatch just behind the commander's cupola, there's a handle as well. Just in case you missed it (I'm sure you are aware of it).
Also, I don't know if you can add it now, there is a prominent horizontal weld line just below the top edge of the side armor (where the smoke dischargers are being fitted). Since you've bothered to add all the important vertical welds missing from all the kit turrets, I wonder if you'd wish to cover this as well...
There is also a thin short strip of metal (almost lateral) on the large panel just rear of the loader's hatch. One tall knob detail right in the center of the strip, flanked by a washer and bolt on each side. Just in front of the strip there is a single bolt. All the bolts are of the same size as the surrounding ones on the large plate.
Thanks, Henk for the introduction - I think I remember them, they did release a range of equally toy-like T-55s right? I don't think I've a single kit of that brand name...
Cheers,
Lawrence
England - South West, United Kingdom
Joined: August 07, 2004
KitMaker: 6,391 posts
Armorama: 4,258 posts
Posted: Sunday, November 15, 2009 - 09:38 PM UTC
Awesome work on that stowage box Chris. Those latches are very slick. What did you use for the welded on anti slip wire?
Cheers
Henk
**edited because I have obviously not woken up yet... lol still, Finnish, Norwegian, it's close... ****
The early bird may catch the worm, but the second mouse gets the cheese...
Removed by original poster on 11/16/09 - 09:51:55 (GMT).
Removed by original poster on 11/16/09 - 20:26:33 (GMT).
Newfoundland, Canada
Joined: February 04, 2007
KitMaker: 473 posts
Armorama: 467 posts
Posted: Monday, November 16, 2009 - 08:28 AM UTC
Lawernce I did do that weld seam on the left,forgot it on the right I'll get it on there.
Henk I used some mesh from a etch set for the anti slip.
Newfoundland, Canada
Joined: February 04, 2007
KitMaker: 473 posts
Armorama: 467 posts
Posted: Friday, November 20, 2009 - 06:16 AM UTC
I have the turret on the 2A4NO complete here it is with primer on and fixes done.

Newfoundland, Canada
Joined: February 04, 2007
KitMaker: 473 posts
Armorama: 467 posts
Posted: Friday, November 20, 2009 - 01:13 PM UTC
Here's a update on the Finnish Leopard
The scratch build storage boxes. These are a resent addition to the Finnish Leos.


Texas, United States
Joined: March 05, 2003
KitMaker: 2,092 posts
Armorama: 1,607 posts
Posted: Friday, November 20, 2009 - 04:41 PM UTC
Thanks for all the progress photos with the Finnish details.
Paul
Newfoundland, Canada
Joined: February 04, 2007
KitMaker: 473 posts
Armorama: 467 posts
Posted: Saturday, November 21, 2009 - 02:53 AM UTC
Newfoundland, Canada
Joined: February 04, 2007
KitMaker: 473 posts
Armorama: 467 posts
Posted: Saturday, November 21, 2009 - 07:56 AM UTC
another pic

Newfoundland, Canada
Joined: February 04, 2007
KitMaker: 473 posts
Armorama: 467 posts
Posted: Monday, November 23, 2009 - 12:28 PM UTC
I painted the turret of the 2A4NO. I started with a dark green and will work in lighter tones .
Here's a few pic of my progress.


England - South West, United Kingdom
Joined: August 07, 2004
KitMaker: 6,391 posts
Armorama: 4,258 posts
Posted: Monday, November 23, 2009 - 01:03 PM UTC
Nice, very nice...

The early bird may catch the worm, but the second mouse gets the cheese...
Hong Kong S.A.R. / 繁體
Joined: May 18, 2008
KitMaker: 49 posts
Armorama: 48 posts
Posted: Monday, November 23, 2009 - 03:59 PM UTC
Excellent build, Chris! I like them most, esp when they come in pair!

Newfoundland, Canada
Joined: February 04, 2007
KitMaker: 473 posts
Armorama: 467 posts
Posted: Tuesday, November 24, 2009 - 07:46 AM UTC
Thanks Guys. Alex I wanted to do both the Revell and HB kit so I figured why not together. I'm in resin overdose at this point in the builds.
Newfoundland, Canada
Joined: February 04, 2007
KitMaker: 473 posts
Armorama: 467 posts
Posted: Wednesday, November 25, 2009 - 02:57 PM UTC
I cracked out the Bronco tracks and first impressions great. So long AFV, those tracks are tough.

All cut from the sprue,this took about 20mins.

I'll use the Tenax to glue them.

Heres a few links put together

Some people wanted to know what I used for the anti slip on the 2A4NO. Here it is its Rust-oleum texture paint. Goes on clean and looks good. I plan to use it on the Finnish Leopard also.

England - South West, United Kingdom
Joined: August 07, 2004
KitMaker: 6,391 posts
Armorama: 4,258 posts
Posted: Wednesday, November 25, 2009 - 08:31 PM UTC
I see, these are not at all like the old HKCW links. These look not to bad to put together.
(The old HKCW links were like the real thing, small pins on the end of the pads, with small end connectors which had to be pushed over the pins... a nightmare. )
I may order a set of these.
Thanks for the pictures.

The early bird may catch the worm, but the second mouse gets the cheese...
Newfoundland, Canada
Joined: February 04, 2007
KitMaker: 473 posts
Armorama: 467 posts
Posted: Thursday, November 26, 2009 - 06:25 AM UTC
There good Henk I ordered mine from Lucky.
Illinois, United States
Joined: March 29, 2009
KitMaker: 1,135 posts
Armorama: 1,030 posts
Posted: Thursday, November 26, 2009 - 07:16 AM UTC
Want to build mine for me?

I cracked into mine as well. I will post pictures tonight or tomorrow. I'm knee deep in my Challenger but the Leopard has been started.
Currently taking back the fight to beat modeling ADD
Newfoundland, Canada
Joined: February 04, 2007
KitMaker: 473 posts
Armorama: 467 posts
Posted: Sunday, November 29, 2009 - 10:58 AM UTC
Here is a update of the 2A4NO I mounted the rear most side skirt up. I had to add the inside detail. This is one ugly duckling,with all the old paint and white resin.
I'm using Tamiya wheels. I thought at first I would have to use the Revell wheels due to the varing depth but it turns out the Tamiya wheels are sitting in the right place and the Revell wheels are too far in toward the Hull.


Newfoundland, Canada
Joined: February 04, 2007
KitMaker: 473 posts
Armorama: 467 posts
Posted: Wednesday, December 02, 2009 - 11:59 AM UTC
Moving right along with these Leopards
I have the rear deck done on one of the Leopards. I'm using a combination of parts from 3 Eduard etch sets, the perfect scale resin parts and some parts from a Tamiya kit. The cables are from the PSM kit,there not so hot I prefer the Eureka cables.


Hong Kong S.A.R. / 繁體
Joined: May 18, 2008
KitMaker: 49 posts
Armorama: 48 posts
Posted: Wednesday, December 02, 2009 - 03:30 PM UTC
delightful! absolutely lovely! keep it up, keep it up!

Washington, United States
Joined: October 13, 2007
KitMaker: 212 posts
Armorama: 208 posts
Posted: Wednesday, December 02, 2009 - 08:05 PM UTC
nice looking cat so far! can't wait to see the paint up.
Terry


