Dioramas: Water Effects
Water! A sometimes intimidating effect.
Hosted by Darren Baker
Spaceman 3
bajtur
Visit this Community
Slovenia
Joined: May 20, 2005
KitMaker: 105 posts
Armorama: 97 posts
Posted: Tuesday, December 22, 2009 - 10:19 PM UTC
Good progress JBA! You know, every time I follow your WIP's, the beginning always looks like pure chaos. I'm always scratching my head and wondering what are you doing. But then, which each step it's more and more clear and the scene slowly evolves into some new, interesting idea.
So, even if I don't know what's going on I'm still happy and excited because I know you are doing something special.

Primož
jba
Visit this Community
Rhone, France
Joined: November 04, 2005
KitMaker: 1,845 posts
Armorama: 777 posts
Posted: Thursday, December 24, 2009 - 04:58 AM UTC
the beginning looks like complete chaos uh? you're right here Primož, actually that's the complete opposite to a lot of diorama makers who begin with tidy models and end up doing litter boxes messy Verlinden like dioramas- So As I noticed you've got a neat T-70 on right now, stay concentrated and it will end up looking great, and something very special too

So here's what my cabin looks like after layers of Magic Sculp and another few layers of Tamiya mastic. As you may notice the right side of the windscreen is still destroyed.


Ah, some extra Tamiya putty and here we have a nice looking cabin -I also added the commander's hatch.


Merry Christmas to most, and Seasons Greetings for the others!


endrju007
Visit this Community
Wojewodztwo Podkarpackie, Poland
Joined: December 05, 2007
KitMaker: 2,435 posts
Armorama: 1,256 posts
Posted: Thursday, December 24, 2009 - 08:04 AM UTC
JB, it looks great as usually - I love the way you bring up clean build from initial chaos of PE parts and tons of plaster and putty .
Merry Christmas to you and your family!
Gundam-Mecha
Visit this Community
England - South East, United Kingdom
Joined: August 05, 2009
KitMaker: 1,019 posts
Armorama: 933 posts
Posted: Thursday, December 24, 2009 - 09:09 AM UTC
Nice update on the project.

I agree that the solution for the curved areas is a great idea. Once filled and sanded down they look great.

Thats good news about the figures, which ones will you be using?

Joyeux Noel!
jba
Visit this Community
Rhone, France
Joined: November 04, 2005
KitMaker: 1,845 posts
Armorama: 777 posts
Posted: Saturday, December 26, 2009 - 08:42 PM UTC
thanks Andrzej , I hope you and family got a great Christmas too! Not too busy time for diorama of course!
yes my desktop is a real mess when i work and I don't clean it as much as i should do, and some bits get stuck in the way everytime!

Hey Jon thanks too! My, it looks like you got great presents, something that will make the eyes around you bulge when you put it out of the pocket!
Actually, I planned using a regular British sailor, complete with dark blue suit and ribbons and stuff, but i thought he would looks too much like straight from a salon you see, too stylish. So i took a guy from an old Dragon British set, complete with ugly battledress. After all those boats were supposed to fetch from the water a number of people, including Canadians trying not to get drown after Dunkerque I suppose. (actually, a big number of those whalebacks were lost at Dunkerque)

Well, i am still modelling with gloves and 3 layers of jumpers in the garden shed, by other than that, I slowly begin to have better material to do dioramas: look at the nice Dremel I got second hand on Evil-bay, doesn't it look nice? and handy to cut plastic and mastic too!
So according to what the diorma should look like I had to cut in the length sense.

the underside of the whaleback, ugh! that's ugly!


it's time to make the form for the turret, first gluing the plastic..and then some MS..
How I regret NOT owning one of those wood and metal "tours", you know those things that get the piece of material spinning at high sped and you can make a shape out of it. Huge and *expensive*. But well.. MS does the trick quite well!


let's try to put the bit of boat on a wooden sheet..


and that's all for today folks
MrMox
Visit this Community
Aarhus, Denmark
Joined: July 18, 2003
KitMaker: 3,377 posts
Armorama: 1,088 posts
Posted: Saturday, December 26, 2009 - 10:14 PM UTC
Looking good J-B !

Less can do it:


If you use soft wood like balsa, a electric drill and a file can do the trick.

Cheers/Jan
slodder
Visit this Community
North Carolina, United States
Joined: February 22, 2002
KitMaker: 11,718 posts
Armorama: 7,138 posts
Posted: Sunday, December 27, 2009 - 12:57 AM UTC
Good update so far. It's starting to show signs of a JBA diorama.
Jan's right you can make a 'lathe' using an old drill, it's important to have a variable speed drill.
kaiserine
Visit this Community
Rhone, France
Joined: April 14, 2008
KitMaker: 383 posts
Armorama: 320 posts
Posted: Sunday, December 27, 2009 - 04:16 AM UTC
Great progress.
And nice little tool, seems very usefull indeed, I should get one.
I wonder how you always manage to get this particular shapes with Putty.
What's the secret to be regular without a "tour"?

Take care.
Gundam-Mecha
Visit this Community
England - South East, United Kingdom
Joined: August 05, 2009
KitMaker: 1,019 posts
Armorama: 933 posts
Posted: Sunday, December 27, 2009 - 05:55 AM UTC
Another great update!

Thats sounds like a good choice for the figure actually, I'm looking forward to seeing him built up and painted

That turret is looking very smooth all the same. Even with plasticard and Putty you got a solid result.
jba
Visit this Community
Rhone, France
Joined: November 04, 2005
KitMaker: 1,845 posts
Armorama: 777 posts
Posted: Sunday, December 27, 2009 - 09:10 PM UTC
hey Jan, that's a great suggestion, thanks for this, but stays the question: how do you actually hold the stuff?

both the Dremel and the bit of wood you have to "turn", I guess you have you have to buy some sort of support. i see

Dremel sells one, but it looks quite flimsy.

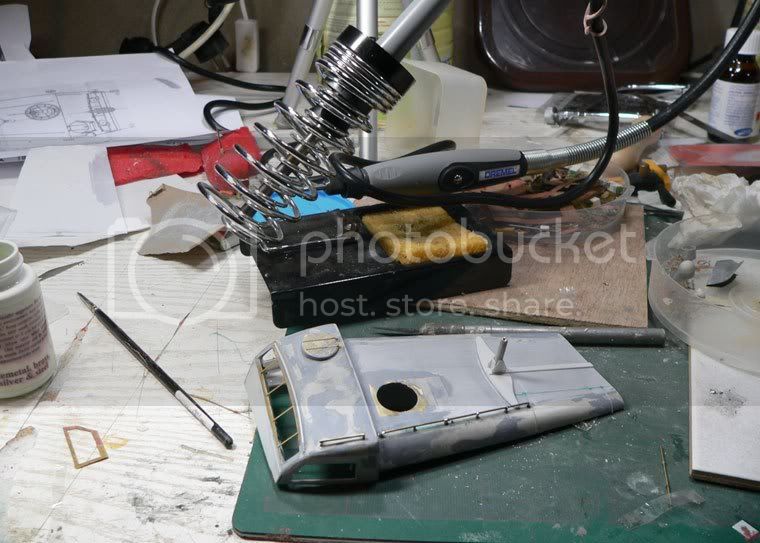
hey Scott thanks for this, yes it slowly begins to take shape, the really difficult part of this diorama will come

soon enough: I mean, the big turret..

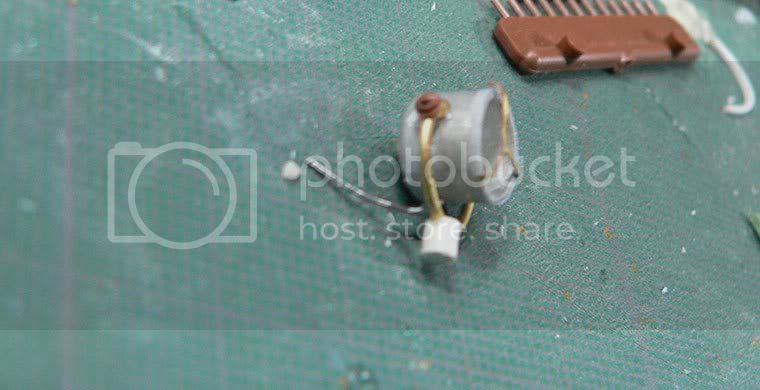
yes Alex, i wonder how I managed to do all those yeras without a Dremel kind of tool. Do you roll your cigarettes

Alex? I used to do, and it's exactly the same thing to roll those guns and here turret: p^roceed with very light

fingers. Actually I grease slightly a sheet of glass and roll the stuff gently until it's more or less the right

shape. then when it's thoroughly dry, I sand it until it's okay.

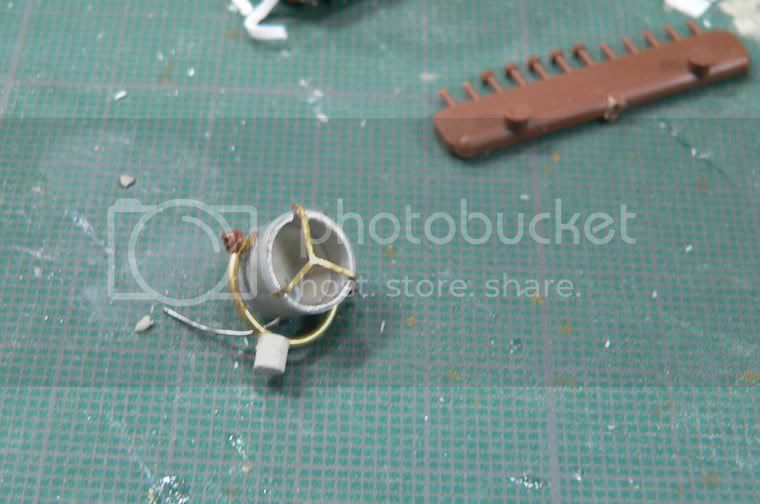
Thanks Jon, it looks alright like that, but I did one of my major mistakes at this time: this form is exactly the

same size as shown in the plans, which means that when i will vacuform the turret it will be oversized because of the

thickness of the plastic! I had to sand it quite a lot after those pics..

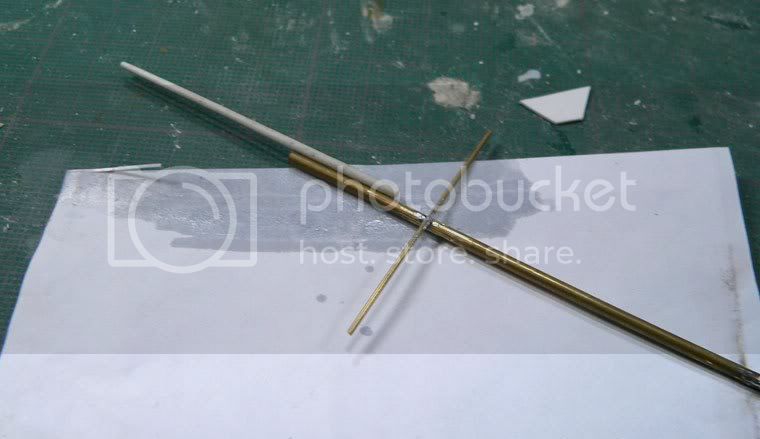
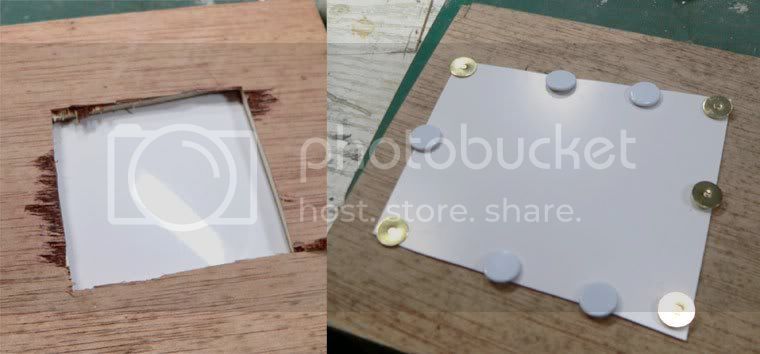
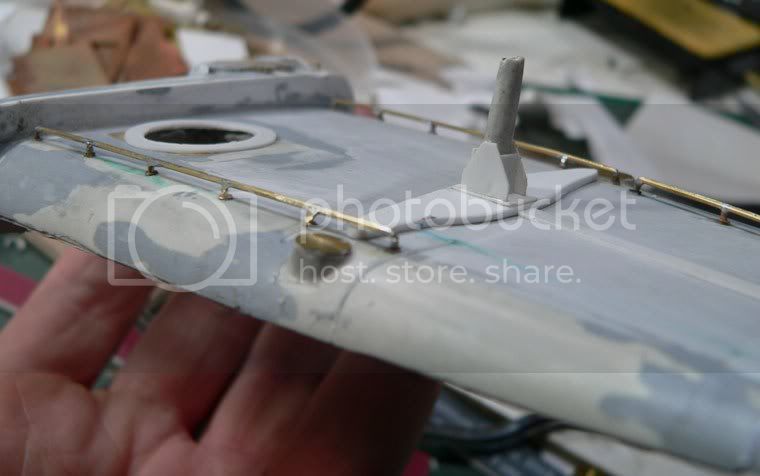
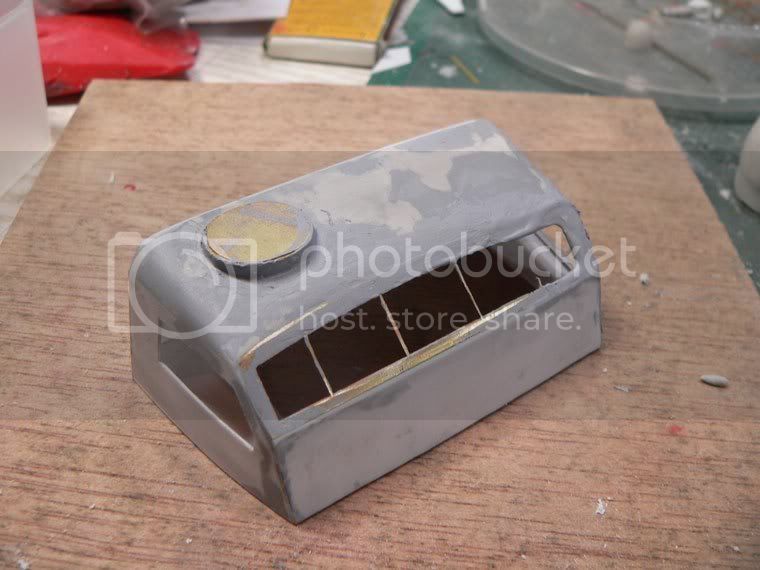
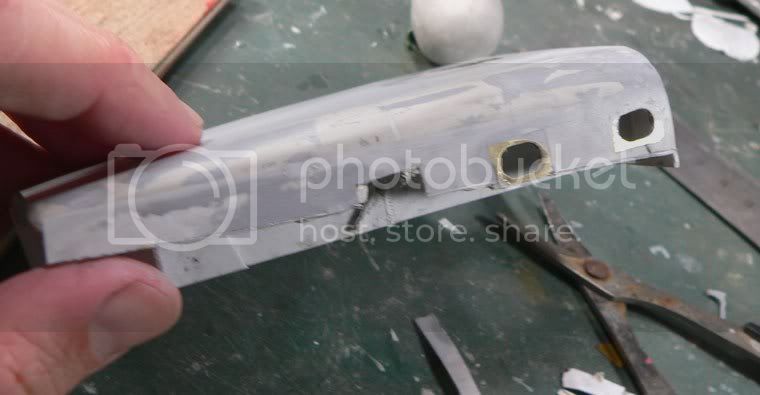
Now one important part of this build is the railings that you can find on each side of the whaleback -you also have some shorter ones on the cabin: on this picture you can see both the elements I used (brass sheet and small circles of photoetched brass left from a previous session) and some detailing job done on the hull itself.
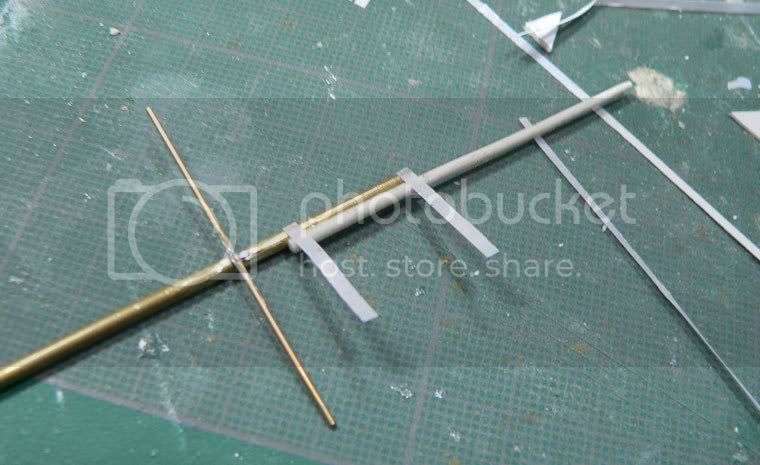
So first some holes in the plastic


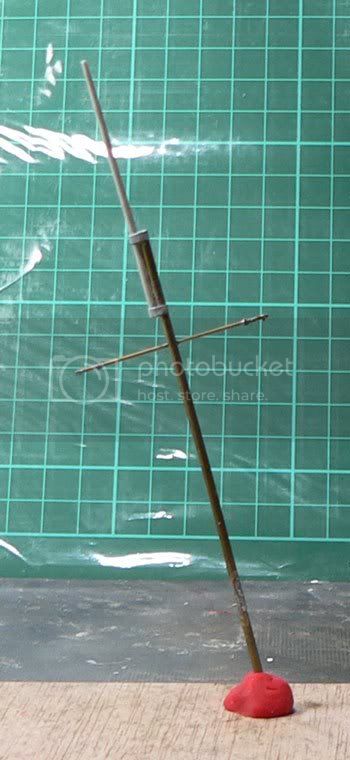
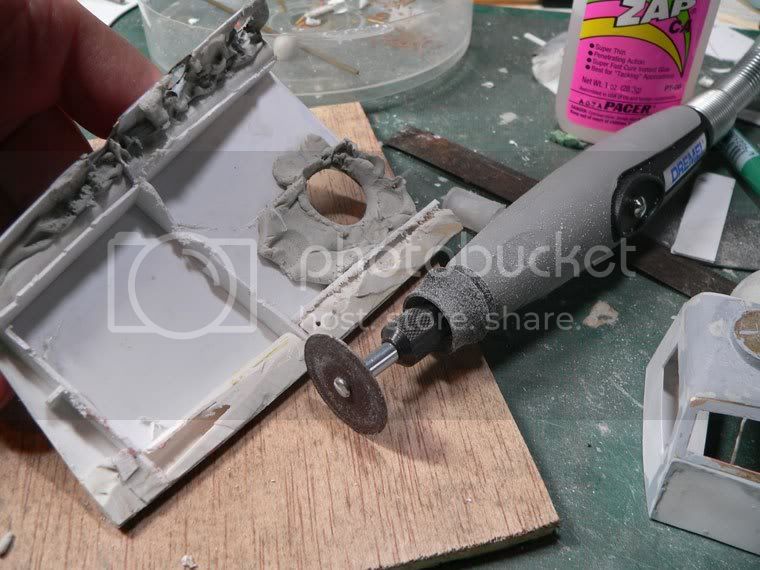
Then inserting some small brass sheets in the hole and try to solder the 2 at each end -i used the Dremel to get a smooth effect just like it was on the real boat.


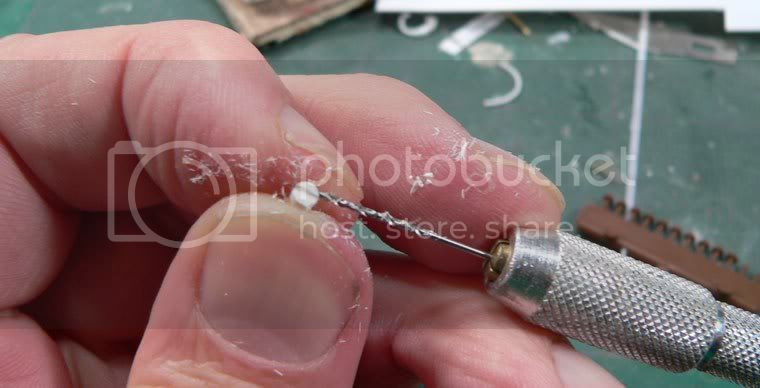
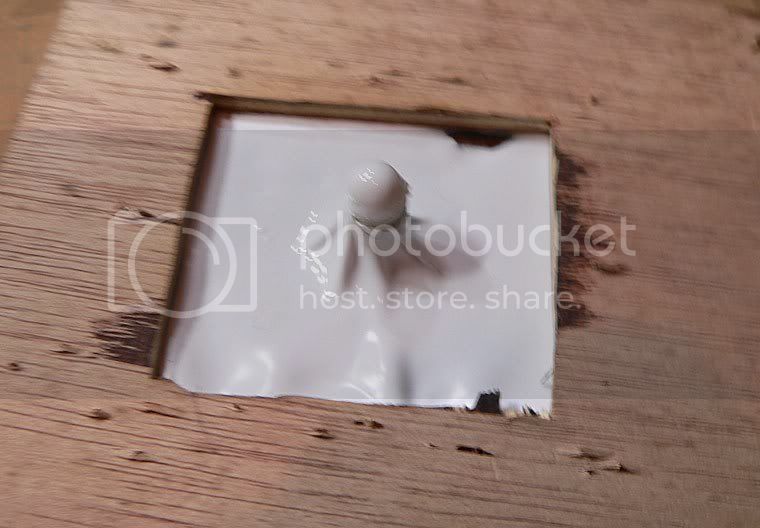
this view show the final result complete with the material I use: as small Weller iron, some Carrs flux and solder.
notice the railings on the cabin are done as well. No sweat really. the thing is to try to pin one drop of flux on each joint, so that it sort of absorbs the heat from the iron -this way you don't burn the plastic underside!
Dangeroo
#023
Visit this Community
Zurich, Switzerland
Joined: March 13, 2009
KitMaker: 2,058 posts
Armorama: 1,656 posts
Posted: Sunday, December 27, 2009 - 09:41 PM UTC

Quoted Text

You know, every time I follow your WIP's, the beginning always looks like pure chaos. I'm always scratching my head and wondering what are you doing. But then, which each step it's more and more clear and the scene slowly evolves into some new, interesting idea.


I was thinking the same... It looks really ugly for a while and then slowly comes together. Great work so far! I'm watching!

Cheerio!
tornado64
Visit this Community
England - North West, United Kingdom
Joined: August 15, 2009
KitMaker: 203 posts
Armorama: 119 posts
Posted: Sunday, December 27, 2009 - 10:24 PM UTC
not been on for a while ( concentrating on my oil painting aviation and portrait )

just checked through my refrence material ( old airfix magazine articles ) but have very little to help you j.b.a. ( although there are some raf launch snippets they mostly deal with vosper m.t.b's.

have to keep an eye on this one looks like it will be your usual hard to follow standard !!
roudeleiw
Visit this Community
Luxembourg
Joined: January 19, 2004
KitMaker: 2,406 posts
Armorama: 2,224 posts
Posted: Monday, December 28, 2009 - 02:45 AM UTC
I'm here watching with the same headshaking as everytime !

And now he has a Dremel! Watch out what he will all do with that!

LOL, have a nice transition to next year

Claude
jagd654
Visit this Community
Singapore / 新加坡
Joined: July 14, 2008
KitMaker: 296 posts
Armorama: 280 posts
Posted: Monday, December 28, 2009 - 07:53 PM UTC
JBA, my friend !
I'm "gone" for a few days and look what happens (referring to your fantastic progress ) !
Simply amazing, my friend; I am awestruck ! WELL DONE and looking forward to the next steps. Cheers !
Kenneth .
jba
Visit this Community
Rhone, France
Joined: November 04, 2005
KitMaker: 1,845 posts
Armorama: 777 posts
Posted: Monday, December 28, 2009 - 08:13 PM UTC
Aha thanks Stefan Once you know exactly where you want to go your work does not need to be tidy at any given point except towards the end of course

hey Paul nice to see you here, i know about Vospers and stuff. See there is this great book series by Conway on MTBs, so number one is about Elcos and Vospers, number 2 about fairmiles and the number 3 apparently due out in 2002 or something is about British Power boats ships.. errr, 2002 or something hey good luck with your regular painting - share a link!

Hey Claude, the transition is melted in CA glue and resin! thanks for the comments as usual...

Thanks Kenneth friend! hey today there won't be much tio show still..

Only the Aerial, but then there are a handful of techniques here, oh well, for what they're worth.
2 brass sheet painfully soldered together and a rolled MS lump for the upper part which is more conical. The problem is that it doesn't want to stay real straight and I should have embed a metal sheet in it oh well.

Some CA glue coated paper to tie everything together. When the whole is glued, some MS to fill the joints.

some of holed photoetch bits I used for the railing are soldered at each end of the horizontal bits and i call it finished
jagd654
Visit this Community
Singapore / 新加坡
Joined: July 14, 2008
KitMaker: 296 posts
Armorama: 280 posts
Posted: Tuesday, December 29, 2009 - 01:25 PM UTC
WOW, JBA !!!
Kenneth .
shopkin4
Visit this Community
Illinois, United States
Joined: March 29, 2009
KitMaker: 1,135 posts
Armorama: 1,030 posts
Posted: Tuesday, December 29, 2009 - 03:56 PM UTC
JBA I hope you know that you're one of the reasons for me scratching building my entire diorama. Although these wet effects scare me

I am really enjoying your progress and saying things don't need to be tidy really makes it easier on me as far as building. I'm a neat freak but now things are much better.

You are an inspiration to say the least
jba
Visit this Community
Rhone, France
Joined: November 04, 2005
KitMaker: 1,845 posts
Armorama: 777 posts
Posted: Wednesday, December 30, 2009 - 05:59 AM UTC
Thanks as usual Kenneth

Sean, I must say i am very happy i inspire you -honest! that's a great compliment. is it your Panzer dio that you are scratchbuilding?..Your wall looks pretty cool at the mo'!

Still on with details, now it's the searchlight that you can find near the cupola.
the work on the searchlight began with the bit of base. i had to use a drill and carve a rounded shape in it so that the metal holder of the searchlight could embed on it (okay, it will become clearer with subsequent pictures


Brass rod for the holder, aluminium tubing for the main body, rounded back done of Magic Sculp -And "gift" bolts on each sides -the triangular shape was a bit of my photoetch fret


shopkin4
Visit this Community
Illinois, United States
Joined: March 29, 2009
KitMaker: 1,135 posts
Armorama: 1,030 posts
Posted: Wednesday, December 30, 2009 - 06:35 AM UTC
No it's actually for my stryker. I'll be working on it again today! So more photos to come Just amazed at how great yours is turning out still.
jba
Visit this Community
Rhone, France
Joined: November 04, 2005
KitMaker: 1,845 posts
Armorama: 777 posts
Posted: Wednesday, December 30, 2009 - 11:50 PM UTC
Sean i will keep an eye on it!

So, i have been building a wooden vacuform machine using the general instructions provided by the wi-king of fun diorama making: northern guy Per Olav Lund. Some pierced wooden box with one big opening to plug the vacuum cleaner in it, and using a paint removal heating machine to soften the plastic.

So basically, you heat your plastic until it's soft, and you press it against the right sahe and it takes the form of the shape.


So first i used a sheet of 5mm thick wood that I cut a square into so that I wouldn't burn my fingers when heating it. I fix the plastic on it with pins

I realize I forgot to take pictures of both the machine and the shape I used to form those air intakes.. Anyway, here's the result.


Thanks heaven for magic Sculp, that's really amazing the amount of scratchbuilding you can do with this material. So here is the base of those air intakes, short ones, one each side of the hull. I used one of my photoetch round bits to put above each.


martyncrowther
Visit this Community
England - West Midlands, United Kingdom
Joined: September 12, 2007
KitMaker: 1,548 posts
Armorama: 1,407 posts
Posted: Thursday, December 31, 2009 - 12:55 AM UTC
Hi JBA, great scratch work, there is plenty of detail in there! Looking forward to more!
roudeleiw
Visit this Community
Luxembourg
Joined: January 19, 2004
KitMaker: 2,406 posts
Armorama: 2,224 posts
Posted: Thursday, December 31, 2009 - 02:25 AM UTC
Jean Bernard,
would an hairdryer be enough to soften the plastic?
I'm really impressed by the simplicity but efficacity of this vacuformer!
What site (thickness) is the plastic?

Claude


Gundam-Mecha
Visit this Community
England - South East, United Kingdom
Joined: August 05, 2009
KitMaker: 1,019 posts
Armorama: 933 posts
Posted: Thursday, December 31, 2009 - 07:09 AM UTC
JBA thanks for the tips on home made vacuum forming.

I have some clear styrene from plus model that needs vacuum forming or heating (I didn't realise when I ordered it as they described it as foil... but it isnt at all) and I've been stumped on ways of heating it.

I echo Claudes question, is a hair dryer enough to heat the plastic up?
grave_digger
Visit this Community
Clare, Ireland
Joined: December 30, 2008
KitMaker: 952 posts
Armorama: 834 posts
Posted: Thursday, December 31, 2009 - 07:26 AM UTC
Interesting work as usually mate, keep that going
Libor
Gorizont
Visit this Community
Sachsen, Germany
Joined: November 28, 2007
KitMaker: 1,462 posts
Armorama: 1,289 posts
Posted: Thursday, December 31, 2009 - 08:19 AM UTC
That´s really good!
I also had the plan to buy Magic-sculp for my needs, but now I use Revell´s "Plasto" and another kind of "magic". (an air-drying stuff)
But that´s not, what I´ve thought from it.

I tried to make a landscape of this, but the result reminded me at the dried grounds of Somalia and other countries. (that gave to me another idea for a dio)

Also with the vacuum-forming-process I have a friend who plans to make a model-kit with this technique.

greetings and a happy new year...
Soeren