Constructive Feedback
For in-progress or completed build photos. Give and get contructive feedback!
M4A3E8 ETO ~ Battlewagon
ProfessorP
Visit this Community
Minnesota, United States
Joined: February 20, 2007
KitMaker: 339 posts
Armorama: 325 posts
Posted: Monday, September 19, 2011 - 04:41 PM UTC
Wow! PanaVise AND a Grex? You got the right tools for the job. Dude, I'm totally comin' over there when it's time to spray mine!


Nice shade of OD. What paints are you using, Tamiya, MM, or Vallejo? How about a little play-by-play action on the spray job too? Gosh, we are a demanding bunch aren't we?

Lookin' good!
Dangeroo
#023
Visit this Community
Zurich, Switzerland
Joined: March 13, 2009
KitMaker: 2,058 posts
Armorama: 1,656 posts
Posted: Monday, September 19, 2011 - 10:48 PM UTC
Eric, that is a very impressive Easy 8, and the Dio looks great too! Very inspiring!

One comment: Your OD seems a bit too green though, maybe the camera? Aparently there was no green at all in OD.

Cheers!
Stefan
errains
#045
Visit this Community
South Carolina, United States
Joined: September 23, 2005
KitMaker: 362 posts
Armorama: 350 posts
Posted: Tuesday, September 20, 2011 - 01:12 PM UTC
Thanks gang for the kind words!
It's been a long time coming but I've finally got that paint going!

@Don my friend you are welcomed anytime. Maybe you can help me out with my figure painting as my skillz are...will...nonexistence shall we say. I do have a figure planed for the display so it will be interesting to see how it comes out.

I took small break to gather my strength for the finish. Truth be told I was just plan scared to start painting. But once I got my nerve up and some words of encouragement from an on-line mentor I just jumped in and got started.

So far all the paints I have used are Tamiya Acrylic Paints after I scored two large Tamiya X20 thinner jars...all the way from Australia...don't ask long story.

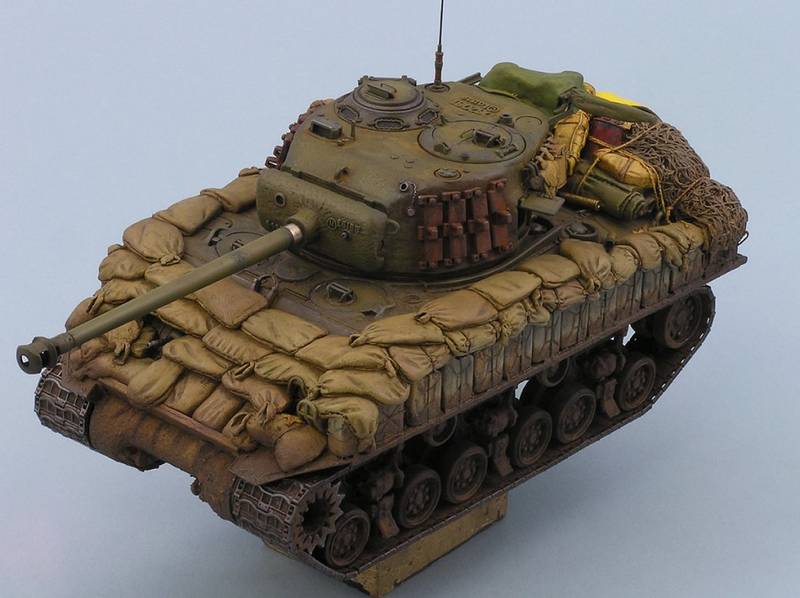
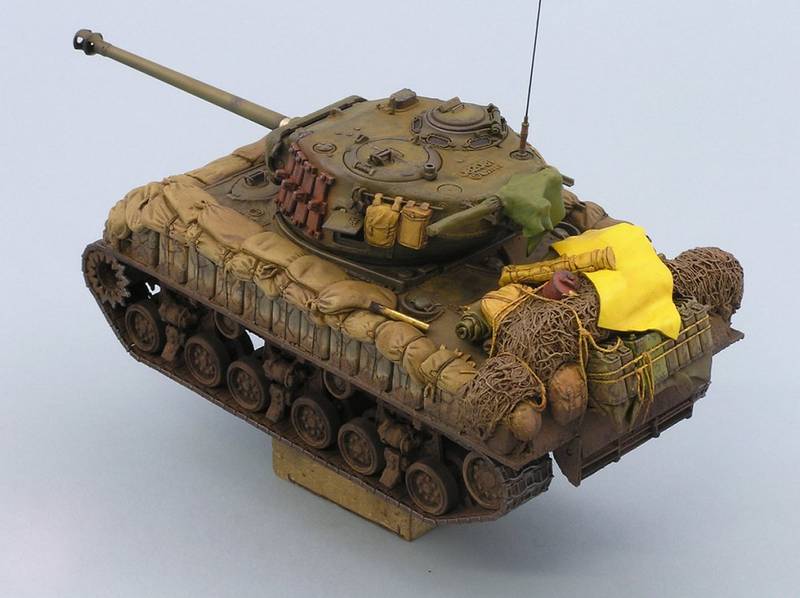
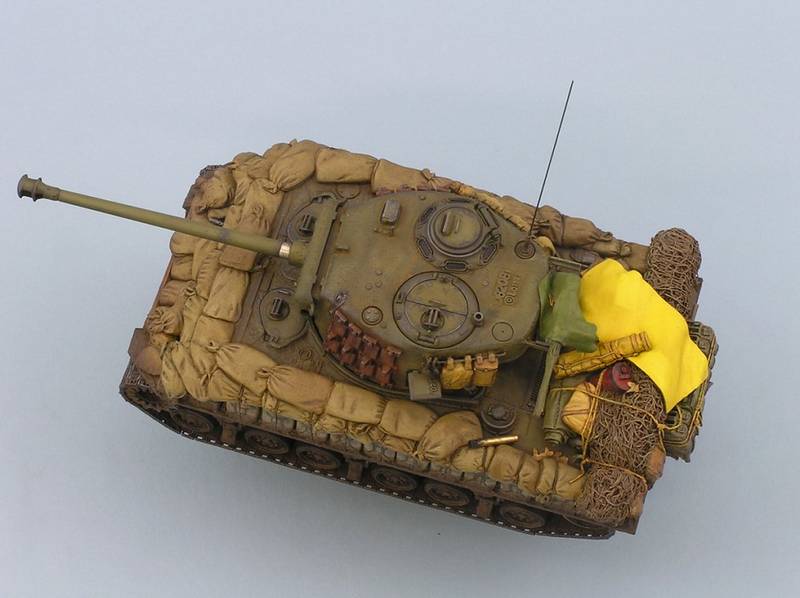
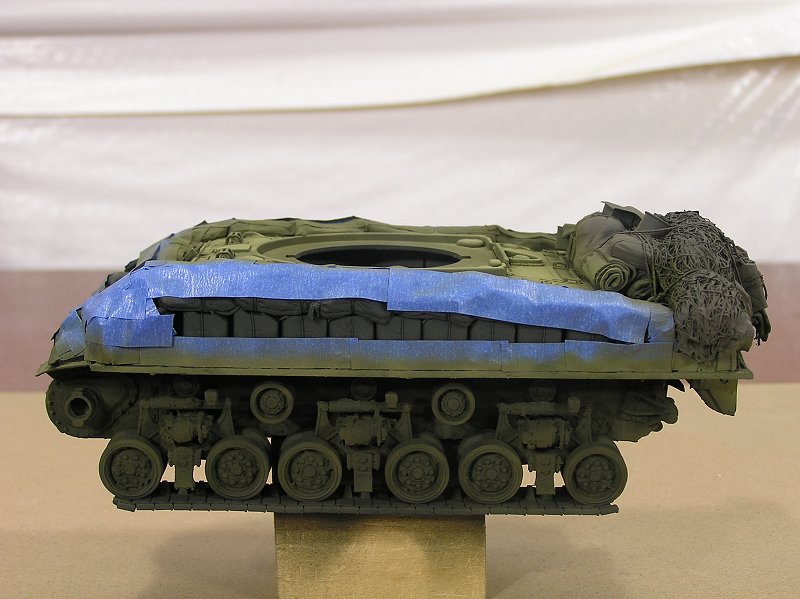
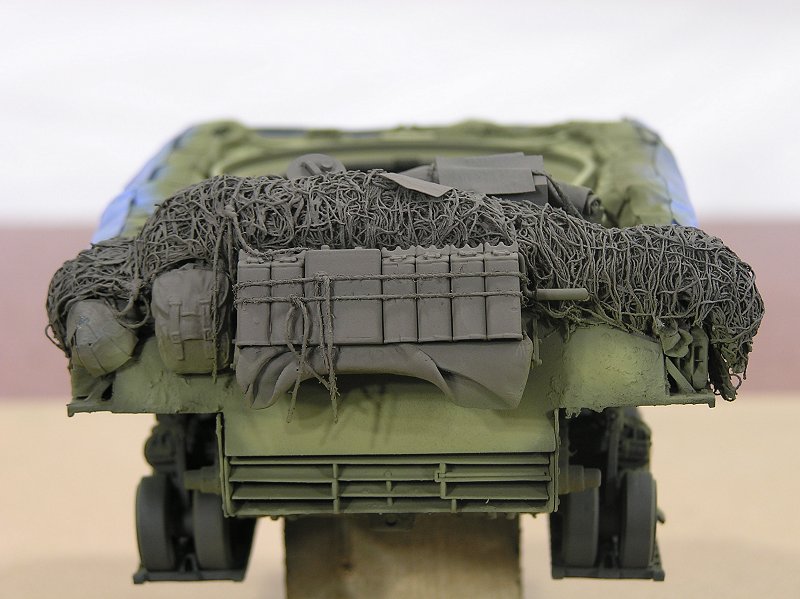
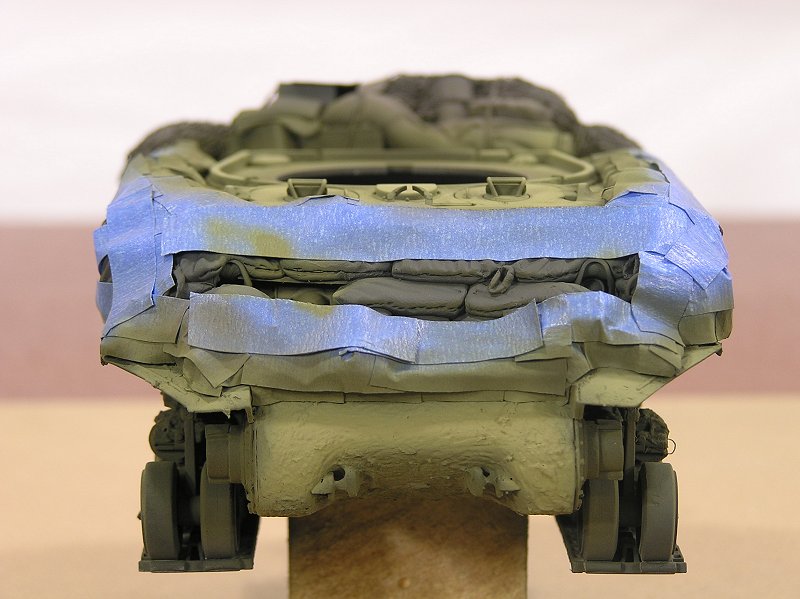
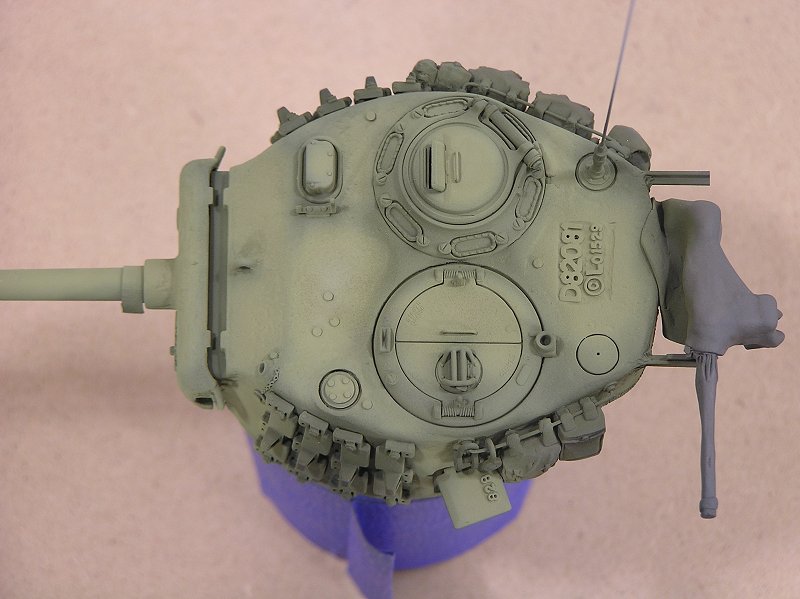
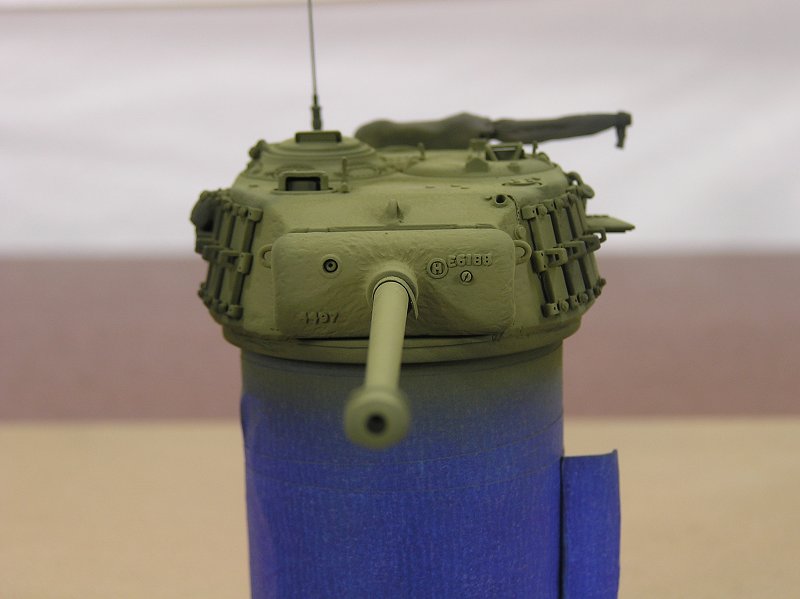
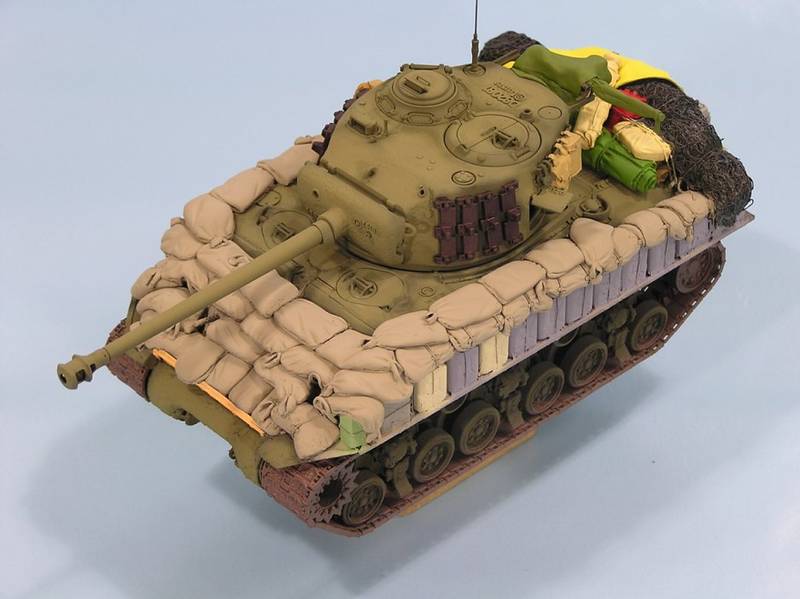
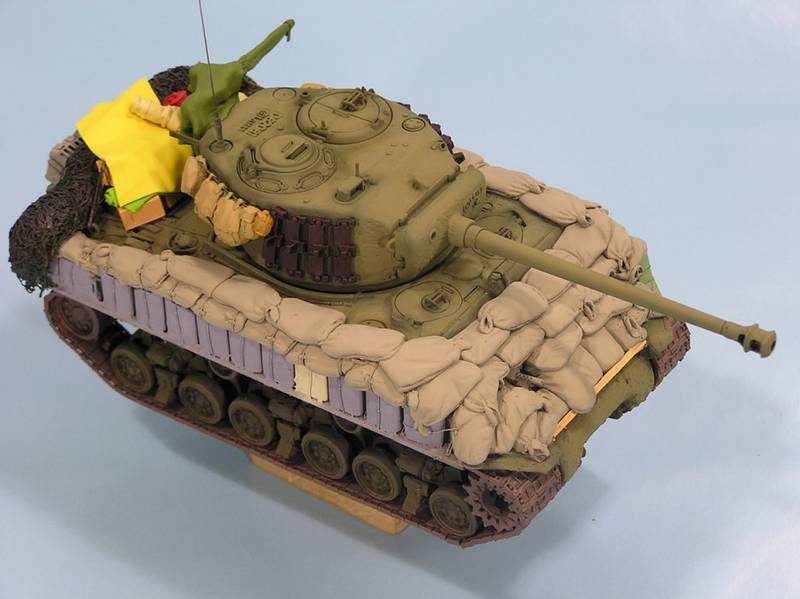
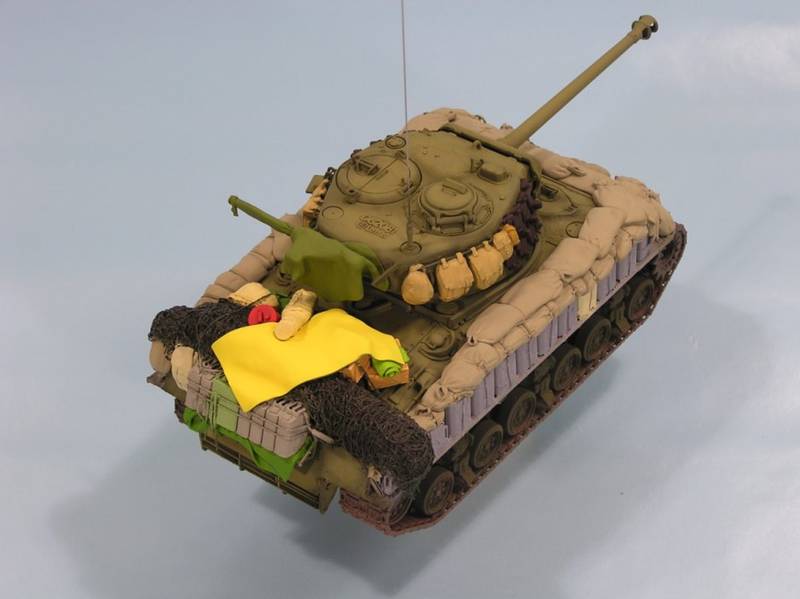
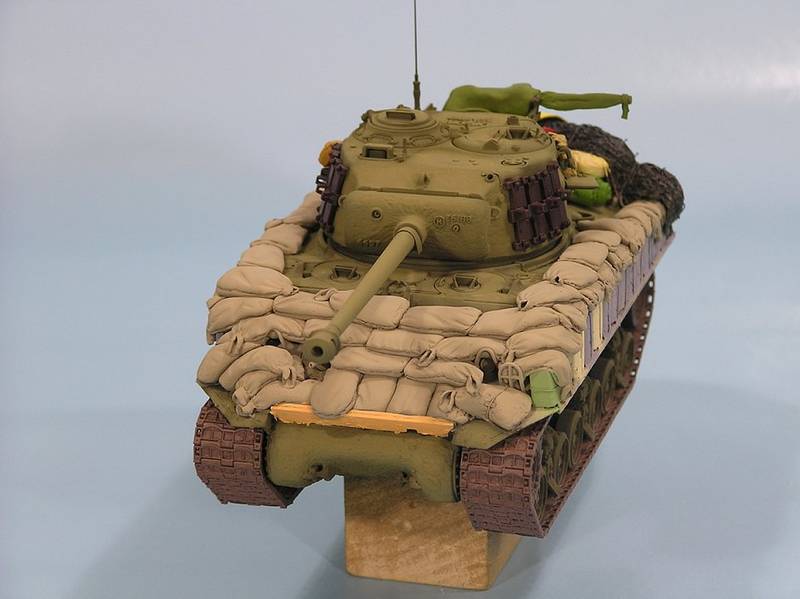
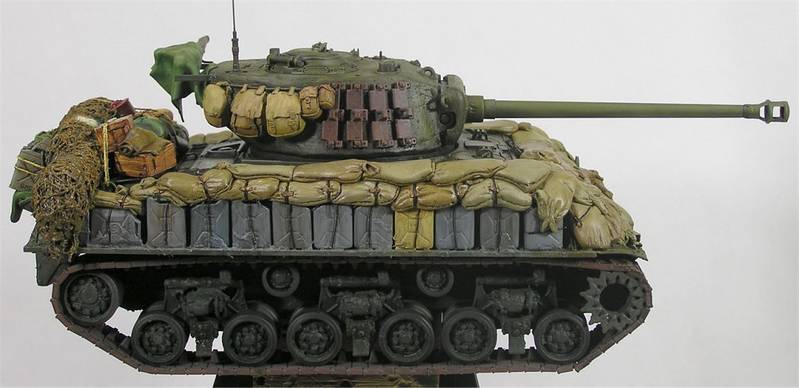
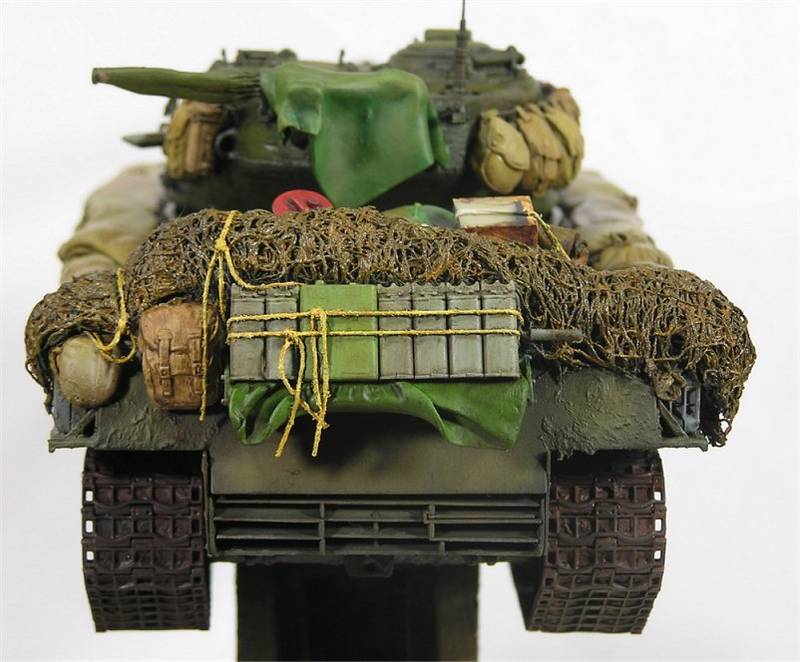
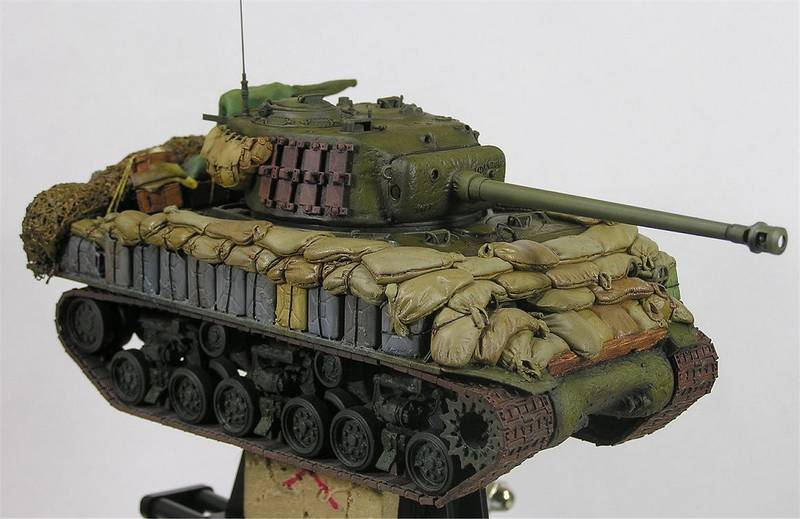
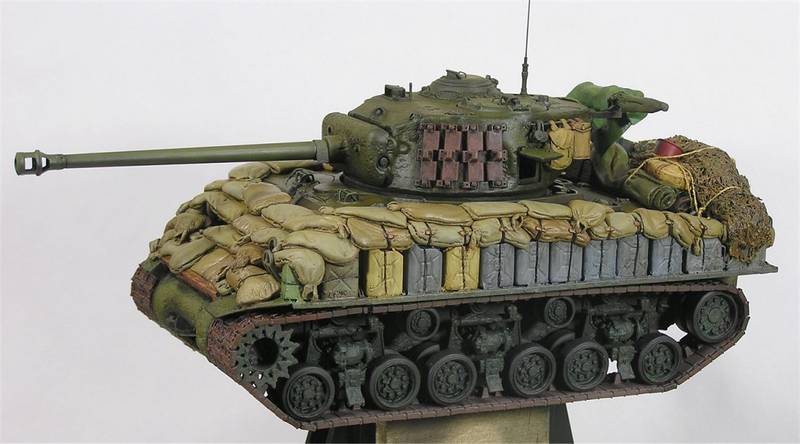
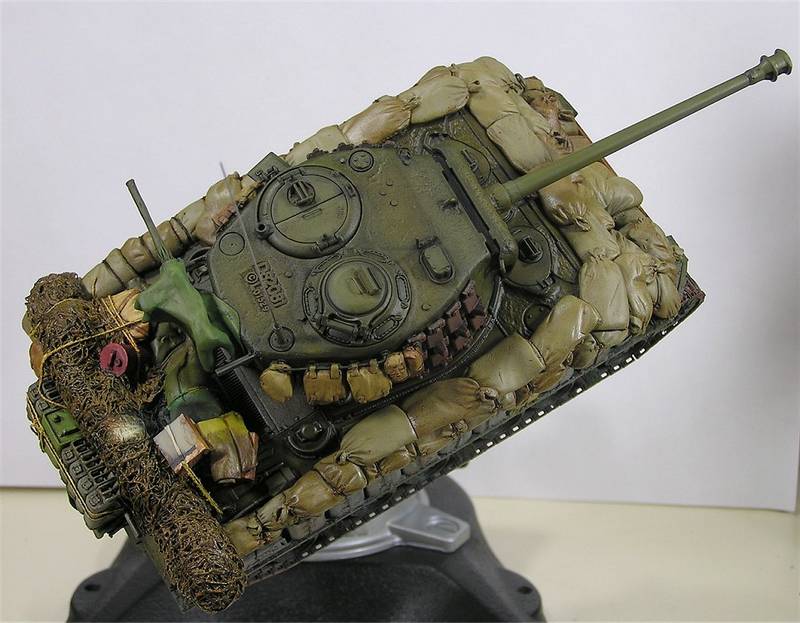
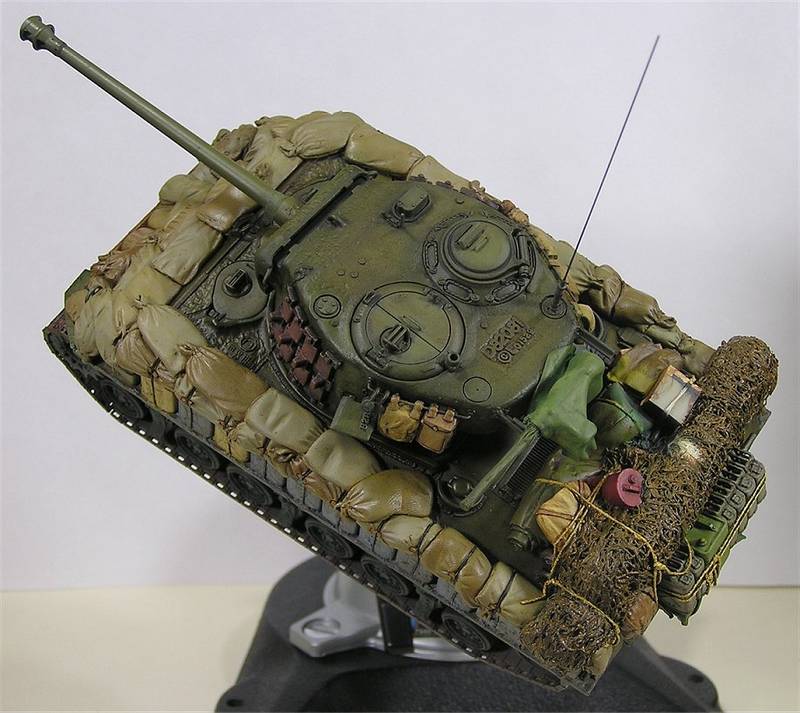
I Started off with XF27 Back Green mixed with a little X1 Black for the pre-shade. Then a coat of XF51 Khaki Drab (which came out on the gray side, check the stowage) and then a few light coats of straight XF62 OD. I have some detailed notes I'm keeping. I'll post them when I get a little further along.

And for anyone who is interested here is some additional info on the vise and AB.

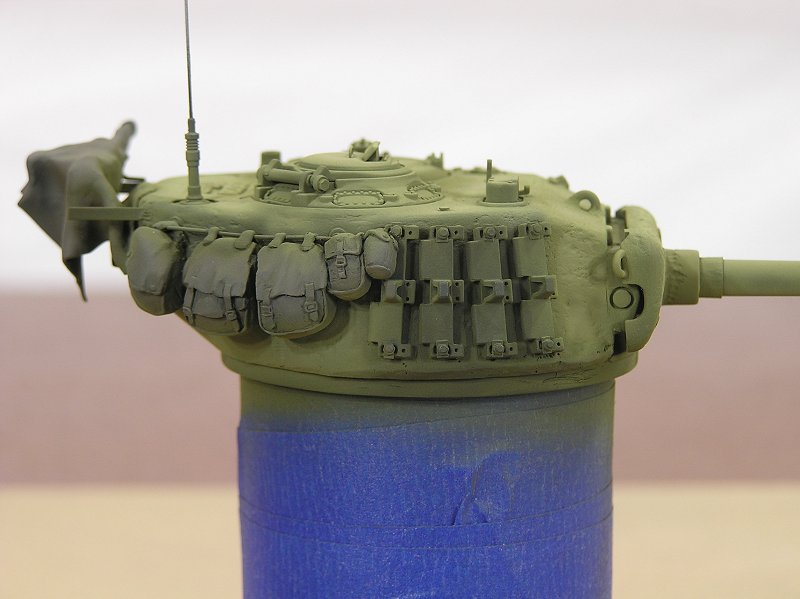
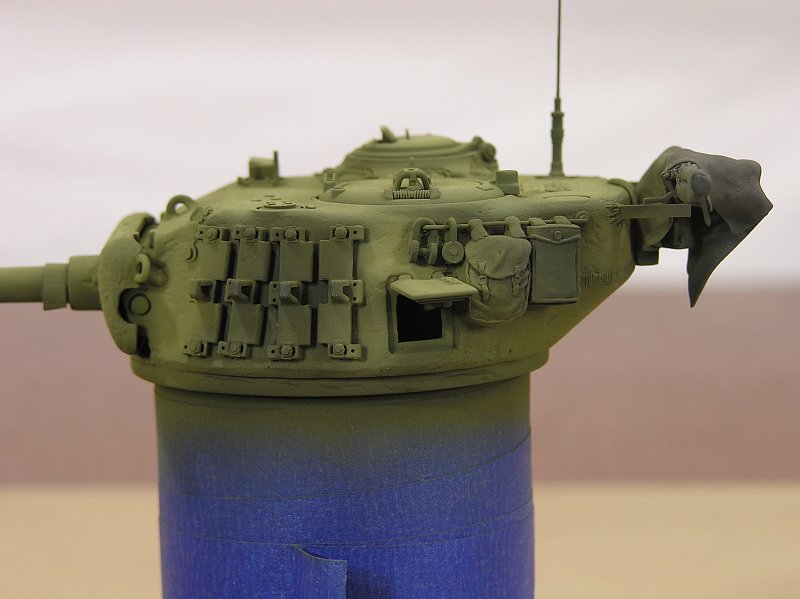
The VISE-- I have been kicking the idea around for a few months. Not to sound like a weirdo or anything but the idea came to me in a dream of all things while I was building up the stowage for the rear deck. I figured if I had something that could hold the model at different angles to free up my other hand life would be much easier. Then I had a dream about my old shop class in high school where I used such a vise. After doing some research on-line the PanaVise was the winner. It seemed to have the best reviews and feedback. But the big selling point for me was that I could order the vise in any configuration I wanted, thus totally tailoring it to my needs...awesome!! The only draw back is the cost. It isn't cheap just under a $100.00 U.S. green backs. I'm sure the are others out there for less so if your interested in getting something similar shop around. I'll post picture on how I use it in the building process during my next model.

Follow the below links
PanaVise
Vise head Model: 203
Base Model: 305 Low-Profile
Base Model: 308 Weighted Base Mount (5lbs/2.3kg) it isn't going anywhere!!

The GUN-- GREX Tritium.TG - Dual Action Pistol Style Airbrush, Top Gravity Let me tell you I can not say enough good things about this bad girl. But let me say ABs are a personnel choice. So I'm not saying this is the end all be all of ABs...but it is for me!! I picked this up at the AMPS National show last April here in Virginia. It just happened to be the first booth I hit and after a test drive without giving it a second thought laid out the green backs for this beauty! For me I always had a problem getting the paint flow with the traditional top trigger ABs but once I used this pistol style trigger I was golden. Now like the vise she's no cheap date at just over $200.00 USD so shop around and you might score a lower priced one.

For more info see Bill Cross's Review Here
Totalize
Visit this Community
Ontario, Canada
Joined: February 04, 2009
KitMaker: 743 posts
Armorama: 549 posts
Posted: Wednesday, September 21, 2011 - 12:29 AM UTC
Eric,

Great to see your update. The painting is coming along beautifully.And a lefty just like me. Well done.

That Vise looks pretty sophisticated. Nothing like that for me just the old right arm and hand for rotation and inversion plus a Tamiya paint stand. I might have to check into something like that but not until I pick up the sub miniature punch and die set I have been wanting for sometime from roll models which is gong to cost me about the same.

Keep up the great work.

Dave.
pseudorealityx
Visit this Community
Georgia, United States
Joined: January 31, 2010
KitMaker: 2,191 posts
Armorama: 1,814 posts
Posted: Wednesday, September 21, 2011 - 03:37 AM UTC

Quoted Text

Eric,

Great to see your update. The painting is coming along beautifully.And a lefty just like me. Well done.

That Vise looks pretty sophisticated. Nothing like that for me just the old right arm and hand for rotation and inversion plus a Tamiya paint stand. I might have to check into something like that but not until I pick up the sub miniature punch and die set I have been wanting for sometime from roll models which is gong to cost me about the same.

Keep up the great work.

Dave.


In another thread on here within the last day or two, someone posted a how-to on building your own punch and die set. May turn out useful if you're in the market.
errains
#045
Visit this Community
South Carolina, United States
Joined: September 23, 2005
KitMaker: 362 posts
Armorama: 350 posts
Posted: Tuesday, September 27, 2011 - 01:06 PM UTC
A Little Update

Just wanted to keep you all apprized of the paint progress. As you can see the I gotz the base color laid on it looks ok-ish and all. I just finished doing up the base colors for Jerry cans and sandbags tonight and will be moving on to the base colors for stowage on the rear deck and turret. Once thats done I'll pull the masking and post new pixs of that...soon I hope. Until then Enjoy!


stansmith
Visit this Community
England - North West, United Kingdom
Joined: July 18, 2010
KitMaker: 611 posts
Armorama: 584 posts
Posted: Wednesday, September 28, 2011 - 07:28 AM UTC
looks superb!! what airbrush is that?
errains
#045
Visit this Community
South Carolina, United States
Joined: September 23, 2005
KitMaker: 362 posts
Armorama: 350 posts
Posted: Tuesday, November 22, 2011 - 01:21 AM UTC
Hey everyone I'm still alive and new pictures of the ye ol Battlewagon will be forthcoming soon. Other commitments over the past couple of months have just concluded so I'll be back at the workbenches following the Thanksgiving holiday here in the States.

Sorry for being gone for so long.
Totalize
Visit this Community
Ontario, Canada
Joined: February 04, 2009
KitMaker: 743 posts
Armorama: 549 posts
Posted: Wednesday, November 23, 2011 - 01:29 PM UTC
Eric,

Good to see you back in action with a nice posting. Looks like some colour moduation going on there with your Shermy.

I like it a lot.

Hope to see some more from your build. It's reall turning out nice.

Dave.
errains
#045
Visit this Community
South Carolina, United States
Joined: September 23, 2005
KitMaker: 362 posts
Armorama: 350 posts
Posted: Friday, November 25, 2011 - 02:27 PM UTC
Battlewagon M4A3E8 ETO: Part 16 – Basic Color

Greeting to Everyone!

I hope everyone here in the States had a great Thanksgiving Holiday with family and friends!


After being out of pocket for several weeks I was able to return to my workbenches and get cracking on the ye ol Battlewagon. As you can see I have laid in the basic colors for this build and will be moving on to the “weathering” phase. I know the colors look rather harsh but with numerous layers of Washes/Filters/Glazes and further detailed painting it is hoped that these will be much more subdued and blended into a common OD-ish color pallet.

I’m keeping this post short for now as I just wanted to get these pictures out there for any constructive feedback from the community. Once I have gotten further along in the finishing process I’ll post an in-depth “guide” to how I completed the painting the weathering thingy.

Everyone Enjoy!


Hornistfuller
Visit this Community
United States
Joined: November 27, 2011
KitMaker: 10 posts
Armorama: 9 posts
Posted: Sunday, November 27, 2011 - 12:14 PM UTC

Quoted Text


In another thread on here within the last day or two, someone posted a how-to on building your own punch and die set. May turn out useful if you're in the market.


Not to be hijacking this great thread, ( the sherman realy is fantastic so far.) but does anyone have a link to this thread? this is a piece of equipment i could really use.

Also, question. Are the jerrycans on the side filled with sand or something? i get the feeling a few extra mm of stamped steel really wouldn't provide any protection, without anything in between it.
errains
#045
Visit this Community
South Carolina, United States
Joined: September 23, 2005
KitMaker: 362 posts
Armorama: 350 posts
Posted: Saturday, December 10, 2011 - 01:55 AM UTC
Part 17 – First Layer: Color Filtering

Hello Gang!!!

The past couple of weeks have involved applying the first layer of filters to bring in the colors.


To begin with Battlewagon got a shiny coat of Pledge floor wax with future, since I couldn’t find any regular ol Future. The Pledge floor wax was shot through the AB s straight from the bottle and did not have any issues and cleaned up well with water and Windex.


This entire filtering layer was applied using Winsor and Newton oils in conjunction with Winsor and Newton Liquin Original. Liquin Original is a semi-gloss medium that speeds drying, improves flow and reduces brush stroke retention. A little practice is need in using the Liquin Original but it really helps with the use of oils. Additionally Mona Lisa Oderless Paint Thinner was also used, this product is a mild thinner that will not attack the under laying surfaces as aggressively as other thinners. I highly recommend both products if you are going to use oil paints.


Starting with the Turret and then moving on to the hull this first filter was applied to the lowest points and then on to the higher points. What this mean is that the filter was applied on to the surfaces under the stowage and then I move to whatever was laying on the previously filtered surface. (not sure if that makes any sense). The results are subtle, but you can see more color depth, which will be built upon with each additional filtering layer that will be applied. (BTW the Air ID panal has NOT be filtered as of yet)


The next layer will be Shadows and pin washes.

Thanks for looking and for your Comments
Coming Soon!...

Totalize
Visit this Community
Ontario, Canada
Joined: February 04, 2009
KitMaker: 743 posts
Armorama: 549 posts
Posted: Saturday, December 10, 2011 - 05:30 AM UTC
Wonderful update Eric.

The old battlewagon is really coming together. Nice to see the panavise in action as well. Very cool.

Looking forward to more.

Dave.
errains
#045
Visit this Community
South Carolina, United States
Joined: September 23, 2005
KitMaker: 362 posts
Armorama: 350 posts
Posted: Friday, January 20, 2012 - 12:09 PM UTC
PROOF OF LIFE

Just wanted to post a couple of pixz to show that I'm still alive and in the "home stretch" in finishing the ol' Battlewagon. So let me know what you think and how I'm doing thus far.

BTW if anyone is interested I have update the Photo Essay for the Battalwagon on my Blog. Just chick on the banner in my signature block at the bottom to get there....If you want to

Thanks and Enjoy


pseudorealityx
Visit this Community
Georgia, United States
Joined: January 31, 2010
KitMaker: 2,191 posts
Armorama: 1,814 posts
Posted: Friday, January 20, 2012 - 12:44 PM UTC
The colors are starting to tie in together. Looks good.

The tracks are a bit 'red' to me. But obviously it's a work in progress.

Don't forget the paint the hull and turret .30 cal's!
errains
#045
Visit this Community
South Carolina, United States
Joined: September 23, 2005
KitMaker: 362 posts
Armorama: 350 posts
Posted: Saturday, February 04, 2012 - 09:49 AM UTC
Part 18: Pretty Colors – Painting Done

Well…..for the most part!

More or less ready to start the “weathering” phase. But wanted to run this by the community first for any feedback and suggests on how best to proceed.

So gang let me know your thoughts!


pseudorealityx
Visit this Community
Georgia, United States
Joined: January 31, 2010
KitMaker: 2,191 posts
Armorama: 1,814 posts
Posted: Saturday, February 04, 2012 - 11:38 AM UTC
It lives!

Start the weathering already.
errains
#045
Visit this Community
South Carolina, United States
Joined: September 23, 2005
KitMaker: 362 posts
Armorama: 350 posts
Posted: Sunday, February 05, 2012 - 12:29 AM UTC
Thanks Jesse!

That's the plan Most likely start rolling on the weathering tomorrow after the Super Bowl festivities of today
SSgtTowers
Visit this Community
Utah, United States
Joined: June 22, 2002
KitMaker: 73 posts
Armorama: 31 posts
Posted: Monday, March 05, 2012 - 03:36 PM UTC
Awesome post and step by step. Do you have anymore updated?

Curtis Towers
Totalize
Visit this Community
Ontario, Canada
Joined: February 04, 2009
KitMaker: 743 posts
Armorama: 549 posts
Posted: Monday, March 19, 2012 - 03:13 PM UTC
Eric,

Great posts on your progress. Your Sherman looks like a splitting image of the one in the photograph you are modelling. Excellent work!

Dave.
russ
Visit this Community
Christchurch, New Zealand
Joined: May 01, 2002
KitMaker: 432 posts
Armorama: 359 posts
Posted: Monday, March 19, 2012 - 05:13 PM UTC
Great job Eric

Followig this one with interest.

Neil
errains
#045
Visit this Community
South Carolina, United States
Joined: September 23, 2005
KitMaker: 362 posts
Armorama: 350 posts
Posted: Monday, September 03, 2012 - 09:31 AM UTC
Part 19: 95%

With the close of summer I thought I would post an update as it has been forever since I last did this.
I have been working off and on over the past several months taking it slow and easy to ensure that I didn’t make any mistakes.

I'm calling this 95% finished as I have a few touch-ups and the display to complete.
As usual any constructive feedback from the community is most welcome…Enjoy


retiredyank
Visit this Community
Arkansas, United States
Joined: June 29, 2009
KitMaker: 11,610 posts
Armorama: 7,843 posts
Posted: Monday, September 03, 2012 - 11:16 AM UTC
You have true talent and have produced a masterpiece! Wish I had caught this one from the beginning. That one would definitely end up in my display case.
Big-John
Visit this Community
Ohio, United States
Joined: August 12, 2010
KitMaker: 731 posts
Armorama: 711 posts
Posted: Monday, September 03, 2012 - 11:44 AM UTC
WOW!!!! Major improvement from the last time you posted Eric. Looks great!!!
errains
#045
Visit this Community
South Carolina, United States
Joined: September 23, 2005
KitMaker: 362 posts
Armorama: 350 posts
Posted: Tuesday, September 04, 2012 - 10:27 AM UTC
I just wanted to say Thanks to everyone for stopping by for a peek and the supportive comments. Trying to get this baby ready for a show at the end of September. So the next post/update should be the completed subject sitting on a display base...fingers crossed