Campaigns
Where Armorama group builds can be discussed, organized, and updates posted.
Where Armorama group builds can be discussed, organized, and updates posted.
Hosted by Darren Baker, Richard S.
The Great War 11-11-11 (official thread)

captnenglish

Joined: May 20, 2008
KitMaker: 1,184 posts
Armorama: 770 posts

Posted: Sunday, April 22, 2012 - 06:58 AM UTC
Alan,what did you use for the seats; that is the most troubling part for me on this kit.
Posted: Sunday, April 22, 2012 - 08:56 AM UTC
Hi Matthew,
Rolled lead wire for the R angles and plastic card and plastic rod for the seats. Cut out the basic shape, added the plastic rod and drill the holes. You'll have to cut out the half seats from the break rod bars. I clipped them off, then drill holes in the remainder and then cut the off.
Cheers
Al
Rolled lead wire for the R angles and plastic card and plastic rod for the seats. Cut out the basic shape, added the plastic rod and drill the holes. You'll have to cut out the half seats from the break rod bars. I clipped them off, then drill holes in the remainder and then cut the off.
Cheers
Al
RedDuster

Joined: March 01, 2010
KitMaker: 7,078 posts
Armorama: 248 posts

Posted: Sunday, April 22, 2012 - 09:00 PM UTC
Nice work on the 18pdr Al, coming really well, the kit does look very basic.
More progress on the Kent, mainly gett ing the foretop finished.
Painted, and some creative gizmology, can't find any good pics of waht was in the tops, but have added rangefinder, a couple of pedestal mounts for telescopes & a some voicepipes.

The top has been added along with a an officer & rating, and a small extention to the foremast to take the roof.

The roof next, which is quite a construction. The stays for the foretopmast connect to this framework, hence I think it's substantial construction.

The roof fitted and the sloped pannels filled in on both tops with milliput.
 .
.
More soon.
Si
More progress on the Kent, mainly gett ing the foretop finished.
Painted, and some creative gizmology, can't find any good pics of waht was in the tops, but have added rangefinder, a couple of pedestal mounts for telescopes & a some voicepipes.

The top has been added along with a an officer & rating, and a small extention to the foremast to take the roof.

The roof next, which is quite a construction. The stays for the foretopmast connect to this framework, hence I think it's substantial construction.

The roof fitted and the sloped pannels filled in on both tops with milliput.
 .
.More soon.
Si

edoardo

Joined: November 30, 2007
KitMaker: 642 posts
Armorama: 234 posts

Posted: Sunday, April 22, 2012 - 09:13 PM UTC
Hi Tom, Si, and all the rest of the bunch!
here are some updates of my work on the MK IV...
First of all I'll show you an overall view..


As you can see, my work is mainly devoted to the unditching rail and beam. As I said, I rebuild the rails, and scratch the beam... here are some detail images:


and the beam...


and that is all for now...
hope you'll enjoy!
All the best!
ciao
edo
here are some updates of my work on the MK IV...
First of all I'll show you an overall view..


As you can see, my work is mainly devoted to the unditching rail and beam. As I said, I rebuild the rails, and scratch the beam... here are some detail images:


and the beam...


and that is all for now...
hope you'll enjoy!
All the best!
ciao
edo
RedDuster

Joined: March 01, 2010
KitMaker: 7,078 posts
Armorama: 248 posts

Posted: Monday, April 23, 2012 - 08:21 PM UTC
Looking good Edo,
Very nice work on the unditching beam & rails.
Si
Very nice work on the unditching beam & rails.
Si

Whitey

Joined: September 20, 2010
KitMaker: 137 posts
Armorama: 100 posts

Posted: Tuesday, April 24, 2012 - 11:49 AM UTC
Looking forward to getting started:


Posted: Wednesday, April 25, 2012 - 03:05 AM UTC
Look forward to the build Alex.
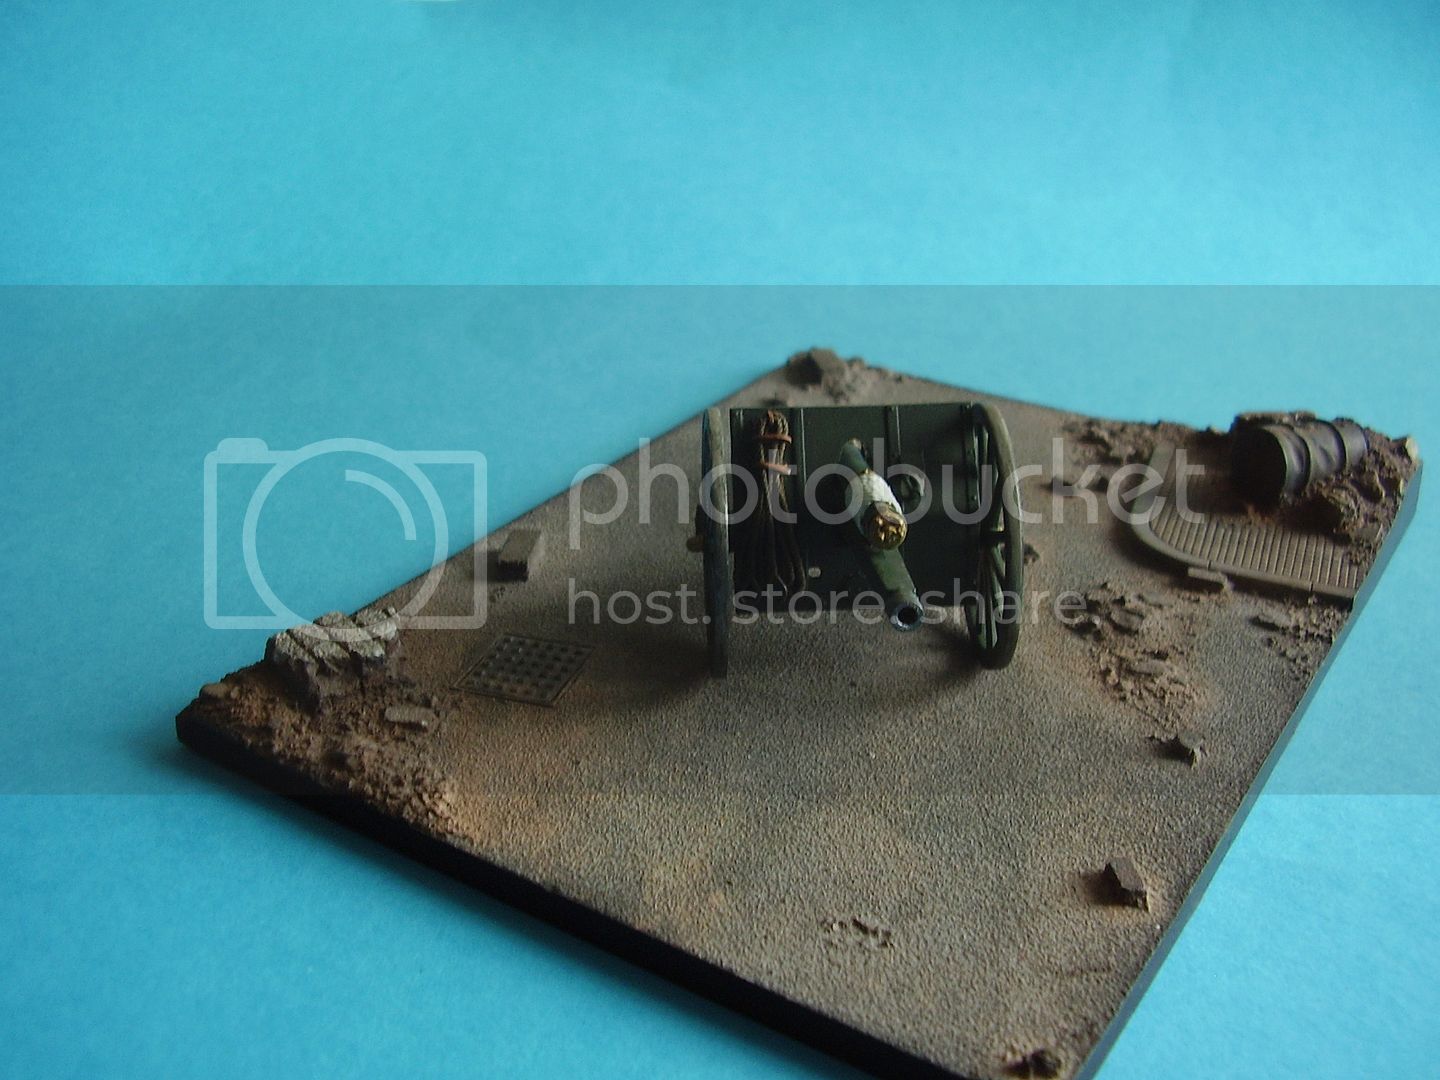
18pdr with wheels, new rope and gun sight.


Cheers
Al
18pdr with wheels, new rope and gun sight.


Cheers
Al

captnenglish

Joined: May 20, 2008
KitMaker: 1,184 posts
Armorama: 770 posts

Posted: Wednesday, April 25, 2012 - 03:20 AM UTC
Great stuff Alan. Let me know when the kit arrives, it went out on its second attempt this past weekend.
Posted: Wednesday, April 25, 2012 - 05:09 AM UTC
Hi Matthew,
Many thaks, I'll look forward to their arrival.
Cheers
Al

Many thaks, I'll look forward to their arrival.
Cheers
Al


Posted: Wednesday, April 25, 2012 - 08:11 AM UTC
That's coming on very nicely Edo. That's an interesting nut & bolt combination you have there, are they scratchbuilt or bought?
Al, you must live in a barn with the amount of models you have around the place!
Al, you must live in a barn with the amount of models you have around the place!

geogeezer

Joined: February 17, 2011
KitMaker: 263 posts
Armorama: 258 posts

Posted: Wednesday, April 25, 2012 - 03:32 PM UTC
Si, your detail work is incredible. I have enough trouble painting 1/35 scale figures and you populate your ship with figures one-tenth that size. Amazing. Have you ever considered starting a flea circus? lol

 Cheers,
Dick

 Cheers,
Dick
geogeezer

Joined: February 17, 2011
KitMaker: 263 posts
Armorama: 258 posts

Posted: Wednesday, April 25, 2012 - 03:35 PM UTC
Hi Edo,
Really nice work with the unditching beam and all the tiny hardware bits. Coming along very nicely.

 Cheers,
Dick
Really nice work with the unditching beam and all the tiny hardware bits. Coming along very nicely.

 Cheers,
Dick

edoardo

Joined: November 30, 2007
KitMaker: 642 posts
Armorama: 234 posts

Posted: Wednesday, April 25, 2012 - 05:46 PM UTC
Hi guys!
Thank you foR the nice comments!
Murdo, no the bolts are not scratch build, I bought them from Masterclub, a quite decent company to deal with.... I believe they are russian made and uk distributed, do have a look at their web site and tell me what you think!
Ciao
Edo
Thank you foR the nice comments!

Murdo, no the bolts are not scratch build, I bought them from Masterclub, a quite decent company to deal with.... I believe they are russian made and uk distributed, do have a look at their web site and tell me what you think!
Ciao
Edo
RedDuster

Joined: March 01, 2010
KitMaker: 7,078 posts
Armorama: 248 posts

Posted: Wednesday, April 25, 2012 - 07:56 PM UTC
Al - Great work on the 18pdr, looks like more additional detail than original kit.
Dick - Thanks for your kind words, actually the trick to painting 1/350th figures is not to try and paint to much detail in, a clean simple finish suggests more than is really there. (To be honest my attempts at 1/35th figures aren't that hot, when I actually have to paint all the detail)
Si
Dick - Thanks for your kind words, actually the trick to painting 1/350th figures is not to try and paint to much detail in, a clean simple finish suggests more than is really there. (To be honest my attempts at 1/35th figures aren't that hot, when I actually have to paint all the detail)
Si
Posted: Wednesday, April 25, 2012 - 08:19 PM UTC
Hi Murdo,
A barn would be useful, space is a big problem!
Hi Simon,
The Emhar kit has little detail on it, for this one I made a breech block, new seats, added some parts of the missing sights and fixing on the gun, grab handles on the trail, cross-struts and fixings for the break assembly, filed off the original moulded on rope and repalced it with something more relaistic, added the missing detail on the front of the recoil mechanism, roped the barrell and added/replaced the missing and poor detail on the wheels. I also removed the upper and lower armour plate on the gun shield, added some support fixing for the shield and drilled out the barrell. To get an accurate gun there would be a need to add additional fixings, but I did as much as I though necessary to fill up the main empty spaces and gaps, without going for the full monty.
As the kit has about 12 parts and 3 toy soldiers (which went into the bin) you can imagine how basic it is.
Cheers
Al
A barn would be useful, space is a big problem!

Hi Simon,
The Emhar kit has little detail on it, for this one I made a breech block, new seats, added some parts of the missing sights and fixing on the gun, grab handles on the trail, cross-struts and fixings for the break assembly, filed off the original moulded on rope and repalced it with something more relaistic, added the missing detail on the front of the recoil mechanism, roped the barrell and added/replaced the missing and poor detail on the wheels. I also removed the upper and lower armour plate on the gun shield, added some support fixing for the shield and drilled out the barrell. To get an accurate gun there would be a need to add additional fixings, but I did as much as I though necessary to fill up the main empty spaces and gaps, without going for the full monty.
As the kit has about 12 parts and 3 toy soldiers (which went into the bin) you can imagine how basic it is.
Cheers
Al
RedDuster

Joined: March 01, 2010
KitMaker: 7,078 posts
Armorama: 248 posts

Posted: Saturday, April 28, 2012 - 08:16 AM UTC
Now on with some of the boring stuff, the Kent has seven boats on davits, and no rigging provided for them on the fret, so I have had to make my own,here is a start on the falls.
In Pictures, using brass, rod, copper wire & blue tack


Next, seeing how many of then actually come out (I reckon I will have to make 21 to get the 14 required).
Si
In Pictures, using brass, rod, copper wire & blue tack


Next, seeing how many of then actually come out (I reckon I will have to make 21 to get the 14 required).
Si
RedDuster

Joined: March 01, 2010
KitMaker: 7,078 posts
Armorama: 248 posts

Posted: Sunday, April 29, 2012 - 08:43 PM UTC
1st Boat fully rigged. Fortunately it appears from looking at pics, whilst the falls were always rigged, the luffing tackles (to swing the boats out) were not.

The port side boats in their chocks rigged, tops painted & weathering commenced. The Kent was a bit of a mess when she was ordered to the Falklands, she had been in reserve for 2 years, and very little in the way of maintainance, except of on the engines & guns had been done. The picutes of the ship around the time of the battle show the superstructre to be quite clean, but the hull & funnels somewhat unloved.

Most of the rigging on the starboard boats is in place, a bit of trimming and painting needed, and the port forward cutter fixed in place swung out and lowered to deck level.

Si

The port side boats in their chocks rigged, tops painted & weathering commenced. The Kent was a bit of a mess when she was ordered to the Falklands, she had been in reserve for 2 years, and very little in the way of maintainance, except of on the engines & guns had been done. The picutes of the ship around the time of the battle show the superstructre to be quite clean, but the hull & funnels somewhat unloved.

Most of the rigging on the starboard boats is in place, a bit of trimming and painting needed, and the port forward cutter fixed in place swung out and lowered to deck level.

Si
Posted: Monday, April 30, 2012 - 02:35 AM UTC
Hi Simon,
Excellent work, this is coming along a treat.
Cheers
Al
Excellent work, this is coming along a treat.
Cheers
Al

steph2102

Joined: April 23, 2011
KitMaker: 735 posts
Armorama: 606 posts

Posted: Monday, April 30, 2012 - 04:04 AM UTC
hello simon
great job. I followed your build with wonder, and again congratulation.
steph
great job. I followed your build with wonder, and again congratulation.
steph
Posted: Monday, April 30, 2012 - 08:09 AM UTC
Edo, I looked up Masterclub. Excellent stuff. I'll be getting some of these.
Si, that ship gets better every time I see it! Lovely delicate work.
Si, that ship gets better every time I see it! Lovely delicate work.
Posted: Monday, April 30, 2012 - 08:55 AM UTC
Slowly but surely getting there.
Added side rails (what the grousers hang on) on the "turret" sides with metal cut and shaped from a beer can.
The Whippet with the first lot of paint on:

I have heard lots of complaints about fit issues with the Emhar Whippet but considering what I did to the insides of it the thing has still gone together very well.
The Cunning Plan is to make a tank workshop. This will give an excuse for having half the tank uncovered so I'll be using this for bits and pieces.

Also, I've only ever done two figures (two soldiers in a Norn Iron Makralon armoured Land Rover). I've never done this chopping up before but I'm going to have a bash at converting these chaps to WW1 Brits. It's really the figgies in shirtsleeves I'm after.

I think I've found a really masochistic streak in myself. It's all Al's fault, I blame him!

Added side rails (what the grousers hang on) on the "turret" sides with metal cut and shaped from a beer can.
The Whippet with the first lot of paint on:

I have heard lots of complaints about fit issues with the Emhar Whippet but considering what I did to the insides of it the thing has still gone together very well.
The Cunning Plan is to make a tank workshop. This will give an excuse for having half the tank uncovered so I'll be using this for bits and pieces.

Also, I've only ever done two figures (two soldiers in a Norn Iron Makralon armoured Land Rover). I've never done this chopping up before but I'm going to have a bash at converting these chaps to WW1 Brits. It's really the figgies in shirtsleeves I'm after.

I think I've found a really masochistic streak in myself. It's all Al's fault, I blame him!

geogeezer

Joined: February 17, 2011
KitMaker: 263 posts
Armorama: 258 posts

Posted: Monday, April 30, 2012 - 03:15 PM UTC
Murdo, your Whippet is coming along nicely and the tracks look great.
Si, seeing all the work you've put into the boats, the davits, and related tackle, I confess I would have been tempted to build HMS Kent as she was after the battle. I understand that the wooden boats and all the woodwork aboard were broken up and used to stoke the boilers during the pursuit of the Nürnberg. That way you'd have had only empty davits and some dangling lines. Just joking, of course. It's a beautiful piece of work.
Cheers

Dick
Si, seeing all the work you've put into the boats, the davits, and related tackle, I confess I would have been tempted to build HMS Kent as she was after the battle. I understand that the wooden boats and all the woodwork aboard were broken up and used to stoke the boilers during the pursuit of the Nürnberg. That way you'd have had only empty davits and some dangling lines. Just joking, of course. It's a beautiful piece of work.
Cheers


Dick
Posted: Monday, April 30, 2012 - 04:18 PM UTC
Hi Murdo,
Nice plan and a great way to display the whippet. Forgot about those guys, they look very useful

Cheers
Al
Nice plan and a great way to display the whippet. Forgot about those guys, they look very useful


Cheers
Al

RedDuster

Joined: March 01, 2010
KitMaker: 7,078 posts
Armorama: 248 posts

Posted: Monday, April 30, 2012 - 08:29 PM UTC
Thanks guys, your comments and encouragement much appreciated.
Murdo, the Whippet is coming on well, good luck with your workshop plan and the figures, Fantastic idea for showing off all your excellent work on the interior.
Dick, Like the thought, good one, I did briefly consider doing the build post battle, but the hit she took on the starboard forward casemate would have meant cutting it off the kit and scratchbuilding a new hollow one, with interior and guns. (There is a limit to my insanity... well sort of)
Thanks again guys
Si

vonHengest

Joined: June 29, 2010
KitMaker: 5,854 posts
Armorama: 4,817 posts

Posted: Tuesday, May 01, 2012 - 04:28 AM UTC
I have one word to say to everyone here.... WOW!!!!
Keep up the outstanding work gentlemen!
Keep up the outstanding work gentlemen!

 |


