Hi guys!
Still working on my Mk IV ( but nothing to show you yet)...
Tonight i started building an unditching beam, but i am wondering how it works and how it is chained to the rails on the tank.
I don'have any good pictures of it so it is difficult for me to guess, do you have some?
Also in the resin traks package i bought are some "grabs" which i understand are supposed to enhance the traks hold on the ground... Do you know which is the right spacing between them? I mean, one each two regular traks? One each three... .?
Thank you
Ciao
Edo
Campaigns
Where Armorama group builds can be discussed, organized, and updates posted.
Hosted by Darren Baker, Richard S.
The Great War 11-11-11 (official thread)
edoardo
Milano, Italy
Joined: November 30, 2007
KitMaker: 642 posts
Armorama: 234 posts
Joined: November 30, 2007
KitMaker: 642 posts
Armorama: 234 posts
Posted: Tuesday, April 10, 2012 - 09:46 AM UTC
Removed by original poster on 04/10/12 - 21:49:36 (GMT).
geogeezer
Arizona, United States
Joined: February 17, 2011
KitMaker: 263 posts
Armorama: 258 posts
Joined: February 17, 2011
KitMaker: 263 posts
Armorama: 258 posts
Posted: Tuesday, April 10, 2012 - 04:03 PM UTC
Hi Simon,
Coming along nicely. I had no idea those casemate guns were double-decked. After seeing your pictures, i looked at a lot of photos of the Monmouth class and found only one or two where I could actually make out the guns in the casemates. Great work,
Dick
Coming along nicely. I had no idea those casemate guns were double-decked. After seeing your pictures, i looked at a lot of photos of the Monmouth class and found only one or two where I could actually make out the guns in the casemates. Great work,
Dick
Posted: Wednesday, April 11, 2012 - 06:40 AM UTC
Quoted Text
Hi folks,
Has anyone built the Emhar 18pdr? Any feedback on the kit?
Cheers
Al
Hi Al, I built this kit a few years ago and it is fairly basic. Here's a couple of pics of it.
captnenglish
California, United States
Joined: May 20, 2008
KitMaker: 1,184 posts
Armorama: 770 posts
Joined: May 20, 2008
KitMaker: 1,184 posts
Armorama: 770 posts
Posted: Wednesday, April 11, 2012 - 07:20 AM UTC
Quoted Text
Quoted TextHi folks,
Has anyone built the Emhar 18pdr? Any feedback on the kit?
Cheers
Al
Hi Al, I built this kit a few years ago and it is fairly basic. Here's a couple of pics of it.
Basic? Unless my copy is missing part (and it was factory sealed when I bought it), there is allot scratchbulding to do.
Posted: Thursday, April 12, 2012 - 03:16 AM UTC
Thanks Matthew,
Is there an update set for it?
Cheers
Al
Is there an update set for it?
Cheers
Al
Posted: Saturday, April 14, 2012 - 11:58 AM UTC
Quoted Text
Quoted TextQuoted TextHi folks,
Has anyone built the Emhar 18pdr? Any feedback on the kit?
Cheers
Al
Hi Al, I built this kit a few years ago and it is fairly basic. Here's a couple of pics of it.
Basic? Unless my copy is missing part (and it was factory sealed when I bought it), there is allot scratchbulding to do.
Which is why I said it was "Basic".
RedDuster
England - South East, United Kingdom
Joined: March 01, 2010
KitMaker: 7,078 posts
Armorama: 248 posts
Joined: March 01, 2010
KitMaker: 7,078 posts
Armorama: 248 posts
Posted: Saturday, April 14, 2012 - 08:20 PM UTC
Looking forward to seen ing more of the Mk IV Edo, good luck with the 18Pdr Al, thanks for the kind words Dick.
More work on the Awning frame on the bridge wings and compass platform.
The last of the supports are up, and the delicate task of constructing the frame from copper wire has started.
Fitting the wire has been interesting to say the least, but got there in the end. I am not 100% sure the structure is totally correct, but the there were few clear pics, and it looks about right,
Now that needs painting, and then it is on with the searchlight platform & fore top.
Si
Posted: Saturday, April 14, 2012 - 10:09 PM UTC
Hi Si,
Nice work, and adding the mini crew makes it very much an active scene.
Hi Murdo,
Mixed you post with Matthews.
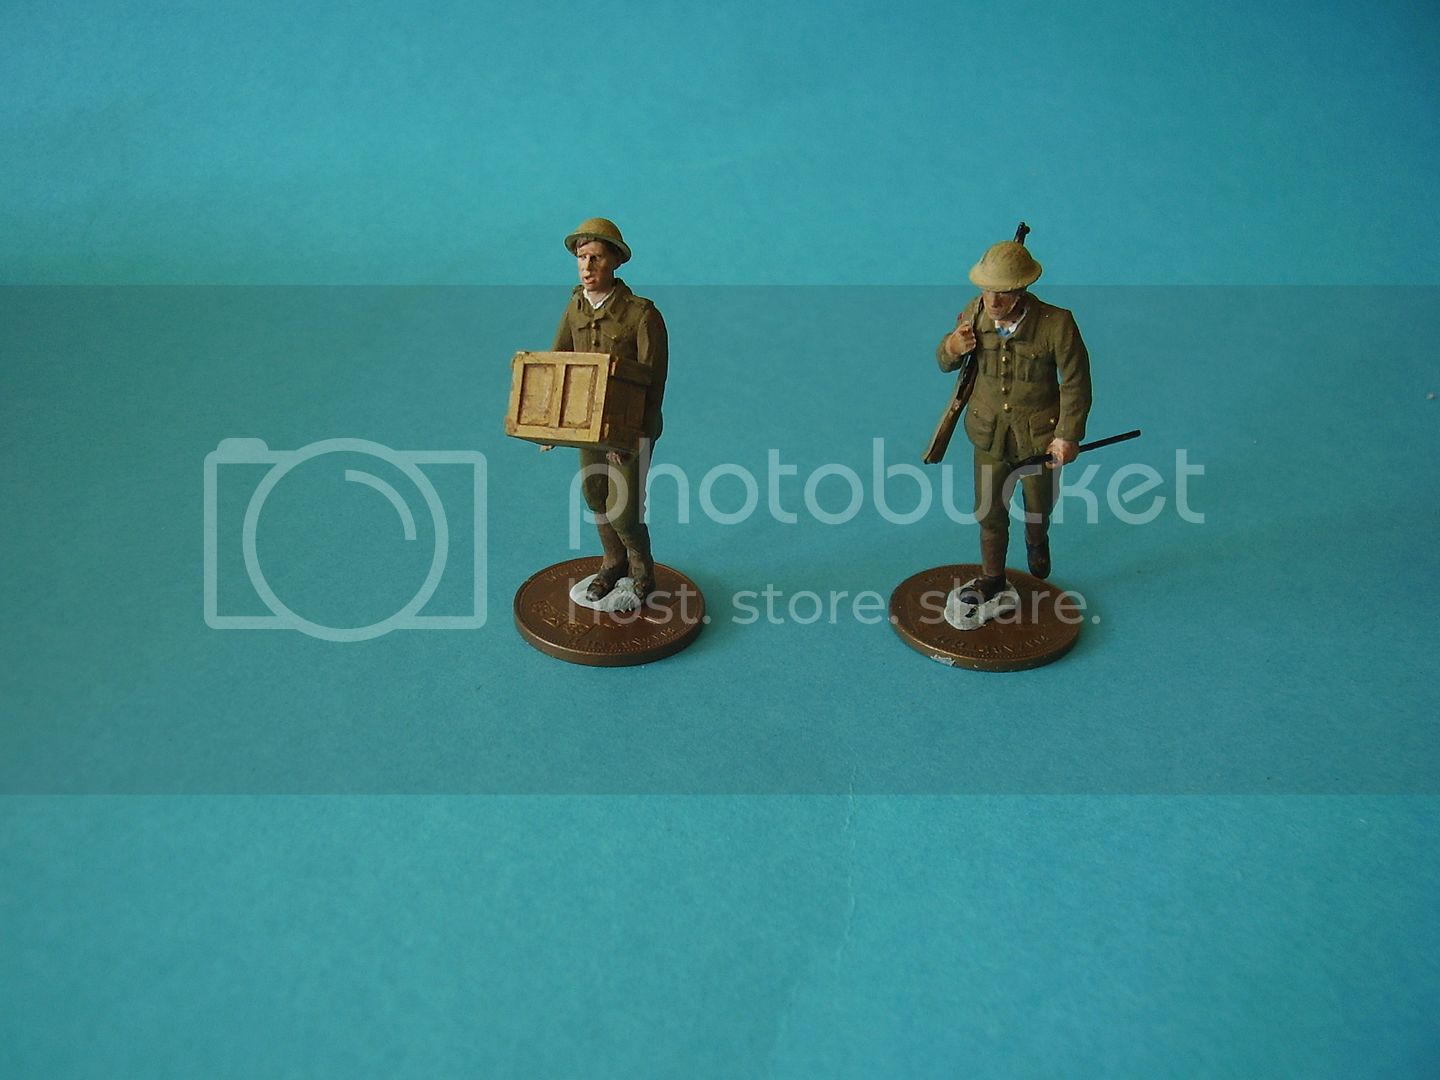
Two of the walking Tommies with a little more work
A few test placements:
Cheers
Al
Nice work, and adding the mini crew makes it very much an active scene.
Hi Murdo,
Mixed you post with Matthews.
Two of the walking Tommies with a little more work
A few test placements:
Cheers
Al
RedDuster
England - South East, United Kingdom
Joined: March 01, 2010
KitMaker: 7,078 posts
Armorama: 248 posts
Joined: March 01, 2010
KitMaker: 7,078 posts
Armorama: 248 posts
Posted: Sunday, April 15, 2012 - 08:19 PM UTC
Thanks Al, one of pet hates when it comes to ship models is the model set on a sea base, under way with no-one on the bridge, looks silly to me.
Like the progress on the Trench, the figures are looking good.
Si
Like the progress on the Trench, the figures are looking good.
Si
RedDuster
England - South East, United Kingdom
Joined: March 01, 2010
KitMaker: 7,078 posts
Armorama: 248 posts
Joined: March 01, 2010
KitMaker: 7,078 posts
Armorama: 248 posts
Posted: Monday, April 16, 2012 - 03:02 AM UTC
Forget my head if it wasn't screwed on!
Update on the weekend's progress, decided to crack on with the foremast.
The searchlight platform, that also forms a base for the fore topmast had to be scratchbuilt.
found some spare supports on an old etched fret. This was then painted & fitted and the awning frame painted.
Next on to the foretop, again a scratch-build, the shorter supports I found some spare, but the longer ones were cut from plastic strip, and lightening holes drilled.
The ratlines added (These came from the WEM Varyag fret I had used to detail up a couple Combrig Pre WW1 destroyers), and the control top test fitted, that needs painting, a rangefinder & some voicepipes & maybe a table & couple of figures adding.
Then boat rigging, before the topmasts.
Si
RedDuster
England - South East, United Kingdom
Joined: March 01, 2010
KitMaker: 7,078 posts
Armorama: 248 posts
Joined: March 01, 2010
KitMaker: 7,078 posts
Armorama: 248 posts
Posted: Monday, April 16, 2012 - 03:05 AM UTC
Not having a good day,
here is the photo of the above, plus also main turrets painted & fitted along with all the casemate barrels painted.
Si
here is the photo of the above, plus also main turrets painted & fitted along with all the casemate barrels painted.
Si
Posted: Monday, April 16, 2012 - 07:31 AM UTC
Quoted Text
Hi guys!
Still working on my Mk IV ( but nothing to show you yet)...
Tonight i started building an unditching beam, but i am wondering how it works and how it is chained to the rails on the tank.
I don'have any good pictures of it so it is difficult for me to guess, do you have some?
Also in the resin traks package i bought are some "grabs" which i understand are supposed to enhance the traks hold on the ground... Do you know which is the right spacing between them? I mean, one each two regular traks? One each three... .?
Thank you
Ciao
Edo
Edo, here's a pic of the beam in use: unditching beam And one of it "stowed" pic. It was simply chained to the tracks in use, and when not in use the chains were wrapped around the rails to tie the beam in place on the top. Later variants had fancy clutches so the crew did not need to get out under fire to attach it to the tracks when needed, but based on pictures it seems Mk IV crews often took the practical route of tying it onto the rear slope of the rails so they could reach it from the back door with minimum exposure...
As for the track spuds, I don't know how formal the rules were, but a spacing of about one every nine links looks about right. (pic)
Hope this helps!
Tom
Posted: Monday, April 16, 2012 - 08:17 AM UTC
Quoted Text
Edo, here's a pic of the beam in use: unditching beam And one of it "stowed" Hope this helps!
Tom
Aaaah! So that's how they did it! I've always wondered and never noticed it in any pics.
Posted: Monday, April 16, 2012 - 08:21 AM UTC
Si, that ship is an absolute beauty!!!
Superb detail!
Superb detail!
captnenglish
California, United States
Joined: May 20, 2008
KitMaker: 1,184 posts
Armorama: 770 posts
Joined: May 20, 2008
KitMaker: 1,184 posts
Armorama: 770 posts
Posted: Monday, April 16, 2012 - 09:26 AM UTC
Quoted Text
Thanks Matthew,
Is there an update set for it?
Cheers
Al
Sent it out last week, hopefully you will get it shortly.
edoardo
Milano, Italy
Joined: November 30, 2007
KitMaker: 642 posts
Armorama: 234 posts
Joined: November 30, 2007
KitMaker: 642 posts
Armorama: 234 posts
Posted: Monday, April 16, 2012 - 05:16 PM UTC
Tom!
Thank you very much! This is just the info i needed!
In the last fiew nights i am working on the undiching rails, which, in my opinion, are too thick in the kit. So i decide to rebuild them in plastic card. Also, the L shape it seems to be in the wrong direction as it should face the inside of the tank...
Anyway a very tedious work and not even very satisfactory as it is very difficult to make the plastic card straight....
I still need some hours of work to finish it, then i'll post some pics... Till then,
Ciao
Edo
Posted: Monday, April 16, 2012 - 08:58 PM UTC
Quoted Text
Quoted TextThanks Matthew,
Is there an update set for it?
Cheers
Al
Sent it out last week, hopefully you will get it shortly.
Hi Matthew,
Cool.
Al
RedDuster
England - South East, United Kingdom
Joined: March 01, 2010
KitMaker: 7,078 posts
Armorama: 248 posts
Joined: March 01, 2010
KitMaker: 7,078 posts
Armorama: 248 posts
Posted: Tuesday, April 17, 2012 - 07:39 PM UTC
Murdo, Thank you for your kind words, I must admit I am going much deeper into this than I originally intended, but I am really enjoying it.
Edo, Looking forward to seeing the progress pics.
Si
Edo, Looking forward to seeing the progress pics.
Si
vonHengest
Texas, United States
Joined: June 29, 2010
KitMaker: 5,854 posts
Armorama: 4,817 posts
Joined: June 29, 2010
KitMaker: 5,854 posts
Armorama: 4,817 posts
Posted: Thursday, April 19, 2012 - 01:26 PM UTC
Si: That's the spirit! Looking fabulous with your mods and additions.
Tom: Thanks for helping out Edo there, I found the info useful myself
Al: Keep posting test shots, things are looking better each time.
Keep going strong gang!
Tom: Thanks for helping out Edo there, I found the info useful myself
Al: Keep posting test shots, things are looking better each time.
Keep going strong gang!
Posted: Friday, April 20, 2012 - 09:10 PM UTC
Hi folks,
Thought I'd try the Emhar 18 pdr. Basic is a good description about 10/12 parts .
I'm using Darren Bakers reference pics to try and add a bit of missing detail.
Would anyone know if the upper and lower armoured flaps were common to all 18 pdrs?
So far I've drilled out the tow hook and added some grab handles and fttings in that area, added a breech of sorts, some binding on the barrel and cut off the seating and cleaned the cross break members to allow detail to be added in that area.
Cheers
Al
Posted: Saturday, April 21, 2012 - 01:22 AM UTC
With a bit more work
Al
Al
captnenglish
California, United States
Joined: May 20, 2008
KitMaker: 1,184 posts
Armorama: 770 posts
Joined: May 20, 2008
KitMaker: 1,184 posts
Armorama: 770 posts
Posted: Saturday, April 21, 2012 - 06:31 AM UTC
Great stuff Alan. All this talk about this "basic" kit got me thinking about what to do with mine and as soon as I have time to start yet another project, I am going to use is as the center piece of a dio/vignette as a derelict with a bunch of Germans around it. I haven worked out the composition yet as this is just a brainstorming idea.
Again nice work Alan. Now I just have to get cracking on my entry for this campaign which is half fnished.
Posted: Saturday, April 21, 2012 - 07:52 PM UTC
Hi Matthew,
Yes, not much detail with this one. A bit more work on the sights and seats.
I donlt know much about the Mk I or Mk II for that matter.
I have removed part of the turning handle leaver. Does anyone know much about this part? I have a feeling the Mk I might not have had it and if so was part of it removeable lol.
Same question for the upper and lower gun shield flaps, how common were these?
Cheers
al
Posted: Saturday, April 21, 2012 - 08:08 PM UTC
Looks like the gun travers handle needs to loose the spiky part and would have to be repositioned in the up angle for firing.
Al
Al