Campaigns
Where Armorama group builds can be discussed, organized, and updates posted.
The Great War 11-11-11 (official thread)
geogeezer
Visit this Community
Arizona, United States
Joined: February 17, 2011
KitMaker: 263 posts
Armorama: 258 posts
Posted: Monday, March 19, 2012 - 04:31 PM UTC
Hi Jeremy & all,
This is a repeat of a post started on March 12 which I intended to attach to the Great War thread. Somehow I hit the wrong button and started a separate thread.
This is my entry for the Great War Campaign, based on the accompanying photo of an Australian Light Car patrol in WWI. I started with a Lindberg 1/32 scale 1915 Model T Ford kit, far from ideal, as some parts are warped and fit poorly, but it's coming along. Enough scratching to accommodate a bad case of hives. Lindberg's plastic doesn't bond well with Tamiya thin cement. Plastruct works better. The tires are too big for the wheels and will have to be glued on somehow. Still working on that.

Troopers of an Australian Light Car Patrol of the 1st Australian Light Horse, near the Sea of Galilee, September, 1918. The emblem on the radiator is the Australian Commonwealth coat of arms beneath a palm tree, predating the DAK by nearly a quarter century. (Source: Australian War Memorial)

The cartridges on top of the instruction sheet are .455 Webley and .303 British. The .303 round has a WWI head stamp.

Partly assembled, engine in place, major surgery on body yet to come. Throttle & spark levers added to steering column (copper wire). Floorboard converted to right hand drive w/scratch-built pedals. Brass plating sanded off radiator shell.

Rear of body cut away, scratch-built pickup bed/tray ready to install.

Upside down, showing chassis and underside of body.

Left side view, body primed, added one louver to each side of hood/bonnet, kit had only 5. Added tie-down cleats to sides of bed/tray. Installed lights. Installed hand brake rods to rear brake drums (stainless steel fishing leader)

Front view: made radiator taller by splicing in square styrene rod, hood rounded off. Added new thinner tie-rod, installed crank (copper wire) Fabricated Lewis gun mount from styrene tube & made cut-out to fit in cowl lamp.

Front quarter view showing toolbox on running board. Still lacks a few details but almost ready for painting.

This is the latest post as of March 18. This is what it looks like after painting with Krylon Fusion (for plastic) Khaki. Applied in light coats it works quite well.

Left side view, hasp added to tool box, steering wheel in place.

Front view, headlight & cowl lamp lenses fitted. Radiator painted flat black.

Right side view.

Underside, exhaust pipe & fuel tank (under seat) in place.

View from above. Need to patch the hole in the firewall left after converting to right hand drive.
Still quite a bit to do, but it's coming along.
Cheers

Dick
AlanL
Visit this Community
England - East Anglia, United Kingdom
Joined: August 12, 2005
KitMaker: 14,499 posts
Armorama: 11,675 posts
Posted: Monday, March 19, 2012 - 05:13 PM UTC
Nice work so far dick.

Al
RedDuster
Visit this Community
England - South East, United Kingdom
Joined: March 01, 2010
KitMaker: 7,078 posts
Armorama: 248 posts
Posted: Monday, March 19, 2012 - 09:02 PM UTC
Robby, thanks for your kind words, I am quite pleased so far, one more coat of "sea", this time more clear, and less colour, to even out ths differing shades a bit. see how that looks, and maybe on further lighter coat if needed.

Richard, looking good, nice pics showing how it was done too.

Si
Buckeye198
Visit this Community
Ohio, United States
Joined: May 02, 2010
KitMaker: 596 posts
Armorama: 265 posts
Posted: Tuesday, March 20, 2012 - 09:42 PM UTC
Richard, that's looking great! I always enjoy it when people transform civilian kits like this. Your work on the kit, scratchbuilding, and painting are really well done. Will the engine be visible in the end? Keep up the great work...can't wait to see the end result! I also finished my Nieuport, but I'm pretty tired now and so I will post all the pictures tomorrow. But the photo is in the gallery
Buckeye198
Visit this Community
Ohio, United States
Joined: May 02, 2010
KitMaker: 596 posts
Armorama: 265 posts
Posted: Wednesday, March 21, 2012 - 03:23 AM UTC
So as promised, here's the end of my Nieuport 28c1! After much finagling, I finally got the top wing mounted. As you can see from the picture, the fit isn't all that great, but it's on, so that's really all I care about now.


Then came work on the rigging. HOLY CRAP, RIGGING IS AWFUL IN 1/48!!!! I know I didn't go about the technique in the right way, but I'm sure that even if I did, I would've had even more issues to deal with and my general lack of superb modeling skills would've caught up with me. So wah. SO much frustration and SO many pieces broken after assembly and SO many times I just wanted to make this plane fly out the window of my car on the highway...but it's done. It's done...


After final assembly


Another head-on view of the rigging (with Udet's D.VII build for the KotS II Campaign in the background)


Took a few shots outside thinking the driveway would be kind of like a runway. I didn't take into account the scale of the cement...whoops. Anyway, they're a good look at the plane.


That war bonds poster on the starboard top wing was a sticker. I didn't realize that when I soaked the other one thinking they were waterslides. Needless to say, the bottom wing does not display a war bonds poster.


Wow. From initial construction to airbrush disasters to my ultimate nightmare that is rigging, this kit has been quite the experience. I would love to try WWI subjects again, but I think I'll restrict myself to the larger 1/32 kits to ensure I can actually work on them. Best of luck to everyone else, and I'll be watching the other entries too!
AlanL
Visit this Community
England - East Anglia, United Kingdom
Joined: August 12, 2005
KitMaker: 14,499 posts
Armorama: 11,675 posts
Posted: Wednesday, March 21, 2012 - 04:13 AM UTC
hi Robby,

The plane is comeing along well, ncie one.

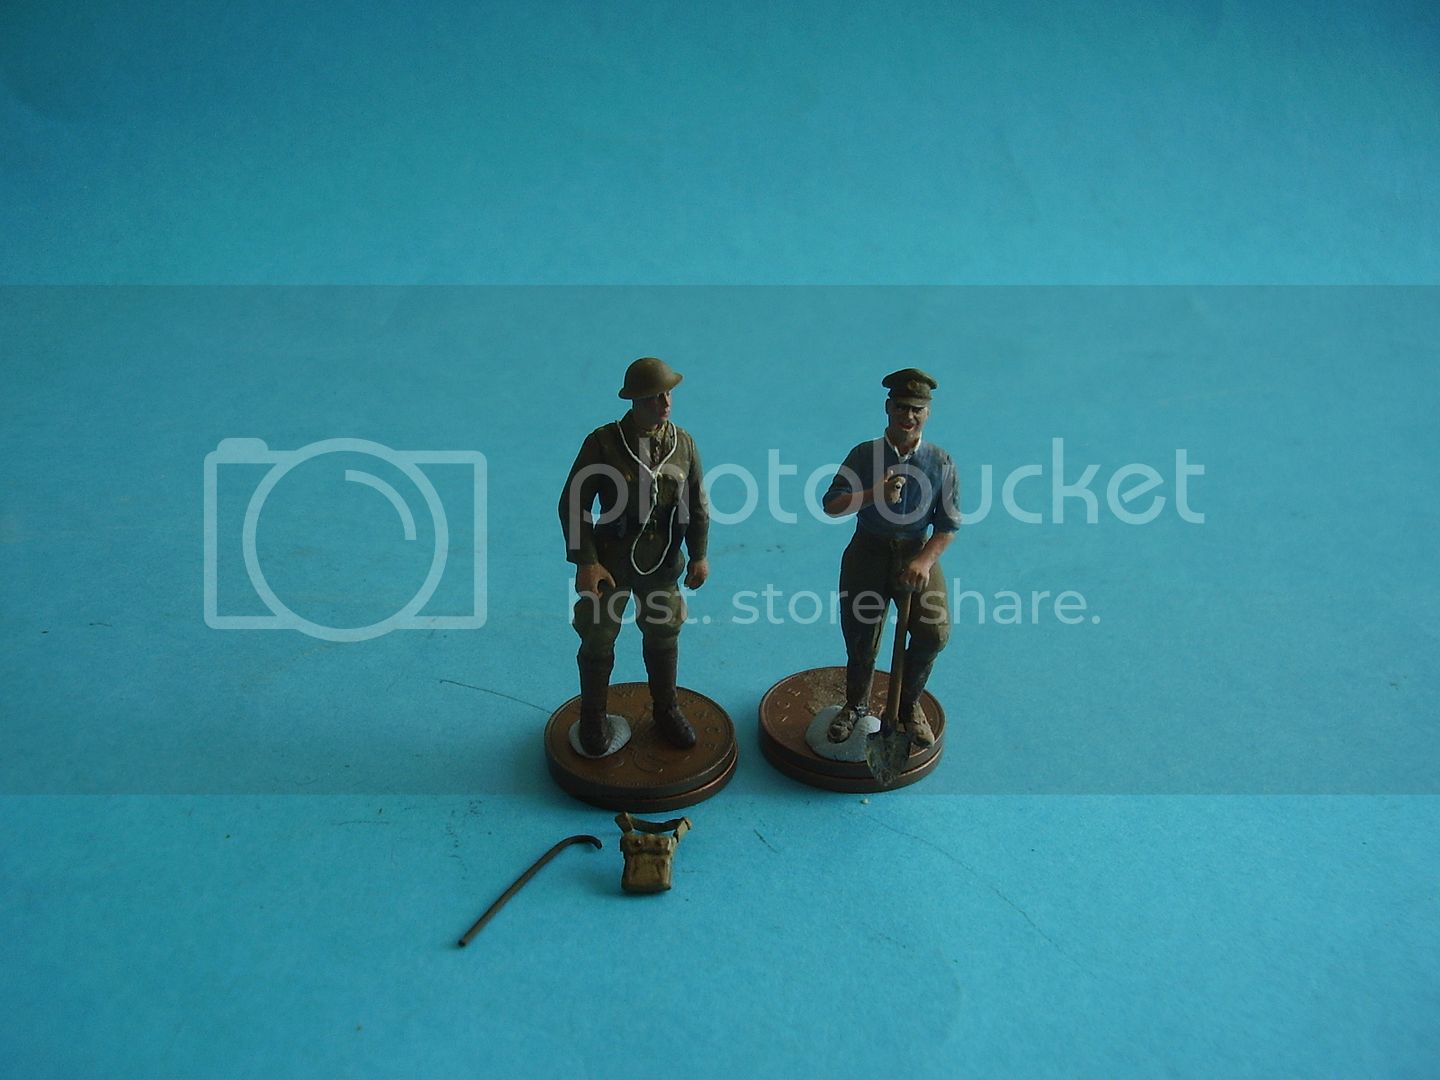
Some progress on the troops.


Al
edoardo
Visit this Community
Milano, Italy
Joined: November 30, 2007
KitMaker: 642 posts
Armorama: 234 posts
Posted: Wednesday, March 21, 2012 - 08:30 PM UTC
Hi all!
I enlisted at last!
and this is what I'm gonna bulid:


My basic idea is to have a tank crossing a german trench, in which 2 brave soldiers are trying to knock out the tank using hand granades...
this is the basic idea:


I found this figures from Masterbox that I'll use (the taller one is actually laying on the ground...)


Also, I bought this stuff for dateiling the tank...


but, on a second thought I am not so sure I did well...
The guns and MG could easly be scratch built and the traks... well, don't seem to me that are so much different from the kit ones, and besides how do I glue indy resin traks in a curved position?


Any suggestion is warmly welcome...

well, that's all for now!
ciao
Edo
RedDuster
Visit this Community
England - South East, United Kingdom
Joined: March 01, 2010
KitMaker: 7,078 posts
Armorama: 248 posts
Posted: Wednesday, March 21, 2012 - 09:06 PM UTC
Robby,

Nice finish, rigging looks good.

Edo

Interesting looking project, will be following with interest.

Si
jeremiaha41
Visit this Community
Armed Forces Europe, United States
Joined: February 27, 2011
KitMaker: 47 posts
Armorama: 18 posts
Posted: Wednesday, March 21, 2012 - 11:13 PM UTC


I've decided to build a 1/48 Monogram Spad 13 for this campaign. It is an old model, I believe Aurora first released it in the 1950's. I won't be using the nice kit decals because they are for a 1919 aircraft. I have a set of decals from the Glencoe French Aces Spad 13 that I'll substitute instead.

Buckeye198
Visit this Community
Ohio, United States
Joined: May 02, 2010
KitMaker: 596 posts
Armorama: 265 posts
Posted: Thursday, March 22, 2012 - 06:01 AM UTC
Brent, will you be doing any rigging? As you can see from my example, I did not go about it the right way! I'm looking forward to seeing what you have to offer!
geogeezer
Visit this Community
Arizona, United States
Joined: February 17, 2011
KitMaker: 263 posts
Armorama: 258 posts
Posted: Thursday, March 22, 2012 - 04:25 PM UTC
Robby, your Nieuport looks great. Does your rotary engine turn with the propeller?

On my Model T Light Patrol Car, the engine is visible only from underneath. Too much putty on the hood to allow it to open. I'm thinking of building this one with the engine in full view.
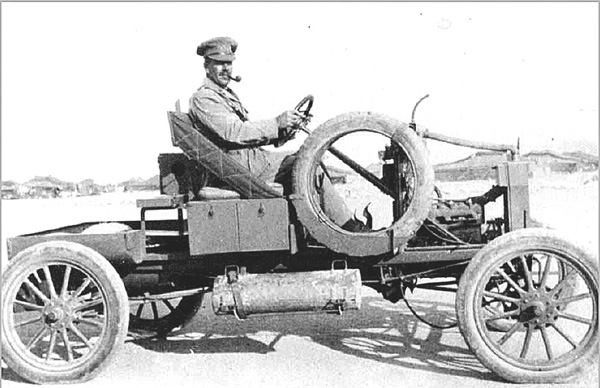
The driver is Captain Claud H. Williams, MC, a New Zealander who traveled to England in 1915 and joined the Pembroke Yeomanry. He was sent to Egypt and assigned to No. 5 Light Car Patrol. Capt. Williams did a lot of exploration in the Western Desert of Egypt, much of it in the Model T hot rod in the above picture. His 1919 report for the Ministry of Defence on the use of motor vehicles in the desert was only declassified in 1963!

Cheers,

Dick
Buckeye198
Visit this Community
Ohio, United States
Joined: May 02, 2010
KitMaker: 596 posts
Armorama: 265 posts
Posted: Thursday, March 22, 2012 - 04:37 PM UTC
If you wanted to crack open the engine housing, that would be a pretty sick looking piece! But I understand the limitations of the kit...the way you have it fully assembled right now looks fantastic! As for my kit, no, the engine doesn't rotate. And neither does the propeller It's a marvel I got the thing to stay together at all!
jeremiaha41
Visit this Community
Armed Forces Europe, United States
Joined: February 27, 2011
KitMaker: 47 posts
Armorama: 18 posts
Posted: Thursday, March 22, 2012 - 04:48 PM UTC

Quoted Text

Brent, will you be doing any rigging? As you can see from my example, I did not go about it the right way! I'm looking forward to seeing what you have to offer!


I have a plan to do the rigging with some fishing line passed through some drilled holes in the struts. I'm concerned about weakening the plastic though.
Brent
Buckeye198
Visit this Community
Ohio, United States
Joined: May 02, 2010
KitMaker: 596 posts
Armorama: 265 posts
Posted: Thursday, March 22, 2012 - 05:19 PM UTC
Yeah, that would be the intelligent way to do rigging...I should try being smart sometime Well again, I'll be watching to see how it's done. Good luck!
AlanL
Visit this Community
England - East Anglia, United Kingdom
Joined: August 12, 2005
KitMaker: 14,499 posts
Armorama: 11,675 posts
Posted: Friday, March 23, 2012 - 01:53 AM UTC
2Lt


Al
AlanL
Visit this Community
England - East Anglia, United Kingdom
Joined: August 12, 2005
KitMaker: 14,499 posts
Armorama: 11,675 posts
Posted: Saturday, March 24, 2012 - 10:37 AM UTC
And another.

Al

Buckeye198
Visit this Community
Ohio, United States
Joined: May 02, 2010
KitMaker: 596 posts
Armorama: 265 posts
Posted: Saturday, March 24, 2012 - 11:47 AM UTC
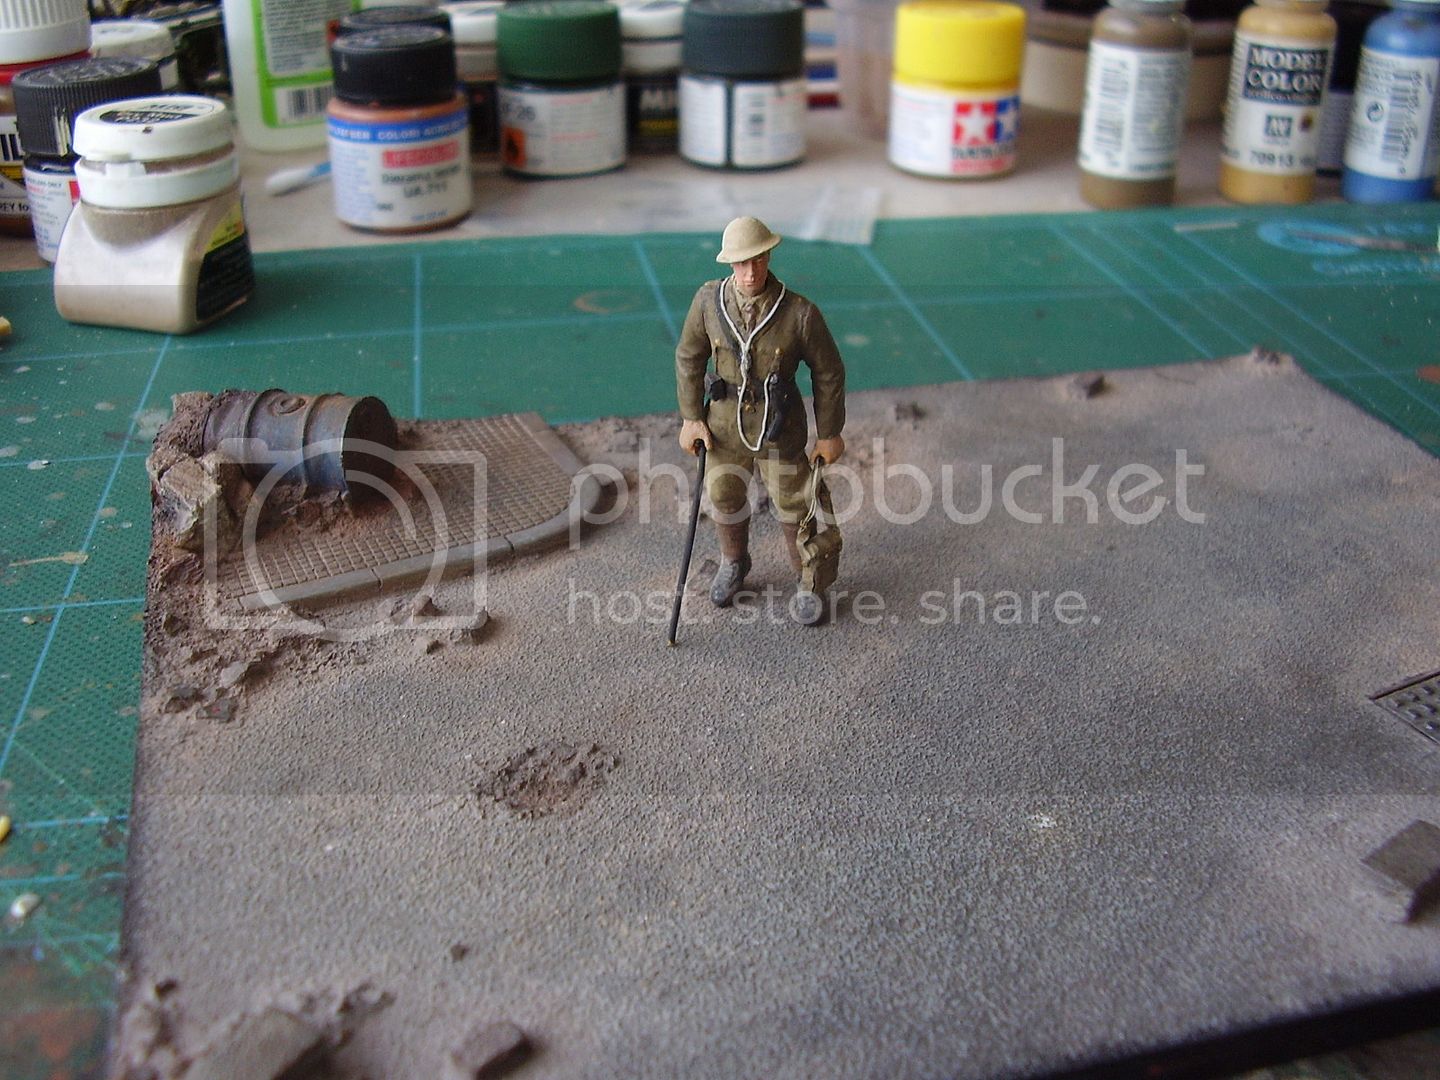
Great figures, Al! I'm curious about that white cord around the leftenant's neck. Can you explain that one? I think I'm just not terribly knowledgeable about the equipment carried by officers in the trenches. Also, the Tommy digging the trench looks VERY clean, neat, and well-dressed...I can't imagine that a man working a pickaxe would stay completely uniformed, not break a sweat, and not get a speck of dirt on his trousers. I feel bad pointing this out, though, because the figure is so well done and the ground base is so believable! I'm sure you can whip up a story to make it all work out though Keep up the outstanding work!
Murdo
Visit this Community
Scotland, United Kingdom
Joined: May 25, 2005
KitMaker: 2,218 posts
Armorama: 1,050 posts
Posted: Saturday, March 24, 2012 - 11:55 AM UTC

Quoted Text

I'm curious about that white cord around the leftenant's neck. Can you explain that one?


It's a lanyard for his pistol.
Buckeye198
Visit this Community
Ohio, United States
Joined: May 02, 2010
KitMaker: 596 posts
Armorama: 265 posts
Posted: Saturday, March 24, 2012 - 12:11 PM UTC

Quoted Text


Quoted Text

I'm curious about that white cord around the leftenant's neck. Can you explain that one?


It's a lanyard for his pistol.


Ope. Embarrassing. I told you I don't know much about WWI...
cdharwins
Visit this Community
New Jersey, United States
Joined: October 28, 2006
KitMaker: 491 posts
Armorama: 462 posts
Posted: Saturday, March 24, 2012 - 01:34 PM UTC
Hi all,

Great work everybody!! It's very inspiring.

I've FINALLY started some work on my Whippet!!! I started with the track sponsons.


The sponsons with shims for the tracks added.


The kit has the idlers too far apart. I did a simple fix with some .040 rod and dilled out the four lightening holes on each wheel.


I love the Model Cellar tracks!! Each link is two parts, but they assemble very, very easily and look great. They're made of styrene; no superglue. Get these!!!


The finished sponsons:


Also...Thanks to the tip from Murdo, the Airwaves PE set just arrived from Hannants the other day. I've never gotten "Royal Mail" before. Pretty exciting.

Thanks for looking....

Chris
Buckeye198
Visit this Community
Ohio, United States
Joined: May 02, 2010
KitMaker: 596 posts
Armorama: 265 posts
Posted: Saturday, March 24, 2012 - 04:45 PM UTC
Chris those sponsons are looking mighty crisp! How much prep work went into them? I know you mentioned the ease of the Model Cellar tracks (looks fantastic!), but was there any cleanup involved? Looking forward to more progress
AlanL
Visit this Community
England - East Anglia, United Kingdom
Joined: August 12, 2005
KitMaker: 14,499 posts
Armorama: 11,675 posts
Posted: Saturday, March 24, 2012 - 08:33 PM UTC
Hi Robby,

Thanks for the thoughts. The lanyard question has been answered by Murdo. You're right and you wrong regarding the infantryman. Yes, he look's very clean at the moment but that's because he's not complete yet nor in situ. As regards jacket on/off depends on the circumstance. Is it hot/cold, morning/afternoon/evening, has he just arrived, is he just leaving, is the trench a front line trench, communications trench or reserve trench etc, etc.

It would not be unusual to dig in that order of dress although given an appropriate opportunity the tunic would most probably come off. Digging was a constant occupation, either new trenches, or repairing old/damaged trench systems, captured trenches or digging 'caves' to shelter in.

It's the same with caps/helmets - what you wear on your head depends on the circumstance and time of the event.

Hope that helps clarify things.

Cheers

Al
cdharwins
Visit this Community
New Jersey, United States
Joined: October 28, 2006
KitMaker: 491 posts
Armorama: 462 posts
Posted: Sunday, March 25, 2012 - 03:21 AM UTC

Quoted Text

Chris those sponsons are looking mighty crisp! How much prep work went into them? I know you mentioned the ease of the Model Cellar tracks (looks fantastic!), but was there any cleanup involved? Looking forward to more progress


Robby,

Thanks for the feedback. The prep wasn't too bad. The sponsons require a .040 shim along the inside to support the tracks and the drives and idlers need to be altered. It's all covered in the instructions that came with the tracks. They're hand-drawn and type-wrtten (made in 1995!) but are easy to follow. Each track had a couple of small attachment points that needed to be sanded off. There were only 67 per side so it didn't take that long. They snapped together and fit the sponsons perfectly. I was so happy that they were injection molded so I didn't have to fool with the superglue. One very minor snag: I had a whole run snapped together and put the glue on (Testors liquid cement). The glue dissolved the pins that hold the tracks together pretty quickly, so they started coming apart when I was wrapping them around the sponsons. The solution there was to wait 15 minutes or so to let the glue stiifen up a little.(I shoulda known that anyway). No problem after that.

HTH...
Chris
geogeezer
Visit this Community
Arizona, United States
Joined: February 17, 2011
KitMaker: 263 posts
Armorama: 258 posts
Posted: Sunday, March 25, 2012 - 04:12 PM UTC
Chris, your tracks look great. All those little pieces would have me climbing the walls.

A little more progress on my Model T Light Patrol Car. I had a 1/35 scale Lewis gun left over from an Italeri LRDG kit,


so I cut off the barrel at the receiver and spliced in a section of Evergreen styrene tube to bring it up to 1/32 scale, and added a bipod (thin styrene rod bent into a hairpin shape.) The rest of the gun is close enough to scale as is.

Lewis gun after painting. Barrel shroud is flat black, receiver and magazine are gun metal.

The next part may seem a little off topic at first, but was essential to the build. When I first put the wheels and tires on the car, they didn't look right, so I checked them for scale. Model T Fords in the US normally had 30 inch diameter tires, 3 inch wide on the front, 3 1/2 on the back. Fords in Canada and in the southern US had 3 1/2 inch wide tires all around, presumably because of road conditions. The tires in the Lindberg kit scale out at 34 x 4 3/4 inches, and to my eye looked as out of place as a turkey in a flock of chickens. What to do? No aftermarket sources of wheels could be found, and the RPM Model T kits seem to have vanished from North America. I considered rubber O rings, and then noticed that the wheels themselves, which are close to correct scale, are also very close to a standard US plumbing size. Off to the home improvement store, where I measured PVC pipe and fittings, electrical conduit, and finally found what I was seeking in the pipe used for lawn irrigation systems. Some of the risers, the parts which connect the main lines to the sprinkler heads were a bit undersized, and exactly the size of my kit's wheels.

The above picture shows the parts and the steps to the finished product. Original 3/4"in tube at the top, turned section below. The inside diameter was fine, but the outside was oversize. I used the lathe on my 1960's era Shopsmith (inherited from my father) to turn down the outside to tire diameter, then cut slices with a razor saw to make the tires. The wood plugs were needed to mount the tube between the lathe centers. The blue tape was added for a snug fit and to eliminate wobble. I used a very slow speed to avoid melting the plastic. It took a lot of hand sanding to make the plastic rings look like tires. The last step was to cut transverse grooves across the tires with the razor saw. The bottom row shows the end result, mounted on the wheels. Snug friction fit, no glue needed. Even after many hours of work they are far from perfect, but they'll do. As my father used to say, it's a lot like hitting yourself on the head with a hammer because it feels so good when you stop!

Cheers,
Dick
vonHengest
Visit this Community
Texas, United States
Joined: June 29, 2010
KitMaker: 5,854 posts
Armorama: 4,817 posts
Posted: Monday, March 26, 2012 - 06:02 AM UTC
Chris: Thanks, I hope to order one soon

Robby: Glad to see you back! Rigging is truly challenging which is why it's often considered an art. There was a link to an very good in-depth tutorial over on Aeroscale. The folks are very friendly over there, so feel free to ask them anything you need regarding rigging or anything else for that matter. It really helps to have the right technique and rigging material to suit the style you are most comfortable with. You can also check out the Wingnut Wings website, they offer some great tips for rigging in 1/32.
I really like the markings on your Nieuport 28c1

Si: She's looking good!

Dick: Excellent, I was hoping somebody would try something like that! Regarding your oversize tires, some gentle heat may help to shrink them, the same technique used to change the length of rubber band style tracks. However since the tread pattern is simple enough, this may be a moot point given your current solution.

Al: The figures are looking good, they have nice facial detail.

Edo: I can't wait to see your take on that beast!

Brent: Wow, that really is an old kit! This is the perfect place for such a build

Chris: I have GOT to get some of those Model Cellar tracks! WOW! Great notes on the idlers and your minor mods to adress them.

Model on!!