Thanks for your kind comments, guys!
Great work, Simon!
Wire cutters of WWI vintage? just google it, there are lots of hits:
Cheers,
Guido
Campaigns
Where Armorama group builds can be discussed, organized, and updates posted.
Hosted by Darren Baker, Richard S.
The Great War 11-11-11 (official thread)
Tailor
Nordrhein-Westfalen, Germany
Joined: May 26, 2008
KitMaker: 1,168 posts
Armorama: 256 posts
Joined: May 26, 2008
KitMaker: 1,168 posts
Armorama: 256 posts
Posted: Sunday, January 29, 2012 - 05:42 PM UTC
captnenglish
California, United States
Joined: May 20, 2008
KitMaker: 1,184 posts
Armorama: 770 posts
Joined: May 20, 2008
KitMaker: 1,184 posts
Armorama: 770 posts
Posted: Monday, January 30, 2012 - 05:13 AM UTC
Quoted Text
Hio folks,
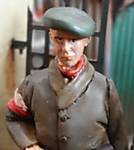
Spent a few hours trawelling the net for WW1 Tommies and came across this chap from Warriors:
What do you think? Is that a leather jerkin and if so would it be appropriate? They are supposed to have a Lewis Gunner to but I can find a pic.
Cheers
Al
PS: Has anyone any thoughts about 54mm figures against 1/35 scale vehicles? Tommies War have some excellent figures but I'm concerned they might dwarf the vehicles!
A
Alan,
I have two of that figure in my grey army and yes he is wearing a leather jerkin. As far as putting 54mm figures with 1/35th vehcles,I think it depends on the figure.
Posted: Monday, January 30, 2012 - 05:23 AM UTC
Hi Matthew,
Thanks, I may do a few of the 54mm figures as stand alones, but I'll not use them for the truck builds.
Thanks for the thoughts folks.
Al
Thanks, I may do a few of the 54mm figures as stand alones, but I'll not use them for the truck builds.
Thanks for the thoughts folks.
Al
RedDuster
England - South East, United Kingdom
Joined: March 01, 2010
KitMaker: 7,078 posts
Armorama: 248 posts
Joined: March 01, 2010
KitMaker: 7,078 posts
Armorama: 248 posts
Posted: Wednesday, February 01, 2012 - 09:58 PM UTC
Nice work Alan / Simon, watching with great interest.
Found some great pics of HMS Kent on this site
http://fevalentine-album.blogspot.com/
was looking for pics of her under way but moving slowly to get an idea of the wake / funnel smoke, which I found, but also found quite a lot of detail in the structure under the bridge is not included in the kit. Also the davits in the kit are shown mounted against the hull, which has a slight but noticable tumblehome, whereas in reality they were vertical, with brackets holding them away from the hull at the top of the bulwarks.
I have just found a great deal of extra work for myself.
but then that is the fun of this hobby
Si
RedDuster
England - South East, United Kingdom
Joined: March 01, 2010
KitMaker: 7,078 posts
Armorama: 248 posts
Joined: March 01, 2010
KitMaker: 7,078 posts
Armorama: 248 posts
Posted: Sunday, February 05, 2012 - 10:36 PM UTC
Some more progress over the weekend, as snow in London kept me from getting to the Milton Keynes model show which I had been planing to go to.
Base first. a suitable size base was dug out and the model tried for size.
some ordinary kitchen foil was crumpled loosely between my finger tips (don't try screwing it up into a ball and opening it, chances are you will tear it), and smoothed over the base & glued down, spots of super glue at the edges and under where the ship will sit and a good coating of white glue eslewhere.
A smaller peice of foil has been more tightly crumpled and torn to size to give a different pattern to propwash. This secured down with superglue and white glue run dow the edges to build up the wake.
Whilst the white glue was drying on with the bridge. Most pictures show prominent vertical frames between the bridge windows, there were added from plastic strip.
painted in and railing added.
railings coated in white glue to represent canvas dodgers.
needs a couple of spot repairs.
Looking at the plans, I decided to add the lower sectionsof the masts, as I will need to add derricks along the centre line, which will be easier to do before I start adding the boats etc. The model is then tested against the wake on the base.
All ok, so next job will be to spray the base colour on the base. which will be a suitable greenish blue, then attach the ship.
More soon
Si
vonHengest
Texas, United States
Joined: June 29, 2010
KitMaker: 5,854 posts
Armorama: 4,817 posts
Joined: June 29, 2010
KitMaker: 5,854 posts
Armorama: 4,817 posts
Posted: Monday, February 06, 2012 - 11:42 AM UTC
It's amazing how there have been good answers provided in a short period of time to all questions that have been asked here, especially with the eclectic variety of projects that we have going on here. This is a really good thread and it's thanks to all of you who have been participating, outstanding participation by everyone!
Simon: I am watching with interest. Particularly your "water" technique, but I've been appreciating your micro detailing on your build of the HMS Kent itself.
Posted: Tuesday, February 07, 2012 - 04:27 AM UTC
Hi Simon,
Great progress.
The Warriors Tommy I'm working on
Al
Great progress.
The Warriors Tommy I'm working on
Al
RedDuster
England - South East, United Kingdom
Joined: March 01, 2010
KitMaker: 7,078 posts
Armorama: 248 posts
Joined: March 01, 2010
KitMaker: 7,078 posts
Armorama: 248 posts
Posted: Tuesday, February 07, 2012 - 09:23 PM UTC
Coming on great Al,
Groundwork lools excellent
Si.
Groundwork lools excellent
Si.
Railmen2000
California, United States
Joined: February 17, 2007
KitMaker: 87 posts
Armorama: 65 posts
Joined: February 17, 2007
KitMaker: 87 posts
Armorama: 65 posts
Posted: Friday, February 10, 2012 - 08:39 AM UTC
I have been enjoying everyone's progress here while I still try to get back to the bench for my project. Hopefully I will get something substantial done and post some pictures over the weekend.
Simon H. - I never knew of the foil technique for water. Great idea!
Simon G.- the book scene is really coming along. Almost wants me to read a book.
Murdo - great scratch building on the interior. Hopefully all your work will not be hidden once the tank is completed.
Alan - nice figure. Don't tell me that is who your ANZACs will be firing on!
Everybody have a great weekend.
Jim
captnenglish
California, United States
Joined: May 20, 2008
KitMaker: 1,184 posts
Armorama: 770 posts
Joined: May 20, 2008
KitMaker: 1,184 posts
Armorama: 770 posts
Posted: Friday, February 10, 2012 - 09:09 AM UTC
I'll try to post in-progress pics this weekend. Can't be certain of the quality as SWMBO is on vacation with the digicam, so I will have to use cam on phone; then I will just have to figure the whole posting pics process (I manage to mess that up every time )
Posted: Friday, February 10, 2012 - 11:10 AM UTC
Thanks Jim.
Simon, that ship is starting to look quite special, it will be quite distinctive when finished.
That book dio is something special too and the Mk 5 is coming on well and the... Ach, there's just too much skill showing here.
Al, love your figures! Whatever happened to "Pier 51"?? there was some fantastic stuff there.
vonHengest
Texas, United States
Joined: June 29, 2010
KitMaker: 5,854 posts
Armorama: 4,817 posts
Joined: June 29, 2010
KitMaker: 5,854 posts
Armorama: 4,817 posts
Posted: Sunday, February 12, 2012 - 10:35 AM UTC
Si, I saw this build feature and thought I'd send a little motivation your way
It's 1903, but still an excellent resource:
1/350 HMS Kent 1903 by Combrig
It's 1903, but still an excellent resource:
1/350 HMS Kent 1903 by Combrig
RedDuster
England - South East, United Kingdom
Joined: March 01, 2010
KitMaker: 7,078 posts
Armorama: 248 posts
Joined: March 01, 2010
KitMaker: 7,078 posts
Armorama: 248 posts
Posted: Sunday, February 12, 2012 - 11:31 PM UTC
Thanks Jim & Murdo
Jeremy, I have seen Kostas' work, he really is a bit good. looking at the weathering and boat fit, looks more 1914, but very impressive.
Haven't been able to get on with the base, as the only places I can spray are in the garage, which has no heating, or the back garden, and both were below zero all weekend.
have made some progress on she ship herself, will post update later or tomorrow.
Si
Railmen2000
California, United States
Joined: February 17, 2007
KitMaker: 87 posts
Armorama: 65 posts
Joined: February 17, 2007
KitMaker: 87 posts
Armorama: 65 posts
Posted: Monday, February 13, 2012 - 12:38 PM UTC
Everybody's work here is outstanding, I am a little embarassed to post my pics. But hey, I am a glutton for criticism.
I finally built up the machine gunner with putty for the overcoat and added a scratch carved pickelhaube. I now can see what others mean when they refer to these old Bandai figures as "soft" in detail.
I am still developing the trnch, and here is the project showing how the gun will be positioned with sandbags along the parapet of the trench and the crew.
I am realizing that constructing my scene has its problems. The ammo loader needs to be lower than the gunner, which results in different levels of trench steps for each soldier. At the same time, the gunner has his arms fully outstretched to reach the gun handles without the rear of the gun sled slicing him in half, I will have to rethink the set up for the machine gun nest so the ammo loader's arms are not stretched like Mr. Fanatastic of the Fantastic 4. Such is the challenges of our hobby.
Jim
vonHengest
Texas, United States
Joined: June 29, 2010
KitMaker: 5,854 posts
Armorama: 4,817 posts
Joined: June 29, 2010
KitMaker: 5,854 posts
Armorama: 4,817 posts
Posted: Monday, February 13, 2012 - 05:54 PM UTC
Hey, this campaign is about fun and awareness of WWI. As long as your building and having a good time your work belongs here Jim
Tailor
Nordrhein-Westfalen, Germany
Joined: May 26, 2008
KitMaker: 1,168 posts
Armorama: 256 posts
Joined: May 26, 2008
KitMaker: 1,168 posts
Armorama: 256 posts
Posted: Monday, February 13, 2012 - 06:12 PM UTC
Quoted Text
...
I am realizing that constructing my scene has its problems. The ammo loader needs to be lower than the gunner, which results in different levels of trench steps for each soldier. ...
Let the gunner stand on an ammo box
Guido
RedDuster
England - South East, United Kingdom
Joined: March 01, 2010
KitMaker: 7,078 posts
Armorama: 248 posts
Joined: March 01, 2010
KitMaker: 7,078 posts
Armorama: 248 posts
Posted: Monday, February 13, 2012 - 10:46 PM UTC
Here is the weekend's progress on the Kent.
The dodgers around the bridge & after superstructure have been painted, a slightly lighter and different hue to the rest of the ship.
detailing work continueing on the bridge, still need some voicepipes around the binacle and the small etched table went ballistic, will find soemthing to replace that. Also the instructions show the searchlights positioned on the ends of the bridgewings, pics of the ship in 1914 show the searchlights moved inboard and semaphores on the ends of the bridgewings. I will hunt down some semaphores from amongst the spare etch.
Before adding most of the boats, the boat derricks were next. I can find no drawings, but I would assume the derricks would rest in crutches when not in use, so these have been added, the actual crutch itself is unpainted in this pic on is on the centerline next to the funnel on the already fitted admirals barge & the other abeam of the fwd funnel.
The derricks have been fitted, the and rigged for stowed position, the lifting block & hook came from an old etched fret & the good old copper wire came out again
Next job has to be base coat on the base, and fixing down. and painting some fujumi figures to man the lady.
Si
windysean
Wisconsin, United States
Joined: September 11, 2009
KitMaker: 1,917 posts
Armorama: 735 posts
Joined: September 11, 2009
KitMaker: 1,917 posts
Armorama: 735 posts
Posted: Tuesday, February 14, 2012 - 03:38 AM UTC
Quoted Text
Hey, this campaign is about fun and awareness of WWI. As long as your building and having a good time your work belongs here Jim
'cause nothing says "fun" like WWI!
-Sean.
vonHengest
Texas, United States
Joined: June 29, 2010
KitMaker: 5,854 posts
Armorama: 4,817 posts
Joined: June 29, 2010
KitMaker: 5,854 posts
Armorama: 4,817 posts
Posted: Tuesday, February 14, 2012 - 12:43 PM UTC
Si: Looking good, the rigging has come out really nice. I don't know about the crutches, and it seems like its hard to find photos online. It seems appropriate to me and I'd be hard pressed to argue that wasn't what was done.
Sean: Nice! Great slogan!
RedDuster
England - South East, United Kingdom
Joined: March 01, 2010
KitMaker: 7,078 posts
Armorama: 248 posts
Joined: March 01, 2010
KitMaker: 7,078 posts
Armorama: 248 posts
Posted: Tuesday, February 14, 2012 - 09:23 PM UTC
Sean, Like the slogan as well.
Jeremy. I am not 100% about the crutches, I can find no photographic evidence ot their existance the lack thereoff, However if the derrick booms were not stowed in crutches, then they should, in the practice of good seamanship have been stowed vertically against the mast. All the pics of this class that show the derrick booms clearly on ships at sea show them horizontal. The crutches may not show up on pictures taken on board in port as they may have been removable fixtures and only fitted when in use.
Si
vonHengest
Texas, United States
Joined: June 29, 2010
KitMaker: 5,854 posts
Armorama: 4,817 posts
Joined: June 29, 2010
KitMaker: 5,854 posts
Armorama: 4,817 posts
Posted: Wednesday, February 15, 2012 - 07:09 AM UTC
Si, I'd say you pretty much just answered your own question then
RedDuster
England - South East, United Kingdom
Joined: March 01, 2010
KitMaker: 7,078 posts
Armorama: 248 posts
Joined: March 01, 2010
KitMaker: 7,078 posts
Armorama: 248 posts
Posted: Thursday, February 16, 2012 - 11:01 PM UTC
As always after you have done something, you find what you are looking for. Found a a couple of pictures on the web of the ship in Esquimult Harbour, British Columbia in may 1915 carrying out more perminant repairs to the shell hit received at the Battle of the Falklands. One clearly shows the after derrick stowed up against the walkway, so that will need to redone. Also clearly shown are the square tops on the fore and mainmasts, which is going to be a scratchbuild job, at least no cage aerials are shown to be fitted, which is a relief.
vonHengest
Texas, United States
Joined: June 29, 2010
KitMaker: 5,854 posts
Armorama: 4,817 posts
Joined: June 29, 2010
KitMaker: 5,854 posts
Armorama: 4,817 posts
Posted: Friday, February 17, 2012 - 07:47 AM UTC
Good grief Si, you should be making a feature for your build!
Barbarossa
United Kingdom
Joined: August 25, 2005
KitMaker: 216 posts
Armorama: 215 posts
Joined: August 25, 2005
KitMaker: 216 posts
Armorama: 215 posts
Posted: Friday, February 17, 2012 - 07:59 AM UTC
Hi everyone
Firstly can I say thanks to all who left some positive comments, especially Guido who took the time to source those wirecutters pics...... cheers!!
Well almost finally got the German trench completed this week..... Added the spades & tools to the trench, the bit of ground at the back I felt needed filling, so made a duck board & some boxes to fill the space. Wanted to add more rats, so put some tomatoes in the boxes to keep them busy.
Wanted to come up with something for the ends of the trenches, instead of just painting the walls black, or blocking them off from each side. Decided upon looking for suitable wartime photos to try & give the impression of the trench continuing....... Normally wouldn't entertain the idea, but since it's still actually a book, I could get away with it. Am alittle undecided though, don't know if it works...., I think it looks ok...??? Any ideas??
Just the figures to add, as well as some field equipment. Jeremy mentioned adding some mud/puddles, which I was intending on doing to, add another aspect to it all. Unfortunatley, I didn't make enough 'pools' in the clay for the water to settle in.......wonderful thing hindsight!!
Anyway, thanks for looking, hoping to finish it all off in the comming weeks.....,
Cheers
SIMON.
Posted: Friday, February 17, 2012 - 08:57 AM UTC
Hi Simon.
The book is coming along a treat, I like you pictures at the end of the trenches. Excellent progress - looking forward to developments.
Al
The book is coming along a treat, I like you pictures at the end of the trenches. Excellent progress - looking forward to developments.
Al