Texas, United States
Joined: March 08, 2010
KitMaker: 2,465 posts
Armorama: 2,383 posts
Posted: Monday, January 02, 2012 - 06:47 PM UTC
Hi all,
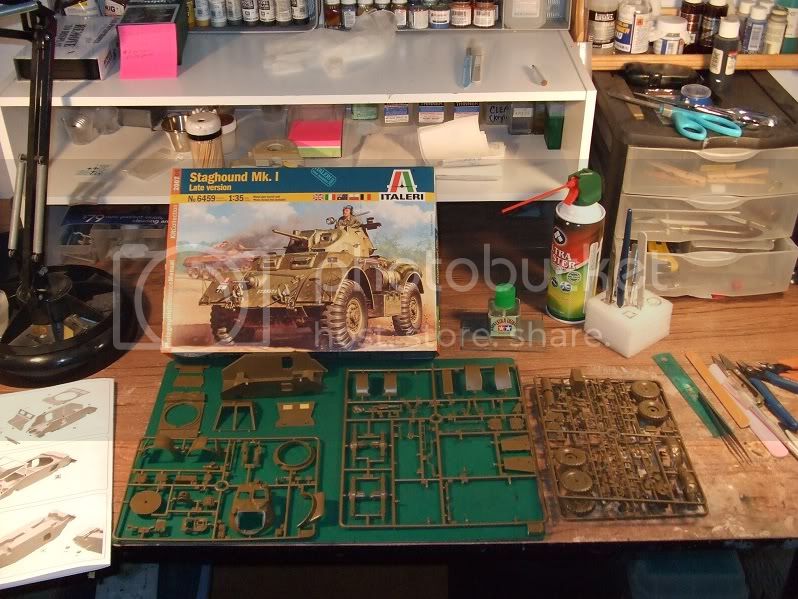
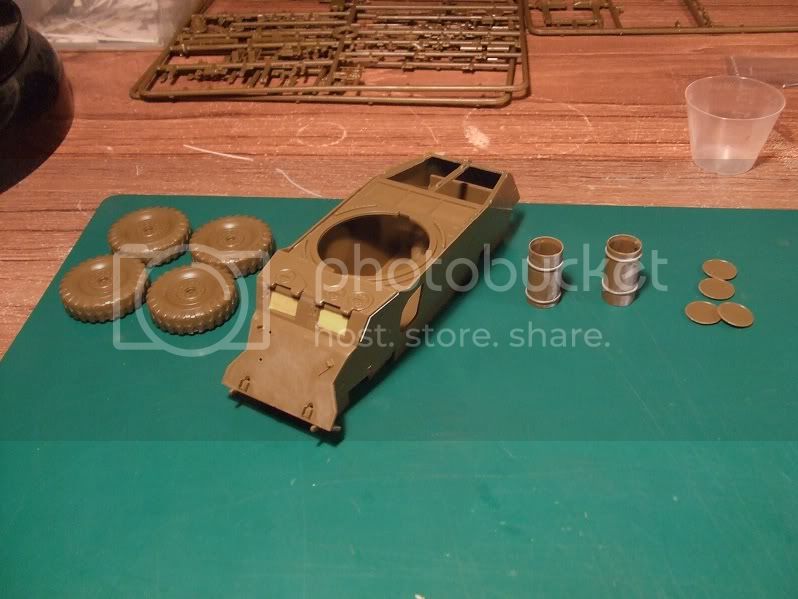
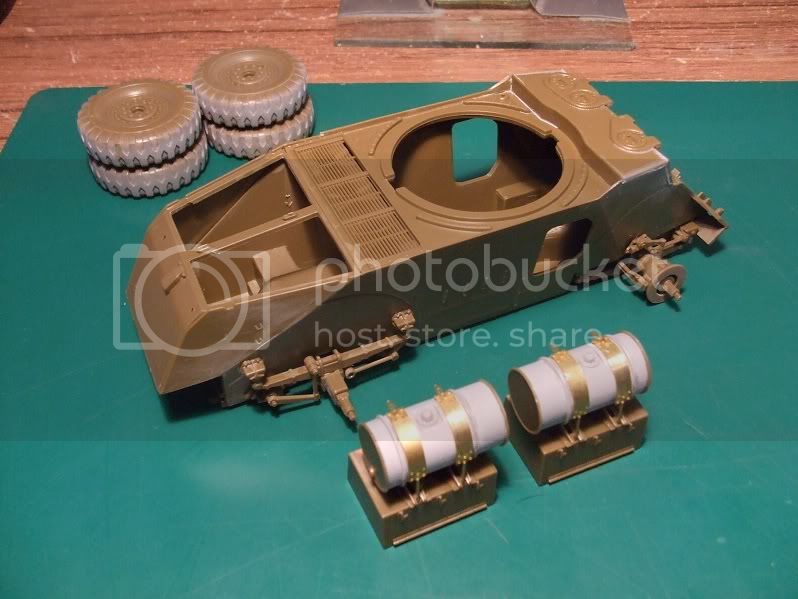
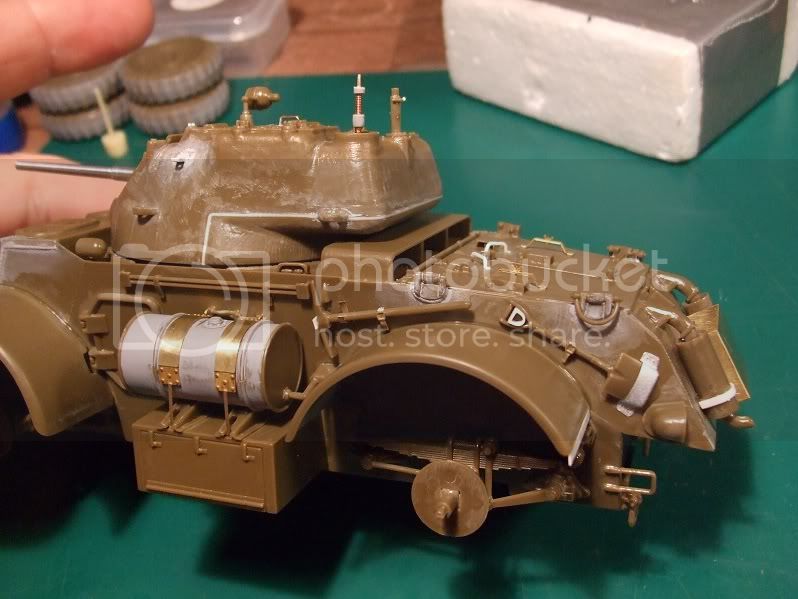
I have started building my present from santa. i have ordered replacement barrels for the 37mm and 2 30cal. ill probably create some weld beads and definatley scratch build some bed and tarp rolls for the fenders. so far its been a pretty easy build with the exception of a couple of minor fit issuses. hese what ive done so far.
Thanks for looking.

Gary
Quebec, Canada
Joined: November 15, 2002
KitMaker: 3,960 posts
Armorama: 3,579 posts
Posted: Monday, January 02, 2012 - 07:54 PM UTC
good start Gary!

Texas, United States
Joined: March 08, 2010
KitMaker: 2,465 posts
Armorama: 2,383 posts
Posted: Tuesday, January 03, 2012 - 02:41 PM UTC
Hi all,
Thanks Richard.

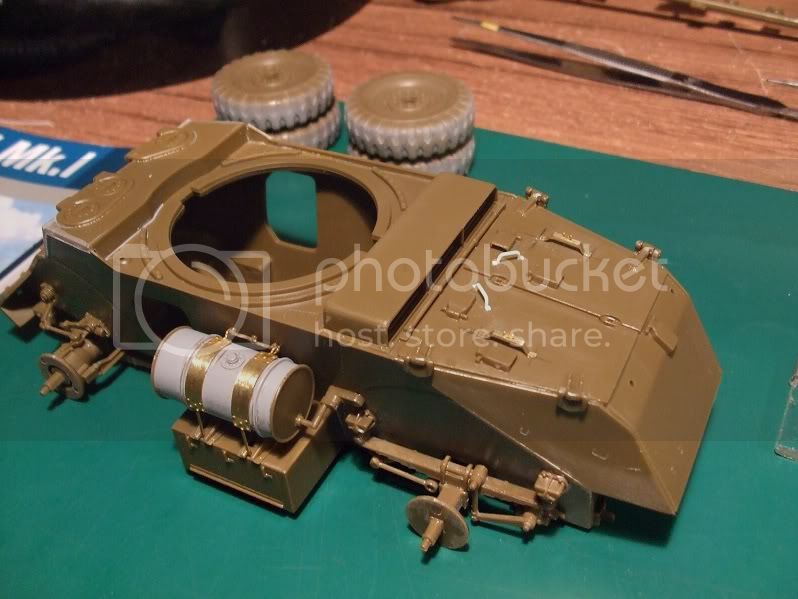
Heres a little more progress.
Thanks for looking!
Gary
Hawaii, United States
Joined: August 27, 2006
KitMaker: 1,646 posts
Armorama: 1,557 posts
Posted: Tuesday, January 03, 2012 - 02:53 PM UTC
Gary: good looking build. I will have to book mark this thread in case I get around to building mine!
Happy Modelling, -zon
"Certainty of death.
Small chance of sucess.
What are we waiting for?"
-Gimli, Return of the King.
England - East Anglia, United Kingdom
Joined: August 12, 2005
KitMaker: 14,499 posts
Armorama: 11,675 posts
Posted: Tuesday, January 03, 2012 - 09:57 PM UTC
'Action this Day'
Winston Spencer Churchill
Texas, United States
Joined: March 08, 2010
KitMaker: 2,465 posts
Armorama: 2,383 posts
Posted: Wednesday, January 04, 2012 - 05:47 AM UTC
Zon, Alan. Thanks gentlemen!

its been a fun little kit.
Gary
Texas, United States
Joined: March 08, 2010
KitMaker: 2,465 posts
Armorama: 2,383 posts
Posted: Thursday, January 05, 2012 - 06:27 PM UTC
Hi all,
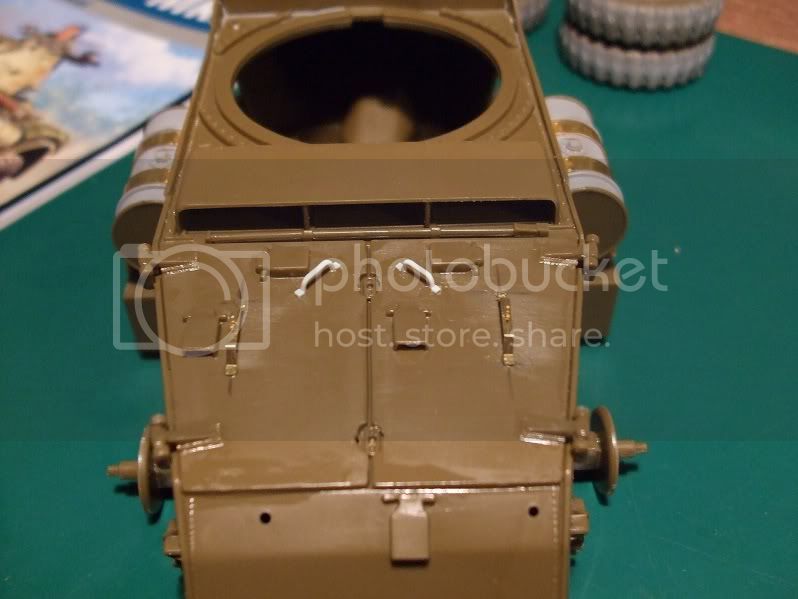
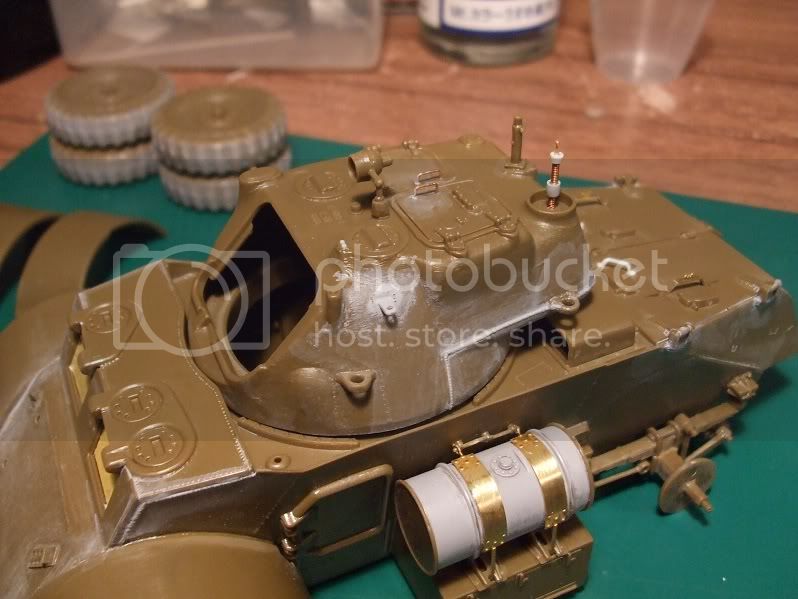
ive made some more progress. still waiting on the 37mm and 30cal.s to arrive. tried building my own antenna but it might be a little off.tell me what you think. added weld seams to turret and some hatch handles.
Thanks for looking!
Gary
Georgia, United States
Joined: January 31, 2010
KitMaker: 2,191 posts
Armorama: 1,814 posts
Posted: Friday, January 06, 2012 - 12:52 AM UTC
Coming together nicely Gary. Looks like mostly out of the box with some small detail improvements. How's the kit in general? Ever built the Bronco version to compare?
Join AMPS.
http://www.amps-armor.org/ampssite
Texas, United States
Joined: March 08, 2010
KitMaker: 2,465 posts
Armorama: 2,383 posts
Posted: Saturday, January 07, 2012 - 06:23 AM UTC
Quoted Text
Coming together nicely Gary. Looks like mostly out of the box with some small detail improvements. How's the kit in general? Ever built the Bronco version to compare?
Hi Jesse,
Thanks man!
over all the kit is pretty good. theres some molding seams to cleanup on most parts and some minor fit issues but that doesnt bother me. The 37mm barrel has to be replaced to be acurrate and the 30cals arent so good but im replacing them. its a fun kit so far. ive not built a staghound before but i have to say the bronco kit looks pretty good. i found out that santa could have got the bronco kit from sprue brothers at about half the cost over the holidays. they had a killer sale! oh well, it was a gift im not out the cash!
thanks again Jesse!
Gary
Texas, United States
Joined: March 08, 2010
KitMaker: 2,465 posts
Armorama: 2,383 posts
Posted: Sunday, January 08, 2012 - 03:37 AM UTC
England - East Anglia, United Kingdom
Joined: August 12, 2005
KitMaker: 14,499 posts
Armorama: 11,675 posts
Posted: Sunday, January 08, 2012 - 05:08 AM UTC
Hi Gary,
nice work, looking good.
Al

'Action this Day'
Winston Spencer Churchill
United Kingdom
Joined: February 25, 2007
KitMaker: 3,033 posts
Armorama: 2,953 posts
Posted: Sunday, January 08, 2012 - 06:46 AM UTC
Hi Gary
Nice build of one of my favourites. I have this waiting in the pile.
I greatly admired your recent Stug build, so am looking forward to seeing this one completed.
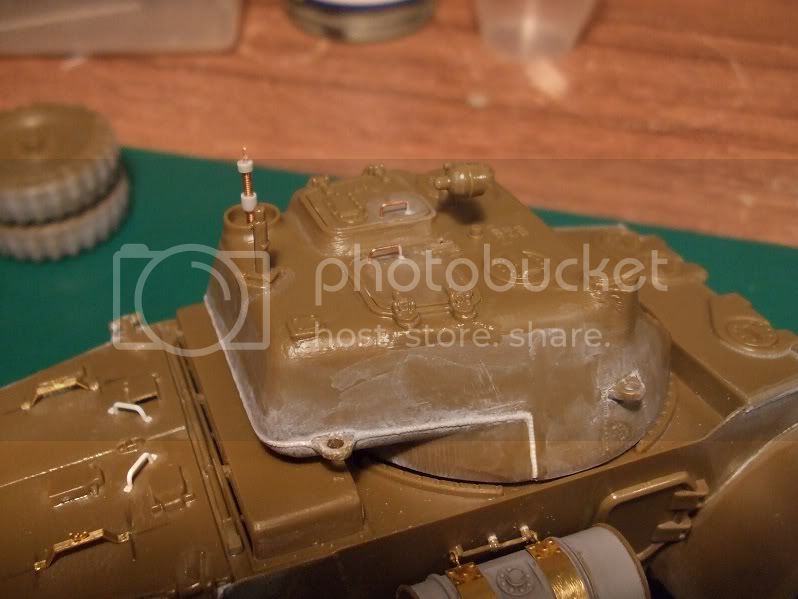
By the way the turret is cast and the lines along it are not weld lines as you've added but casting lines from the mould if you want to adjust them.
http://data3.primeportal.net/apc/martin_noorloos/staghound_mk1/images/staghound_mk1_057_of_108.jpg regards
Alan
Texas, United States
Joined: March 08, 2010
KitMaker: 2,465 posts
Armorama: 2,383 posts
Posted: Sunday, January 08, 2012 - 07:40 AM UTC
Hi gentlemen,
Al-thanks man!
Alan-thanks for the heads up on the mould lines. im definatly gonna adress that issue.

Thanks again!
Gary

#135
California, United States
Joined: August 05, 2007
KitMaker: 1,501 posts
Armorama: 1,485 posts
Posted: Sunday, January 08, 2012 - 11:14 AM UTC
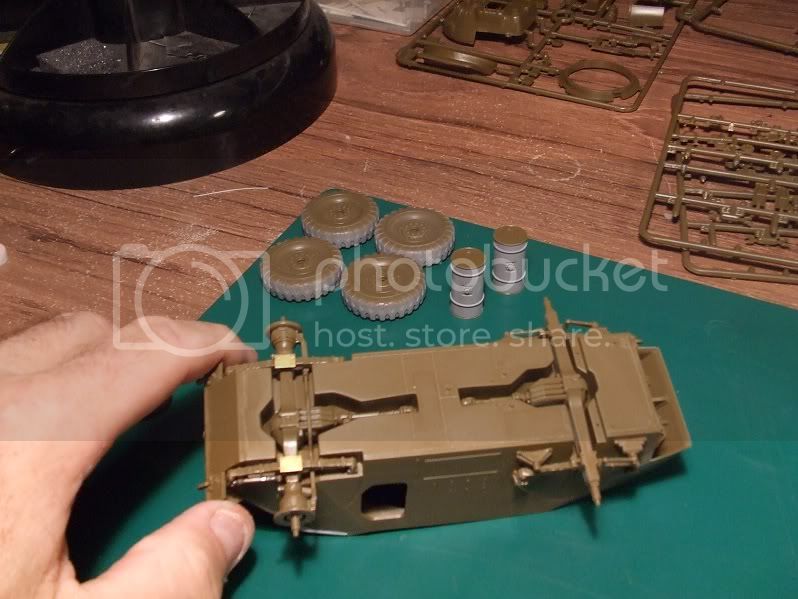
@BBD468 Gary,
Excellent progress on your latest build, I like all of the scratch made details that you have added. Nice work on the photo-etch parts and good save on the 37 mm barrel. Good idea to check for seam lines with the primer before moving on with the rest of the build, I mean horror of horrors discovering them later during final painting.

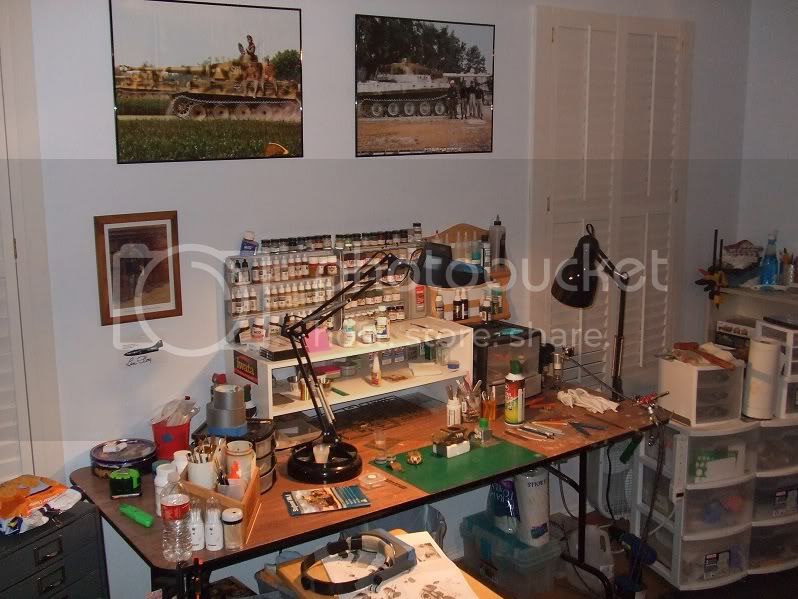
Kinda looks like a radial dome buggy with just the wheels attached to the chassis! Very organized workstation with most everything at arms reach, at least from what I can see in the photograph. Would have dropped in sooner but been busy working on my contribution for the Panther Campaign, and trust me I do understand about writing up text for the photographs for posting just about as time consuming as building the kit itself, at least it is for me. Ill be dropping in again to check on your progress, keep up the excellent and clean work.
~ Eddy

If you absolutely must have a city completely destroyed overnight . . . call the MARINES
Currently on the bench:
1:12 Bandia Star Wars K-2SO
1:35 Takom T-54B Late
Texas, United States
Joined: March 08, 2010
KitMaker: 2,465 posts
Armorama: 2,383 posts
Posted: Sunday, January 08, 2012 - 12:37 PM UTC
Hi Eddy,
Thanks for your kind words and for following along. i really appreciate it.
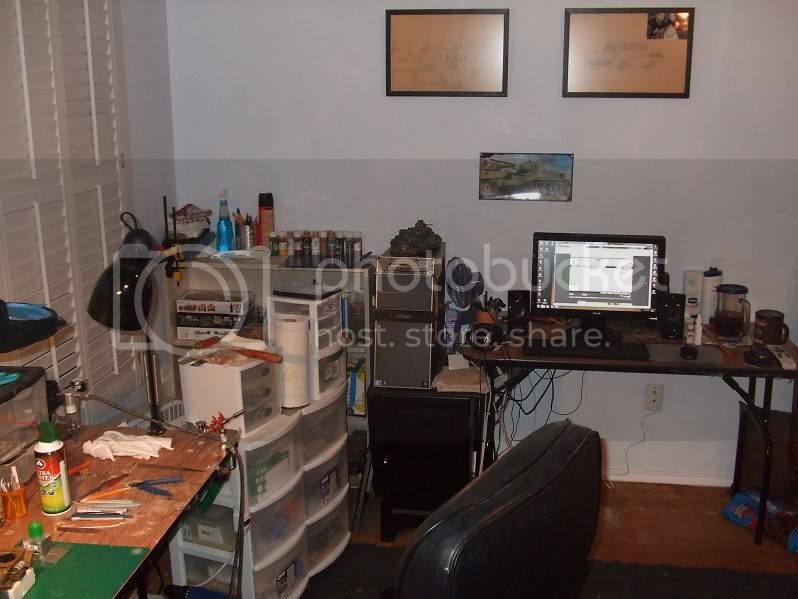
i thought i would post a couple pics of my work bench. just for sh*ts and giggels!
hmmm...hope thats not inapropriate?

Thanks for looking Eddy!
Gary
England - South East, United Kingdom
Joined: January 09, 2010
KitMaker: 979 posts
Armorama: 959 posts
Posted: Sunday, January 08, 2012 - 08:31 PM UTC
Hi Gary,
I am impressed with your build, I like the Staghound and your interpretation of it so far looks very good. I like the way you have lifted a inaccurate kit with all your improvements it makes the model more personal.
I admire the moddling space that you have created, space is at a premium in our flat and would like the freedom to work as you do. With my first child due in May space will be even more limited !
S
Texas, United States
Joined: March 08, 2010
KitMaker: 2,465 posts
Armorama: 2,383 posts
Posted: Tuesday, January 10, 2012 - 09:18 AM UTC
Hi All,
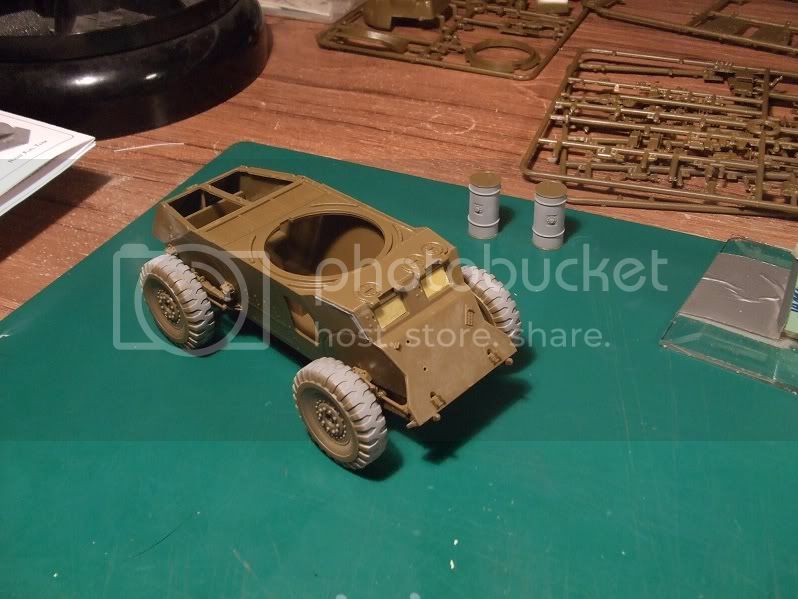
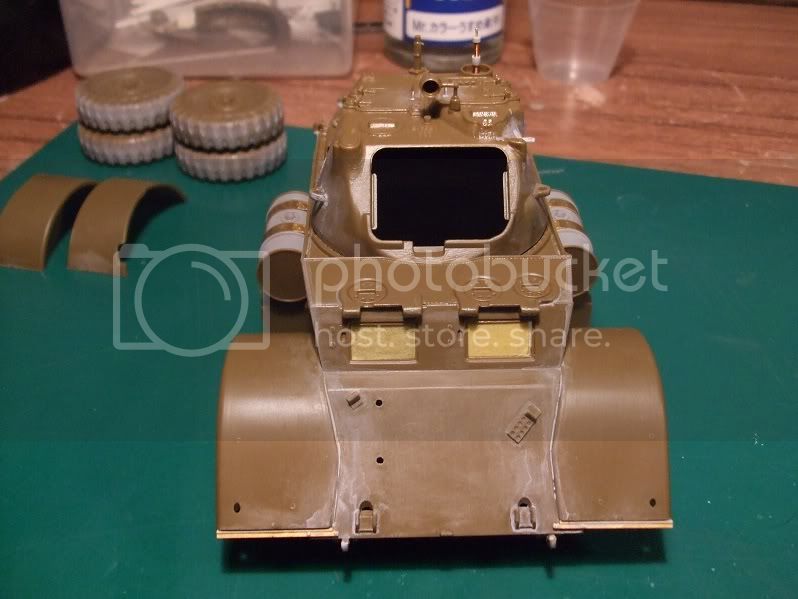
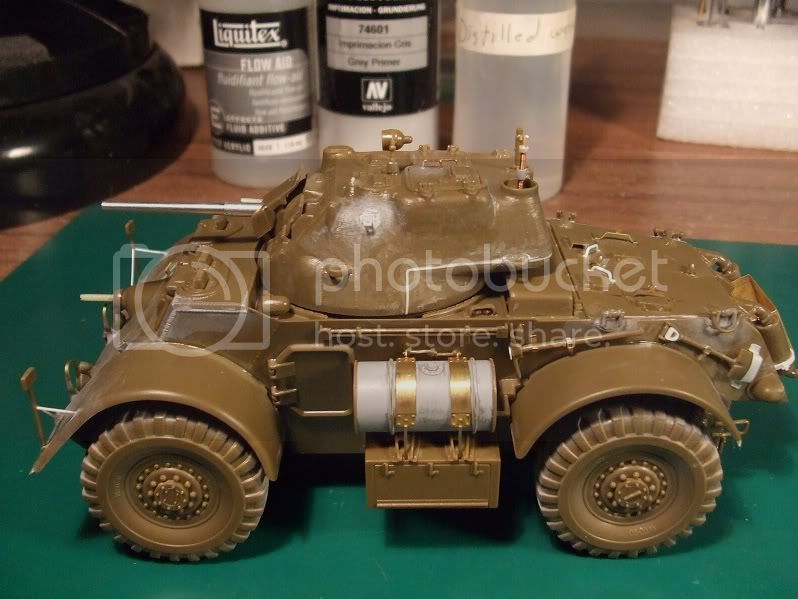
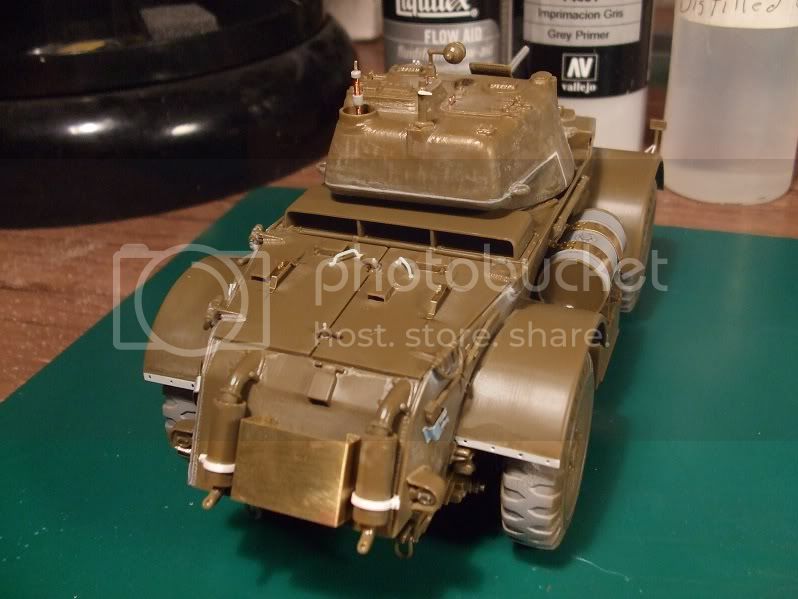
Ive completed the backend of the kit. ive added some tool support brackets and upgraded the shovel and axe head support/hangers...lack of better words. ive also sanded the turret seam welds down to properly look like mould lines. i may add more detail to the muffler retaining straps.
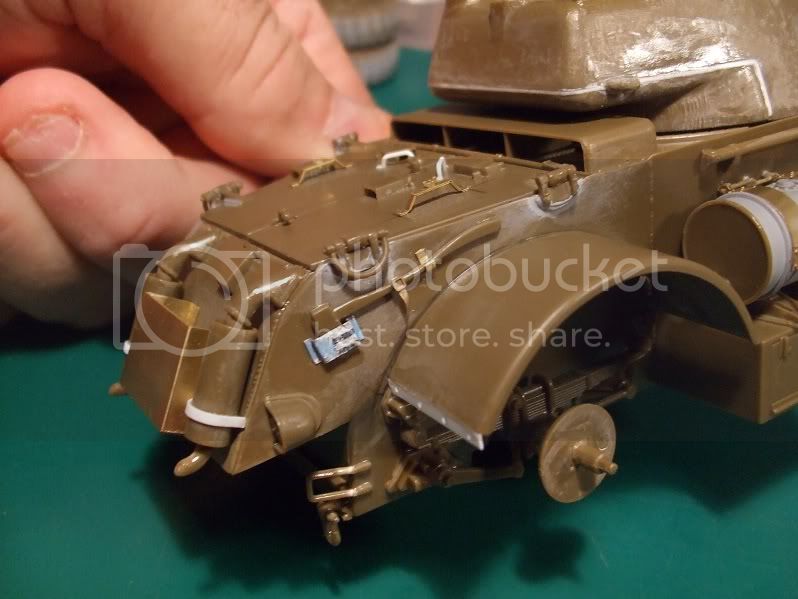
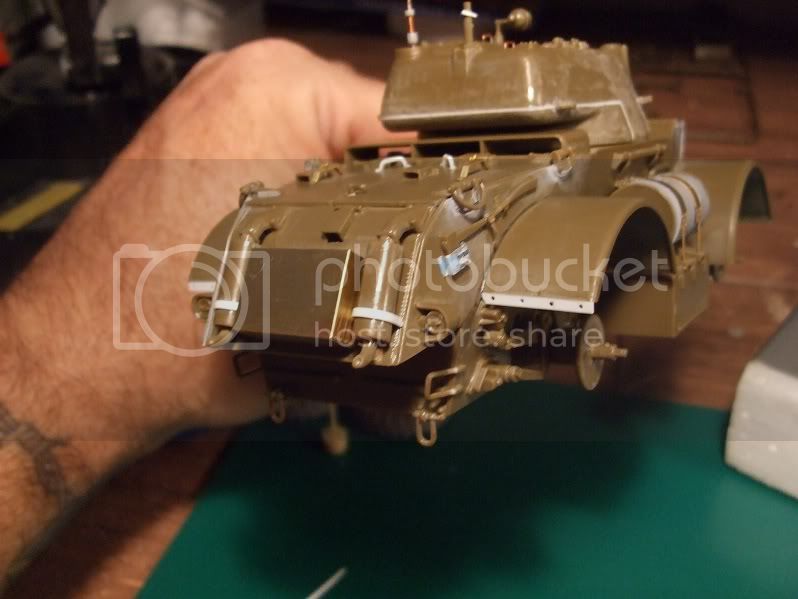
Thanks for looking!
Gary
England - South East, United Kingdom
Joined: January 09, 2010
KitMaker: 979 posts
Armorama: 959 posts
Posted: Tuesday, January 10, 2012 - 08:07 PM UTC
Very nice so far, impressive level of detail
Georgia, United States
Joined: January 31, 2010
KitMaker: 2,191 posts
Armorama: 1,814 posts
Posted: Wednesday, January 11, 2012 - 02:33 AM UTC
Indeed. A nice blend of upgrades without going crazy over every little detail.
Well done.
Join AMPS.
http://www.amps-armor.org/ampssite
Texas, United States
Joined: March 08, 2010
KitMaker: 2,465 posts
Armorama: 2,383 posts
Posted: Wednesday, January 11, 2012 - 12:32 PM UTC
Hi,
Steven-Jesse, Thank gentlemen!
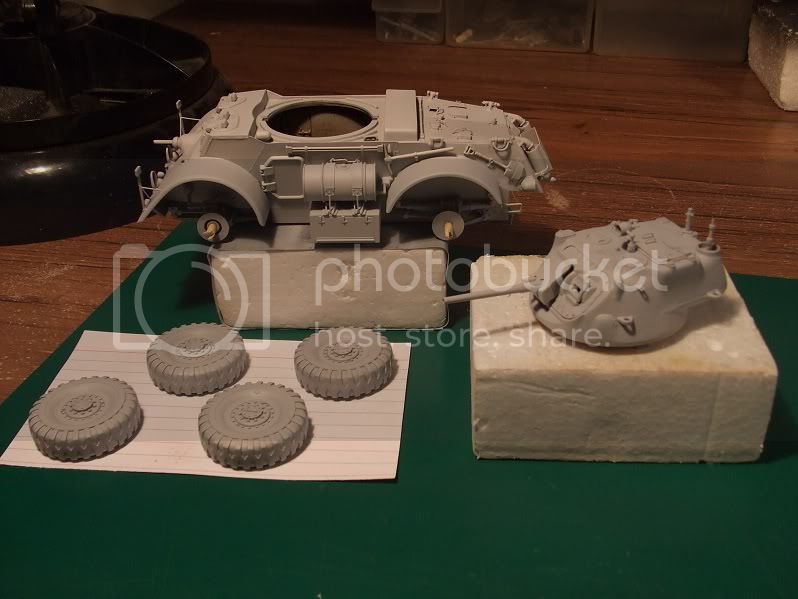
Well i think its time for primer. im going to use vallejo 74601 grey primer. i am im a loyal tamiya paint and primer user however im out of primer and my nephew gave me the vallejo. i tried it on an old practice KV-1 and was very disapointed. a few weeks ago i posted a question about thinning and cleanup with vallejo primer and was recomended to try a few drops of liquitex flow aid in a full cup of primer and i must say it made alot of difference. i normaly decant tamiya primer and use it in my air brush and while the vallejo doesnt spray as good as tamiya it dries great and is durable as heck. i clean up with full cup of windex first then sray water after and it cleans pretty good.
Anyway, heres some pics of her finished.
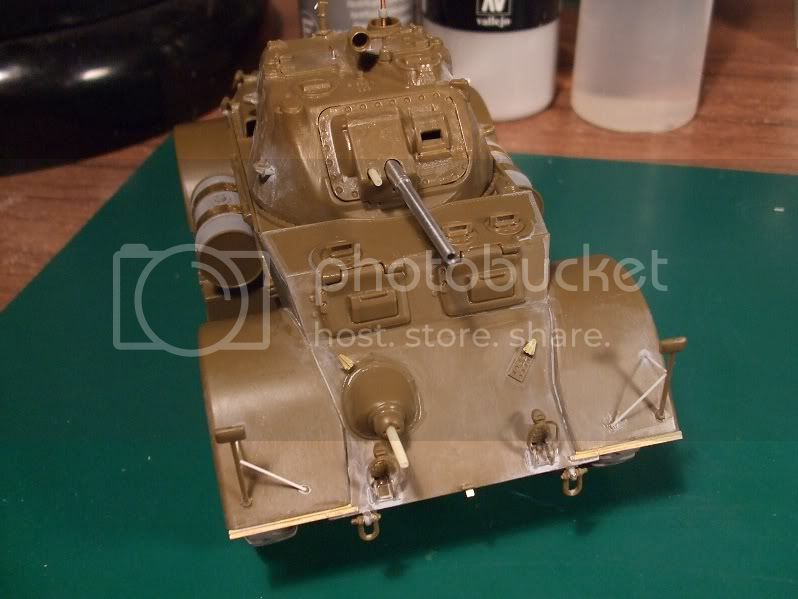
Thanks for looking!
Gary
#135
California, United States
Joined: August 05, 2007
KitMaker: 1,501 posts
Armorama: 1,485 posts
Posted: Wednesday, January 11, 2012 - 07:23 PM UTC
@BBD468 Gary,
Youve used your time wisely and have already completely assembled, modified and scratch made and added items to this kit and now your ready to start on some painting. Im in the same boat as Steven SDavies Davies with space being a premium over here in our apartment, although Ive managed a bit of a man-corner in our bedroom.
From your last set of photographs it appears that youve filled the seams along the fenders and body with super glue? Clean build, looks sharp, keep it coming! Love your man-cave.
~ Eddy
If you absolutely must have a city completely destroyed overnight . . . call the MARINES
Currently on the bench:
1:12 Bandia Star Wars K-2SO
1:35 Takom T-54B Late
Texas, United States
Joined: March 08, 2010
KitMaker: 2,465 posts
Armorama: 2,383 posts
Posted: Thursday, January 12, 2012 - 02:34 PM UTC
Hey Eddy,
Thanks for the complements man! the fenders have no superglue. i put extra tamiya thin cement along the seams between the fenders and the body and held them together with a little pressure and when it melts a bit of plastic will kinda oooze out and when the fenders stay on by them selves i go back with a paint brush and work the seam with more tamiya cement till its smooth with no pinholes or lumps. the end result looks kinda shiney.
Man i hope that made sence!
Anyways, thanks again Eddy
Gary
Georgia, United States
Joined: January 31, 2010
KitMaker: 2,191 posts
Armorama: 1,814 posts
Posted: Thursday, January 12, 2012 - 03:51 PM UTC
Gary,
How did you make the handles on the rear engine deck? I like their shape, and they look better than the wire handles I typically make.
Join AMPS.
http://www.amps-armor.org/ampssite
Texas, United States
Joined: March 08, 2010
KitMaker: 2,465 posts
Armorama: 2,383 posts
Posted: Friday, January 13, 2012 - 03:31 AM UTC
Quoted Text
Gary,
How did you make the handles on the rear engine deck? I like their shape, and they look better than the wire handles I typically make.
Hi Jesse,
i made the rear handels from round styrene. dont remember the size but i know that its a bit bigger than 0.4mm/.015". just bent it while holding with tweezers.if you try bending it sharply it will break so thats why it has a nice round bend. the other part of the handles is also small flat styrene. just cut to length, notched it out on one end, and butted i against the handel and glued.
Gary
Texas, United States
Joined: March 08, 2010
KitMaker: 2,465 posts
Armorama: 2,383 posts
Posted: Friday, January 13, 2012 - 07:52 AM UTC
Hi all,
Well shes primed! but im very confused. i tested the vallejo primer on the old KV-1 and liked what i saw, but now i think i spoke to soon. i had a couple of spots tha needed to be sanded and cuople of pieces of lint plucked off. when i started sanding with 400 wet/dry sand paper the primer kinda chipped and peeled off. and plucking the lint off did the same thing.
i always follow the same prep steps before primeing and ive never once had an issue with tamiyas primer. the vallejo primer has dried for 3 days. when i tried to feather the edges of the peeled areas it made it worse. ive had to go back and spray thinned Mr.surfacer 1000 over troubled areas and try to smooth them out.

it looks better now but i thought if it got worse id have to get out the old brake fluid and strip her down and i think we all know what thats like.

Anyone know what went wrong? has anyone else had similar problems with vallejo primer? ive heared some people swear by it but i just dont see it. im gonna have to stick with the old tried and true tamiya primer!
anyways, heres a pic of her now already fixed.
Thank for looking!
Gary


