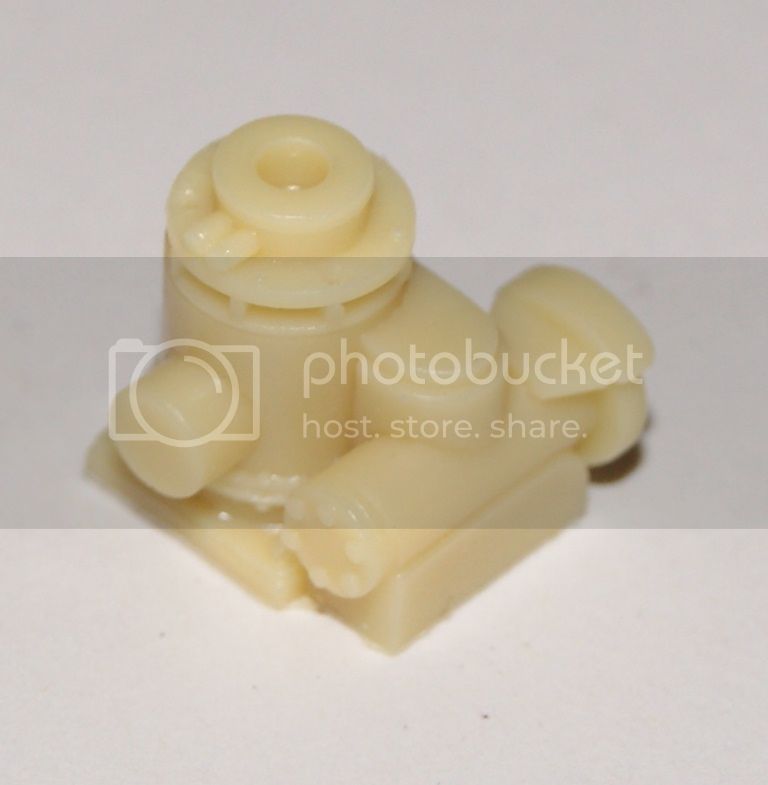
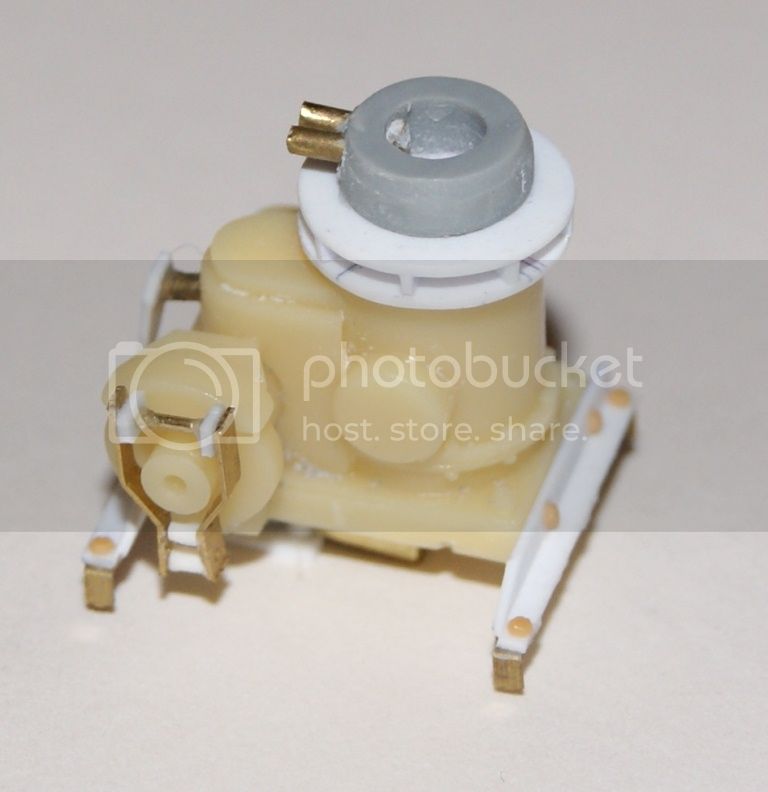
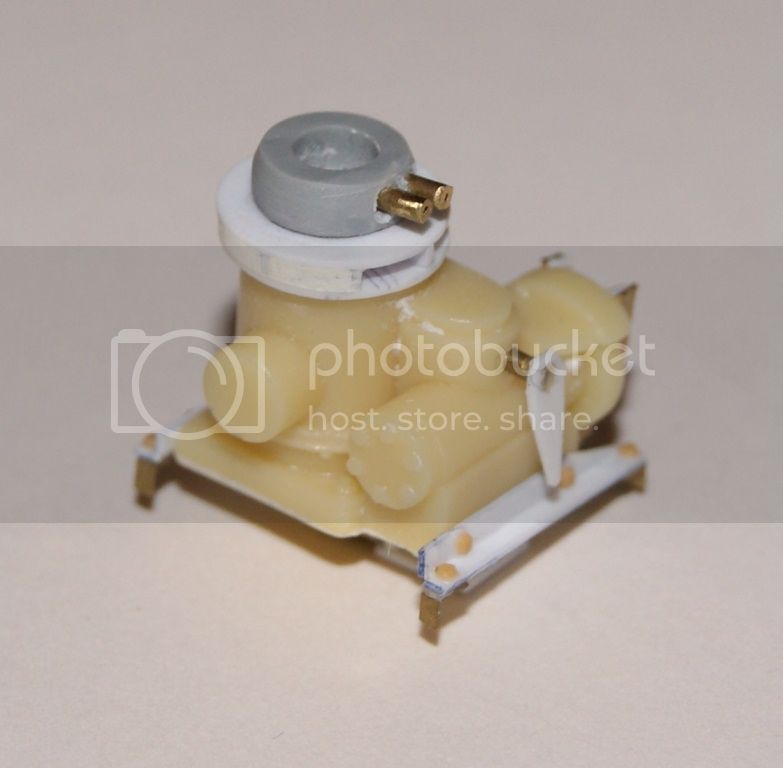
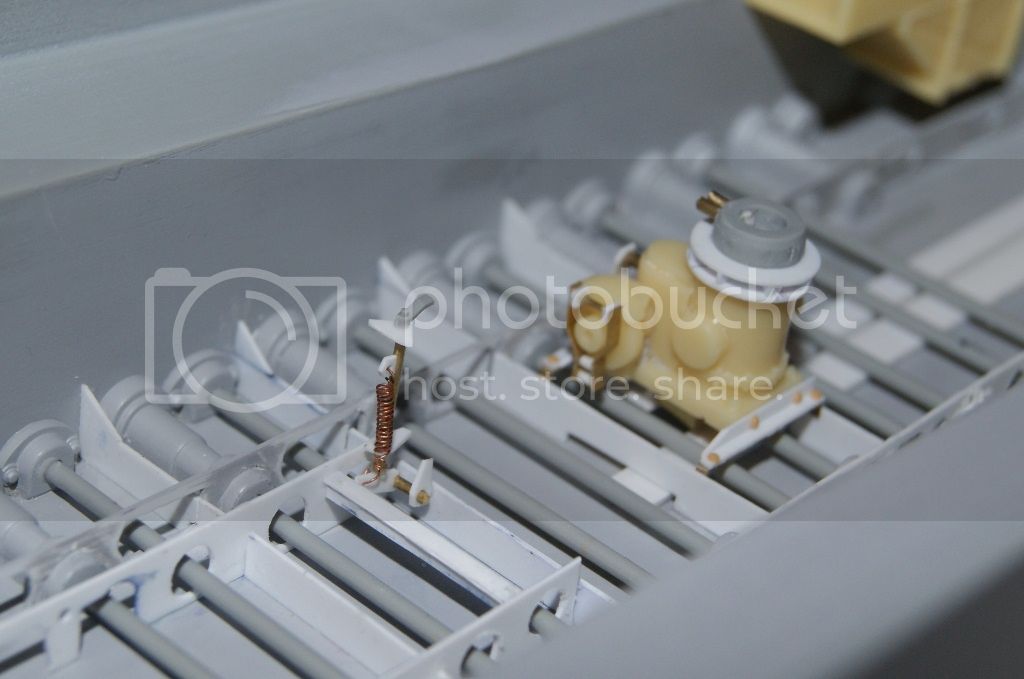
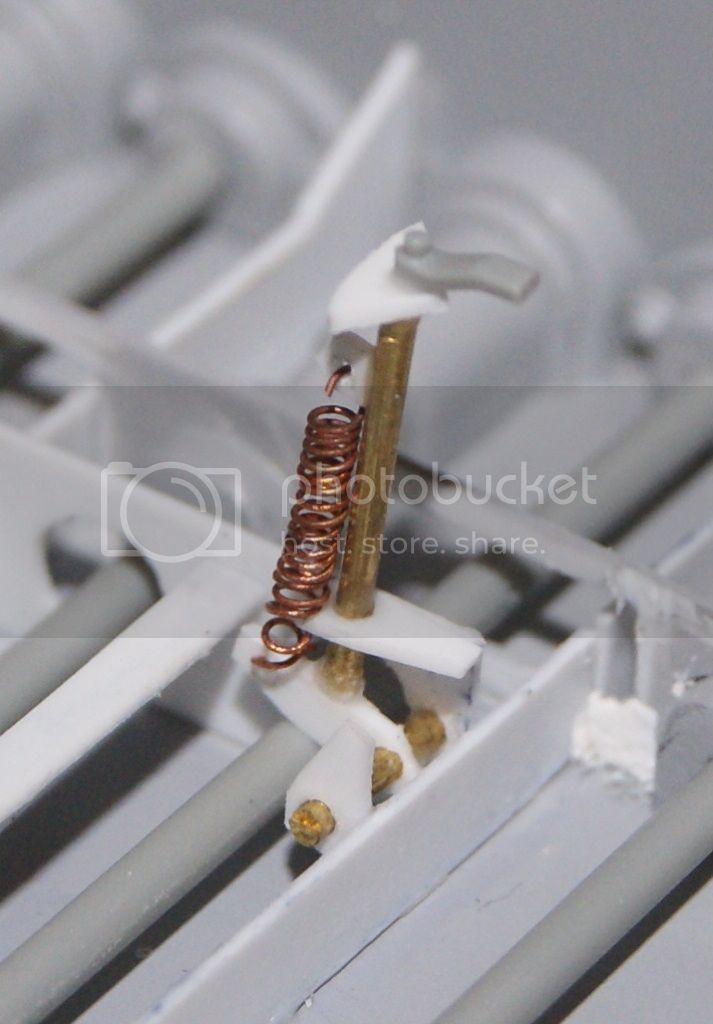
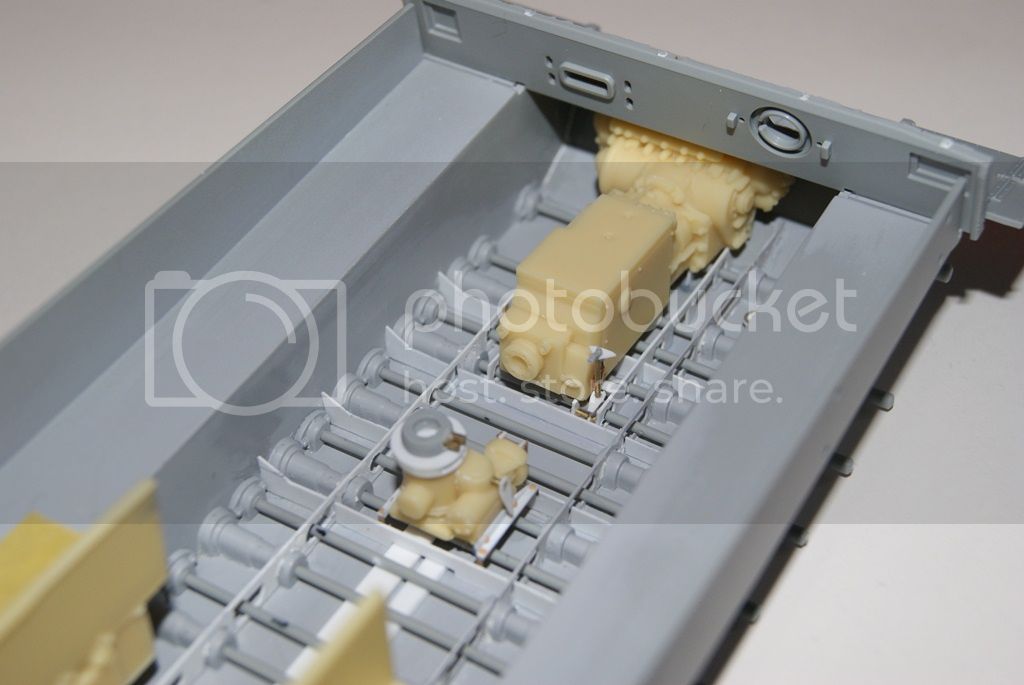
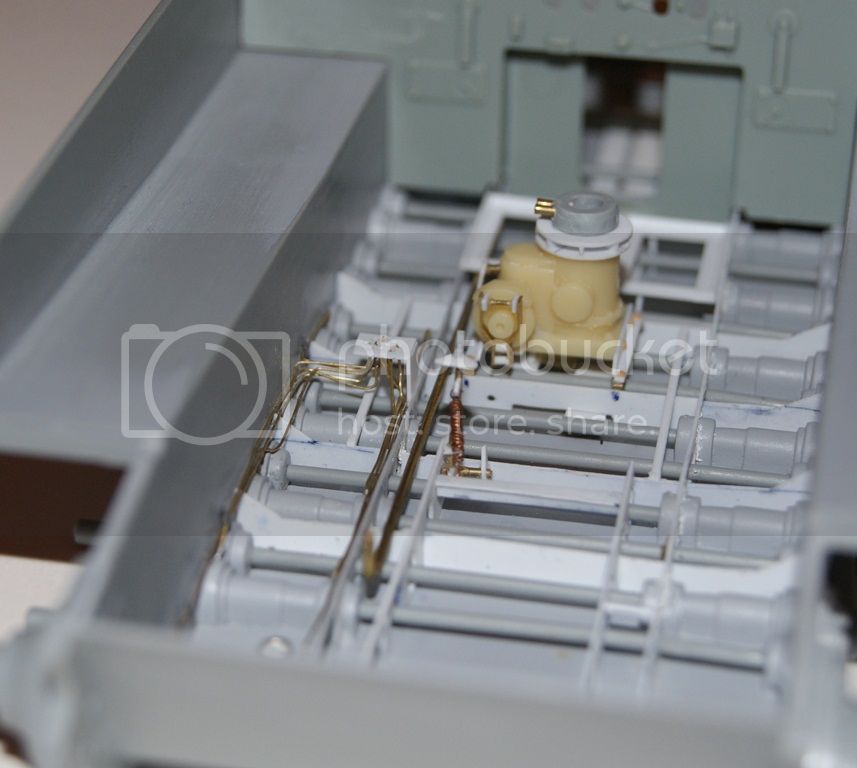
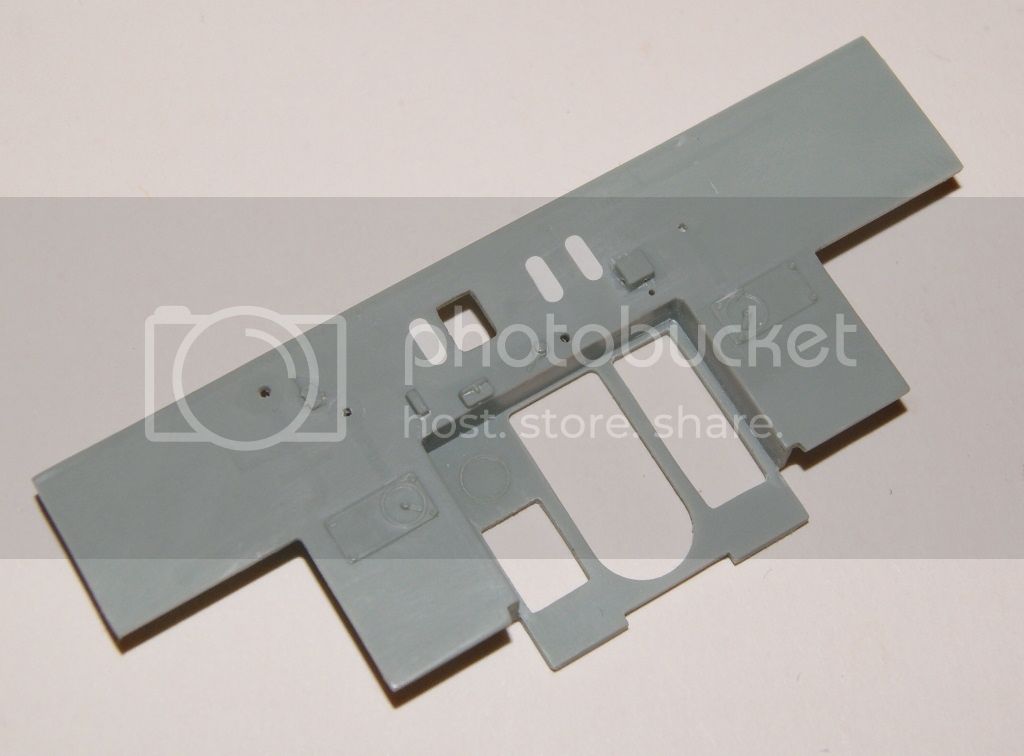
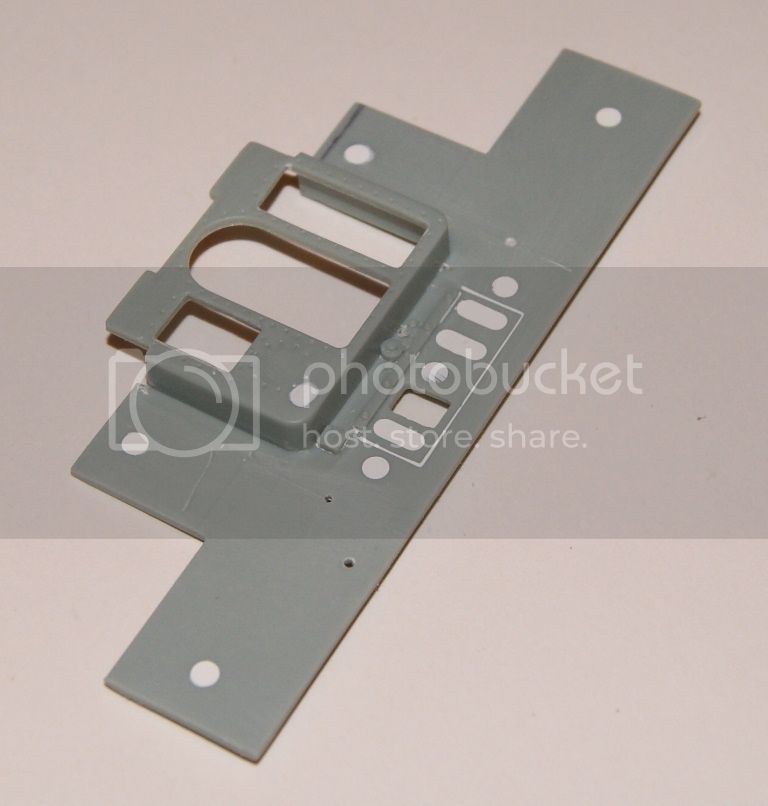
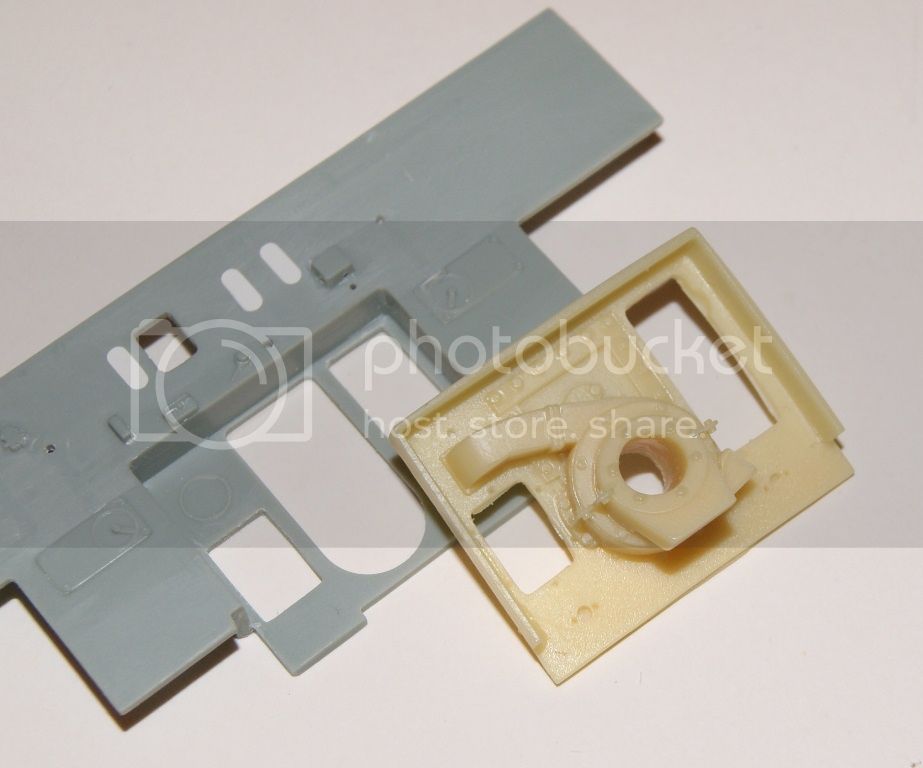
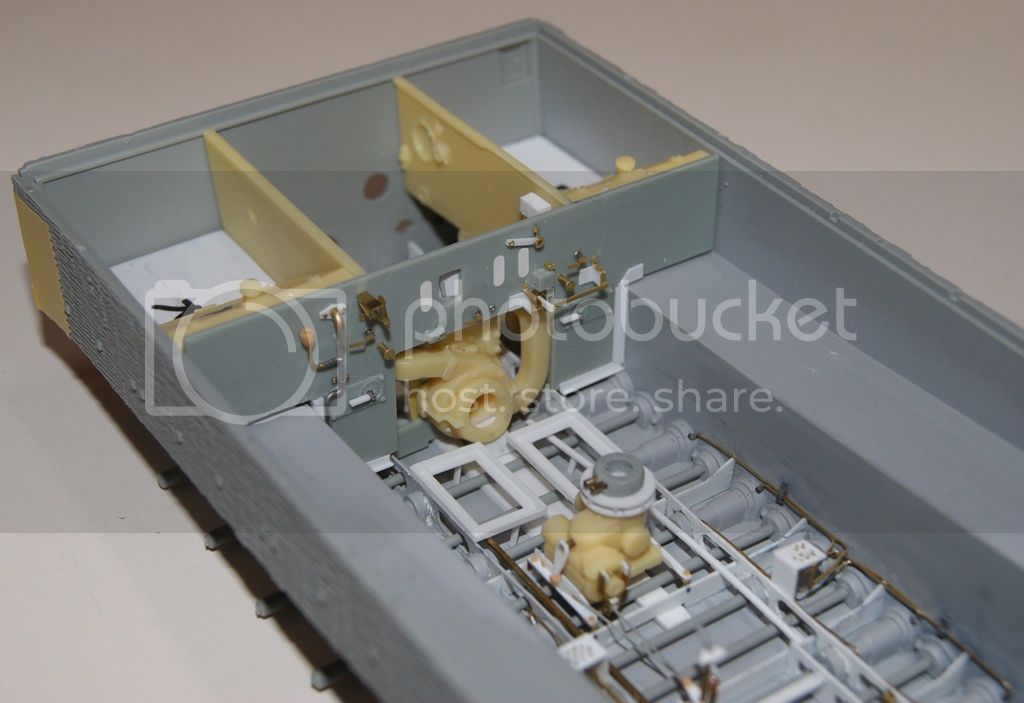
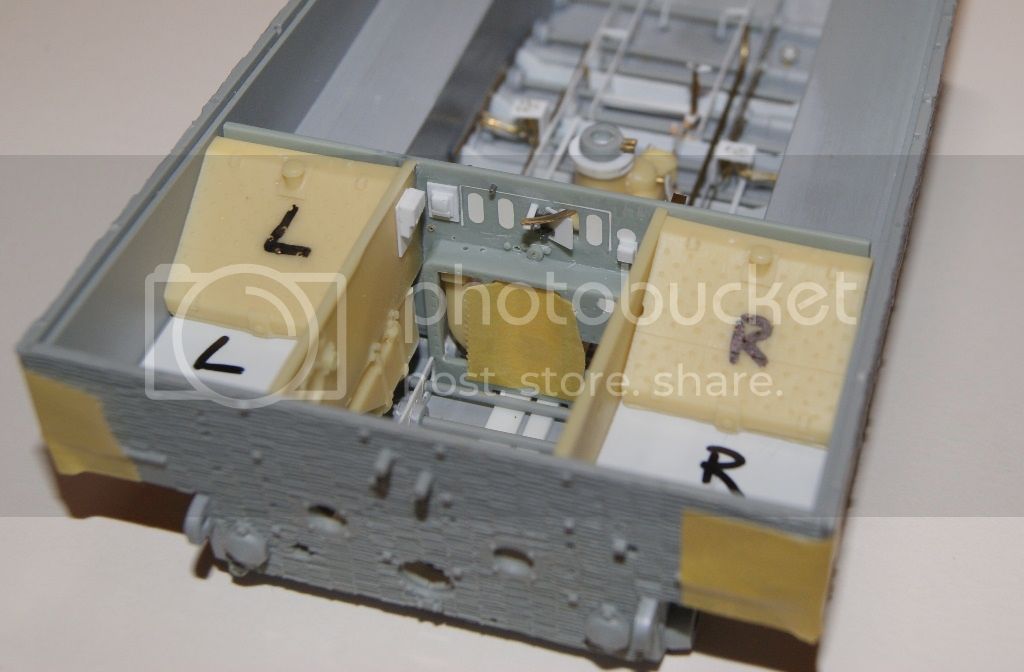
Armor/AFV: Axis - WWII
Armor and ground forces of the Axis forces during World War II.
Hosted by Darren Baker
Late Tiger 1 Build Log
Braille
#135
Visit this Community
California, United States
Joined: August 05, 2007
KitMaker: 1,501 posts
Armorama: 1,485 posts
Posted: Sunday, September 23, 2012 - 08:31 PM UTC
@SDavies – Steven,

Steven, I just ran into this build log of yours and I’m seriously going to be enjoying it!!! Just what have you gotten yourself into! I mean think about it! Aside from all of the difficulties in getting things somewhat correct on the exterior portion of a build and then coming up with the finish and weathering to compliment all of the work and effort put into it, you have to go and make things more complicated and add an interior.

From what you’ve done already it sure looks impressive. So I’ll be following your build with interest.

~ Eddy
Hoa_ro
Visit this Community
Ho Chi Minh City, Vietnam
Joined: November 01, 2011
KitMaker: 50 posts
Armorama: 50 posts
Posted: Sunday, September 23, 2012 - 08:44 PM UTC
_ I am planning to do the Tiger.I will follow your work .....
SDavies
Visit this Community
England - South East, United Kingdom
Joined: January 09, 2010
KitMaker: 979 posts
Armorama: 959 posts
Posted: Sunday, September 23, 2012 - 10:09 PM UTC
Hi Everyone,

Thanks for all the kind comments, they really do help with motivation. For example I spent all yesterday working on the turret motor and bilge pump not exiting but necessary.

The verlinden turret motor kit is sooooo inaccurate and can you believe that they left the bilge pump out? I mean whats next.

I was very exited yesterday when I found out how the Tiger crew got rid of waste rain water from the floor of the hull to I could add fake plumbing.

I am so sad.

S
Braille
#135
Visit this Community
California, United States
Joined: August 05, 2007
KitMaker: 1,501 posts
Armorama: 1,485 posts
Posted: Monday, September 24, 2012 - 08:29 PM UTC
@SDavies – Steven,

I hear your pain. I’m currently working on creating a complete interior for Dragon’s latest Smart Kit release of the s.IG.33 auf Fgst.Pz.Kpfw.III(Sfl.). The main gun is a model in itself and the rear bulkhead and flooring are included in the kit as are the radios, with the exception of the radios these are retooled parts made from their ausf G series of Stugs. I’m having to backdate these items to an ausf C,D as this is the chassis used for the build I am working on. Using photographs of earlier Stug III vehicles (ausf. C – D) I’ve modified the rear bulkhead and with a few exceptions have left the flooring pretty much alone, with all of the items that will be stuffed on top of the flooring you won’t be able to see much of it anyways. I purchased CMK’s driver’s set, made for Dragon’s Stug III ausf G kits, as this portion of the interior is not included in the kit and really needs it. I’ve had to modify some of the components because the set is made for the earlier Stug III Dragon releases where there is no working suspension included in the kit. Anyhow, IMHO, the CMK set is a fantastic piece of work. The CMK sets are highly recommended and well worth the money.

You may already know but here is a link to CMK’s Tiger I – Driver’s Set for the Dragon Kit (simply click on the instructions numbers on the page just below the drawing to see what’s in the kit and how it goes together. They also produce an interior set for the turret and ammunition storage for the side sponsons, the part that you mention may be in this kit? Here’s the link. They also produce an engine set too, just take a look around their site. I know you already have quite an investment in parts for your interior but many of the pieces that you will need are not included in the items you have shown us, as you now already know. So you’ll either have to spend extra time to make them, and we know you’re skilled enough for that, or take a short cut and buy them? It is of course your choice?

I don’t have the luxury of having good documentation or photographs, as you have, for the interior that I’m working on so I have to take my best educated guess and run with that. So far I think it is looking the part and will be posting an update on the Tank Destroyer / SPG campaign when it’s ready for paint, it’s my contribution build. I’ll be following your build as I plan on doing an interior for an earlier Tiger I. Steven, don’t be sad, unless you point it out most people won’t notice what is or what is not accurate anyways, especially with the interior. This is not an easy statement to make if your anything like me and are after accuracy with what you are working on but don’t let things like this get in the way of the big picture, you can do it!

~ Eddy
HipKitty
Visit this Community
Pennsylvania, United States
Joined: February 14, 2011
KitMaker: 390 posts
Armorama: 387 posts
Posted: Wednesday, September 26, 2012 - 02:05 AM UTC
Steven,

Mason ran into several inefficiencies with the Verlinden interiors for his build, so he knows your frustration (he read your update last night and was complaining before bed about the details...or lack of accuracy).
SDavies
Visit this Community
England - South East, United Kingdom
Joined: January 09, 2010
KitMaker: 979 posts
Armorama: 959 posts
Posted: Wednesday, September 26, 2012 - 02:14 AM UTC
Dear Eddy and Neal,

Thanks for the replies.

I am resisting the desire to purchase any new kits or components as I feel that I have all the necessary parts I just need to get on and build.

Unfortunately the verlinden tiger detail kit ranges from good to very very poor and I am sorry to say that the gearbox is the wrong size and at least 2mm larger than it should be. That really annoys me.

This is just my opinion but Verlinden either need to get things right or start to make something else. I dont mind superdetailing but fixing their faults is so annoying.

S
HipKitty
Visit this Community
Pennsylvania, United States
Joined: February 14, 2011
KitMaker: 390 posts
Armorama: 387 posts
Posted: Wednesday, September 26, 2012 - 03:28 AM UTC
Steven,

Sounds like a scratchbuild approach to me
SDavies
Visit this Community
England - South East, United Kingdom
Joined: January 09, 2010
KitMaker: 979 posts
Armorama: 959 posts
Posted: Saturday, September 29, 2012 - 03:52 AM UTC
Hi All,

I have been working on the tiger and in particular the slip ring transfer unit. This is not a very sexy part but an essential one in the operation of the tank. The transfer unit dealt provided mechanical and electrical power to the turret and had a bilge pump in the bottom to remove waste water from the hull floor.

This is the Verlinden stock unit and while better than the awful Academy part, it still needs subctantial modification.


And here is the modified unit


This unit looks quite acceptable, although it is not quite completed.

Here is an image of the unit in the tiger with its control handle. This was 100% scratch built. This control handle activated the bilge pump, exiting stuff I know.


The hull is still mork in progress with milliput that still needs sanding back.


The last image is a test fit of the gearbox. I have modified it so that it now fits.

Thanks for looking

Steven
Braille
#135
Visit this Community
California, United States
Joined: August 05, 2007
KitMaker: 1,501 posts
Armorama: 1,485 posts
Posted: Saturday, September 29, 2012 - 11:36 AM UTC
@SDavies – Steven,

That is some impressive work, indeed!


Quoted Text

The last image is a test fit of the gearbox. I have modified it so that it now fits.


I’m thinking that the Verlinden gearbox was correct in length to begin with and the kits hull may actually be the culprit here. I don’t have this particular Tiger kit in my stash but all of the other Dragon Tiger kits, with the workable suspension have what appears to be an added section of plates behind the forward armor plates. These may be there to keep this area from warping during the molding process? In order to get the transmission to fit without any undo modifications to it, these added plates would have needed to be removed – a lot of work! Anyhow, here is a scan of what I am talking about.


I ran into the same issue on the kit that I am working on and modified the CMK gearbox for it to fit. Had I known, before starting the kit, that I would be going to the added effort of adding a complete interior I would have modified the lower hull to get the transmission to fit without going to the trouble of hacking it up. But I already had the lower chassis pretty much completed when I opted for tackling an interior.

Well sir, you’re on the way! With all of the extra effort in creating all of the parts per the prototype this build is going to be awesome when done!

~ Eddy
SDavies
Visit this Community
England - South East, United Kingdom
Joined: January 09, 2010
KitMaker: 979 posts
Armorama: 959 posts
Posted: Saturday, September 29, 2012 - 11:42 PM UTC
Hello Eddy,

That was a really interesting reply.

The Tiger hull that Dragon have created is identical across all their tigers, the main difference being the front of the hull which varied according to whether the hull is early, mid or late production. These would be dealt with by adding differnt front ends.

I took the decision to remove some of the extra structure in my tank, but I was not confident on the stability of the front of the hull if I removed all of it.

The Verlinden gearbox was aparently designed to fit this generation of Dragon tiger, but since they did not include floor struts it is these which have potentially been the issue. I have fixed the problem now though I am pleased to say.

The two side panels of the tank have caused an issue, I have had to alter the Academy firewall and the hull roof support inorder to make them fit.

Oh while I think about it, I should also add that I have purchased a Panzerkampfwagen Tiger 181 E CD from http://www.tigertank-h-e-181.com/index.html

This is a really good CD full of images and diagrams of the tiger, its engine, turret and hull and a must if you are attempting a interior build of a Tiger 1

Thanks for looking

S
Plasticbattle
#003
Visit this Community
Donegal, Ireland
Joined: May 14, 2002
KitMaker: 9,763 posts
Armorama: 7,444 posts
Posted: Sunday, September 30, 2012 - 03:03 AM UTC
Great progress Steven!! Enjoying your updates.
Totalize
Visit this Community
Ontario, Canada
Joined: February 04, 2009
KitMaker: 743 posts
Armorama: 549 posts
Posted: Sunday, September 30, 2012 - 03:28 AM UTC
Steven,

Thanks for another update. Nice progress thus far.

David.
Braille
#135
Visit this Community
California, United States
Joined: August 05, 2007
KitMaker: 1,501 posts
Armorama: 1,485 posts
Posted: Sunday, September 30, 2012 - 11:02 AM UTC
@SDavies – Steven,

Thank you for providing me with sound information regarding my questions. And thanks for the link on the Tiger’s interior and exterior CD, I have gone and ordered it!

I’m learning a great deal with the interior that I’m attempting for Dragon’s s.IG.33 auf Fgst.Pz.Kpfw.III(Sfl.) Smart Kit and adding some new skills and techniques along the way. This will help me when I go and do a complete and detailed interior for an early Tiger.

These things take so much effort and time to do, so don’t give up and keep hammering away!

Here’s watching you,
~ Eddy
Militarymodeller80
Visit this Community
England - East Anglia, United Kingdom
Joined: March 19, 2012
KitMaker: 117 posts
Armorama: 90 posts
Posted: Thursday, October 04, 2012 - 12:22 AM UTC

Quoted Text

Steven,
I'll be following along as well as I find the Tiger a very interesting tank.
Those interior pics are good, but am surprised that the interior parts are painted green?
Dan


So was I, I had discussed this on another forum and oppinion there was that either the photos have a colour cast or the inside had been incorrectly re-painted post War. It should be some sort of ivory, cream or beige. But like the correct colour for the outside, Panzer Grey or Dunkelgelb, no one actually agrees as to just what that colour really was. With my kit I am going with Vallejo Ivory.

Paul
Byrden
Visit this Community
Wien, Austria
Joined: July 12, 2005
KitMaker: 2,233 posts
Armorama: 2,221 posts
Posted: Thursday, October 04, 2012 - 01:57 AM UTC
You should probably read this discussion of Tiger interior colours.

Here is the gearbox installed in the Tiger at Bovington. It's not the original paint but it's pretty close.


The end of the gearbox comes just ahead of the 5th torsion bar.

David

SDavies
Visit this Community
England - South East, United Kingdom
Joined: January 09, 2010
KitMaker: 979 posts
Armorama: 959 posts
Posted: Thursday, October 04, 2012 - 07:14 PM UTC
Dear Paul and David,

Thank you or your comments and the great image of the Gearbox !

I am taking, what you might say is a controversial line with painting the interior, the lower interior will be hull red, the torsion bars will be metallic black and the upper portions of the hull standard ivory.

This, I believe, was the standard colour scheme for Tiger II's so a late production Tiger 1 might just have been painted like this.

The Bovington Tiger was an early vehicle captured in North Africa and all the other other Surviving Tigers are either very rusty or have been repainted at some stage after the war.

May not be right, but it will be attractive.

S
SDavies
Visit this Community
England - South East, United Kingdom
Joined: January 09, 2010
KitMaker: 979 posts
Armorama: 959 posts
Posted: Wednesday, October 10, 2012 - 09:10 AM UTC
Hi All,

A quick progress update tonight, I have been working on the lower hull and have completed the two battery shelves, added a tube which would carry the electrical wiring and power to the radio and gearbox and the lubrication system on the right of the tank. The lubrication system is not yet completed but it looks ok.


I have also added two struts across the hull, I have no idea what they were used for but I dont really mind.


The lubrication system has 10 individual oil lines and these connect to specific torsion bars. It was challenging installing them because one wrong more and they tend to spring out of position.

The design of the system on the King Tiger is greatly simplified and improved.

Next step is to complete the lubrication system on the left sife of the hull and then get to work on the internal floor supports.

Once they are completed I need to start on the rear lubrication system. It occours to me that I have said lubrication system alot in this update.

Thanks for looking

Steven
Tanksami
Visit this Community
Victoria, Australia
Joined: August 06, 2011
KitMaker: 1,314 posts
Armorama: 1,217 posts
Posted: Wednesday, October 10, 2012 - 10:03 AM UTC
Hi Steven,

The interior is looking fantastically awesome!! I would be guessing that after all lubricating you would have needed some too lol

Mike
TMikeCurry
Visit this Community
Missouri, United States
Joined: June 02, 2009
KitMaker: 128 posts
Armorama: 97 posts
Posted: Tuesday, October 16, 2012 - 08:01 AM UTC
Wow, this looks like it's going to be a really impressive and detailed build. Good luck with this project and thanks for sharing! I'll be watching this one.
SDavies
Visit this Community
England - South East, United Kingdom
Joined: January 09, 2010
KitMaker: 979 posts
Armorama: 959 posts
Posted: Monday, October 22, 2012 - 07:00 AM UTC
Hi All,

Quick update tonight, highlighting the progress that I have made on the Tiger

Firstly I have added the lubrication system on the left side of the tank and added in some physical connection lines between the turret electrical system and the bilge pump system control handle. This would have been operated by the radio operator.


There were no real problems here, just lots of hours put in.

I have decided to alter the firewall next and the following images illustrate that this is a work in progress. I have decided to use the Academy Kit part with some add-ons from the Verlinded set. Because this is a late production Tiger, the firewall would have had the third version firewall vent so some modification will be needed.


The above image shows the standard kit part, I have already removed the plastic waste water system which was quite crude and in completely the wrong position.


And with lots of modification we can see the stripped down firewall ready for substantial alteration.

I will be adding the following excellent Verlinden airfan housing


I will need to modify it too !

Thanks for looking

S

Tanksami
Visit this Community
Victoria, Australia
Joined: August 06, 2011
KitMaker: 1,314 posts
Armorama: 1,217 posts
Posted: Monday, October 22, 2012 - 08:29 AM UTC
Hi Stephen,

Keep up the great work!! Very inspirational & inspiring to say the least!!

Cheers Mike
asmodeuss
Visit this Community
Quebec, Canada
Joined: November 19, 2011
KitMaker: 1,389 posts
Armorama: 1,388 posts
Posted: Monday, October 22, 2012 - 12:31 PM UTC
This thread is always a blast! keep it up, i've bookmarked it for future build!
Braille
#135
Visit this Community
California, United States
Joined: August 05, 2007
KitMaker: 1,501 posts
Armorama: 1,485 posts
Posted: Monday, October 22, 2012 - 05:51 PM UTC
@SDavies – Steven,

You’re making great progress. This is going to be something to be extremely proud about when you have it completed. I also agree that this project is extremely inspirational & inspiring!

~ Eddy
SDavies
Visit this Community
England - South East, United Kingdom
Joined: January 09, 2010
KitMaker: 979 posts
Armorama: 959 posts
Posted: Sunday, November 04, 2012 - 06:07 AM UTC
Hi Everyone and thank you for all the kind comments. They really do help my motivation with this long build.

I have been working on the firewall and engine bay and I have made some substantial progress.

I have been adding lots of handles, primers, fuel pump levers to the fire wall as well as the third kind of firewall heating vent, a single door.

I have also made significant modifications to the firewall fan but more will need to be done.


If anyone is interested I can tell you what everyone of those handles does!


This is the back of the firewall with the main fuel tanks in place but not glued in. in the next stage of this build I will be adding fuel lines. Exiting I know. The white boxes you see are electrical junction boxes awaiting wiring.


This is a view of the firewall taken out of the tank. As you can see I have added a strip of styrine to hide flaws in the Verlinden bulkheads

Oh lastly this is a exploded view if a Tiger 1 interior. North Africa 1943


Thanks for looking

Steven


Snorri23
Visit this Community
Ontario, Canada
Joined: March 25, 2010
KitMaker: 514 posts
Armorama: 261 posts
Posted: Sunday, November 04, 2012 - 09:00 AM UTC
I have been lurking on the factory floor for some time. The progress of your building is superb. I usually do not go into such detail. Though I will look into time to time to see your headway on this project. May borrow some ideas for my future builds. Thanks for letting us in.