First things first...SORRY for the pathetic quality of the pic I took it a long time ago with my less than adequate phone and have been too lazy to take another as it's not finished yet.
As I say, I'm not calling this complete yet - Assembly is done and my (poor attempt at a) camo paint job is done too.
Decals were thrown on post-pic and the next step is going to be trying out some weathering products.
Considering going with a light to heavy mud look - Only because then I can apply more and more to cover it up if my light mud look doesn't go to plan...
Anyway, enough ramblings - Here's the pic, and sorry again!
This build has been a lot of firsts for me..
First 1/72 build
First attempt at camo
First non-Soviet kit
Soon to be first attempt at weathering
First vinyl tracks
First campaign entry too!
Some very interesting vehicles/guns being built here - Some have gone on my wish list too.
Let's just hope I can build them to the same quality as I am seeing here!
Campaigns
Where Armorama group builds can be discussed, organized, and updates posted.
Hosted by Darren Baker, Richard S.
Big Guns Campaign
Nokturnal
England - East Anglia, United Kingdom
Joined: January 11, 2013
KitMaker: 65 posts
Armorama: 64 posts
Joined: January 11, 2013
KitMaker: 65 posts
Armorama: 64 posts
Posted: Thursday, December 12, 2013 - 09:41 PM UTC
Petro
Connecticut, United States
Joined: November 02, 2003
KitMaker: 984 posts
Armorama: 846 posts
Joined: November 02, 2003
KitMaker: 984 posts
Armorama: 846 posts
Posted: Friday, December 13, 2013 - 12:00 PM UTC
Camo job, decals and a Vallejo satin varnish done.
I am trying the acrylic type washes and i have been watching some vids, so hopefully i don't screw it up.
Nito74
Lisboa, Portugal
Joined: March 04, 2008
KitMaker: 5,386 posts
Armorama: 4,727 posts
Joined: March 04, 2008
KitMaker: 5,386 posts
Armorama: 4,727 posts
Posted: Sunday, December 15, 2013 - 05:28 AM UTC
Tracks:
Still a lot to clean up ... I hate this part of the build.. motivation drops like a hammer...
ltb073
New York, United States
Joined: March 08, 2010
KitMaker: 3,662 posts
Armorama: 3,078 posts
Joined: March 08, 2010
KitMaker: 3,662 posts
Armorama: 3,078 posts
Posted: Sunday, December 15, 2013 - 05:49 AM UTC
Quoted Text
Tracks:
Still a lot to clean up ... I hate this part of the build.. motivation drops like a hammer...
Tell me about it I think the link and length 1s on my Strumorse Tiger are worse then Indy links
But I have 1side almost finished and the tri color camo on pictures soon
@Marc camo is looking good looking forward to seeing more
1721Lancers
England - East Anglia, United Kingdom
Joined: March 21, 2012
KitMaker: 1,673 posts
Armorama: 1,640 posts
Joined: March 21, 2012
KitMaker: 1,673 posts
Armorama: 1,640 posts
Posted: Sunday, December 15, 2013 - 05:57 AM UTC
Alex that is one horrible foto dude , but looking at it as it is she looks fine . Get some some oils and matte on now
Marc great looking paint job, what's next?
John I have just realised which kit that is, it's from the 80' s yes?
Man you have done a good job there, and the only way to sort those tracks is to build them and then clean the edges up in situ. It's easier than cleaning separately
Sal I'm looking forward to seeing your tri_colour camo bro
Paul
Petro
Connecticut, United States
Joined: November 02, 2003
KitMaker: 984 posts
Armorama: 846 posts
Joined: November 02, 2003
KitMaker: 984 posts
Armorama: 846 posts
Posted: Sunday, December 15, 2013 - 06:37 AM UTC
Sal, thanks for the positive comment.
Paul, i am currently working on tracks while I practice with Vallejo Washes on some scrap models and the wheels. Kind of freaking out about it as i don't want to screw up my model.
When i did the camo job, my paint was a little to dry. Also, i use the instructions as a basis for the camo job. Well, they don't have the pattern for the right side, so i winged it. trying to match up with where the front and back lines go. I really didn't like what i came out with. I wasn't changing it. It's no so bad now.
Tailor
Nordrhein-Westfalen, Germany
Joined: May 26, 2008
KitMaker: 1,168 posts
Armorama: 256 posts
Joined: May 26, 2008
KitMaker: 1,168 posts
Armorama: 256 posts
Posted: Sunday, December 15, 2013 - 07:13 AM UTC
Great work on the tracks!
I am too used to Friul tracks by now... I can't even remember which was my last link-and-length-type track...
... must be getting old!
I am too used to Friul tracks by now... I can't even remember which was my last link-and-length-type track...
... must be getting old!
Nito74
Lisboa, Portugal
Joined: March 04, 2008
KitMaker: 5,386 posts
Armorama: 4,727 posts
Joined: March 04, 2008
KitMaker: 5,386 posts
Armorama: 4,727 posts
Posted: Sunday, December 15, 2013 - 09:36 AM UTC
@Sal
We're waiting for those photos Sal
@Paul
it's kit #6150 instructions printed 2003.
Cleaning those tracks is
And of course they don't say how many links you need for each side..
@Guido
Thanks... I still have months to end this Campaign..
We're waiting for those photos Sal
@Paul
it's kit #6150 instructions printed 2003.
Cleaning those tracks is
And of course they don't say how many links you need for each side..
@Guido
Thanks... I still have months to end this Campaign..
ltb073
New York, United States
Joined: March 08, 2010
KitMaker: 3,662 posts
Armorama: 3,078 posts
Joined: March 08, 2010
KitMaker: 3,662 posts
Armorama: 3,078 posts
Posted: Sunday, December 15, 2013 - 02:48 PM UTC
Petro
Connecticut, United States
Joined: November 02, 2003
KitMaker: 984 posts
Armorama: 846 posts
Joined: November 02, 2003
KitMaker: 984 posts
Armorama: 846 posts
Posted: Wednesday, December 18, 2013 - 09:23 AM UTC
30 + more links and I will have my tracks ready for finishing.
I try sooo many different ways to get these bastards to stick together, but man they just bust my nuts.
I came close to throwing a whole run at one point!
I know when I go to paint , they will break apart again
No picture updates. Need to work on my lighting and photo box again.
I try sooo many different ways to get these bastards to stick together, but man they just bust my nuts.
I came close to throwing a whole run at one point!
I know when I go to paint , they will break apart again
No picture updates. Need to work on my lighting and photo box again.
Petro
Connecticut, United States
Joined: November 02, 2003
KitMaker: 984 posts
Armorama: 846 posts
Joined: November 02, 2003
KitMaker: 984 posts
Armorama: 846 posts
Posted: Thursday, December 19, 2013 - 12:20 PM UTC
OK time for an update.
I awoke one morning last week and decided i wanted to make a tool for getting the track sag set without using the actual model. I figured that would save me from a lot of heartache due to broken bits on the model. I also know i will be building more PZ IV type vehicles, so i can keep it for later.
So i spent pretty much 6-8 hours laying out and assembling this tool.
and while i believe it helped me (i hope my dimensions are good!), it sure has caused me lots of aggravation. Well, i should blame the Magic tracks for that.
The run in the picture was a whole length minus the bottom run. My first problem was getting the teeth from the sprocket in the holes. So of course, my length broke in a few spots. Then of course these tracks when they have good adhesion, they are like a spring. after some hours and lot's of cursing, i finished that run.
I then came upstairs and decided to do a search on Magic track assembly. I saw an article here where the author assembled 10 links and set the piece on the model to set the sag and let set up. I assumed that he added each set of ten to the last length, so that is what i did next.
It worked good for a few lengths and then the spring action/ coming apart kicked back in. so after much more cursing, I took a break or 2. I made sure i took some loonngg breaks before continuing, and today i finished the assemblies.
Got them primed and painted (that's another clusterf#%* of a time, but i'll spare you the details.)
Soo, my current status is here. I am trying many new techniques. My first time using acrylic washes and heavy applications of pigments. Of course, i overdid the chipping. I can't seem to get a hold on that yet.
I'm not sure how i feel about the acrylic washes. Kind of so so with them. But i am still continuing experimenting with them on and older model before i use them on this kit.
The pigments, i am liking.
Ignore the greenish tint differences. It is just one of the lights i am using.
Well, i hope i didn't bore you with my story.
Marc
I awoke one morning last week and decided i wanted to make a tool for getting the track sag set without using the actual model. I figured that would save me from a lot of heartache due to broken bits on the model. I also know i will be building more PZ IV type vehicles, so i can keep it for later.
So i spent pretty much 6-8 hours laying out and assembling this tool.
and while i believe it helped me (i hope my dimensions are good!), it sure has caused me lots of aggravation. Well, i should blame the Magic tracks for that.
The run in the picture was a whole length minus the bottom run. My first problem was getting the teeth from the sprocket in the holes. So of course, my length broke in a few spots. Then of course these tracks when they have good adhesion, they are like a spring. after some hours and lot's of cursing, i finished that run.
I then came upstairs and decided to do a search on Magic track assembly. I saw an article here where the author assembled 10 links and set the piece on the model to set the sag and let set up. I assumed that he added each set of ten to the last length, so that is what i did next.
It worked good for a few lengths and then the spring action/ coming apart kicked back in. so after much more cursing, I took a break or 2. I made sure i took some loonngg breaks before continuing, and today i finished the assemblies.
Got them primed and painted (that's another clusterf#%* of a time, but i'll spare you the details.)
Soo, my current status is here. I am trying many new techniques. My first time using acrylic washes and heavy applications of pigments. Of course, i overdid the chipping. I can't seem to get a hold on that yet.
I'm not sure how i feel about the acrylic washes. Kind of so so with them. But i am still continuing experimenting with them on and older model before i use them on this kit.
The pigments, i am liking.
Ignore the greenish tint differences. It is just one of the lights i am using.
Well, i hope i didn't bore you with my story.
Marc
Nito74
Lisboa, Portugal
Joined: March 04, 2008
KitMaker: 5,386 posts
Armorama: 4,727 posts
Joined: March 04, 2008
KitMaker: 5,386 posts
Armorama: 4,727 posts
Posted: Thursday, December 19, 2013 - 01:02 PM UTC
Quoted Text
OK time for an update.
I awoke one morning last week and decided i wanted to make a tool for getting the track sag set without using the actual model. I figured that would save me from a lot of heartache due to broken bits on the model. I also know i will be building more PZ IV type vehicles, so i can keep it for later.
So i spent pretty much 6-8 hours laying out and assembling this tool.
and while i believe it helped me (i hope my dimensions are good!), it sure has caused me lots of aggravation. Well, i should blame the Magic tracks for that.
The run in the picture was a whole length minus the bottom run. My first problem was getting the teeth from the sprocket in the holes. So of course, my length broke in a few spots. Then of course these tracks when they have good adhesion, they are like a spring. after some hours and lot's of cursing, i finished that run.
I then came upstairs and decided to do a search on Magic track assembly. I saw an article here where the author assembled 10 links and set the piece on the model to set the sag and let set up. I assumed that he added each set of ten to the last length, so that is what i did next.
It worked good for a few lengths and then the spring action/ coming apart kicked back in. so after much more cursing, I took a break or 2. I made sure i took some loonngg breaks before continuing, and today i finished the assemblies.
Got them primed and painted (that's another clusterf#%* of a time, but i'll spare you the details.)
Soo, my current status is here. I am trying many new techniques. My first time using acrylic washes and heavy applications of pigments. Of course, i overdid the chipping. I can't seem to get a hold on that yet.
I'm not sure how i feel about the acrylic washes. Kind of so so with them. But i am still continuing experimenting with them on and older model before i use them on this kit.
The pigments, i am liking.
Ignore the greenish tint differences. It is just one of the lights i am using.
Well, i hope i didn't bore you with my story.
Marc
No boring Marc.
I'm guessing we all have the same problems give or take a link or two ..
Just one thing, the fire extinguisher isn't red but should be grey.
I really like the weathering on the lower hull.
Tailor
Nordrhein-Westfalen, Germany
Joined: May 26, 2008
KitMaker: 1,168 posts
Armorama: 256 posts
Joined: May 26, 2008
KitMaker: 1,168 posts
Armorama: 256 posts
Posted: Thursday, December 19, 2013 - 05:39 PM UTC
Boring? Never!
It's good to hear that others suffer the same fate as oneself!
You'll get there!
Guido
It's good to hear that others suffer the same fate as oneself!
You'll get there!
Guido
Petro
Connecticut, United States
Joined: November 02, 2003
KitMaker: 984 posts
Armorama: 846 posts
Joined: November 02, 2003
KitMaker: 984 posts
Armorama: 846 posts
Posted: Friday, December 20, 2013 - 06:02 AM UTC
Tracks are on! Woo Hoo!
My first assembled run went on painlessly except for being 1 link short. But even that wasn't a problem .
The second run, not soo much. Some broke apart before I even primed them.
So I just brushed them and said I would deal with them later.
And deal with them I did.
But they are done!!!!!!!!
My first assembled run went on painlessly except for being 1 link short. But even that wasn't a problem .
The second run, not soo much. Some broke apart before I even primed them.
So I just brushed them and said I would deal with them later.
And deal with them I did.
But they are done!!!!!!!!
Tiger_213
California, United States
Joined: August 10, 2012
KitMaker: 1,510 posts
Armorama: 1,443 posts
Joined: August 10, 2012
KitMaker: 1,510 posts
Armorama: 1,443 posts
Posted: Friday, December 20, 2013 - 09:59 PM UTC
It all looks good everybody. Sorry for dropping the ball on this campaign, seeing as it was my idea it's been one hell of a year, nothing bad but defiantly nothing good either. if I get anything done in the next few months it'll be for the campaign (I hope).
John (Nito)
Thanks for looking after the thread, adding a ribbon and the like, at least I think it was you. Last I saw you were still the only campaign admin so if anyone's due any credit it's you (as far as I know, sorry if I missed anyone!). And don't feel bad about the suspension John, I think running gear kills everyone's motivation I built the Tasca M4E8 and the Mk. 5 Firefly a few months back, took me ages to get the running gear built. The E8 alone has TWELVE pieces per suspension bogie and the tracks weren't fun either.
ltb073
New York, United States
Joined: March 08, 2010
KitMaker: 3,662 posts
Armorama: 3,078 posts
Joined: March 08, 2010
KitMaker: 3,662 posts
Armorama: 3,078 posts
Posted: Sunday, December 22, 2013 - 02:09 AM UTC
Hi Guys
Ok like I said the link and length tracks were a pain in then A$$
I think they may need to be covered in mud
The interior is not that visible even with the rear deck off
But Ill leave it dry fit cause it is a tight fit
Added the Ambush camo spots did I go to heavy with them
I added the tow cable because the photos that Paul posted of the real beast had 1 laying on it
Still needs washes and weathering but what do you guys think so far
Petro
Connecticut, United States
Joined: November 02, 2003
KitMaker: 984 posts
Armorama: 846 posts
Joined: November 02, 2003
KitMaker: 984 posts
Armorama: 846 posts
Posted: Tuesday, December 24, 2013 - 09:38 AM UTC
My Christmas update:
After getting the tracks on, i worked on , obviously, the wheels. Dirtied them up first. Then i figured i would check the fit of the side skirts. Well, that was a PITA. Found a problem between each side (height wise). And of course, they really didn't seem like they would fit correctly spaced. I was planning on leaving 1 or 2 off anyways.
So i mounted the skirts up and figured i would start with some of the final knick knacks. like the spare wheels . When i reached for them, i saw a pile of return rollers.
SO lots off weathering, (to hide some problems).
Next i try to make a base and paint up a crewman for it.
Happy holidays all.
Tailor
Nordrhein-Westfalen, Germany
Joined: May 26, 2008
KitMaker: 1,168 posts
Armorama: 256 posts
Joined: May 26, 2008
KitMaker: 1,168 posts
Armorama: 256 posts
Posted: Tuesday, December 24, 2013 - 06:52 PM UTC
Looking great, dude! Merry Christmas!
Guido
Guido
ltb073
New York, United States
Joined: March 08, 2010
KitMaker: 3,662 posts
Armorama: 3,078 posts
Joined: March 08, 2010
KitMaker: 3,662 posts
Armorama: 3,078 posts
Posted: Wednesday, December 25, 2013 - 01:32 PM UTC
Nito74
Lisboa, Portugal
Joined: March 04, 2008
KitMaker: 5,386 posts
Armorama: 4,727 posts
Joined: March 04, 2008
KitMaker: 5,386 posts
Armorama: 4,727 posts
Posted: Thursday, December 26, 2013 - 03:57 AM UTC
Very nice Sal !
Looks a bit too shiny but with same natural light that will change for sure.
Congrats on another finished Campaign !!
Looks a bit too shiny but with same natural light that will change for sure.
Congrats on another finished Campaign !!
Nito74
Lisboa, Portugal
Joined: March 04, 2008
KitMaker: 5,386 posts
Armorama: 4,727 posts
Joined: March 04, 2008
KitMaker: 5,386 posts
Armorama: 4,727 posts
Posted: Wednesday, January 01, 2014 - 08:17 AM UTC
Took some time and worked on some tracks for the Hummel
Posted: Thursday, January 02, 2014 - 04:05 AM UTC
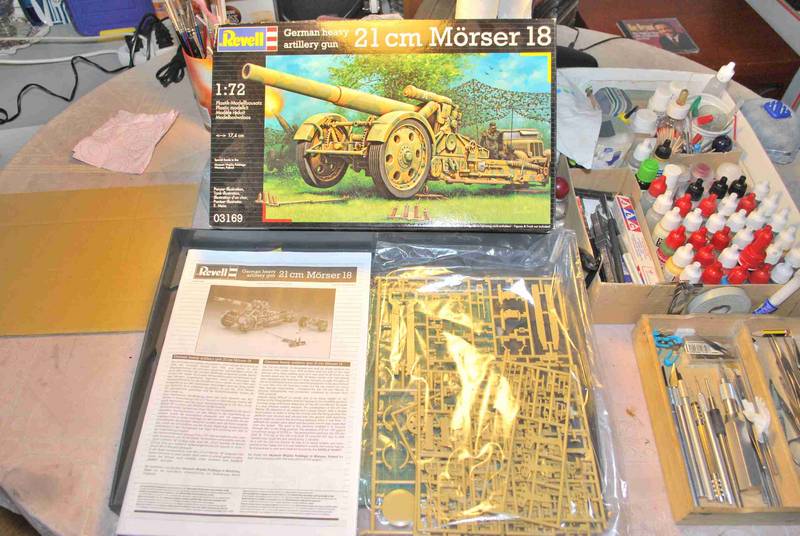
Well, not only finished 2013, but also my Tiger II for Panzers Return, so I will begin not only 2014, but my Morser 18 too. Great level here, so I only expect to be up to the mark.
Happy New Year, modelling and else!
mmeier
Nordrhein-Westfalen, Germany
Joined: October 22, 2008
KitMaker: 1,280 posts
Armorama: 1,015 posts
Joined: October 22, 2008
KitMaker: 1,280 posts
Armorama: 1,015 posts
Posted: Friday, January 03, 2014 - 10:11 AM UTC
Posted: Friday, January 03, 2014 - 10:52 AM UTC
Hi folks,
just enrolled as I've just started my 6 inch howitzer if that qualifies?(152mm)
Cheers
Al
just enrolled as I've just started my 6 inch howitzer if that qualifies?(152mm)
Cheers
Al
Petro
Connecticut, United States
Joined: November 02, 2003
KitMaker: 984 posts
Armorama: 846 posts
Joined: November 02, 2003
KitMaker: 984 posts
Armorama: 846 posts
Posted: Friday, January 03, 2014 - 11:09 AM UTC
@ Sal, looks good. I agree with John, a little shiny in those pics.
As for everyone else, let's get some action going in this campaign.
I got the base of my base figured out. Now i just need to pour some ground material. Kind of procrastinating.
As for everyone else, let's get some action going in this campaign.
I got the base of my base figured out. Now i just need to pour some ground material. Kind of procrastinating.