

Hosted by Richard S.
Churchill Group Build

Tiger_213

Joined: August 10, 2012
KitMaker: 1,510 posts
Armorama: 1,443 posts
Posted: Friday, April 18, 2014 - 02:04 PM UTC
Gary, how was the IMA conversion? I've never heard of them before.

gastec

Joined: February 03, 2014
KitMaker: 1,042 posts
Armorama: 871 posts
Posted: Friday, April 18, 2014 - 02:18 PM UTC
Chris
Pretty good actually. Made for a very nice base conversion though soome details needed to be spruced up a little here and there.
As you can see, it can be built to be fully workable.
Gary
Pretty good actually. Made for a very nice base conversion though soome details needed to be spruced up a little here and there.
As you can see, it can be built to be fully workable.
Gary
PvtMutt
Joined: July 01, 2006
KitMaker: 614 posts
Armorama: 601 posts
Posted: Saturday, April 19, 2014 - 01:05 PM UTC
I got the SCC-2 on today


Details painted then Decal and Tools
Thanks for lookin in.
Tony lee


Details painted then Decal and Tools
Thanks for lookin in.
Tony lee

D_J_W
Joined: December 30, 2005
KitMaker: 436 posts
Armorama: 367 posts

Posted: Saturday, April 19, 2014 - 08:52 PM UTC
Looking very nice Tony, I must pull finger and get started on my one. Keep up the great work.
Cheers
David
Cheers
David


Yeti01012001

Joined: July 28, 2005
KitMaker: 360 posts
Armorama: 334 posts
Posted: Friday, April 25, 2014 - 04:08 AM UTC
Some more progress shots from the AFV model - Churchill mk2 infantry tank. About 80% done, it has been given a light black wash, then some scuff and streaks marks added. The next step is then to add a pin wash and then a dry brush with weathering


comments welcome.


comments welcome.

IronOwl
Joined: January 07, 2013
KitMaker: 572 posts
Armorama: 302 posts

Posted: Friday, April 25, 2014 - 04:20 AM UTC
Very well done looks great
Sascha(Ironowl)
Sascha(Ironowl)
PvtMutt
Joined: July 01, 2006
KitMaker: 614 posts
Armorama: 601 posts
Posted: Friday, April 25, 2014 - 04:32 AM UTC
Nice work Gary
Tony lee
Tony lee

Jamesite

Joined: December 05, 2006
KitMaker: 2,208 posts
Armorama: 2,152 posts

Posted: Sunday, May 11, 2014 - 08:20 PM UTC
Just spotted this one and as I've been getting back into posting on the Big A over on the T-54/55/62 campaign I couldn't resist this as the Churchill is my all time favourite AFV.
Have wanted to do a 3" gun carrier for years but will wait to 'stumble' over the AFV kit in a LHS before I go down that road!
I finished a bit of a 'what-if' post-war Jordanian 20pdr 'super-churchill' recently for a bit of fun that needs paint but for this campaign I think I'll do something very different (for me) and go braille scale as I picked up Airfix's Churchill bridgelayer not to long back that I thought would be fun and impossible to do in 1/35. Therefore extremely impressed with Gary's builds....WOW!
Not sure when I'll get around to it but hopefully not too far off!
James

AlanL

Joined: August 12, 2005
KitMaker: 14,499 posts
Armorama: 11,675 posts
Posted: Monday, May 12, 2014 - 07:37 AM UTC
Hi Gary, Tony and Pawel,
Excellent work guys. Some cracking vehicles coming along in this one.
Inspiring stuff folks.
Al
Excellent work guys. Some cracking vehicles coming along in this one.
Inspiring stuff folks.
Al
Yeti01012001
Joined: July 28, 2005
KitMaker: 360 posts
Armorama: 334 posts
Posted: Monday, May 12, 2014 - 11:30 PM UTC
Here is my finished CHURCHILL tank. The pictures do not give it justice though. With tank riders added


comments welcome
gary


comments welcome
gary
Tiger_213
Joined: August 10, 2012
KitMaker: 1,510 posts
Armorama: 1,443 posts
Posted: Tuesday, May 13, 2014 - 12:23 AM UTC
I like the figures, Gary. And the modulation is very nice too.
PvtMutt
Joined: July 01, 2006
KitMaker: 614 posts
Armorama: 601 posts
Posted: Tuesday, May 13, 2014 - 02:46 AM UTC
Mighty Fine Gary Mighty Fine
Tony lee
Tony lee

pablo_g

Joined: October 21, 2003
KitMaker: 529 posts
Armorama: 500 posts

Posted: Tuesday, May 13, 2014 - 02:58 AM UTC
Good work gentlemen, your tanks looks great. I like it.
Paweł
Paweł
IronOwl
Joined: January 07, 2013
KitMaker: 572 posts
Armorama: 302 posts
Posted: Thursday, May 15, 2014 - 09:53 AM UTC
that looks great and the added figures wow every body is doing awesome on there builds .
Sascha(ironowl)
Sascha(ironowl)
Jamesite
Joined: December 05, 2006
KitMaker: 2,208 posts
Armorama: 2,152 posts
Posted: Monday, May 26, 2014 - 04:57 PM UTC
Right gents, time to get involved!
Now I've finished up my rebel Syrian T-55 I can concentrate on this build.
As stated beforehand I'm not a braille scale builder at all, but my chances of building this in 1/35 are well under zero so its will be a fun way of representing such an interesting vehicle.
So this is what I'm starting with:

It seems that Airfix took their somewhat 'tired' Mk. VII (70's vintage?) and added the bridgelayer portion much later as there is a definite difference in moulding quality between the different spruces.
In two nights I've managed to get one sponson together:


A bit of love is required to clean up mould seams and tidy up edges etc. Not many flat parts are actually flat due to sink marks so some filing/sanding and filling is required to neaten things up. I also thinned out the mudguards where necessary to get a better in scale appearance.
Cheers,
James
Jamesite
Joined: December 05, 2006
KitMaker: 2,208 posts
Armorama: 2,152 posts
Posted: Wednesday, May 28, 2014 - 02:10 PM UTC
A little bit more progress now,
The bridge has gone together pretty easily. As I said in my earlier post, the quality of the bridgelayer parts is significantly better than the base Churchill kit:


Just some filling of sink marks on the inner faces was the only real 'issue' here.
I've cleaned the tracks up a bit. Certainly these are fairly weak and the material isn't that nice but at this scale and with a bit of mud, they should clean up no problems:

Also started thinking about how I wanted to display it. Originally I thought a little dio base of a destroyed bridgehead with the Churchill dramatically lowering the bridge over the turbid waters of a crucial river crossing.
I then realised I'd never finish it if I did that and so dug out this nice simple wooden base instead!

I can't remember the source of this but I've had it years. While the top is laminated with a nice red wood (looks much darker in the pic than real life) the sides are just MDF. I've coated the latter in Mr. surfacer as I find the MDF doesn't paint well being too absorbent and is difficult to sand to a decent finish. I can tidy up the Mr. Surfacer nicely and paint black for a good look instead.
That's all for now, Keen to see what you guys think so far.
James
Jamesite
Joined: December 05, 2006
KitMaker: 2,208 posts
Armorama: 2,152 posts
Posted: Wednesday, June 04, 2014 - 12:24 PM UTC
Hey guys,
Quiet campaign this, anyone out there?
So these little kits go together pretty quickly, if the Churchill 'base kit' was as cleanly moulded as the bridgelayer portion it would have been even quicker, but a bit of clean-up was needed.
Here's the tank all ready for paint:


I didn't want to get carried away with improvements on this build for three main reasons:
1. I didn't want to drag the build out.
2. I have a very minimal source of 1/72(6) scale parts/additions
3. Detailing in this scale is probably beyond my skills!
However, I did make a couple of additions that seemed to be worthwhile.

Here you can see I replaced the hull Besa barrel with a piece of plastic rod. Not perfect but beats cleaning up the kit part. However in hindsight I'm not sure if this would even be fitted giving the bulky bridge attachments in its line of fire. The reference pics I have are inconclusive.
Also you can see some basic detail additions to the cupola. Far from perfect but adds some detail to this blank area.
You may also be able to tell (if familiar with these Airfix kits) that I re-carved a lot of detail on the hull spare track links as these were fairly poor representations of the real things (like the tracks themselves!)


Here you can see I used some old spare PE mesh to replace the air intake screens. I did this by carving away the solid moulded kit areas first to add depth beneath the PE parts (old Tiger 1 mesh from 1/35 scale if memory serves me correctly!).
Also from my meagre collection of braille scale parts I salvaged a tarp and two jerry cans that I re-carved detail on and added, including foil strips to represent the holders and straps. Strictly speaking I know these should be POW cans but an easy field mod surely?
Some photos now of it all together on its base:


Appreciate to know what you think!
Cheers,
James
robw_uk

Joined: June 22, 2010
KitMaker: 1,224 posts
Armorama: 1,207 posts

Posted: Wednesday, June 11, 2014 - 07:07 AM UTC


Jamesite
Joined: December 05, 2006
KitMaker: 2,208 posts
Armorama: 2,152 posts
Posted: Wednesday, June 11, 2014 - 11:23 AM UTC
Nice Rob,
Is that the Airfix kit? If so I feel for you having put the same hull together myself!
Not sure about the tarp over the mantlet though - seems to be defying gravity somewhat!
Well done,
James
Is that the Airfix kit? If so I feel for you having put the same hull together myself!
Not sure about the tarp over the mantlet though - seems to be defying gravity somewhat!
Well done,
James
robw_uk
Joined: June 22, 2010
KitMaker: 1,224 posts
Armorama: 1,207 posts
Posted: Wednesday, June 11, 2014 - 07:58 PM UTC
Quoted Text
Nice Rob,
Is that the Airfix kit? If so I feel for you having put the same hull together myself!
Not sure about the tarp over the mantlet though - seems to be defying gravity somewhat!
Well done,
James
James, yep that is the Airfix kit and yes its a pig... I have the same thought on the tarp - it worked ok when I started to place it (its made of 2 part putty) but seems that as I have taken it on/off to paint etc it has bent slightly... but hey, now know to leave it for longer (and on a flatter surface)...

TMoon

#152
Joined: December 07, 2002
KitMaker: 487 posts
Armorama: 441 posts
Posted: Saturday, June 14, 2014 - 10:23 AM UTC
Here is my startup photos of the Tamiya Churchill Crocodile.
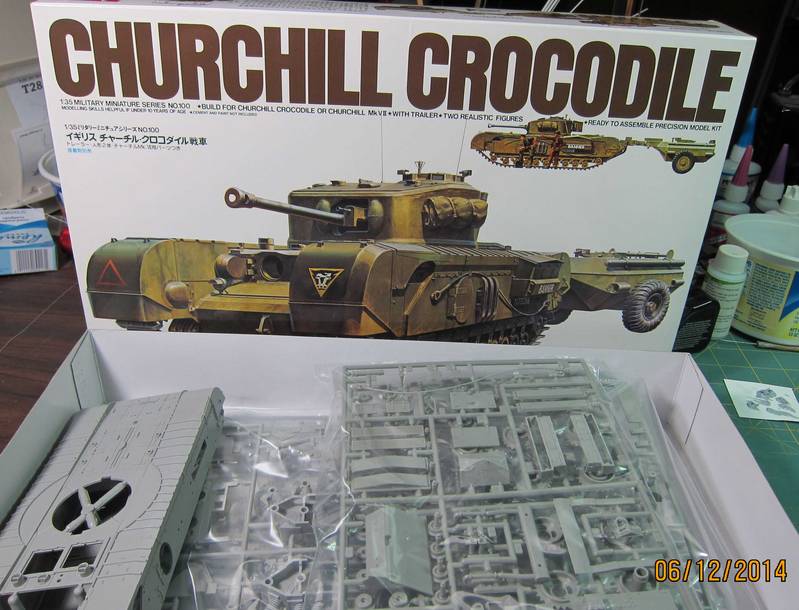
Tom
Tom
Cookiescool2
Joined: May 09, 2014
KitMaker: 273 posts
Armorama: 270 posts
Posted: Saturday, July 05, 2014 - 04:46 AM UTC
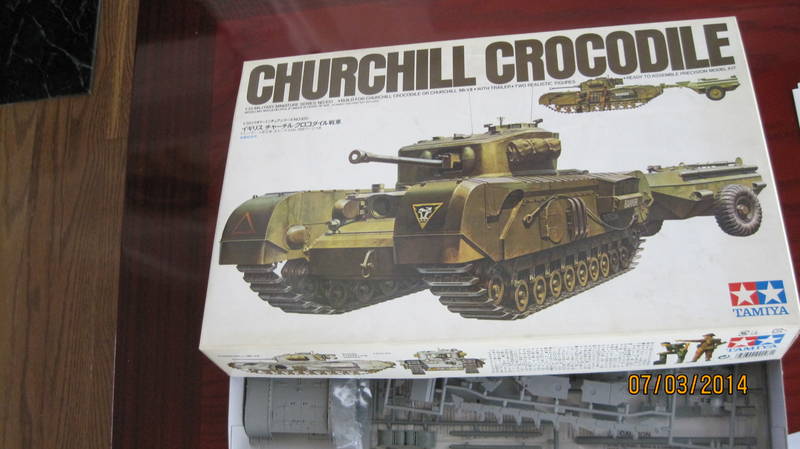
Here are my startup pictures, I'm not trying to step on anyone's toes with this build, but as I'm a beginner I hope to learn some techniques and tips from this build. Happy Building! 


IronOwl
Joined: January 07, 2013
KitMaker: 572 posts
Armorama: 302 posts
Posted: Saturday, July 05, 2014 - 06:52 PM UTC
well done Churchills all round I Have had no computer for a month now (lighting) zapped it and my lap top just picked up a new computer should be starting on my Mk VII shortly
Ironowl
Ironowl

beefy66
Joined: October 22, 2007
KitMaker: 971 posts
Armorama: 280 posts

Posted: Sunday, July 06, 2014 - 12:36 AM UTC
Some great Churchill,s getting done here well I have eventually got round to making a start on mine you might recognize the start photo I had to use that as no fancy phone 

beefy66
Joined: October 22, 2007
KitMaker: 971 posts
Armorama: 280 posts
Posted: Sunday, July 06, 2014 - 12:38 AM UTC


 |

WEB HOSTING BY


Copyright ©2021 Armorama and Kitmaker Network, a subsidiary of Silver Star Enterprises
All Rights Reserved. Please read our Conditions of Use and Privacy Policy.
All Rights Reserved. Please read our Conditions of Use and Privacy Policy.