Campaigns: Active Campaigns
Campaigns that are either in planning or underway should be grouped here.
Hosted by Richard S.
Trumpeter Campaign
LarryLawler
Visit this Community
Florida, United States
Joined: March 30, 2010
KitMaker: 139 posts
Armorama: 136 posts
Posted: Monday, October 21, 2013 - 07:27 AM UTC
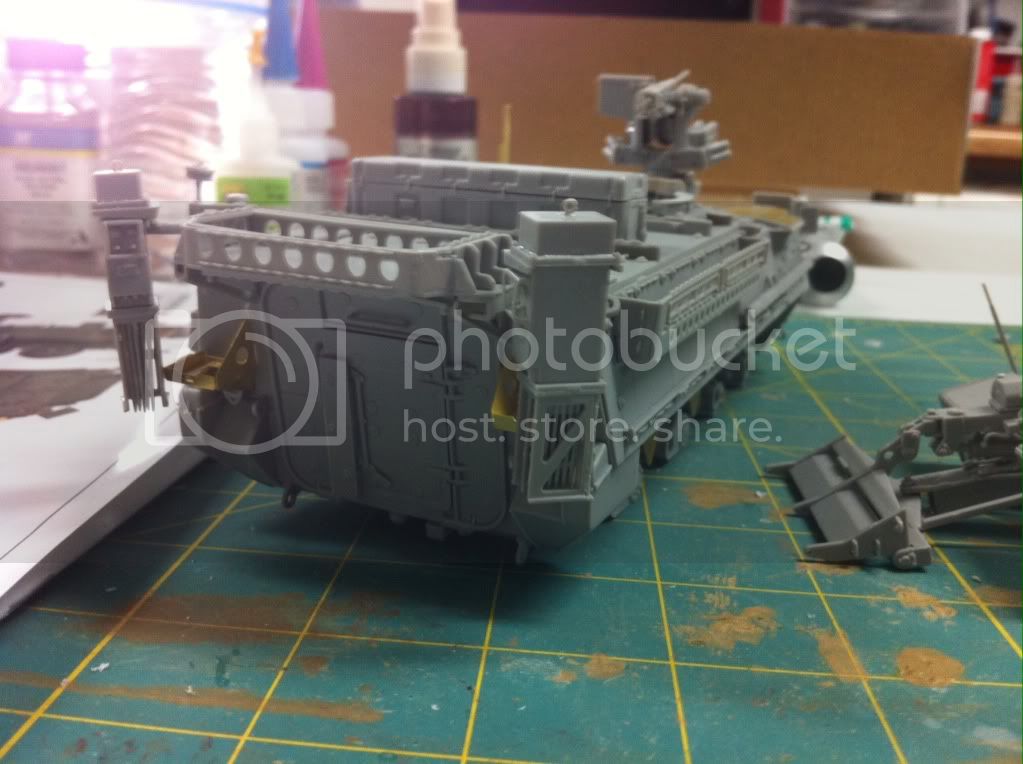
Today's update:


Everything's primed now, and I'll be shooting paint later today!
3rdArmoredVet
Visit this Community
North Carolina, United States
Joined: August 28, 2013
KitMaker: 148 posts
Armorama: 108 posts
Posted: Monday, October 21, 2013 - 07:46 AM UTC
That is an intense looking build, great job so far Larry.
Nito74
Visit this Community
Lisboa, Portugal
Joined: March 04, 2008
KitMaker: 5,386 posts
Armorama: 4,727 posts
Posted: Monday, October 21, 2013 - 09:04 AM UTC
Hi Larry !

Nice Stryker |

But you are building it for which Campaign ? I've seen the same photos for the Trumpeter & Armored Car Campaign.

You can't use the same kit for both Campaigns.
Pick one Campaign and build something else for the other one.

Cheers,
John
PantherF
Visit this Community
Indiana, United States
Joined: June 10, 2005
KitMaker: 6,188 posts
Armorama: 5,960 posts
Posted: Monday, October 21, 2013 - 09:28 AM UTC
Good catch there John, maybe we should start including that in the Campaign rules as many don't read the Guidelines set up for executing a Campaign build.


Jeff
RedDuster
Visit this Community
England - South East, United Kingdom
Joined: March 01, 2010
KitMaker: 7,078 posts
Armorama: 248 posts
Posted: Tuesday, October 22, 2013 - 06:51 AM UTC
A bit more progress today,

The untidy boot topping has been tidied up and the main deck glued down,


The kit and WEM supplied details added to the after mooring deck, not much to see, but then not much can be seen.


The after section of the flight deck is fitted, I have also stated to paint the superstructure decks. Here's everything so far test fitted.


More soon,

Si
Bluestab
Visit this Community
South Carolina, United States
Joined: December 03, 2009
KitMaker: 2,160 posts
Armorama: 1,906 posts
Posted: Wednesday, October 23, 2013 - 11:41 AM UTC
Okay here goes my Trumpy KV-1 mod '42 with the lightweight cast turret (#00360). I actually started a couple of weeks ago. I just haven't posted any progress until now.

First up is to open the required holes on this piece. This is the first Trumpy KV I've built where I actually opened the holes when I was supposed to.


Lower hull. It's a multi-piece hull with side pieces that overlay. It went together well. You just have to make sure it's a s square as possible because once it's assembled the side plates make it really stiff. I clamped the pieces and let it set thoroughly.


Now for the suspension. Again, pretty straightforward. I deviated from the instructions and assembled the entire running gear for both sides at the same time.


Now you get to see how square your lower hull is. The upper hull plates will pop in place. I used clamps to pull the edges together.


And there she is. I usually name my models...I think I'll call this one Venka.


On to the turret. Again, it's pretty straightforward. It required a little extra cleanup. I think the kit barrel even looks nice. I'm debating on whether to try to give the turret a more textured finish to represent to cast.


And that's where I am at. Besides the turret texture, I am also thinking of how I want to damage the fenders.
1721Lancers
Visit this Community
England - East Anglia, United Kingdom
Joined: March 21, 2012
KitMaker: 1,673 posts
Armorama: 1,640 posts
Posted: Thursday, October 24, 2013 - 03:48 AM UTC
Hi there, a quick update:

Numbers:


Dullcote lacquer after a light oil paint attack:


A light drybrushing (sorry for swearing)


I hope it appeals to all, more tomorrow


Paul
Nito74
Visit this Community
Lisboa, Portugal
Joined: March 04, 2008
KitMaker: 5,386 posts
Armorama: 4,727 posts
Posted: Thursday, October 24, 2013 - 04:06 AM UTC
Great job Paul !! Green looks perfect !!

My update,


Turret details finished.
Turret is ready for primer.


Next on the small wheels & suspension


...
PantherF
Visit this Community
Indiana, United States
Joined: June 10, 2005
KitMaker: 6,188 posts
Armorama: 5,960 posts
Posted: Thursday, October 24, 2013 - 04:16 AM UTC
I like the exhaust stains Paul.


Jeff
SHAKY962
Visit this Community
Buenos Aires, Argentina
Joined: May 21, 2012
KitMaker: 765 posts
Armorama: 438 posts
Posted: Thursday, October 24, 2013 - 08:34 AM UTC
Well, after two weeks of a lot of work I start for the following campaign!!


SHAKY962
Visit this Community
Buenos Aires, Argentina
Joined: May 21, 2012
KitMaker: 765 posts
Armorama: 438 posts
Posted: Thursday, October 24, 2013 - 08:36 AM UTC

Quoted Text

Great job Paul !! Green looks perfect !!

My update,


Turret details finished.
Turret is ready for primer.


Next on the small wheels & suspension


...


John, nice tank!!!!!!!!!
You are making a tank wich I can´t write!!!!!
Nito74
Visit this Community
Lisboa, Portugal
Joined: March 04, 2008
KitMaker: 5,386 posts
Armorama: 4,727 posts
Posted: Thursday, October 24, 2013 - 09:18 AM UTC
Hola Jose !

Glad to see you here !

You mean the Neubaufahrzeug ? eheheh

I have that same KV-2 in stash, still don't know when I will build it.
The 3 colour camo looks good.

Here's one with Zimm


A cool prototype


Captured by the Germans


Some camo schemes that might help HERE

PantherF
Visit this Community
Indiana, United States
Joined: June 10, 2005
KitMaker: 6,188 posts
Armorama: 5,960 posts
Posted: Thursday, October 24, 2013 - 09:42 AM UTC
WHAT? Zimm on a Russian tank?


Say it ain't so John! Say it ain't so!


Jeff
Nito74
Visit this Community
Lisboa, Portugal
Joined: March 04, 2008
KitMaker: 5,386 posts
Armorama: 4,727 posts
Posted: Thursday, October 24, 2013 - 10:29 AM UTC

Quoted Text

WHAT? Zimm on a Russian tank?


Say it ain't so John! Say it ain't so!


Jeff


Well Jeff I was doing a quick search for KV-2 when I came across that image.. my guessing it's a what-if build by some modeler. Never saw a Russian tank with Zimm..

found the website / here

If it was my WhatIf... mmhh I would add either a SturmTiger gun ot a double 76mm from a T-34.
With a M2 .50 cal for the commander hatch and some Stug Side Skirts
Tiger1944
Visit this Community
Victoria, Australia
Joined: October 11, 2013
KitMaker: 160 posts
Armorama: 152 posts
Posted: Thursday, October 24, 2013 - 10:23 PM UTC
Guys the builds are coming along beautifully!
@Larry the Stryker looks great, loads of detail!

@Simon, she's looking beaut!

@Alex, nice start to the KV

@Paul, looks great and don't worry I still drybrush myself as there's nothing like old school techniques. Love the exhaust stains on the rear deck too!

Well I got my Aber barrel all assembled and fitted into the mantle:

hence to say the kit's plastic barrel got chucked into the spares box.

I then moved onto finishing the breech assembly, assembling the floor and dry fitting it into the hull.

I only have a few little bits to do for assembly then it's time for the final paint.
RedDuster
Visit this Community
England - South East, United Kingdom
Joined: March 01, 2010
KitMaker: 7,078 posts
Armorama: 248 posts
Posted: Friday, October 25, 2013 - 07:52 AM UTC
great builds going on, Jason, Alex, John, Larry, Paul et al really tidy work.

Quick update, Hanger interior done, very little will be visible, even with the door open, so I have not spent time adding stuff that will be invisible once finished.


The larger starboard platform has been added along with its supports, strangely the WEM fret has etched supports for the platforms abeam of the funnel section, but none of the others.


And yes, the hanger roof paint job needs tidying up, I will do that when I paint in the other platform decks.

Si
SHAKY962
Visit this Community
Buenos Aires, Argentina
Joined: May 21, 2012
KitMaker: 765 posts
Armorama: 438 posts
Posted: Friday, October 25, 2013 - 07:53 AM UTC
Thanks for the welcome JOhn!!!

I start building

Toyguy
Visit this Community
Vermont, United States
Joined: July 28, 2013
KitMaker: 13 posts
Armorama: 11 posts
Posted: Friday, October 25, 2013 - 09:04 AM UTC
Let the work begin! After some poking around on the web, I stumbled on this photo of a spring/shock unit.


I found it interesting that it was a dual-coil design. I decided I'd go with a red-oxide type primer on the spring and steel for the body, with chrome silver on the shaft. I decided to do one as a test piece. Here's a shot of that next to a road wheel off my Tamiya M1A2, for reference:


There's some evidence in the first photo that the attachment bracket should perhaps be white, so I'm going to paint that later and see which I prefer. Once decided, there are one more short unit and 8 longer ones to make as Step 1 in the instructions. It's a small start, but a start nonetheless!
3rdArmoredVet
Visit this Community
North Carolina, United States
Joined: August 28, 2013
KitMaker: 148 posts
Armorama: 108 posts
Posted: Friday, October 25, 2013 - 10:57 AM UTC
All the builds are looking fantastic thus far gentlemen. So much so that they got me back on the ball with my ASU-85 this week. No pics, just the boring process of putting the tracks together right now but I am enjoying my newly designed track jig that I will be marketing very soon.
Tiger1944
Visit this Community
Victoria, Australia
Joined: October 11, 2013
KitMaker: 160 posts
Armorama: 152 posts
Posted: Friday, October 25, 2013 - 08:54 PM UTC
Simon, your naval vessel is coming along great. I also don't bother with details that will never be seen as I can't see the point as to why.

Dave, Never built a kit with working suspension before, should be great to position on a diorama where you can show the suspension doing it's thing!

Today's progress, broke out the airbrush and paint brushes and got painting
First up was the wooden floor in the crew compartment. I can't remember who told me but I sprayed the floor in black primer, then Panzer grey. I then dry brushed the planks using Gunze deck tan. Tomorrow I will give the planks an oil paint wash.


Then I sprayed the gun breech with parts in Panzer grey and other parts in burnt iron. Then drybrushing with a mixture of silver and steel metallic colours, followed by an AK Panzer grey filter.


Have also painted the vinyl tracks (though someday I will replace them with workable tracks.
The model is basically now almost ready for final assembly and then an overall Panzer grey coat.
RedDuster
Visit this Community
England - South East, United Kingdom
Joined: March 01, 2010
KitMaker: 7,078 posts
Armorama: 248 posts
Posted: Saturday, October 26, 2013 - 03:45 AM UTC
Thanks Jason, yup life is too short.

Nice work on the metallic finish on the breach, looks very real.

Si
1721Lancers
Visit this Community
England - East Anglia, United Kingdom
Joined: March 21, 2012
KitMaker: 1,673 posts
Armorama: 1,640 posts
Posted: Saturday, October 26, 2013 - 04:24 AM UTC
John, Jeff, Jose and Jason thanks for your kind words lads
there are well appreciated .
The exhaust stains are airbrushed with Revell 08 black enamel.

Jose nice to see you here, and a flying start there too. Are you going with the Trumpy camo, or will go for a different scheme?

Alex she's looking cool

John your Neubaufahrzeug is also looking great. You not going to have go at that KV-V1 Battleship are you ?

Jason great paint job there on the gun and the floor boards are perfect is that an RB barrel ?

Simon the frigate is looking great, anything for the hanger ?
Maybe a Lynx or something similar.

The final steps on my SU 152:

tools, tow cables and fuel stains:


And a final dusting with Tamiya enamel Buff:


No more mister nice guy


hope you like it.

Jeff thanks for the opportunity to do something different, if you do a KV campaign I shall sure join in on that

Keep em coming lads I shall be watching


Paul
PantherF
Visit this Community
Indiana, United States
Joined: June 10, 2005
KitMaker: 6,188 posts
Armorama: 5,960 posts
Posted: Saturday, October 26, 2013 - 05:08 AM UTC

Quoted Text


Jeff thanks for the opportunity to do something different, if you do a KV campaign I shall sure join in on that


Paul


Well, to give credit where credit is due... this is Johns idea not mine but I was asked to run it as at the time he didn't think he could and I had just lightened up my schedule.

But a KV Campaign? Well heck Paul, how about you doing one? I am all Campaigned out as you won't believe the weird requests and exceptions you get asked on these and it's really burned me out.

I want to build a KV Mine Roller in the near future?


Jeff
Quasimofo
Visit this Community
New York, United States
Joined: November 30, 2012
KitMaker: 105 posts
Armorama: 87 posts
Posted: Saturday, October 26, 2013 - 05:34 AM UTC
Hey all....I just enlisted. This is my first campaign, and I've only built one Trumpeter kit as of yet, their UAZ-469.

I have probably five Trumpeter kits on my stash and couldn't make up my mind which to do, so I picked two:


The 1/35 Panzer 38(t) E/F:


And the 1/144 Il-76:


The Panzer 38(t) will be built out of box, but I'm not yet sure if I'll build the E or F.

The Il-76 will be done in the Aeroflot civilian scheme, but I want mine to be Soviet. Since Trumpeter only includes post-Soviet Russian Aeroflot decals, I'll be laser printing any markings that I need.

I'm just coming off a multi-month building frenzy getting ready for three contests and am taking a week or so off from modeling to catch up on life. Will likely start the Il-76 first since I have a partially built Flakpanzer V to finish before I start the 38(t).
1721Lancers
Visit this Community
England - East Anglia, United Kingdom
Joined: March 21, 2012
KitMaker: 1,673 posts
Armorama: 1,640 posts
Posted: Saturday, October 26, 2013 - 05:40 AM UTC
Ok Jeff, credit to John.

As for being campaigned out, well I'm running 3 :-
Waste not, want not - The 54/55/62 due to start - and Desertised starting in March 14 and I might go provisional leader in the Big guns campaign, plus the 15 I'm signed into.

But what the hell, I might put a proposal in tomorrow


Paul