Going Whole Hog!! Campaign
Praha, Czech Republic
Joined: April 03, 2006
KitMaker: 2,450 posts
Armorama: 2,409 posts
Posted: Tuesday, December 16, 2014 - 08:02 PM UTC
Hi all,
I add Cyber-Hobby Panther Ausf.F
Voyager PE set
Real Model Engine set
Fruit Tracks (ordered)
Anntena set ????


Hope you like it and "watch those negative waves"
Bayern, Germany
Joined: October 22, 2013
KitMaker: 380 posts
Armorama: 376 posts
Posted: Wednesday, December 17, 2014 - 05:09 AM UTC
I made a start, kit is almost building itself. Without the upgrades you could be done within one day. But that would be boring

All replacement barrels are slightly bigger than the kit parts, which results in some sanding and drilling.

Looks almost done, but the engine deck needs some attention:

I want to replace all grab handles (marked in balck) with wire...and all the difficoult PE is missing aswell...
Impossible only means that you haven't found the solution yet.
Auckland, New Zealand
Joined: February 03, 2014
KitMaker: 1,042 posts
Armorama: 871 posts
Posted: Wednesday, December 17, 2014 - 01:25 PM UTC
Nice clean work Fabian

Slow progress due to the small details that are being worked on - but hopefully they'll be worth the extra effort in the end

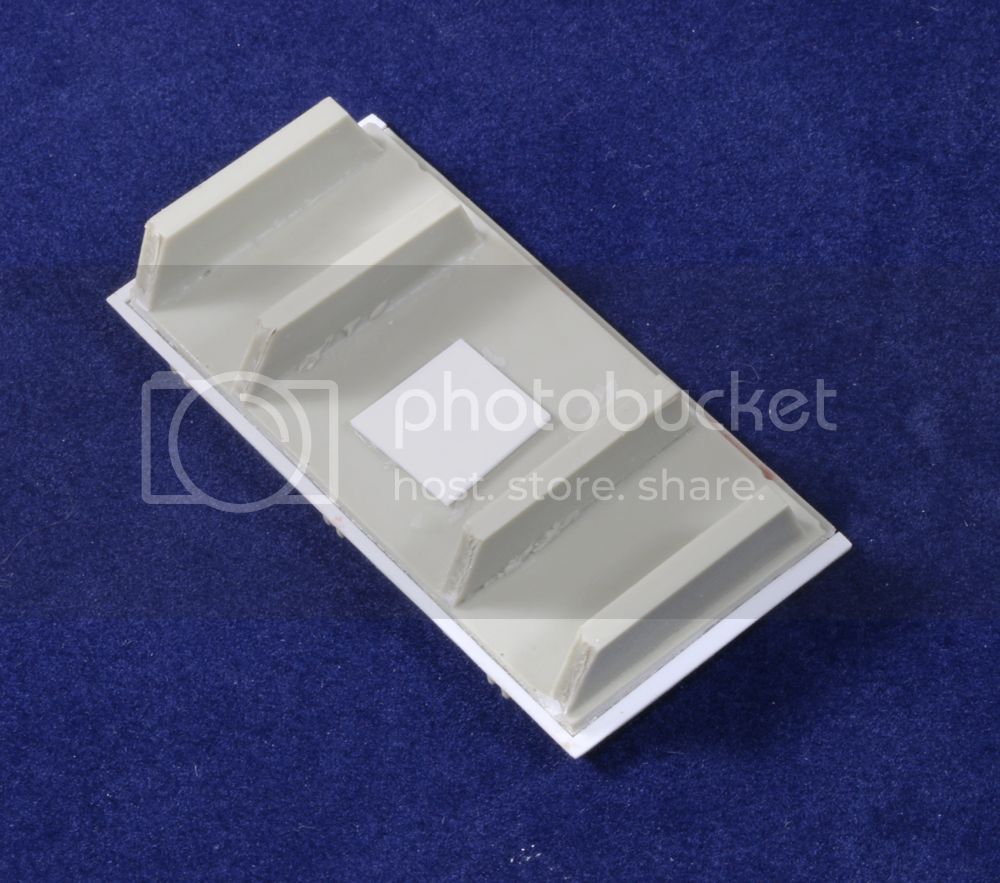
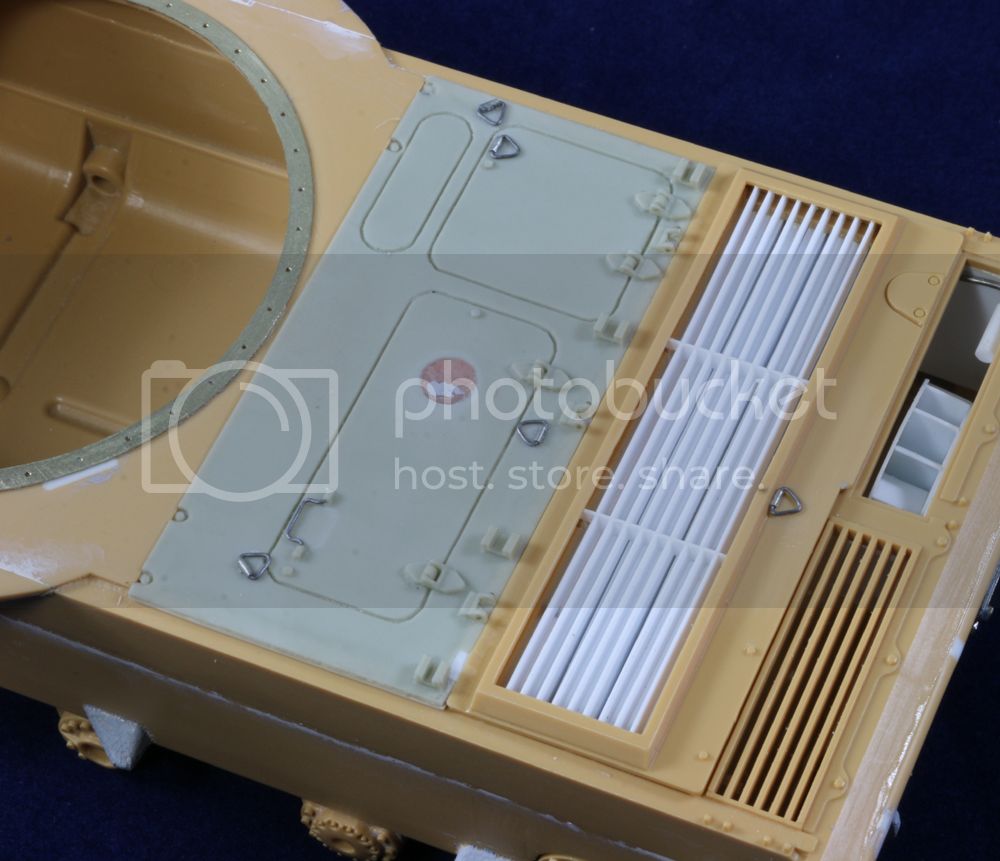
The Legend replacement resin deck need a bit of clean up on the edges and I've added some styrene shims to 'thicken' the plate a little too. The scrap styrene piece in the middle is a base for filling the hole with filler....
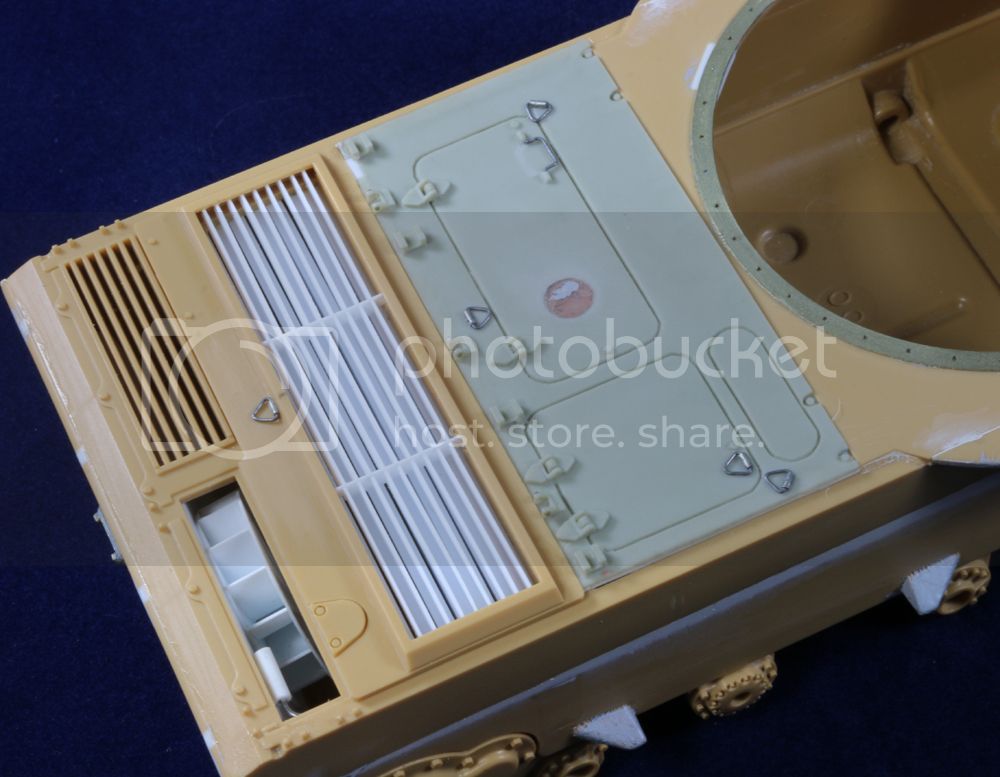
I've also replaced all the moulded on lifting loops etc with lead wire which is easier to manipulate when making such small pieces....
Gary
Bayern, Germany
Joined: October 22, 2013
KitMaker: 380 posts
Armorama: 376 posts
Posted: Friday, December 19, 2014 - 07:04 AM UTC
Quoted Text
Nice clean work Fabian 
Gary
Same to you, Gary. But it seems you´re simply outnumbering my skills in clean building.

Looking fantastic.
Made some good progress tonight:

But still a lot of PE left to do...
Impossible only means that you haven't found the solution yet.
Auckland, New Zealand
Joined: February 03, 2014
KitMaker: 1,042 posts
Armorama: 871 posts
Posted: Friday, December 19, 2014 - 09:27 AM UTC
Thanks Fabian

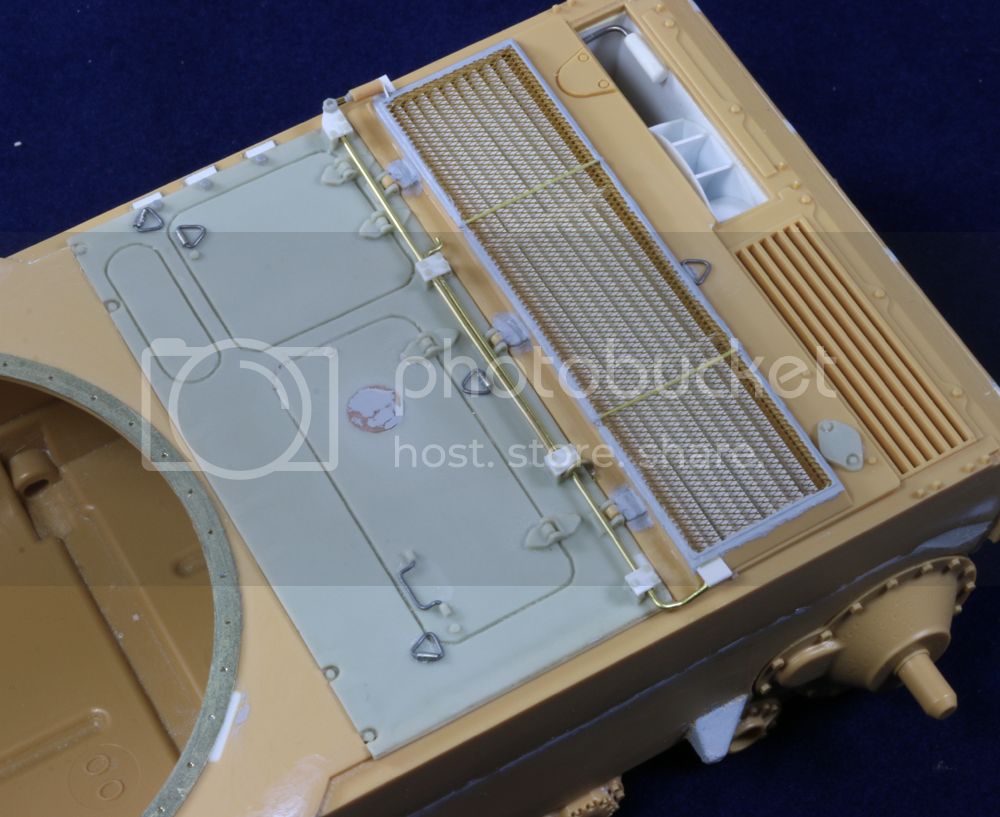
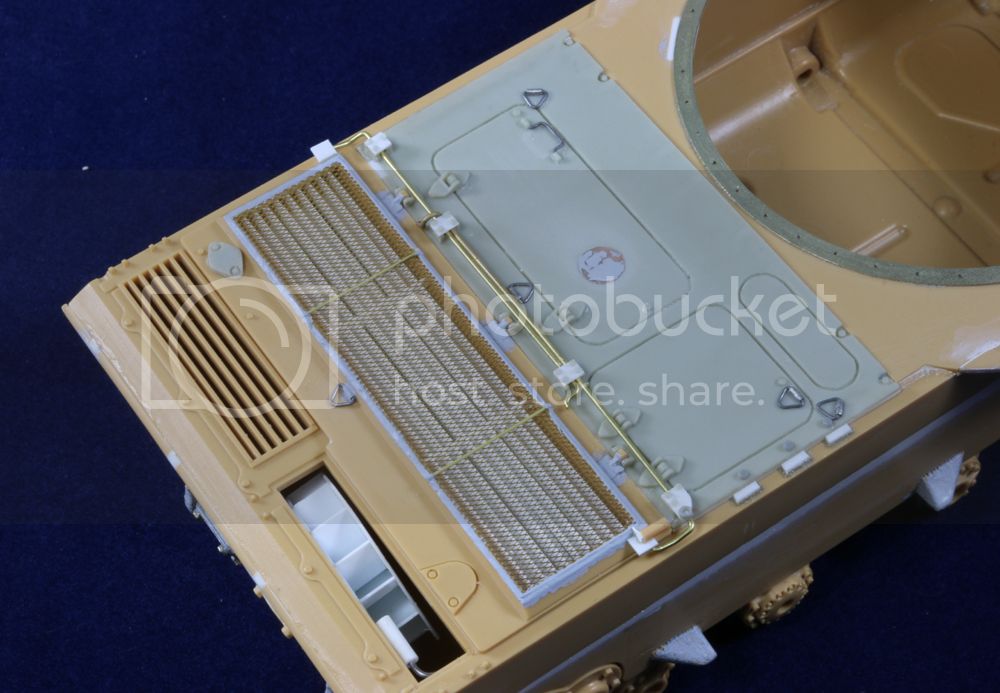
More work completed on the engine deck including the access door torsion bars specific to the T54....
Gary
Auckland, New Zealand
Joined: February 03, 2014
KitMaker: 1,042 posts
Armorama: 871 posts
Posted: Saturday, December 20, 2014 - 11:31 AM UTC
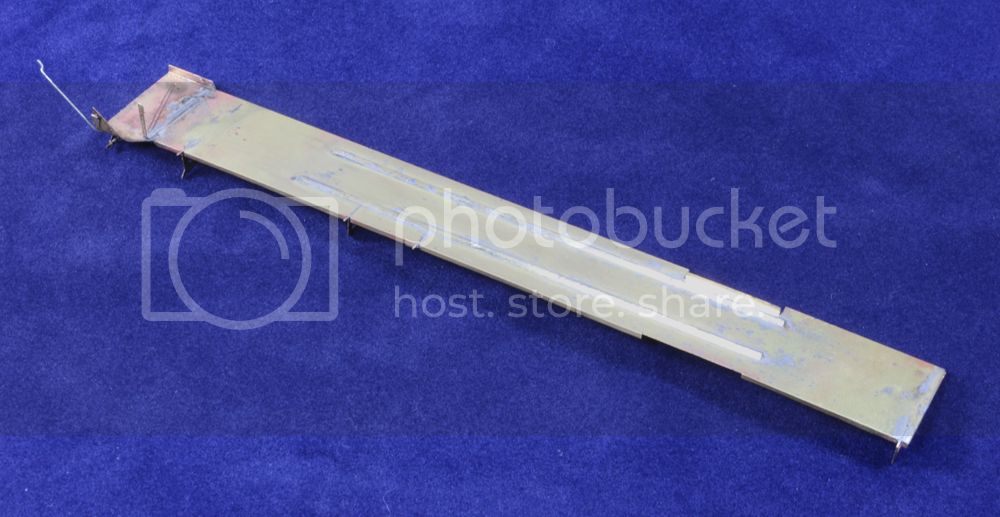
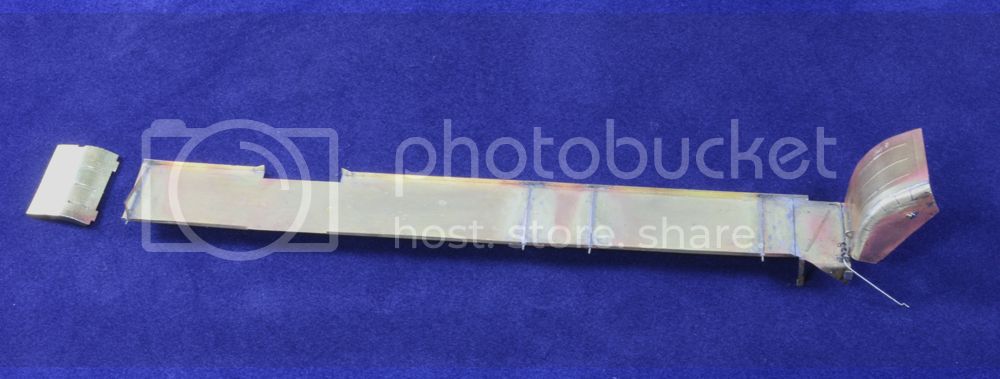
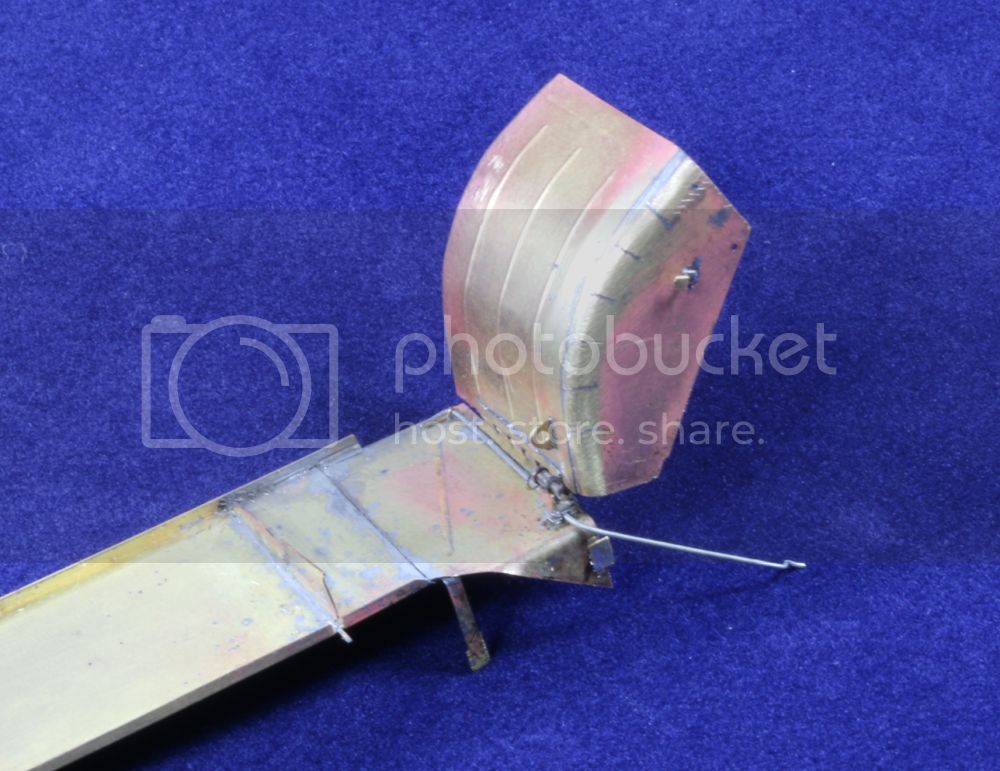
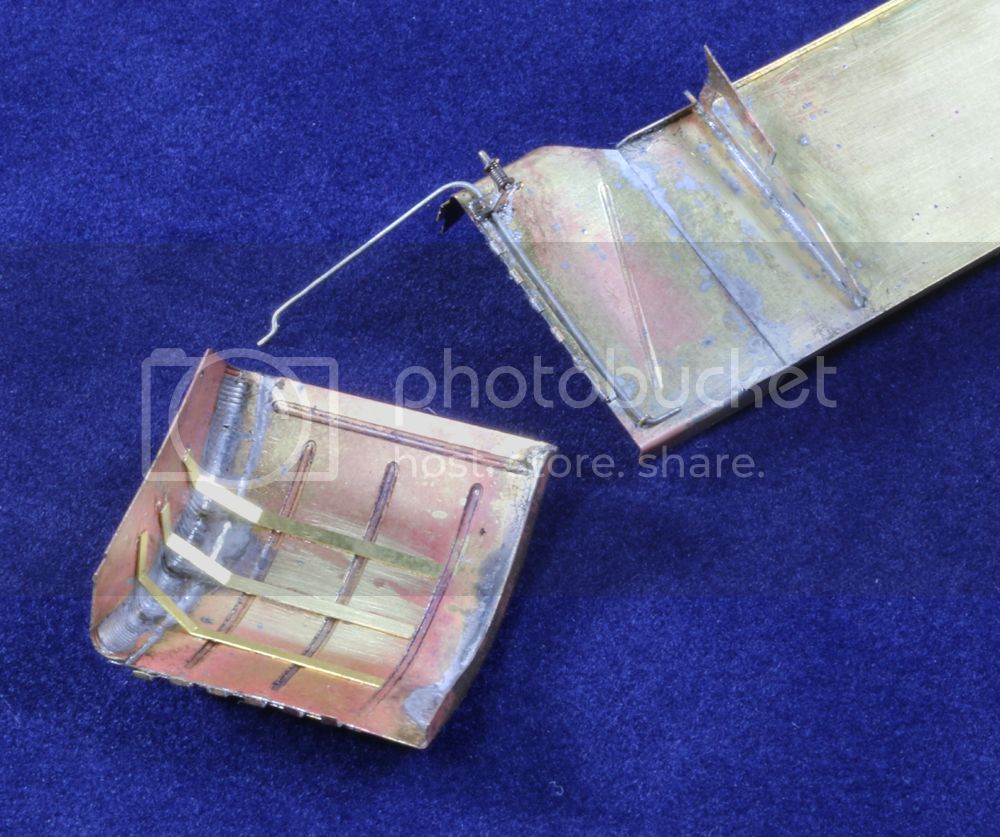
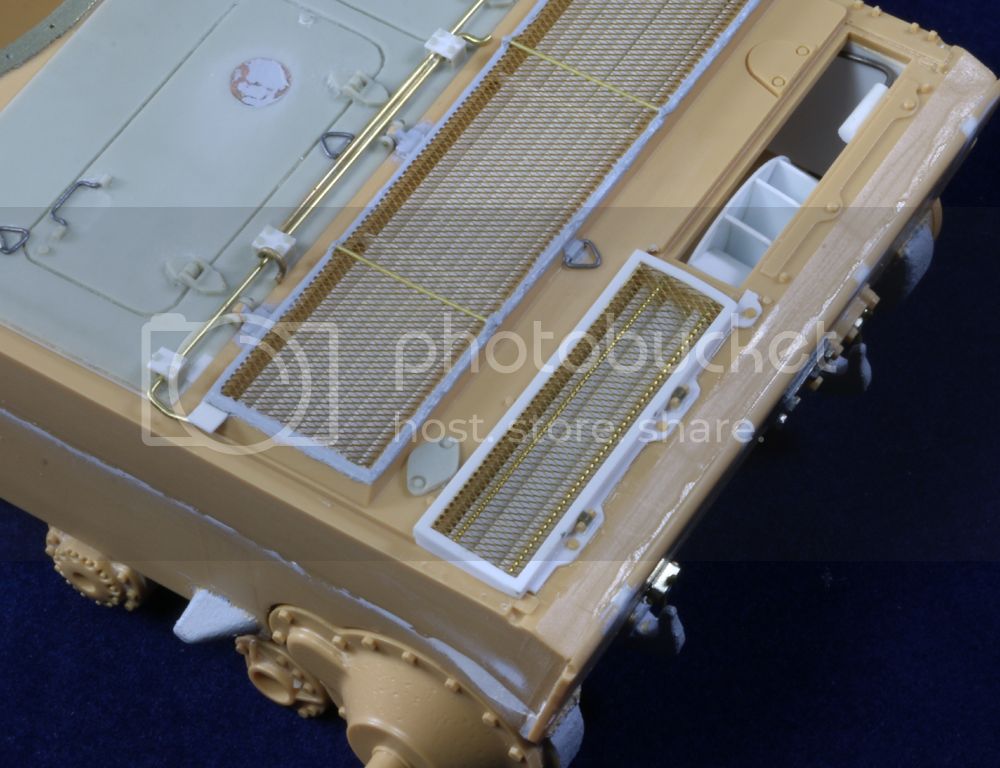
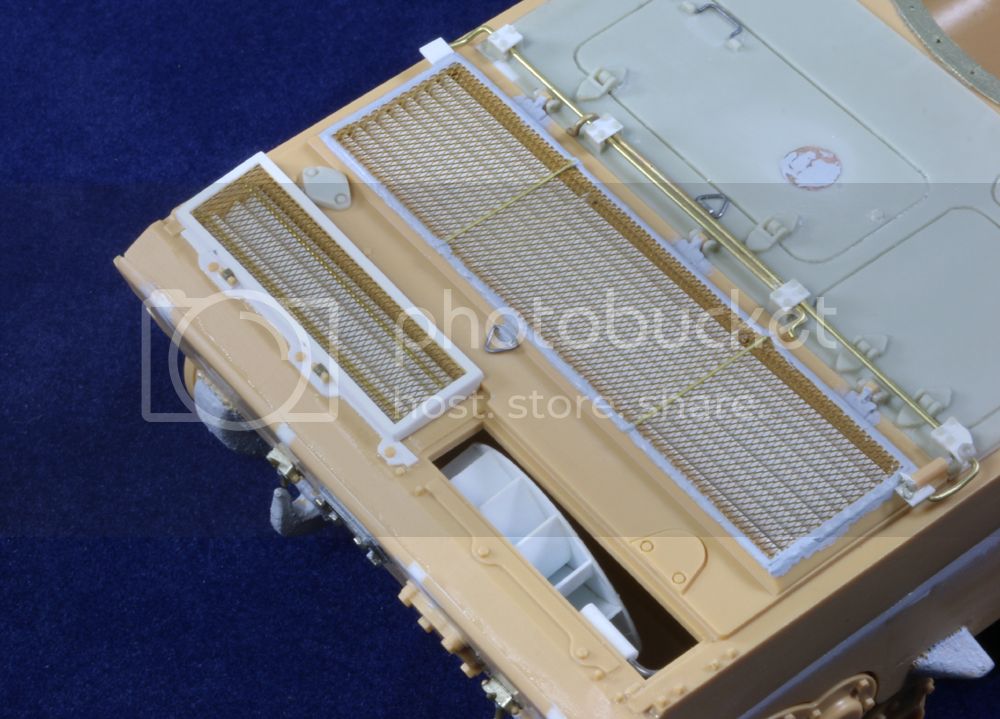
The slats in the rear outlet are removed and replaced in accordance to T54 ref photos. It also appears that the cover also differs to the T54 - not just in appearance but also the hinge points. So the entire cover was scratched using styrene strip, Legend PE mesh and brass wire. The rear panel mounting plate shape also needs to be modified - again, using strip styrene...
Gary
Namabiiru
 Associate Editor
#399
Rhode Island, United States
Joined: March 05, 2014
KitMaker: 2,888 posts
Armorama: 1,920 posts
Posted: Saturday, December 20, 2014 - 04:32 PM UTC
ColinEdm
 Associate Editor
Alberta, Canada
Joined: October 15, 2013
KitMaker: 1,355 posts
Armorama: 1,229 posts
Posted: Saturday, December 20, 2014 - 08:31 PM UTC
Gary, how the heck do you make such nice, clean, consistent bends with the wire? I am insanely jealous!
The voices are back.....excellent....
Auckland, New Zealand
Joined: February 03, 2014
KitMaker: 1,042 posts
Armorama: 871 posts
Posted: Sunday, December 21, 2014 - 11:05 PM UTC
Thanks guys

Colin - annealing the brass rod helps a lot when you need to bend a tight angle.
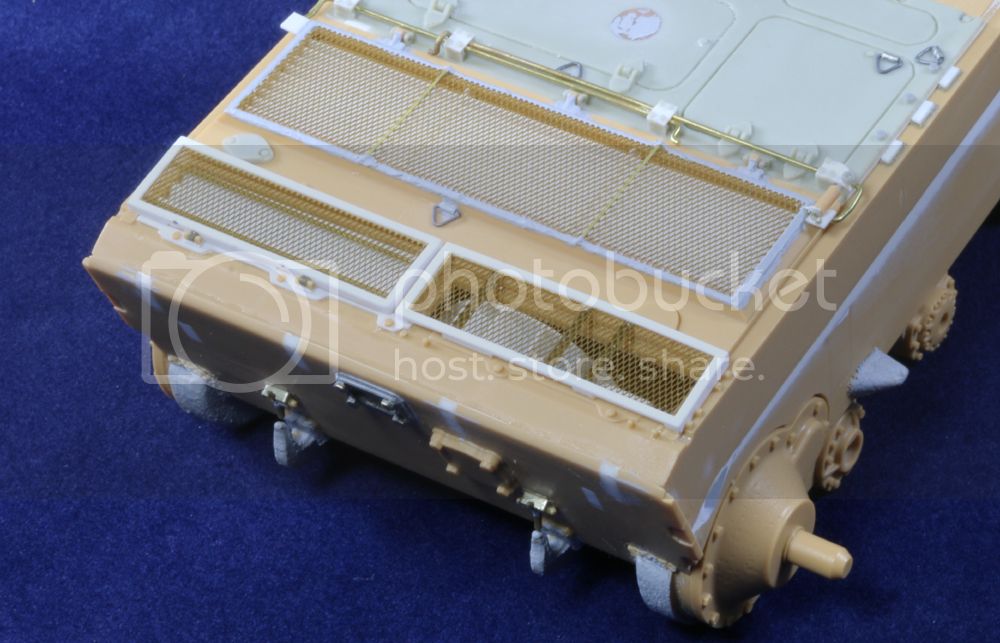
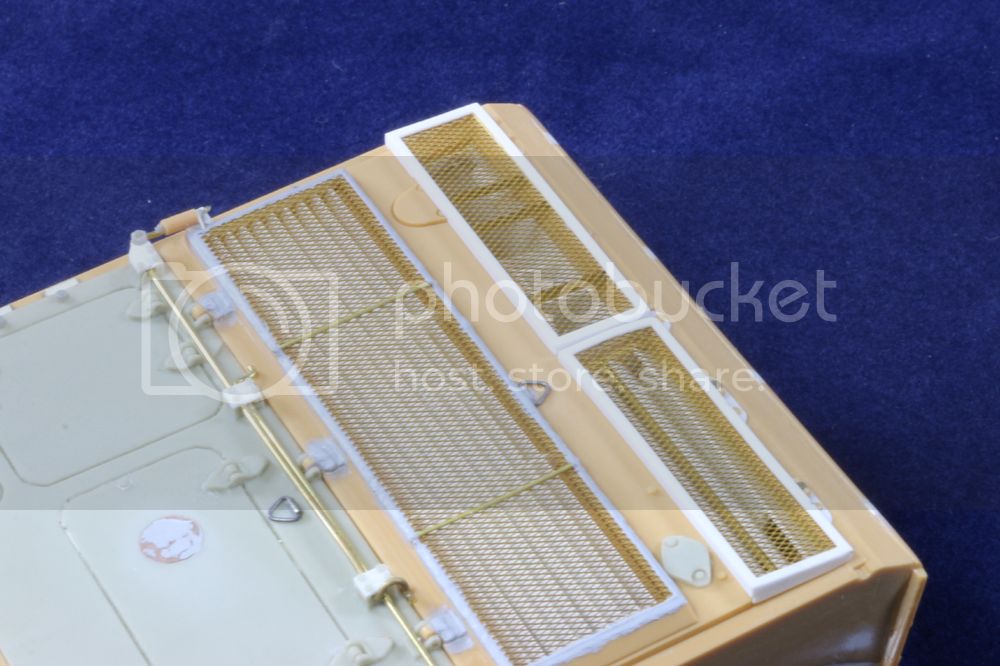
Second grill WIP....
Gary
Auckland, New Zealand
Joined: February 03, 2014
KitMaker: 1,042 posts
Armorama: 871 posts
Posted: Monday, December 22, 2014 - 05:31 AM UTC
The radiator fan armoured cover on the earlier models was split in two. The DEF Models part is actually about 1mm too short so after cutting the cover in two, I remade the flat section from scrap sheet styrene. After adding hinge parts (Need trimming once cement has set) and priming the fan assembly black, the covers are fixed in place. The armoured covers, when open, can be fixed in place with a bolt as depicted on my model...
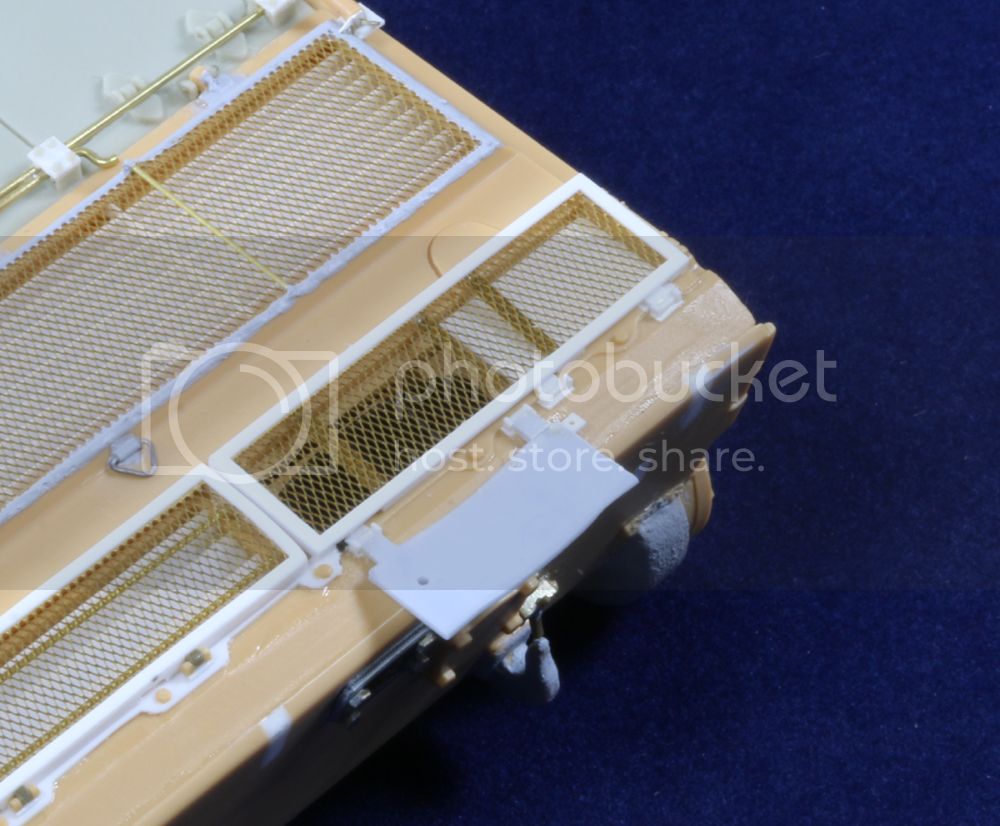
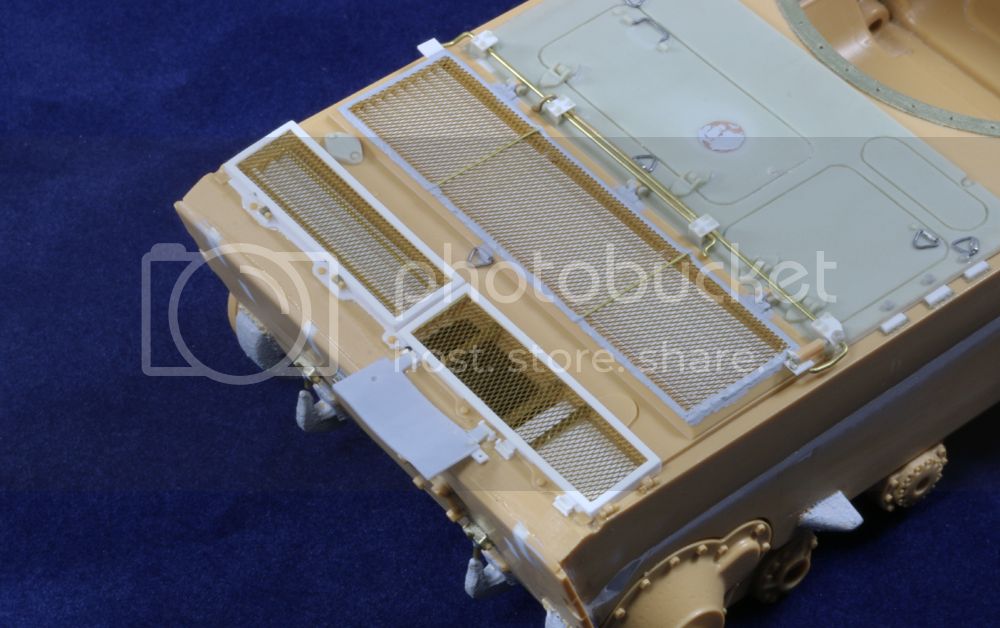
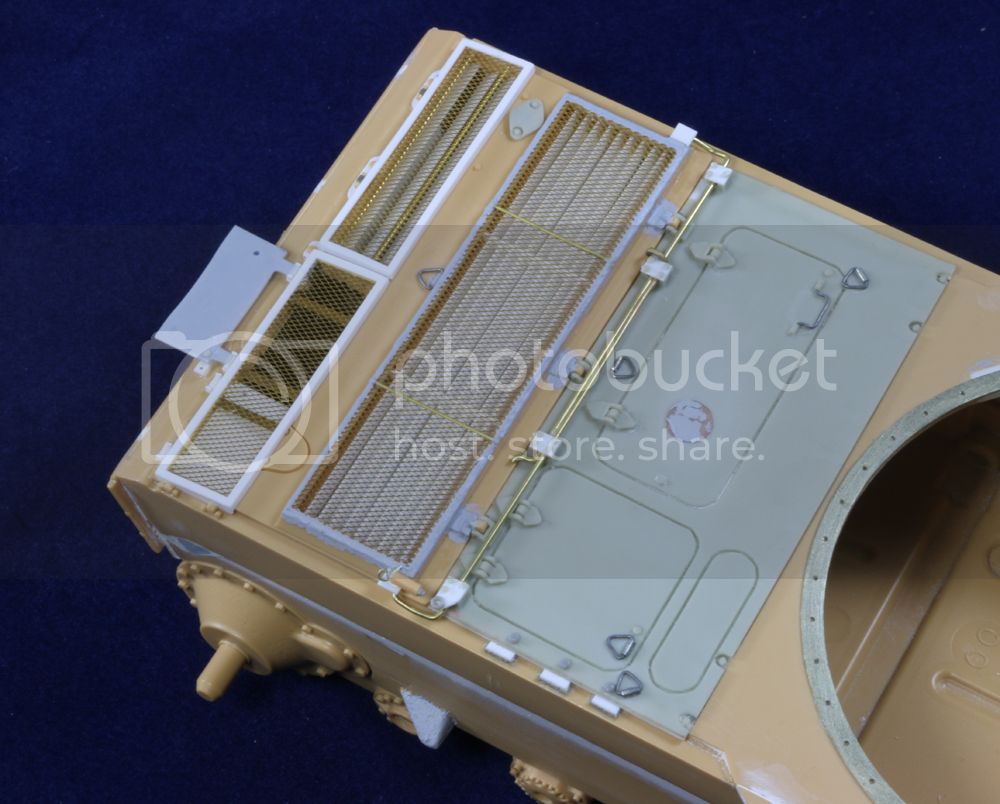
The 'dot' on the cover is an air bubble but still has a thin piece of resin on top so will 'vanish' under paint.
Sao Paulo, Brazil
Joined: January 24, 2012
KitMaker: 1,054 posts
Armorama: 1,050 posts
Posted: Monday, December 22, 2014 - 02:50 PM UTC
Yes! Fantastic work Gary!
Cheers!
Marco
Auckland, New Zealand
Joined: February 03, 2014
KitMaker: 1,042 posts
Armorama: 871 posts
Posted: Tuesday, December 23, 2014 - 03:26 AM UTC
Cheers Marco

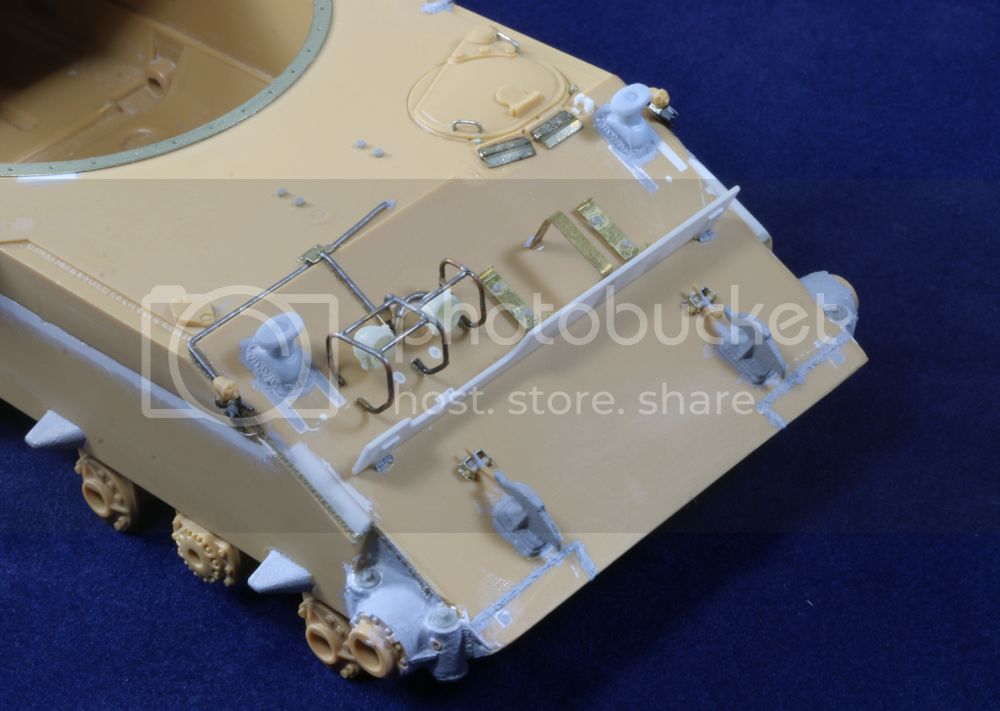
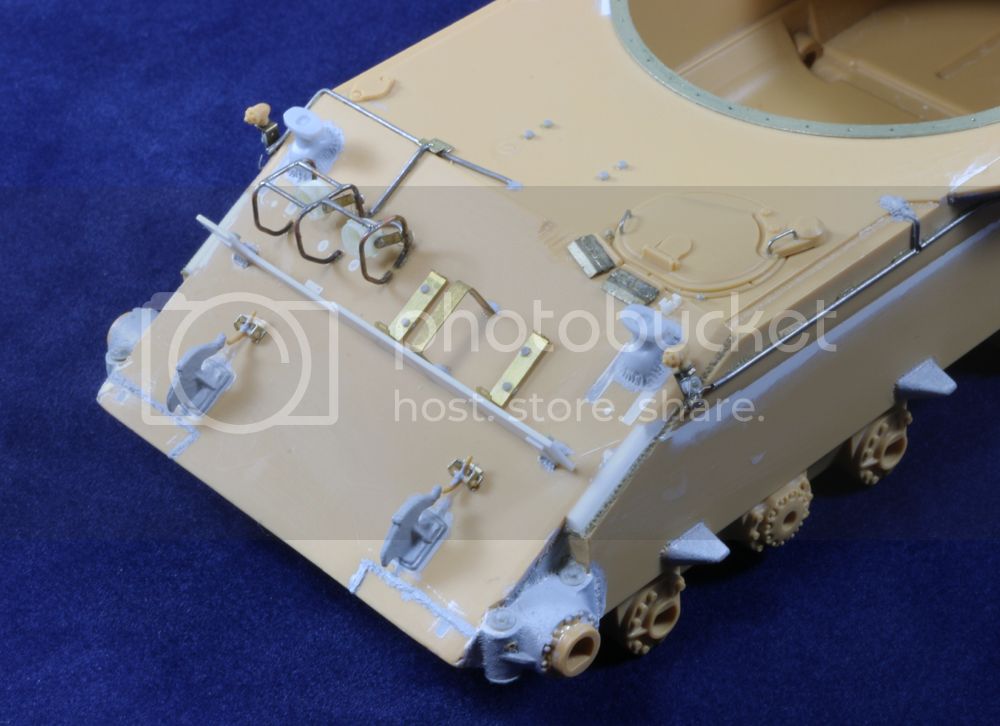
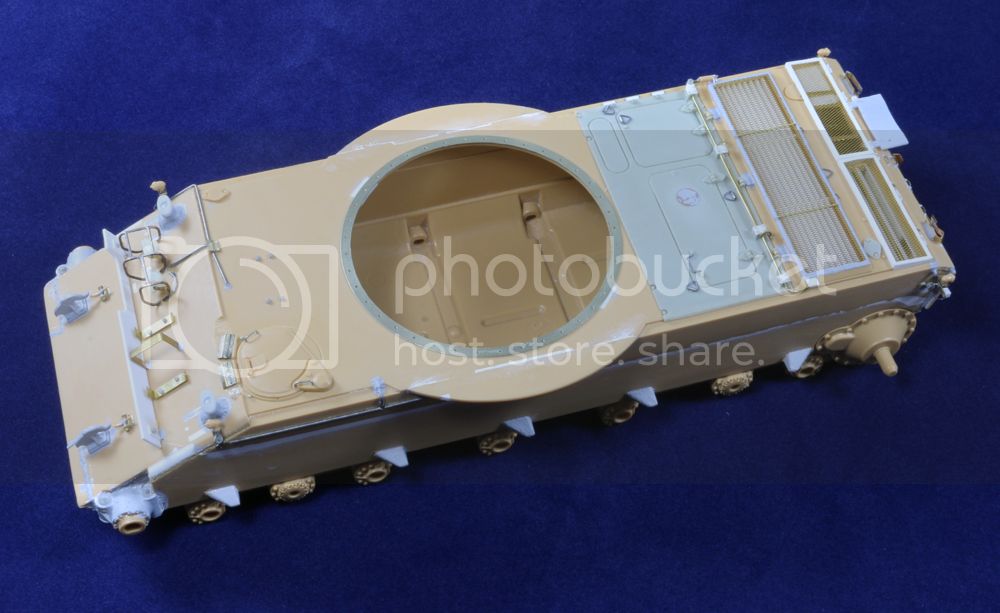
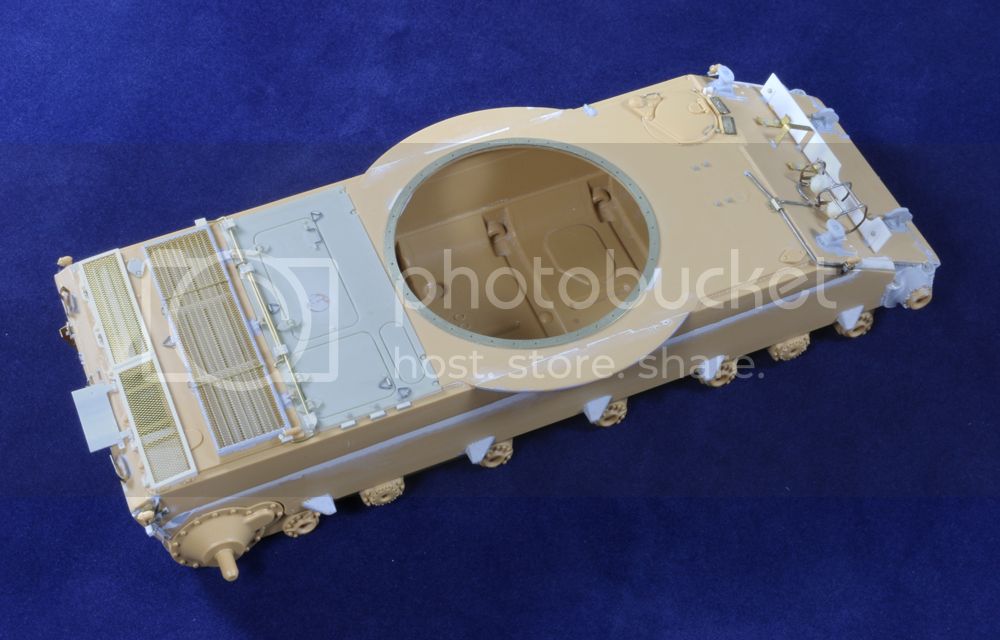
More work done at the front end. The wading board is remade from styrene as the PE option in the DEF set is way too thin. The two resin 'posts' on either side are from DEF - though I don't actually know what they are for

The wiring conduits are added using solder wire as it's much easier to bend to shape and the ends are drilled out to make it look like hollow tube....
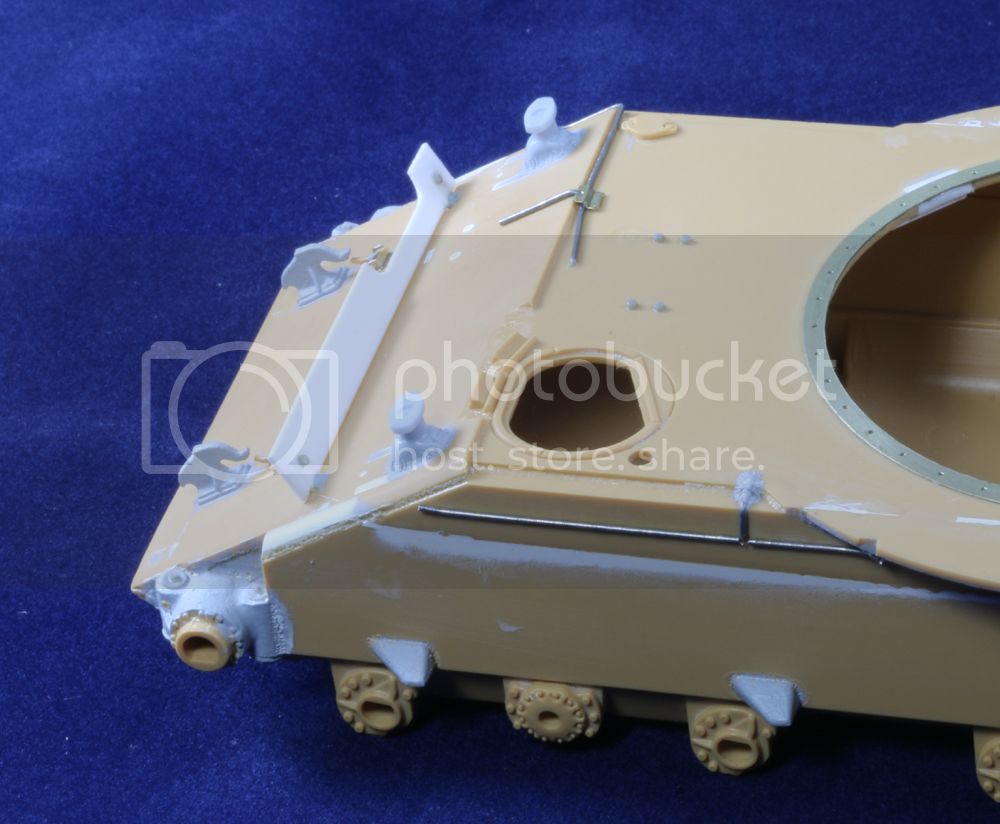
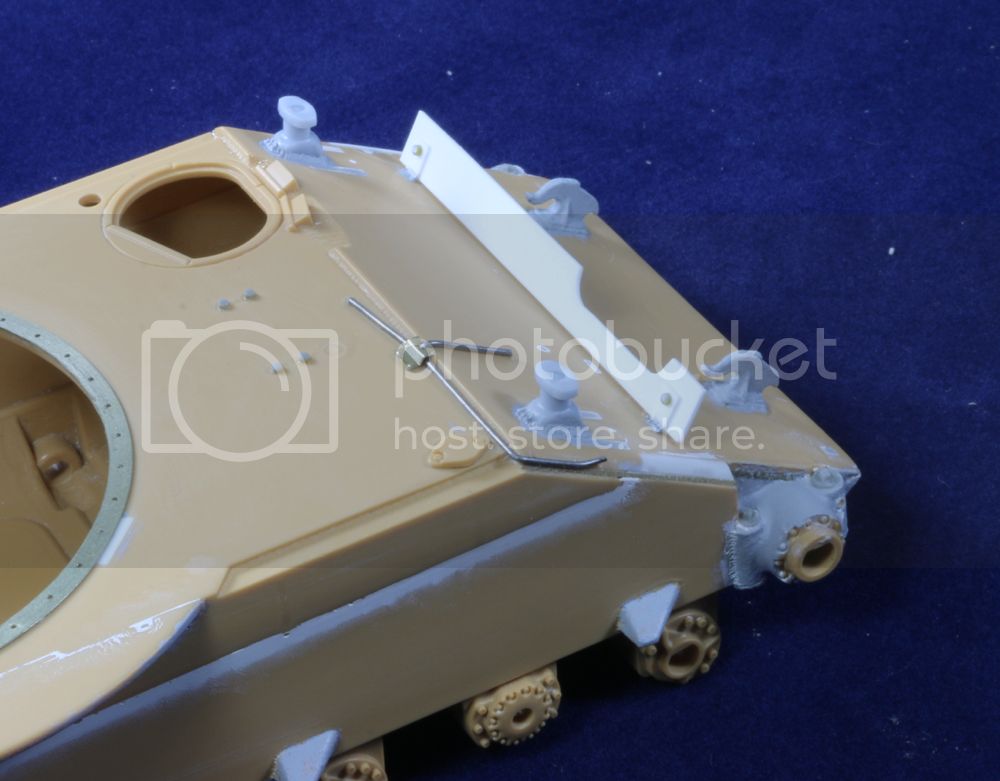
Next I need to add some welds to the conduits.
Gary
Auckland, New Zealand
Joined: February 03, 2014
KitMaker: 1,042 posts
Armorama: 871 posts
Posted: Tuesday, December 23, 2014 - 08:22 AM UTC
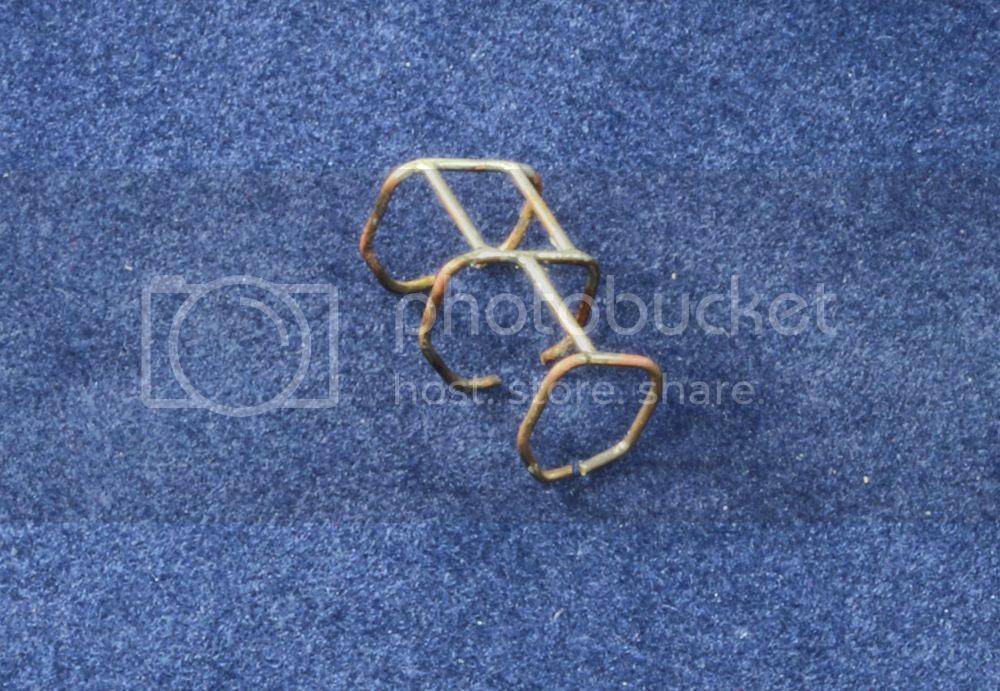
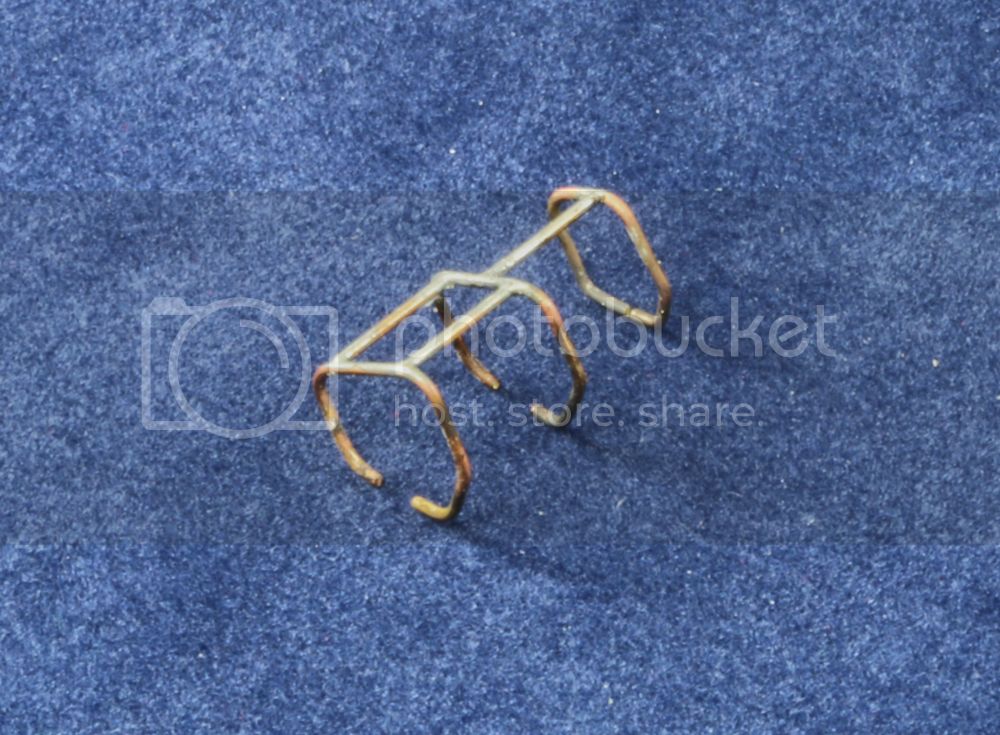
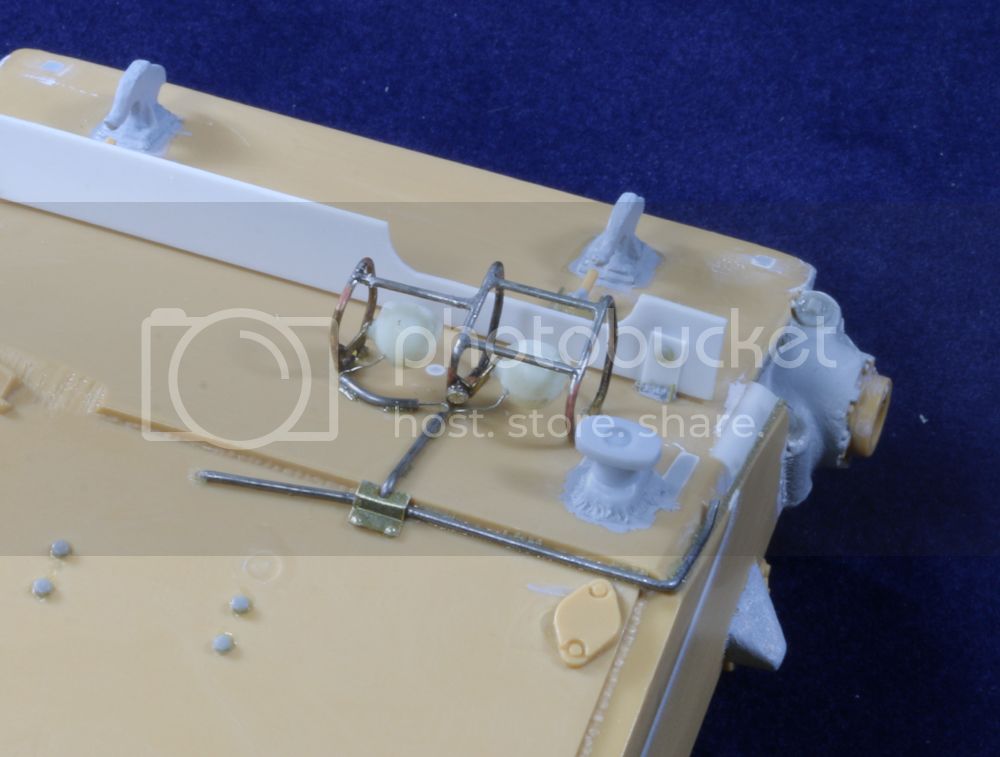
Initial Tiran 4s kept their original light guards. These aren't in the Tamiya Tiran 5 kit, but I do have a T55 in my stash so raided that. The styrene guard isn't really that good but makes a nice template guide to make one which is truer to scale. I used .020 brass rod bent to shape and soldered together for strength....
Gary
Auckland, New Zealand
Joined: February 03, 2014
KitMaker: 1,042 posts
Armorama: 871 posts
Posted: Tuesday, December 23, 2014 - 01:33 PM UTC
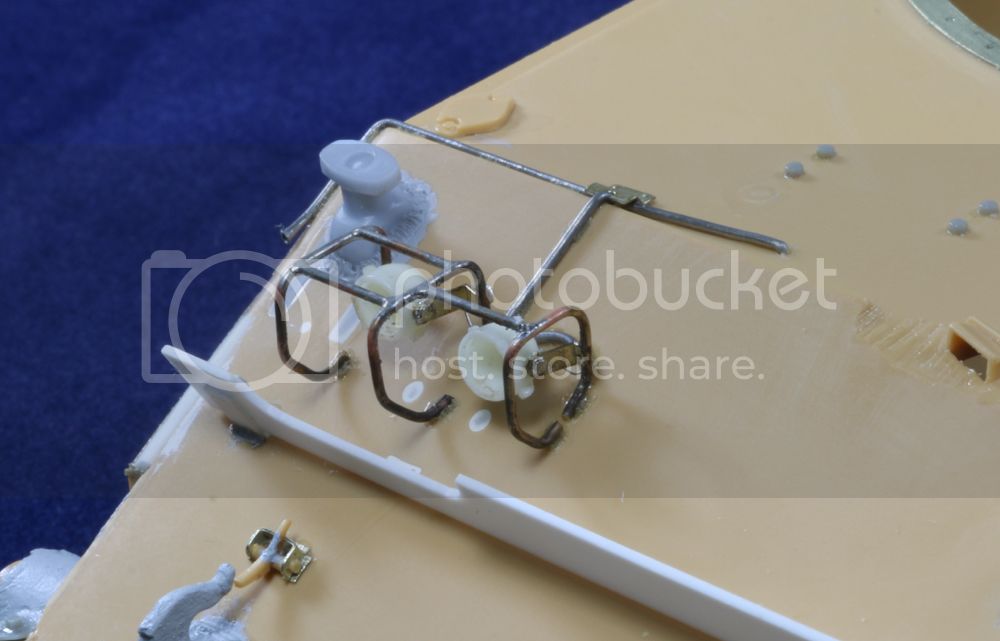
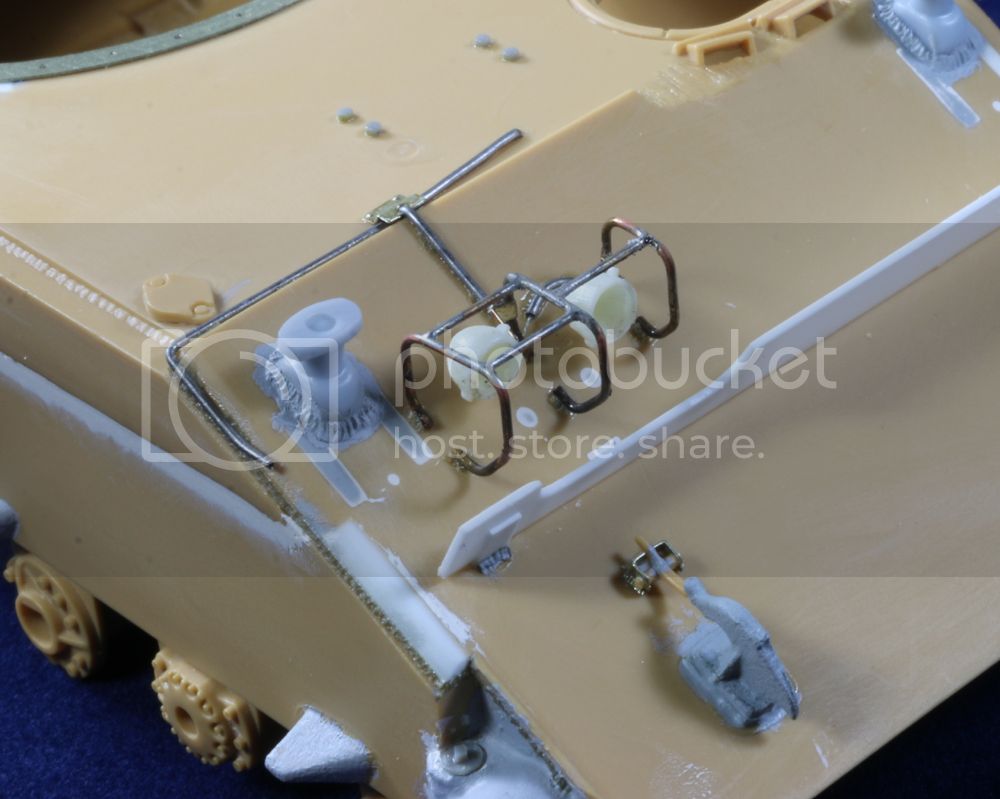
All in place now. Resin lights (hollowed out with a Dremel ready for clear lenses) are from the spares box....
Gary
Texas, United States
Joined: June 12, 2007
KitMaker: 1,866 posts
Armorama: 1,696 posts
Posted: Tuesday, December 23, 2014 - 09:59 PM UTC
Wonderful work, as always, Gary. The posts sure look like IDF tow cable mounts.
I've got this hot mess accumulated, Friuls on the way or I may scavenge some from a T-72 I did a long time ago, would it qualify? There's a Verlinden set for the Tamiya kit with a new turret, drop-in engine bay and brass, two sets of Eduard brass, two Model Point gun tubes and a Model Point resin mantlet cover for the Tamiya turret, and two Tamiya T-62 kits.

If so, I'll go sign up.
Auckland, New Zealand
Joined: February 03, 2014
KitMaker: 1,042 posts
Armorama: 871 posts
Posted: Wednesday, December 24, 2014 - 07:02 AM UTC
Looking forward to seeing that T62 take shape Russel

With the wife about to finish work, time for one last update today before heading off to the in-laws.
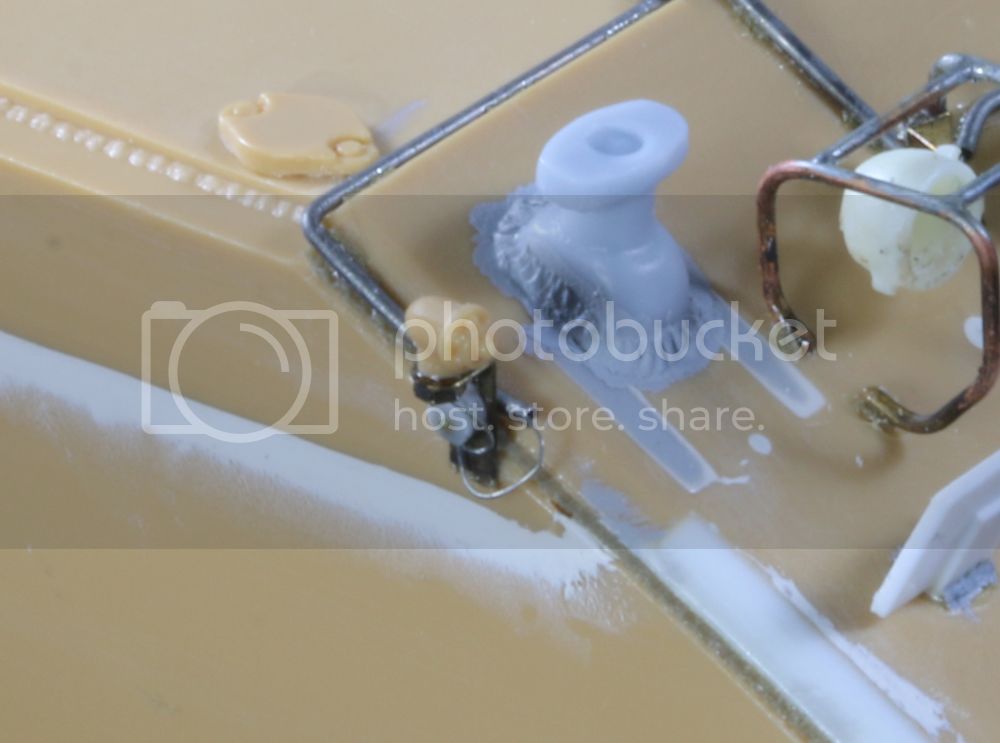
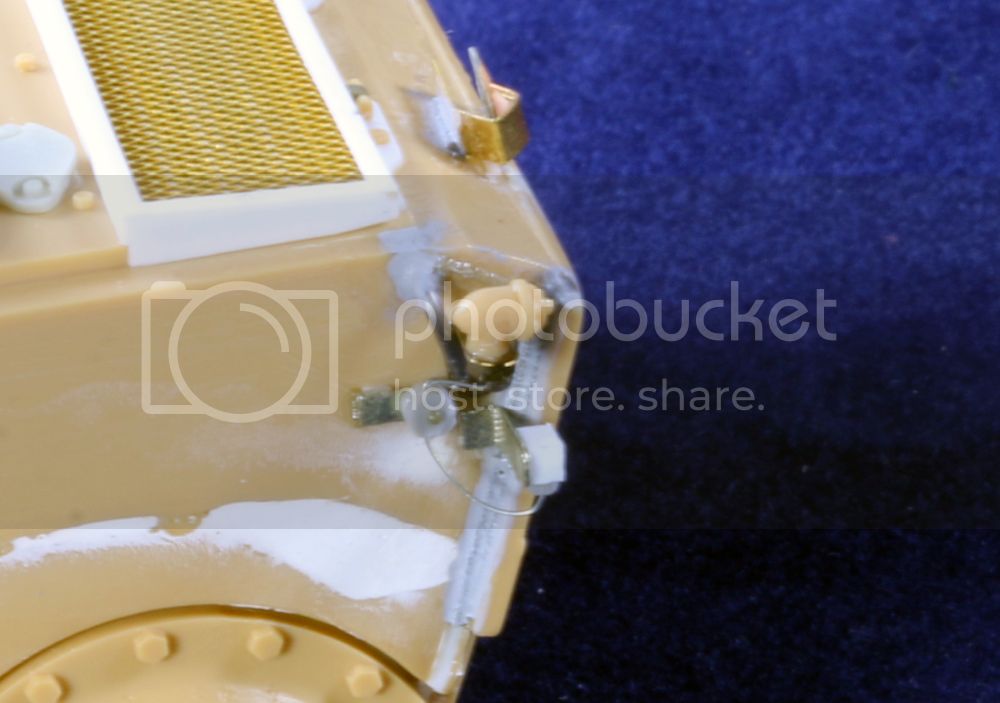
Convoy marker lights. Mixture of kit parts, Aber PE and some scratchbuilding....
Gary
Auckland, New Zealand
Joined: February 03, 2014
KitMaker: 1,042 posts
Armorama: 871 posts
Posted: Thursday, December 25, 2014 - 10:07 AM UTC
Praha, Czech Republic
Joined: February 13, 2006
KitMaker: 674 posts
Armorama: 637 posts
Posted: Thursday, December 25, 2014 - 04:37 PM UTC
Hi Gary, great work. How can You build so quickly an with such precision? What You did in a few days would take me a whole month, or more.
Anyway, could You explain how You did the weld seams? I have not managed to figure out the ideal technique yet.
Texas, United States
Joined: June 12, 2007
KitMaker: 1,866 posts
Armorama: 1,696 posts
Posted: Thursday, December 25, 2014 - 10:08 PM UTC
I've enlisted, with the mess of stuff here:

The two T-62 kits were picked up for about $15 each, the bag of Verlinden and all the etch, gun tubes and other small bits were had for $50, and the tracks, whether I use late or early type (which depends on what kind of pic I can come up with) are easily $35 most everywhere. I may dig out a Trump T-55 with the mine roller that cost all of $15, see if I can work something with that too. I realize the dollar amount is a bit low for this Campaign's "mission statement", but it's a boat-load of AM....
Time to start trolling the interweb for pics of beat-up T-62 with (hopefully) late (Correct term?) tracks.
Auckland, New Zealand
Joined: February 03, 2014
KitMaker: 1,042 posts
Armorama: 871 posts
Posted: Friday, December 26, 2014 - 02:16 PM UTC
Praha, Czech Republic
Joined: April 03, 2006
KitMaker: 2,450 posts
Armorama: 2,409 posts
Posted: Friday, December 26, 2014 - 03:25 PM UTC
Hope you like it and "watch those negative waves"
Auckland, New Zealand
Joined: February 03, 2014
KitMaker: 1,042 posts
Armorama: 871 posts
Posted: Friday, December 26, 2014 - 05:14 PM UTC
Thank you Miloslav

First fender is on...
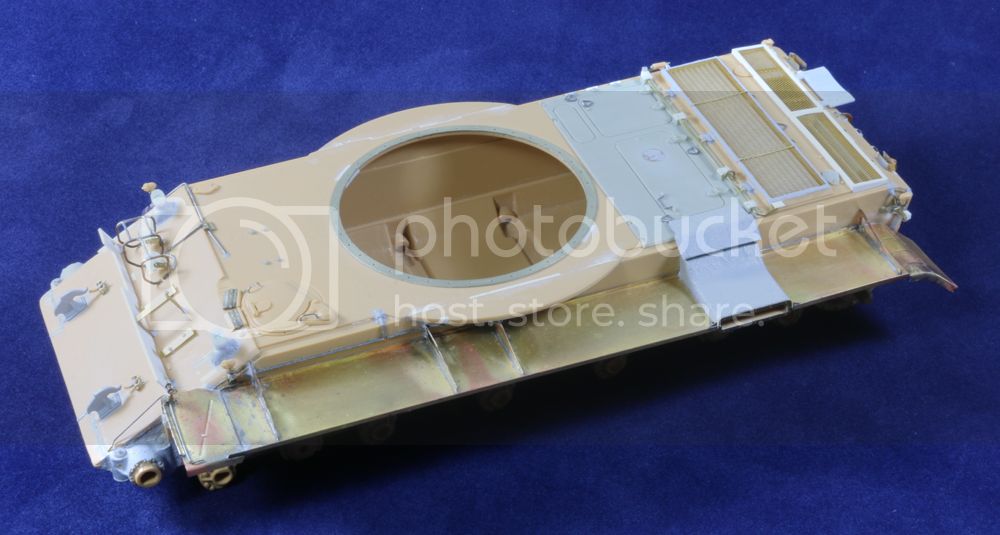
Leading inside edge needed a slight trim with some sharp scissors to get a snug fit, but overall, happy with the way it mated up to the hull...
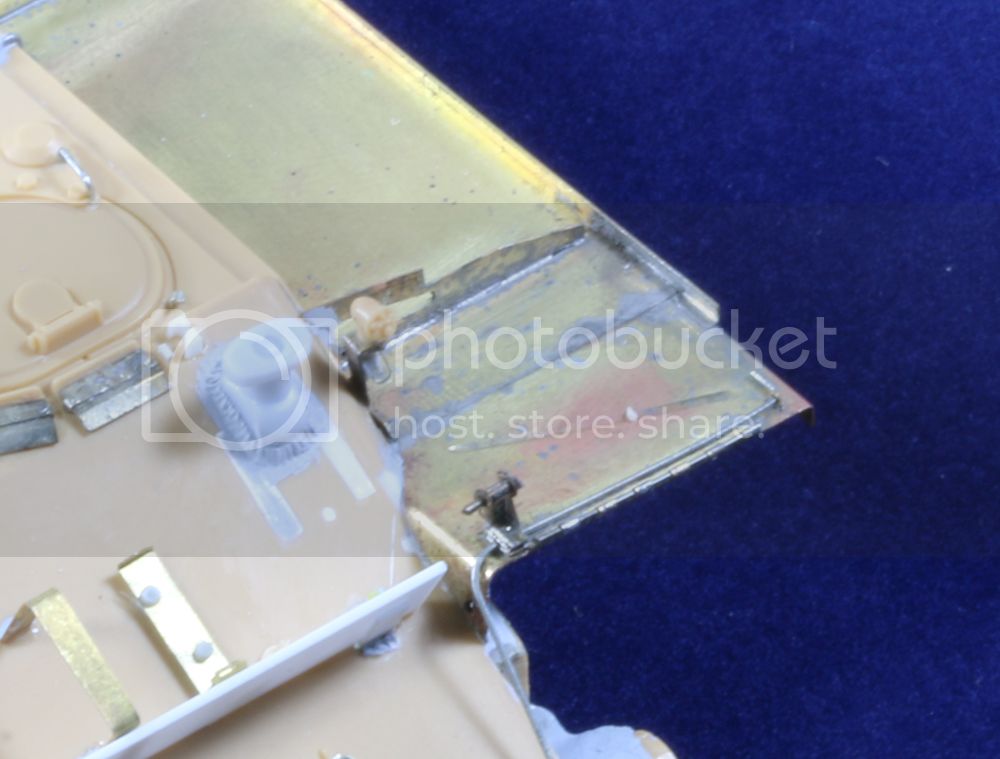
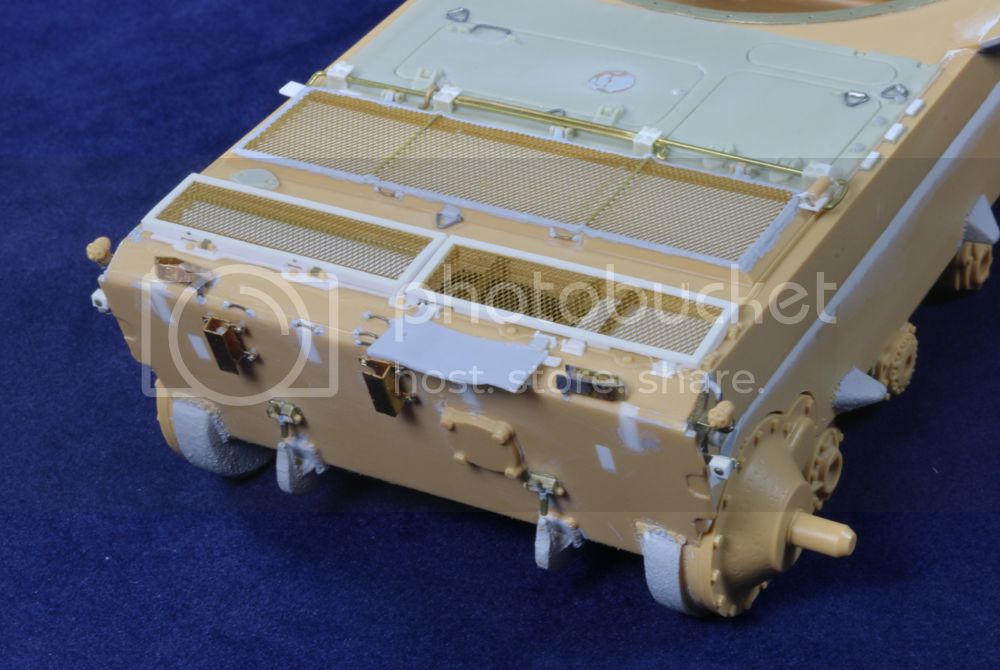
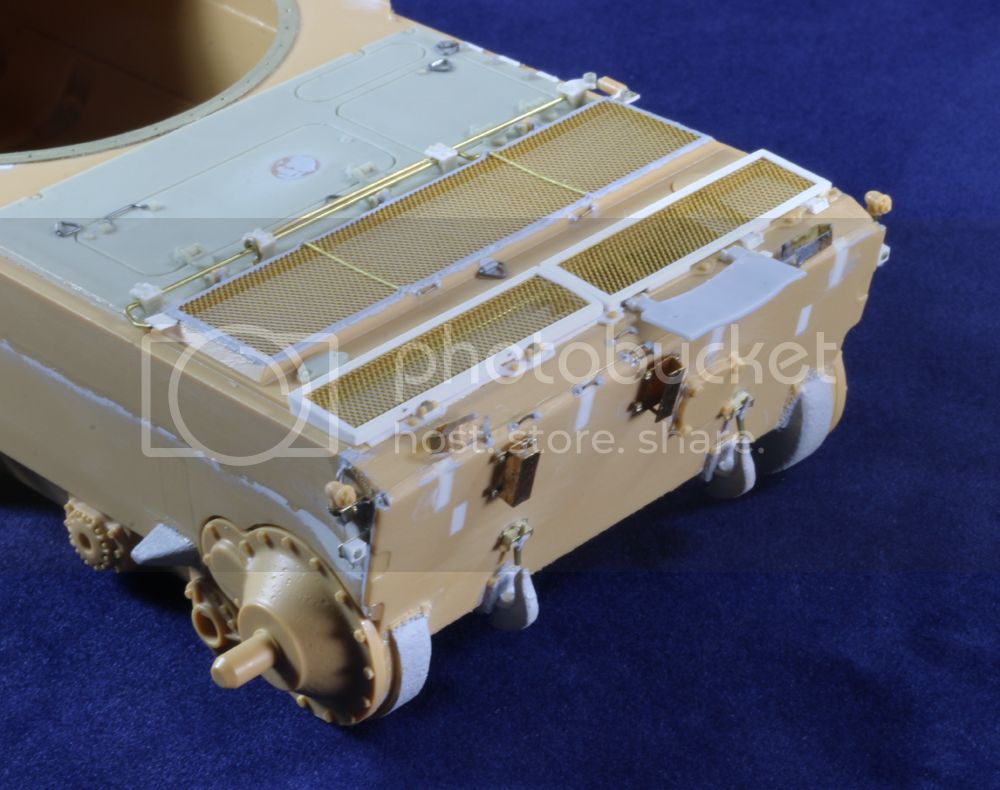
However, I'm not 100% happy with the exhaust outlet - going to need to re-do that so it better resembles the real thing. New armoured cover is from the Legend set...
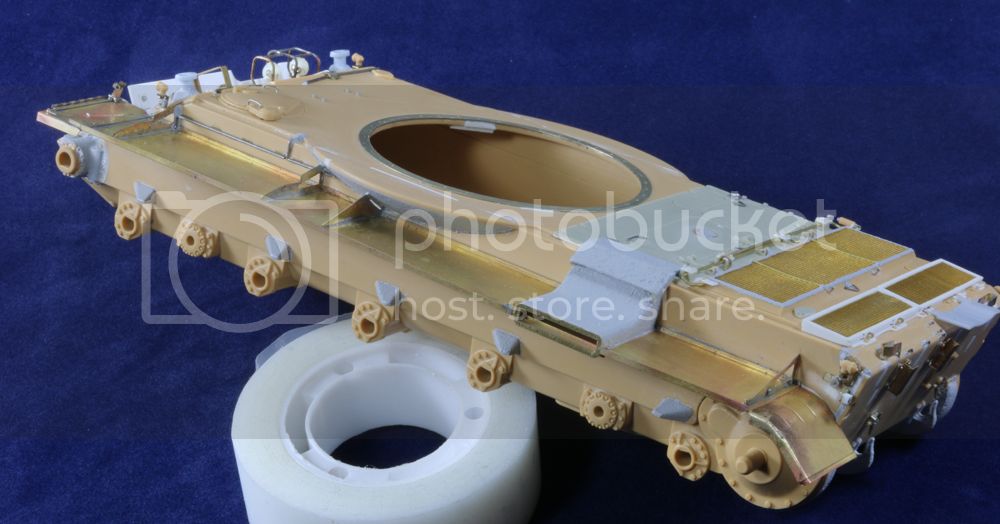
After the exhaust is sorted, I'll start adding some welds where required.
Gary
Praha, Czech Republic
Joined: April 03, 2006
KitMaker: 2,450 posts
Armorama: 2,409 posts
Posted: Friday, December 26, 2014 - 09:44 PM UTC
Quoted Text
Hi all,
I add Cyber-Hobby Panther Ausf.F
Voyager PE set
Real Model Engine set
Fruit Tracks (ordered)
Anntena set ????


Small update.
I decided to add some Royal Model - interior set, which I have adapted to this type of.

Hope you like it and "watch those negative waves"
Auckland, New Zealand
Joined: February 03, 2014
KitMaker: 1,042 posts
Armorama: 871 posts
Posted: Saturday, December 27, 2014 - 02:52 AM UTC
Nice start Miloslav

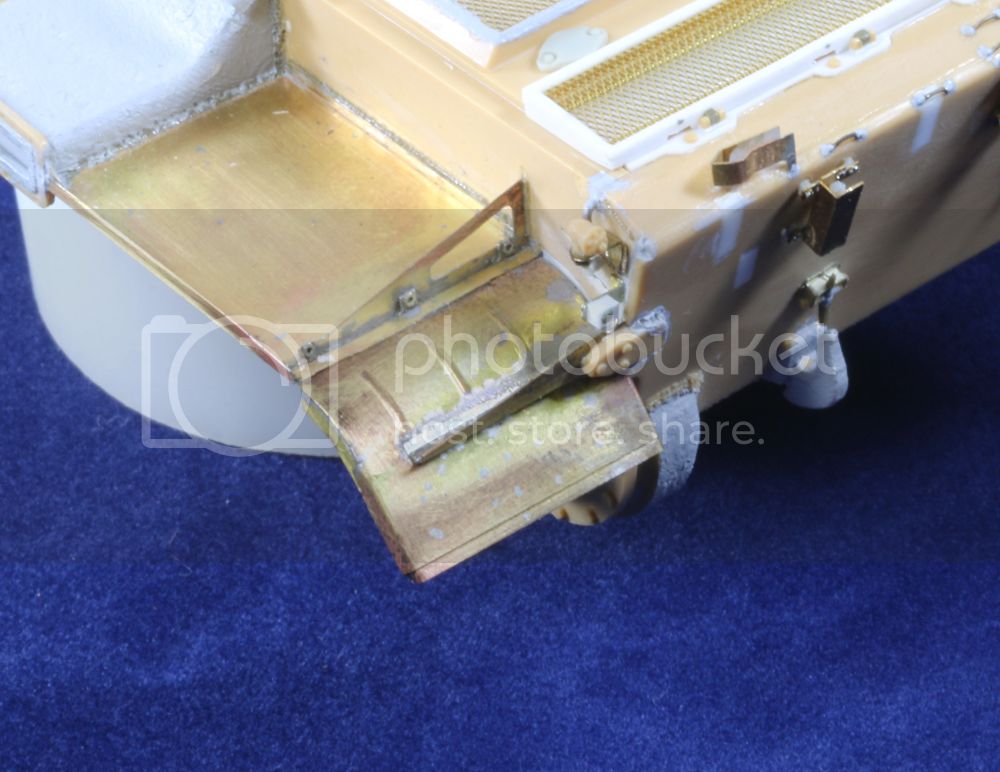
Welds added where required and exhaust outlet still being worked on but much happier with it now. I've decided to leave off the front guards so that the idler tensioning units can be seen on the finished model...
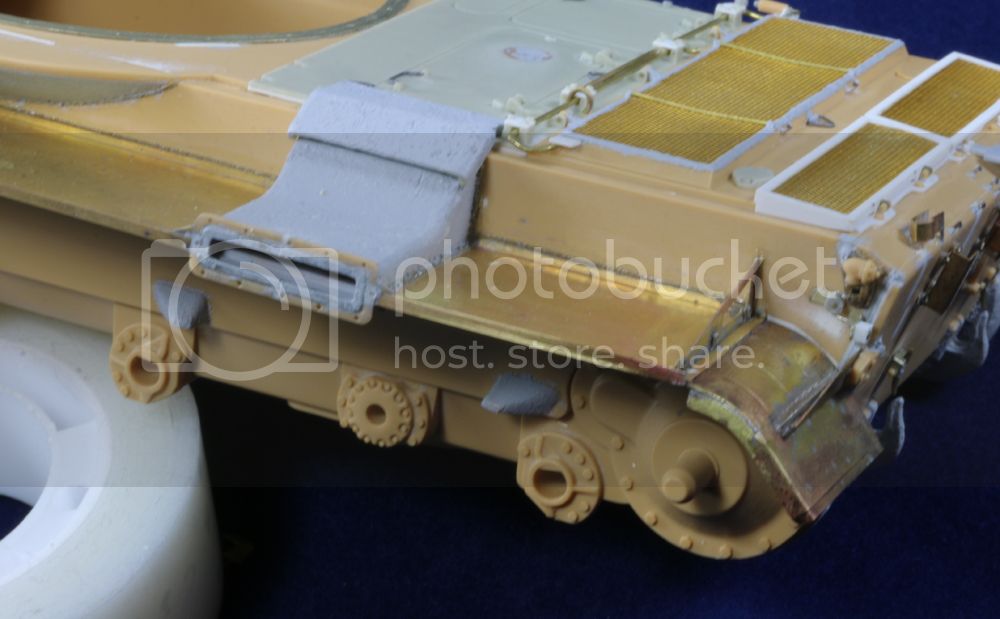
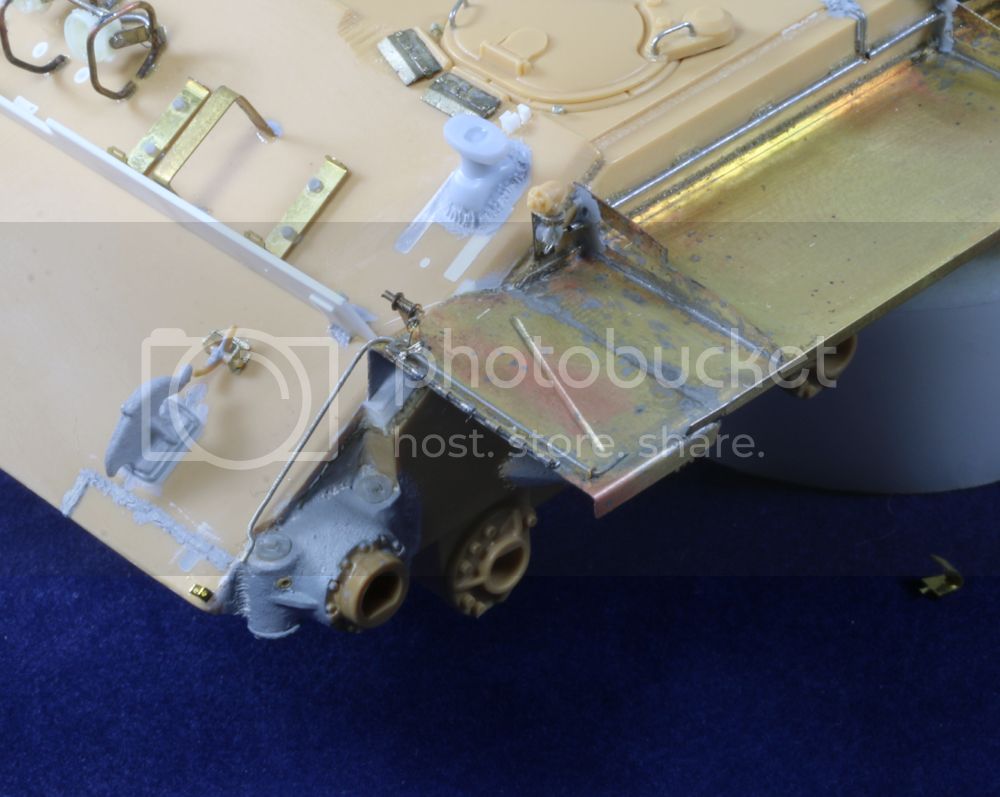
Gary
Auckland, New Zealand
Joined: February 03, 2014
KitMaker: 1,042 posts
Armorama: 871 posts
Posted: Saturday, December 27, 2014 - 04:20 AM UTC
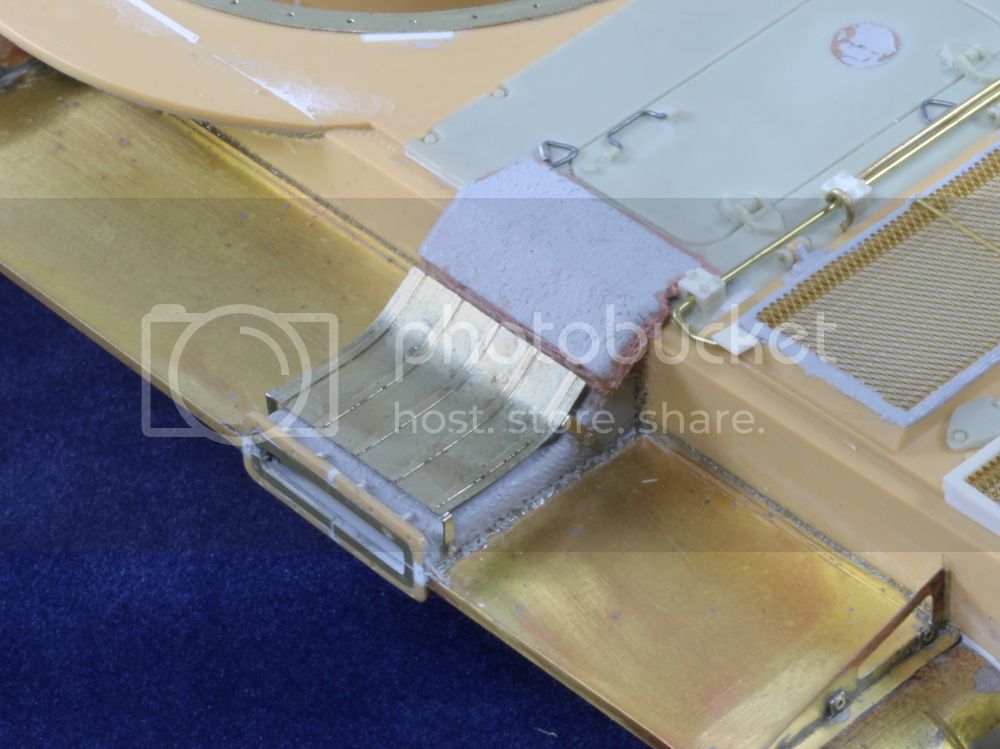
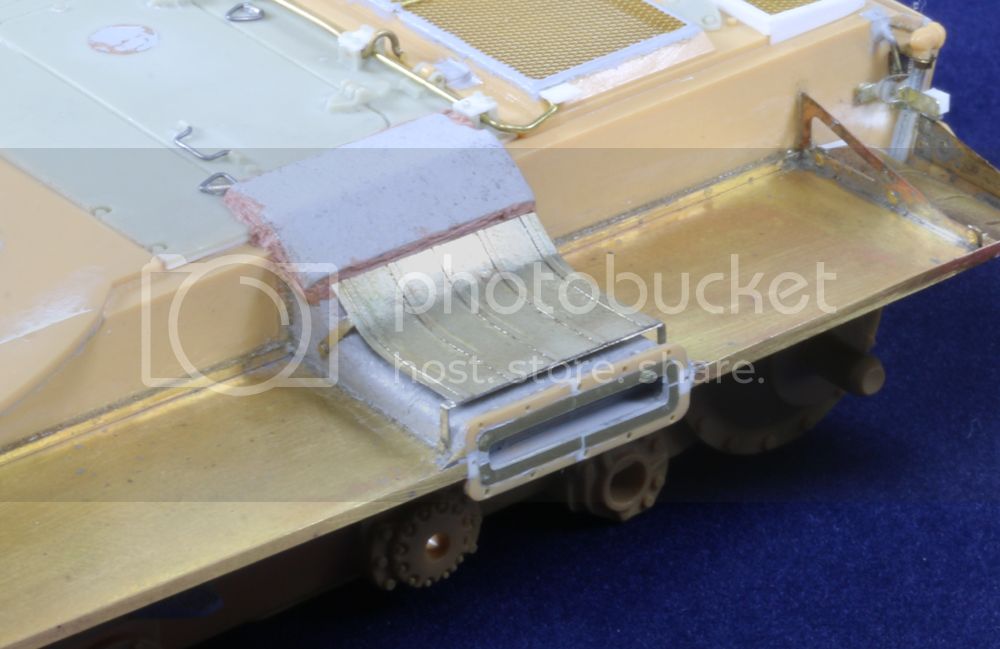
Exhaust complete....
Gary







 The wiring conduits are added using solder wire as it's much easier to bend to shape and the ends are drilled out to make it look like hollow tube....


