Going Whole Hog!! Campaign
Auckland, New Zealand
Joined: February 03, 2014
KitMaker: 1,042 posts
Armorama: 871 posts
Posted: Saturday, December 27, 2014 - 05:22 AM UTC
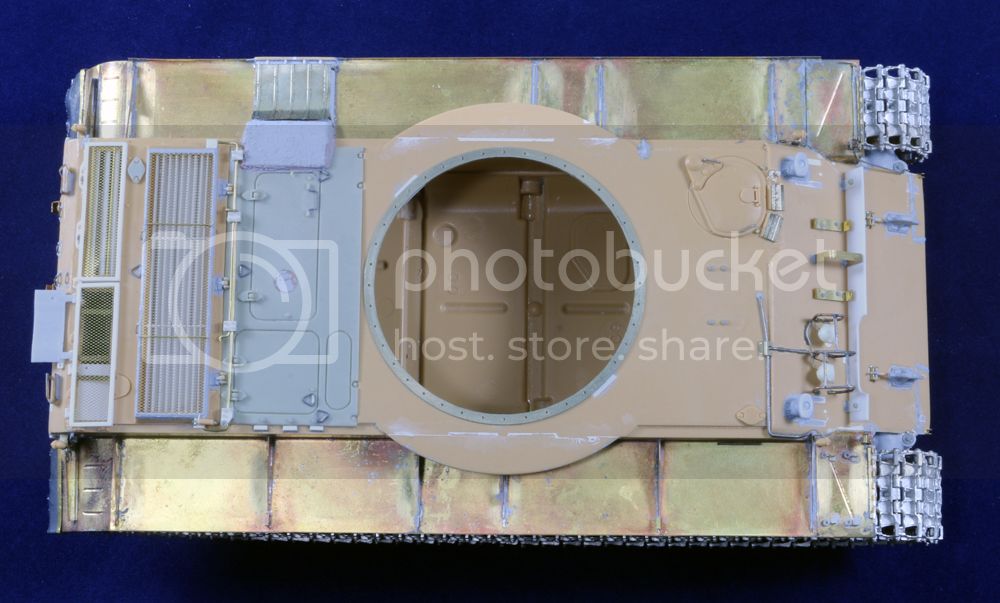
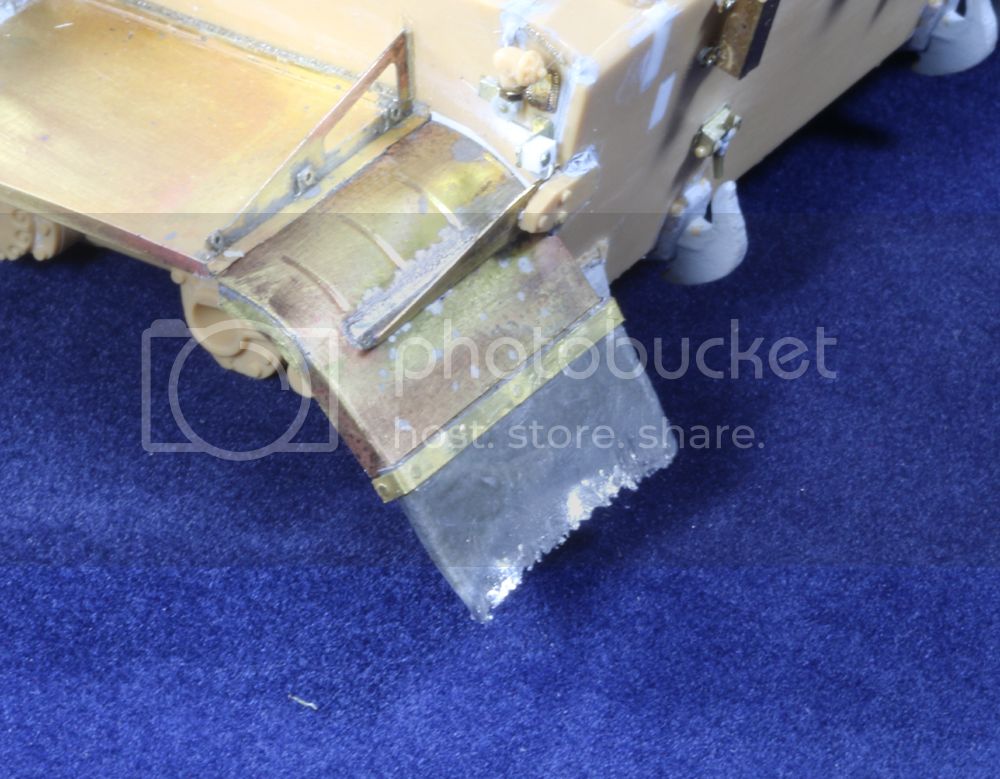
Well worn mudflap....
Gary
Auckland, New Zealand
Joined: February 03, 2014
KitMaker: 1,042 posts
Armorama: 871 posts
Posted: Saturday, December 27, 2014 - 01:30 PM UTC
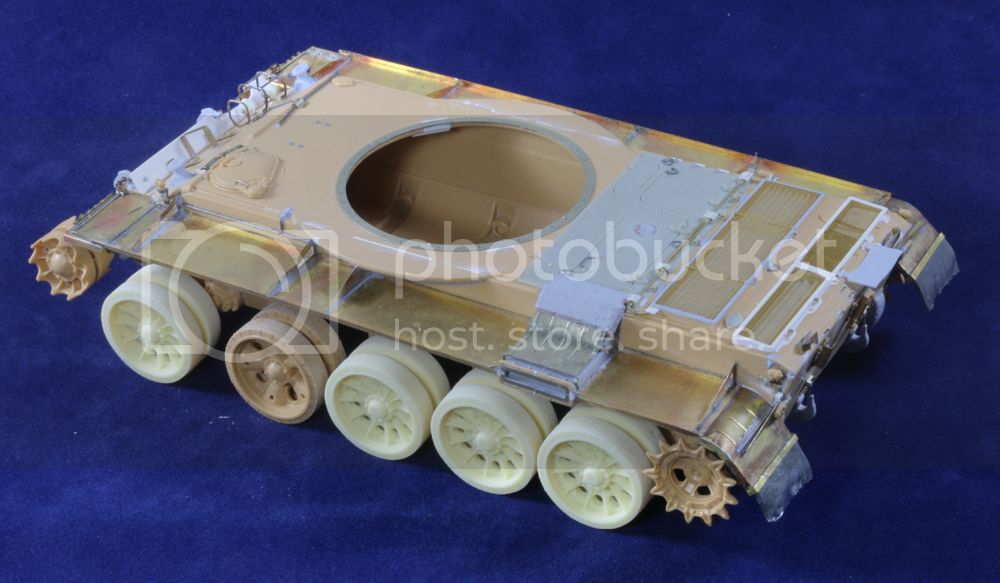
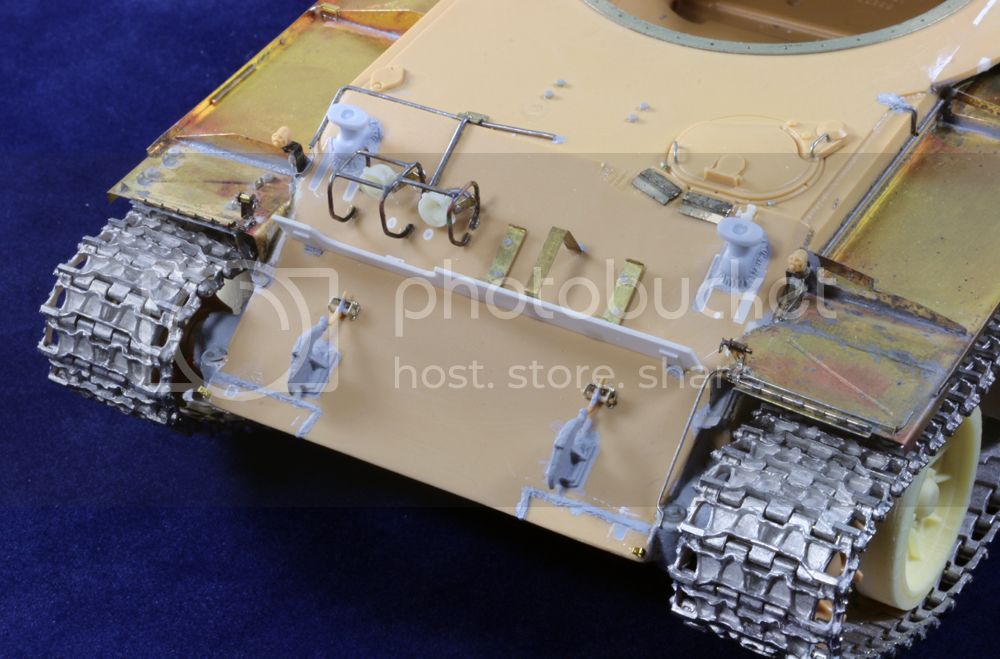
Second fender in place....


Welds etc need to be added as per other side. Had a slight mishap where I knocked off the front RHS convoy light - could be anywhere so will have to make a new one.
The small spring loaded clamps are made using 5 amp fusewire for the main pin and 5gm gold wire from a fly fishing shop....

Gary
British Columbia, Canada
Joined: August 13, 2009
KitMaker: 420 posts
Armorama: 416 posts
Posted: Sunday, December 28, 2014 - 01:12 AM UTC
well she's starting to look like a stryker. I've already carved off a lot of capbolts getting ready for the etch when it arrives. I've also decided to replace the M2 barrel with an RB barrel and I've replaced the kit M2 with an Academy version. Still trying to decide if I'm going to get replacement wheels. I maybe taking a bit of a break so I can do another project, a retirement gift for my JR's mess.
https://drive.google.com/file/d/0B_NTXxG1KUhTWTJRU0JUbTY3TzA/view?usp=sharingHave a Happy New Year eveyone
Auckland, New Zealand
Joined: February 03, 2014
KitMaker: 1,042 posts
Armorama: 871 posts
Posted: Sunday, December 28, 2014 - 12:30 PM UTC
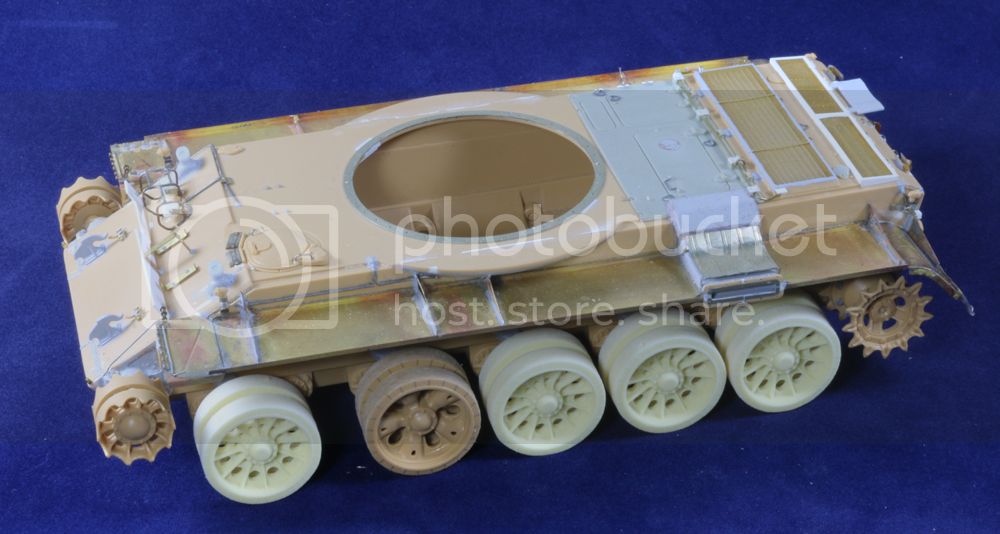
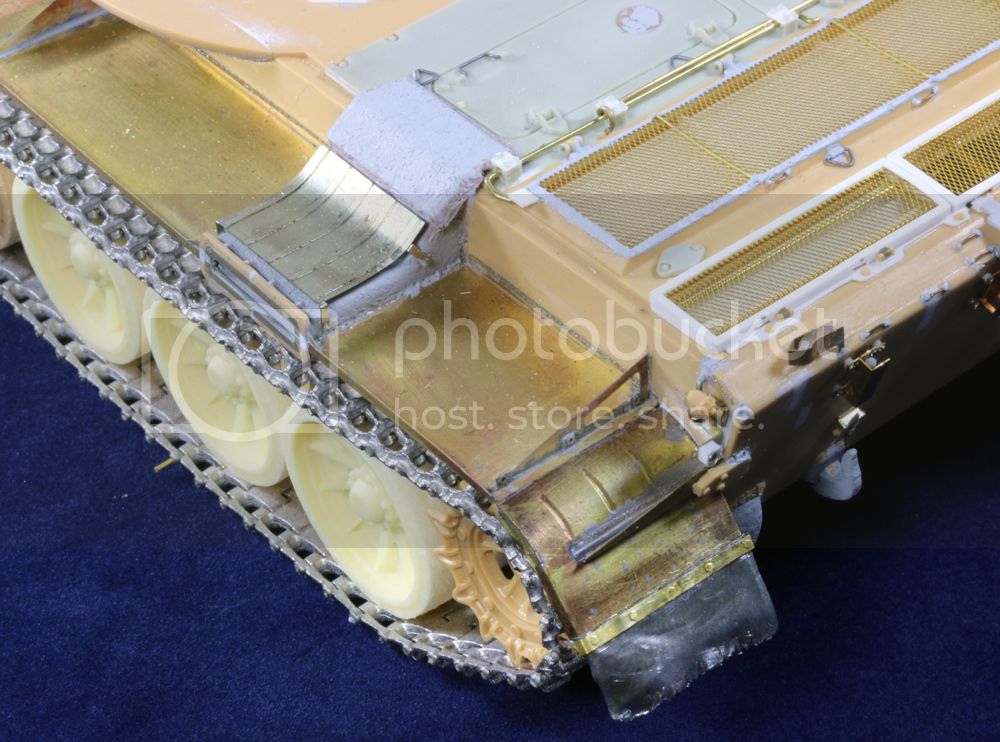
Missing light replaced and fender's welds added means this stage is now complete....
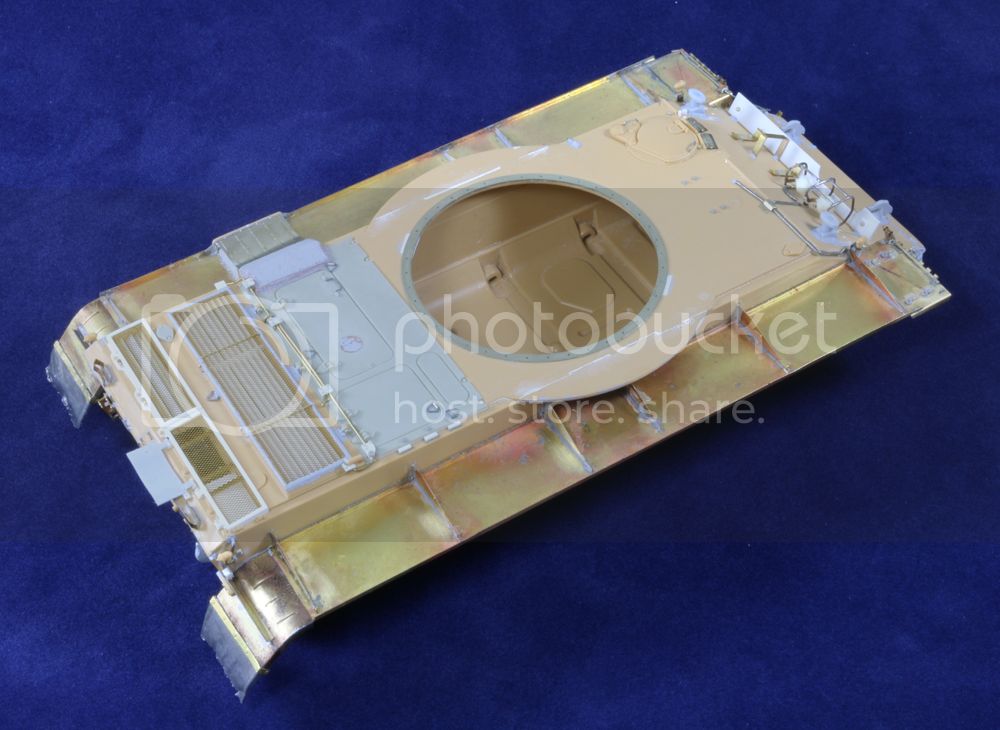
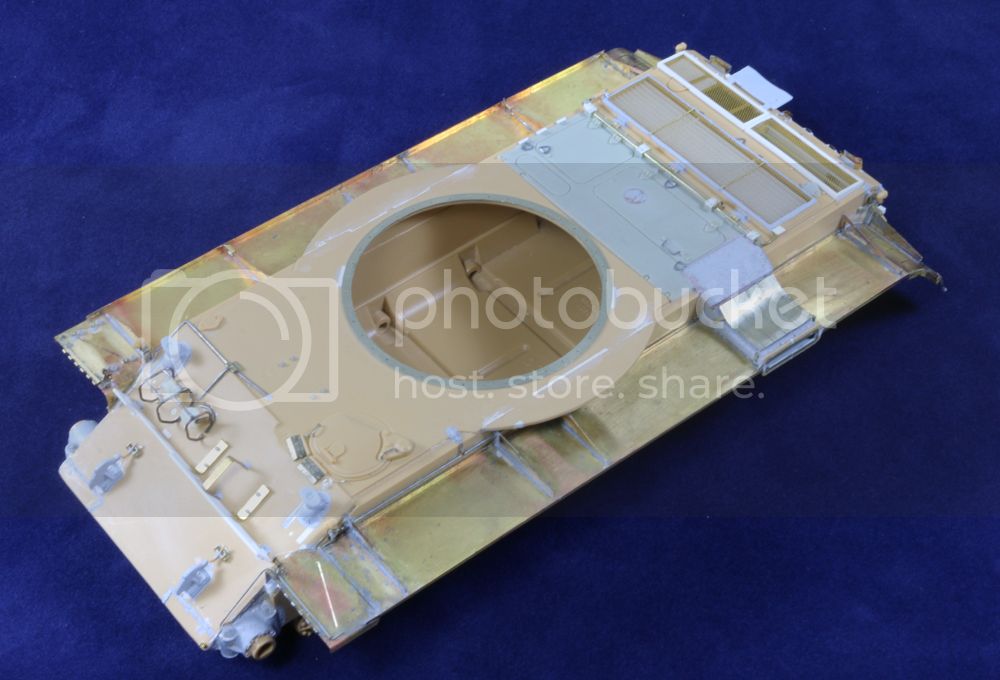
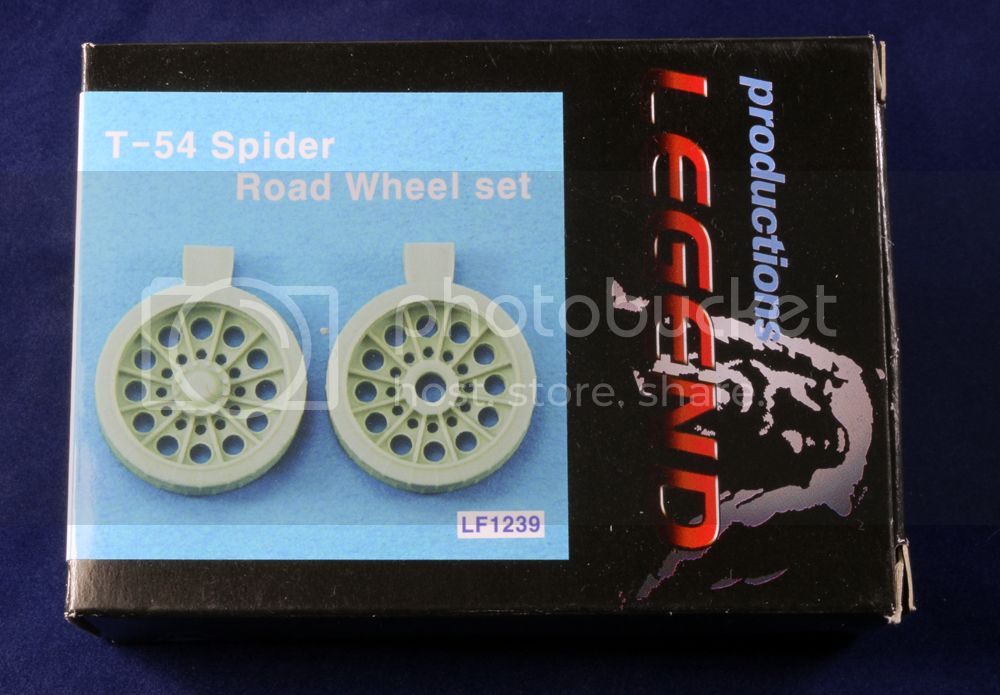
Onto the wheels next and I'll be using these beauties from Legend....
Gary
Auckland, New Zealand
Joined: February 03, 2014
KitMaker: 1,042 posts
Armorama: 871 posts
Posted: Monday, December 29, 2014 - 12:54 AM UTC
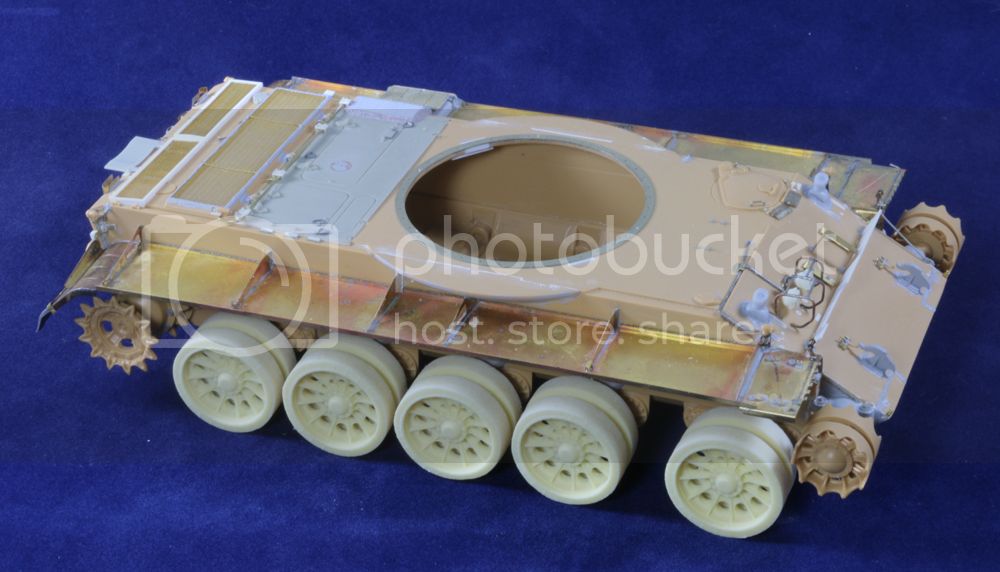
Wheels, wheels and more wheels - WIP....
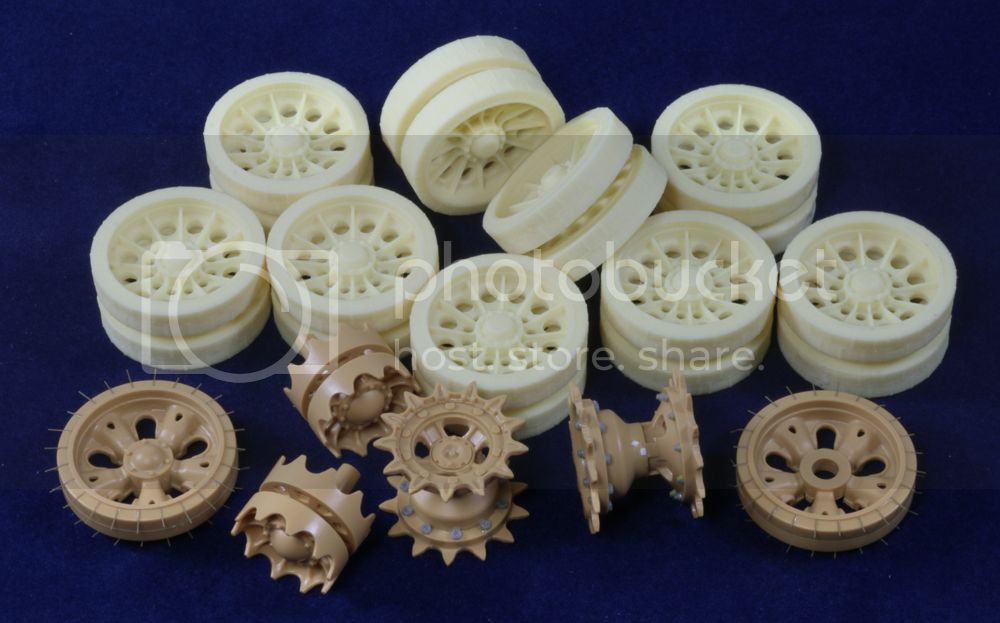
Some minor flash on the Legend wheels, but nothing that a quick twist with a round file can't easily deal with. I'm adding a standard T55 wheel to the set up by using a Tamiya offering. As nice as it is, the rubber rim has recessed ribs so have used stretched sprue to correct that. Drive sprockets get missing bolt detail courtesy of Meng's excellent styrene Nuts and Bolts sets.
Gary
Auckland, New Zealand
Joined: February 03, 2014
KitMaker: 1,042 posts
Armorama: 871 posts
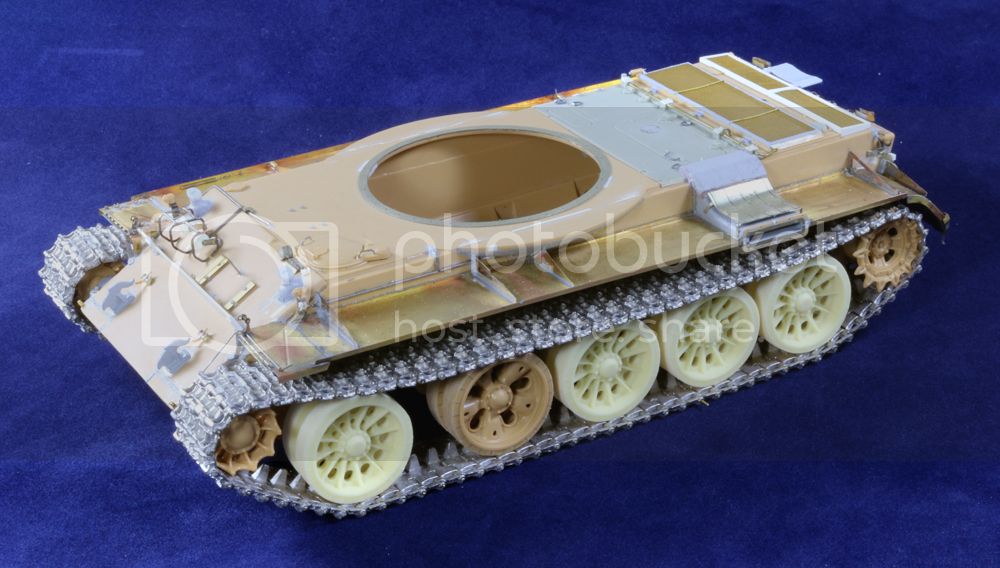
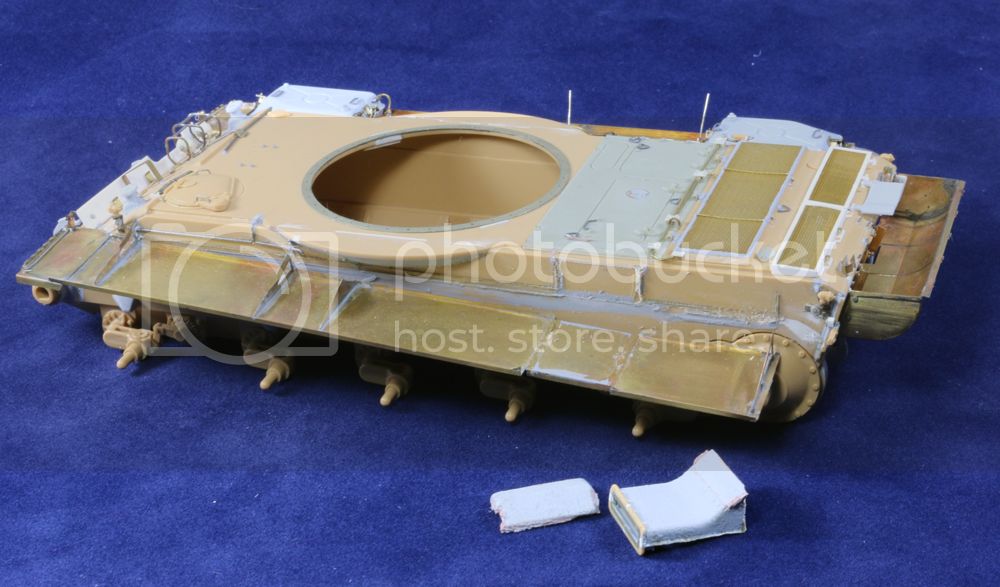
Posted: Monday, December 29, 2014 - 02:33 AM UTC
Auckland, New Zealand
Joined: February 03, 2014
KitMaker: 1,042 posts
Armorama: 871 posts
Posted: Monday, December 29, 2014 - 06:55 AM UTC
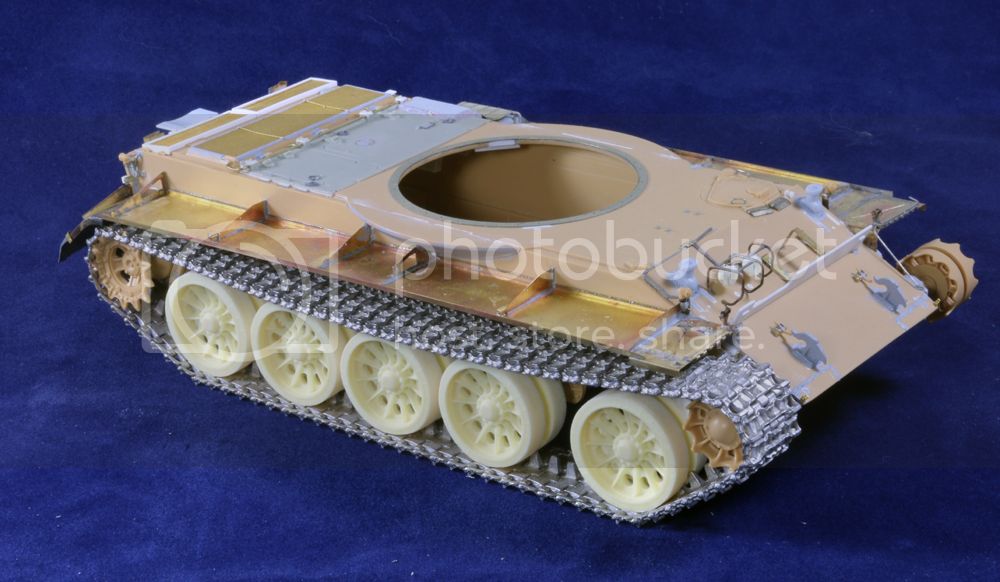
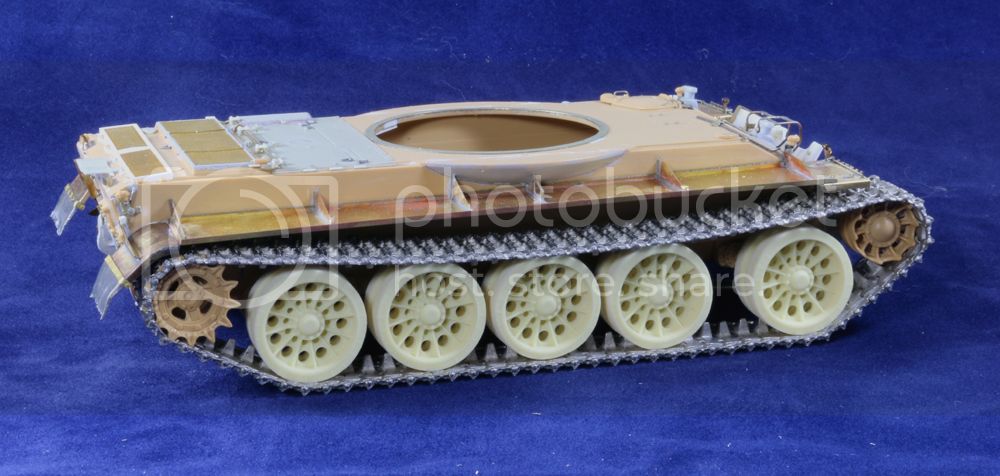
Tracks are pretty straightforward. Drilling out each link is a bit of a chore, but makes inserting the pins much easier in the end....

Gary
Auckland, New Zealand
Joined: February 03, 2014
KitMaker: 1,042 posts
Armorama: 871 posts
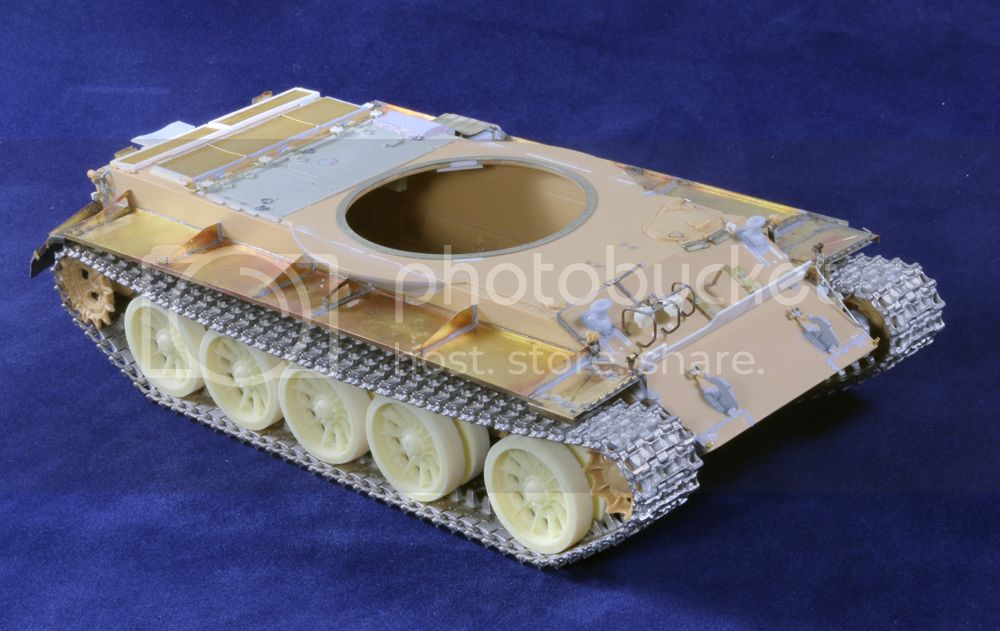
Posted: Monday, December 29, 2014 - 10:02 AM UTC
Gotta love Friuls for 'dead' tracks

Gary
Texas, United States
Joined: June 12, 2007
KitMaker: 1,866 posts
Armorama: 1,696 posts
Posted: Tuesday, December 30, 2014 - 02:41 AM UTC
Schweet!
Did you have to adjust the idler to get what to me looks like perfectly correct track tension? Reasin I ask: I have a Tamiya T55 barely started, and as it is nmow, the tracks lay on all five road wheels, but if I remove one link, they're too tight to mount.... and of course I've already glued the idler mount.

Namabiiru
 Associate Editor
#399
Rhode Island, United States
Joined: March 05, 2014
KitMaker: 2,888 posts
Armorama: 1,920 posts
Posted: Tuesday, December 30, 2014 - 03:00 AM UTC
Wish I had as much time to devote as you seem to, Gary! Such fantastic detail! One would almost recommend leaving the whole thing unpainted in order to show off better all the work you've done. But that, of course, wouldn't do, would it?


Auckland, New Zealand
Joined: February 03, 2014
KitMaker: 1,042 posts
Armorama: 871 posts
Posted: Tuesday, December 30, 2014 - 04:49 AM UTC
Auckland, New Zealand
Joined: February 03, 2014
KitMaker: 1,042 posts
Armorama: 871 posts
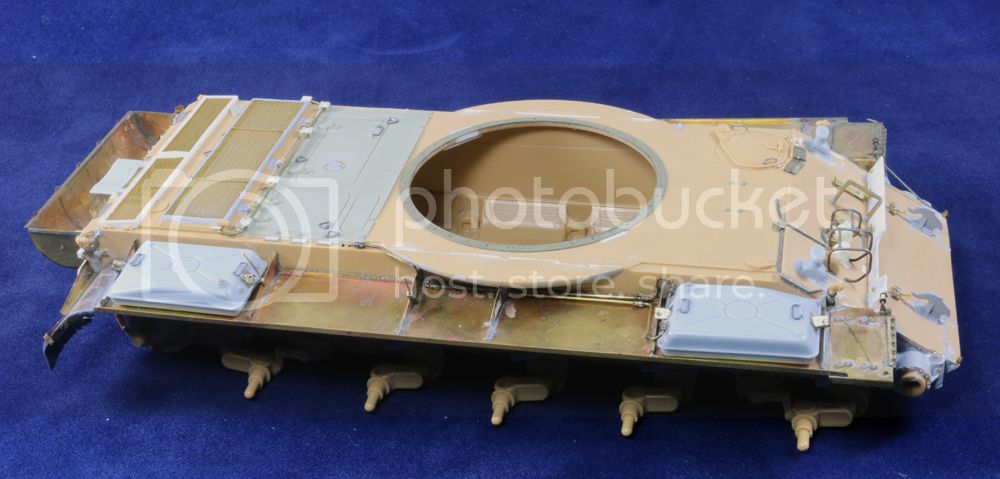
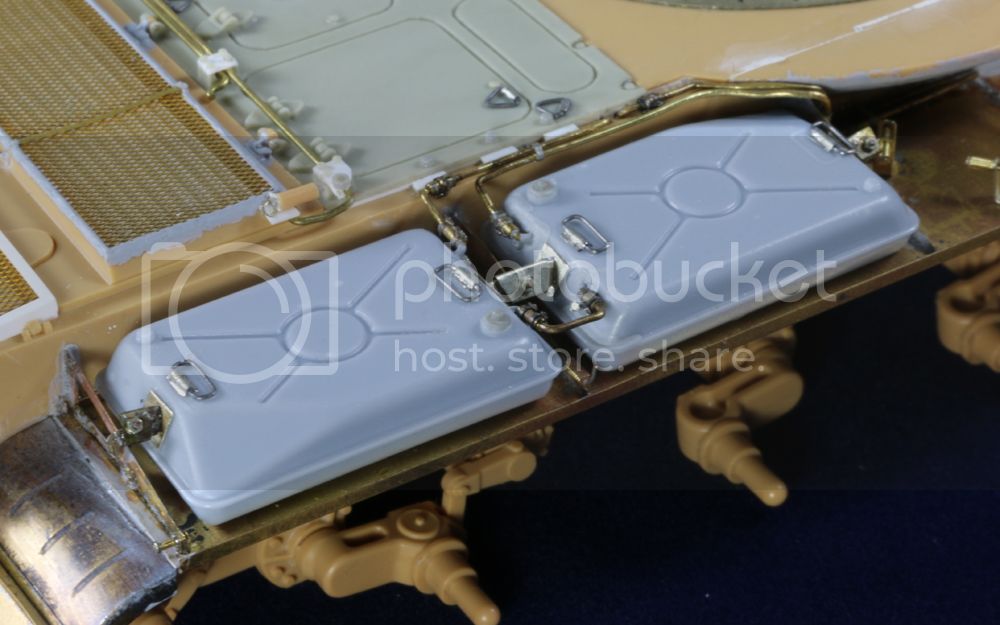
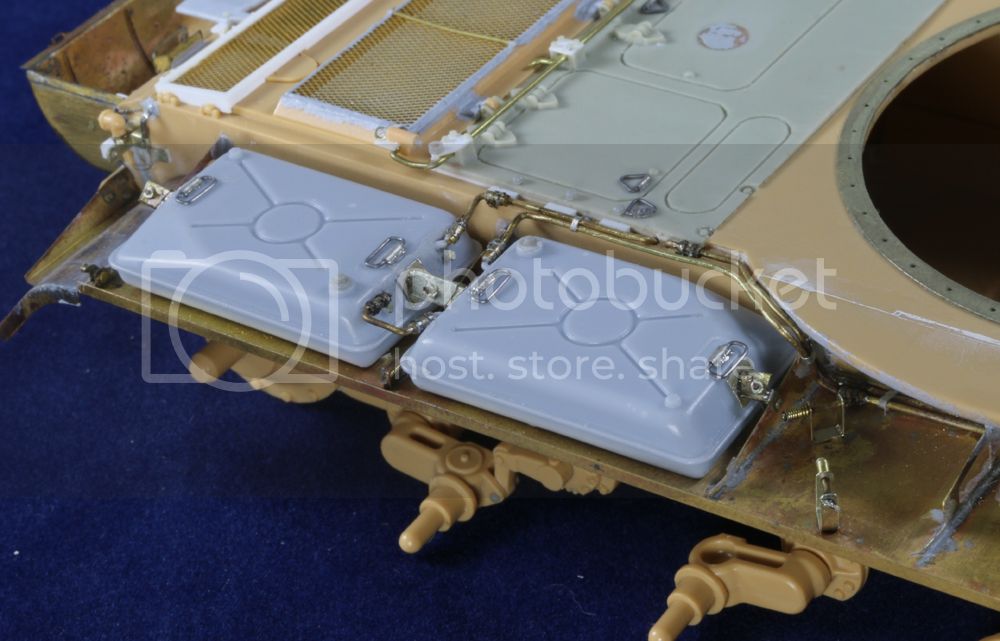
Posted: Tuesday, December 30, 2014 - 08:19 AM UTC
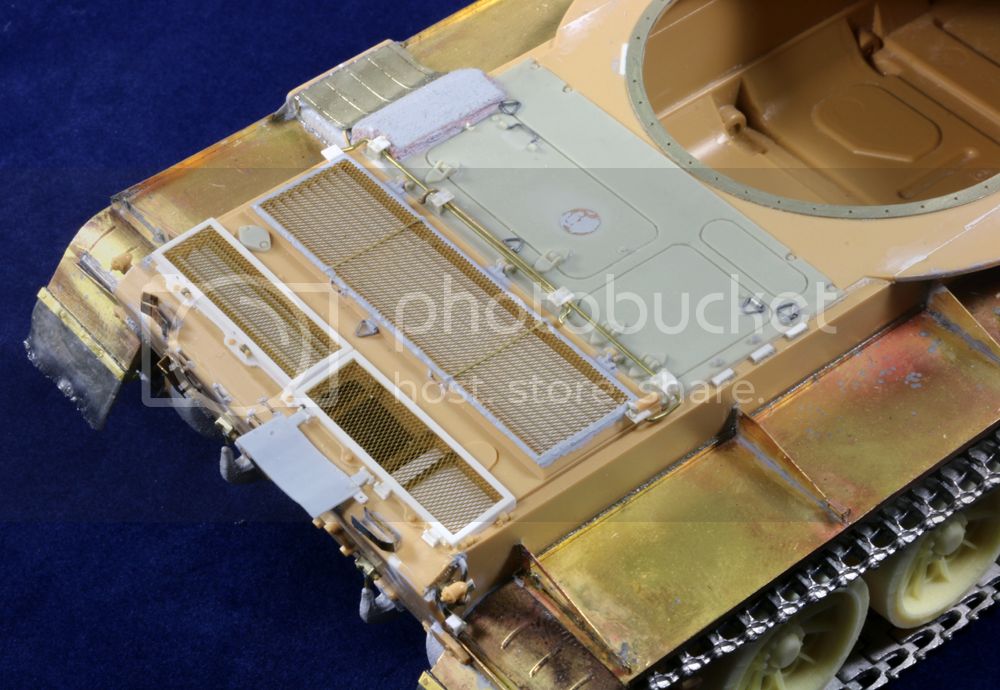
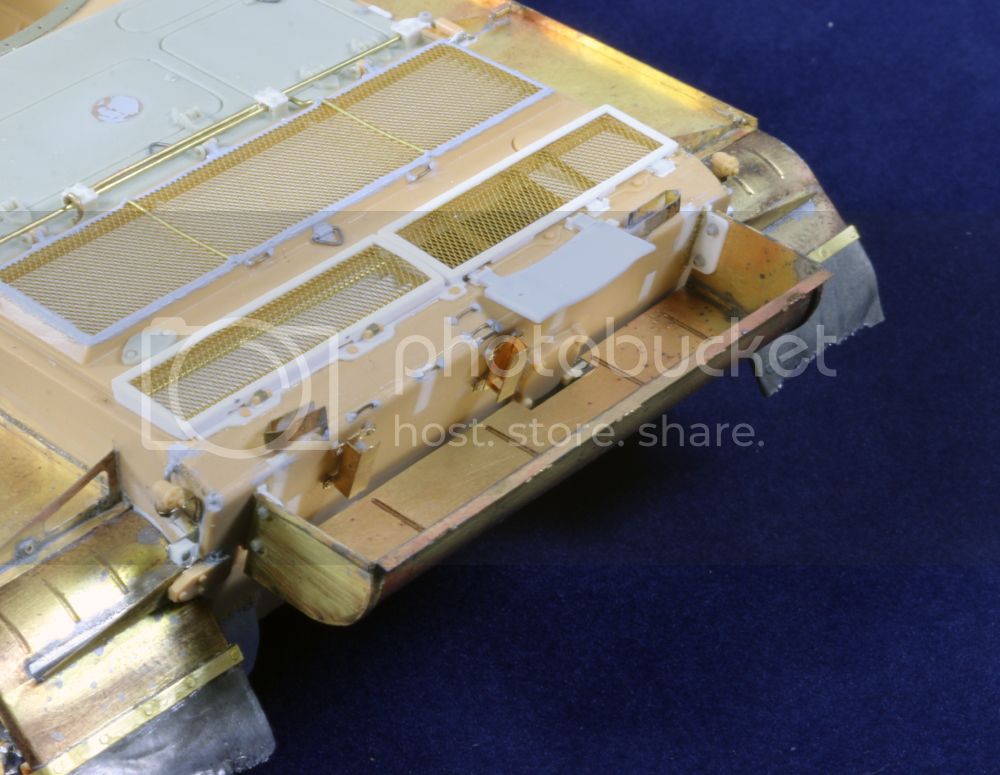
The DEF Model set provides a very nice early type rear stowage basket....


Gary
Auckland, New Zealand
Joined: February 03, 2014
KitMaker: 1,042 posts
Armorama: 871 posts
Posted: Wednesday, December 31, 2014 - 05:13 AM UTC
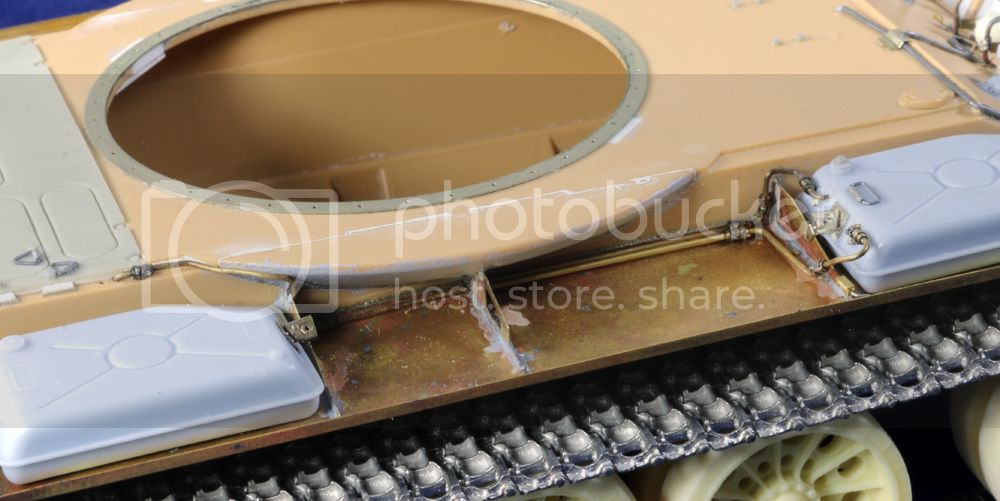
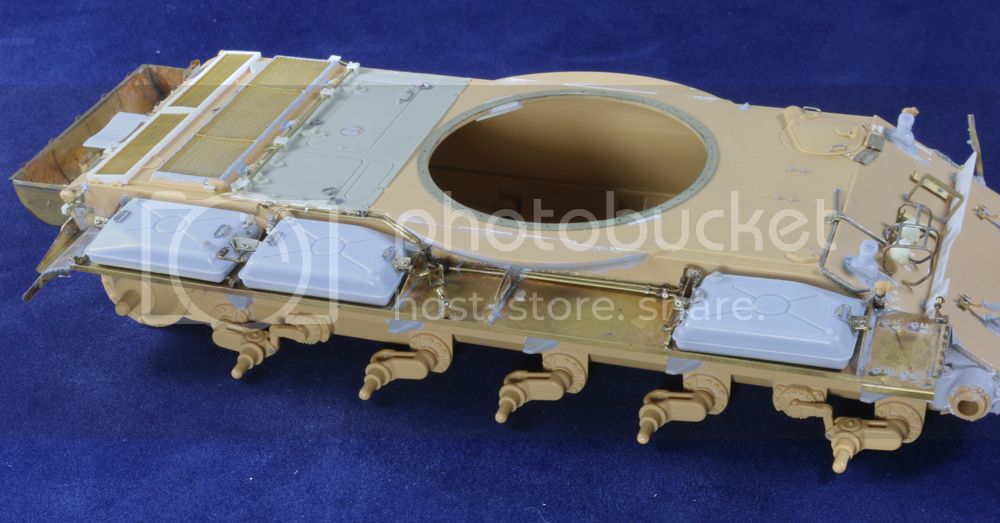
A nice set of replacement resin external fuel tanks are provided by DEF. As good as they are, there is still room for improvement but adding details from the ABER set along with some scratch built parts. The hose joiners are made from vinyl wire insulation....
The mounting brackets are again from ABER with 10amp fusewire for the main rod and heat stretched sprue used to attach the brackets to the fender support so they are full adjustable at this stage...
Which allows the fuel tank to be carefully slid into place....
When the time comes, I'll fix the tank in place, add retaining nuts and then trim the wires to suit.
Gary
Auckland, New Zealand
Joined: February 03, 2014
KitMaker: 1,042 posts
Armorama: 871 posts
Posted: Wednesday, December 31, 2014 - 10:03 AM UTC
Tank now fixed in place and made a start on the associated pipework....
Gary
Praha, Czech Republic
Joined: April 03, 2006
KitMaker: 2,450 posts
Armorama: 2,409 posts
Posted: Wednesday, December 31, 2014 - 09:54 PM UTC
Hope you like it and "watch those negative waves"
California, United States
Joined: November 01, 2009
KitMaker: 657 posts
Armorama: 481 posts
Posted: Sunday, January 04, 2015 - 09:47 AM UTC
Hello All,
I am sorry for my abscence and lack of posting, but some things have transpired in recent months, Divorce, moving a mini deployment. So i apologize.Wow the builds and subject,look great and in the spirt of what i was looking achive with our group build. I will be putting up my entry as soon as i get my garage set up. So i am sorry for not answereing some of your questions and i will I hope the stashes got a little more fatter at xmas and your build list will be in your new year.
Eugene
" For those who fought for it Freedom has a flavor the protected will never know"
Italeri T-55, Syrian Army 6 Day War Taken out. 2%
AFV IDF Shot. 6 Day War 0%..
New South Wales, Australia
Joined: February 06, 2012
KitMaker: 138 posts
Armorama: 133 posts
Posted: Friday, January 09, 2015 - 09:20 AM UTC
Wow Gary, that is a phenomenal build mate! Excellent work! I will be following this with great interest.
Queensland, Australia
Joined: April 15, 2006
KitMaker: 915 posts
Armorama: 797 posts
Posted: Friday, January 09, 2015 - 09:54 AM UTC
wow, there are some super builds here.
Mr Gary Boxall your build is super.
Keep them images coming people .
I was going to join the campaign with a wolf defender

but a all out build on a famo and trailer is due first

.
Thanks
Michael

Auckland, New Zealand
Joined: February 03, 2014
KitMaker: 1,042 posts
Armorama: 871 posts
Posted: Saturday, January 10, 2015 - 05:19 AM UTC
Thanks Michael. Nice choice too with the Wolf. Look forward to seeing that one develop
Been a while since I've been able to do any modelling due to a short trip away and some major gardening work. Back to work tomorrow too so treated myself to some 'me' time today

I've not been 100% happy with the plumbing work due to two reasons. Firstly, I think that pipe joiners are a little too oversized and the clamps are difficult to fix as any glue etc doesn't work on the vinyl tubing. So, I ordered some Griffon Model brass hollow pipe (Ext 0.9mm/Int 0.54mm) to use with the .20 brass rod I'm using. This will give a better scale diameter and also allow me to solder all connections as well as the Aber PE tube clamps. Here is the first section completed...
And on the vehicle....
Much happier with the result now
Gary
Namabiiru
Associate Editor #399
Rhode Island, United States
Joined: March 05, 2014
KitMaker: 2,888 posts
Armorama: 1,920 posts
Posted: Saturday, January 10, 2015 - 06:51 AM UTC
Still looks fantastic, Gary. You are insane; you know that, right?
Auckland, New Zealand
Joined: February 03, 2014
KitMaker: 1,042 posts
Armorama: 871 posts
Posted: Saturday, January 10, 2015 - 09:52 AM UTC
Quoted Text
Still looks fantastic, Gary. You are insane; you know that, right?
Heck yeah


WIP.....
Note that there is no breather vent next to the fuel inlet/outlet pipes on the hull on the T54.
Gary
Auckland, New Zealand
Joined: February 03, 2014
KitMaker: 1,042 posts
Armorama: 871 posts
Posted: Monday, January 12, 2015 - 01:00 PM UTC
Quoted Text
Schoolboy Error
Schoolboy Error: (n.), (der. old English), A mistake, often trivial, clumsy, dimwitted or easily avoided. Derived from the "trial and error" psychology present in Victorian-era English public schools.
In short, I mounted the fenders too low towards the rear of the hull. This became clearly evident when I went to add more plumbing and realised that the external fuel tanks sat too low. I initially hoped that the resin tanks were too small (much easier to blame someone else
) but alas, that was not the case
So I had 3 options. A) Ignore the error and hope no one else notices. B) Add some thickness to the base of the fuel tanks to make up for the lack of 'height'. C) Rip the fenders off and put them where I should have in the first place

Only one option really.....
The other side was relatively straightforward as no exhaust to remove, but annoying nonetheless. That side is now as it should be....
Pretty basic error to make and I really should know better
I could have pretended it didn't happen, but that's how we learn sometimes - and hopefully it'll prevent someone else doing the same
Gary
Namabiiru
Associate Editor #399
Rhode Island, United States
Joined: March 05, 2014
KitMaker: 2,888 posts
Armorama: 1,920 posts
Posted: Monday, January 12, 2015 - 06:23 PM UTC
Gary, there are two kinds of people in here: those that never would have known the difference, and those that would have had they not been so pre-occupied by all the other fantastic detail you put into this build. But then there's that little voice in your brain that says, "I would have known"...been there, done that. Me, I'm too lazy. Assuming I had your level of competency (I think the lazy bit explains why I don't), I don't think I could have convinced myself too tear so much of it up to rectify something like that. My hat is truly off to you, Sir!

Auckland, New Zealand
Joined: February 03, 2014
KitMaker: 1,042 posts
Armorama: 871 posts
Posted: Wednesday, January 14, 2015 - 06:02 AM UTC
Thank you Mark
Well, despite trying to make things as difficult as I can for myself, the fuel tanks and lines are now done.....
Gary
Auckland, New Zealand
Joined: February 03, 2014
KitMaker: 1,042 posts
Armorama: 871 posts
Posted: Wednesday, January 14, 2015 - 11:16 AM UTC
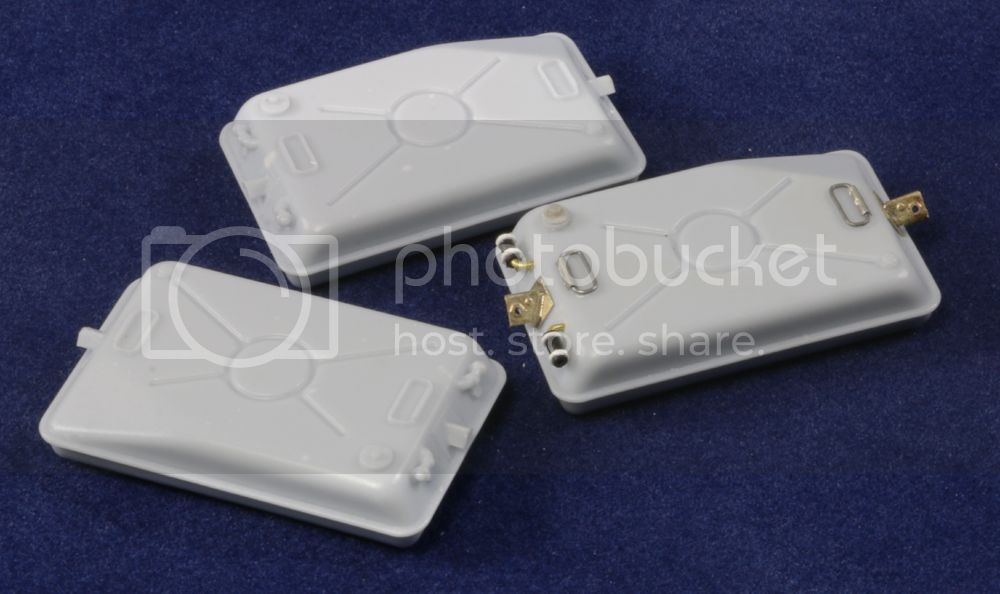
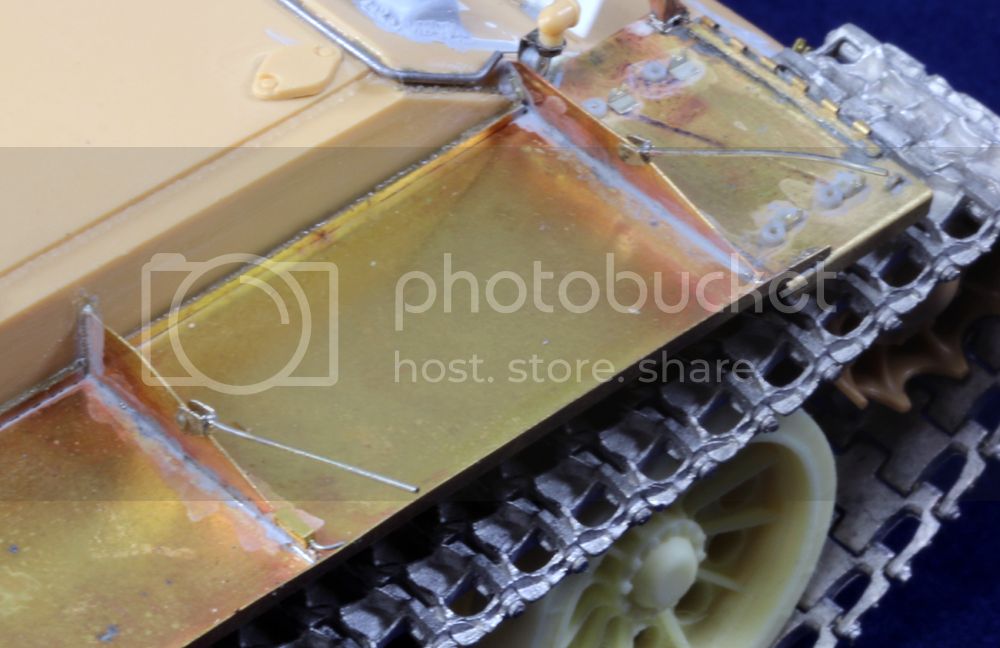
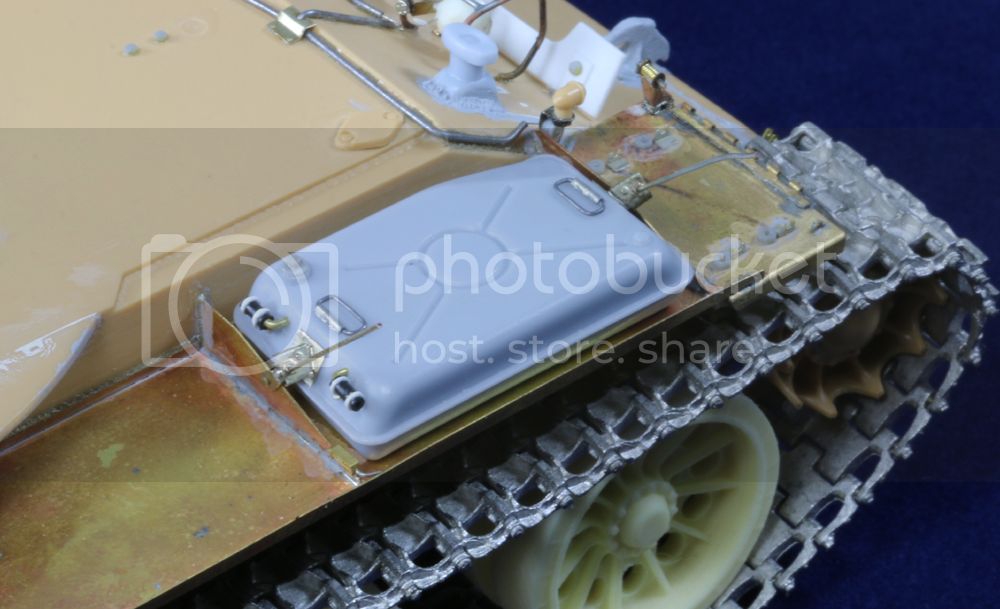
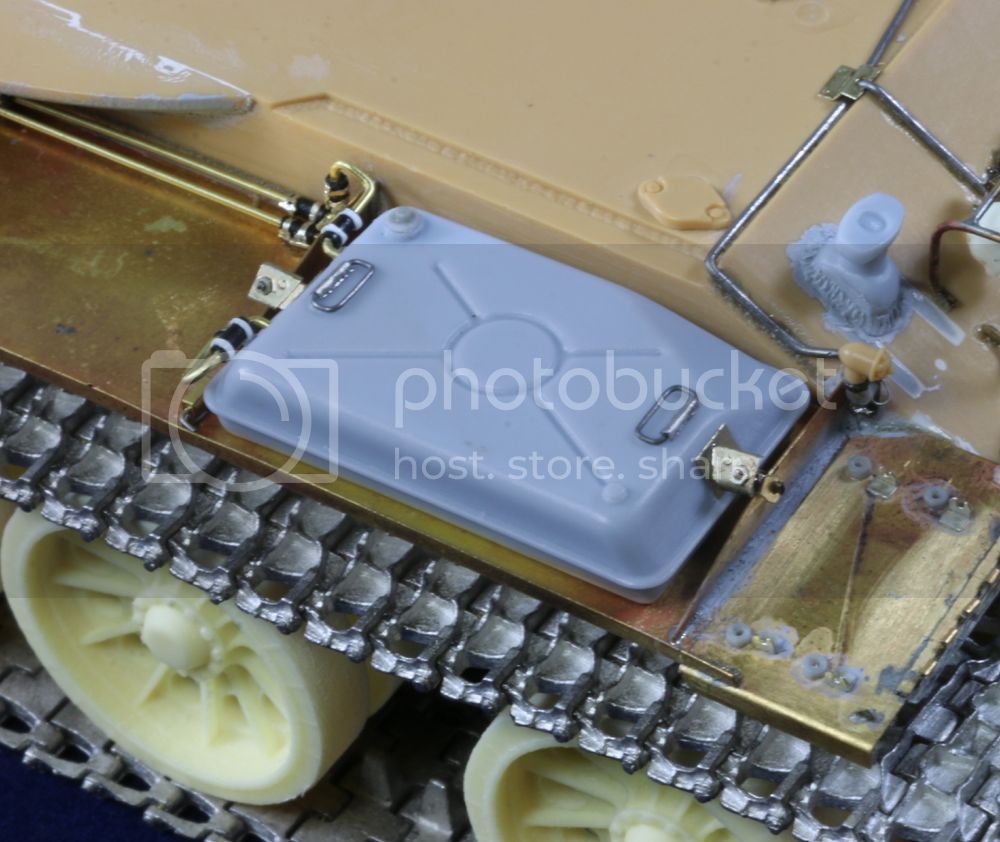
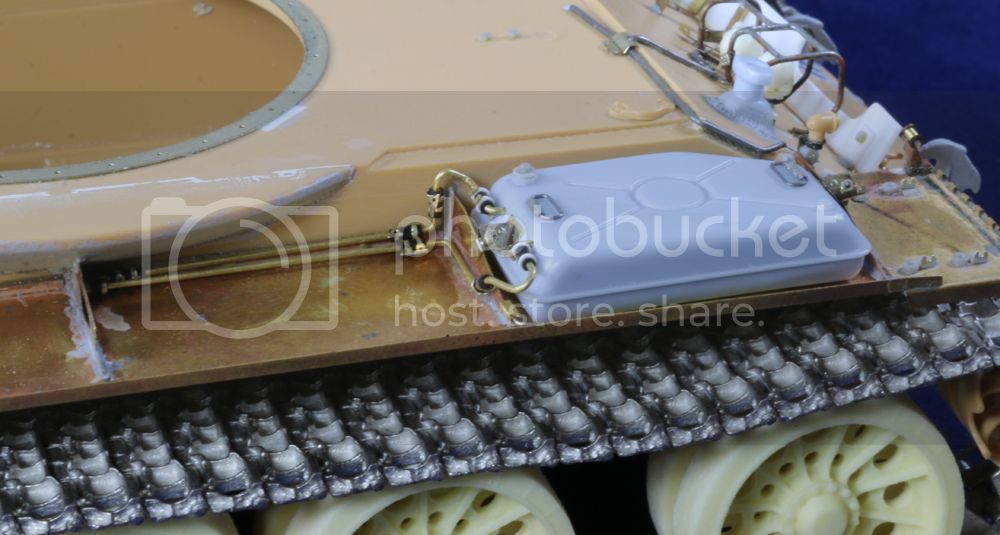
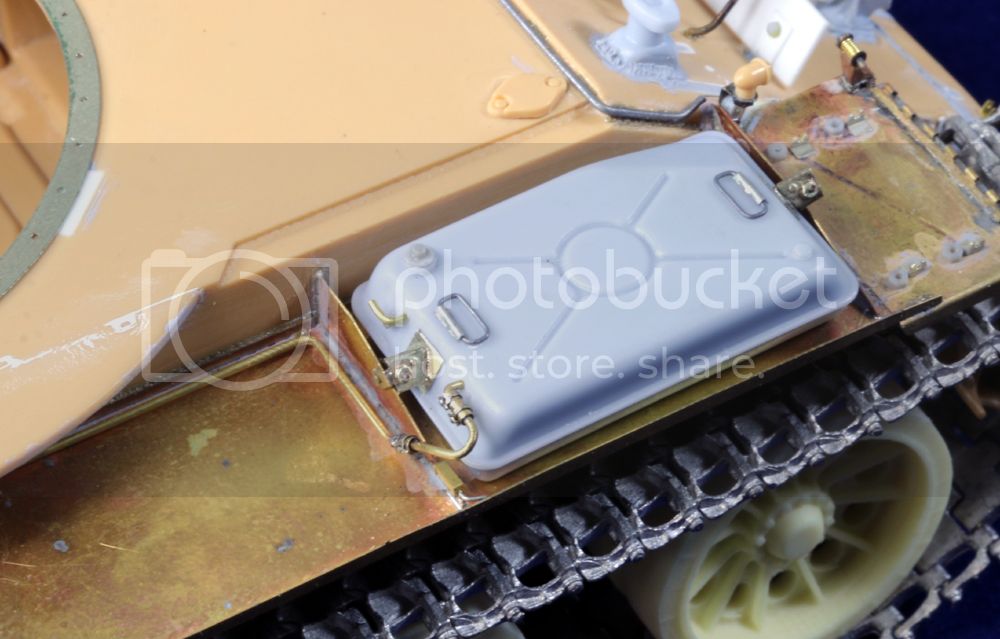
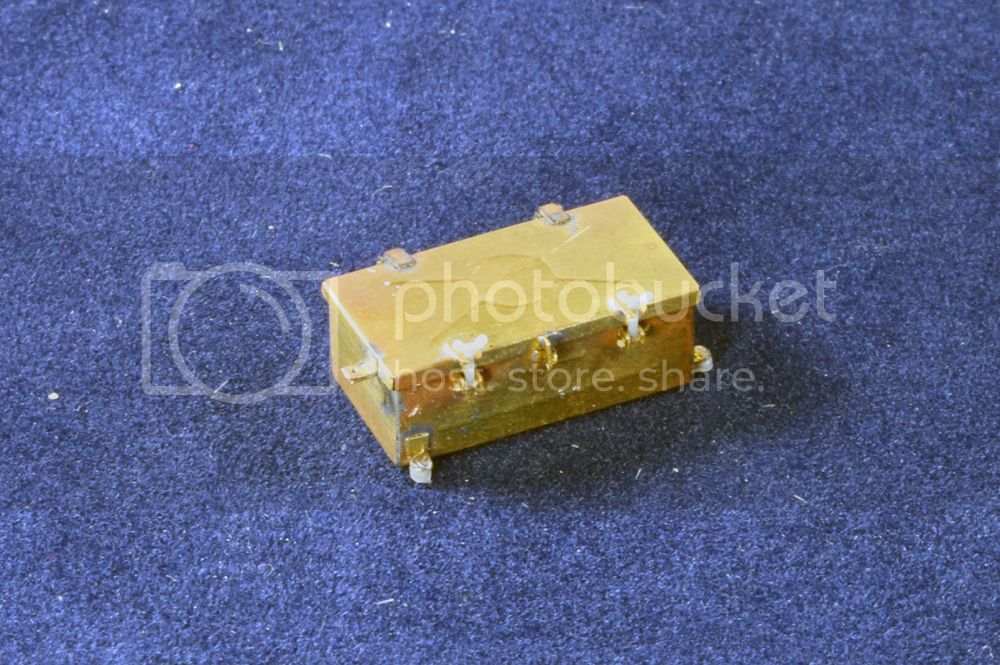
Onto the first of several tool/stowage boxes. I'll be using a mix of Tamiya and Aber - kicking off with the former...
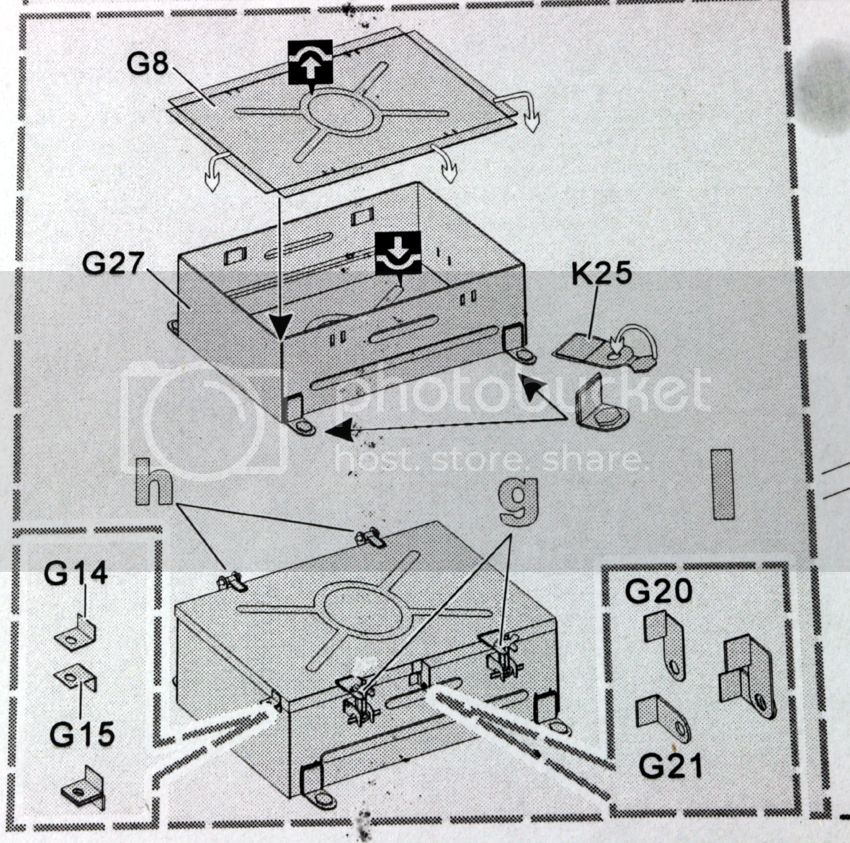

Everything is soldered together for strength.
While I love working with PE, some parts don't work well and wings nuts is one example. Their flat profile doesn't really suit.

So I replaced part G5 with a piece of heat stretched sprue and a butterfly wingnuts from Bronco...
And the box mounted on the fender....
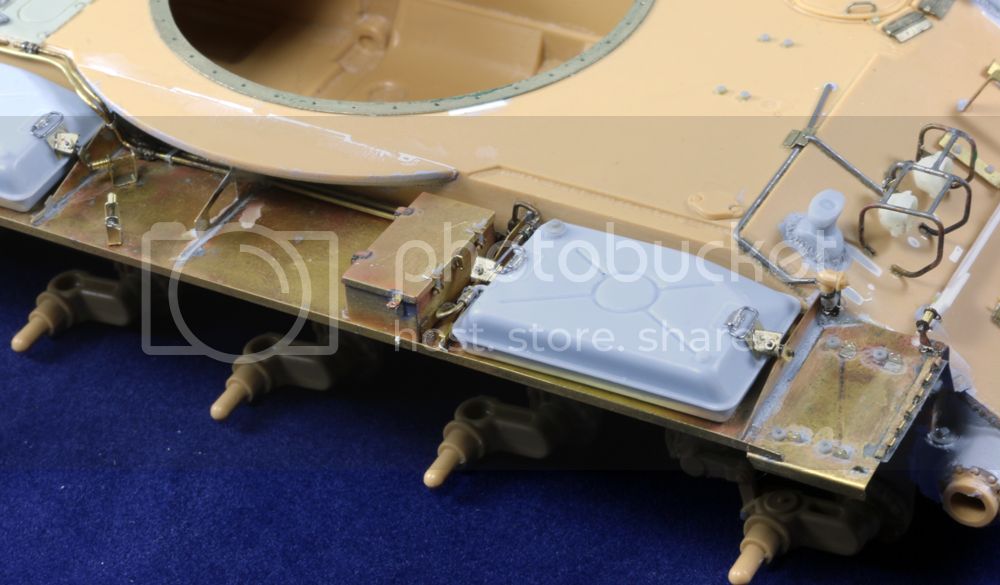
The mounting brackets (K25) have been placed differently according to ref photos.
Gary