Going Whole Hog!! Campaign
Ontario, Canada
Joined: October 17, 2002
KitMaker: 448 posts
Armorama: 306 posts
Posted: Tuesday, March 10, 2015 - 08:05 AM UTC
Hello again.
First eastern front subject, first time with MK tracks and first time painting panzer grey. Comfort zone come home, I miss you.
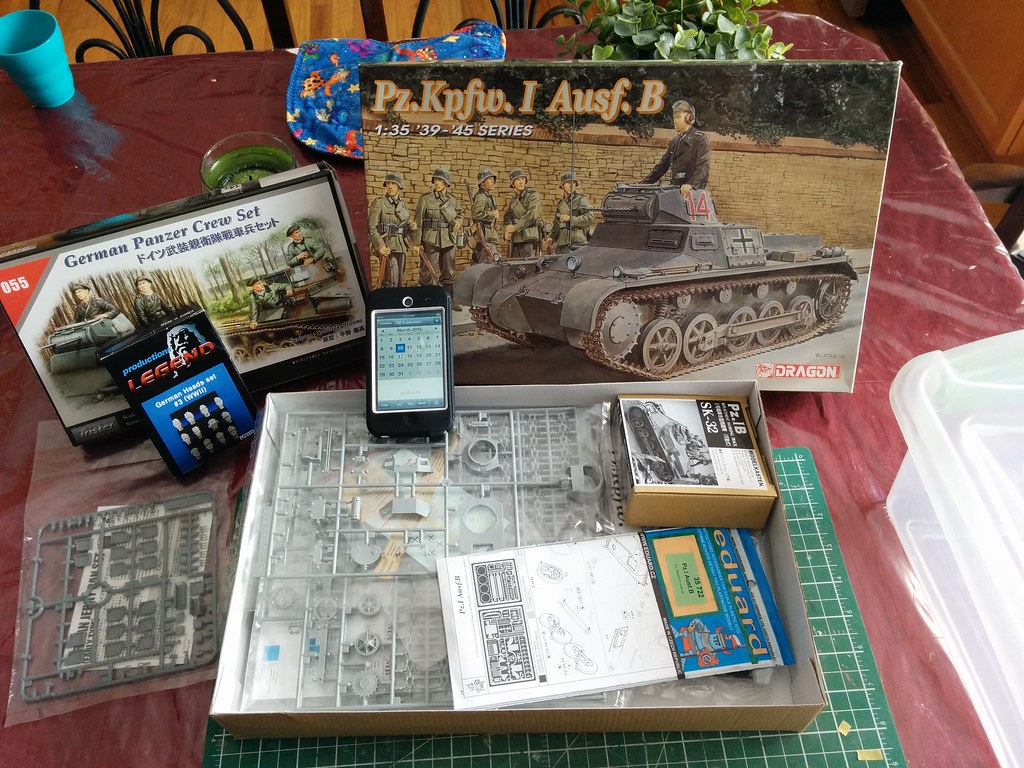
The kit is from 2005 and with the exception of the on vehicle tools, looks pretty nice. Even the OOB tracks look ok, but they're not magic tracks.
Going with these markings from the 14th Panzer Division.
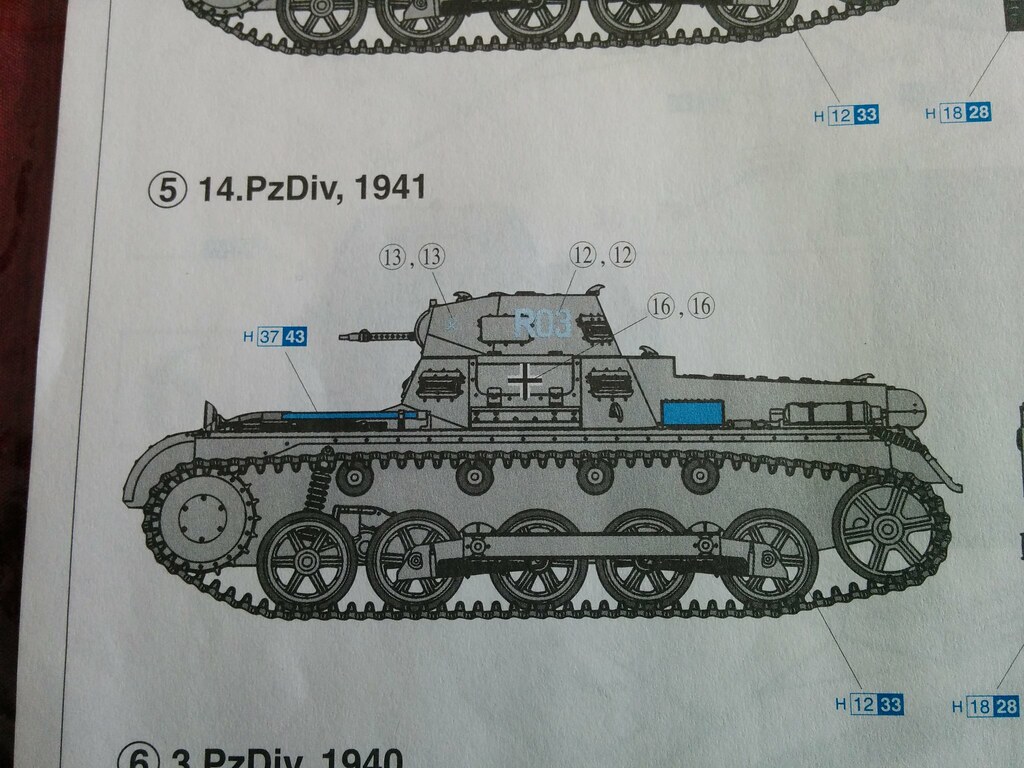
I chose this because the division was made up of veterans from the 4th Panzer Divison who went through Poland and France. Also Yugoslavia as the 14th. I figure this gives me an opportunity to weather this little beast pretty heavily since by '41 she'd been through the ringer.
I plan to add one or two figures to the tank, but I'm not married to the tristar ones just yet.
Got about 2hrs into it tonight and this is where I left it.
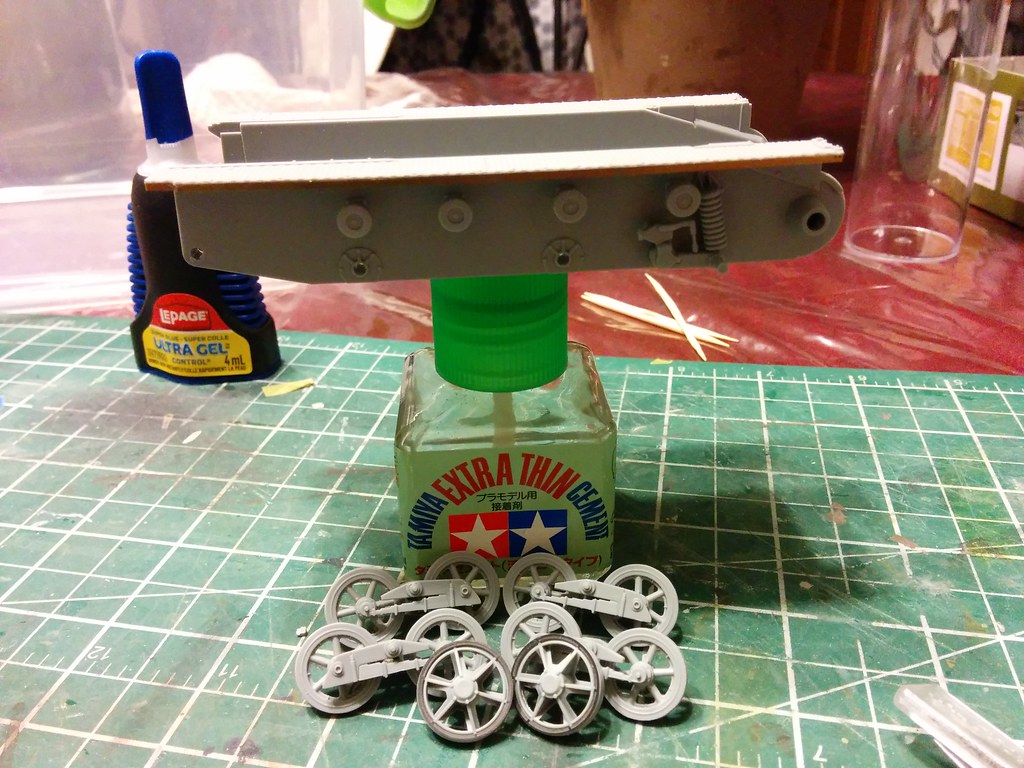
Nice fit so far.
Thanks for looking.
Jeff
Go Green! Go White!
On the bench
1/32 BF-109 G-6
1/24 1968 Dodge Dart
Namabiiru
 Associate Editor
#399
Rhode Island, United States
Joined: March 05, 2014
KitMaker: 2,888 posts
Armorama: 1,920 posts
Posted: Saturday, March 21, 2015 - 10:39 AM UTC
Chipping away at the Bronco workable track links for my M3 Grant:
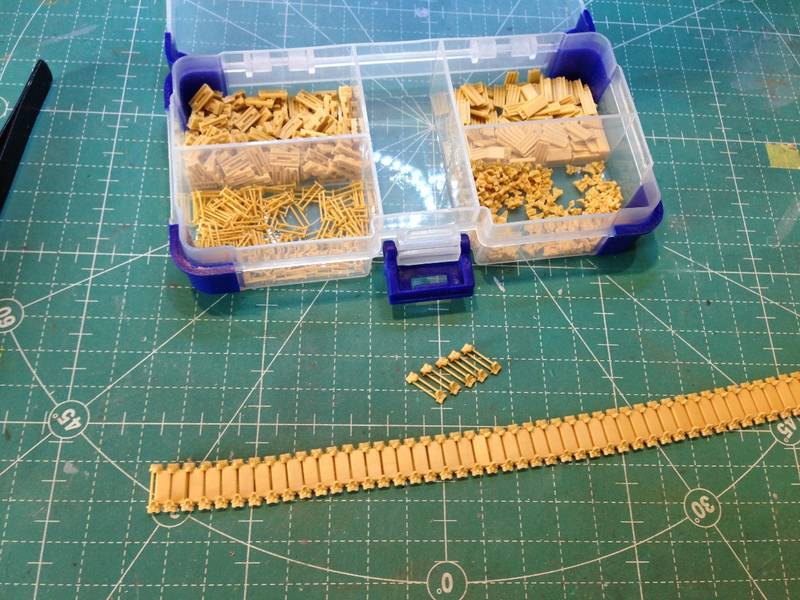
5 tiny pieces per link times 83 links per side times two sides equals hours of fun for the whole family!


Texas, United States
Joined: June 12, 2007
KitMaker: 1,866 posts
Armorama: 1,696 posts
Posted: Sunday, March 22, 2015 - 09:02 PM UTC
My hat's off to you, sir.
Ontario, Canada
Joined: October 17, 2002
KitMaker: 448 posts
Armorama: 306 posts
Posted: Saturday, March 28, 2015 - 12:32 AM UTC
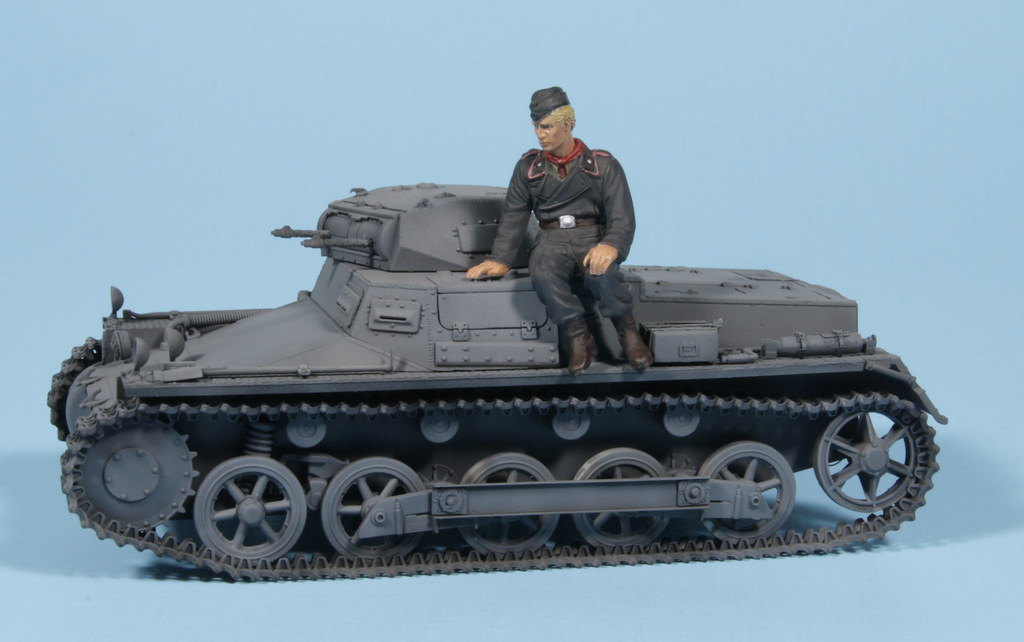
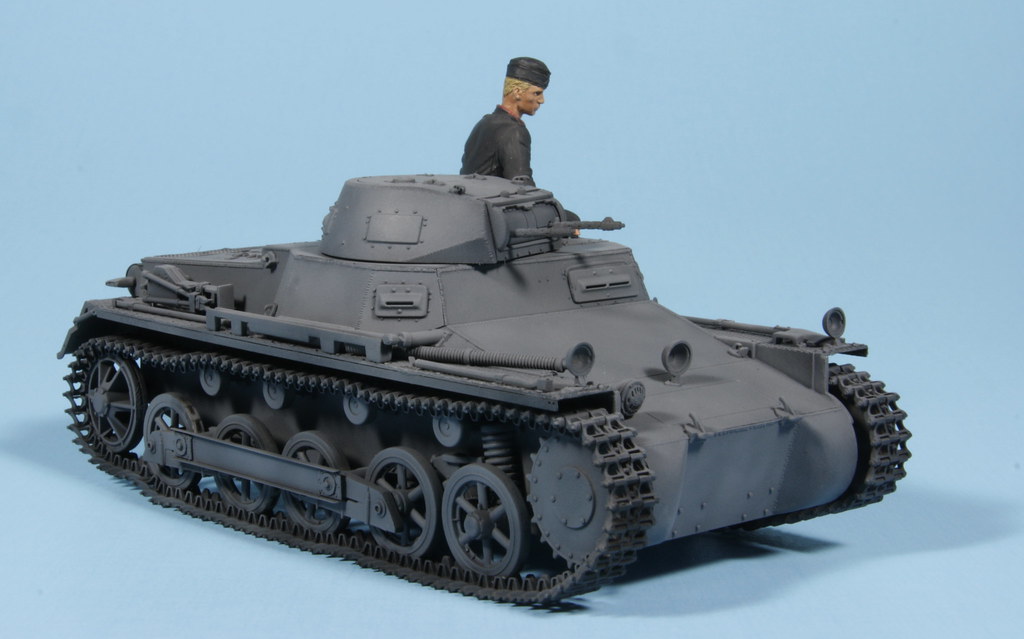
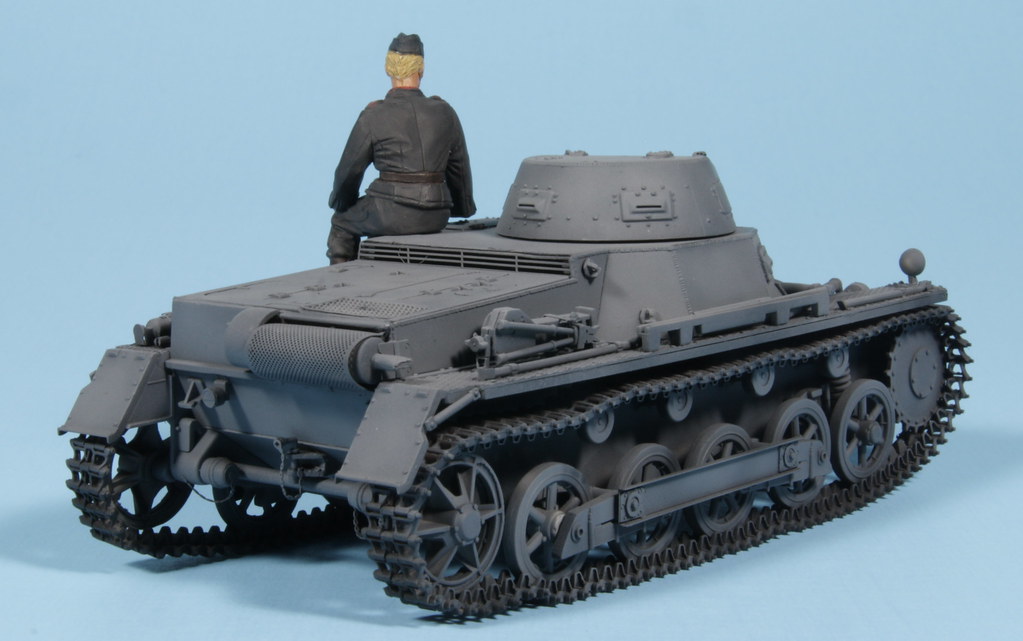
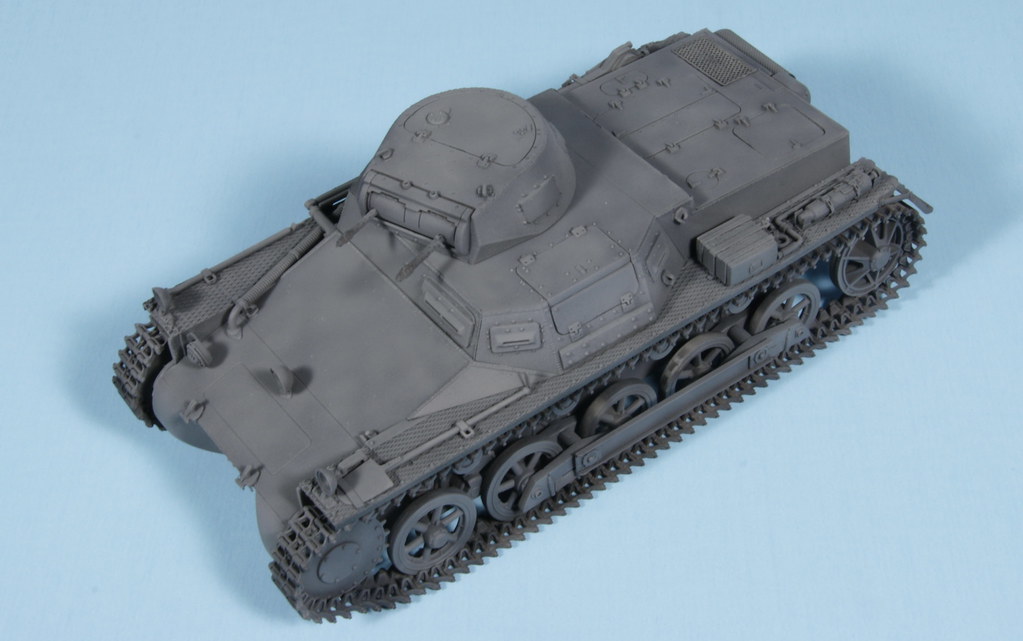
Getting pretty close to primer time.
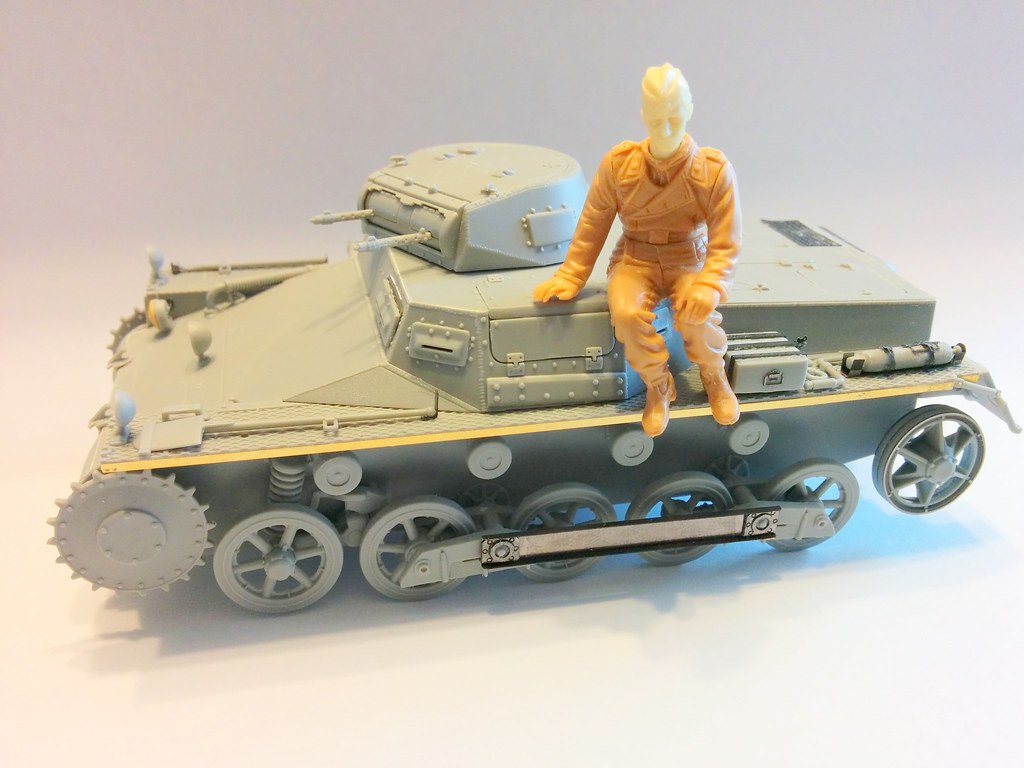
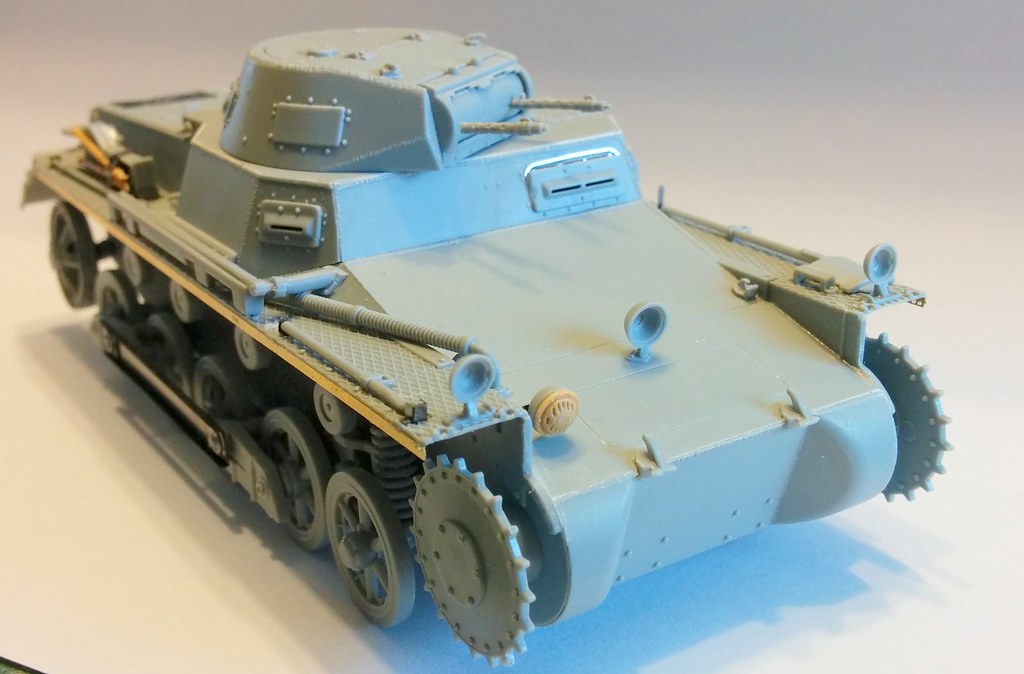
The figure is from a Tristar set with a Legend head, he scooted forward for the photo, but fits in his spot pretty well. I also got one run of MK tracks finished. The Eduard set hasn't been great, to the point where it probably wasn't necessary, a lot of the kit details were better then the etch. If I had to do it over again I'd probably buy brass MG barrels instead.
Replaced the OOB vehicle tools with spares box newer DML and Tamiya pieces which were nicer.
Will try to keep everyone up to date.
Cheers
Jeff
Go Green! Go White!
On the bench
1/32 BF-109 G-6
1/24 1968 Dodge Dart
Ontario, Canada
Joined: October 17, 2002
KitMaker: 448 posts
Armorama: 306 posts
Posted: Tuesday, April 07, 2015 - 07:52 AM UTC
Hi again.
Got the MK tracks on, and primed. Sorry about the quality of the photo, black is a pain even without a crappy camera.
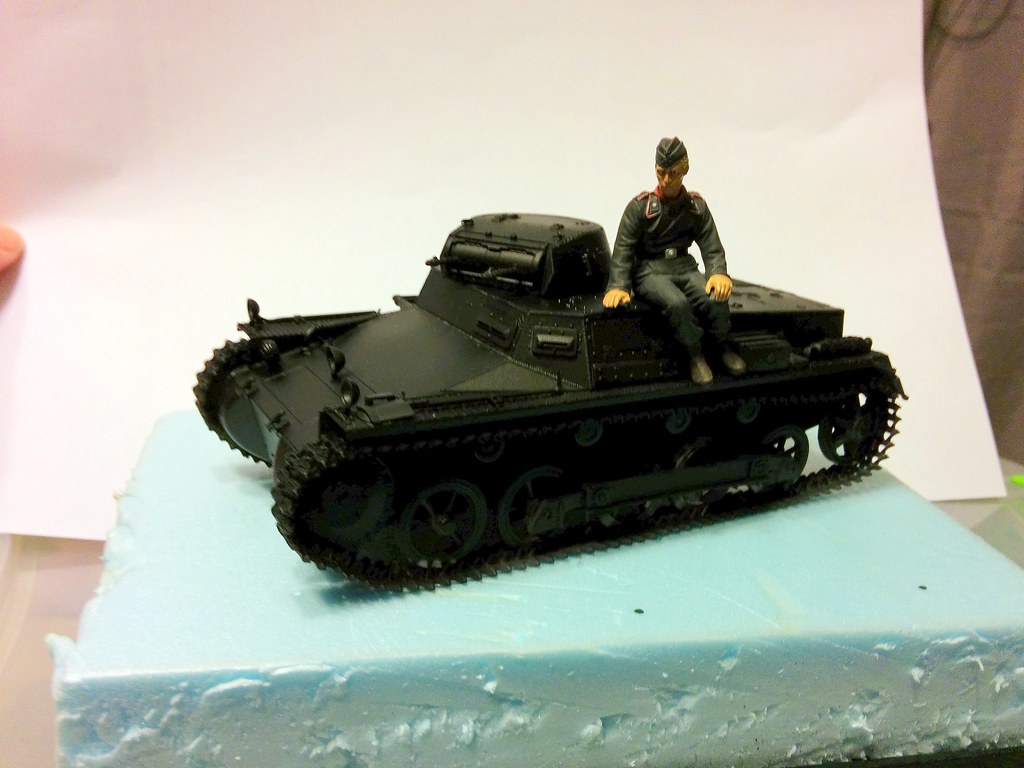
Decided to paint the figure 1st for a change. With the photo blown up I see some mistakes I should fix, but I'm relatively happy with it.
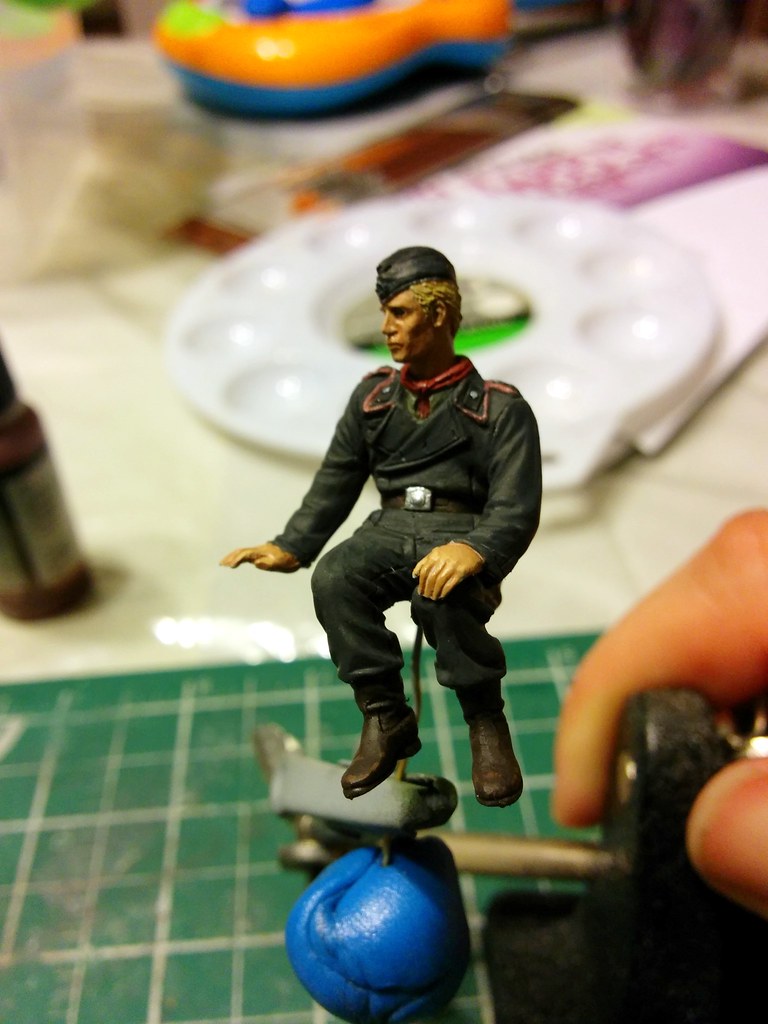
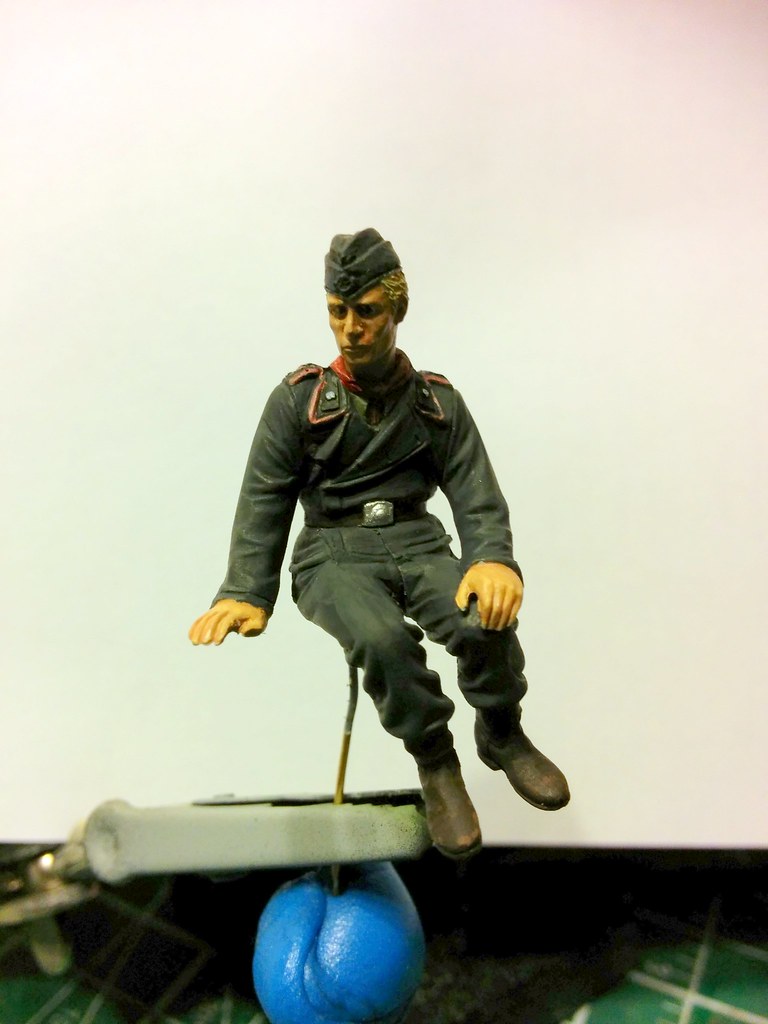
Take care,
Jeff
Go Green! Go White!
On the bench
1/32 BF-109 G-6
1/24 1968 Dodge Dart
#041
Kobenhavn, Denmark
Joined: July 20, 2006
KitMaker: 10,069 posts
Armorama: 4,677 posts
Posted: Tuesday, April 07, 2015 - 07:29 PM UTC
Tedious work, Mark. I am sure it wll be worth it in the end.
Jeff, looks good so far. ood job on the crew man.
Looking forward to see more.
Campaign'oholic - 252+ campaigns completed
Ontario, Canada
Joined: October 17, 2002
KitMaker: 448 posts
Armorama: 306 posts
Posted: Thursday, April 09, 2015 - 11:49 PM UTC
Thanks for the comment Jesper.
Got a little bit of paint down. A few small repairs, then on to some detail painting.
Thanks for looking.
Jeff
Go Green! Go White!
On the bench
1/32 BF-109 G-6
1/24 1968 Dodge Dart
Ontario, Canada
Joined: October 17, 2002
KitMaker: 448 posts
Armorama: 306 posts
Posted: Saturday, May 16, 2015 - 04:48 AM UTC
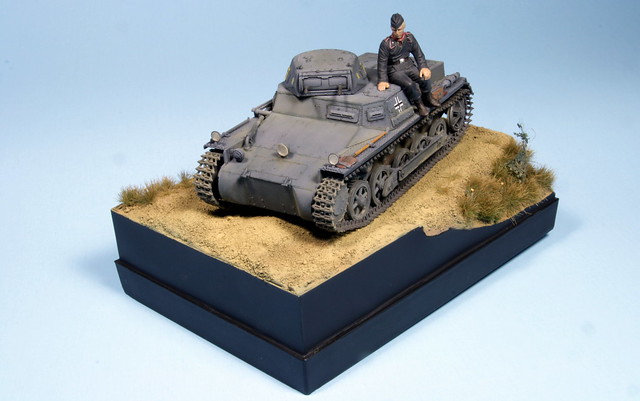
All done.
Just to recap.
DML Panzer IB
Eduard P/E set
MK Tracks
Tristar figure with Legend resin head.
Home made base.
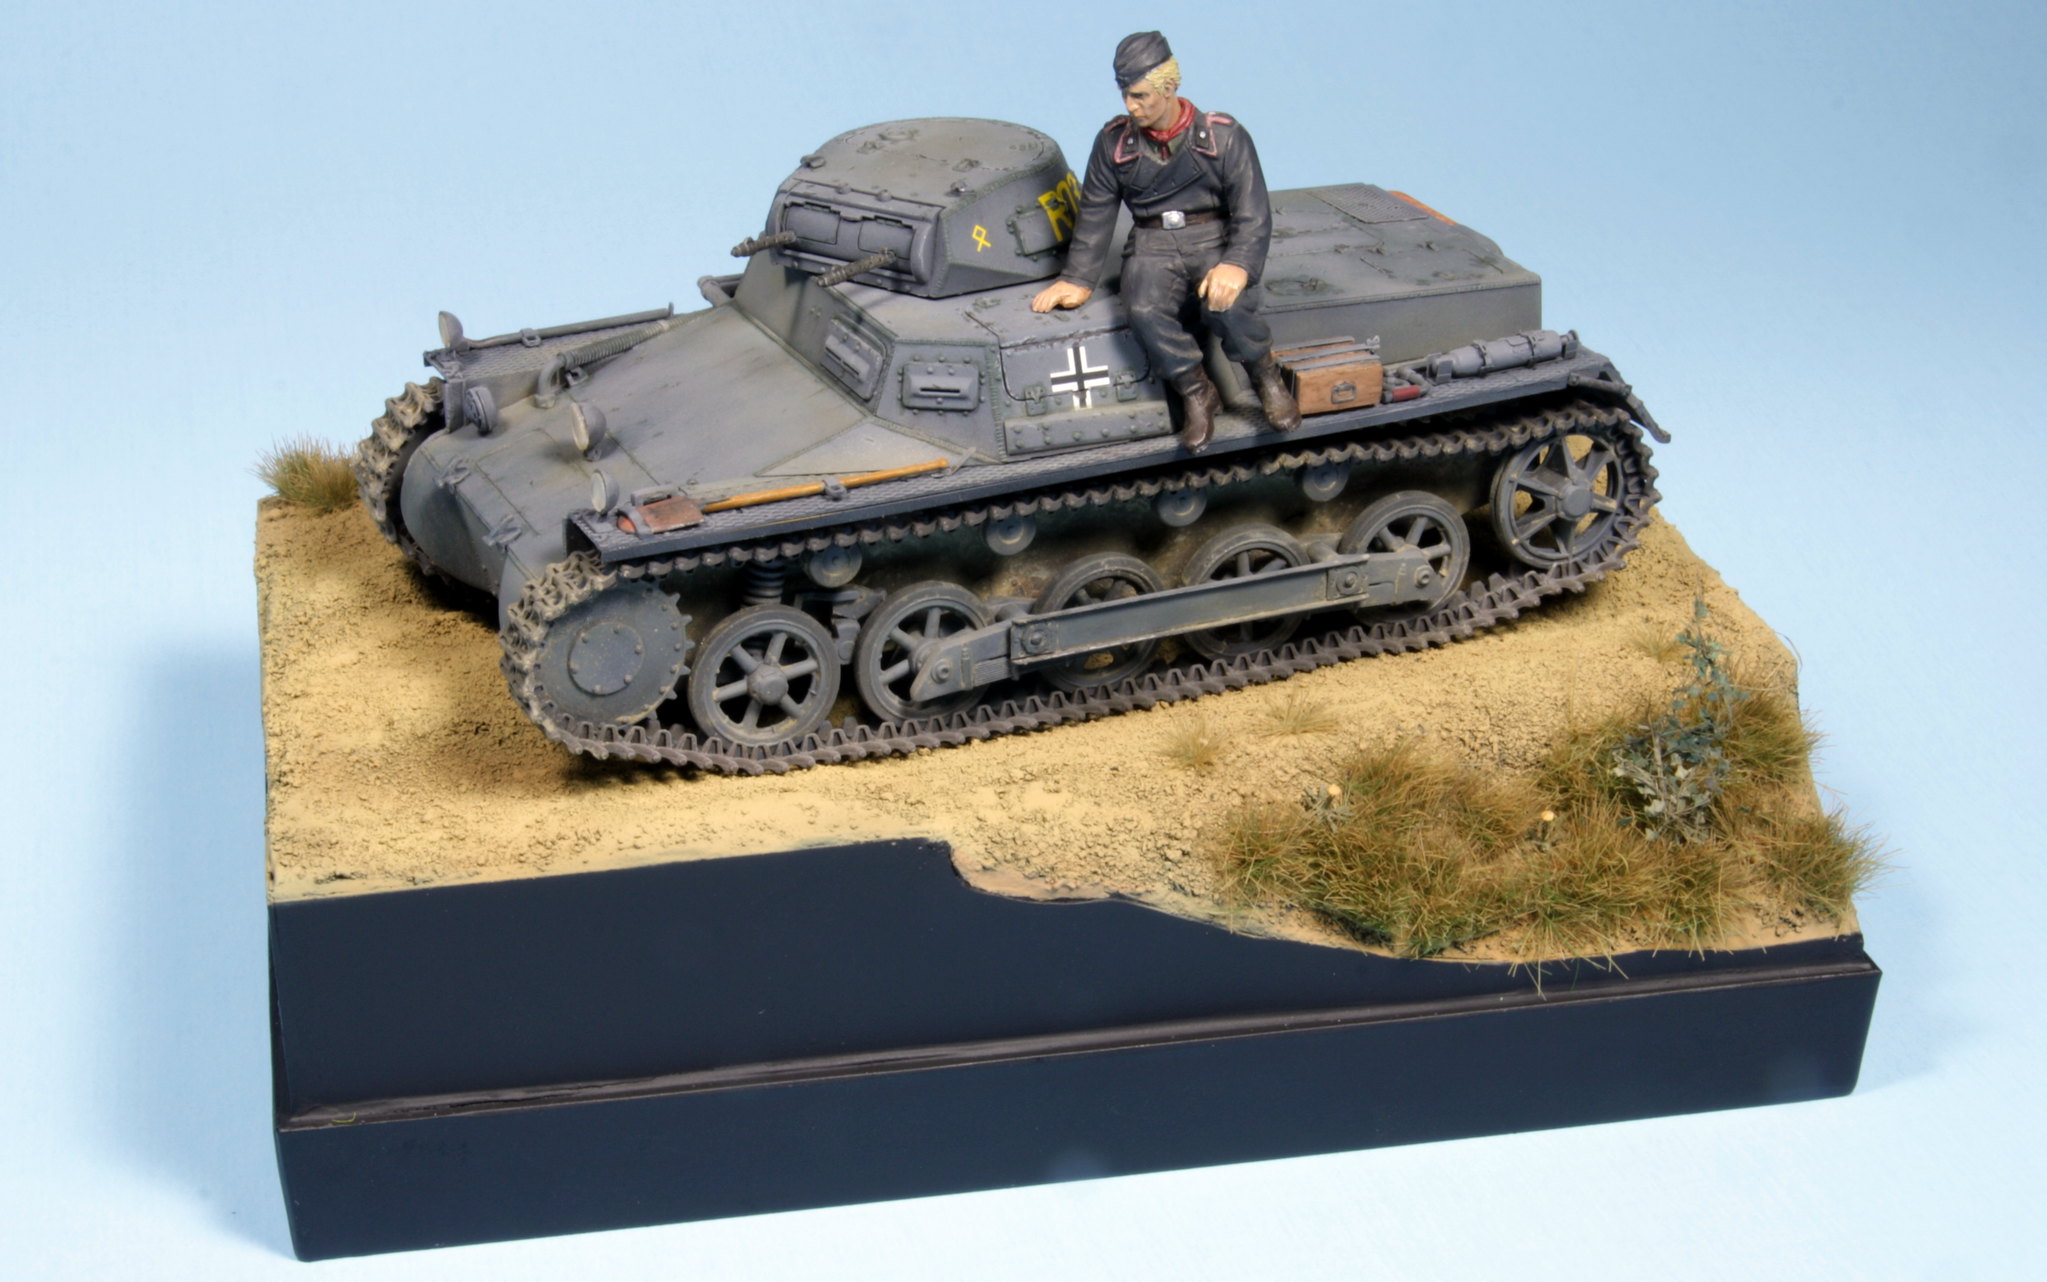
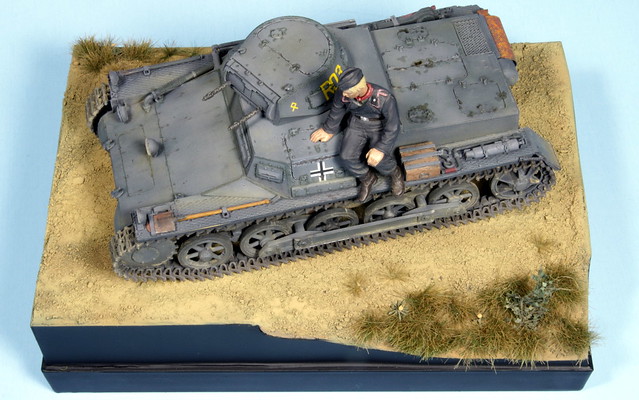
Fun little build. If I had to do it all over again I would have probably purchased AM MG barrels.
The group has gotten a little quiet in the last month, but hopefully it will pick up soon. Really enjoying the builds.
Jeff
Go Green! Go White!
On the bench
1/32 BF-109 G-6
1/24 1968 Dodge Dart
#274
England - North, United Kingdom
Joined: April 09, 2007
KitMaker: 98 posts
Armorama: 8 posts
Posted: Saturday, May 23, 2015 - 04:30 AM UTC
That is an awfully nice Panzer I.
I have had this Italeri re-box of the Esci Matilda II for ages but the tracks in the box have always put me of. OKB recently released resin tracks for this so it would now fit here:
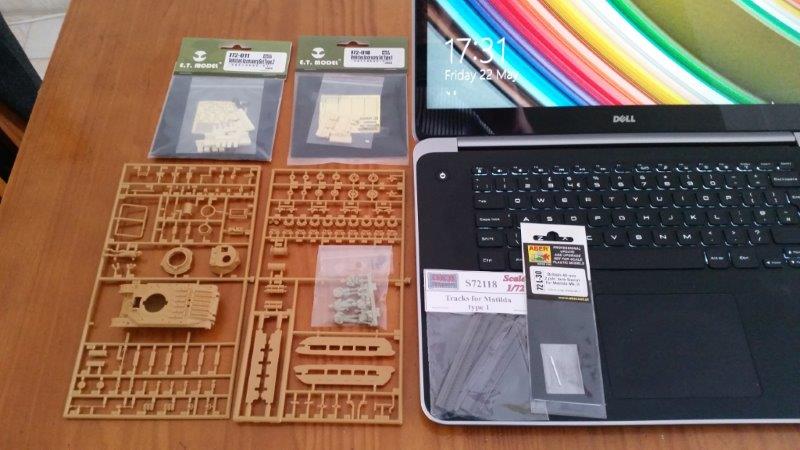
The extras, then, are the OKB tracks, Milicast figures, Aber gun barrels, E.T.Model Allied stowage sets. I'm sorry the box isn't on holiday with us so it's not in the picture.
Alan
Namabiiru
Associate Editor #399
Rhode Island, United States
Joined: March 05, 2014
KitMaker: 2,888 posts
Armorama: 1,920 posts
Posted: Wednesday, July 01, 2015 - 03:26 AM UTC
All, sorry to report I'm going to have to drop out of this one. I've still got way too much to do on this build, and with an unexpected move back to the US suddenly bearing down on me next month, there's just no way I can wrap up in time. Rather, going to focus my time and energy on knocking out a couple other campaigns in which I'm already enlisted. Guess my Grant will be ready for the next unfinished business/hangar queen campaign.
Best of luck to all with your builds!
California, United States
Joined: November 01, 2009
KitMaker: 657 posts
Armorama: 481 posts
Posted: Friday, July 17, 2015 - 09:06 PM UTC
WoW So many Awesome Projects and builds, I hope this has been a great Campaign for everyone. So inspiring everyone. Great Work!!!
" For those who fought for it Freedom has a flavor the protected will never know"
Italeri T-55, Syrian Army 6 Day War Taken out. 2%
AFV IDF Shot. 6 Day War 0%..
#041
Kobenhavn, Denmark
Joined: July 20, 2006
KitMaker: 10,069 posts
Armorama: 4,677 posts
Posted: Tuesday, July 21, 2015 - 05:00 PM UTC
Beautiful result, Jeff. The figure really helps scale the small panzer I. Well done!
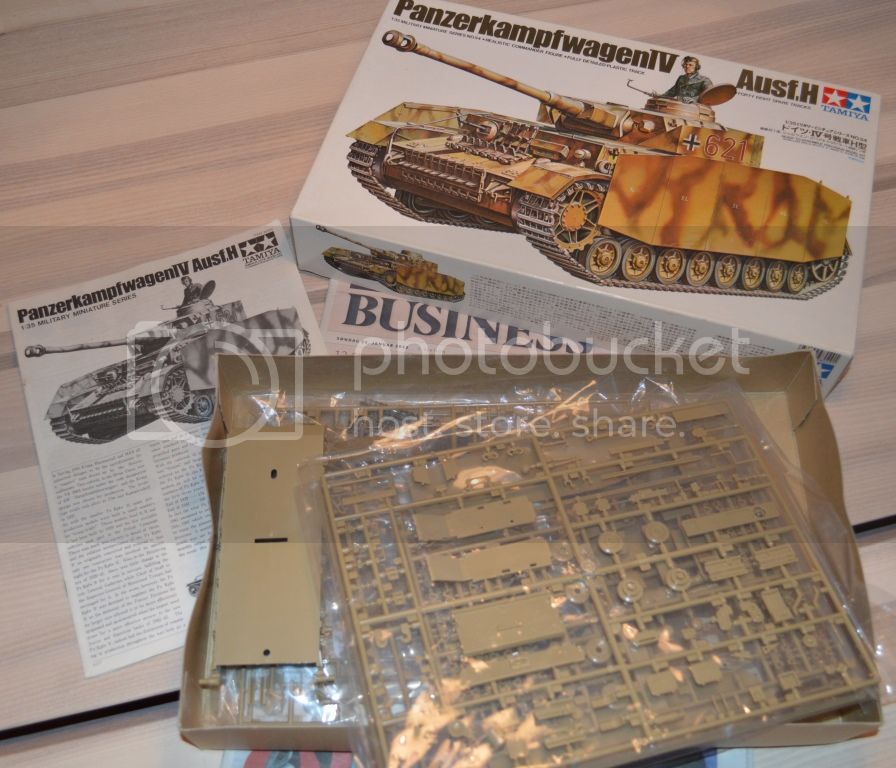
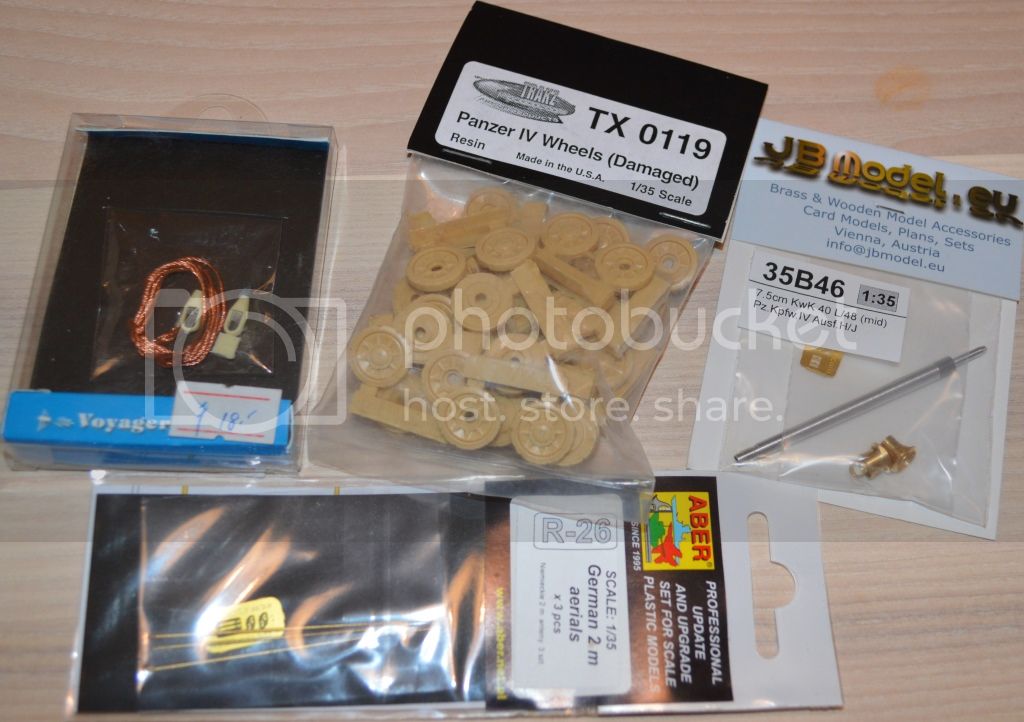
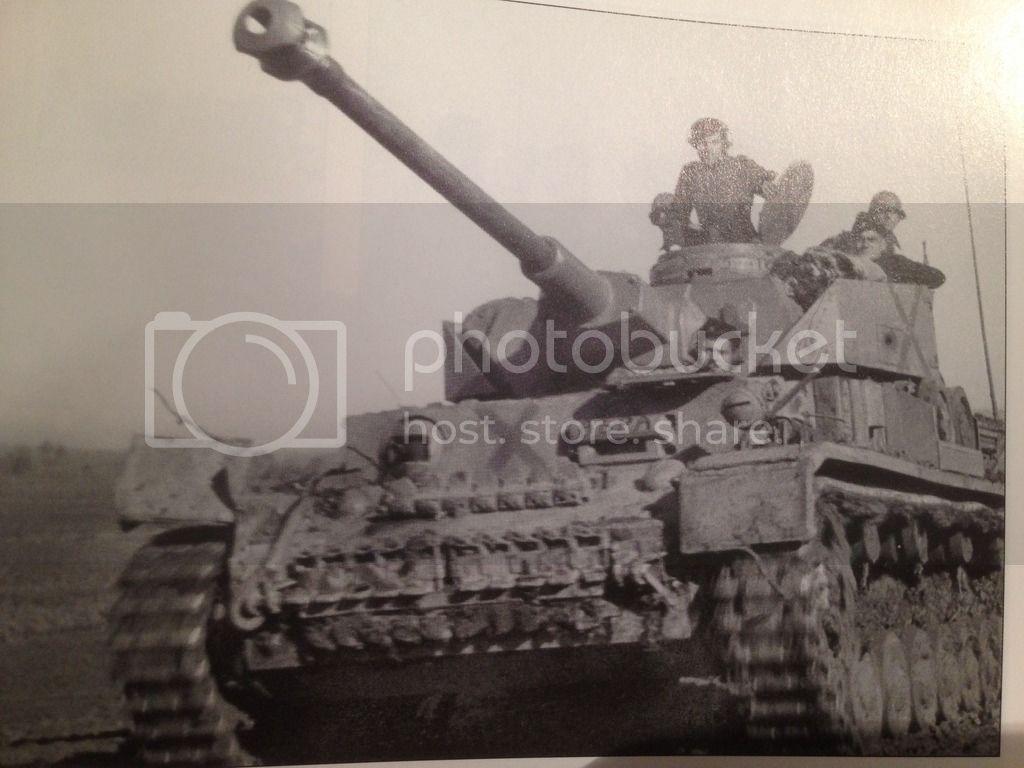
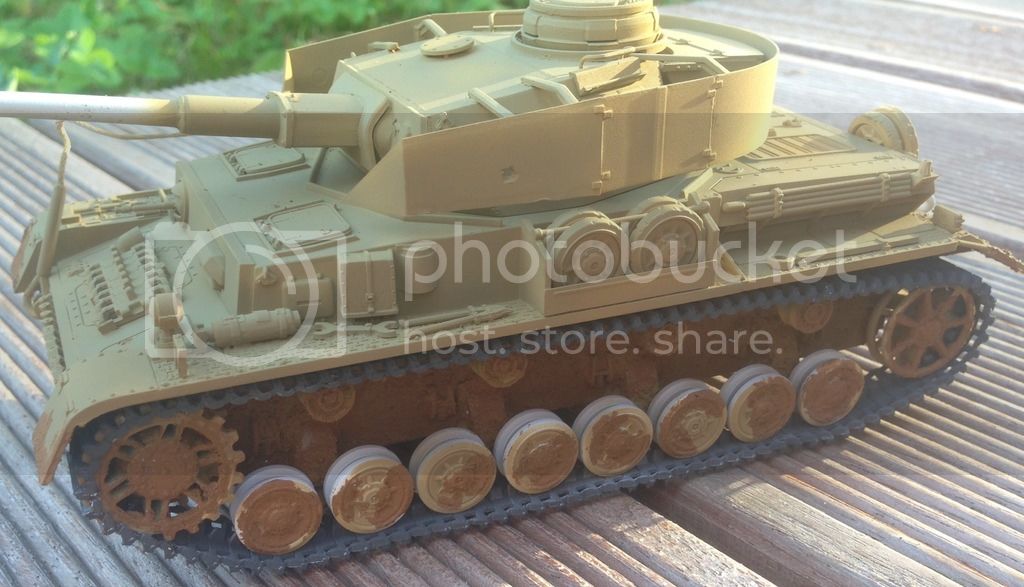
I have decided to build this particular Bulgarian panzer IV. I will use after market antennas, main gun, tow cables, decals, and road wheels.
I posted the start picture a long time ago. I have reposted it here since I will finally get started this week or next.

Campaign'oholic - 252+ campaigns completed
#041
Kobenhavn, Denmark
Joined: July 20, 2006
KitMaker: 10,069 posts
Armorama: 4,677 posts
Posted: Friday, July 31, 2015 - 11:30 PM UTC
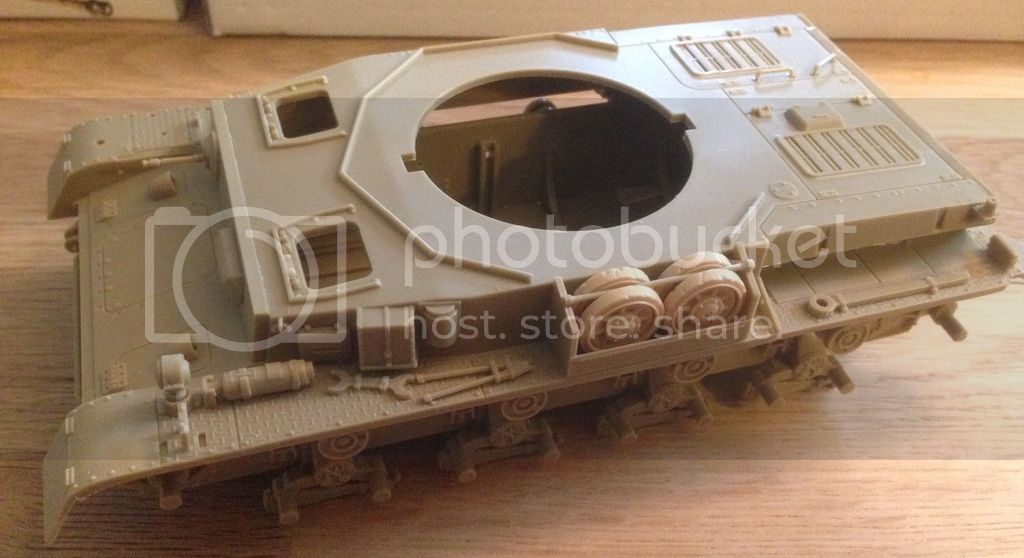
Work is progressing on my Pz. IV. The first few bits of AM are on - two worn spare road wheels. Obviously not the last AM to hit this tank. Despite the old age of this kit - 1975 - it is actually a decent kit and the fit is excellent as always with Tamiya.
More to follow
Campaign'oholic - 252+ campaigns completed
#041
Kobenhavn, Denmark
Joined: July 20, 2006
KitMaker: 10,069 posts
Armorama: 4,677 posts
Posted: Sunday, August 02, 2015 - 01:29 AM UTC
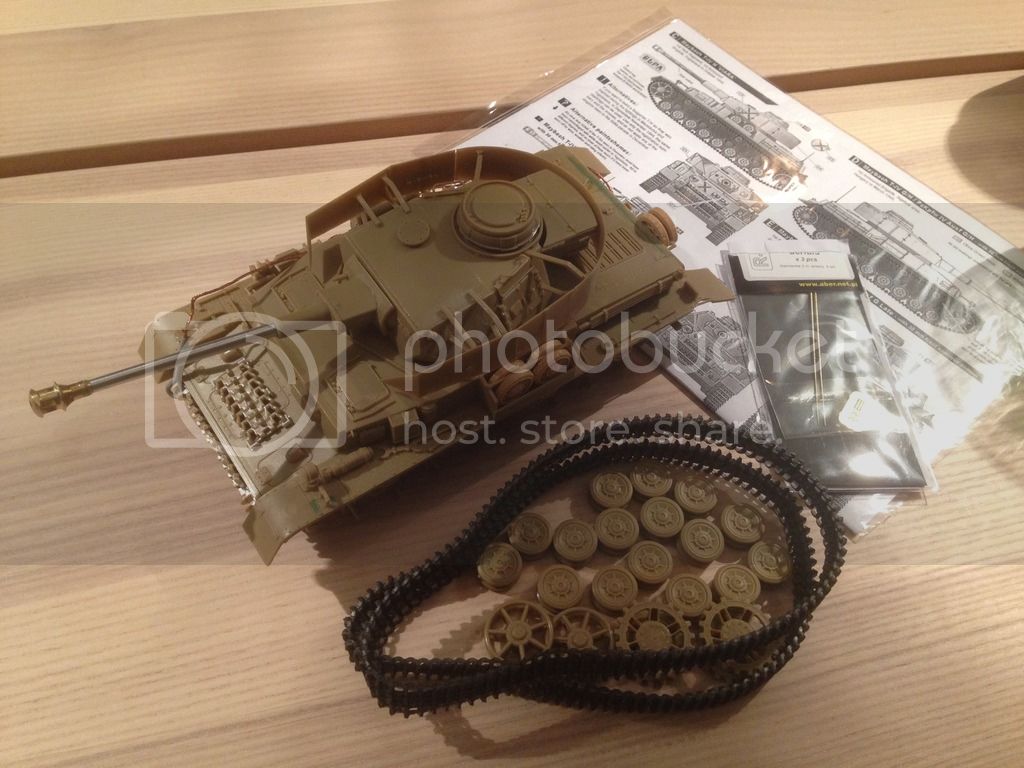
Some good progress on my Bulgarian Pz. IV. The main construction is done. It felt weird to melt the tracks together - a trip down memory lane. The gun is a vast improvement and the tow cable and worn wheels help fit the Pz. IV to the picture I am working from.
Other AM accessories are the antenna and decals.
More to follow soon
Campaign'oholic - 252+ campaigns completed
Sao Paulo, Brazil
Joined: January 24, 2012
KitMaker: 1,054 posts
Armorama: 1,050 posts
Posted: Sunday, August 02, 2015 - 04:47 PM UTC
Hi guys!
So, I started this challenge. The suspension is done, I liked the final result, but the instructions are

.

[/url]

[/url]

[/url]
After that, as I want to finnish the chassis, I started to build the chock absorvers:

[/url]

[/url]

[/url]
Is that fo now. Hope you like guys.
Cheers!
Marco
Texas, United States
Joined: June 12, 2007
KitMaker: 1,866 posts
Armorama: 1,696 posts
Posted: Wednesday, August 05, 2015 - 01:02 AM UTC
Time gets away sometimes... I'm just now pulling all my T62 stuff off the shelf. There's no way I'll finish by completion time, but I'm going to have fun anyway.
First off:
I stated pulling pieces out of the Verlinden bag, and looking closely at the turret. I'd heard it was a copy of the poor Tamiya kit turret, and it's pretty close. On top of that I had some shrinkage which compounded the major fault of the Verlinden turret: being too "squat". So I trimmed out the ring from one of the Tamiya turret lower halves and attached it to the base of the Verlinden turret, which oddly enough was an excellent fit. I then filled the gap at the base of the Verlinden turret with Aves 2-part putty and roughly shaped it. I still have a lot of texturing and such to do, but here it sits so far, almost as tall as it should be:


More later, cheers.
And Marco: looking good!
Sao Paulo, Brazil
Joined: January 24, 2012
KitMaker: 1,054 posts
Armorama: 1,050 posts
Posted: Wednesday, August 05, 2015 - 01:07 AM UTC
Hi Russ!
Thanks man!
I want to se more about this T62.
Cheers!
Marco
#041
Kobenhavn, Denmark
Joined: July 20, 2006
KitMaker: 10,069 posts
Armorama: 4,677 posts
Posted: Thursday, August 06, 2015 - 10:48 PM UTC
Looks good, Russell. Nice choice. Looking forward to see more
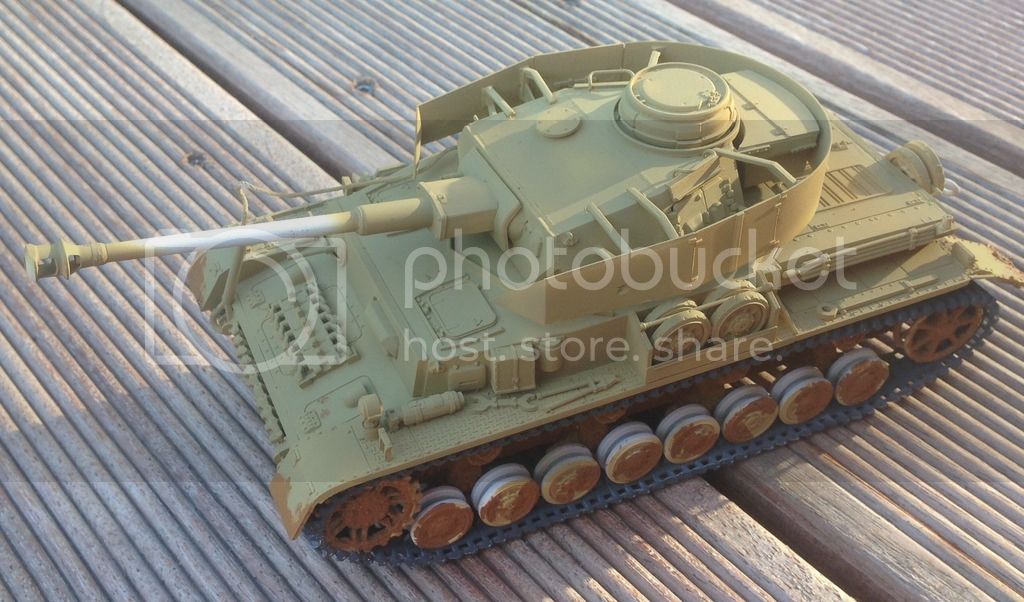
I have made a little more progress on my Pz. IV. Base color is on and the first light layer of mud.
More to follow
Campaign'oholic - 252+ campaigns completed
Netherlands
Joined: May 20, 2015
KitMaker: 335 posts
Armorama: 266 posts
Posted: Thursday, August 06, 2015 - 11:59 PM UTC
Jeff that diorama base for your Panzer 1B looks great! Still can't figure out how people source such a realistic type of sand, have a number of diorama ideas that could benefit from this.
Texas, United States
Joined: June 12, 2007
KitMaker: 1,866 posts
Armorama: 1,696 posts
Posted: Sunday, August 09, 2015 - 08:39 PM UTC
Marco, as I can, but there's a lot going on now....
Jesper, Pz. IV is looking good, very good.
So I have a bunch of Mr.Surfacer on the turret now, still need to clean up around some details, and then start working on the actual texture I want to end up with. I'm starting to think it may have been just as easy to modify one of the kit turrets....


#041
Kobenhavn, Denmark
Joined: July 20, 2006
KitMaker: 10,069 posts
Armorama: 4,677 posts
Posted: Tuesday, August 18, 2015 - 12:05 PM UTC
Campaign'oholic - 252+ campaigns completed
#041
Kobenhavn, Denmark
Joined: July 20, 2006
KitMaker: 10,069 posts
Armorama: 4,677 posts
Posted: Saturday, August 22, 2015 - 01:52 PM UTC
Campaign'oholic - 252+ campaigns completed
Texas, United States
Joined: June 12, 2007
KitMaker: 1,866 posts
Armorama: 1,696 posts
Posted: Wednesday, August 26, 2015 - 10:11 PM UTC
Very nicely done, sir! I like the history behind German armor operated by their allies, always interesting.
Okay, I jumped in last night and did the major hull surgery and adding of the Verlinden parts, some wheels, a couple of adjustable idler mounts from Trumpy T72 parts, and a fair amount of filling, the latter mostly due to my errors in cutting hull parts. The Verlinden parts are actually well-molded, no short shots, minimal flash, and fit well.
Pics:


More later, hopefully sooner than later.
Sao Paulo, Brazil
Joined: January 24, 2012
KitMaker: 1,054 posts
Armorama: 1,050 posts
Posted: Sunday, August 30, 2015 - 03:52 PM UTC
Hi guys!
As I was on vacation, I didn't build anything for two weeks.
But now is time to restart this project.
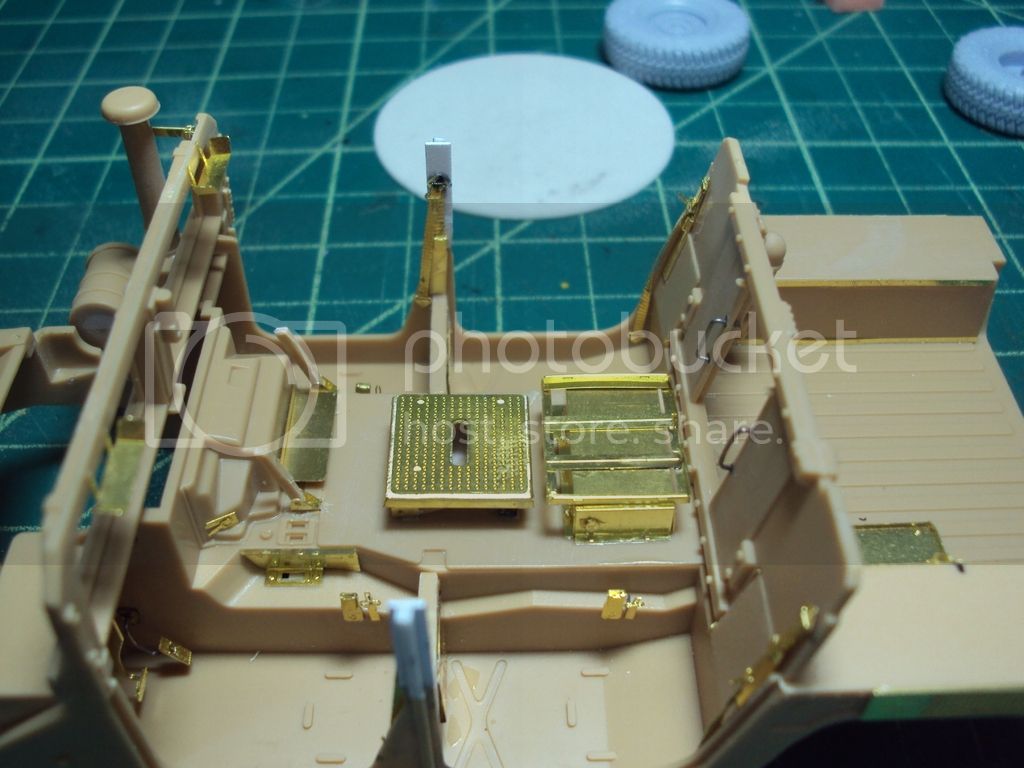
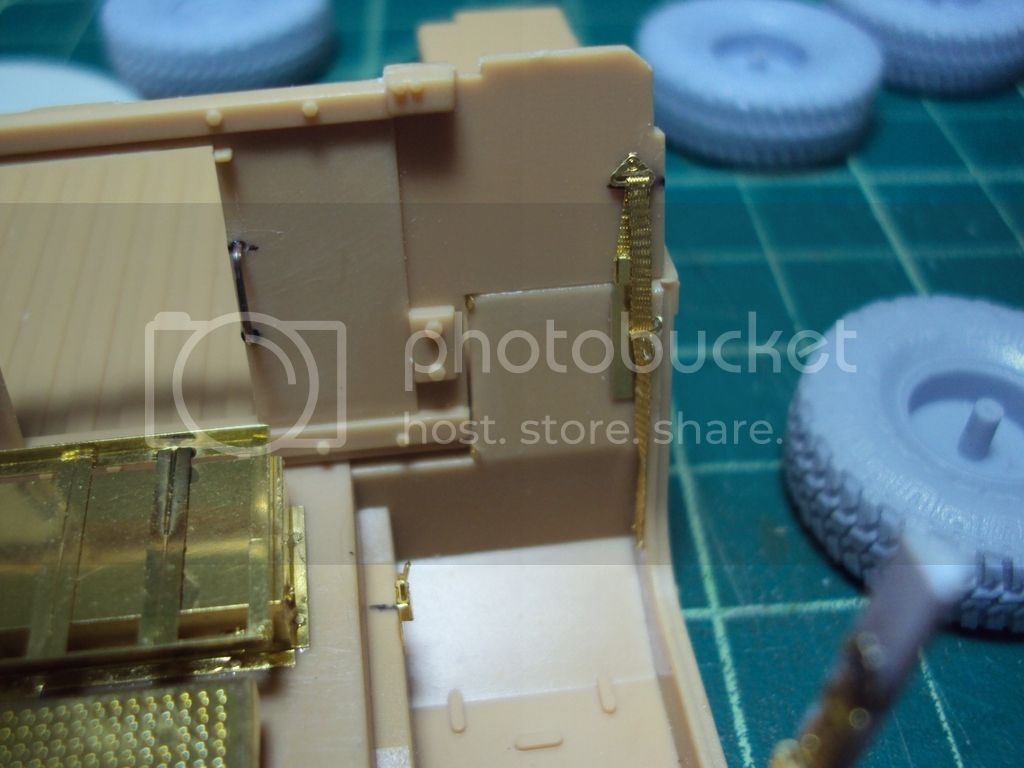
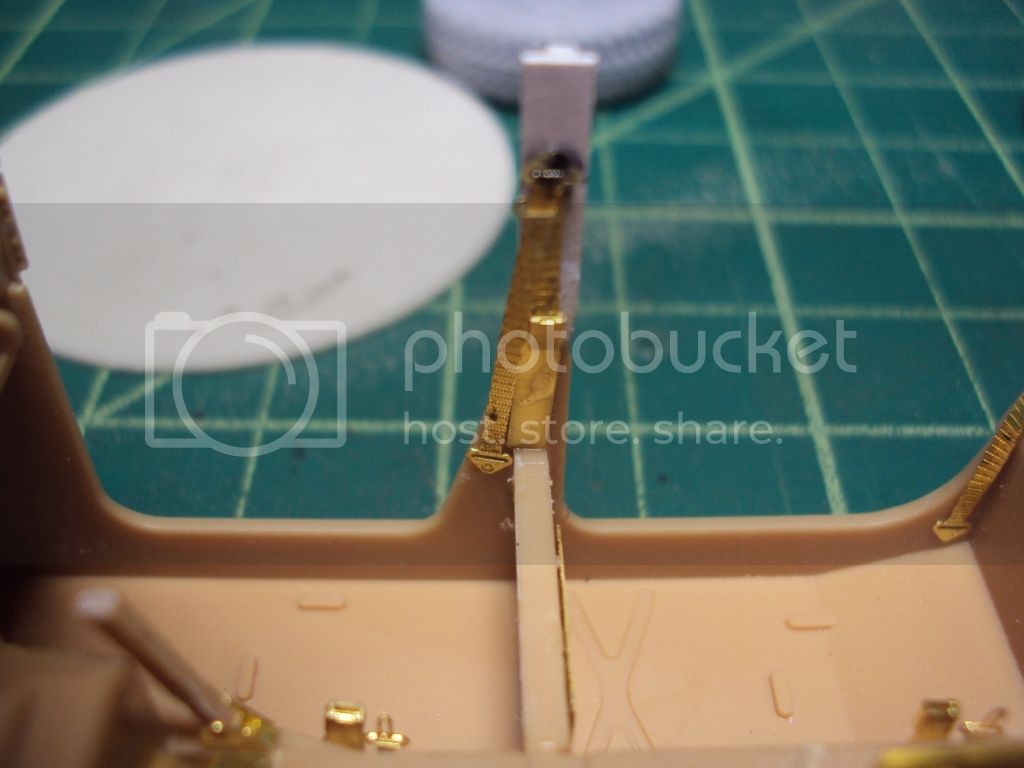
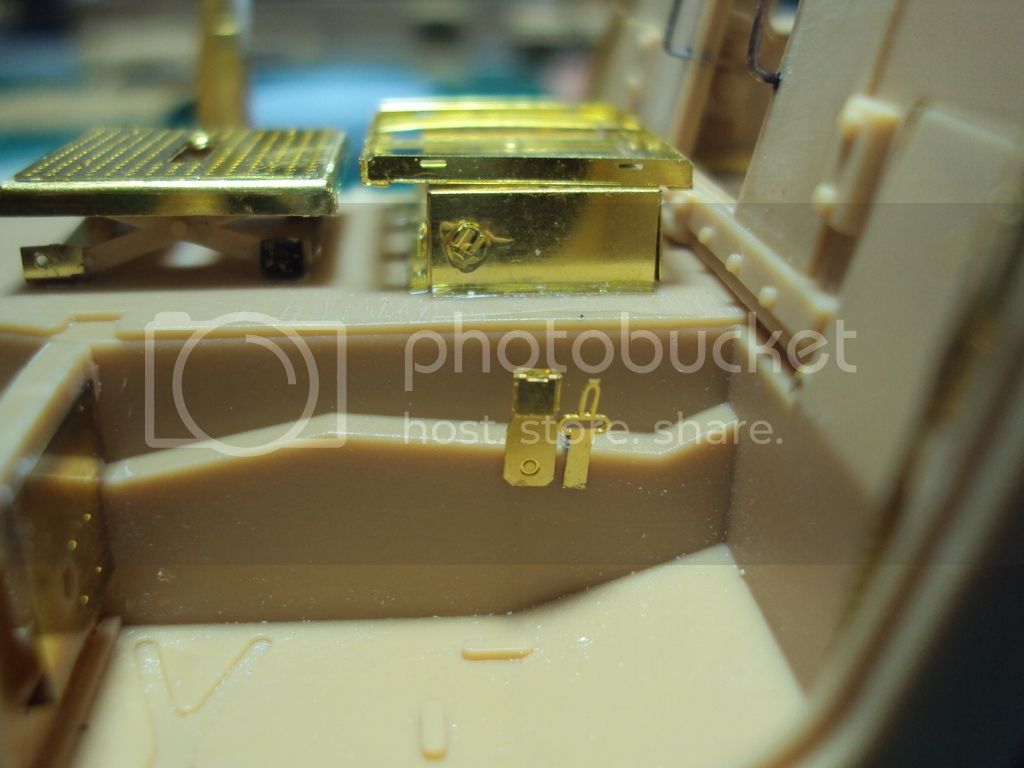
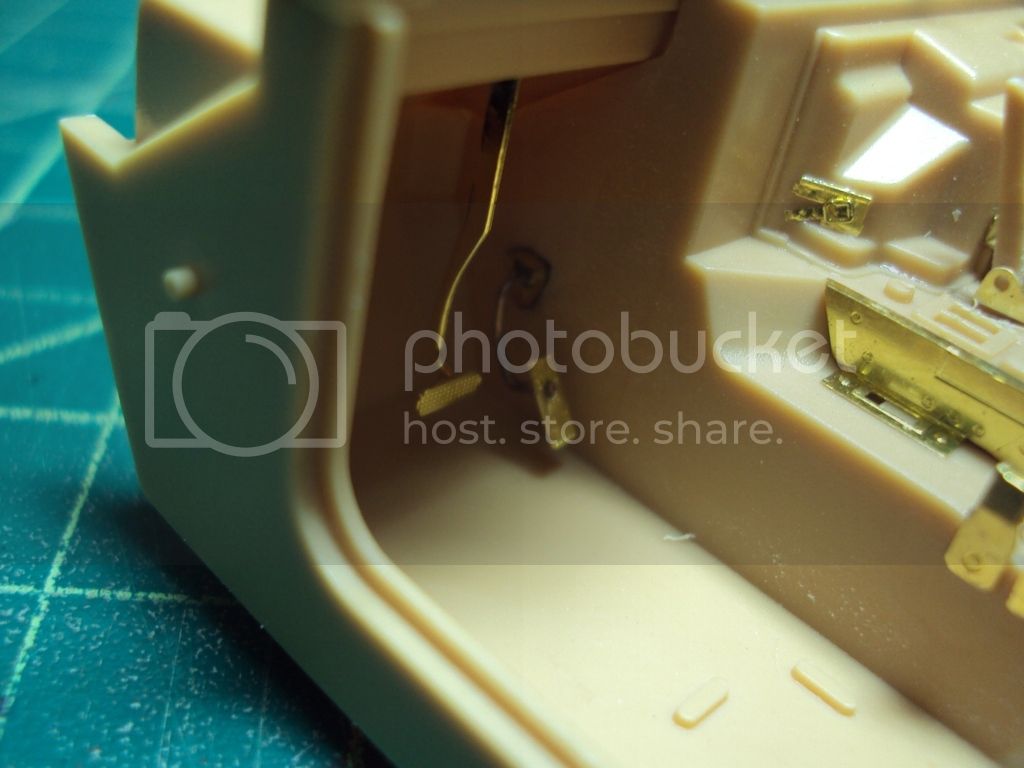
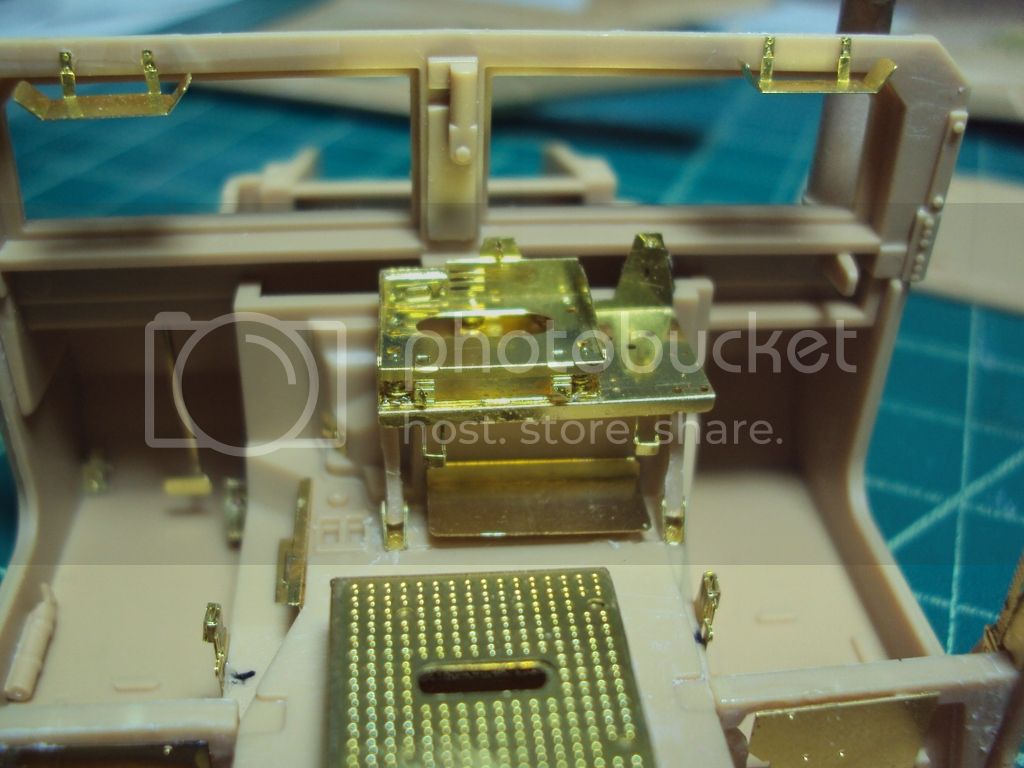
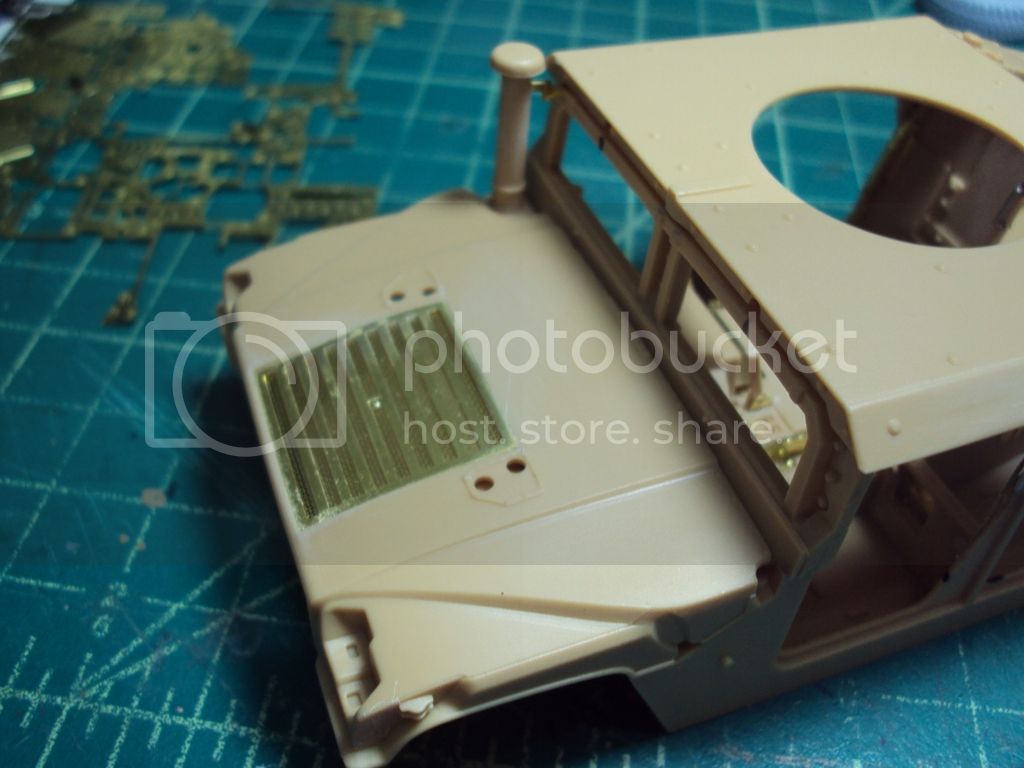
I did most of interior PE. Lots of work so far and lots of work to do (Did I heard anyone interested in an extension?)

Now I show you some images. Hope you like:
Cheers!
Marco
Texas, United States
Joined: June 12, 2007
KitMaker: 1,866 posts
Armorama: 1,696 posts
Posted: Sunday, August 30, 2015 - 10:57 PM UTC
Really nice work, Marco.
I got some more done myself, last night. Fenders are on, storage boxes on, from a Trump T55 and one from the Tamiya kit, and the exhaust, from an Esci T55 kit with a little bit of the Tamiya part grafted on to get it long enough. The Verlinden fenders are really thick,but I was able to to a little bending on one to get it looking beat up. I may wrinkle them some more. I also used MrSurfacer on the hull sides, both for texture and to obscure the plastic angle I had to add to give the dfnders a more secure mounting point. The red arrow is pointing to the Verlinden engine exhausts, which clearly don't line up with the actual exhaust outlet. I wonder who's right there? Anyway, the pics:


I'm also curious about how much the Verlinden engine area slopes down towards the rear. This is not what Tamiya depicts, and to me doesn't look right, but there's nothing I can do about it now....